|
Got a commission request a while back for a Tali helmet from Mass Effect. Some issues abounded, some lessons were learned, all the while my son had been born recently and occupied more of my time than anticipated. Top that off with someone else completely screwing me over money-wise (with PayPal's help of course), and this build just backfired. But I'm getting ahead of myself. 
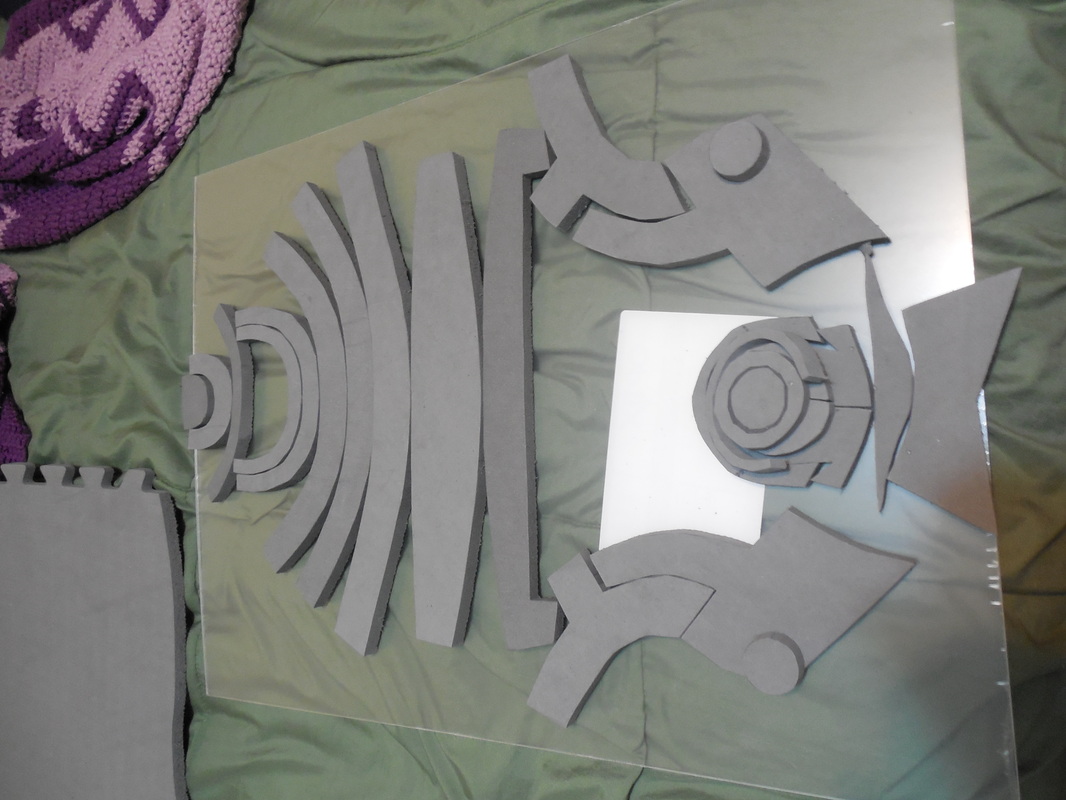
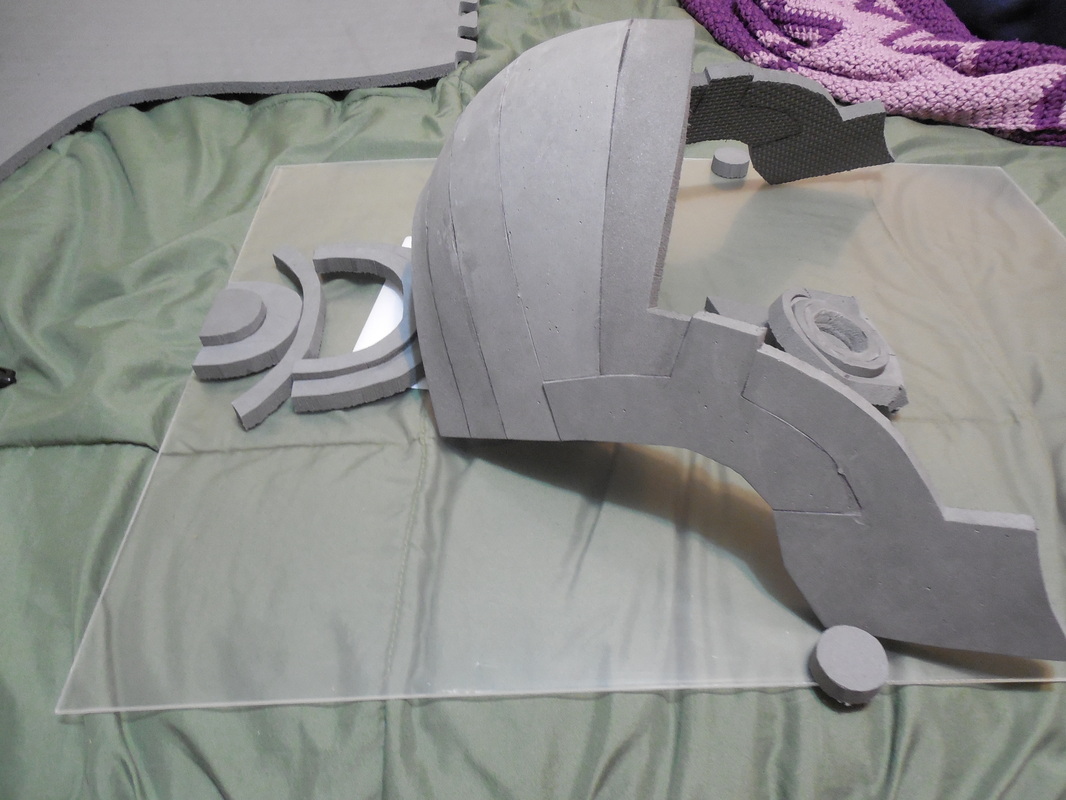
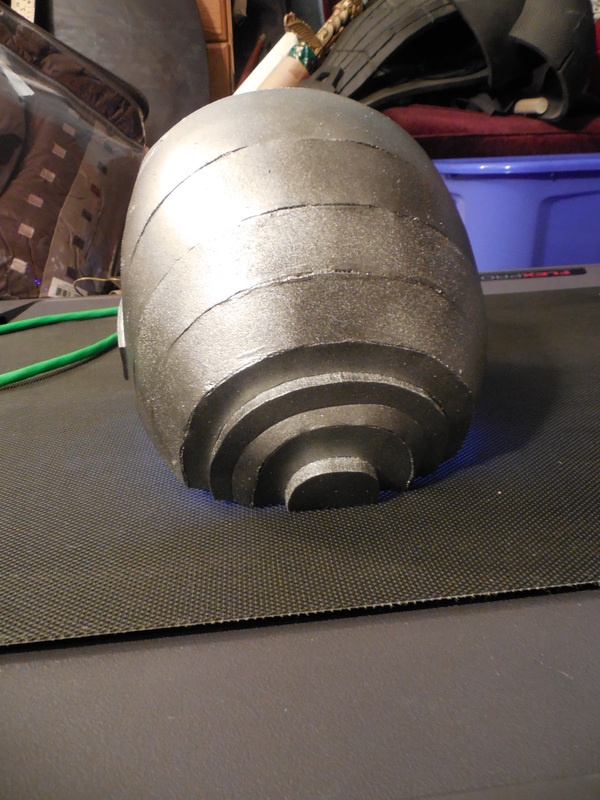
This one started off simple enough. I found a good 3D rendering image that I could size the helmet with, and a pepakura file I adapted to foam myself. Once all that was set, I got to foaming. This portion was quick, coming together a lot faster than I thought it would. I had to angle some of the back pieces and parts of the mouth bit, but it was assembled in no time. I also threw on some craft foam on either side, for added depth. 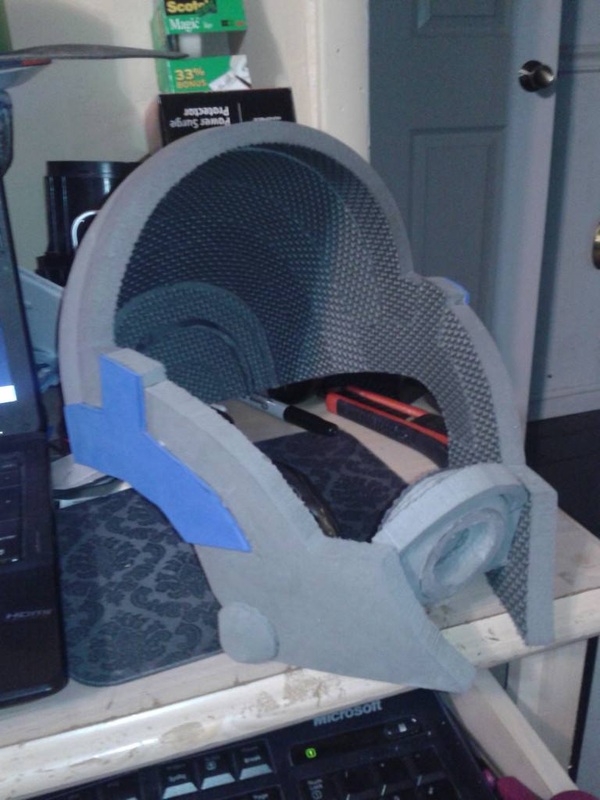
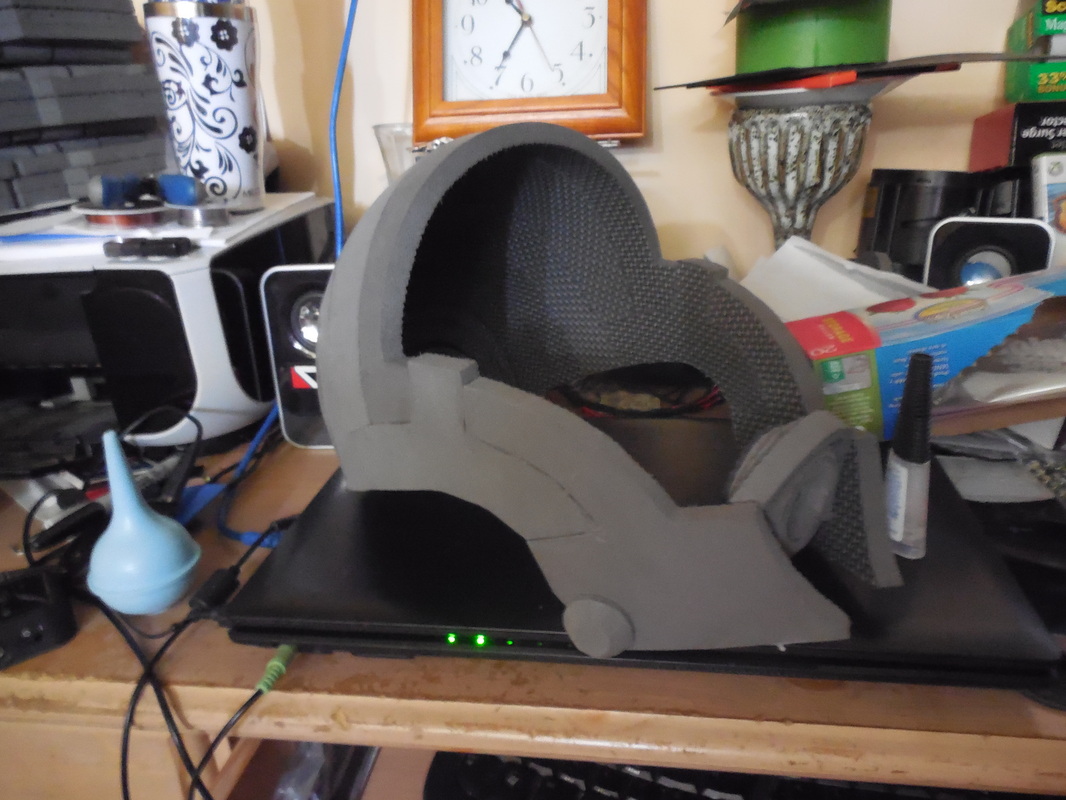
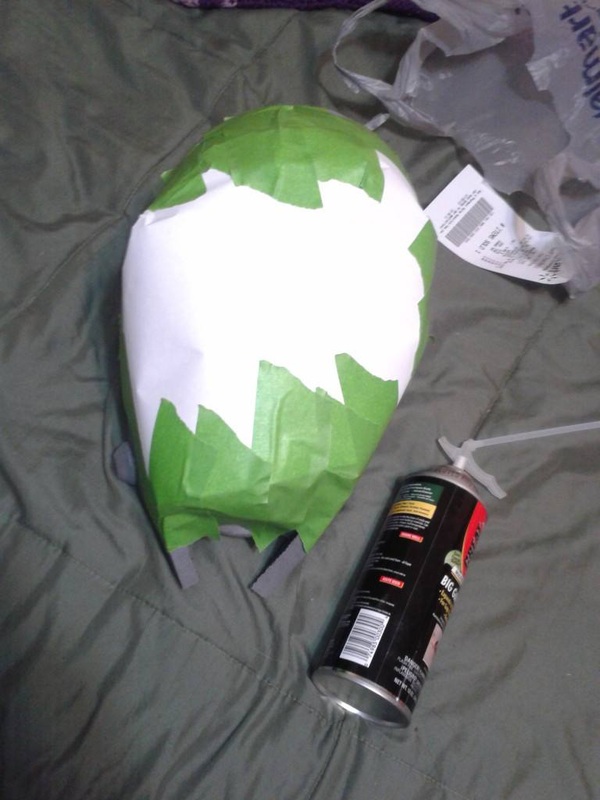
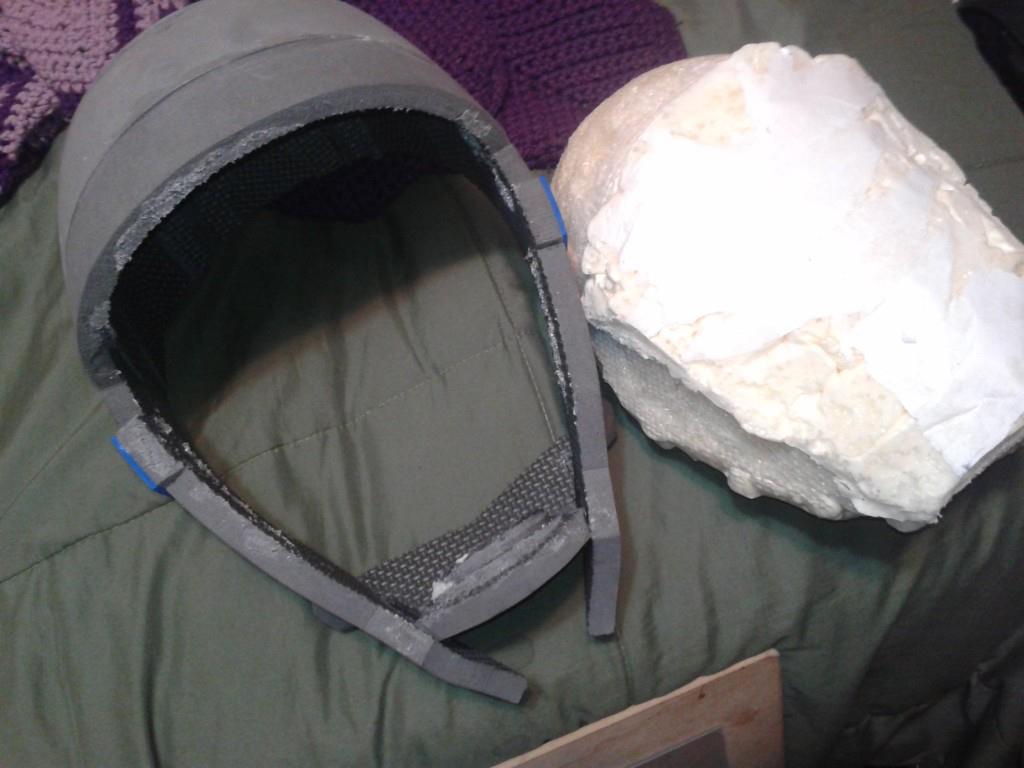
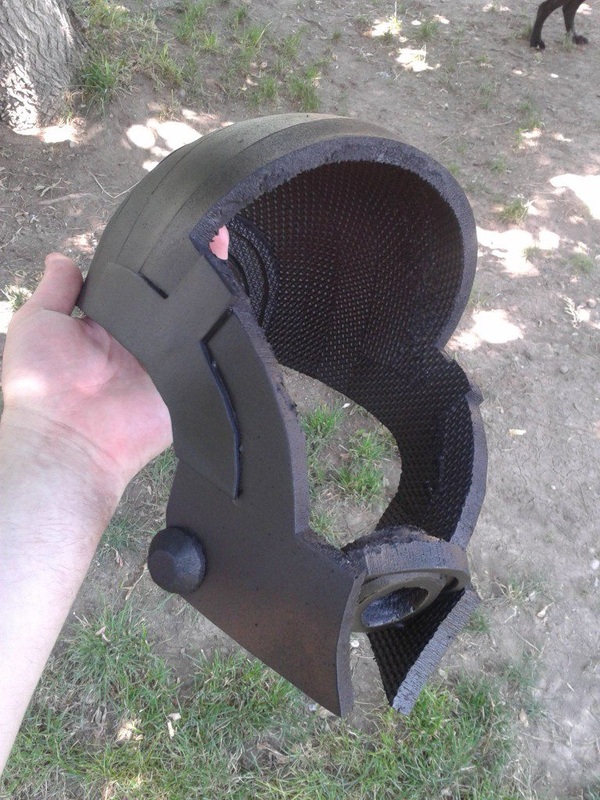
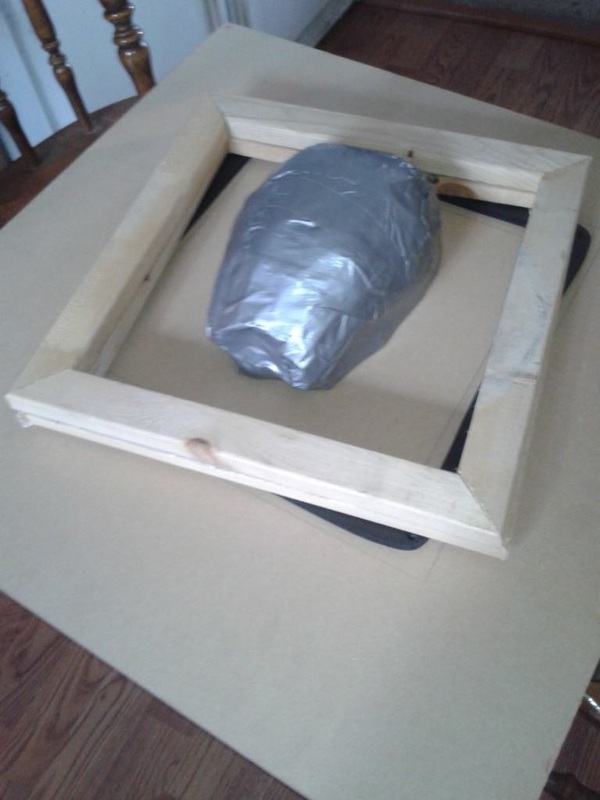
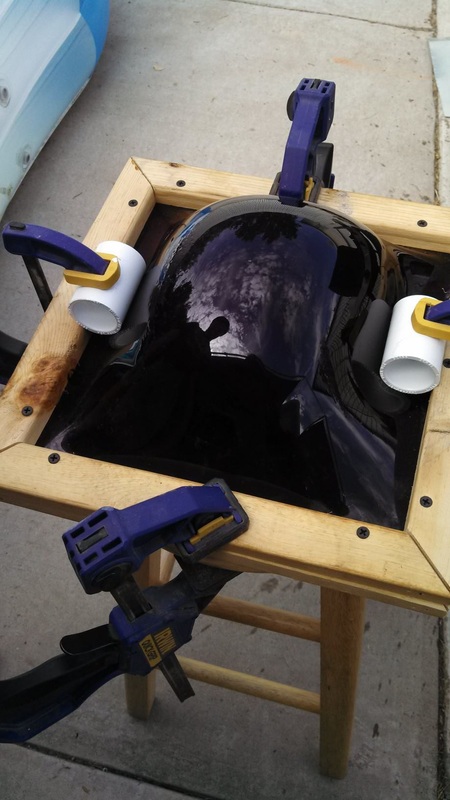
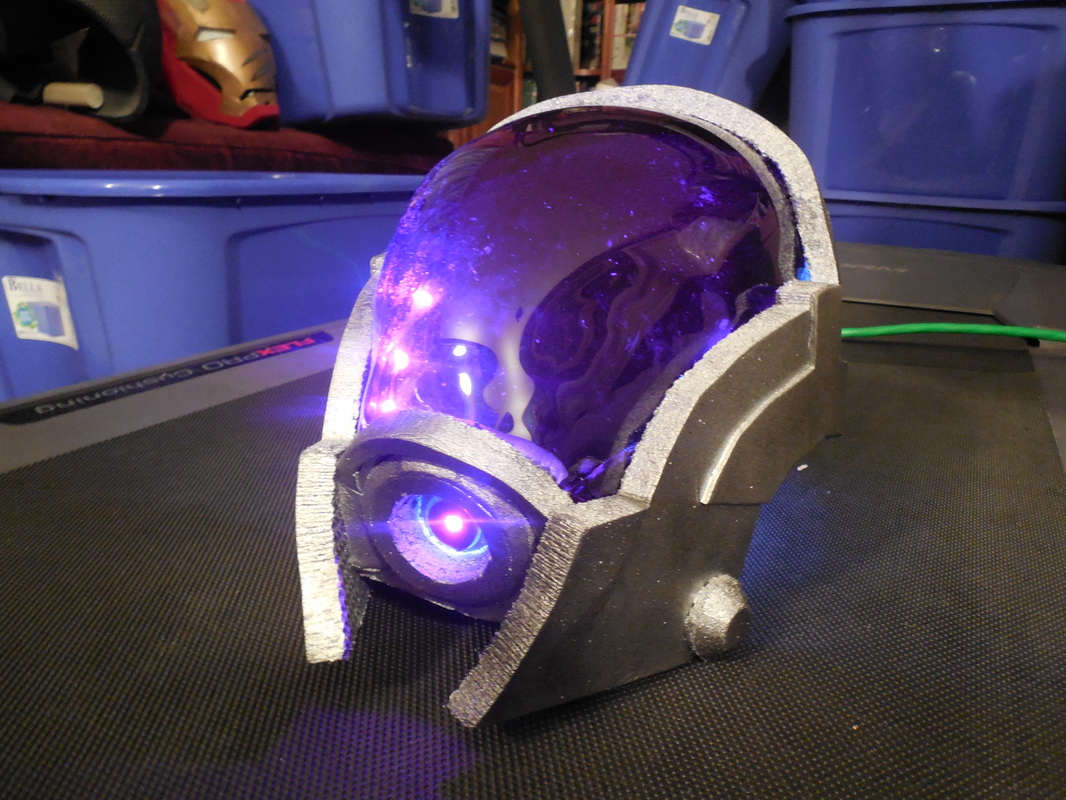
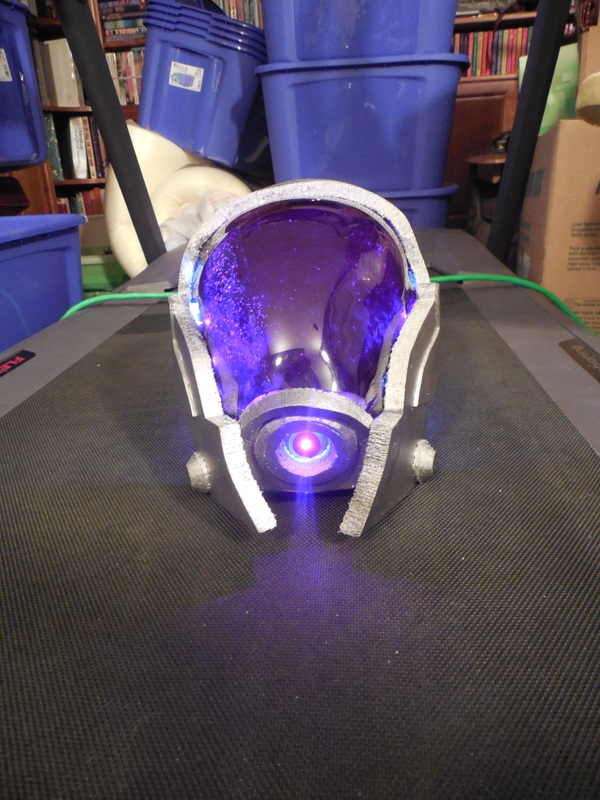
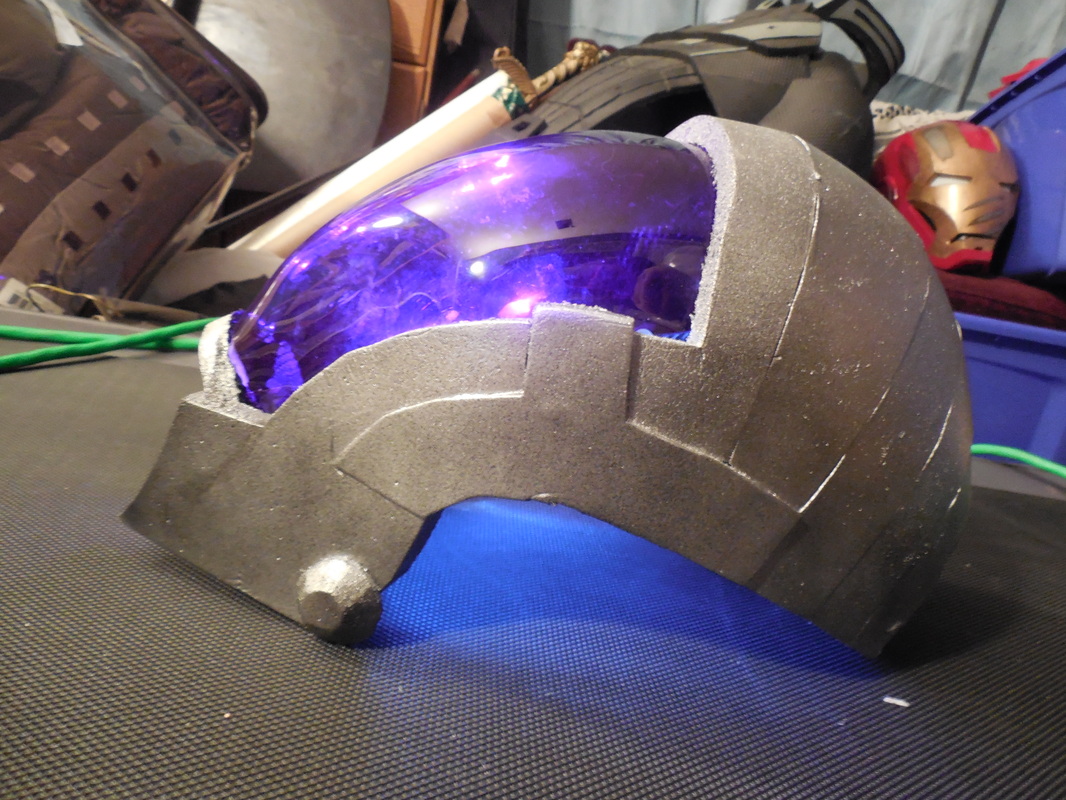
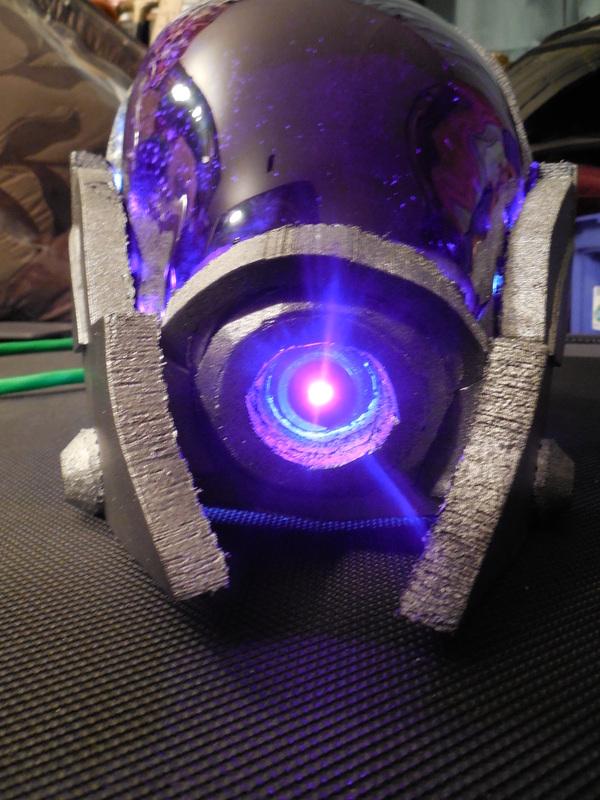
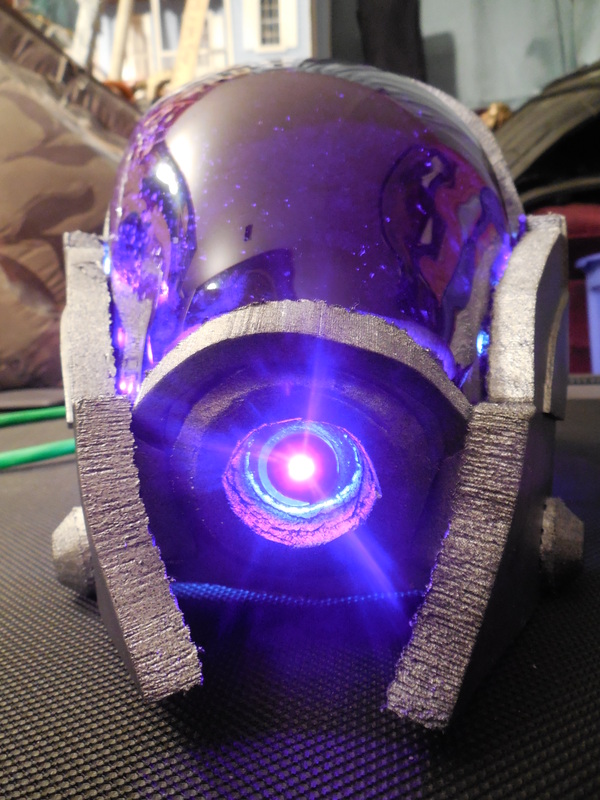
This was where things got interesting. Now I had to make a form for the visor, and I didn't have anything that would work properly: no clay, nothing solid for a shape, nothing. So, I decided to improvise. I took a couple sheets of paper, taped them up on the inside, and sprayed in Great Stuff, the expanding foam. Well, it worked, but it left a residue inside the helmet that I couldn't fully remove, it was full of bubbles, and I still had to cut it down to the proper shape. For the moment though, I put that bit aside and worked on the final stages of the helmet. This bit was simple, once again: plasti dip as always to seal the foam, a layer of Krylon Hammered Black for a bit of texture, then layers of silver metallic. I also lightly misted a black metallic over it, to add depth and simulate age, with a little bit of weathering. You can see some of the detail best on the far right shot, though you'll be able to see it better later. Back to the visor. I finally got the foam shaped right, though it wasn't as rigid as I knew I needed. I found a local shop that sells an awesome translucent purple acrylic sheet, though it was thicker than I had hoped. Got two sheets just in case. First I tried papier mache to strengthen the foam buck, though the dogs tried to eat it (I got to it in time). That didn't last past the heat gun, unfortunately, and the closest I got to a visor shape was this: 
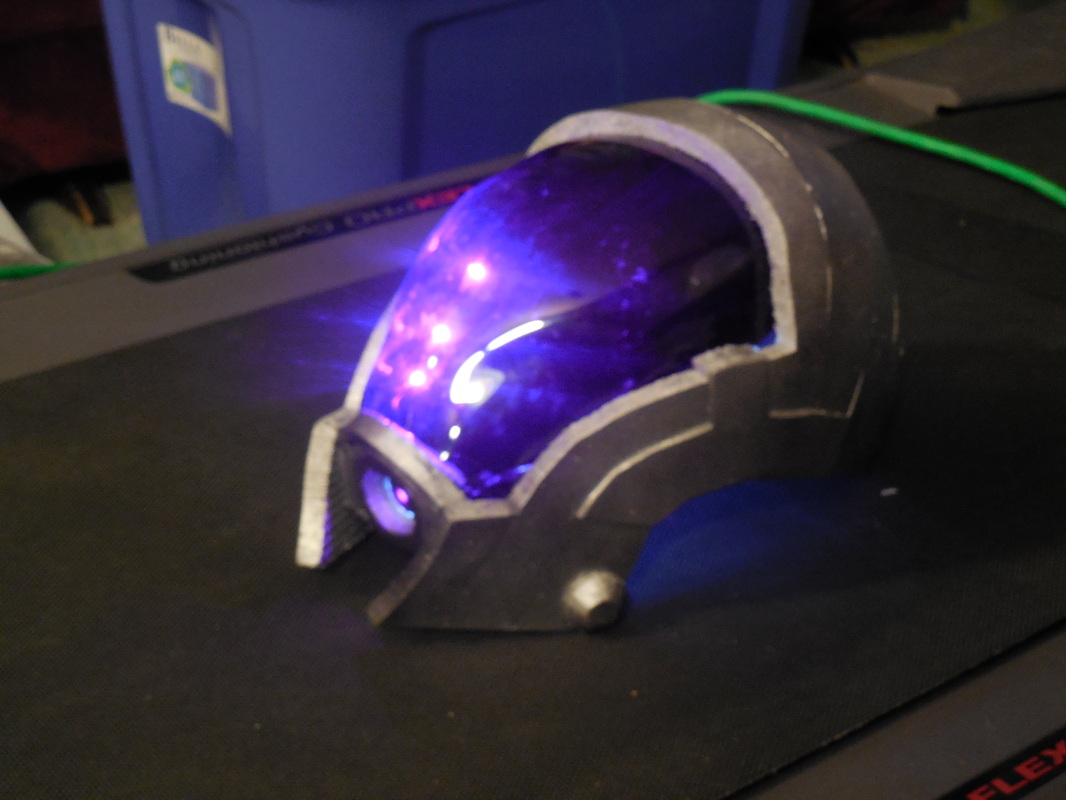
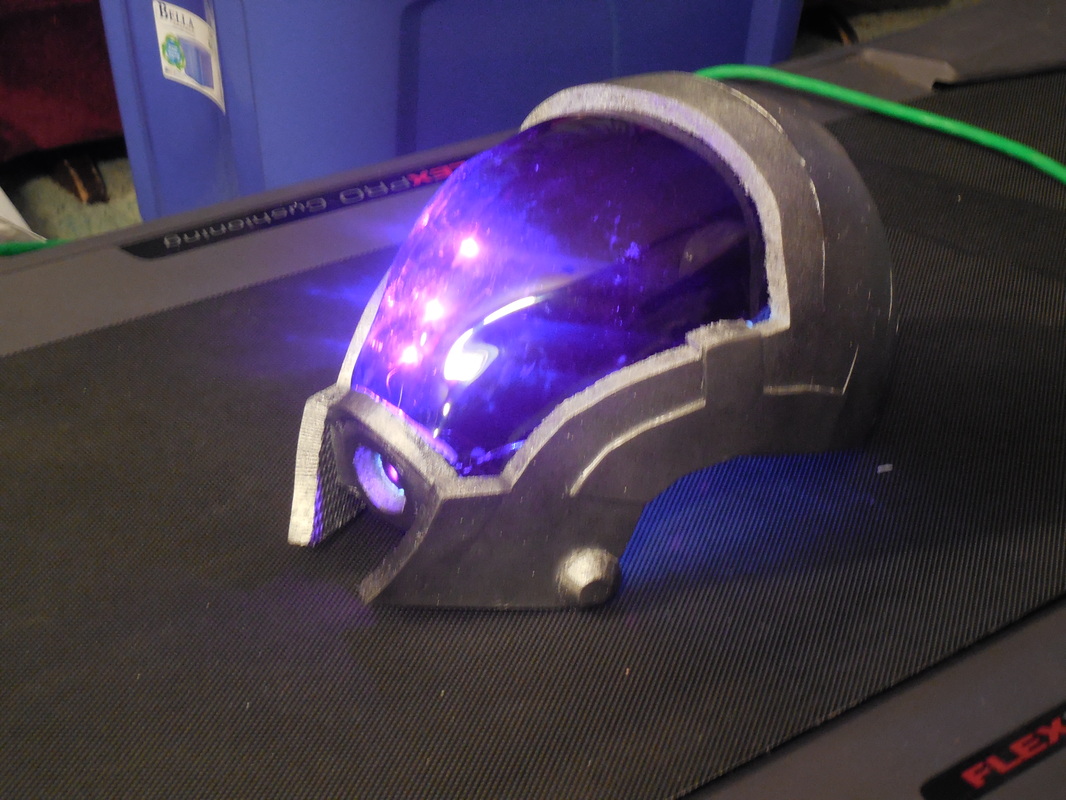
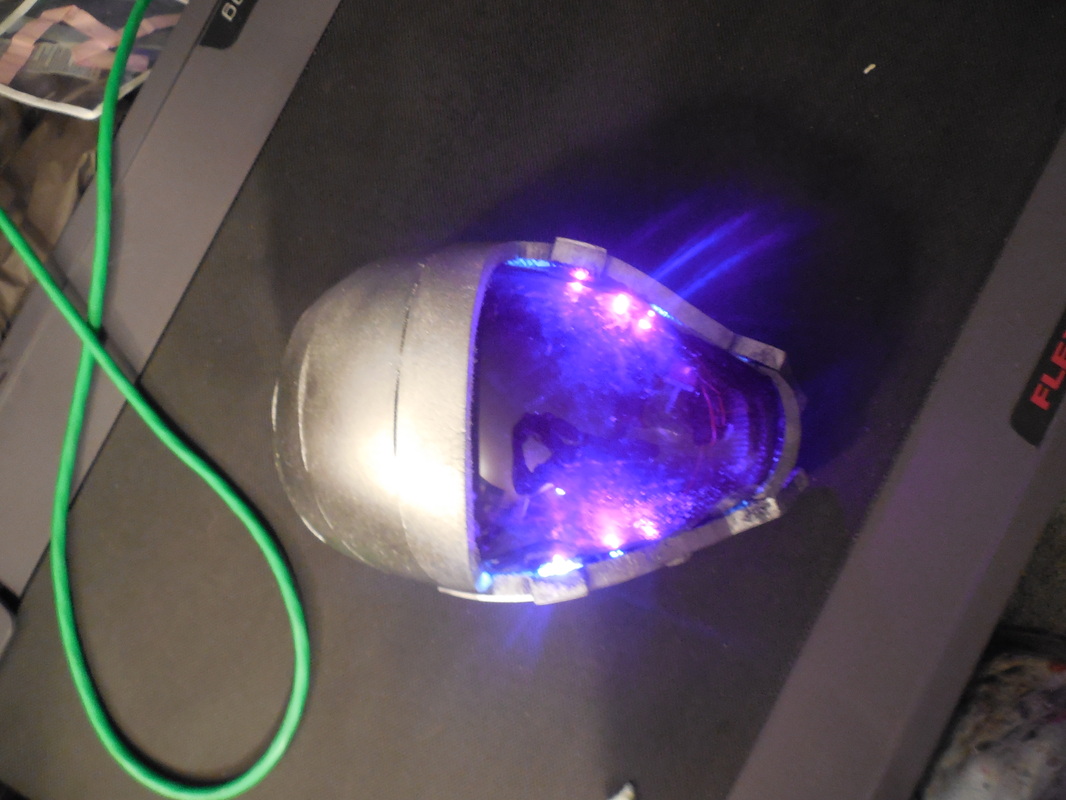
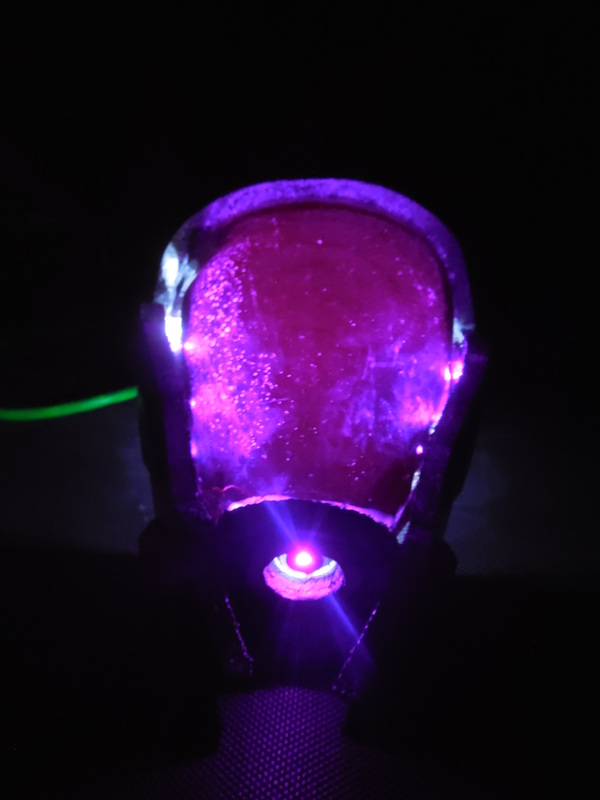
Tried that three times before I tried our oven, which for some reason just wouldn't heat the whole sheet evenly. Finally I covered the buck in duct tape, which was a better strengthener, though parts of it tried to melt on me.... After a while I gave up, ready to spend money to get a company to do it for me. My good friend Zach at Quantum Entanglement Props saved my day though, offering to help me out. Neither of us have a vacuum former, but he had enough experience from his day job to know some tricks we could try. Drove up to him, cooked up the sheet in his grill... ...and finally got it forced down to the proper shape. Now all I had to do was cut it a little longer than the helmet opening, and things would be smooth sailing! Unfortunately I nicked a couple spots, namely in the back left corner and a piece on the front right cracked. I was running out of time, and if I didn't get this to the customer that day it wouldn't make it in time for the convention. They wanted lights too, so I threw those in as quick as I could. The most glaring one is picture number seven, where you can see the opening in the back corner. However, I thought this would be hidden well enough by Tali's hood, though obviously not completely. When I sent it out, I sent a message of apology, and that I wanted them to at least have something for the convention while I made a better one to replace it. Unfortunately, this was apparently not enough. The customer was livid, and demanded I refund her.
The biggest complaints, of course, were the crack and the hole, but they also had things to say about the quality. "Wasn't worthy of DragonCon" and that it looked "like a four year old made it" also came up. They complained about the back, the seams, that wouldn't be seen even once. Eventually they demanded their money back, and have since returned it. So, now I have a Tali helmet made of foam, with a visor that, though it does have those two problems, is passable and replaceable in the future. I will absolutely admit that I could have made it better, but there it is. If anyone is interested in purchasing it, I am taking offers. Please send me a message through the Contact page, if you wish to talk more regarding this item.
18 Comments
Jacqueline Bracht
1/8/2014 12:25:08 am
Do you think you could send me a blue print of this helmet? I would also pay for it !
As I mentioned in the write-up above, I didn't use a blueprint for this. I used a 3D image I found on the internet as a way to view it from all directions, and adapted an already existing pepakura file into a foam pattern. You can find the foam pep file here:
Destanie Danielle
5/31/2015 09:16:06 am
I was wondering about the Foam pattern, at http://www.4shared.com/file/_F5njIFL/FemShep_N7_Armor_by_Darhood_un.html?
Hey there, you do GREAT stuff! Could likely not achieve half as good as that, but I hope you are open for input.
Emily Groen
4/30/2014 11:33:53 am
Hello this amazing!!! What sort of glue do you use to hold all of the foam together, and what sort of foam do you use for something like this, and where can you get it? I have made some things with pep before but with paper, and I would love to try foam. Thank you!!!:) <3
Kate
7/1/2014 08:59:46 am
How much would it be for you to make one of these? Saw in the above suggesting taking another shot at it and I'm considering buying or making one of my own Hey Matt, I was just wondering if you would be willing to share the foam version of the pep file you drew up for this project? I totally understand if you'd rather keep it to yourself but it's worth a shot, whatever my talents may be, they don't extend to being able to modify pep patterns! I think this build is fantastic and inventive, it's just a shame the client was so displeased with it, a bit of an over reaction I think...
collin
12/28/2014 03:40:57 pm
How much you usually charge for your commission. Just curious 6/15/2016 04:21:47 am
and amazing how your post is! It Is Useful and helpful for me That I like it very much, and I am looking forward to Hearing from your next.. 9/10/2016 04:39:44 am
What a remarkable post. These are great lesson and I definitely agree with you. This is very timely for me. Thanks for sharing! Leave a Reply. |
|


 RSS Feed
