|
Time for another edition of Building Stuff with Matt! Okay, so I will come up with a better title maybe. But here we go! I was commissioned to make the M-27 Scimitar from the Mass Effect universe, and I want to make it real good 'cause it's for the guy's wife. ;) Anyway, on to the build! 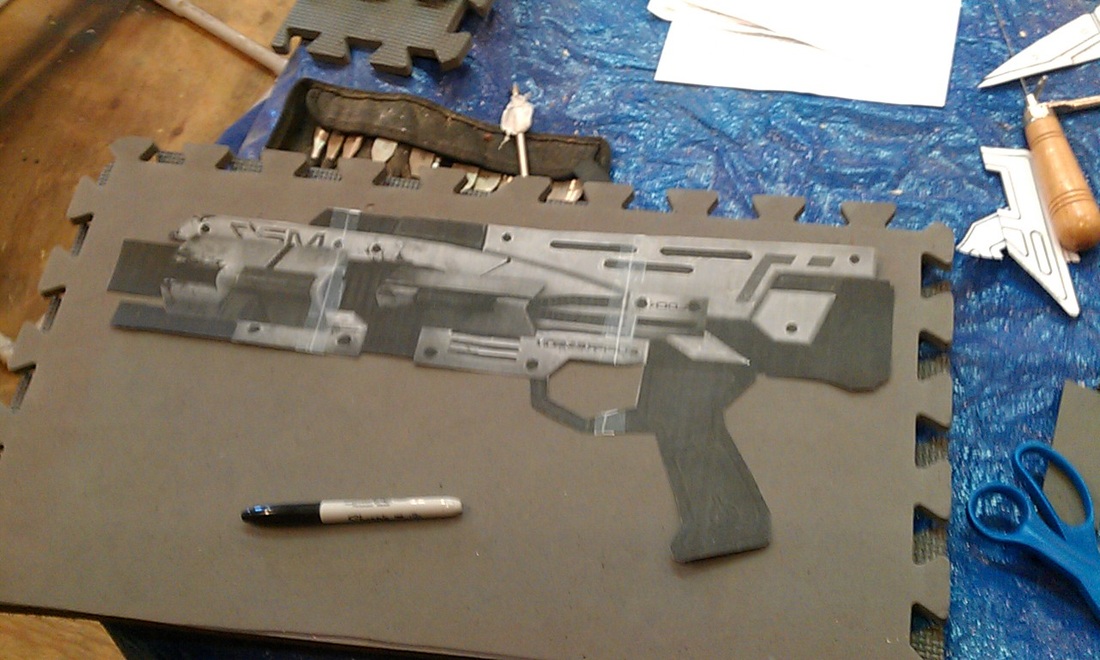
End result and template all in one! I took a good shot of it in game, blew it up, shot a few things with it, then took it to my printer (which I did not shoot). As with my other weapon builds, this one (as you can see) will be made with several layers of EVA foam. Because it's a shotgun, though, even before I add the extenders it will be quite a bit thicker than the rifle, which takes four. I didn't get many shots of cutting out each layer, but here's the end result: 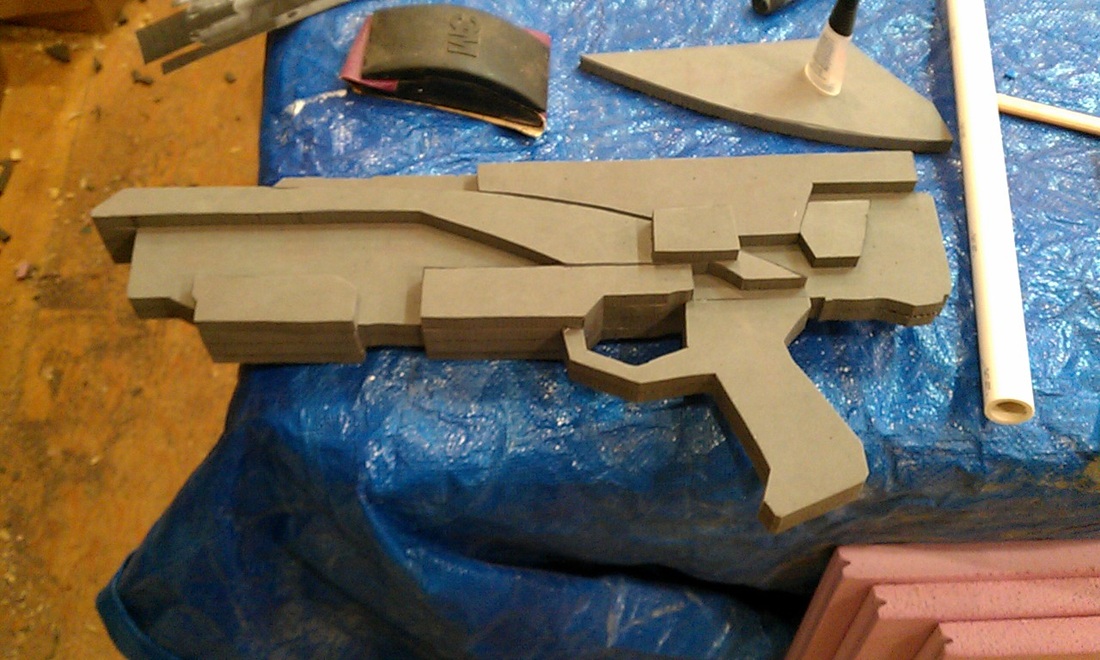
The really annoying thing is that in between cutting the first two layers my band saw blade decided it was done and broke on me. I had to delay building for almost a week before I could get a replacement and continue cutting, but I prevailed! I cut a few more pieces out, busted out the craft foam, and got to work on building up the details. 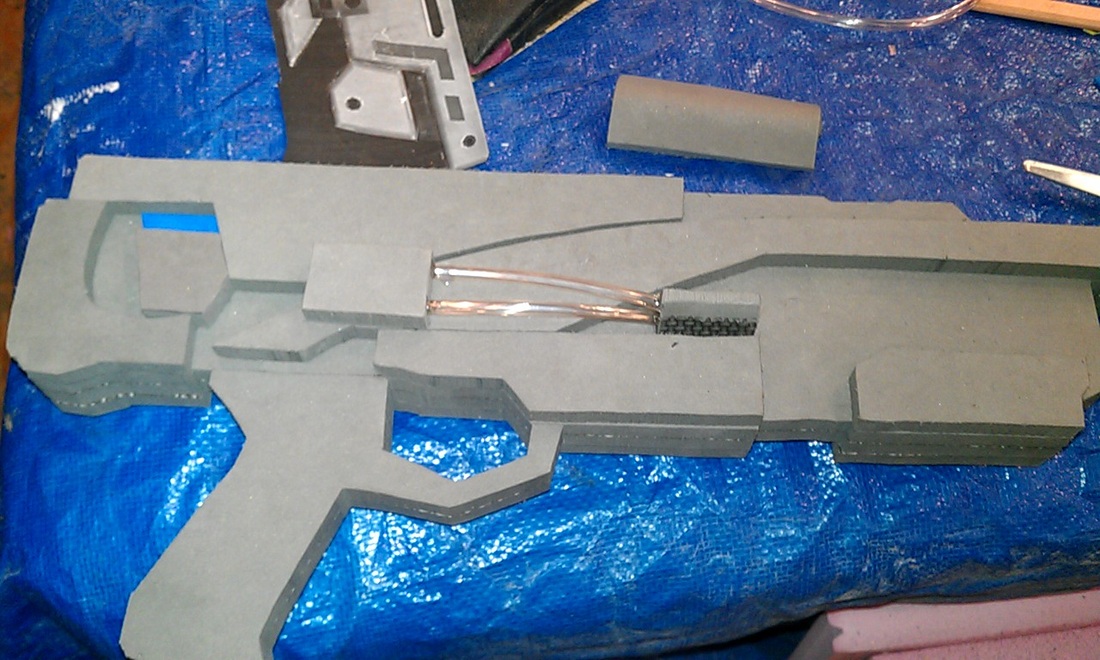
More on that weird shaped piece in just a bit. I needed it to attach the tubes to. As you can see there's more details in the butt of the shotgun. (Side note: the shotgun, which has more kick, has less butt than the rifle. Go figure.) Went to Lowes (love costume hunting there hehehe) and found some pipes and tubing for the barrels. I was looking for some PVC pipe that I could just segment into each other, but instead I found the awesomest thing ever, which really adds to the detail and makes this thing look even more mean! 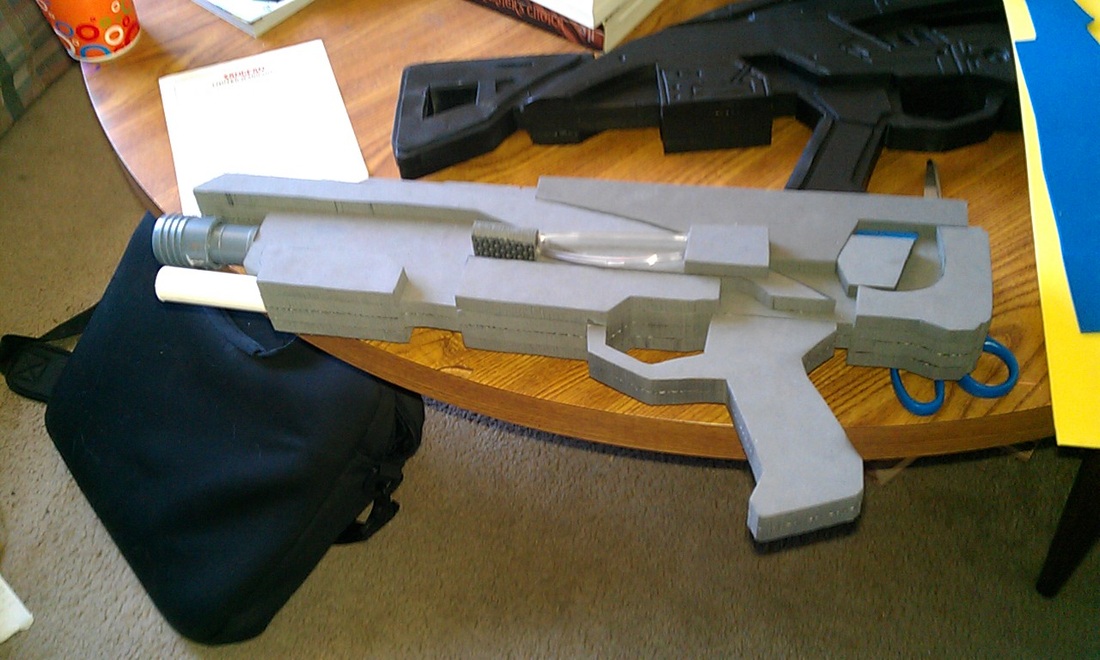
You'll see a good close-up later, but doesn't that just look awesome?! I also picked up some vacuum tubing for the undercarriage, and finished up on the details with the craft foam. 
The side extensions were next, though they were a pain for a bit while I tried to both angle them and get them to stay secured. The back ones were a little harder, but that's because the front supports actually stick through. Undeterred, I cut them out, then etched a groove in the back of them and folded them to get them into shape. The back ones are being held in place by those supports from earlier. 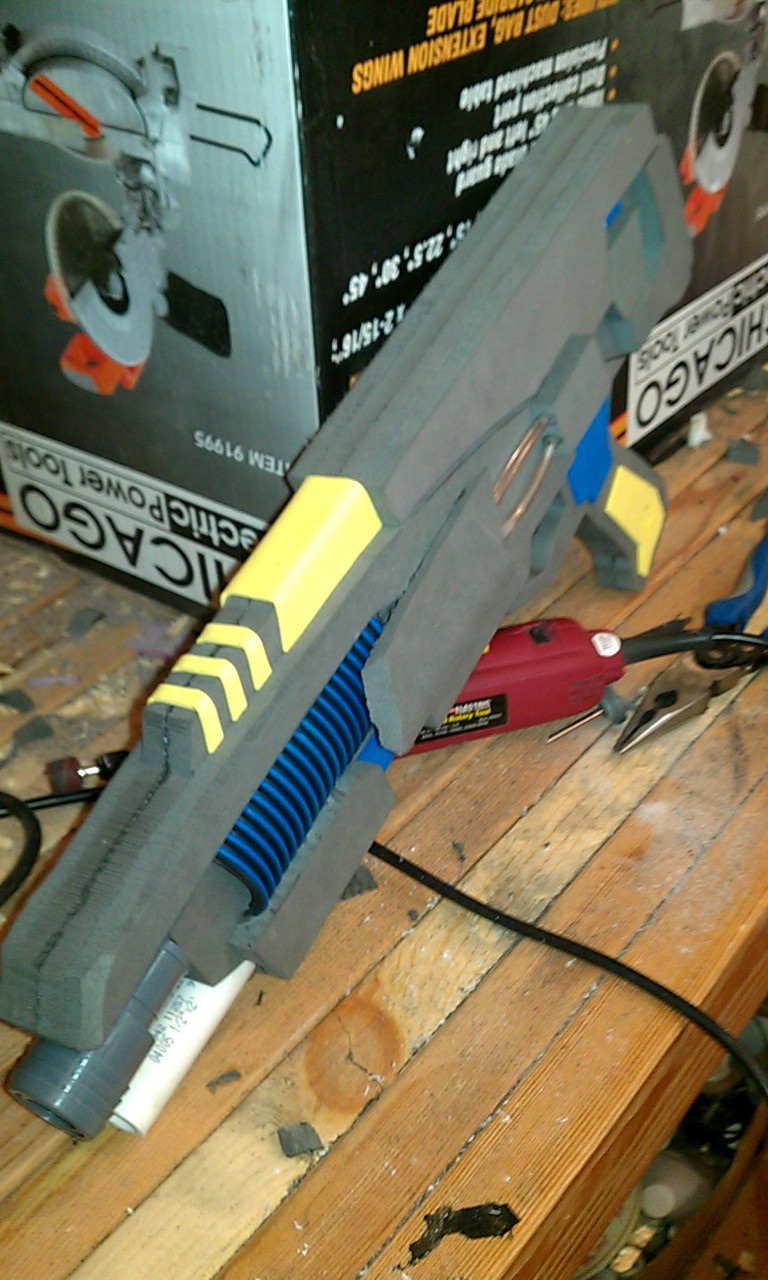
The front ones were trickier in a different way, as I had to fold them, then cut out a good chunk of the fold. Luckily they stayed in shape pretty well. 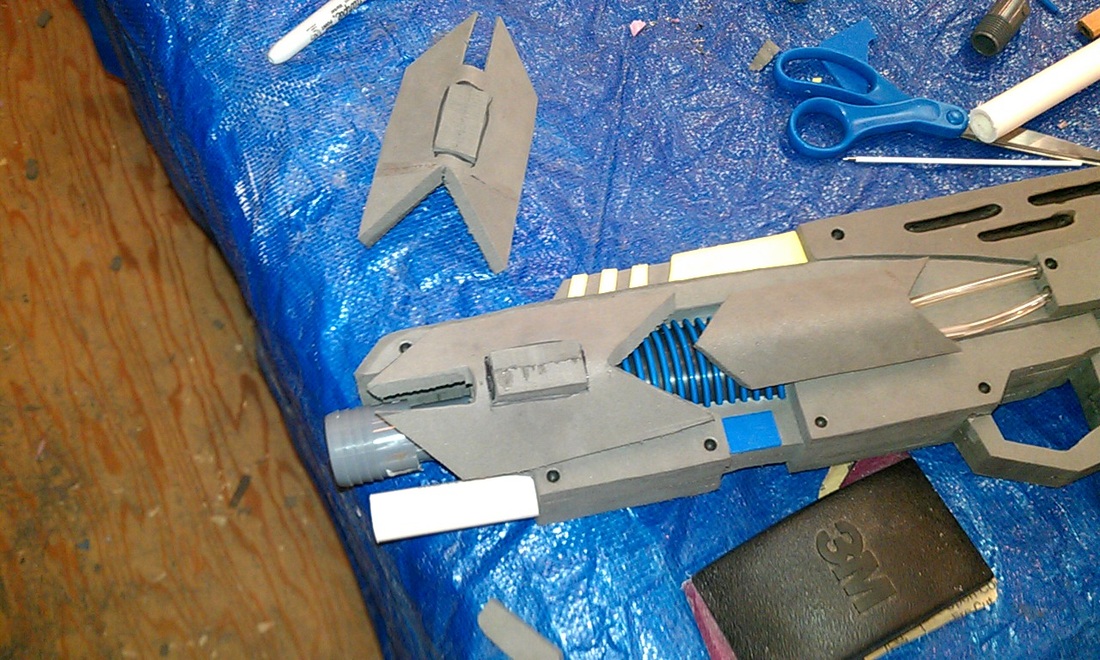
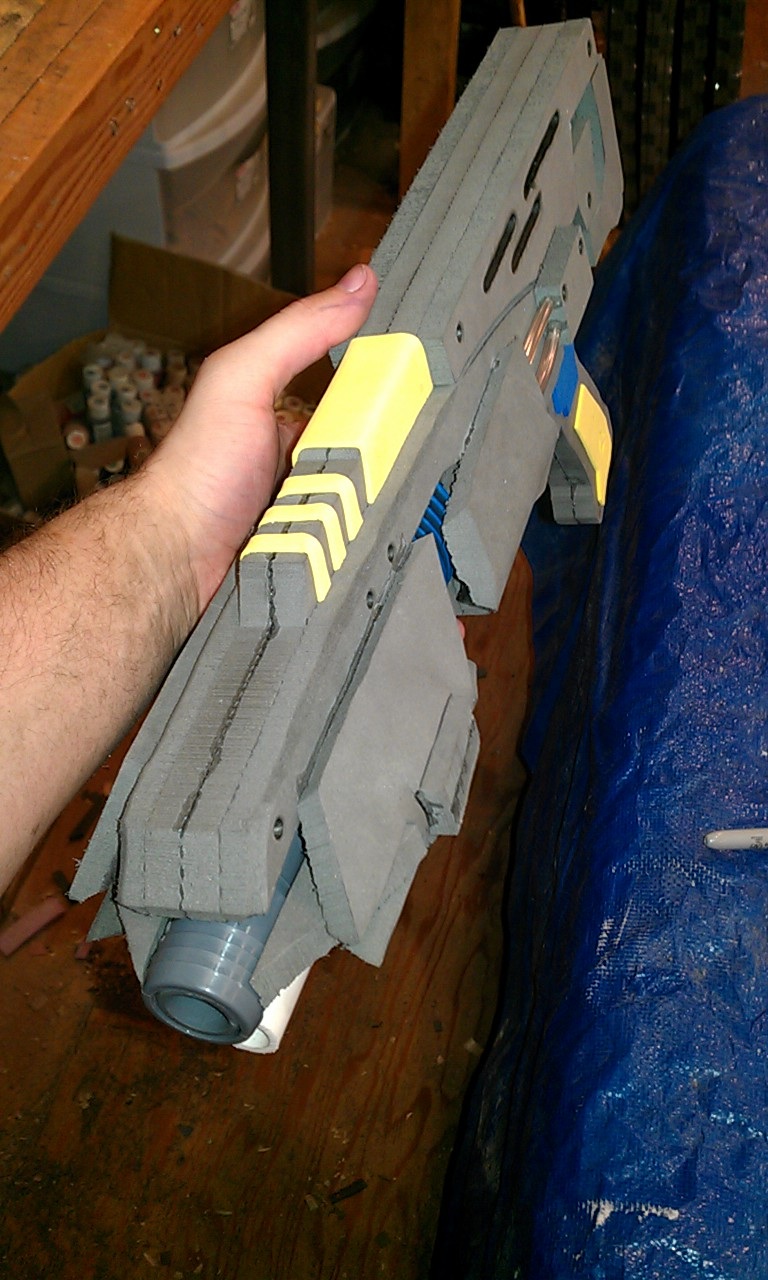
Lastly it was time to etch in the details with the burning tool! I loved with this one that most of the details came from building up, as there was little I had to etch in. Made life easier! I also added the final pieces to the front, connecting the extension to the barrel. 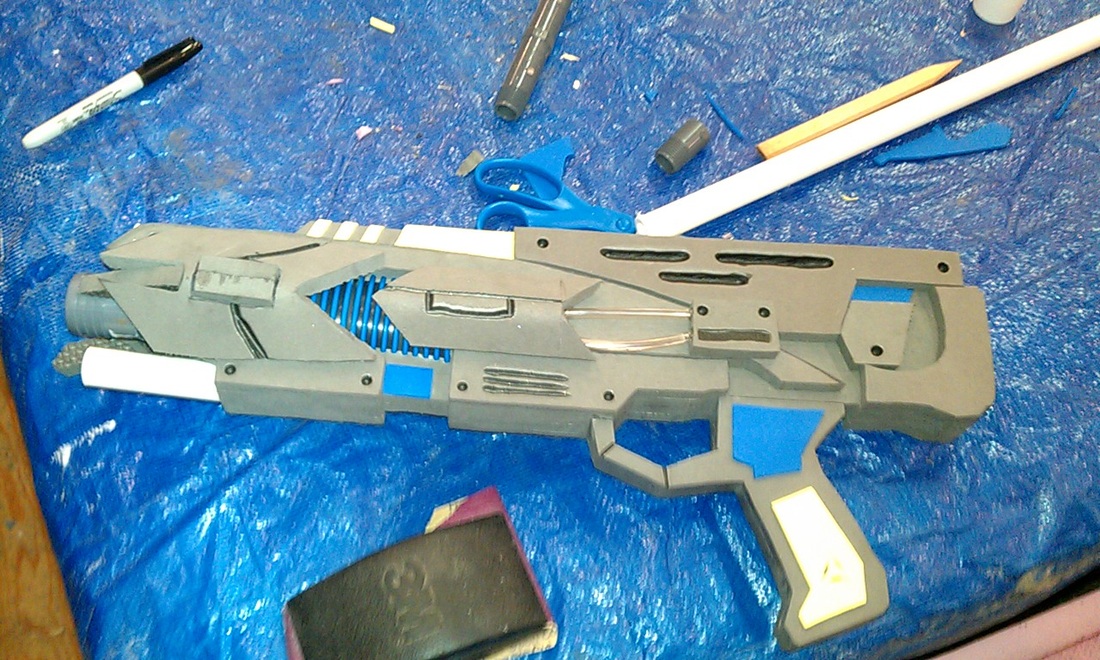
Next came the paint! I used my favorite sealer, Plasti Dip (the black variety too - less painting later!). This really seals the foam and keeps the paint from sinking in like my first two attempts. 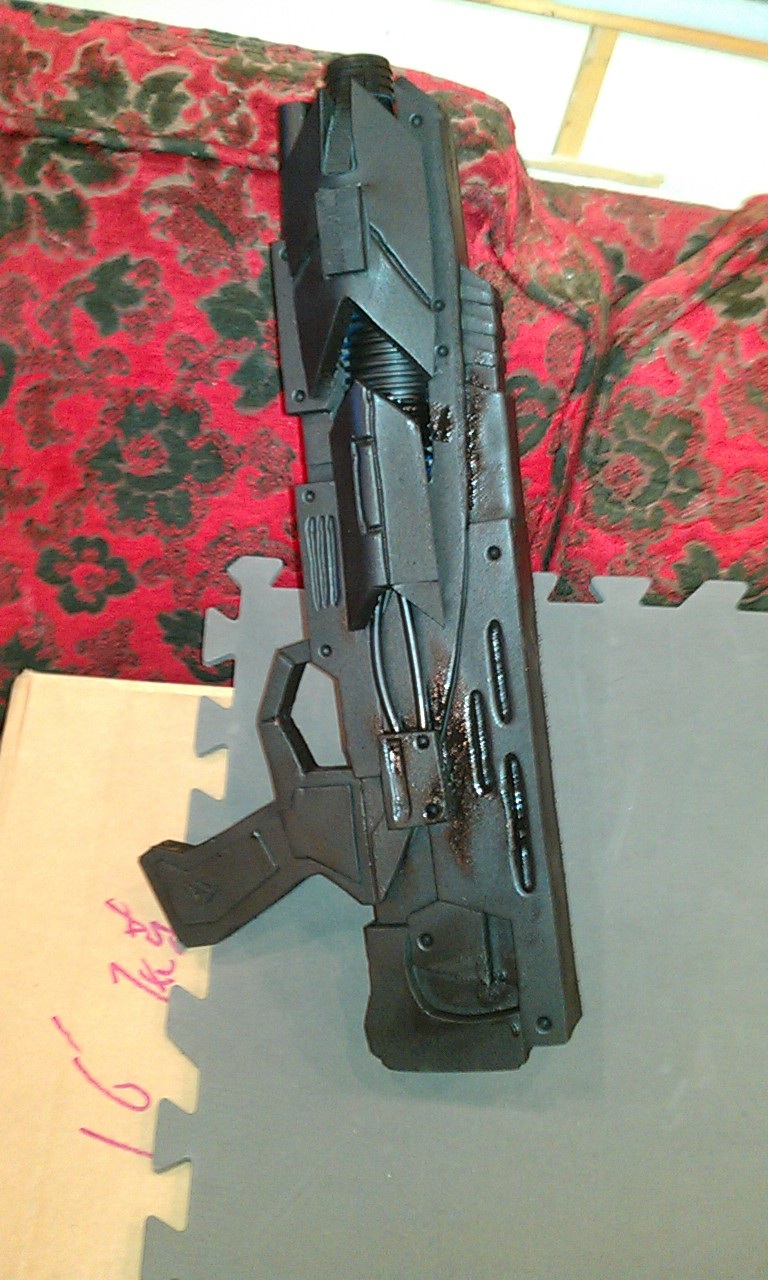
In that pic I had a couple spots I touched up to make sure everything was covered. Three coats, and it was set. I was very tempted to leave the shotgun like that, as it looked like a beast and I loved it! Sadly, this one isn't for me, so I had to keep going. I used my slowly improving dry brushing skills and started adding white. 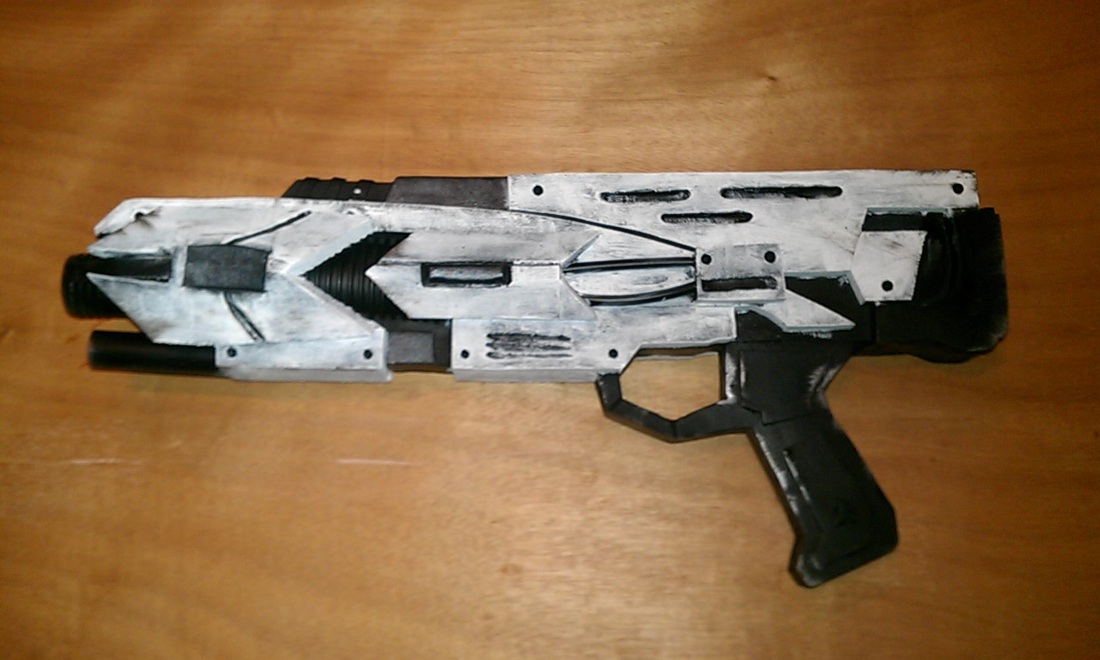
It's not as stark white as it is in the game, which is why I added the dry brushing. I didn't want to blind anyone with it, and frankly it would look ugly. This at least gives it a hint of winter camo and weathering. Speaking of which, here's a few shots of the weathering I did! 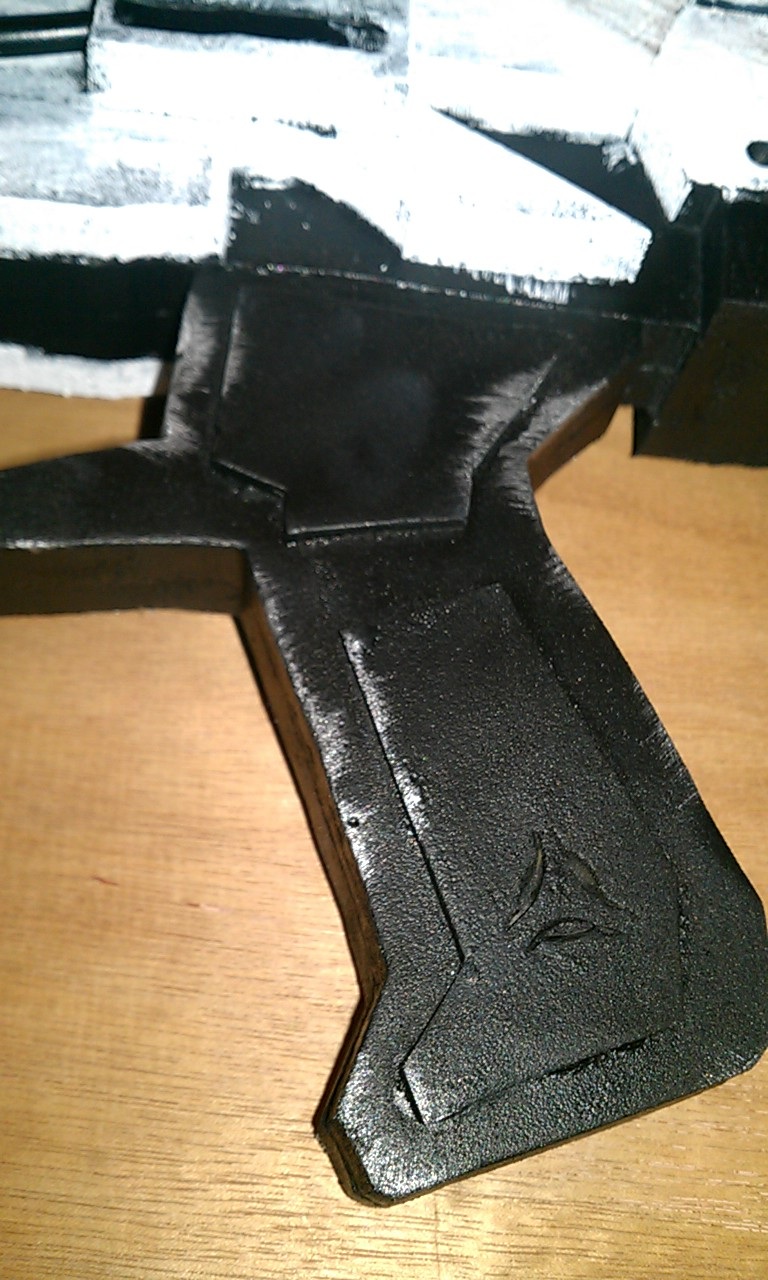
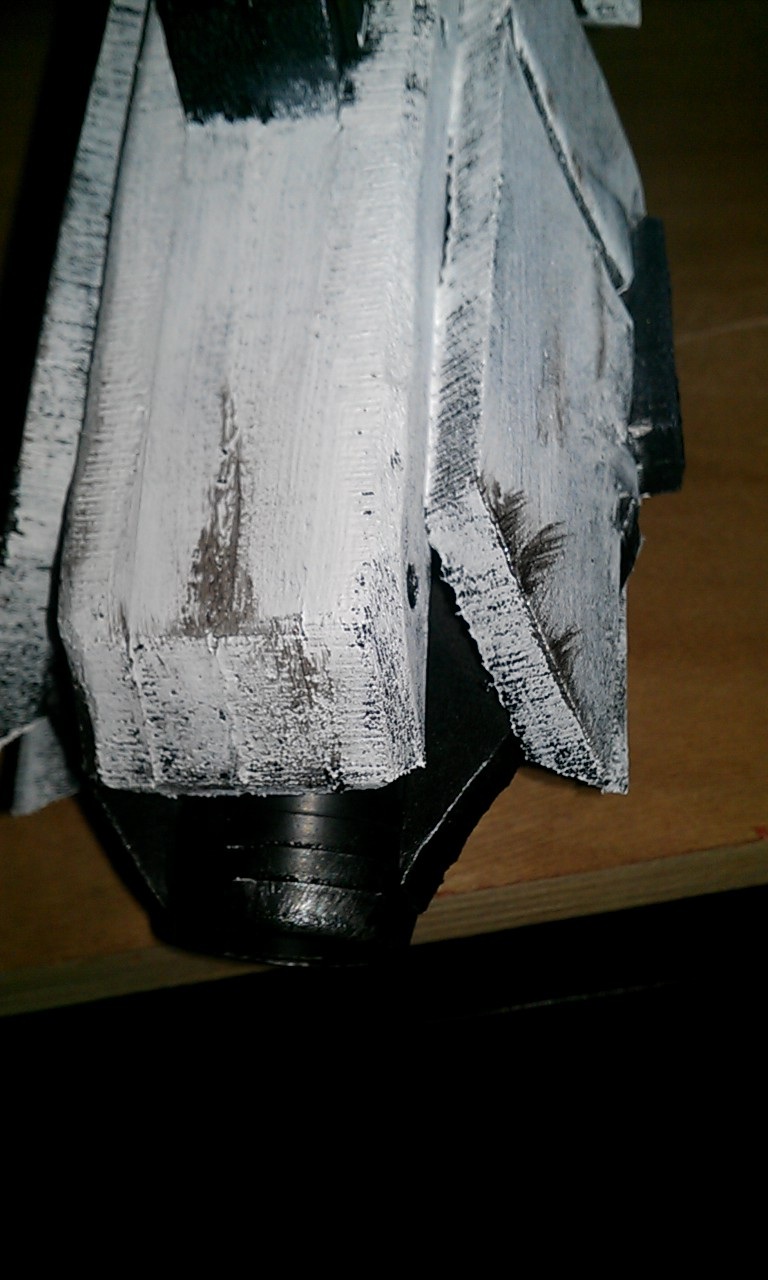
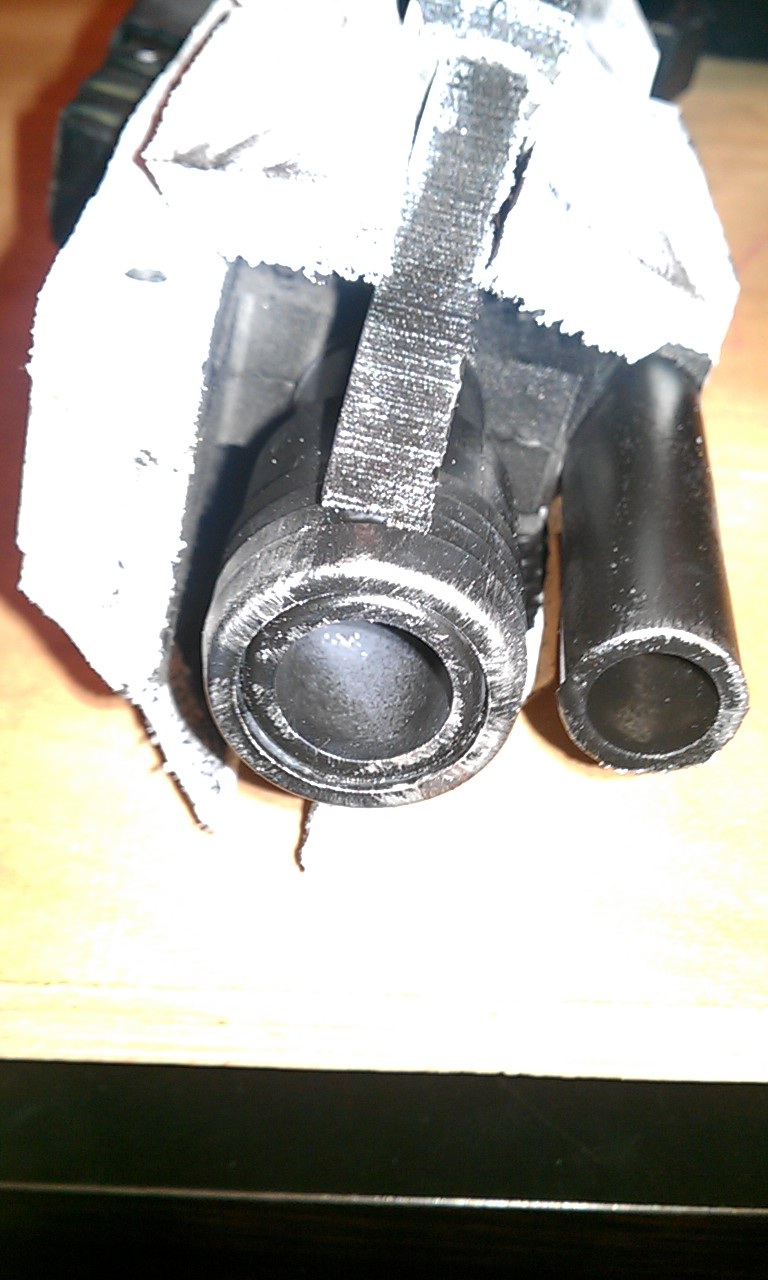
There's a good shot of the barrel. Doesn't that just look so much better than a straight piece of boring PVC? :D Anyway.... 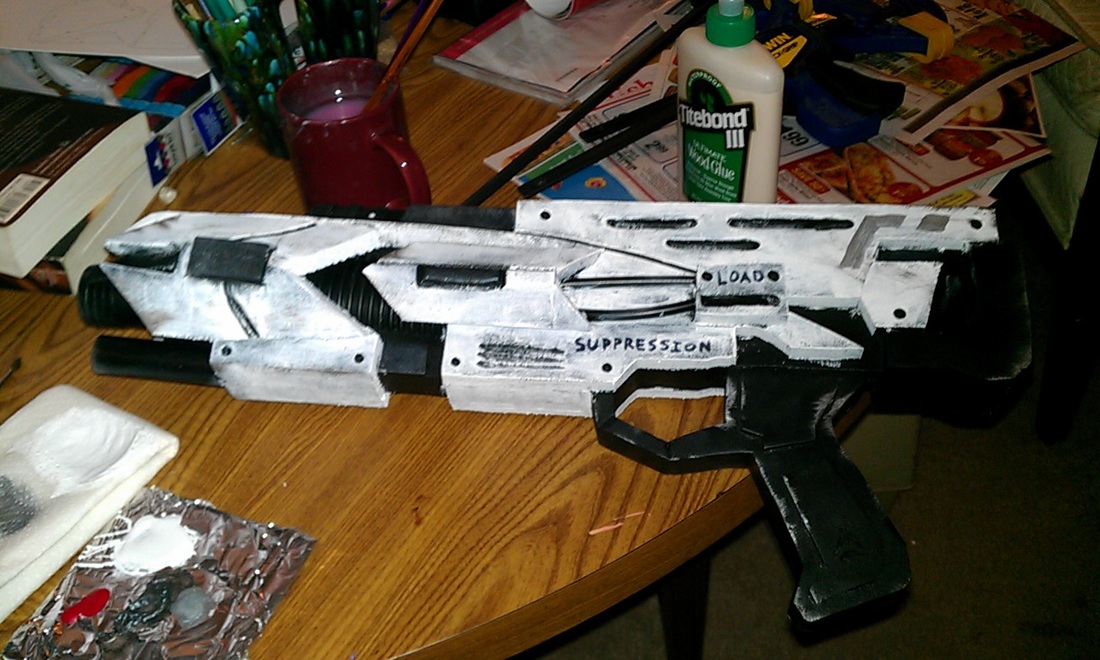
The final product! A couple coats of clear to protect it during use, and the shotgun is complete! Some of you may have noticed that I have added this to my shop already, so now you can see what steps went into making it. I really enjoyed this one - even my wife wants me to keep it! I may have to make two more, one for me and one for her..... :D
0 Comments
Leave a Reply. |
|
 RSS Feed
