|
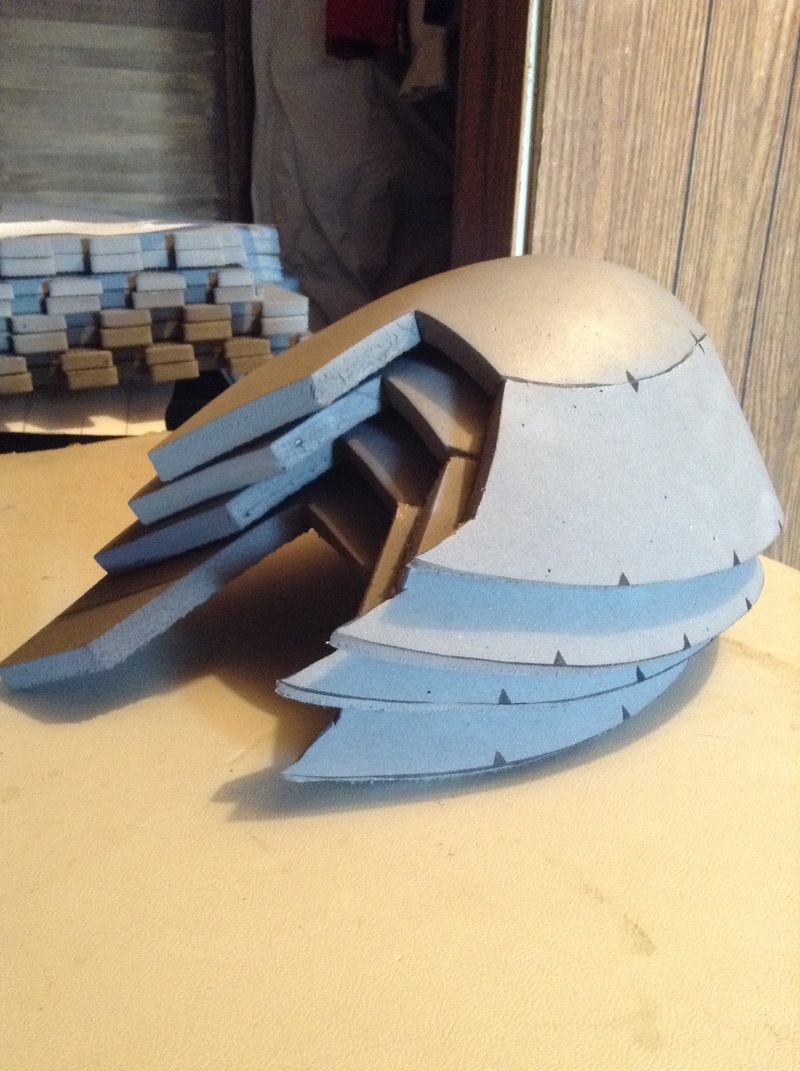
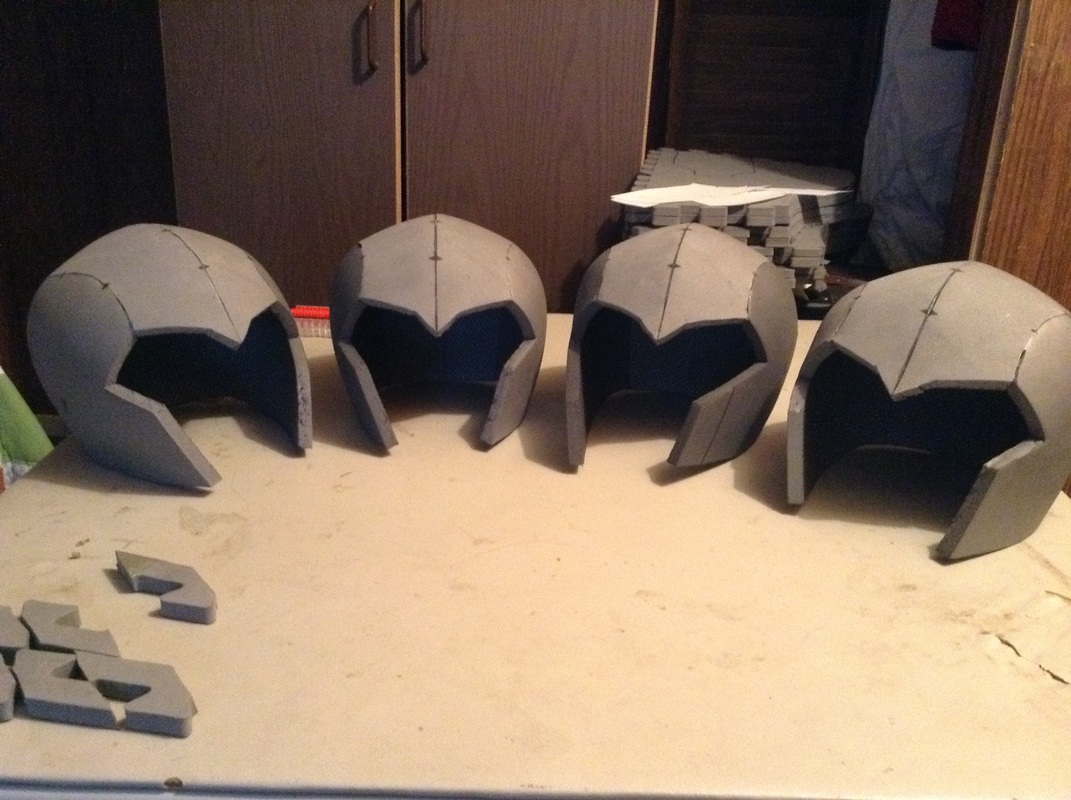
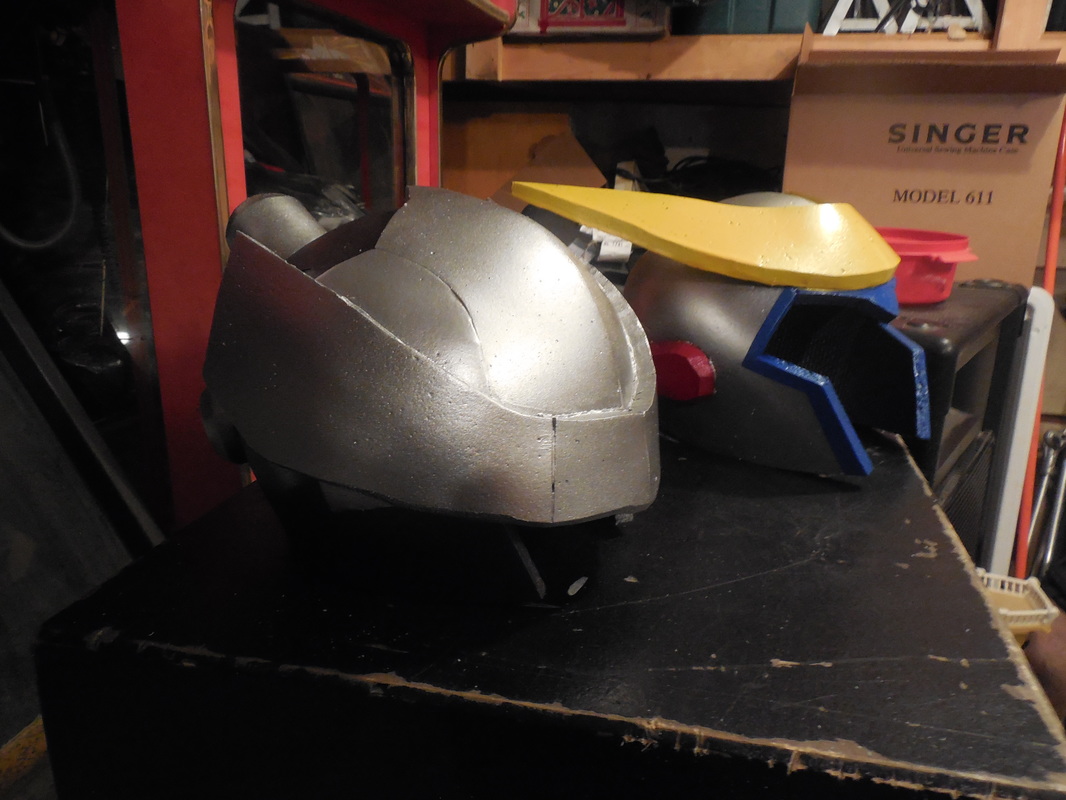
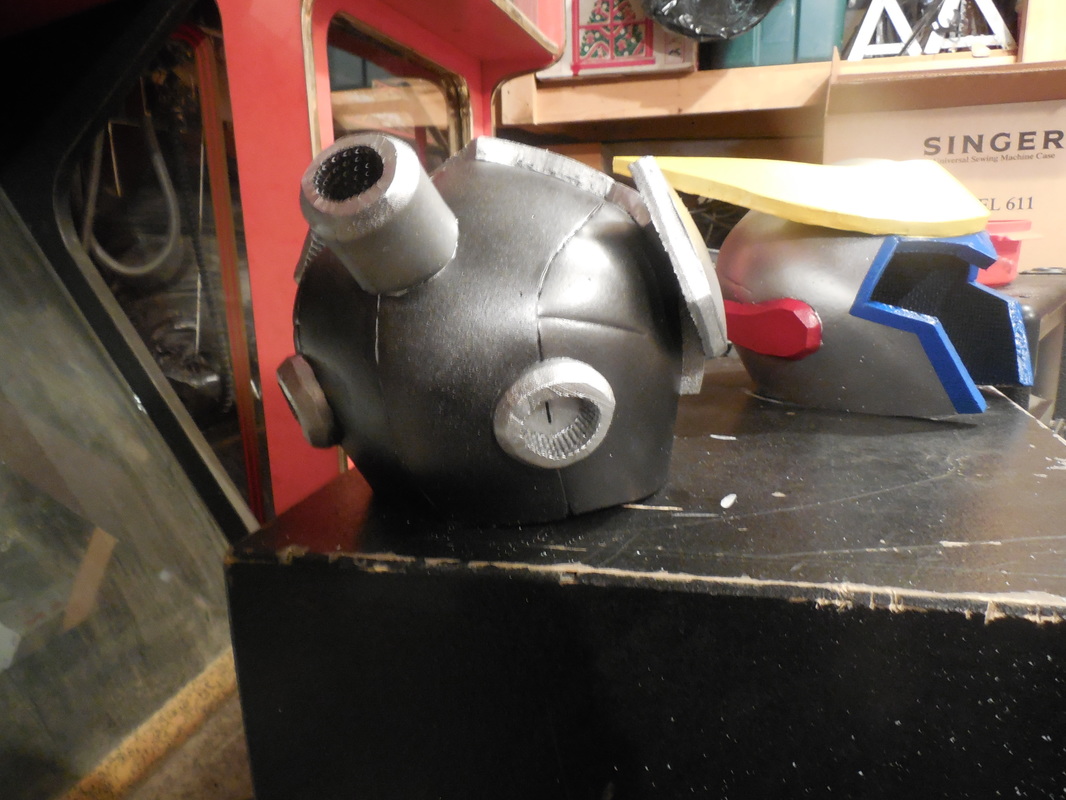
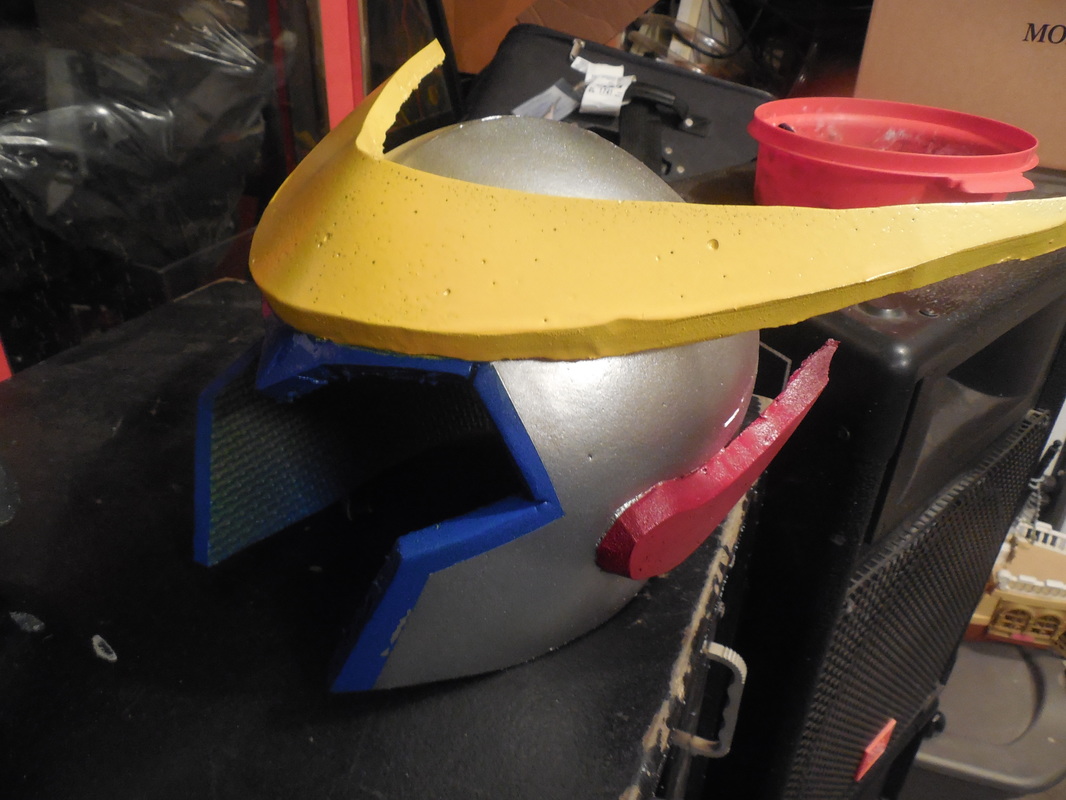
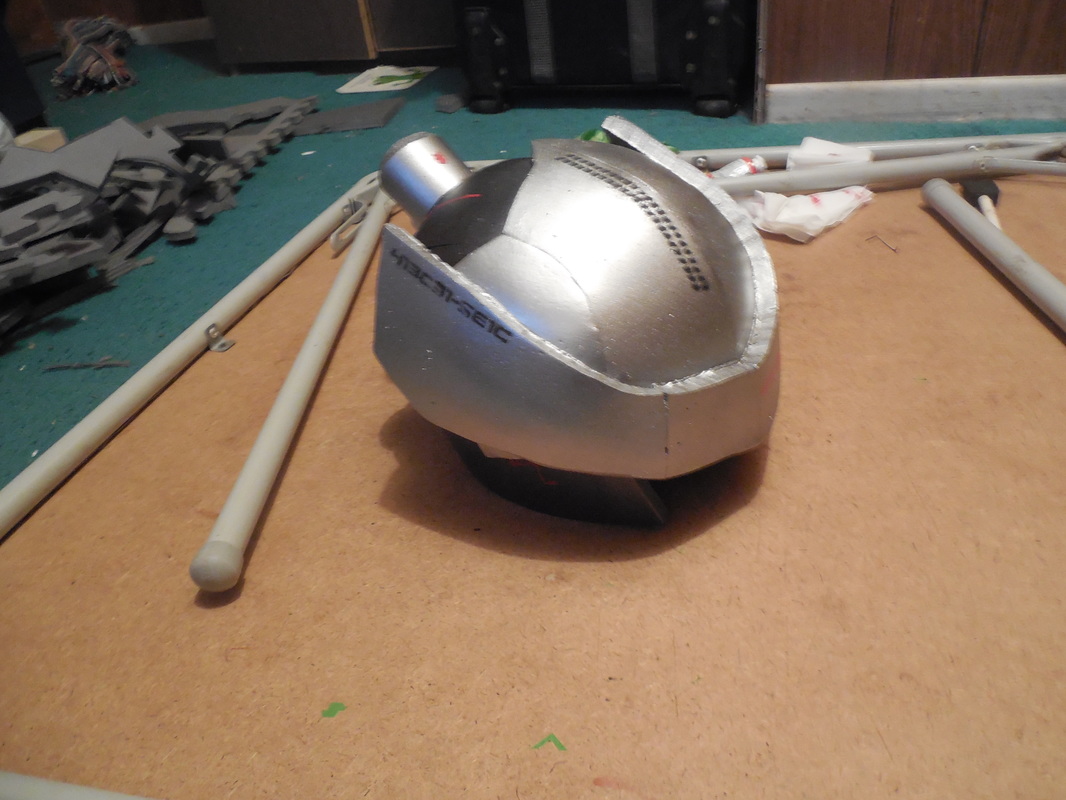
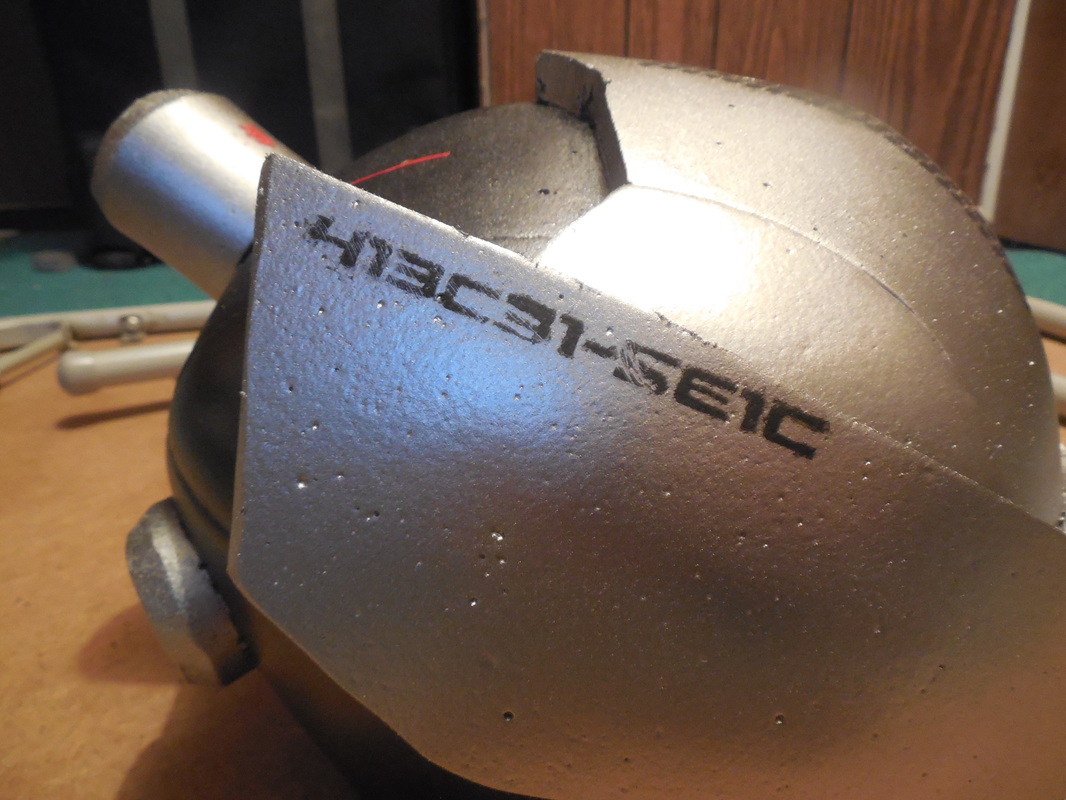
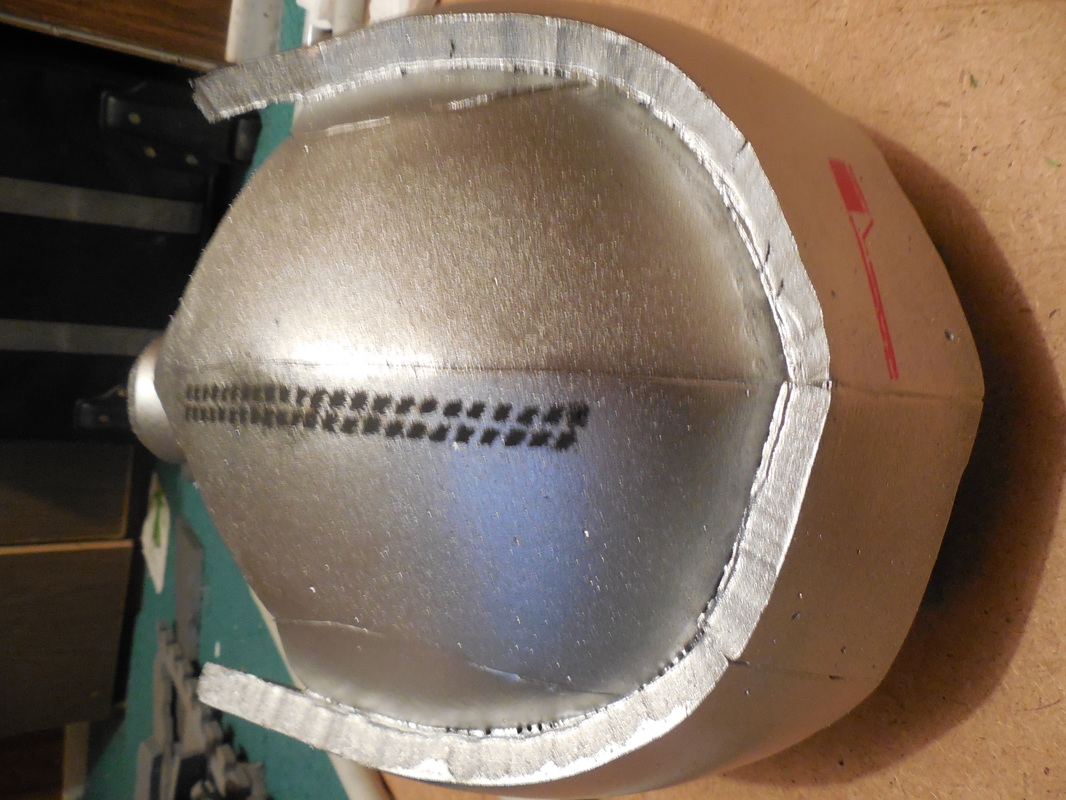
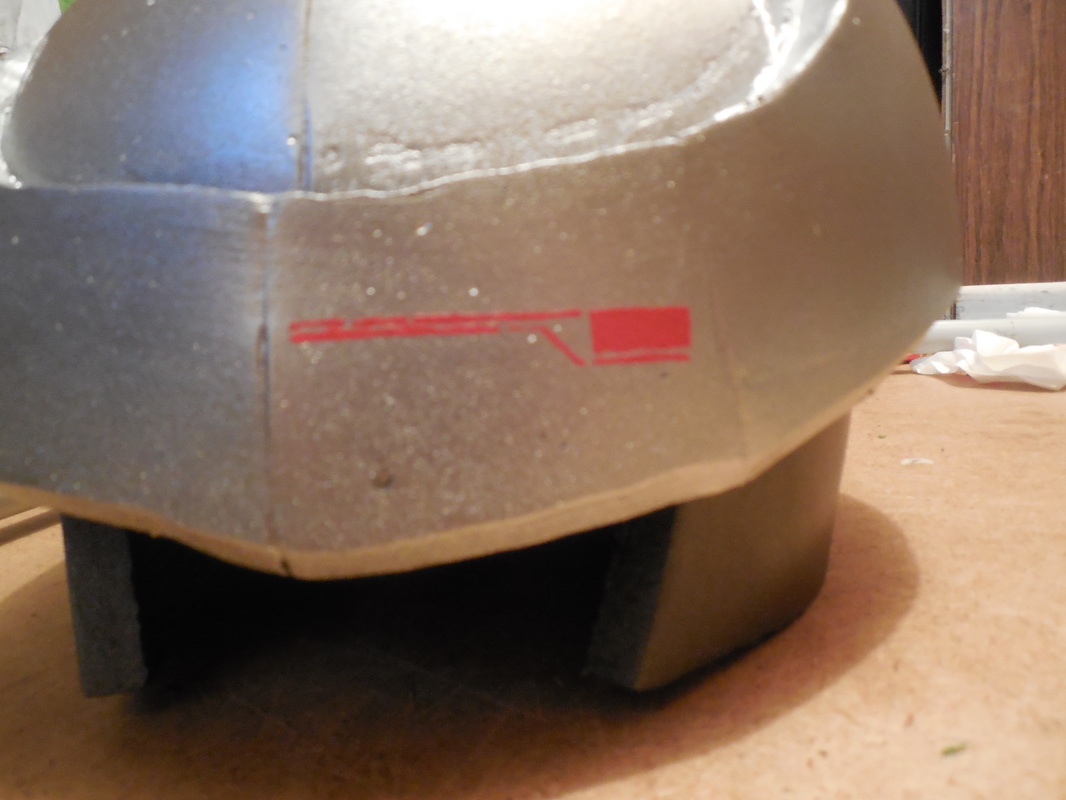
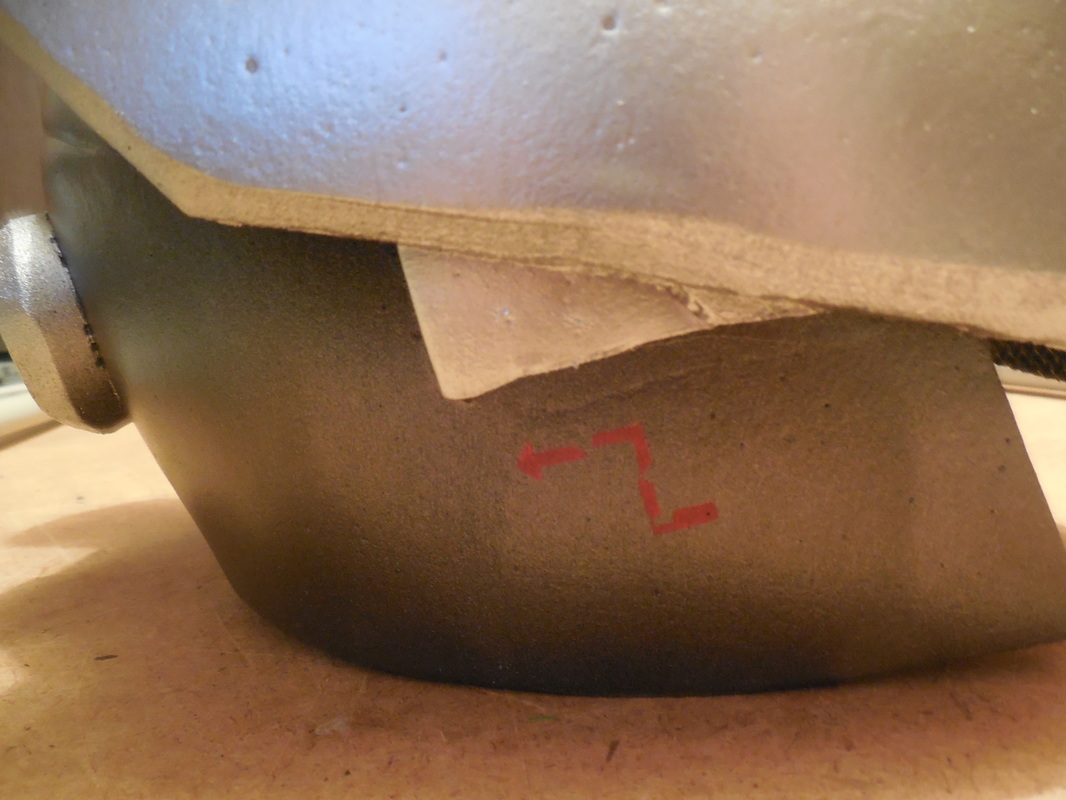
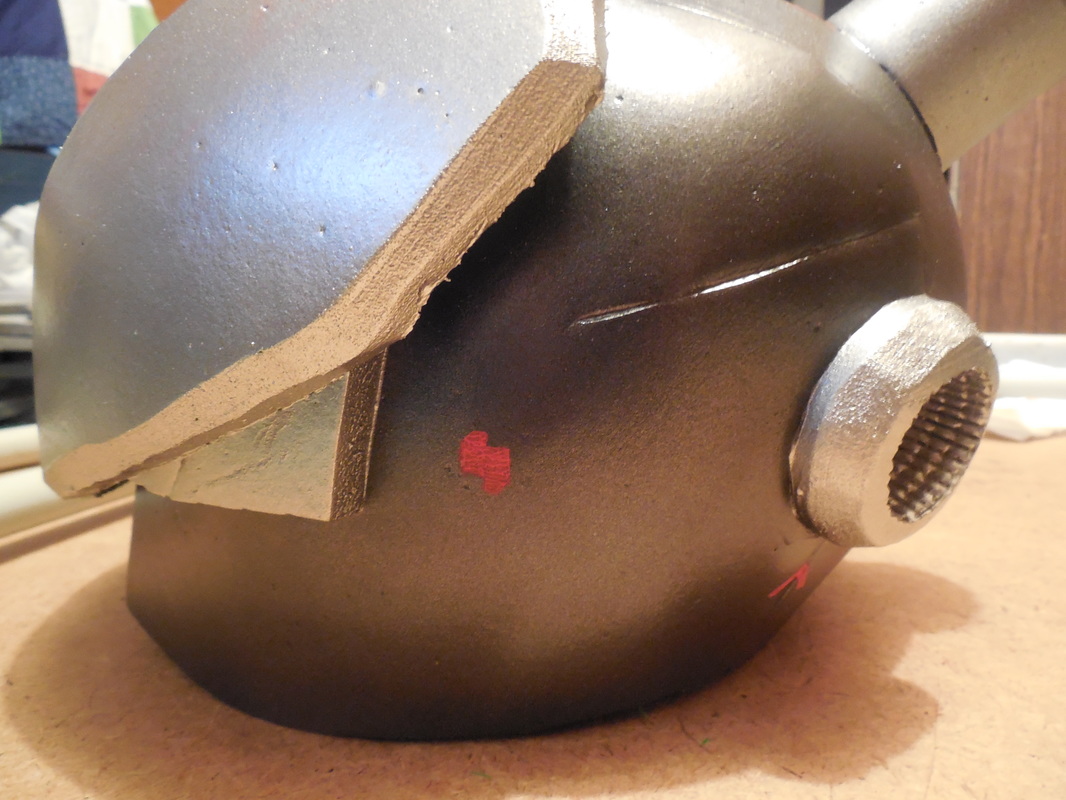
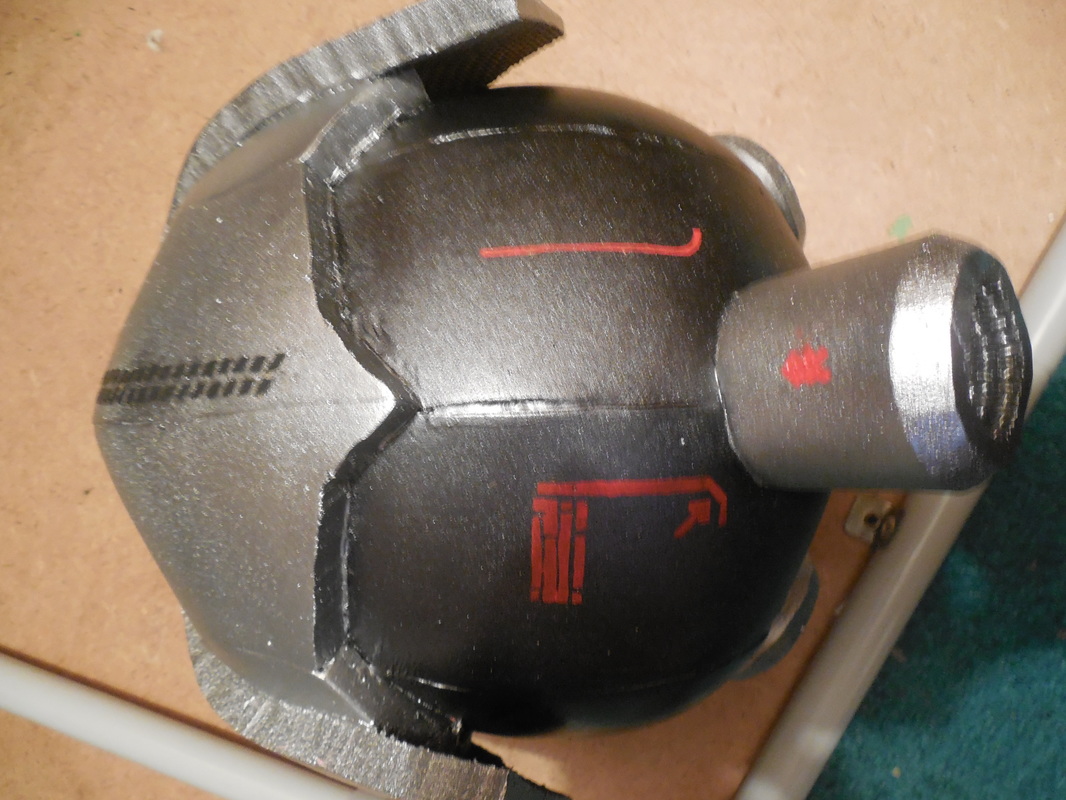
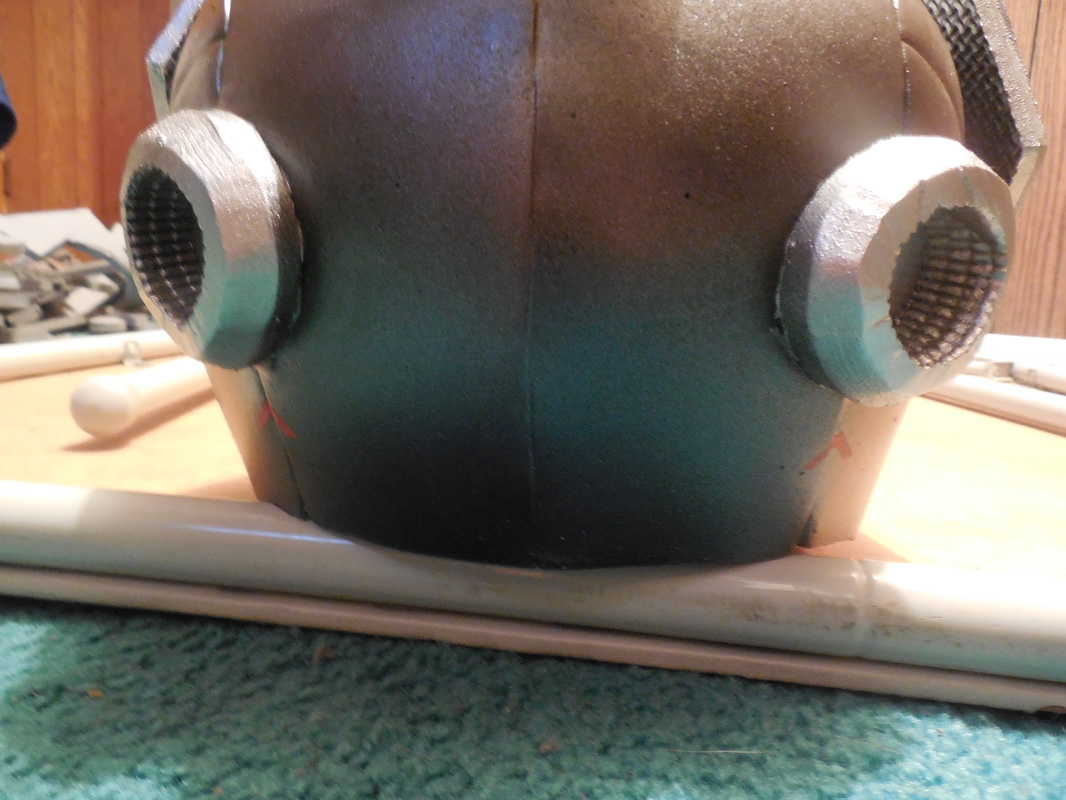
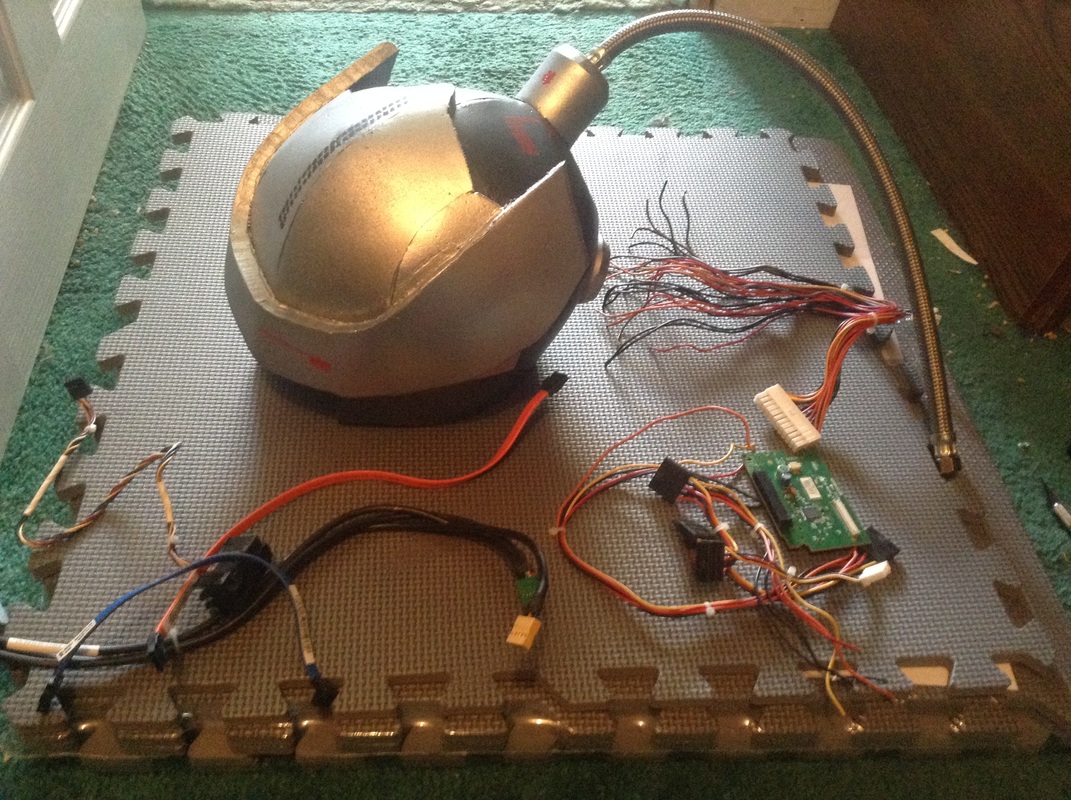
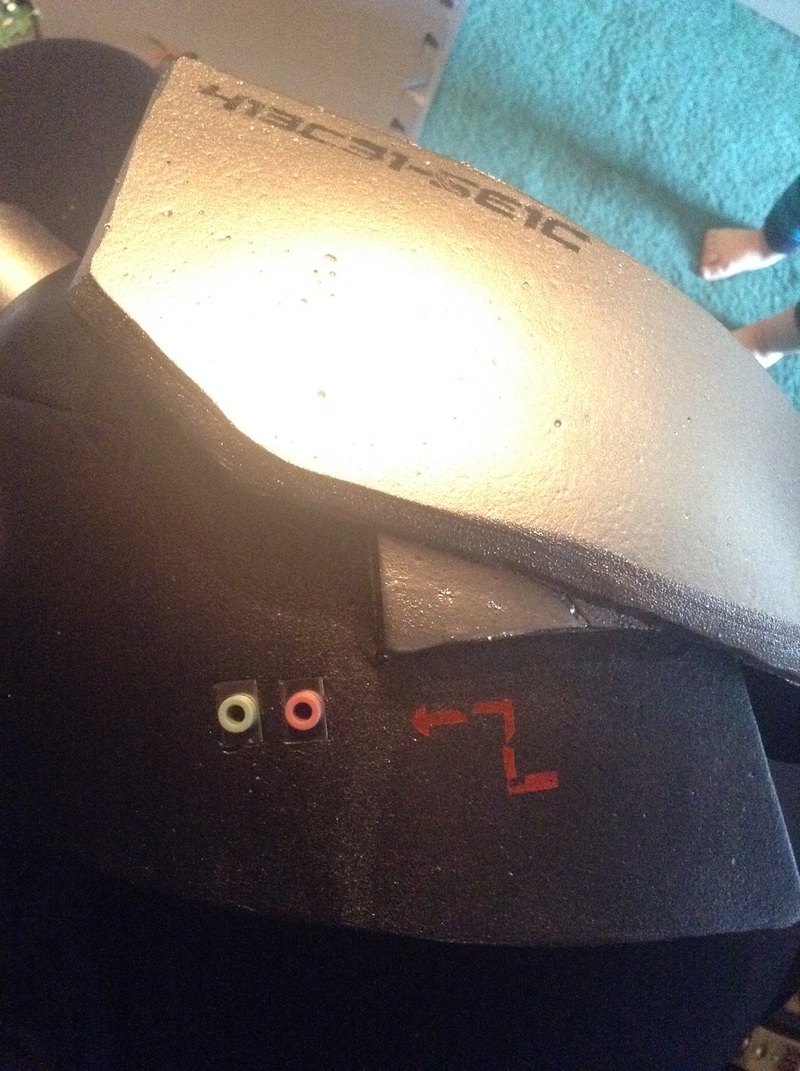
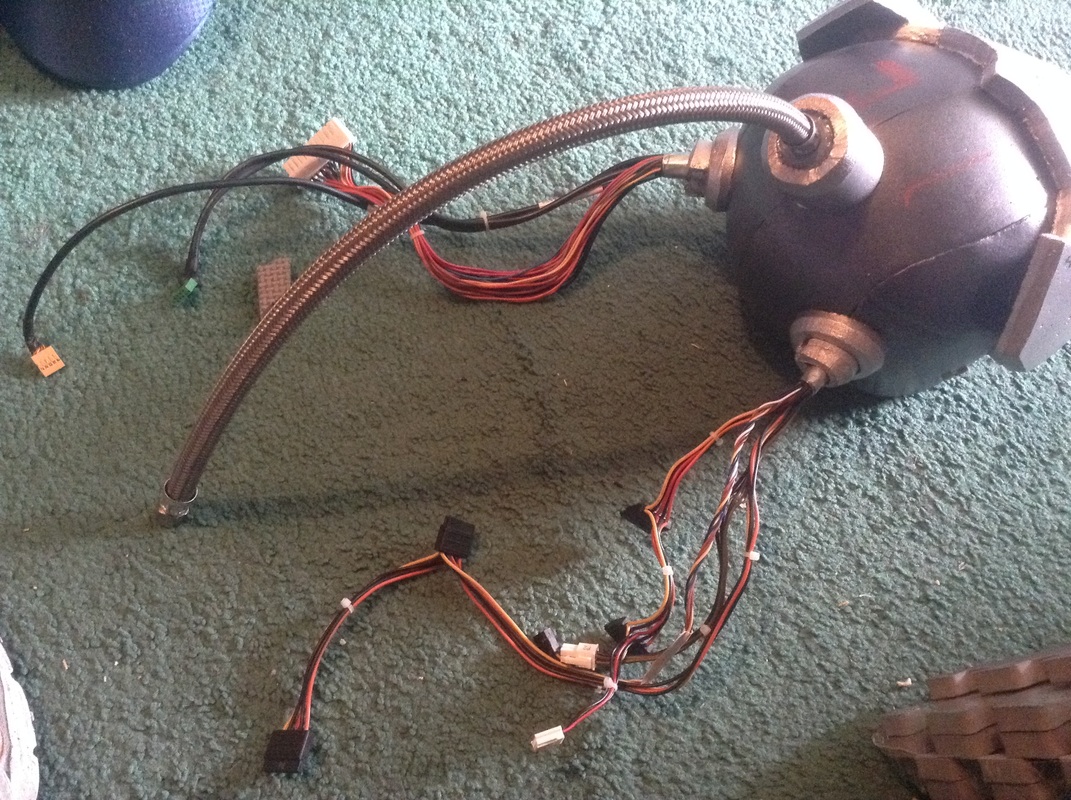
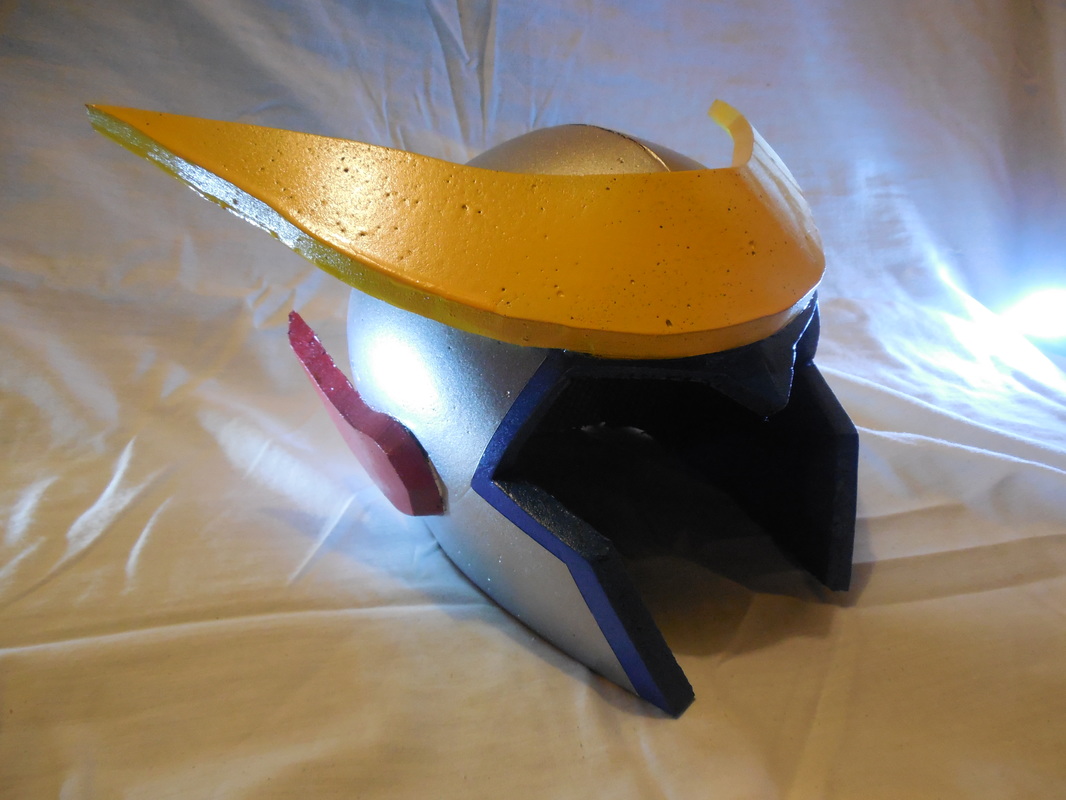
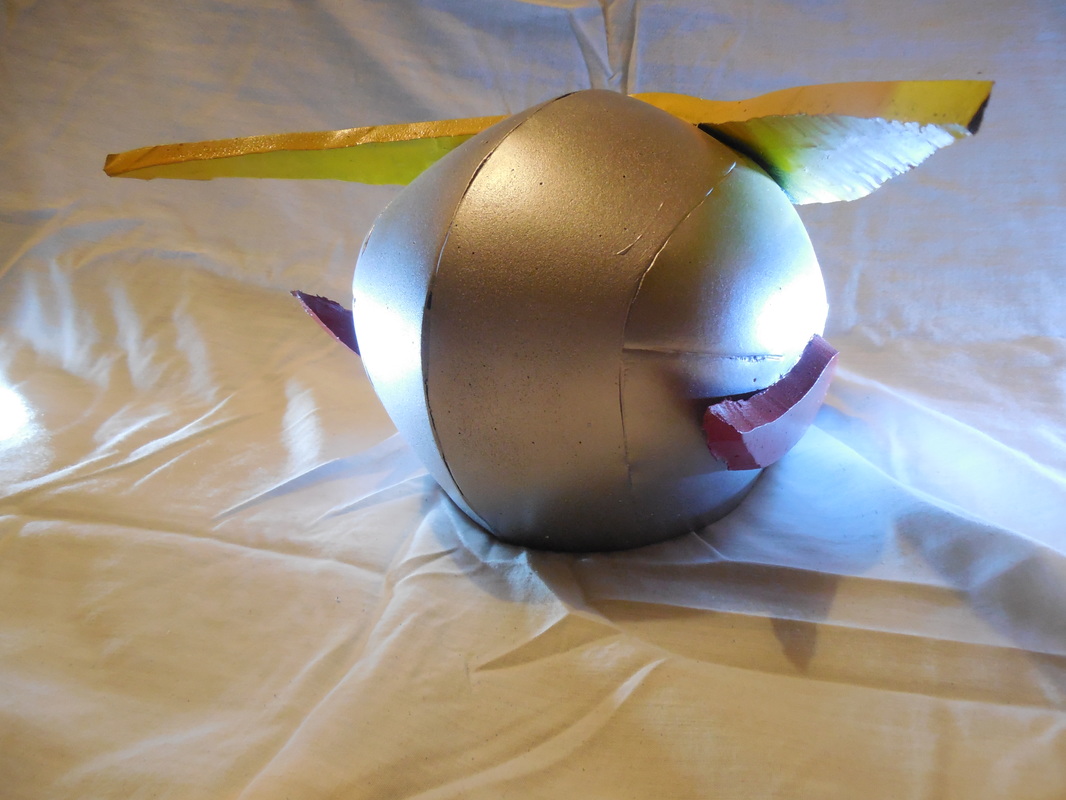
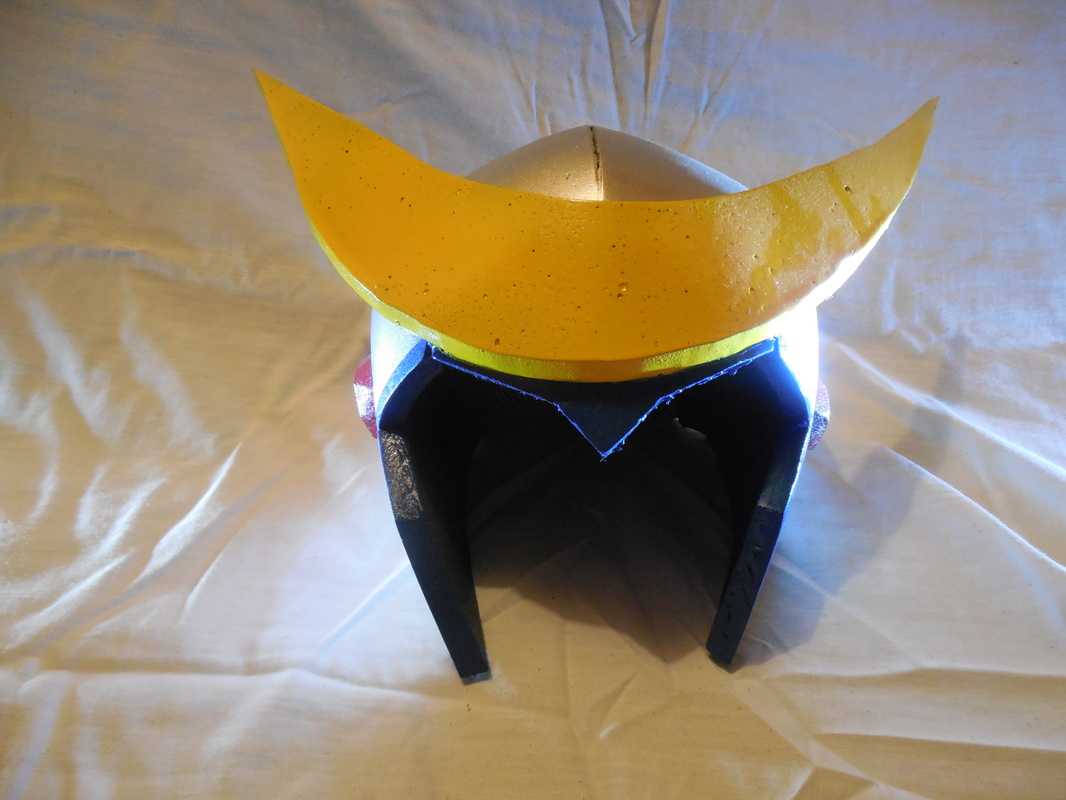
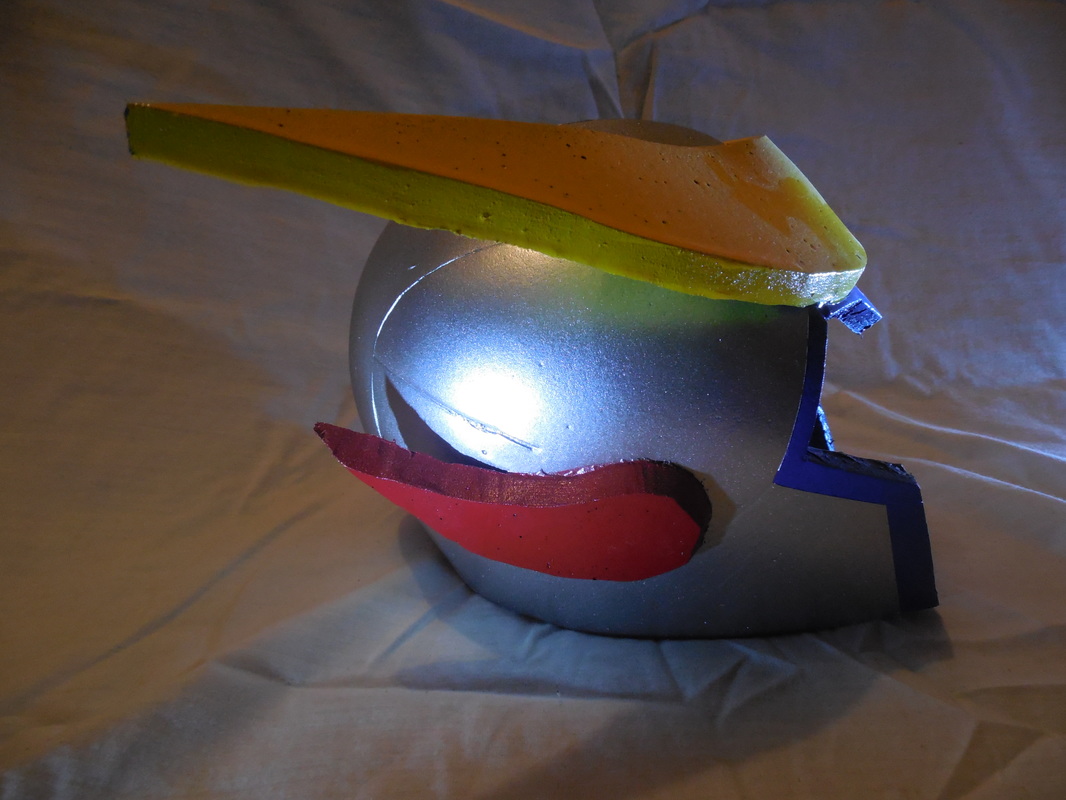
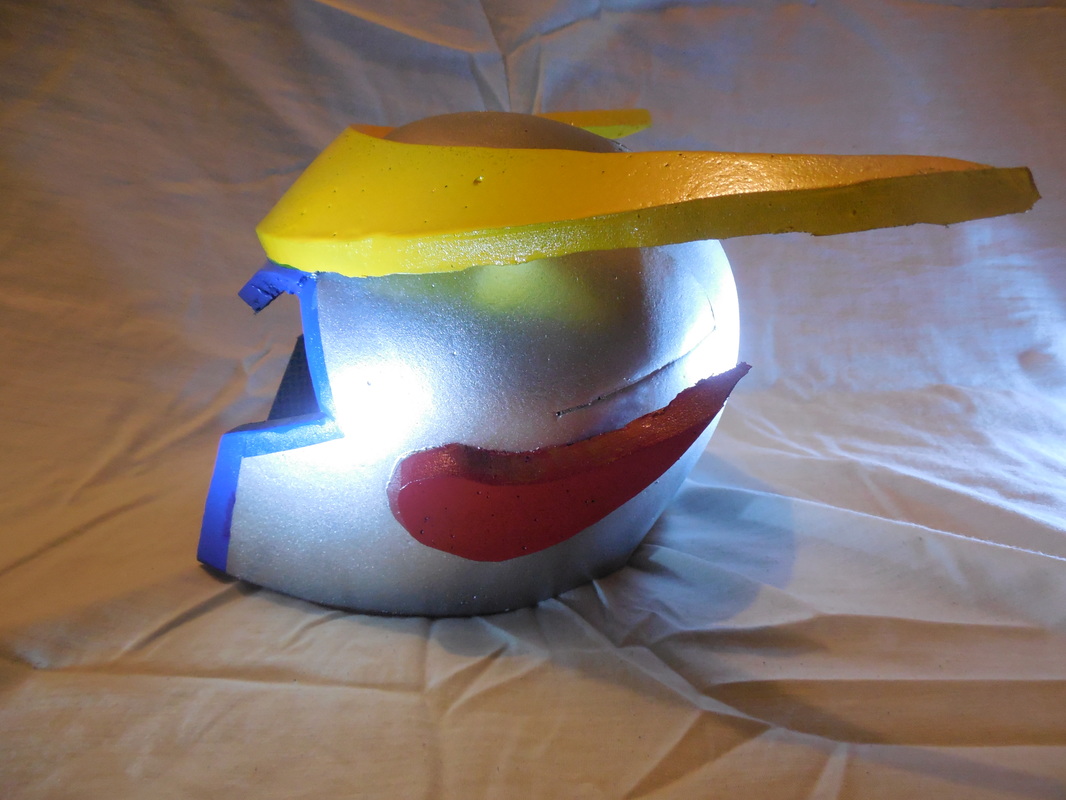
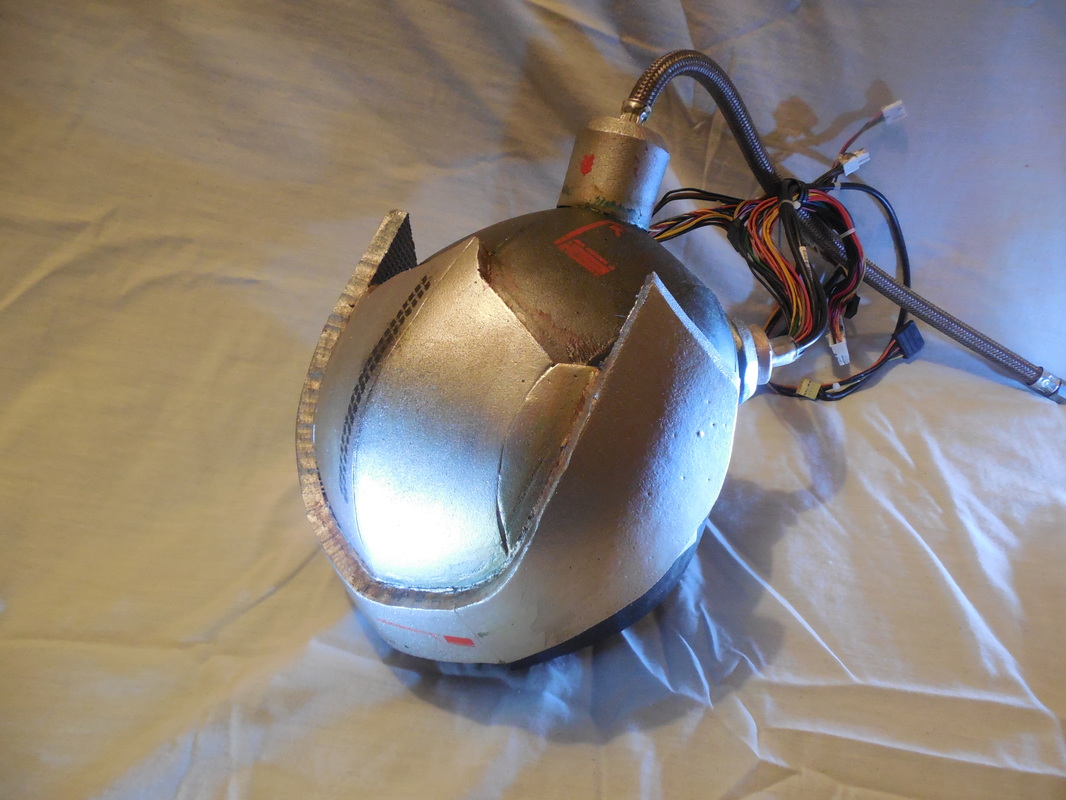
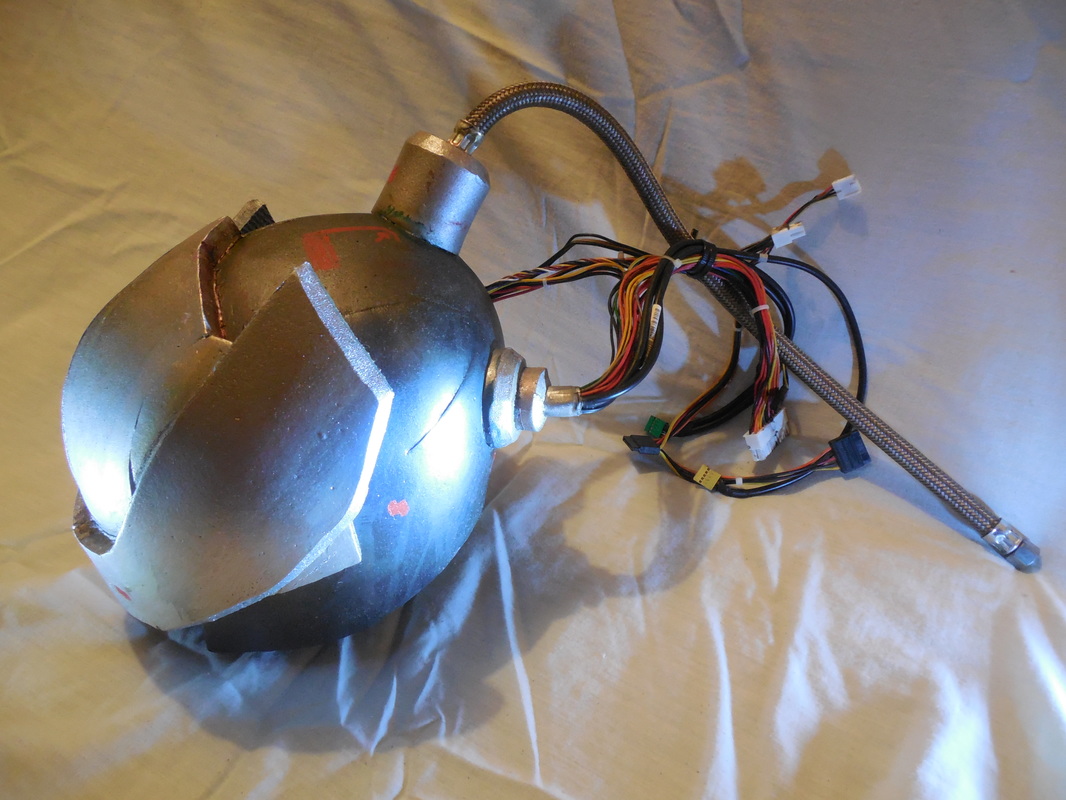
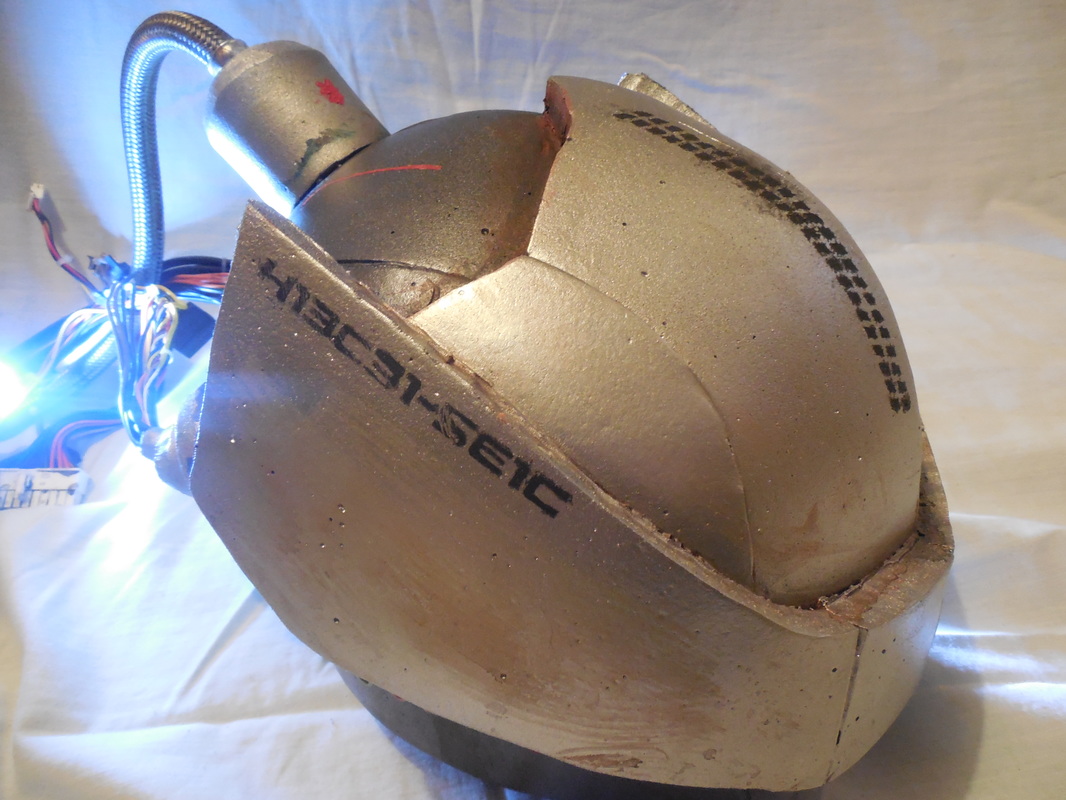
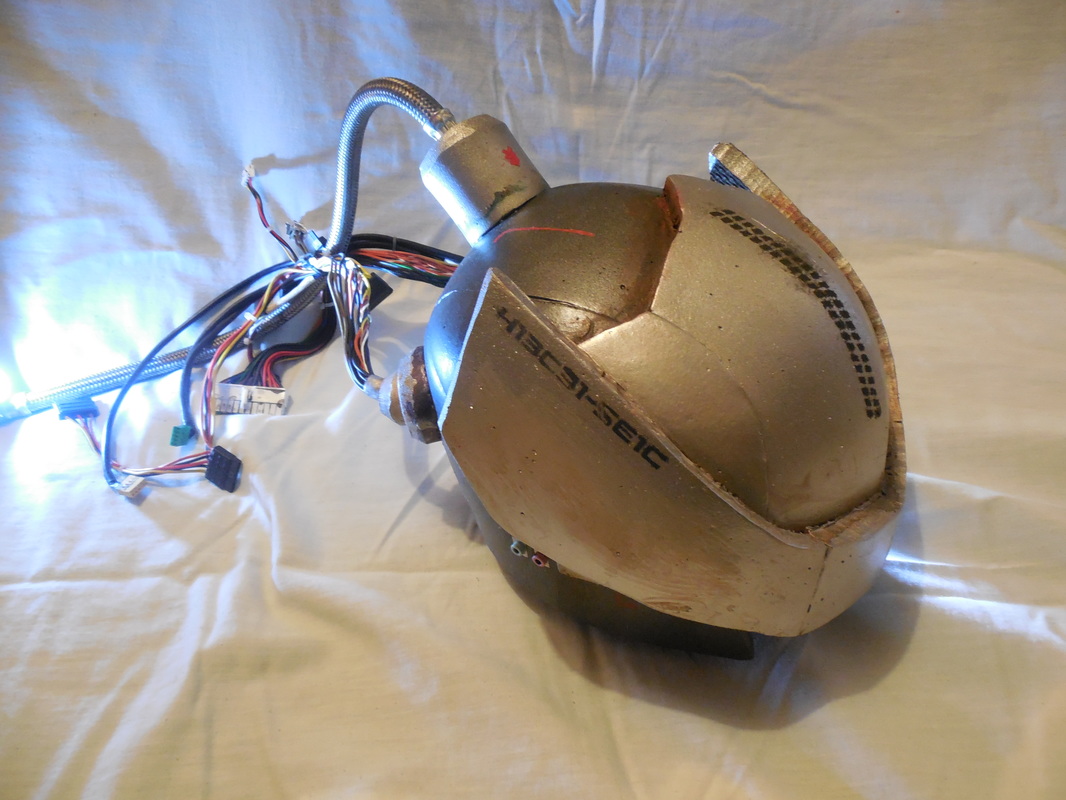
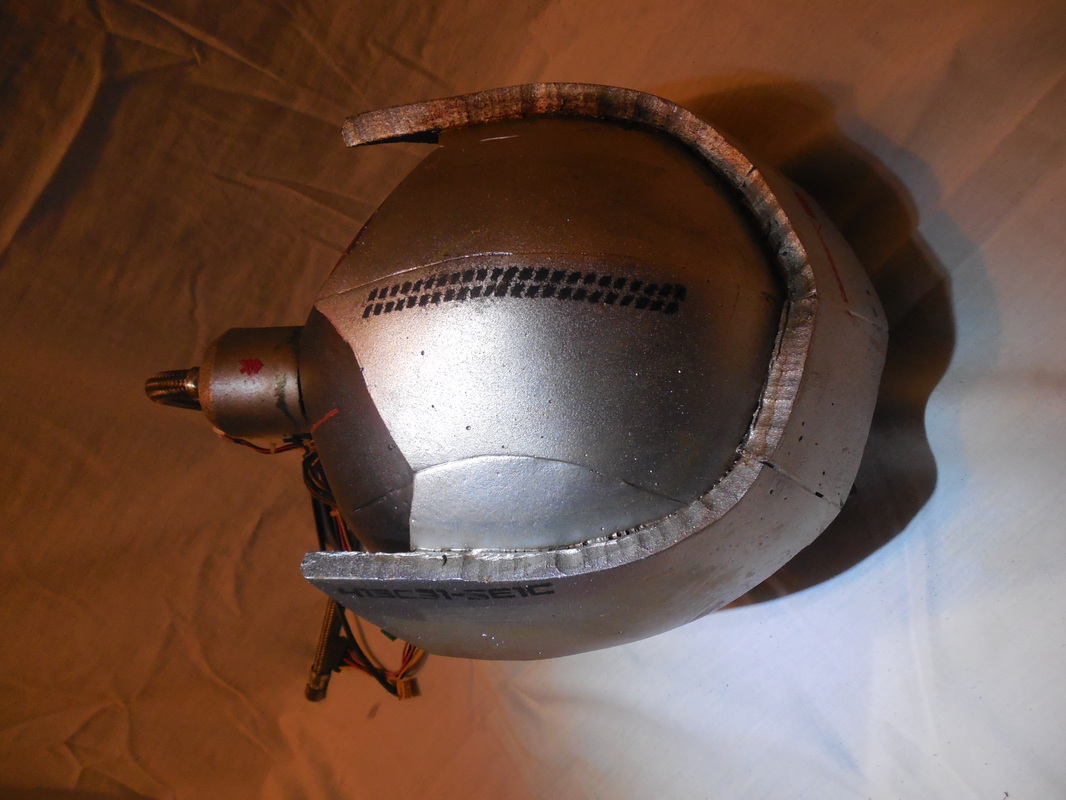
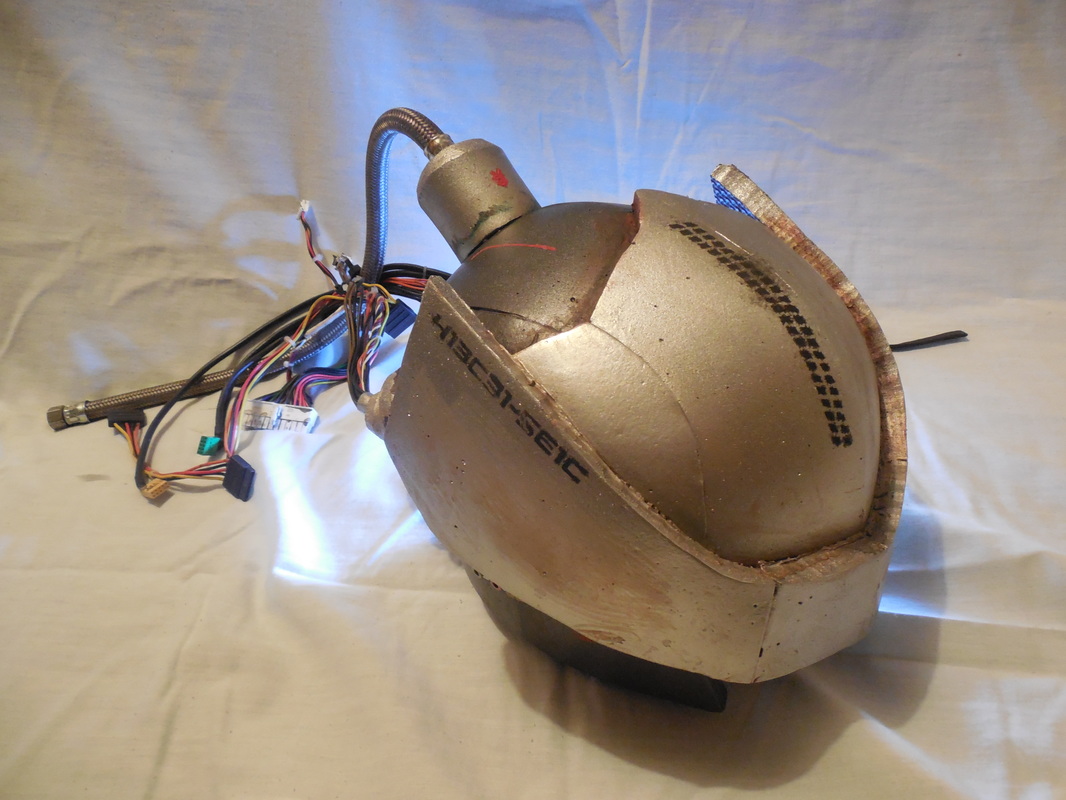
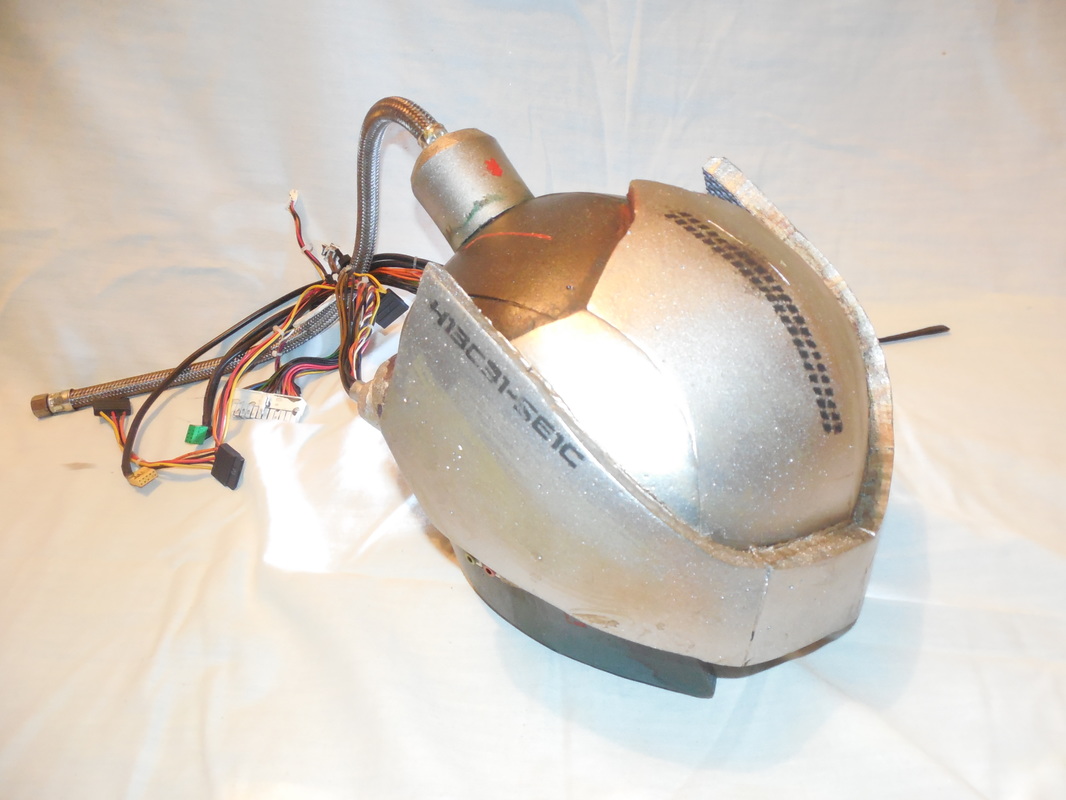
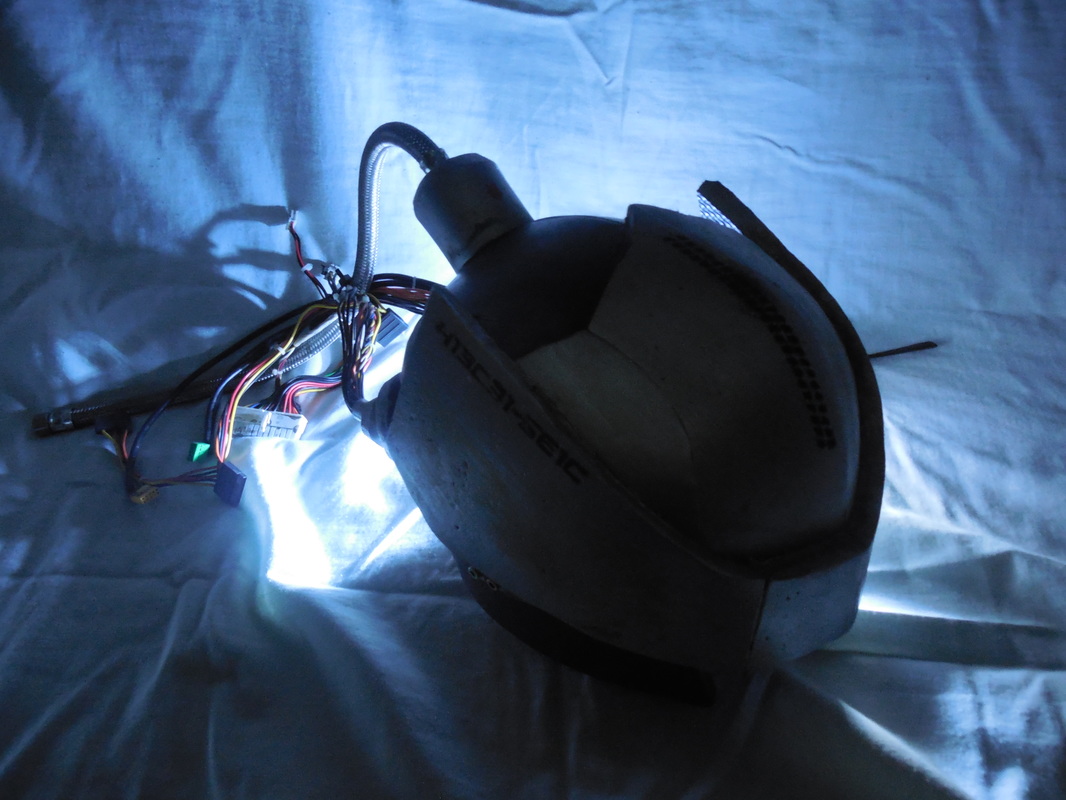
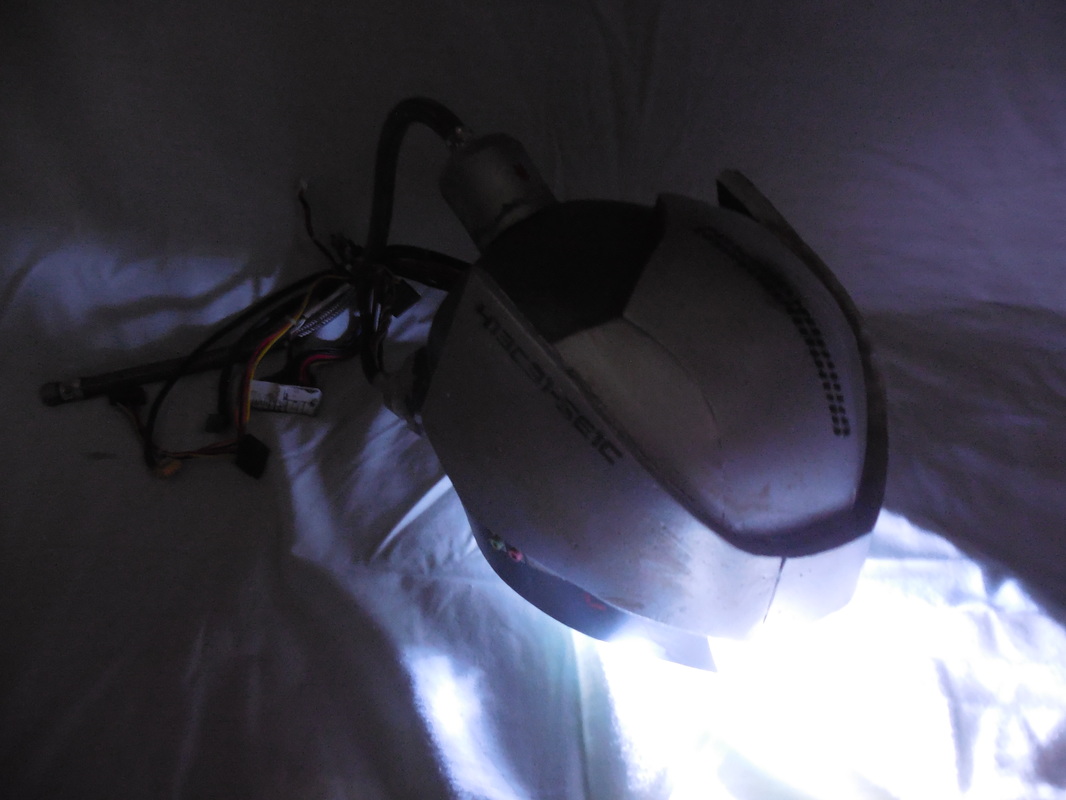
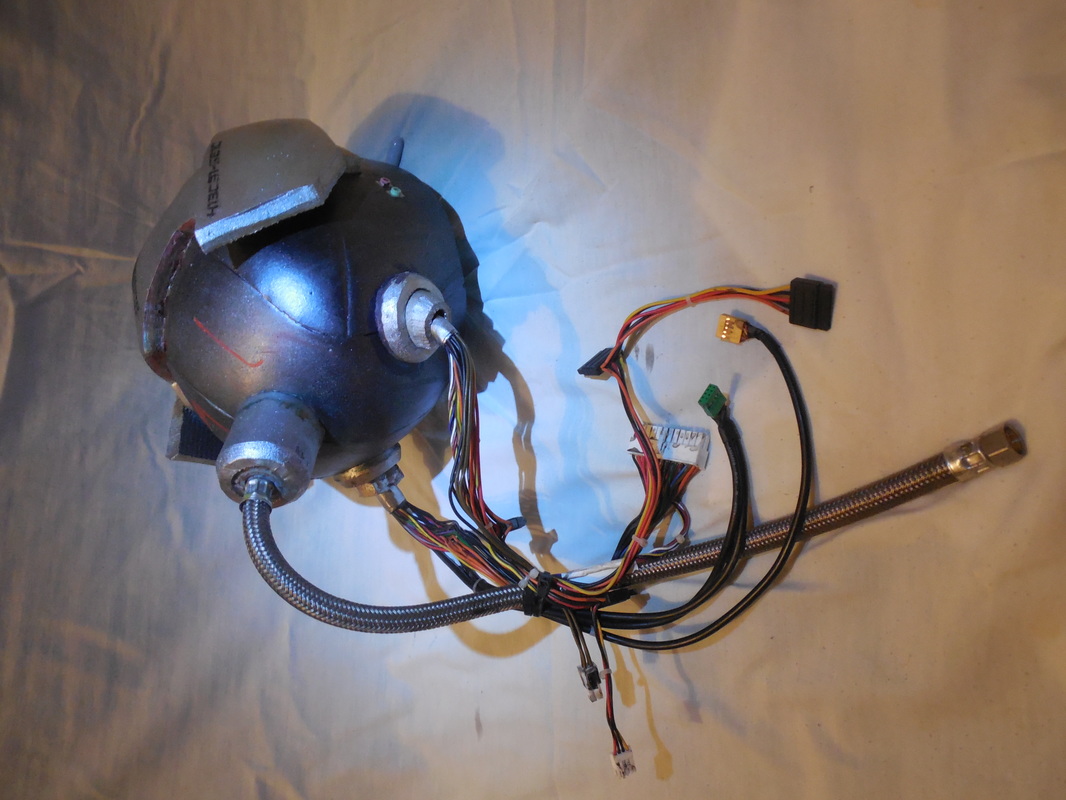
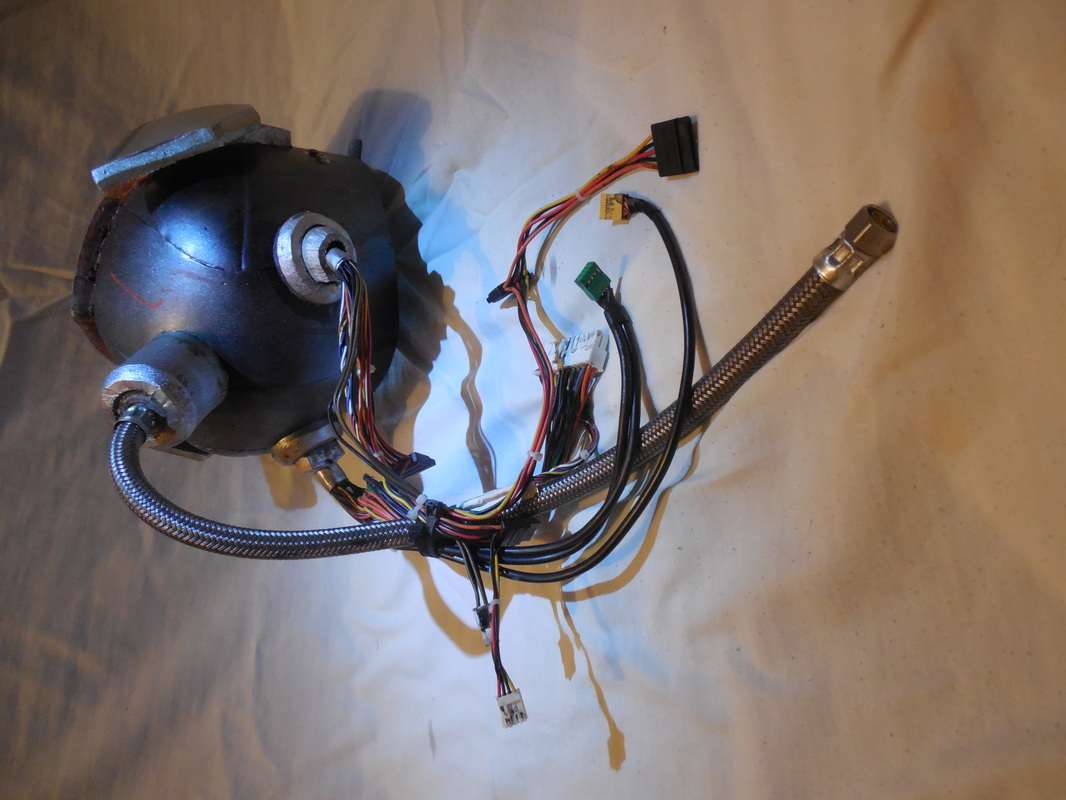
Before I moved back to Utah, I got a hankering to make my own helmet design. Lo and behold, the amazing Evil Ted Smith came out with a video series on how to make foam armor and costumes, and the first series he put out focused on helmets! You guys may remember the end results of that. Well, a good friend of mine invited me to help her out at her booth at Anime Banzai, and in return offered to display a few of my things for sale. I didn't have anything made at the time, having just moved back here, but I figured why not make a few more helmets? So, it being an anime themed convention, I decided to go generic space anime helmet! Nice, simple, same-old same-old foam floor mats. I used the same pattern I made in the previous build (which is up for sale in the Store if you want to make your own), and prepped the base to 4 helmets. I grabbed the first, and put the other three aside for later! Now, just so you don't get confused, this one is extremely simple and doesn't really have a lot of photos. I also did a lot of the next helmet - the Cyberpunk one - at the same time, so a lot of the pics will overlap. On with the show! 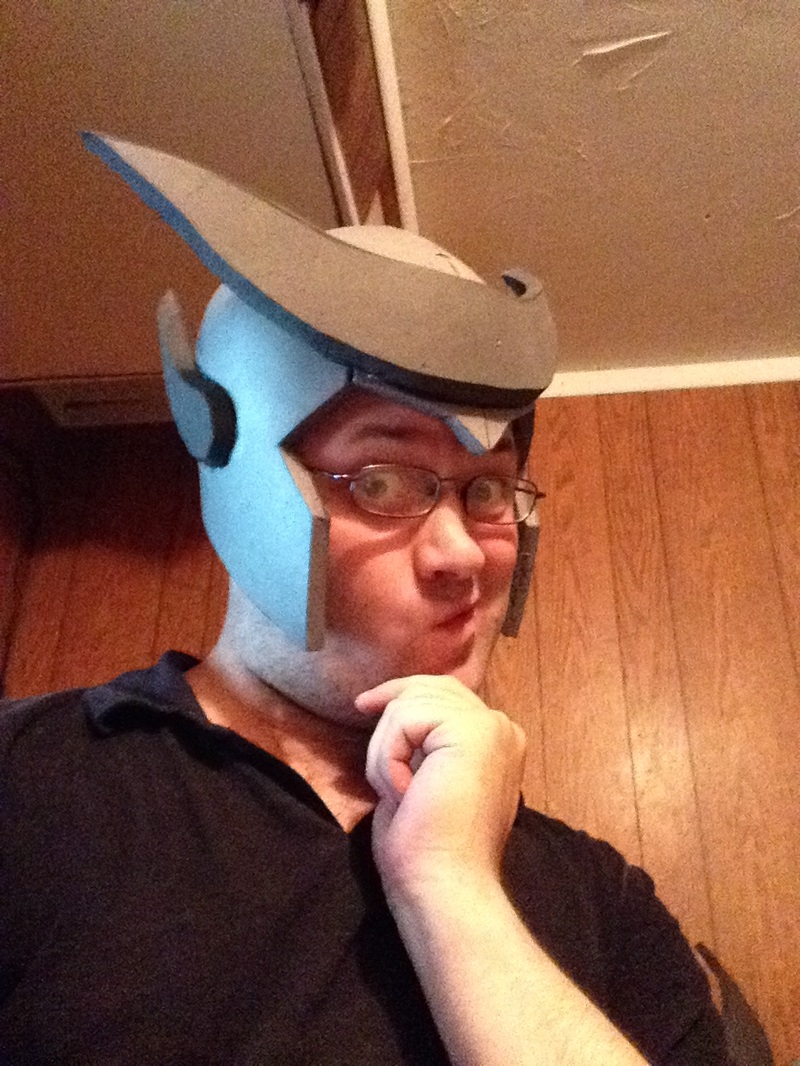 I opted for a super basic helmet, keeping it recognizable as an anime style, but not as any one specific series. The ears and horn were completely freehanded, and I beveled the ears inward with my dremel. Once that was done, I grabbed the next helmet, then ended up grabbing the third helmet and chopping it to pieces. 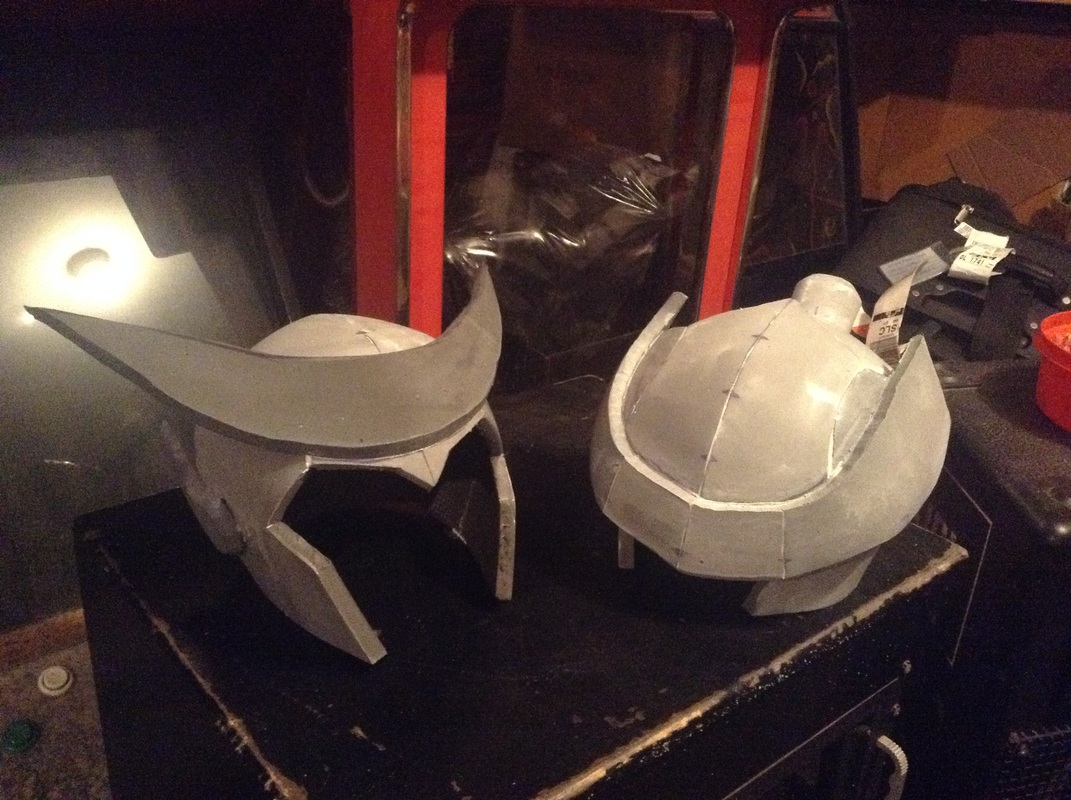 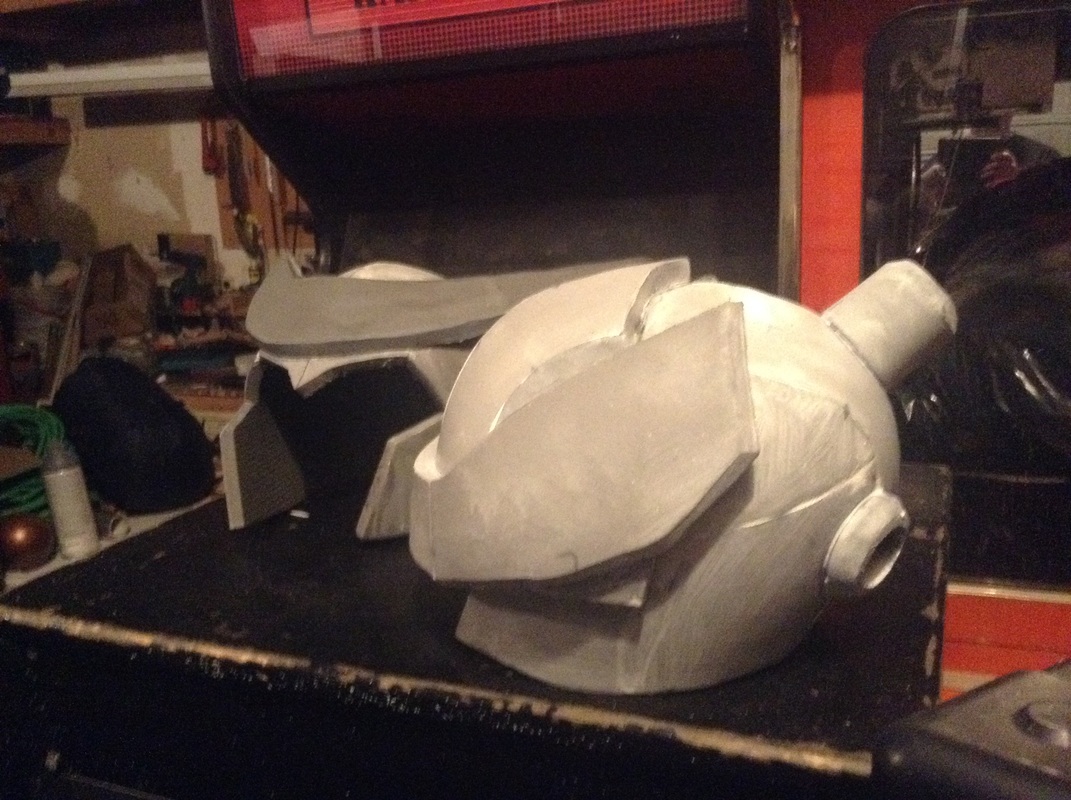 Kind of hard to tell, but I cut the third helmet in half horizontally, turned it backwards, and attached it to the front. Then I took the bottom half, turned it backwards AND upside down, then stuck it on top of that. The goal here was to make a sort of visor screen thing that covered the eyes entirely. Also made some tubes and stuck them to the back for the wires and tubes and things. Tried something new with the caulk from before. Was suggested to me to thin it with water and paint a few coats onto the foam - told it would fill the seams and work about as well as the Plasti Dip. I wasn't as successful with that method, so from now on I'll just be doing it the same way I used to. Anyway, on to paint! The anime one was simple: paint the upper horn yellow, tape it off, then paint the ears red and tape those off. Once that was done, I also painted the front of the helmet blue (don't worry, it'll make sense in a minute). The Cyberpunk helmet I painted a metallic black, then the upper visor and wire tube things silver.  After that I taped off the front of the anime style one, then painted everything else silver. Tape came off, and I got to see firsthand how terribly the new sealing method worked. Can you see all the bubbles on the yellow horn? Not terrible, but not up to par. You can also see all the seams, though I wasn't too worried as it kind of accented the look of the Cyberpunk one. Anyway, sprayed a little, light bit of orange on the horns and a darker red on the ears, to give it a bit of a gradient look. I wasn't weathering it at all, so that added a bit more depth to it and made it look a bit better. Anime helmet done! (Final shot pre-gradient) 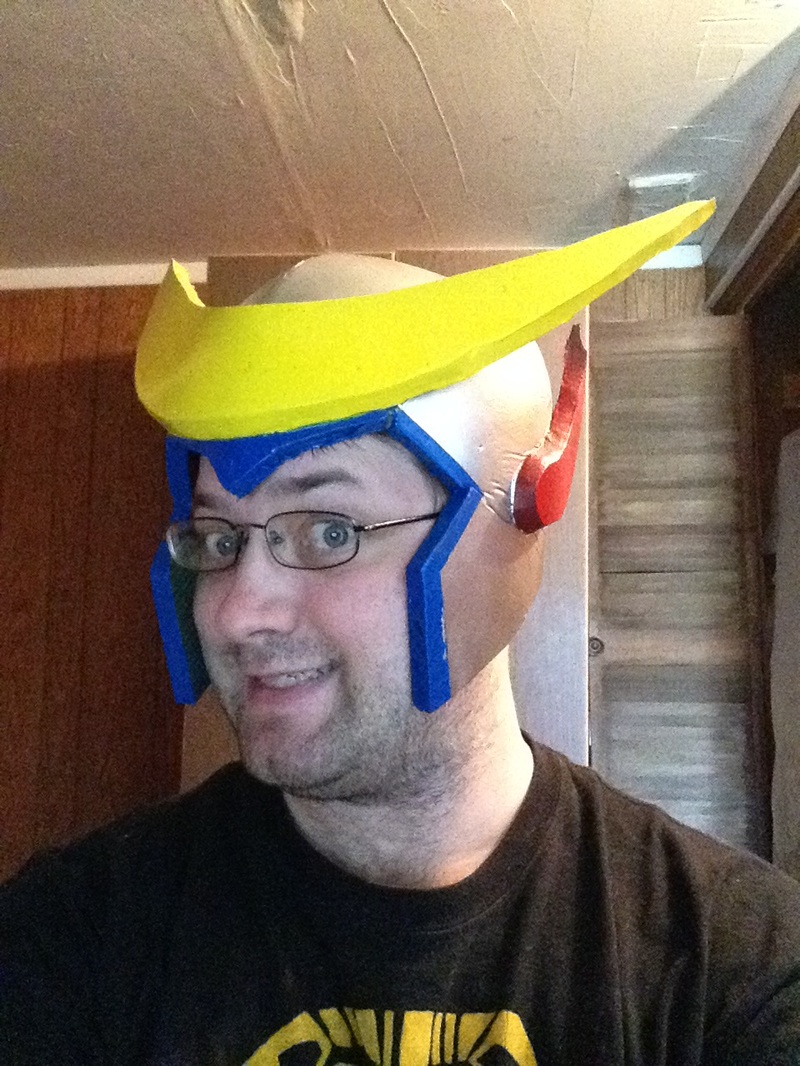 To finish off the Cyberpunk helmet, I used a method of stenciling I learned from Punished Props: print a stencil, lay it on some painter's tape, cut it out with a hobby knife, lay it in place, then paint it on! This was a lot of fun to add, though definitely time consuming. I will absolutely admit to some of those splotches being on purpose! Fit the look anyway, even on the accidents, so I was happy with it. Test fit: 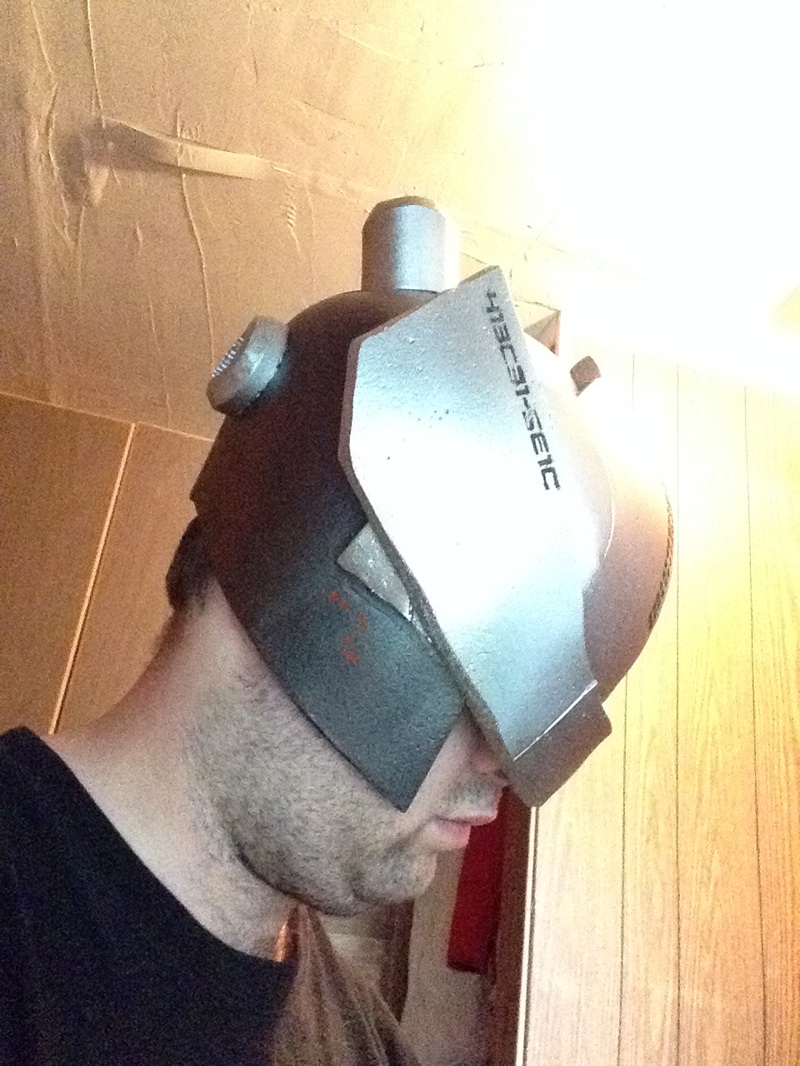 Hooray for craptacular selfies when you can't see! Time for some tubes and random wires. A good friend of mine, Keelah Monster Cosplay, sent me a ton of random computer parts and wires, so I put them all to good use! Also snagged a random plumbing tube from Walmart, then arranged them all and hot glued them in place. Tied 'em all up with a zip tie so they weren't bouncing around loosely and bashing the wearer painfully, called it good, and took another silly selfie! 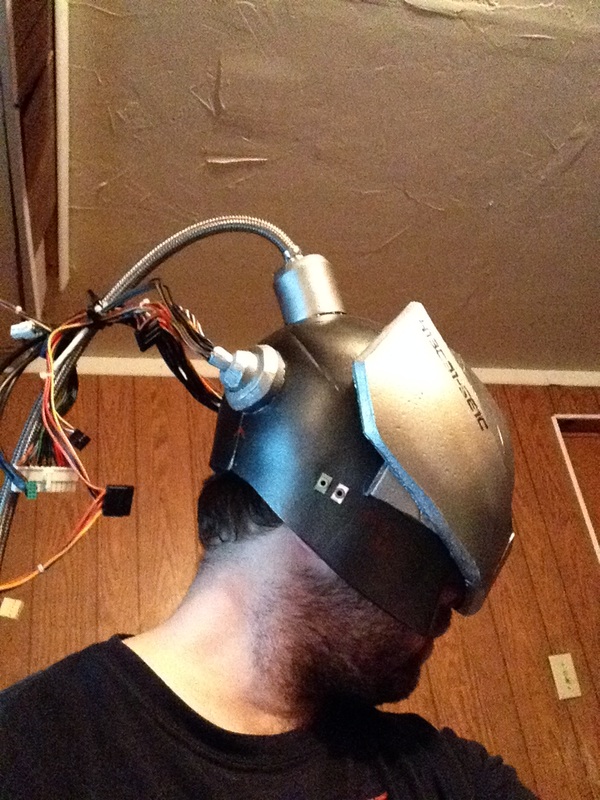 After that I had a ton of fun messing around with acrylic washes, drybrushing, and actual painting. I messed around with a bunch of different colors of paint, giving it a really nice, rusted, dirty grungy look. Hope you had as much fun reading about these two helmets as I did making them. They were a big hit at the convention, and even though neither of them sold, I got a lot of compliments on them! Here's some finished fancy shots to send you off with. If anyone is interested, the Anime style helmet has been purchased already but the Cyberpunk helmet is still available! You can find it here.
0 Comments
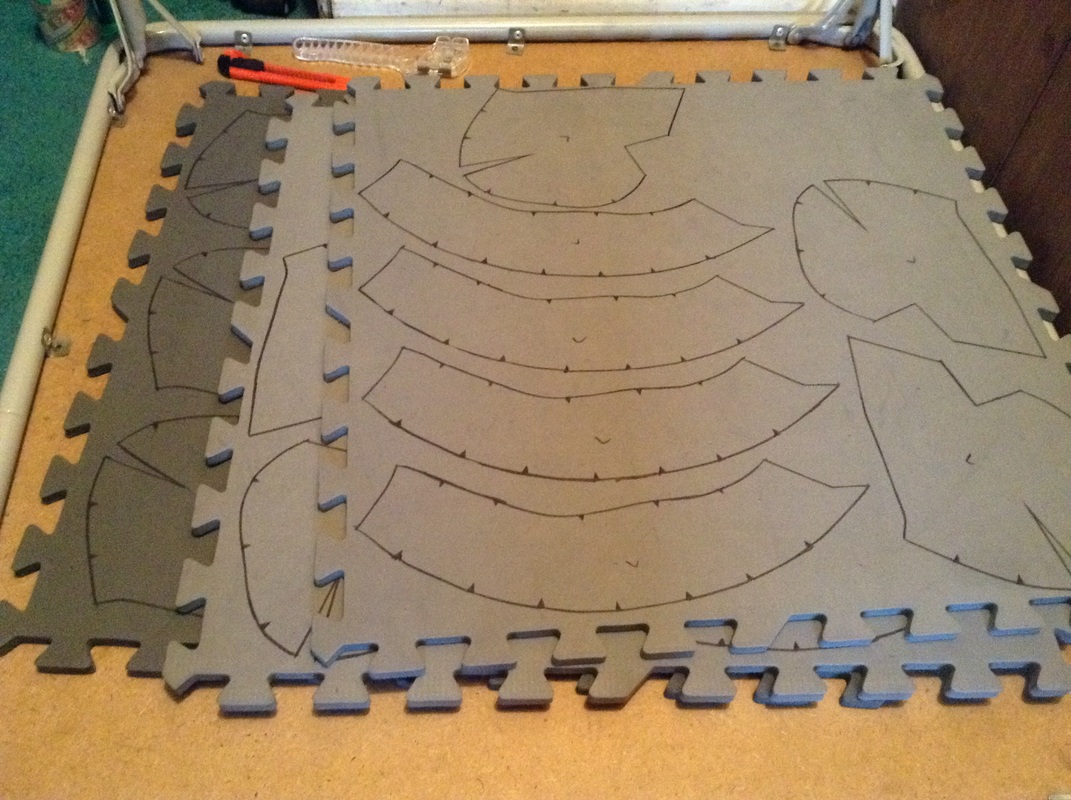
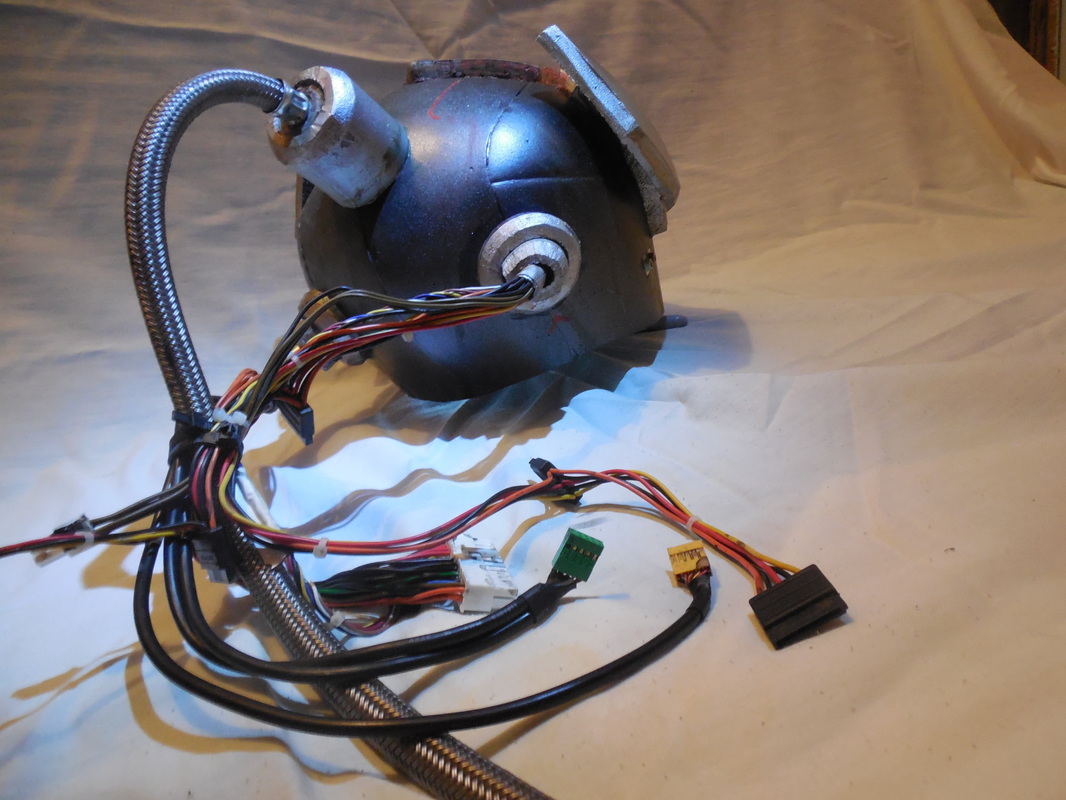
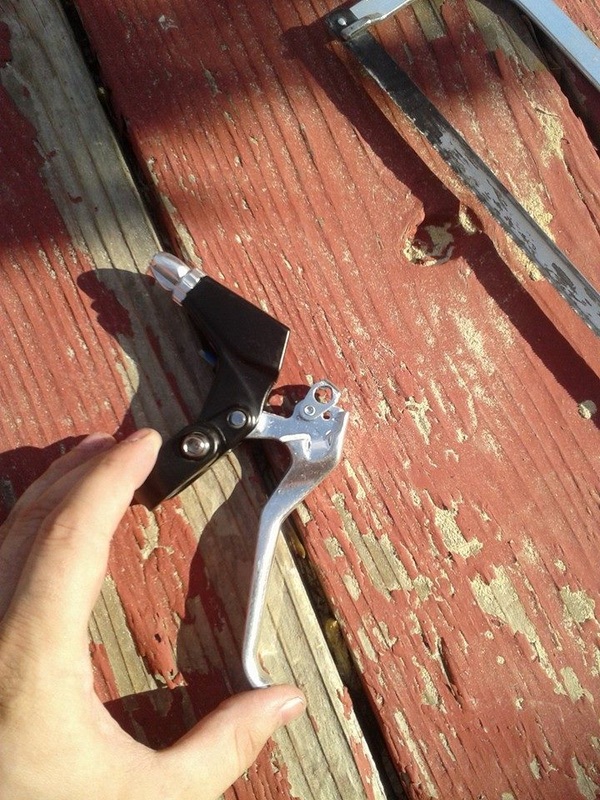
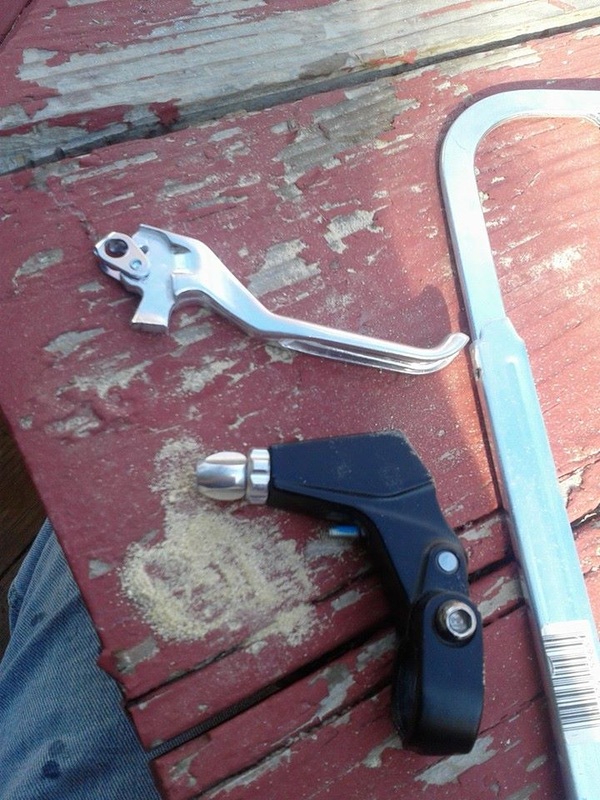
I was commissioned by a friend to make a set of 3D maneuver gear from the increasingly popular anime, Attack on Titan. I will admit, it wasn't until after I made these that I sat down and actually watched the anime, though I had heard about it and seen other cosplayers with various costumes and whatnot (even though my brothers and friends kept telling me to watch it constantly lol). When I saw the concept art for it, though, it looked really interesting and a good bit of fun. Word of warning: this anime is not for the squeemish. I've definitely seen worse, but it does get pretty violent and bloody.  Now, there is a major difference between the gear from the anime and the gear from the manga, so right off the bat my friend said he specifically wanted the anime ones. With that, I got straight to work. Due to time constraints and a lack of PVC board, we both decided on foam. This was going to a convention and it needed to survive the jammed hallways, and it needed to be light so that it wasn't a burden. I also had about two weeks to do this in, while I was finishing up the Giant Robot build as well, so I cut whatever corners would be safe and did a ton of improvising. Tally ho! 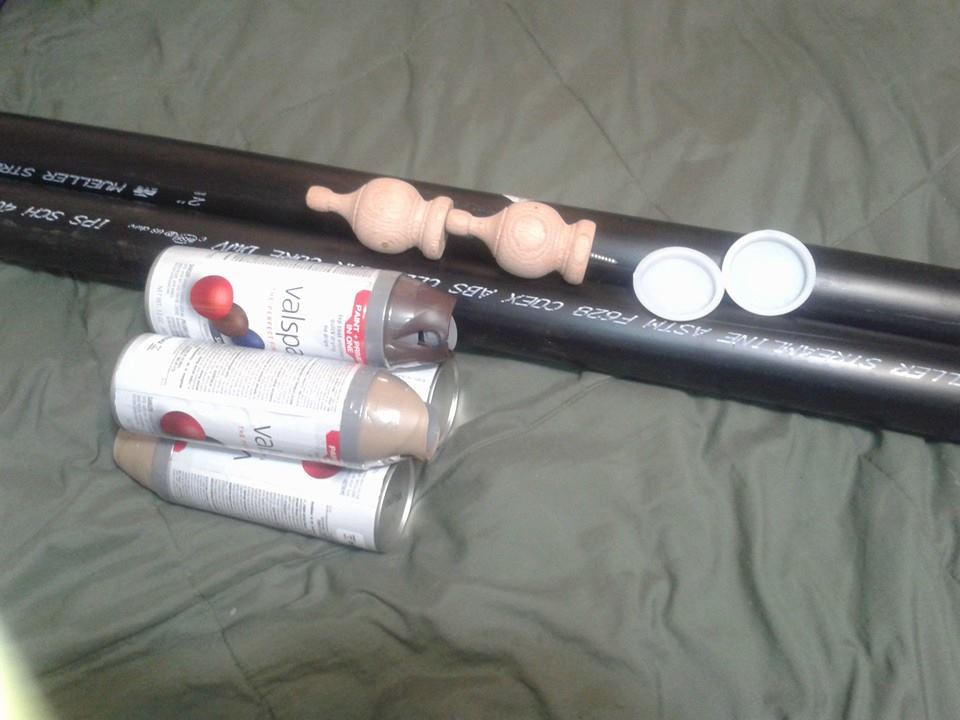 First up was the air canisters. I grabbed two 2" ABS pipes, end caps, and a couple wooden banister toppers that fit nice and snug inside. The pipes I rounded with the belt sander after cutting them to size, put an end cap in one side and the toppers in the other, and glued it all down with epoxy. 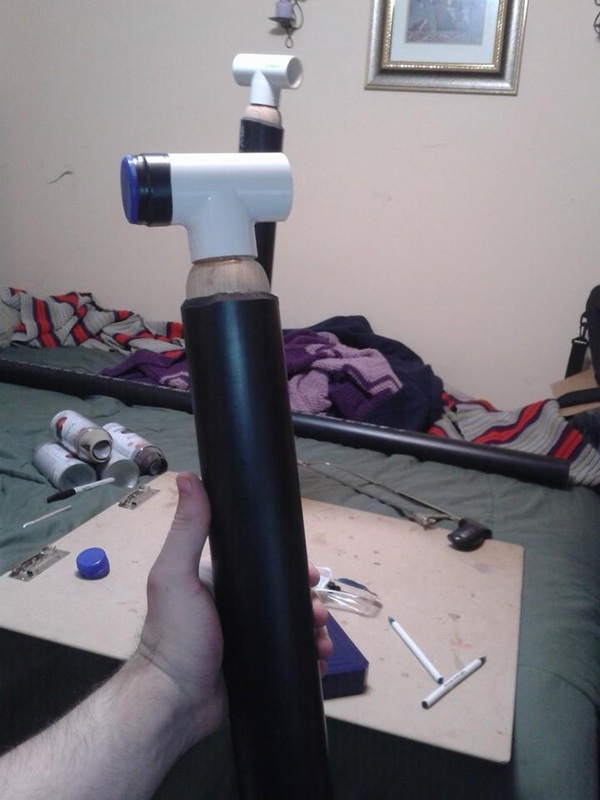 To that I epoxied a T-joint PVC pipe, and then (as you can see) I used electric tape to attach some milk lids to the end. I used the tape to cover up most of the ridges on the lids, but kept some sticking out for effect. After that I epoxied small bits of pen tubing (just like the M8 - stuff is versatile!) to each side, so my friend could add the tubes to it when he got it.  I did what I could to help make it easier to tell which side was which, alternating the pen bits just in case. Once that was done it was straight to the paint: black base coat with a layer of clear, then several light dustings of silver metallic to get a better metal look. Learned that one from Stan Winston School. [/shameless plug]   While those dried, I started on the sheathe bits. Because this was being made out of foam, we were both a bit worried about bending - especially at a convention. I thought of a couple of ways to support the inside, then decided to make the entire thing in several sections. First came the top.  Based on the measurements we agreed on, I decided it would be easiest to make the front and all the supporting sections out of the 1" foam I had (though the supporting sections would be two layers of that stuck together). Given the measurements of the swords, I went with 1/2" slits, set 1/2" apart, with 1" in the middle for spacing. These I marked out and cut with my trusty knife. 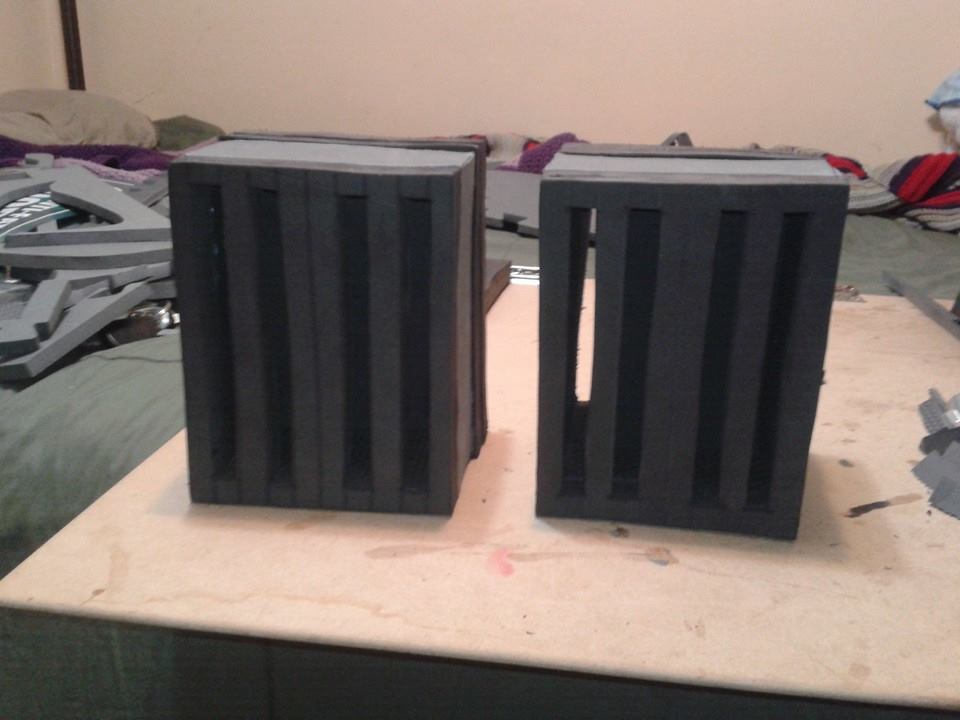 I then built up a box shape behind the front pieces, which attached to the first support section. I made these support bits a little wider, since in the anime they are actually supposed to be large metal strap-things meant to hold the two halves of the sheaths together. I also cut out one slit on each side to allow for the sword, which we'll get to. Once those were connected, I finished cutting out the rest of the sections. 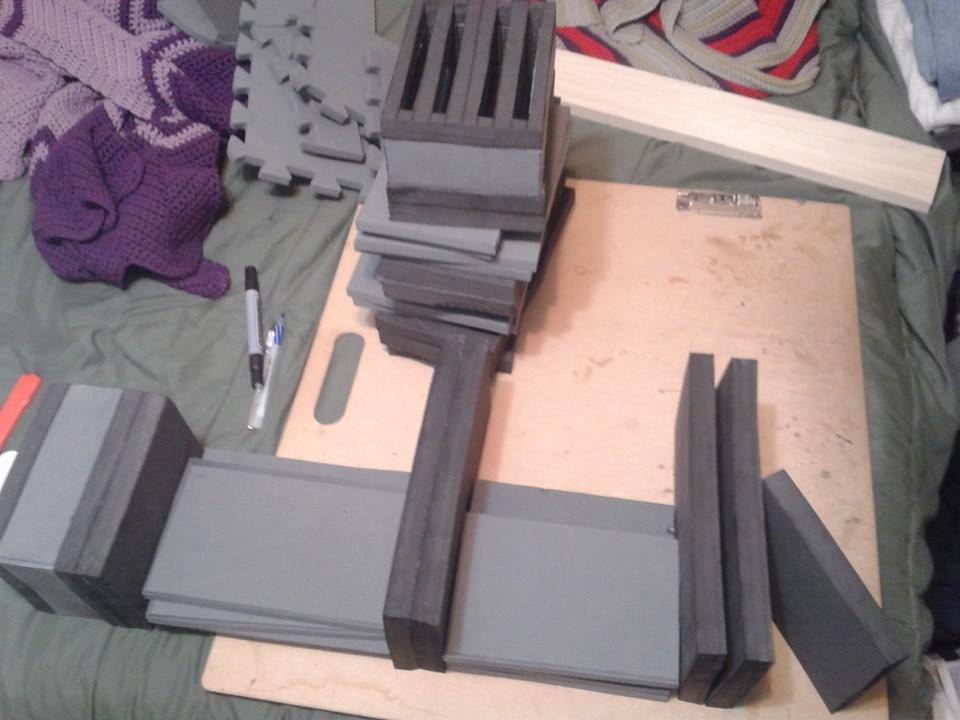 That should also give you a better idea of what I mean for the sections. Had I done that all one single bit of foam, it would easily bend and quite likely break apart if someone hit it hard. Each of the sections were glued as before, though I left the front off for the moment until the friend was able to show me how it would connect to the strapping that was being made for the costume. Just like the front box bit, each of the 2" thick sections got a slit cut out to accommodate the sword, and the longer ones on top got a hole cut out for the canisters. 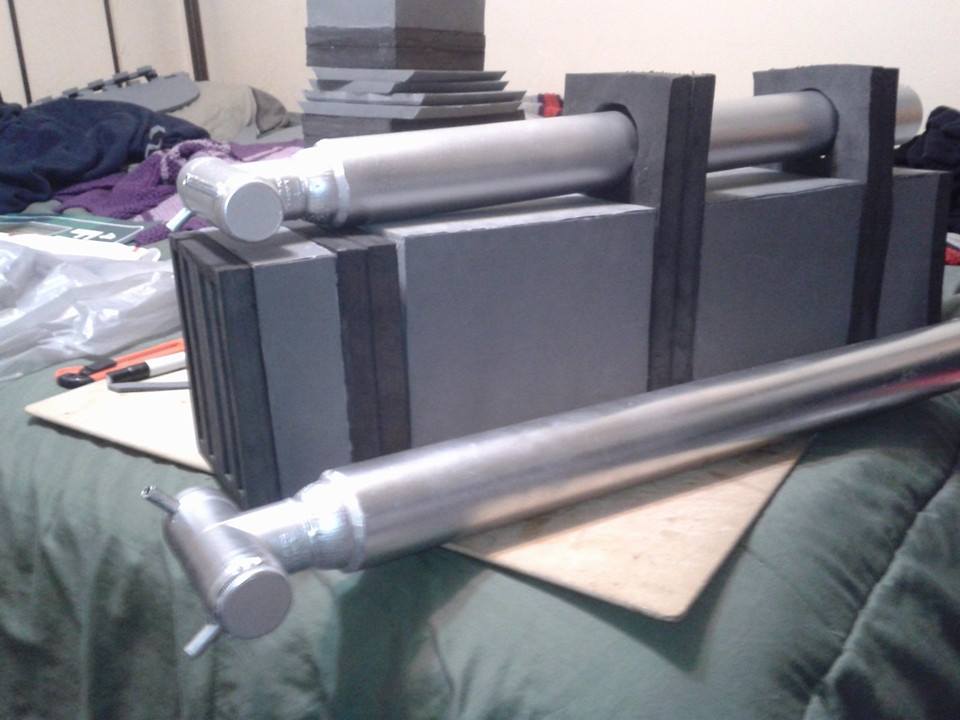 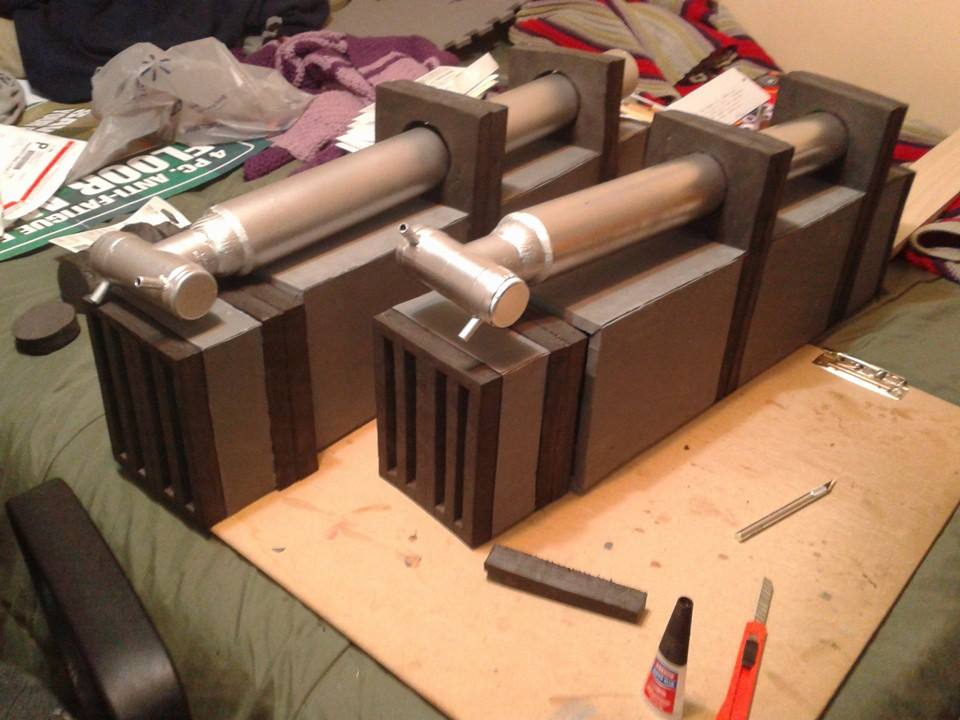 While I was waiting on the attachment method, I got to work on the actual swords. These were to be removable from the sheaths, though the blades didn't need to come off, so it could be one solid piece. That made it a ton easier for me. Grabbed some 1/2" thick pine planks for the blades and some 3/4" thick blocks for the controller hilts, then hit up a local bike shop for some cheap brakes. 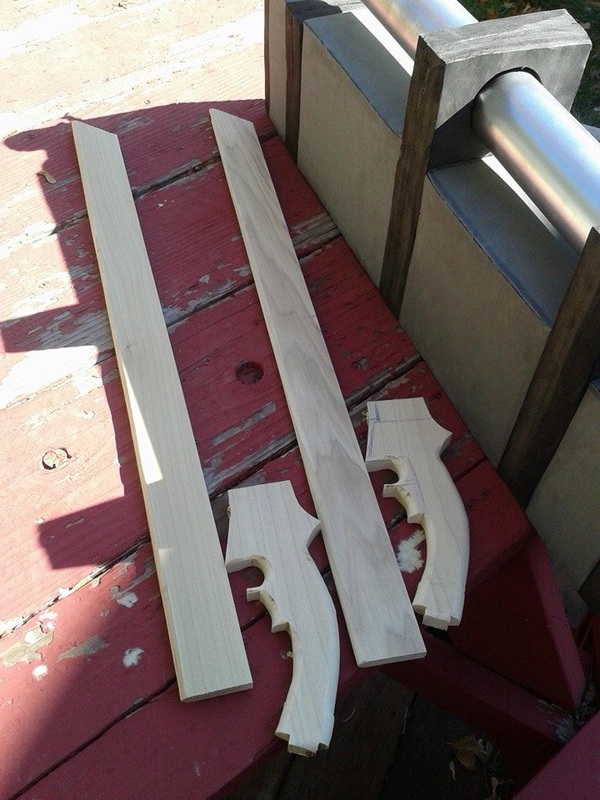 The blades I cut out with my trusty band saw, then used the router with a round bit on the "business" side. The actual blade is angled much like a box cutter blade or a razor blade (in fact its design is exactly like the former) but, again, convention safe so no sharp edges. The hilts I cut out with the scroll saw, then used the router again to round the edges where it is held. There should also be a cover over the upper curved bits (actually those should also be trigger buttons) but I didn't have anything that would look good enough and I wanted to make sure the friend's fingers could fit. Remember how I'm in a hurry? Anyway, I used a hack saw to etch in the segmented bits on the blades, then cut a groove in each grip and used the ever wonderful Titebond 3 to glue the two parts together. 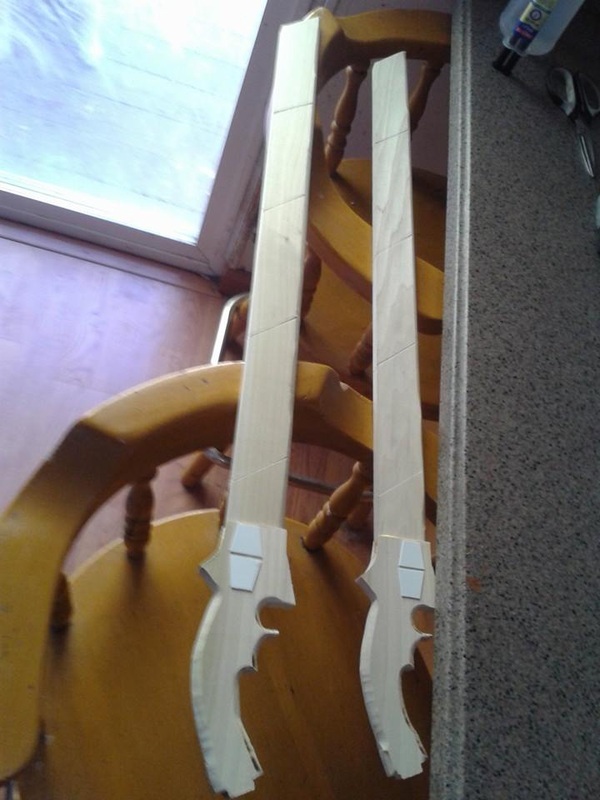 Epoxied some 1/16" styrene bits for quick detailing, then sanded down the bumps left from the router. Once that was done, I got to the fun bit: cutting off the part of the brakes I needed. The kind of brakes I was able to find (cheap, yet similar to the look) unfortunately weren't quite right on the attachment bits, so I had to cut off the levers. I also didn't have anything that could safely hold it open while I cut it, so dremel and air-powered cutter were out. I had to use the hack saw again, which took ages (and gave me a heart attack a couple times), but I finally got them off. Once that was off I epoxied each to the swords. I don't have any pictures of swords being painted (down to the wire at this point so was too rushed to remember) but they got the same treatment as the air canisters: black base, clear coat, then several light dustings of silver metallic. 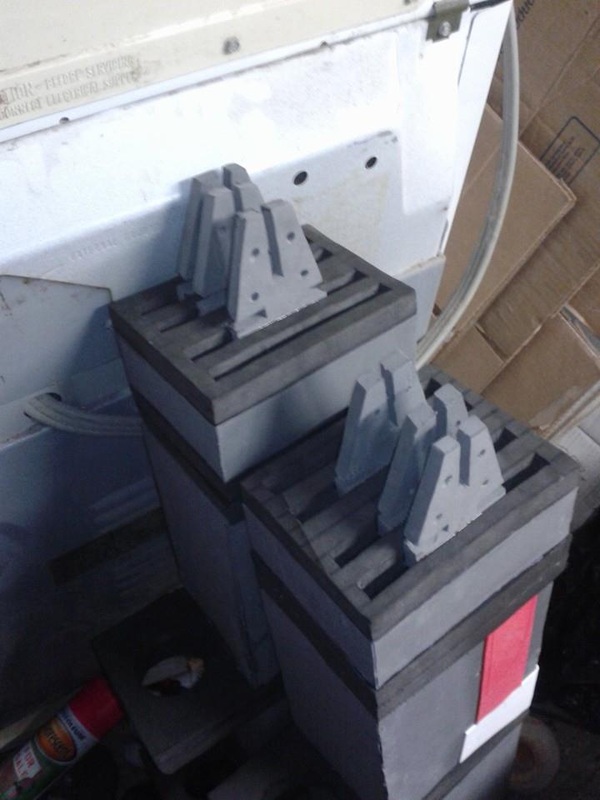 While that paint was drying, I put in a few sword "blanks" (more like the ends, really) as placeholders in the sheath slots not in use. I also threw on some craft foam in areas that still needed detailing. My friend also got back to me on how these would be attached, which was basically a cloth covered patch with two holes in them, strengthened with rivets. My description sucks, but I hit up Walmart and found some wall hooks that worked perfectly. Of course, they had some pointlessly massive plastic bits on them I was having a hell of a time deciding how to remove without damaging the metal hooks, but once I got them out of the packaging I discovered a really easy way to take them apart. So I did. 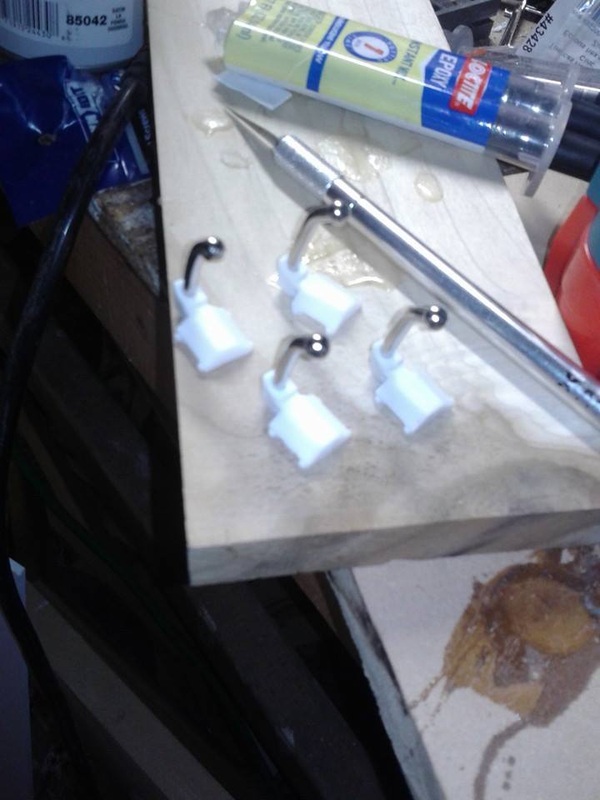 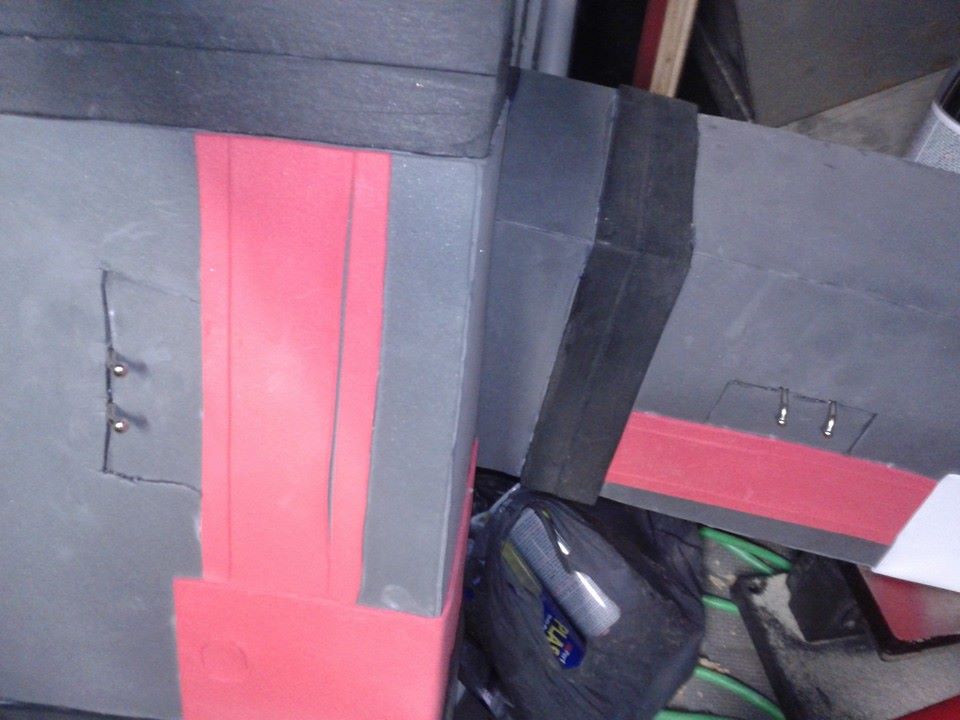 Glued up the tops and cleaned up the edges of those cuts, though I didn't have to do much as they would be covered by the legs. Once those were in it was off to painting straight away! This was literally two days before the event, and the day before I had to be absolutely done before five - epic Mass Effect photoshoot with Legion! *cram cram cram* 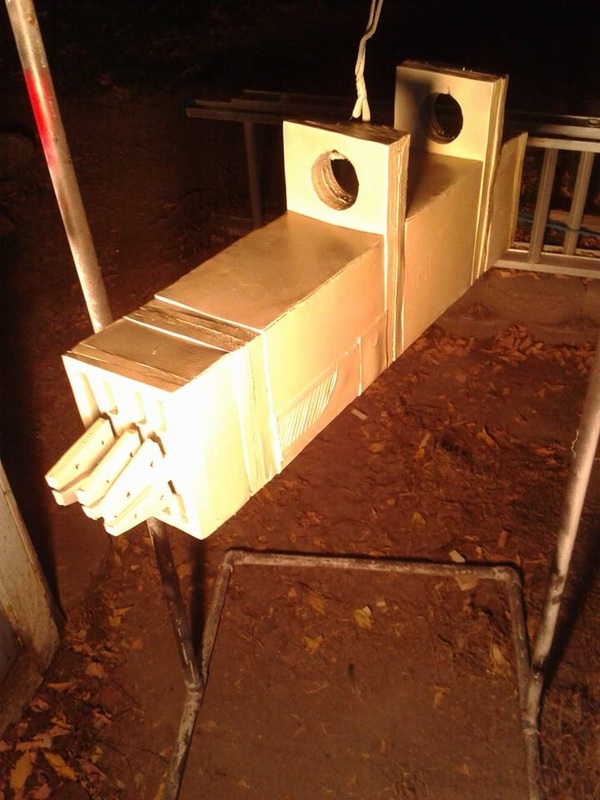 Stayed up extremely late touching up all the finished parts and getting the sheathes at least to the main color, since I wanted to give it as much time as possible to set and avoid as much tape mark residue as possible. This got a grey primer coat, then a tan color for the main section. 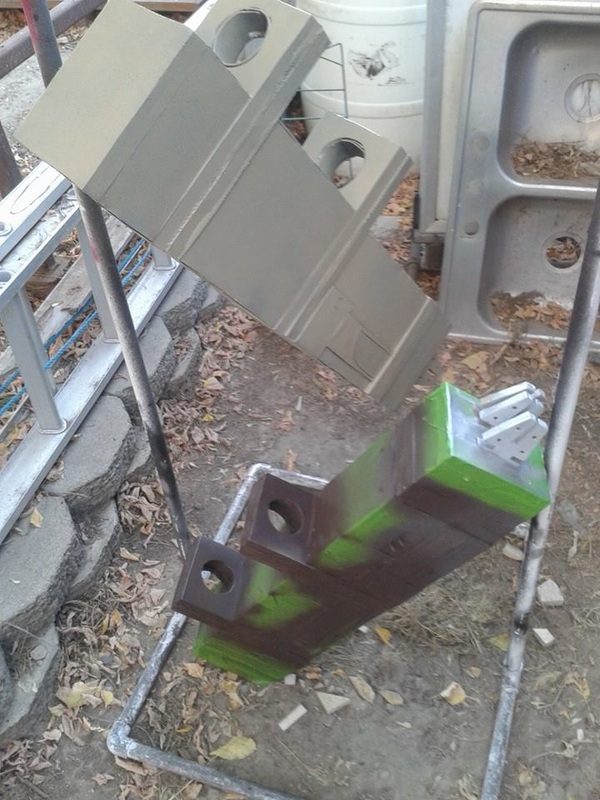 The next morning, as early as I could muster, I taped everything off and sprayed a brown layer, with a silver coating on the blade blanks. The result? 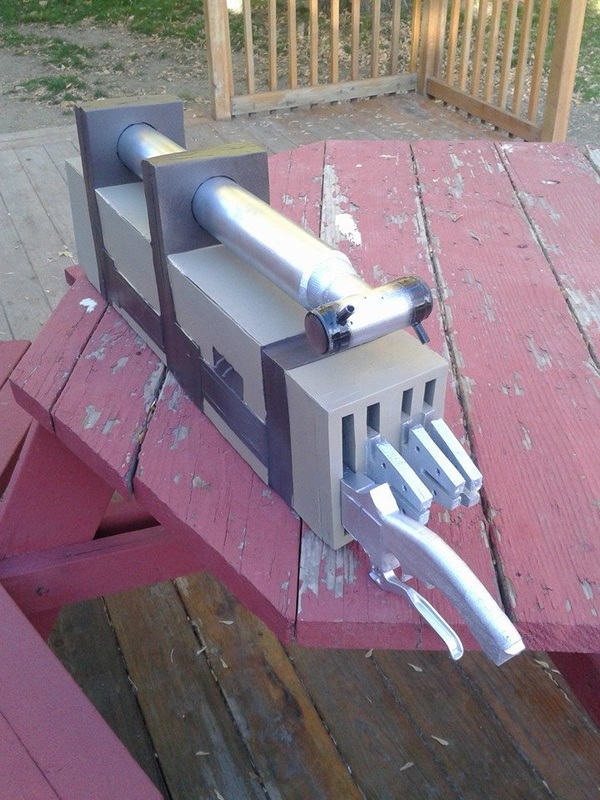 A look nearly identical to the screen captures I got - these colors are nearly dead on. I squealed. Of course, that morning while the paint was drying I literally threw together the engine that hangs off the characters' back. Easier than I expected, though not perfect, and I learned a cool trick! First up, the sides. 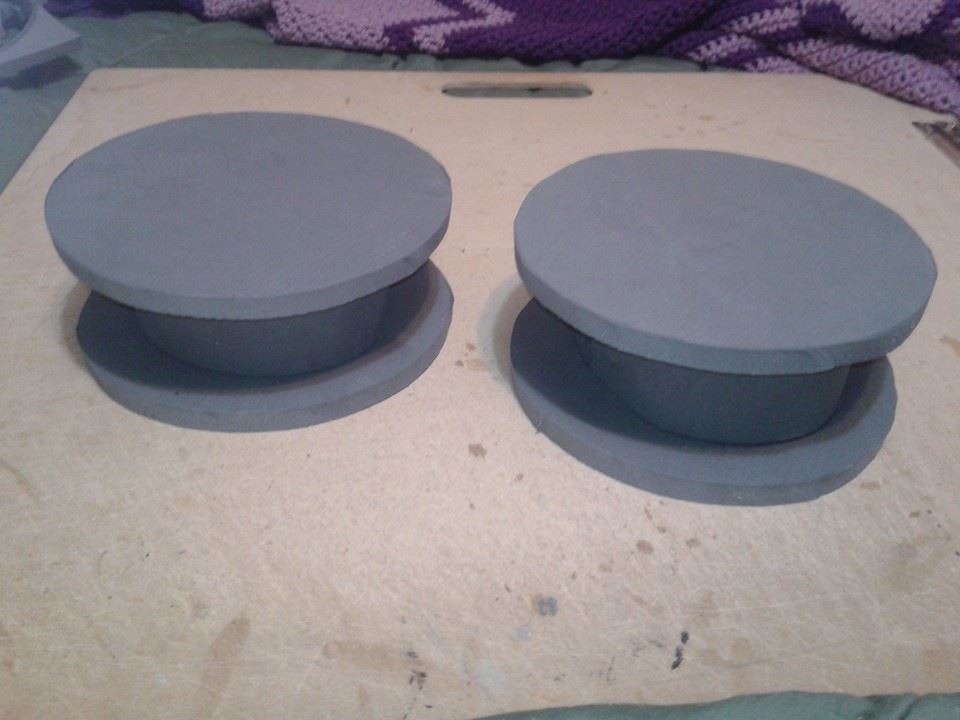 Lucky me, I had a bowl that was the exact size of the larger circles, so that made things easier there. The inner circles though were a bit harder. Cut the larger ones out, then looked for something that was the width of the inner bit, but realized I would still have to measure it since I wanted the inner bit to be a strip. By a stroke of luck, my painter's tape was currently the exact width, which gave me a fantastic idea! By marking where the end of the tape was, pulling it off, and cutting at the mark, I now had a strip of tape exactly as long as the circumference of the inner circle. Go figure! Marked out and cut two strips of foam, glued them in, then quickly cut out the connection points on the back of each. 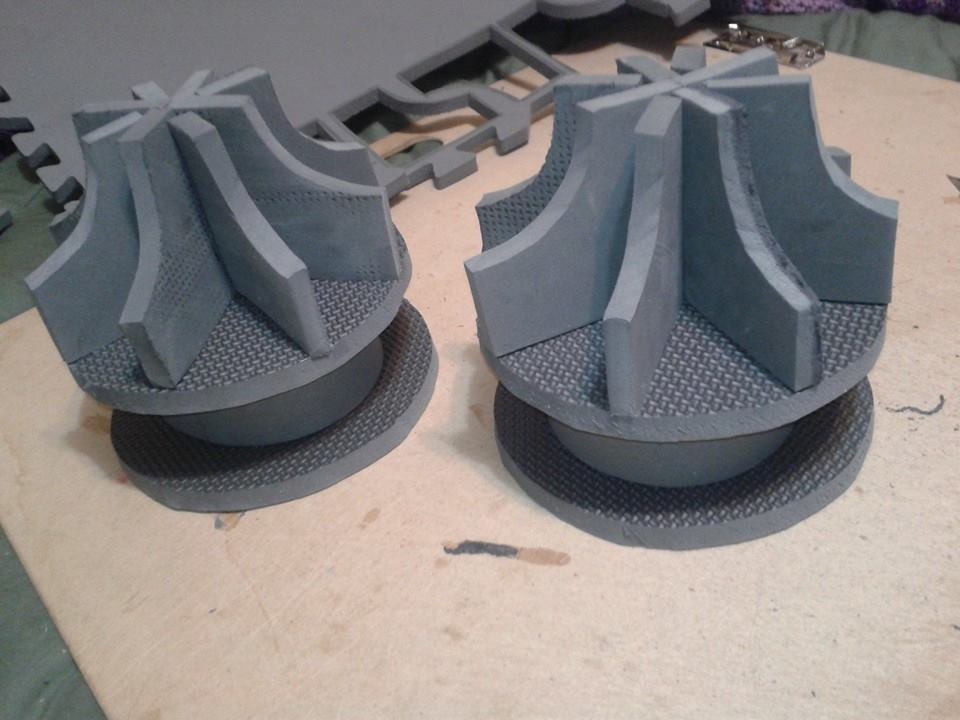 You can see the one on the right that I used to trace out all the others. You can also see that I sanded down most of the texture pattern on them, which I should have also done on the circle bits, as well as shortening the backs of quite a few of them so they'd all fit right. From here I was running out of time, so again I only have one other picture, and that's of it assembled. For your sake, I'll tell you what I remember. Inside the circle sections I added small square bits of foam at the same points of the shaped back section. From there, I made a box, a can-like thing with a port on one side, and a quick but effective attachment section to hold it all together. Quick and dirty description, but here it is! 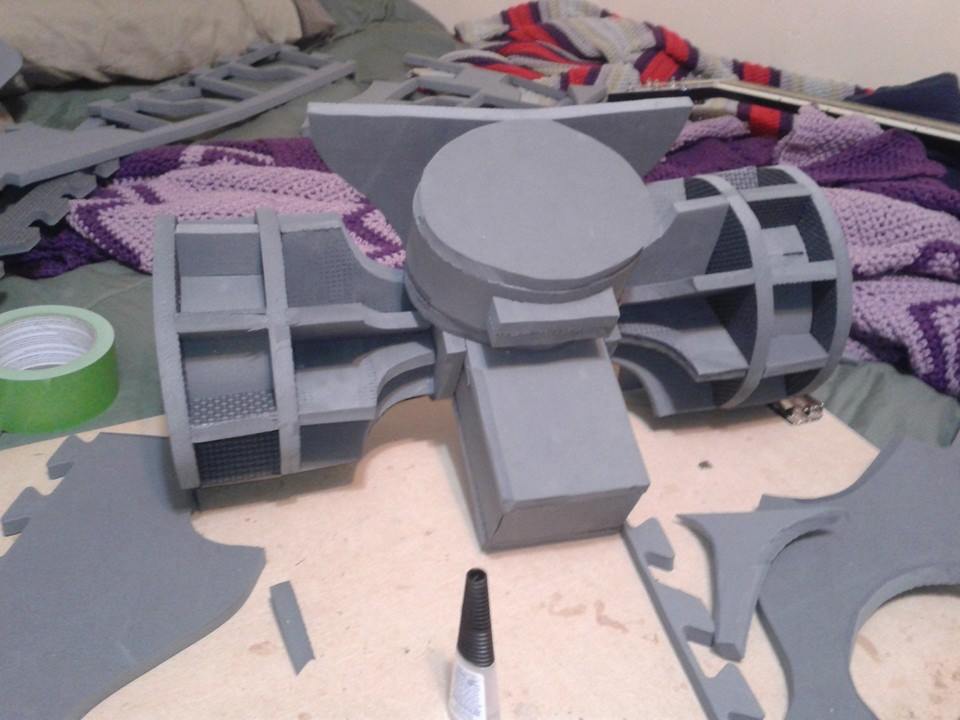 It's not very clean, and I would have liked to make it look a lot more like it should, but again I was extremely strapped for time and just needed to finish. The engine bit got the same paint treatment as the swords and canisters: black, clear, silver. I also did some design work with the wood burning tool, to make it look at least a little better. Sadly, I've only got the one completed picture because I had to immediately hand it off to my friend. I was out of time, and the engine still smelled strongly of paint. There were still a few things that were left to do, but they would be covering those bits. I did leave him with some velcro to make it easier to attach the engine. Anyway, here's the finished product! 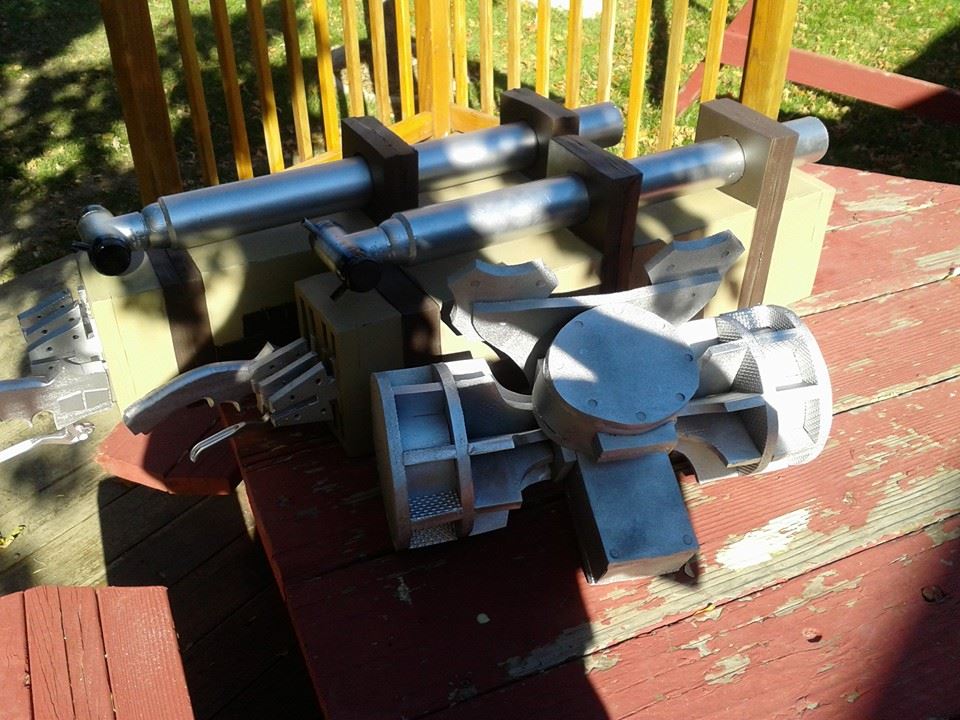 One picture, and it's a bad shot, but hey. I finished it, my friend loved it, and it worked. One of these days I may take some time to make a proper one. For now though, I'm proud of this one. Despite the rushing I think it turned out pretty good. Not perfect, that's for sure - but still pretty good.
So in the midst of all my Fallout building and Mass Effect weapon orders, I received a commission for Caliburn, Saber's sword in Fate/Stay Night. I was really excited for this one, since it is one of my favorite series, and it gave me a chance to test out some new tools I hadn't used before. Now, I was only commissioned to make the blade, since she was going to do the details and painting, but she posted pics or her progress that I am happy to share (especially since I gave some suggestions that she ended up using). Anyway, here's a random awesome shot of the sword for reference: 
...and an awesome wallpaper of Saber if you want to trace back the original link. ;) I was able to find a really high quality image online rather than having to whip out Illustrator, and printed it out full size for this one. Here is where we find my first problem: what to make it out of. Originally, I was intending to start thick and carve down each piece as I thinned, so we got a ten foot piece of pine two inches thick. Unfortunately, the wood was TOO thick and started to do a number on my little bandsaw. Here is a shot after I gave up on this piece: 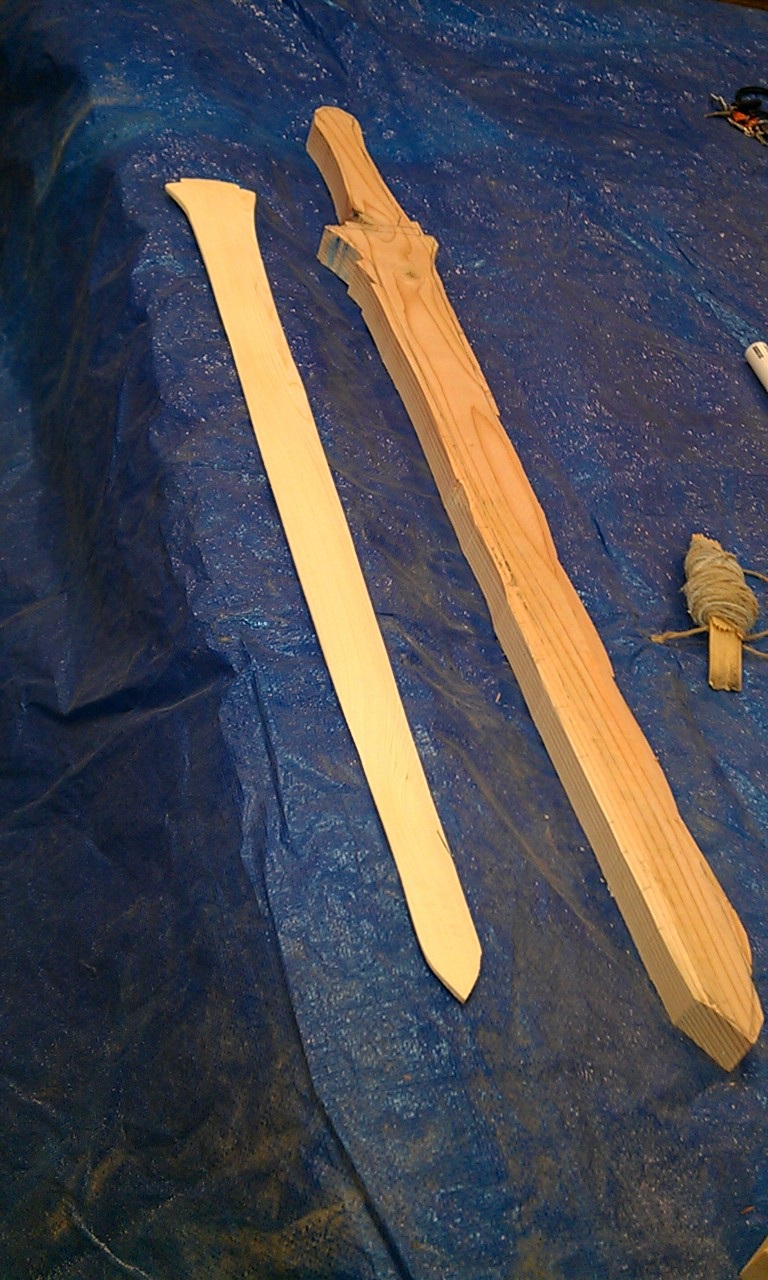
Here you can also see my failed second attempt. I was having so much trouble with the first one that I went and got a jigsaw. The wood, however, was still way too thick, and it barely did anything. Luckily, my commission-er (lol), who is also my new landlord, found another random plank of wood that had room enough for three or four attempts (should I mess up). Bad as I felt for wasting the wood she supplied, I started work on the second blade. Rather than cut the grip out of the same piece, since the new board was a whole lot thinner, I did it with the blade on its own (with a bump at the top as a registration insert for the hilt). I got to try out a spoke shave for the first time, and man was it awesome! Took down the wood like a hot knife to butter. Here, though, is why the second attempt also failed: I got too excited and exuberant with the spoke shave, and took too much off. Can't see it in the pic, but while one side is shaped well, the other is flat and has no more that can be taken off. So now we come to attempt number three. Blargh. I was feeling really bad. Really bad. Twice now I had wasted wood that wasn't even mine to waste. Wasn't allowed to give up, though, since it needed to get done, and ordering one from someone else wouldn't make it in time for what she needed it for. I cut another piece out and started with the spoke shave again, this time taking small amounts out. Very small. And this time, it worked. 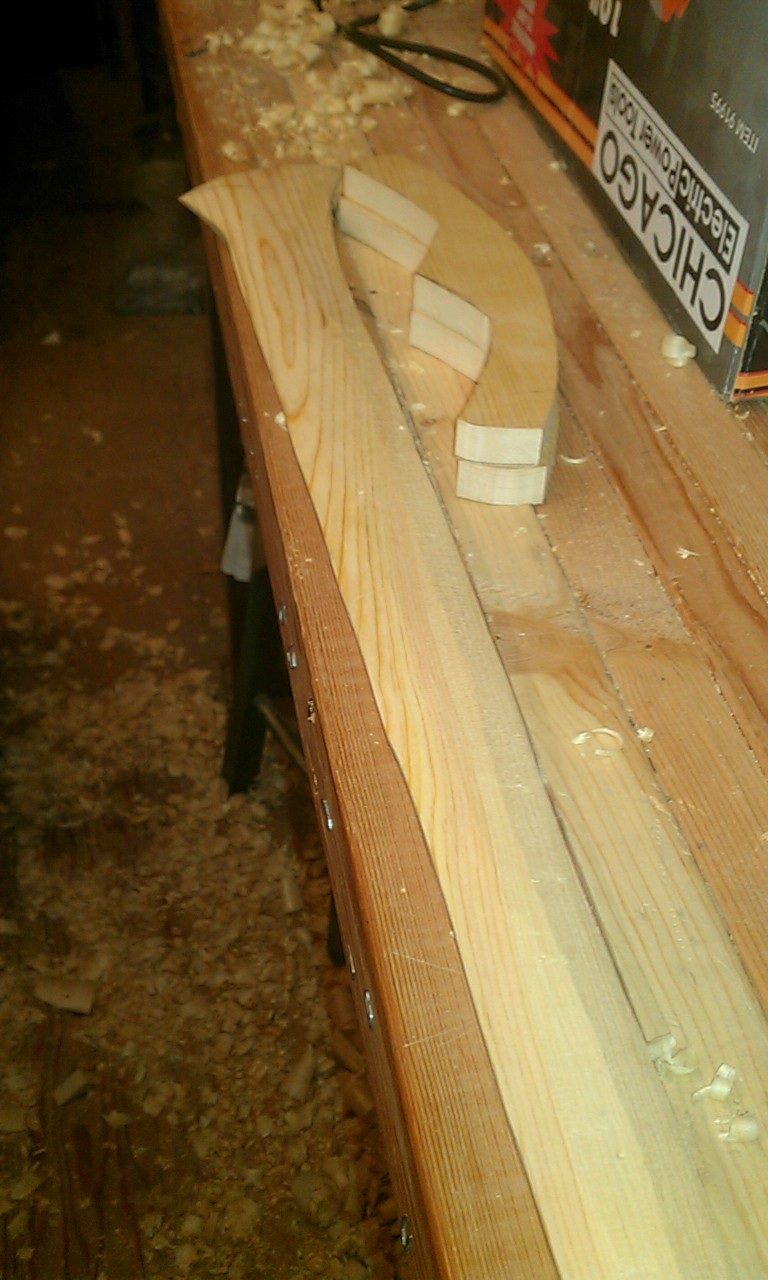
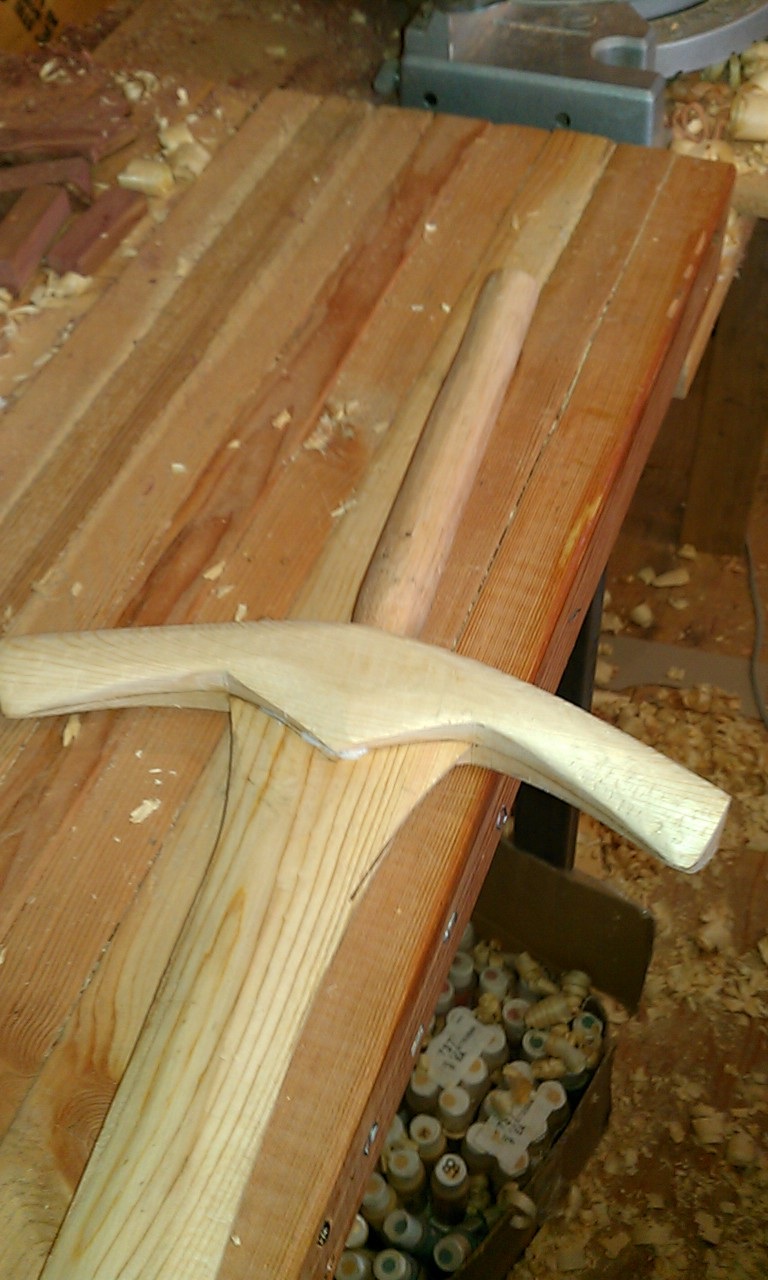
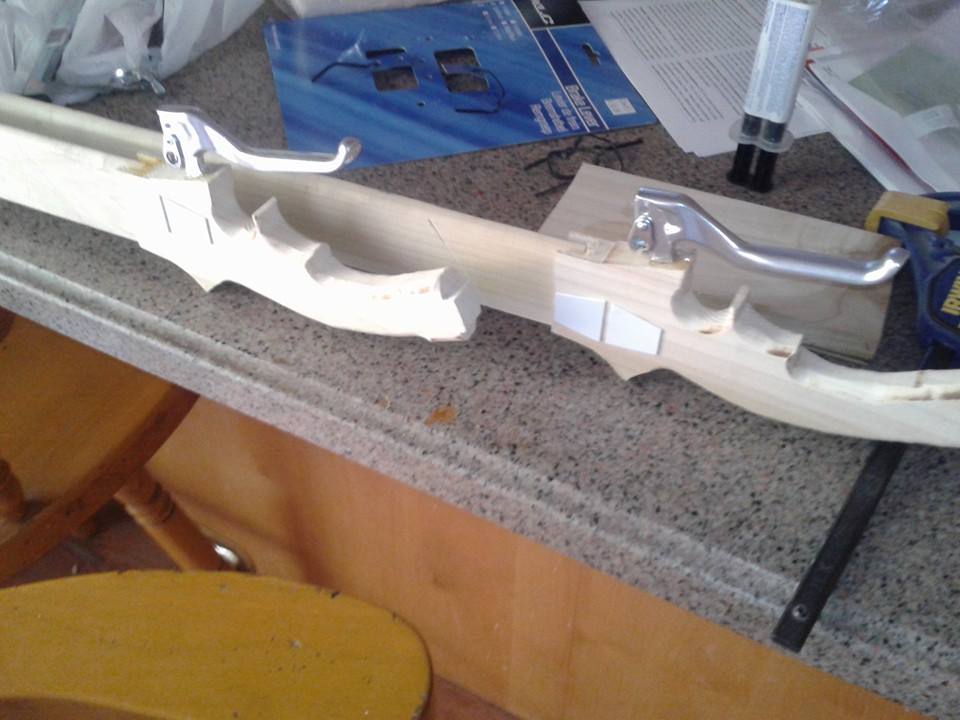
Made a huge mess, but holy hand grenades, batman, it worked. I didn't add the insert at the top this time, because I realized by the shape that it already had an insert: the blade itself sat inside the hilt. You can see the start of the hilt above, cut from the same board in two pieces. This was the original plan for it anyway, so I'm glad it turned out so far. For this, I took a chisel I got from my wife for work (yes, I work on Violins for a living), and started carving out the hilt. 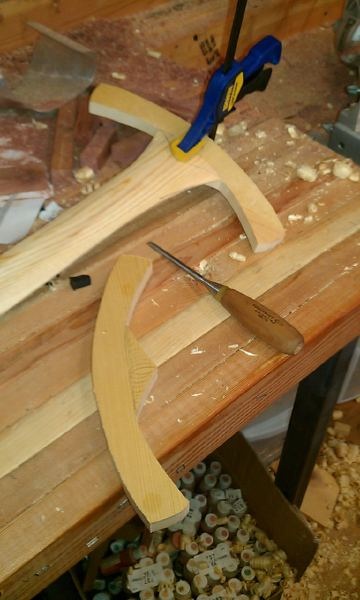
You can see the mark where I took off the chunks on the one not attached. For the glue, I used the absolutely amazing Titebond 3, which set strongly in 30 minutes and held like cement after 24. If I ever do something like this again, I'm definitely using it. Anyway, got both sides done and glued: 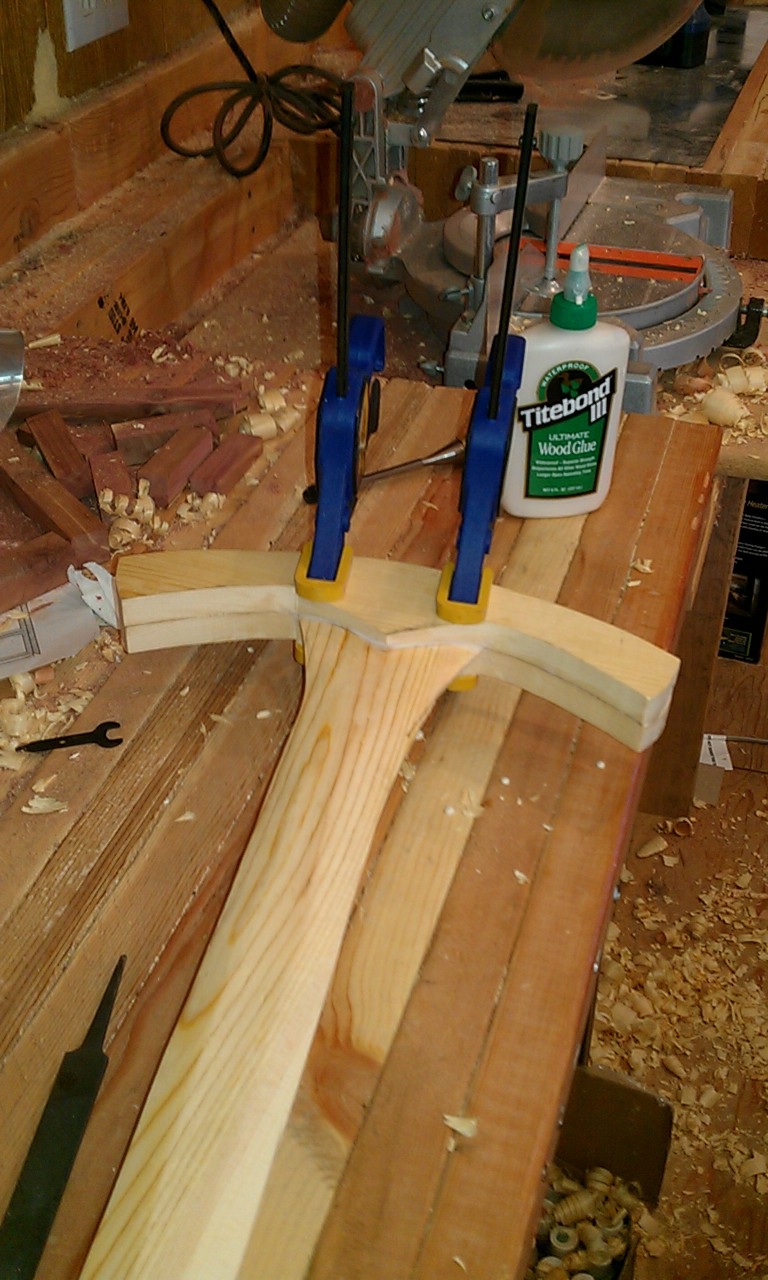
Good shot of the glue, should any of you want to get some! I gave this bit a half hour, came back out and started on the spoke shave again for the cross guard. The glue held strong the whole time. I still took great care and went slowly, since I really didn't want to do this again. 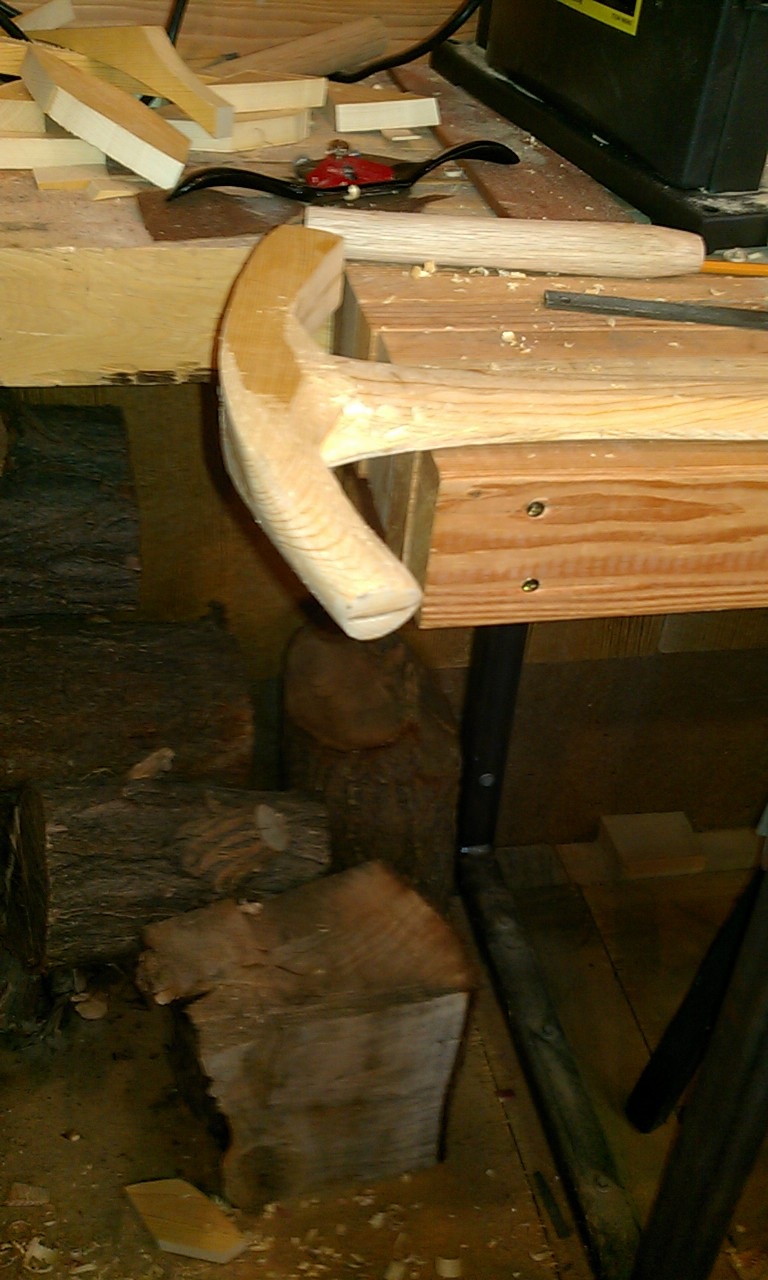
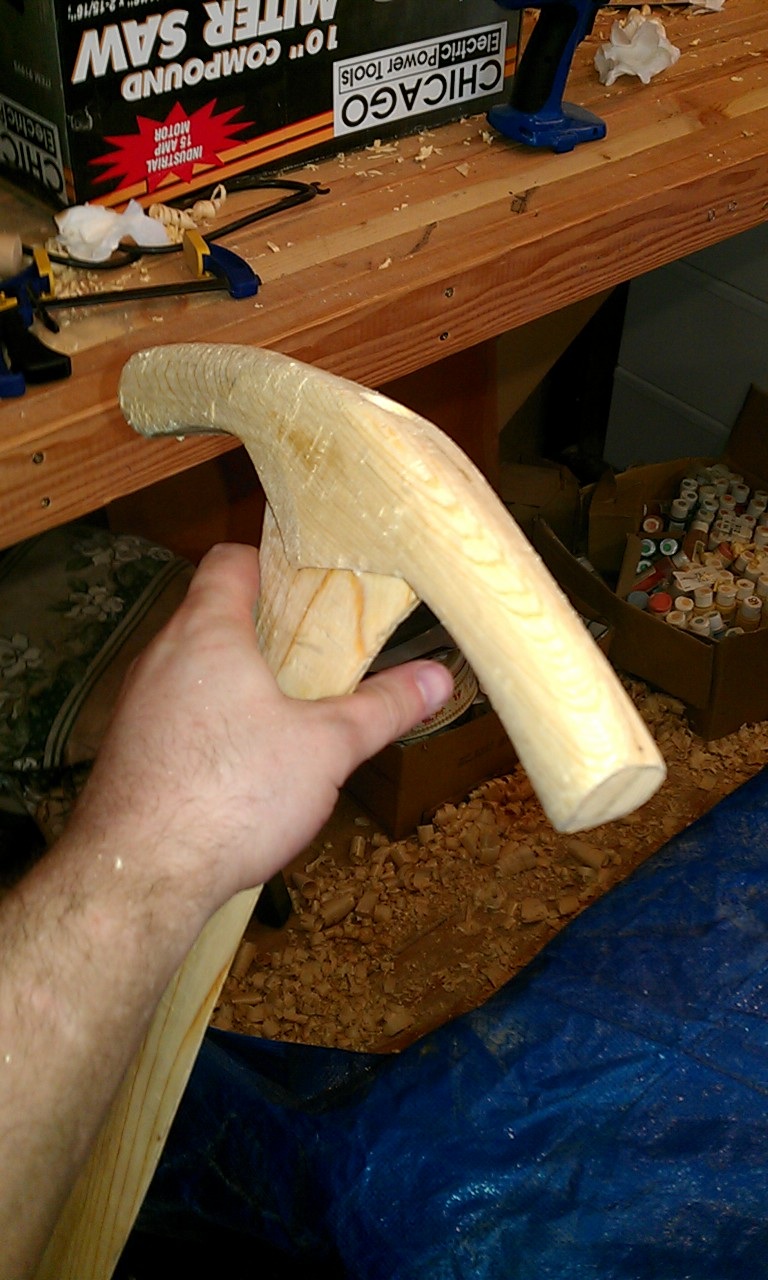
This next bit was the absolute scariest thing I have ever done. I had to attach the grip, which I had made with a dowel that I thinned, to the rest of it. The best and strongest way I knew was to insert a rod as the "tang" of the blade, which meant drilling a hole a ways into the blade. My third attempt. After all this work finally looking like I wanted, I risked starting all over again. After nerve wracking minutes, here's the final verdict: 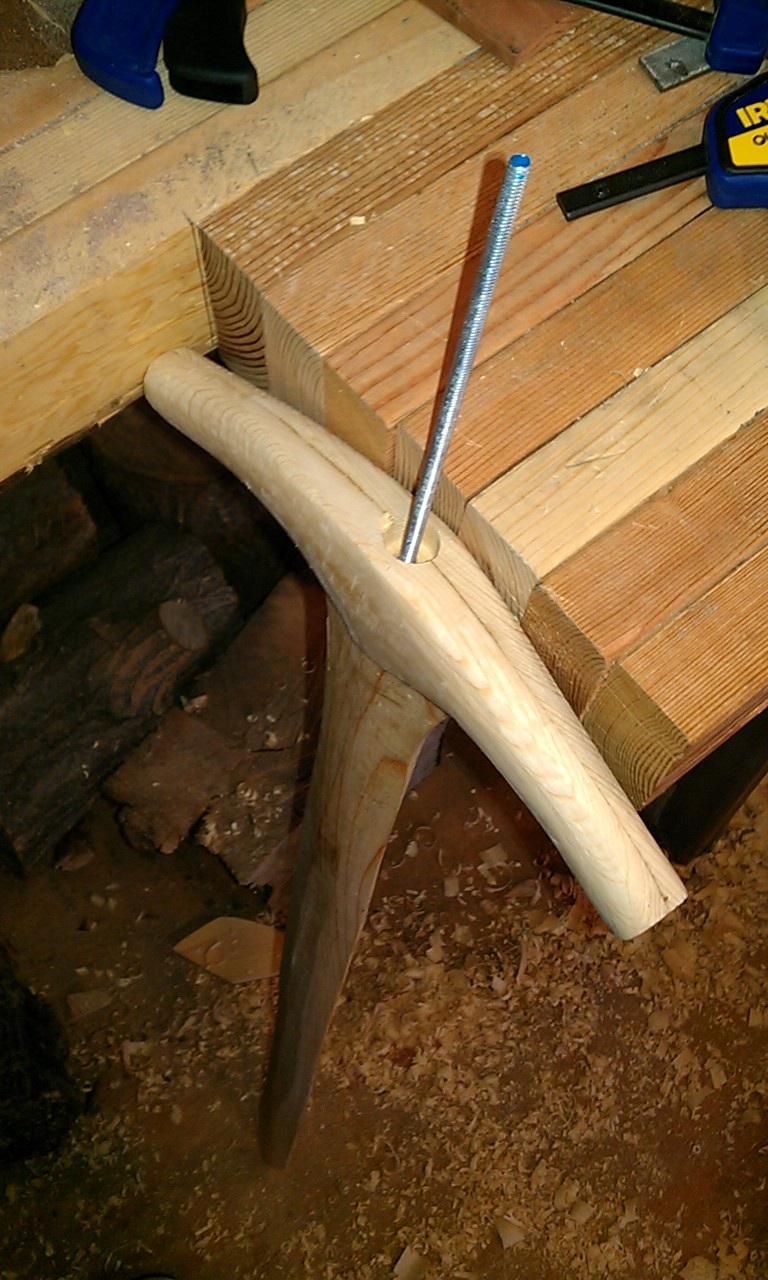
Caliburn, I so win this one. I had to do the same to the dowel, which wasn't as scary but just as hard, and I secured it once again with the Titebond 3. 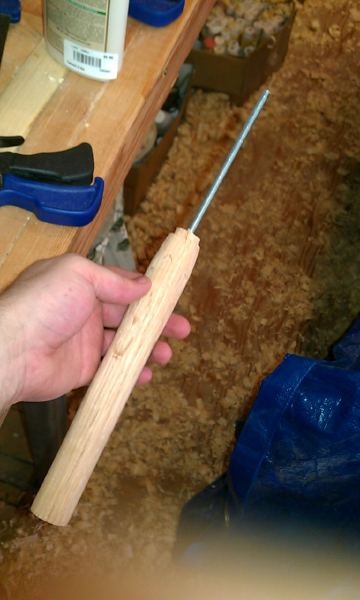
I used some spackle to fill the bumps and some wood putty to fill mistakes, then grabbed a wooden washer and doll head ball from Michaels and attached them. My part was done! 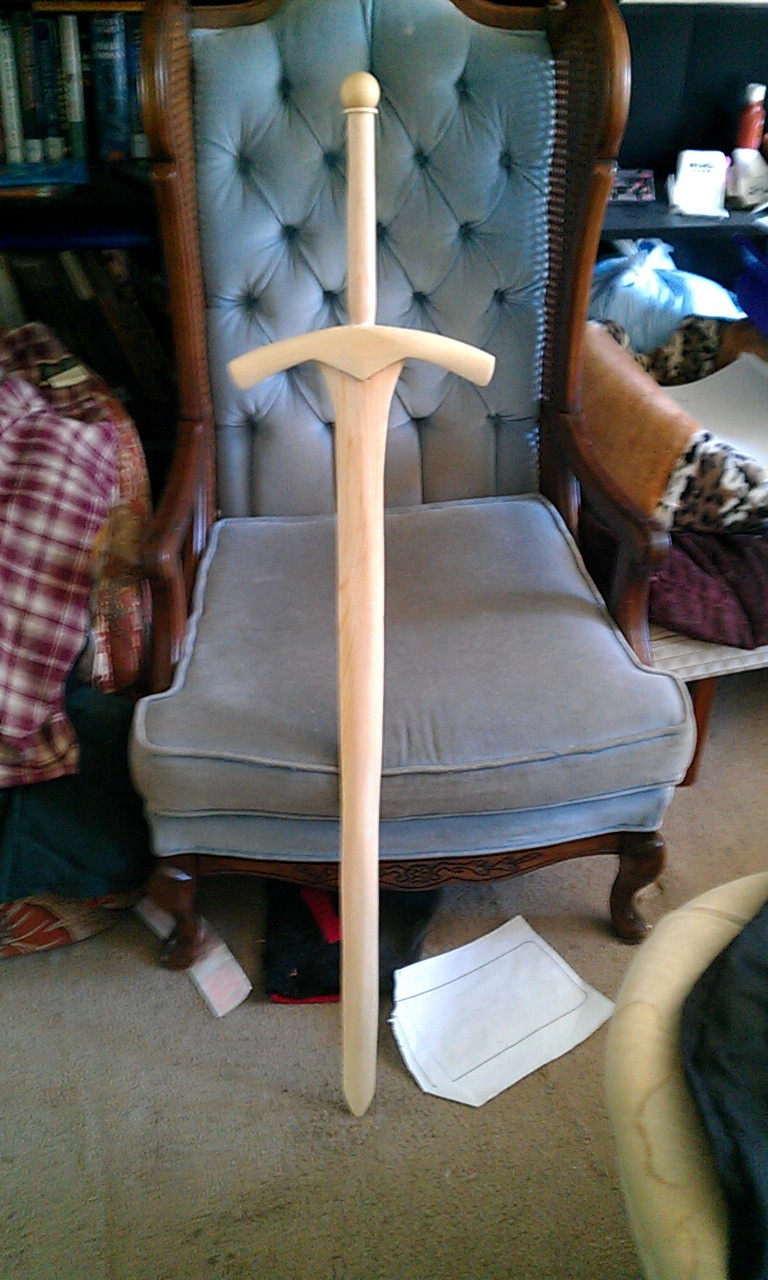
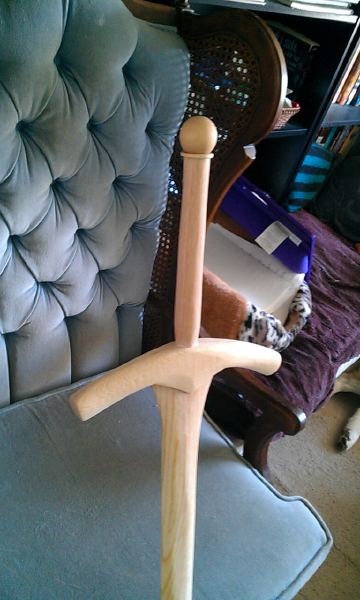
Absolutely ecstatic how that turned out! From here, she took over, built up the details in wood putty, sealed and primed it, then painted: 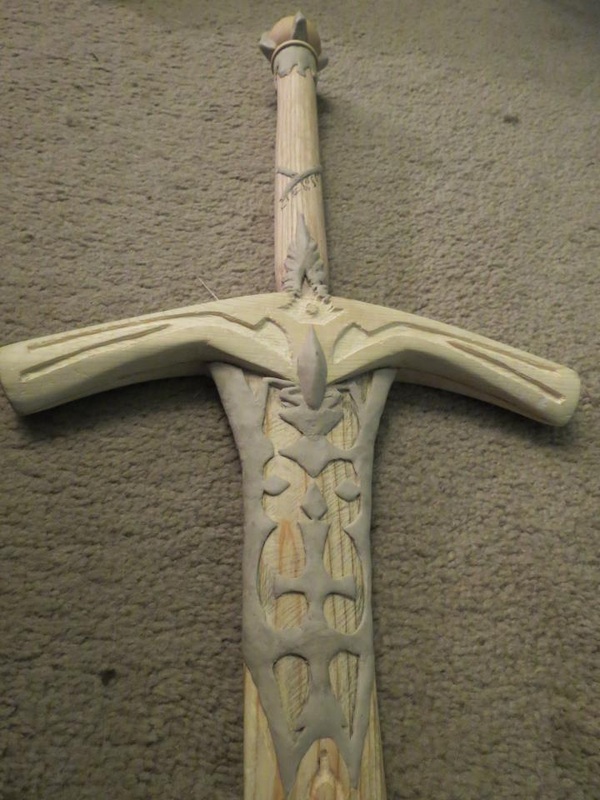
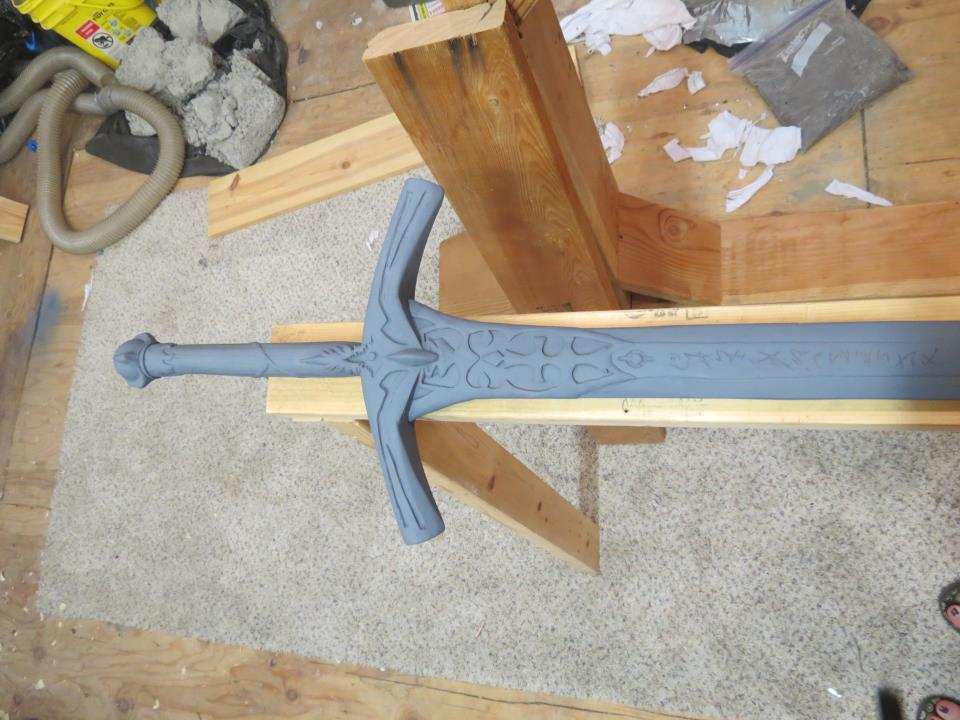
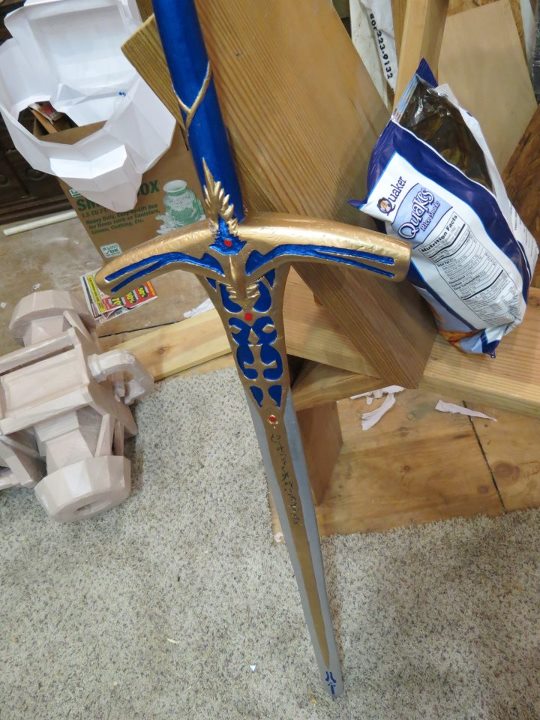
I think it turned out awesome. Haven't seen it finished in person, since I'm on my way to work and it's on its way to Nihon Matsuri, the SLC Japanese Festival. Pretty soon I'll be doing the sheath with her, but that one is done! Woo!
|
|


 RSS Feed
