|
Haven't been able to do much without glue and whatnot, though I will be getting back to detailing the sledge in the next day or so. Meantime, we are less than a week out for the Mass Effect midnight release! I'm so excited. Apparently some local stores are combining their release parties! Might go crash it at one point if the store I preordered it at isn't teaming up. Either way, let the countdown begin!
0 Comments
Well, I decided I had enough foam left over from the armor, so I might as well try to make the M8 to go with the armor and pistol I just finished. The template I used was from the same 405th thread with Ithica's armor files (and the other person that helped - forget the name *sorry*). Once again, the foam proved easy to cut: 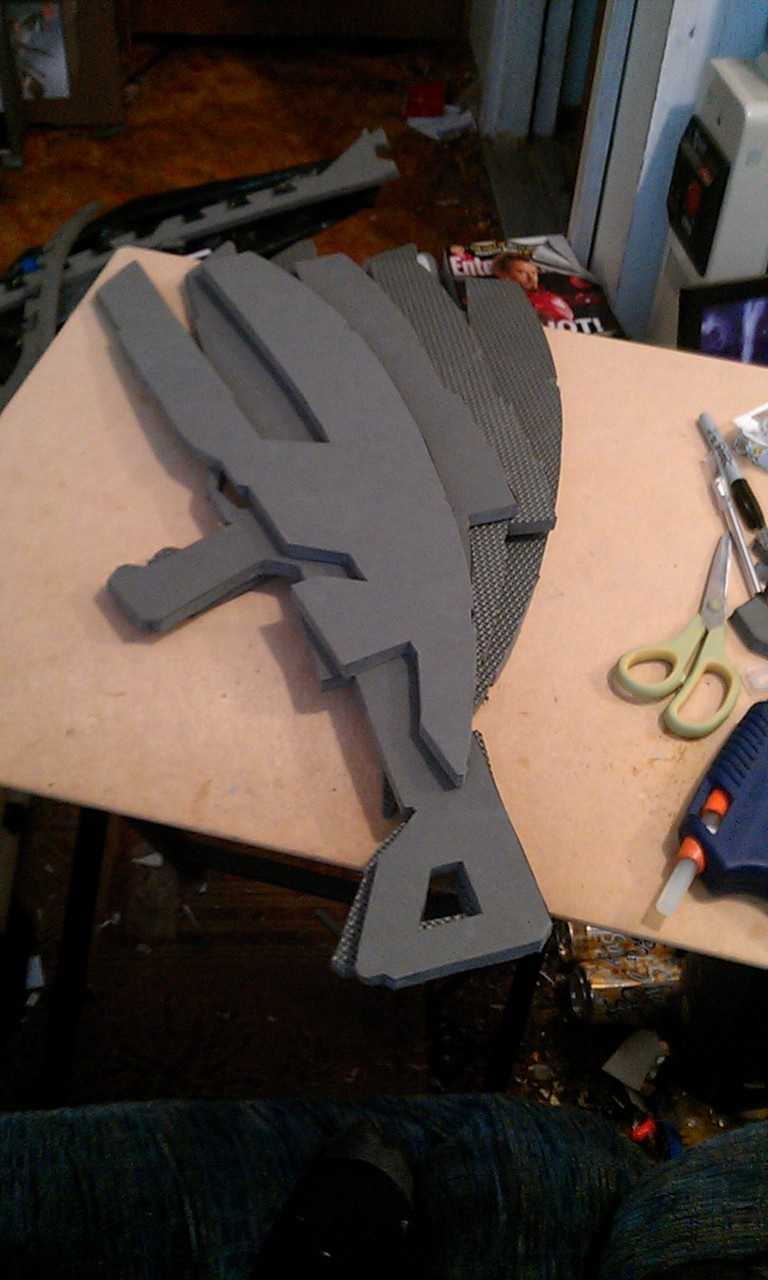
...and then semi-easy to add a stick to the middle for support and strength. This may be just a simple build for release night, but I wanted to make sure it held up in case some eager gamer bumped into it or it gets passed around and stuff. Now, just to warn you, I only have a dremel and a wood burning tool at the moment, besides my now depleted exacto blades. I need a router/table and the right bits to make this exactly how I want to. Given that, though, I am very happy with how this turned out. Anyway.... I took a sharpie (best things on the planet), drew in the detail lines, and etched them in with the burn tool. 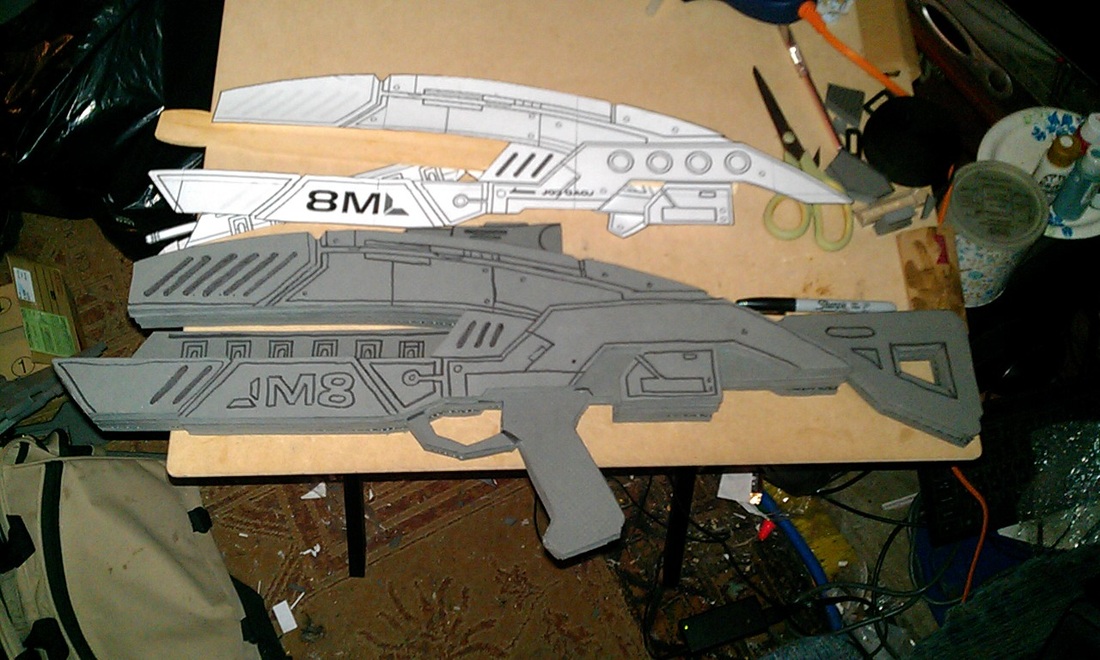
At this point, none of the four layers are secured to each other, because, with the way I build this one, there were some spots that went under the layer above, so I didn't want to burn the upper layers on accident. Here's all four connected and mostly detailed: 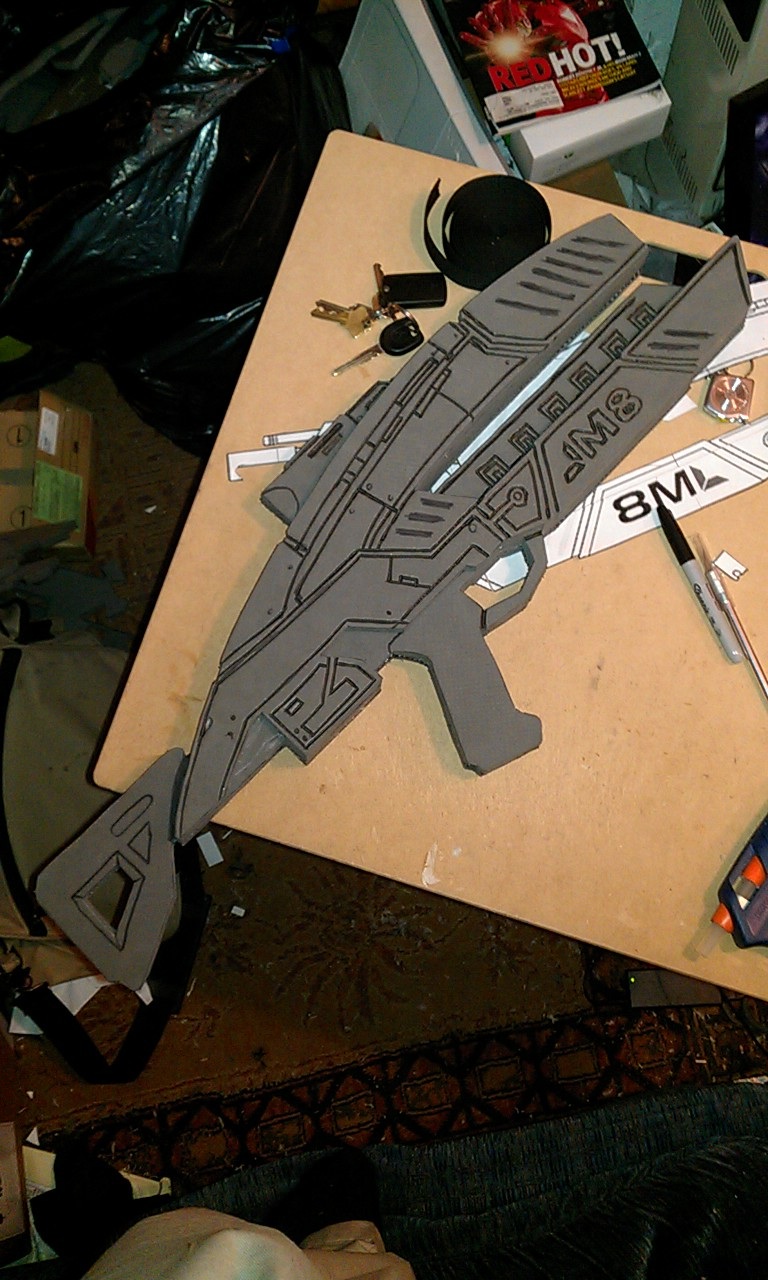
You can still see some detail marks, for the vents on the barrels and the marks on the stock. The latter was just for alignment purposes, and I didn't want to burn the vents in until I had done some rounding to the top edges. It's not a box, after all! Here's a pic of after the rounding, with a great closeup of the vents and other details. 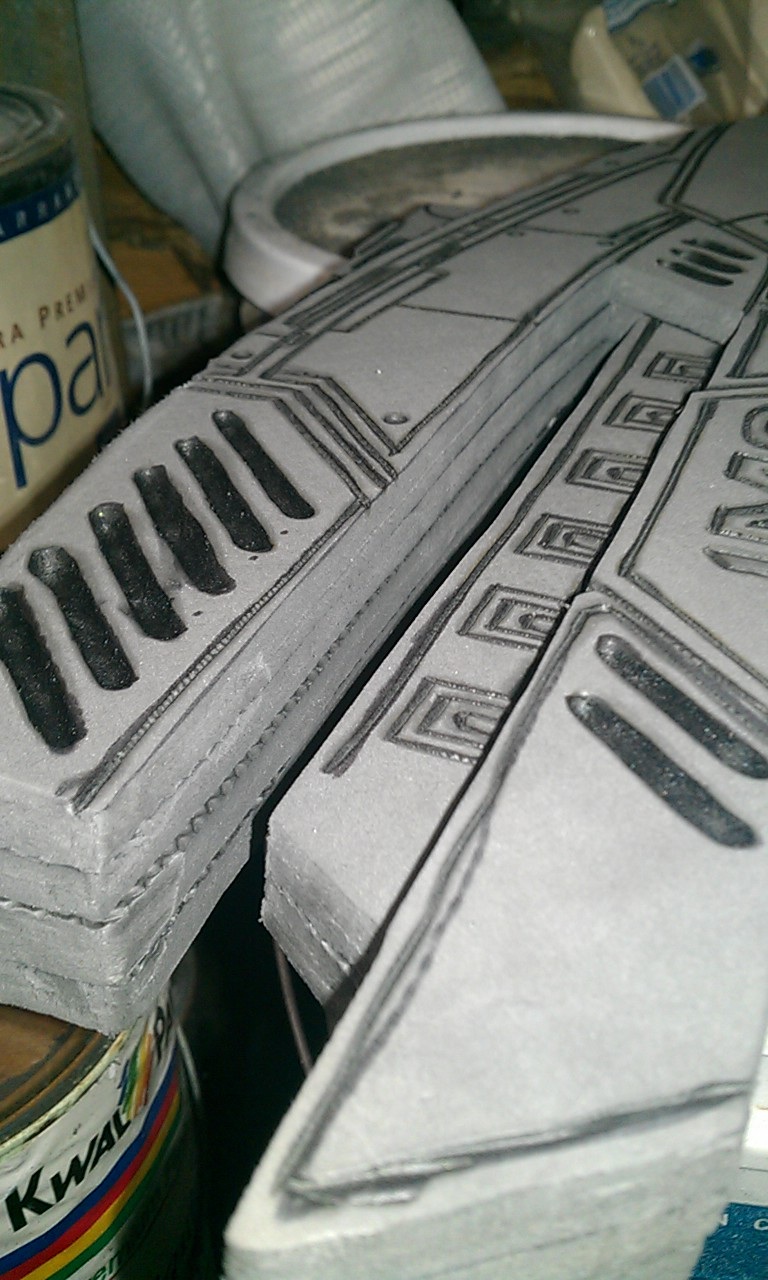
I know, I know - the layers weren't exactly the same. There wasn't much I could do to fix that, even with the dremel sanding tube. I also need a band saw or something else that can cut multiple layers. That would make the edges much smoother. No big deal though - it's not for a con. Not yet, anyway. And that, my friends, is day one! I was home sick anyway, so I figured what the hey, I might as well be productive! Next step: a bit of craft foam on the grip and stock, for a fuller, cleaner look! 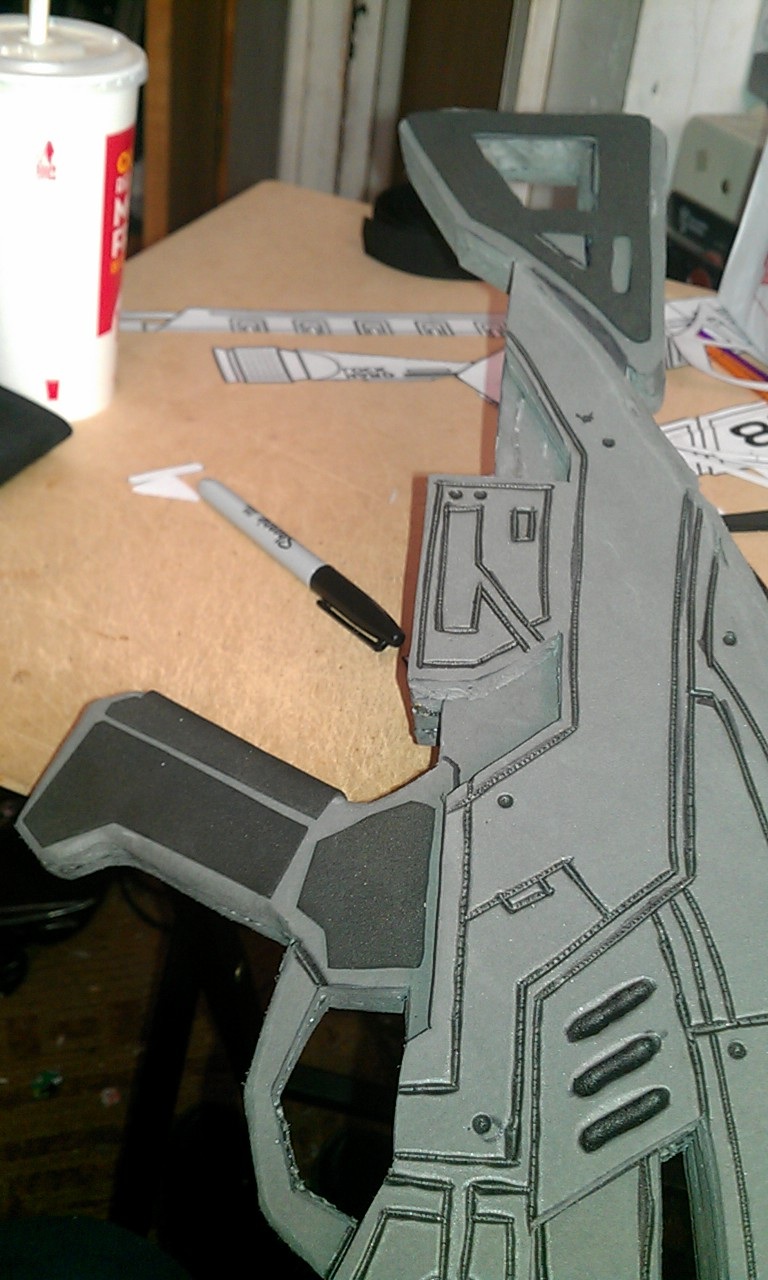
That was pretty much all I did day two, since I went back to work and as far as I knew we were totally out of cash. Taxes were set to come in that day, yet - naturally - they didn't. For all I knew, that was as far as I would be able to get on this one. Wouldn't you know it, today I found $3 in my pocket! It was left over from when I went to get some white paint for the pistol! I rushed out to Lowes and found a few things I could use for the barrels and the sight: 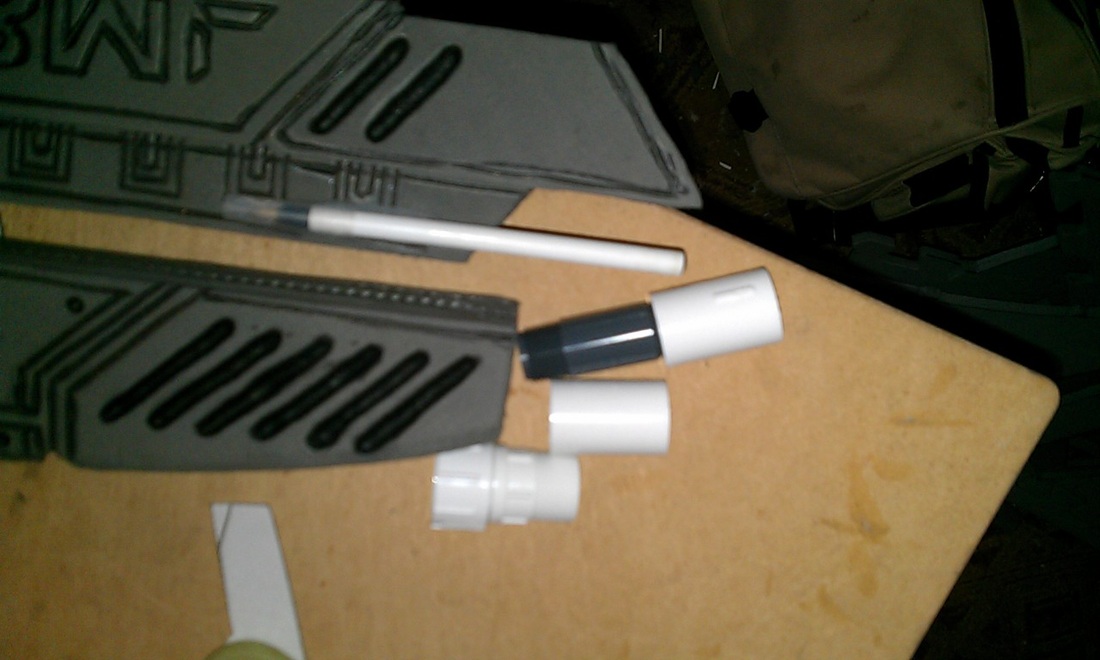
Crappy picture, but I was so excited I was able to get it done that I wanted to get right to it. I cut each to shape (with a hacksaw - did I mention I need better tools?) and started attaching them. 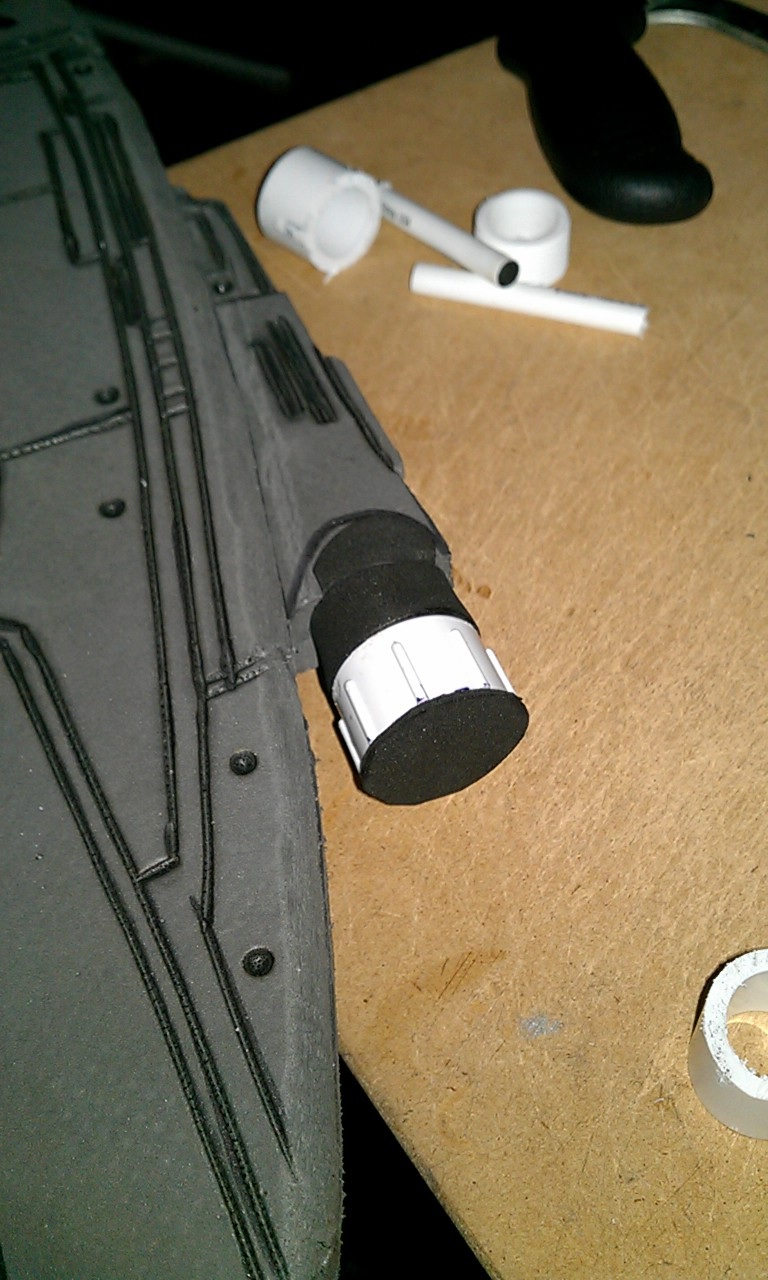
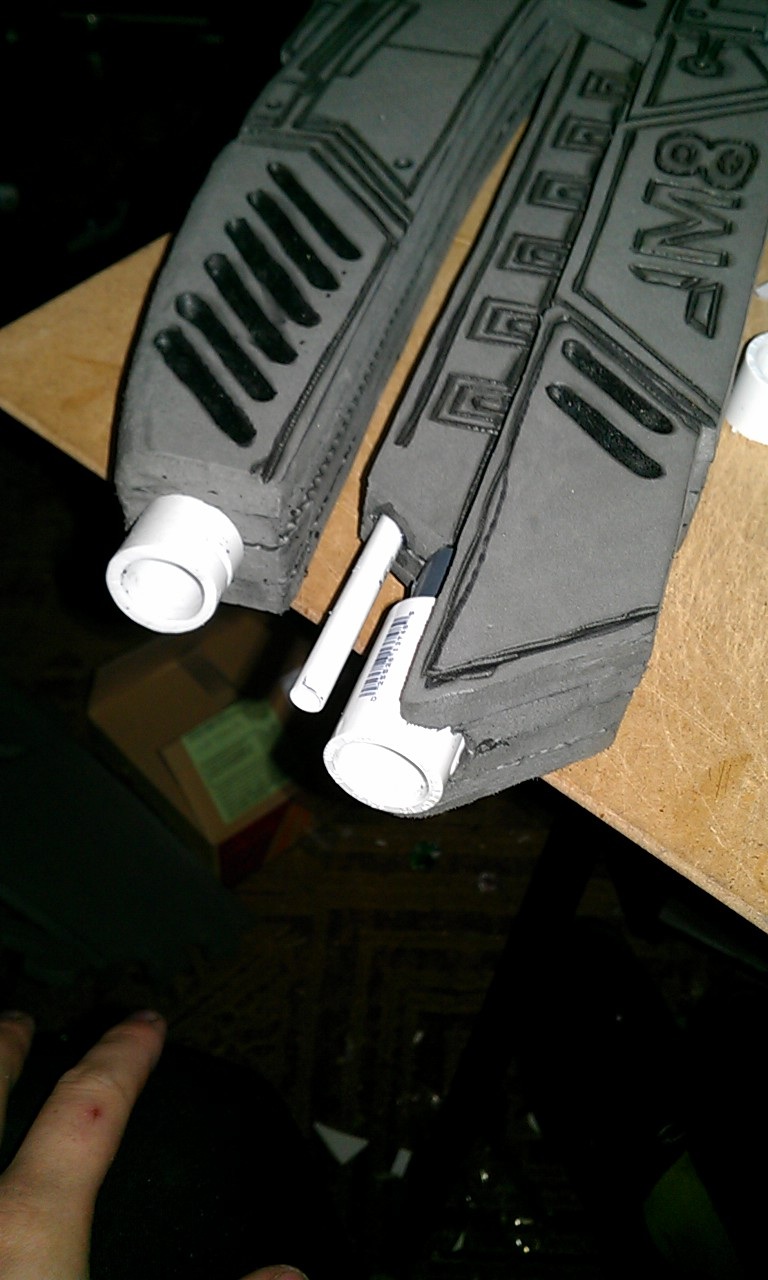
Yes, that little one is an old pen. Hey - Volpin did it, I can too. Right? ;) After all that, it was finally time to paint! Did the black areas on one side first: 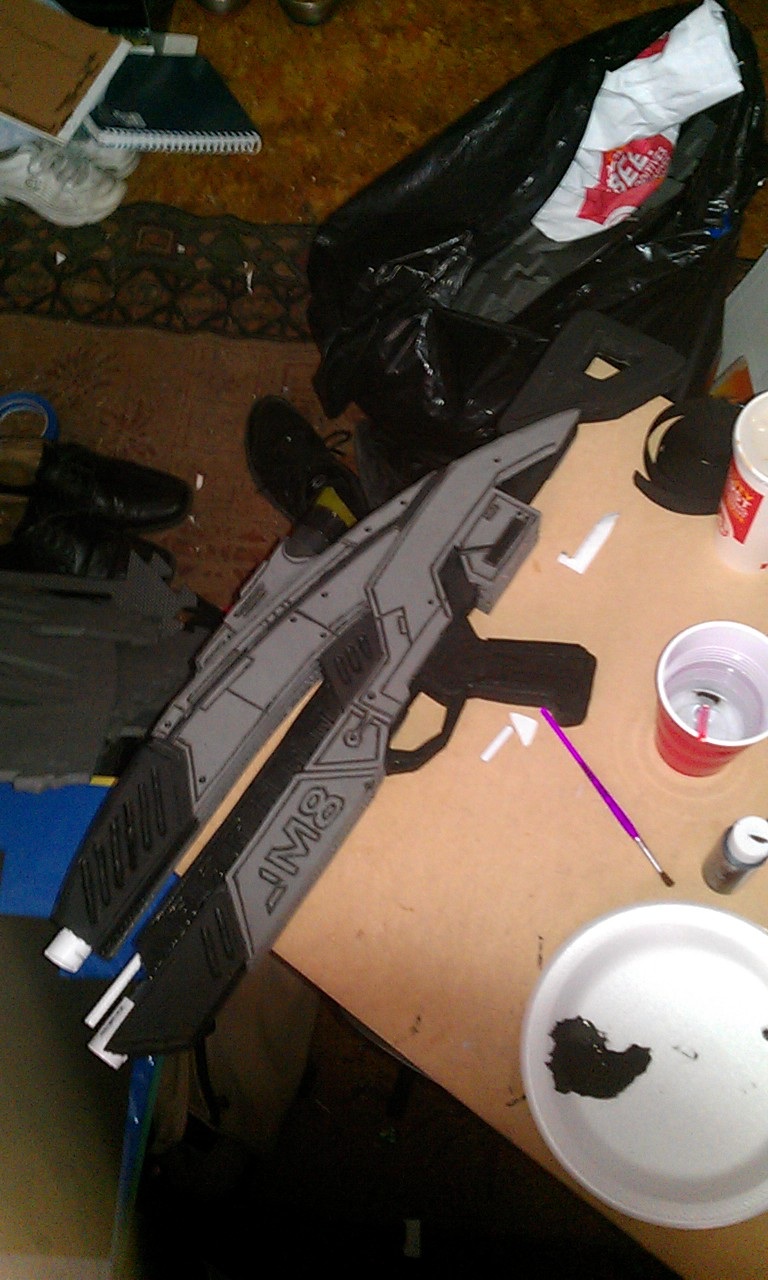
...flipped it over, did the black on the other side and the silver areas: 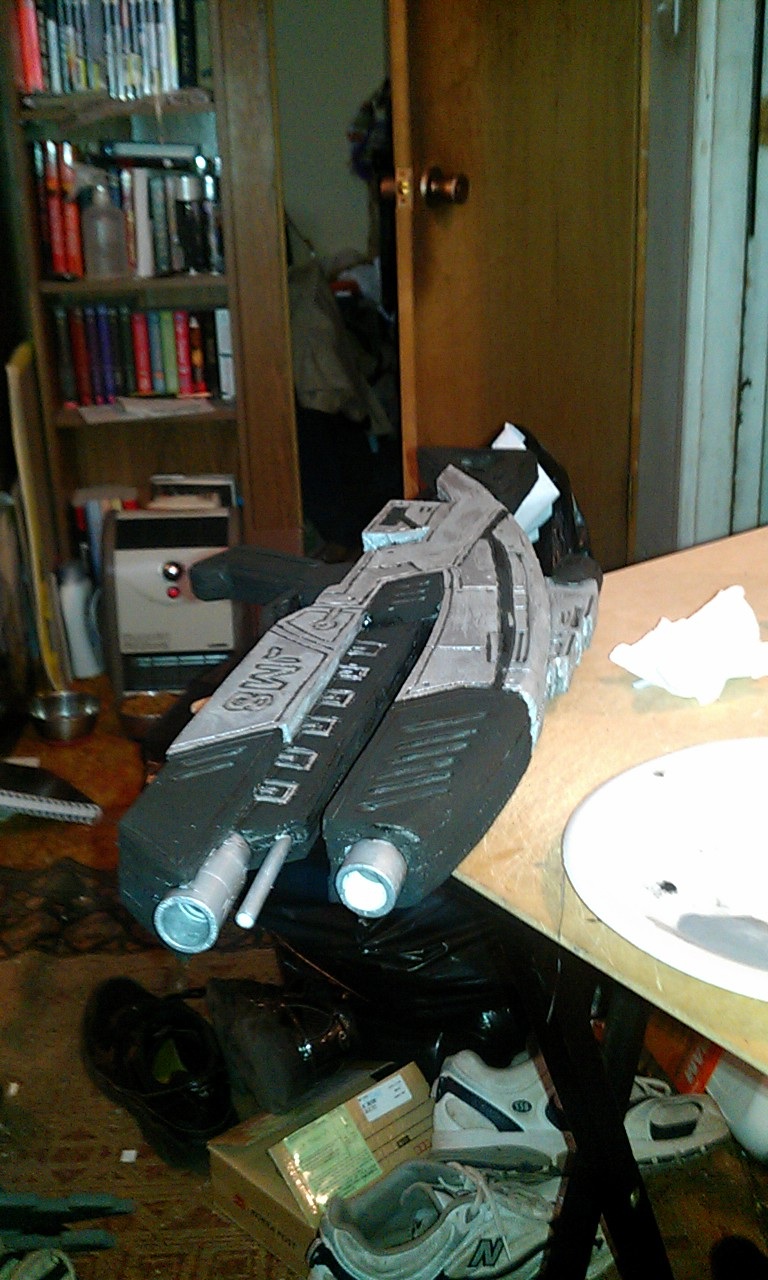
...flipped it back over, finished the silver, and did all the decals. Aaaaaand done! 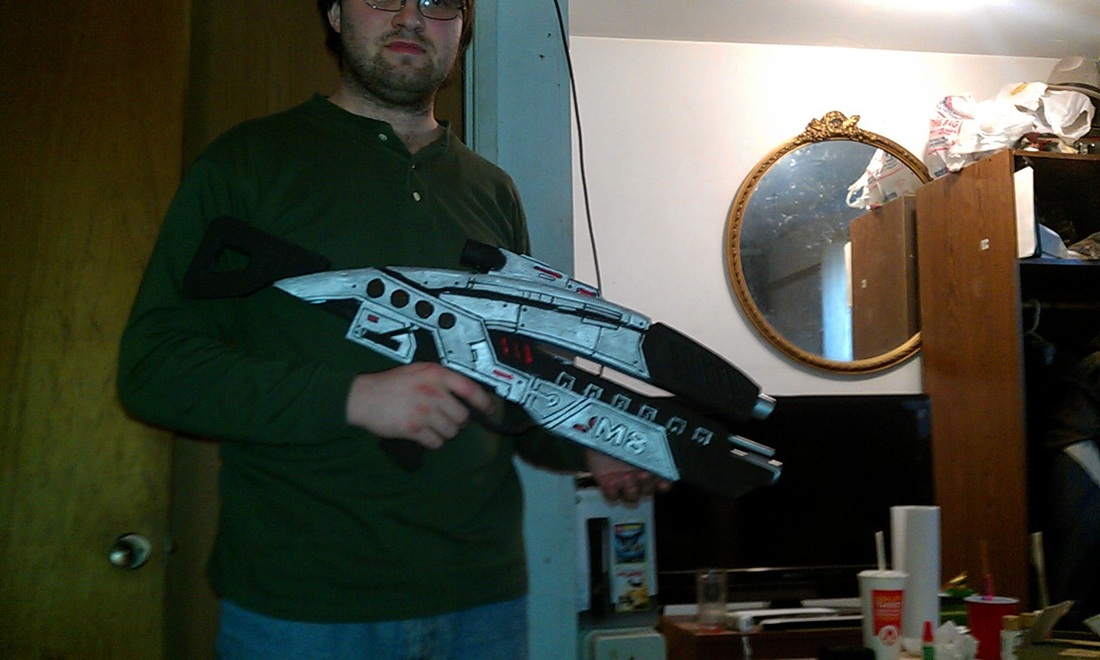
Couple of spots were still wet, hence the delicate hold I have on it above. Man! Three days, and done! For a simple, quick build, this went really well. When I have more tools and such I will make a much better quality rifle, but in all honesty, I'm very happy how this one turned out.
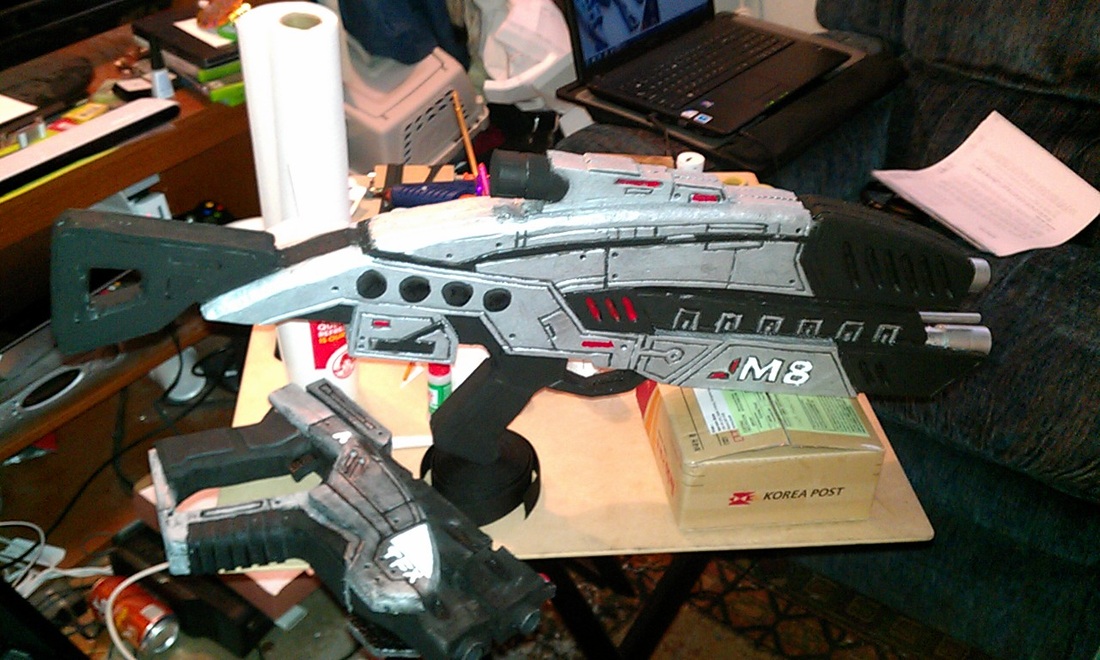
I'll have pictures with everything after the release, and I might even add a few of these to the store. Depending on the tools I can get, the price may or may not fluctuate depending on the quality. Keep an eye out! I have started a store to start alleviating tool costs and such. Not much on there at the moment, mostly due to current funding. As things get going, I will have much more up there for you guys to drool over. ;)
Go! Buy! I'm more than happy to make more. So Mass Effect 3 is coming out in a couple of weeks. I preordered the collector's version because the game is that awesome. I decided to bust out a set of armor to commemorate the occasion. It was a great way to learn a new medium, and I can honestly say now that foam is my new best friend. Those of you following me on twitter can attest to this. ;) I based how I did things using Volpin's methods, who based his off Evil FX's. Both did amazing jobs, so I highly recommend checking them out. As a warning, I took these pics with my phone, so they aren't the best quality. I have a friend who needs lots of photographs for a class, so I'll have pics to post from a photoshoot with her later. First up, the medium! 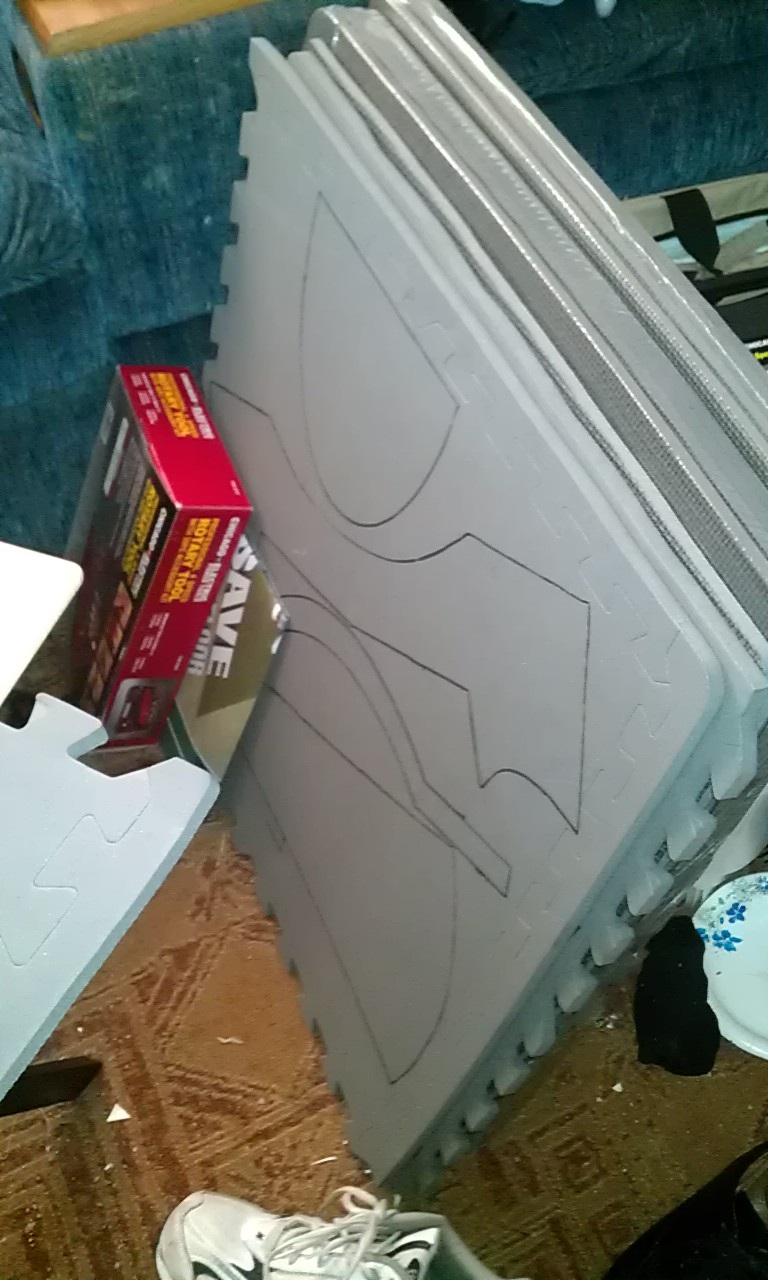
Yes, I used floor mats. Harbor freight has them for $10 for a pack of 4 2'x2's - one side flat, the other side patterned in a way that looks like carbon fiber weaving. It's easy to mark, moderately easy to cut (I used four exacto blades for this), and it's light and durable. Did I happen to mention it's cheap? No? Okay. Well it's cheap! I didn't make my own pattern, mostly because I don't have paper rolls handy yet. I used one from Ithica, found on the 405th.com forums. It was a pretty basic pattern, admittedly, but considering how much time I had I didn't want to get too fancy. After completing it I can tell you every problem it has, but I was more concerned about getting it done in the meantime. First I assembled the arms: 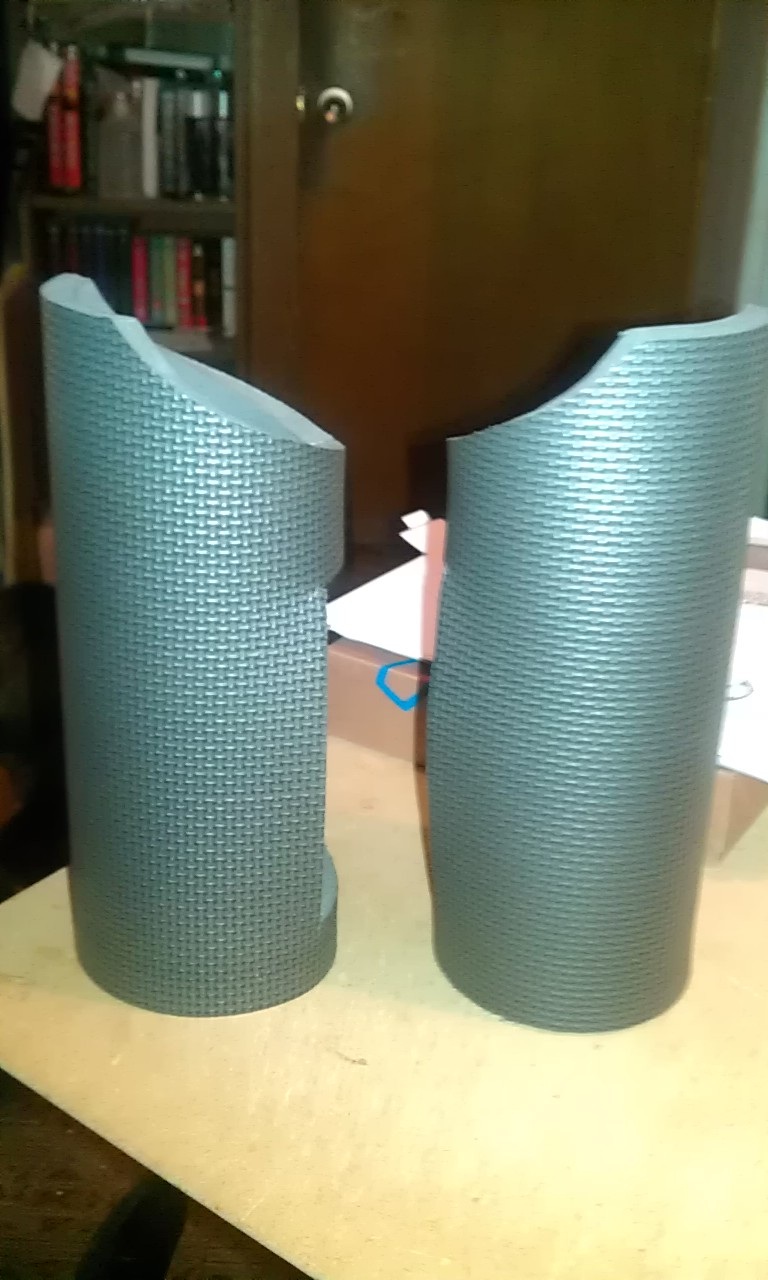
Or at least the main section. Had to use a dremel to round out the part near the elbow, then later I cut the connecting sections and strapped it better. More pics later for that. After that I cut out the chest and got to work with a wood burning tool to etch in the details. 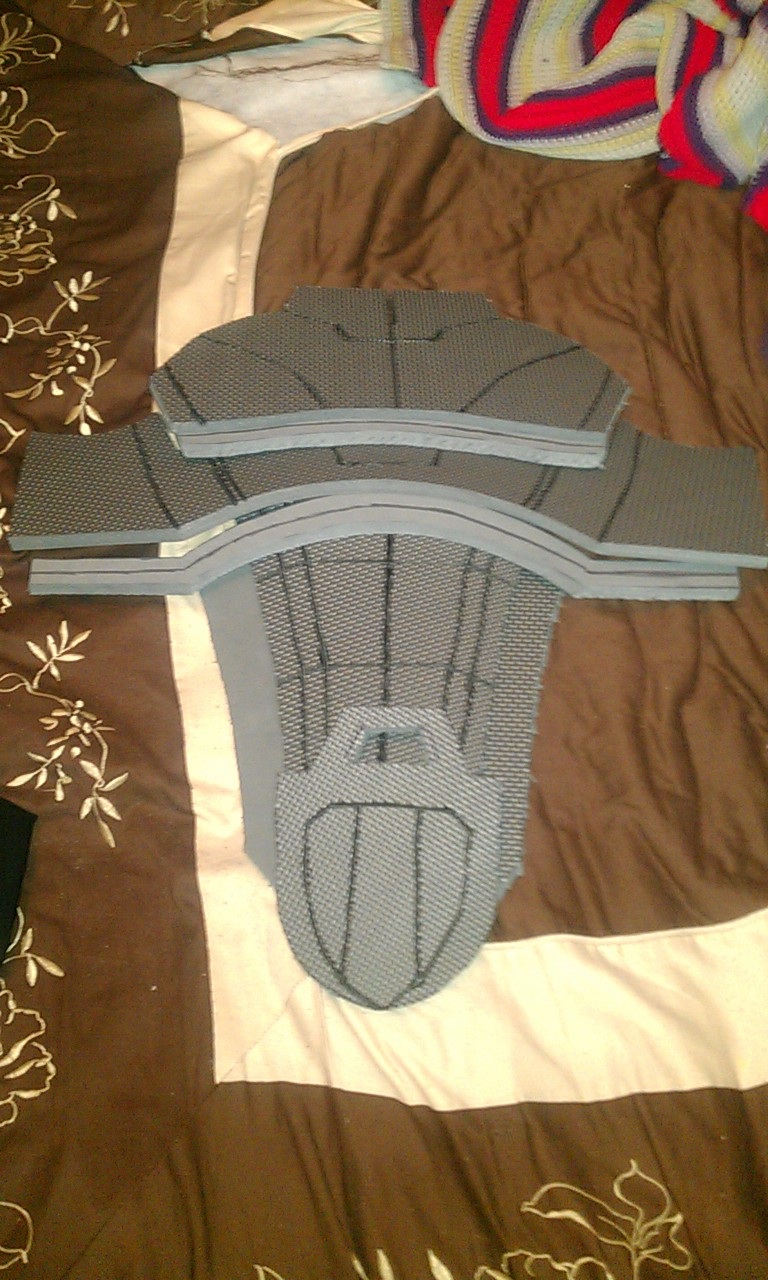
It was at this point I started seeing how little room I have to work, let alone store this stuff. Our little shed outside is cramped, due to it being filled with model train stuff from my wife's grandfather, leaving a small path for extracurricular working (you saw it with the sledge). I also noticed the connection pieces for the front were way too thick and I didn't like them. I tossed them and grabbed some craft foam from Walmart to use, which you'll see later. In the meantime, I used my trusty dremel and sanded down key spots:  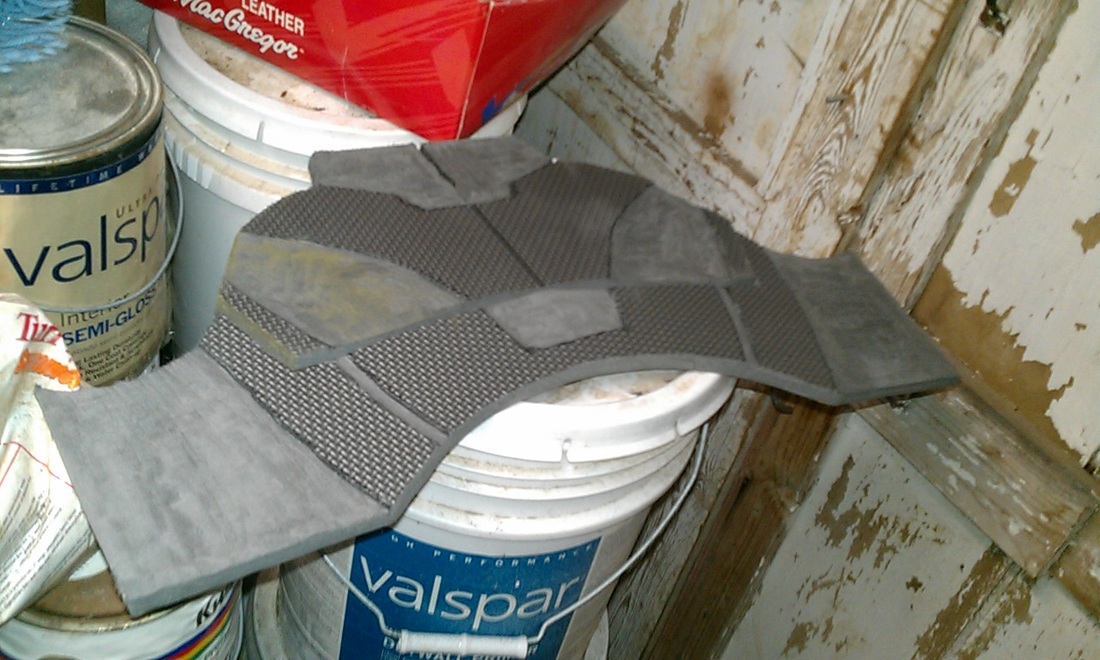 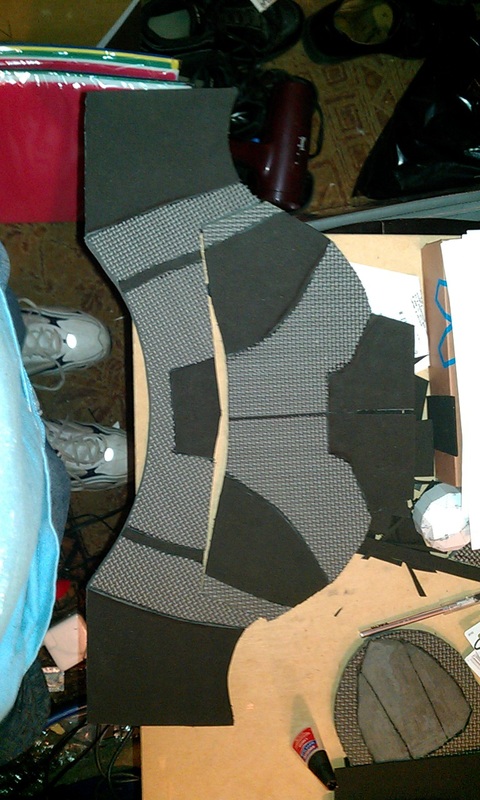 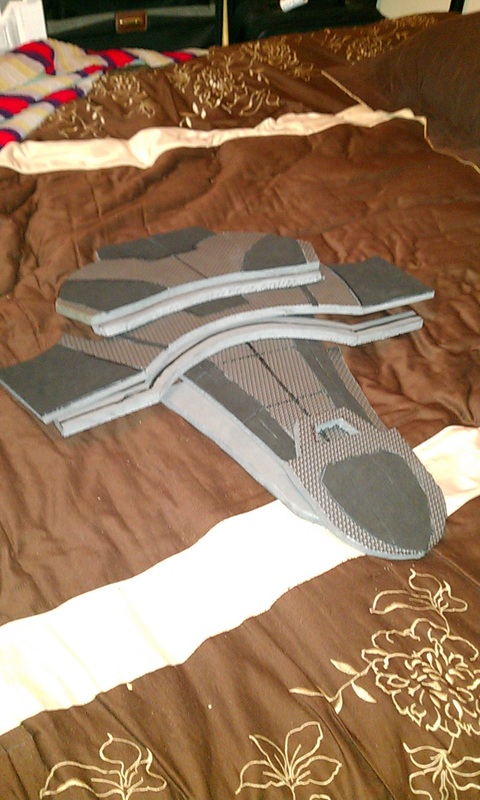 ...and added that same craft foam to make the section smooth rather than spend hours learning how to smooth it evenly with the dremel. That's one technique I stole from Volpin, and it was much easier than learning the latter and having to cut a new piece or six. I assembled those, swapping a couple more detail pieces with craft foam, then shaped it using the oven (no heat gun yet - taxes soon!). 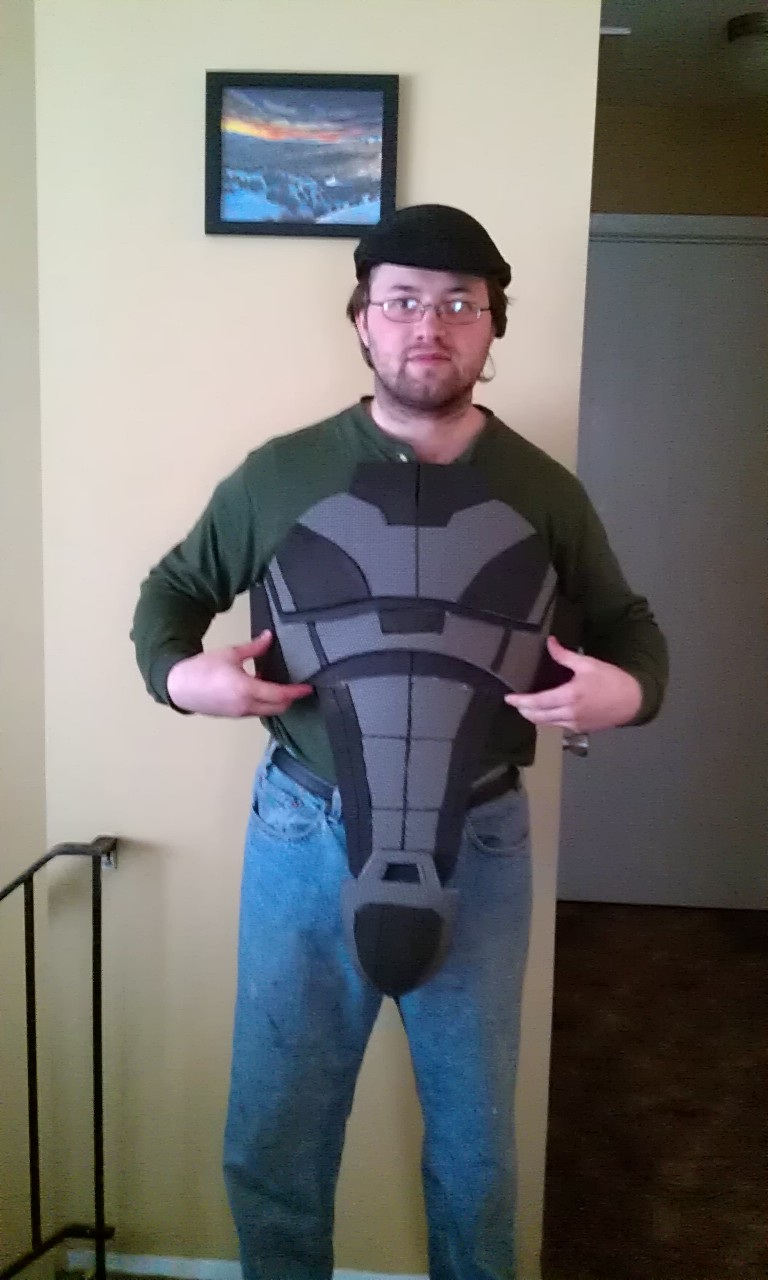
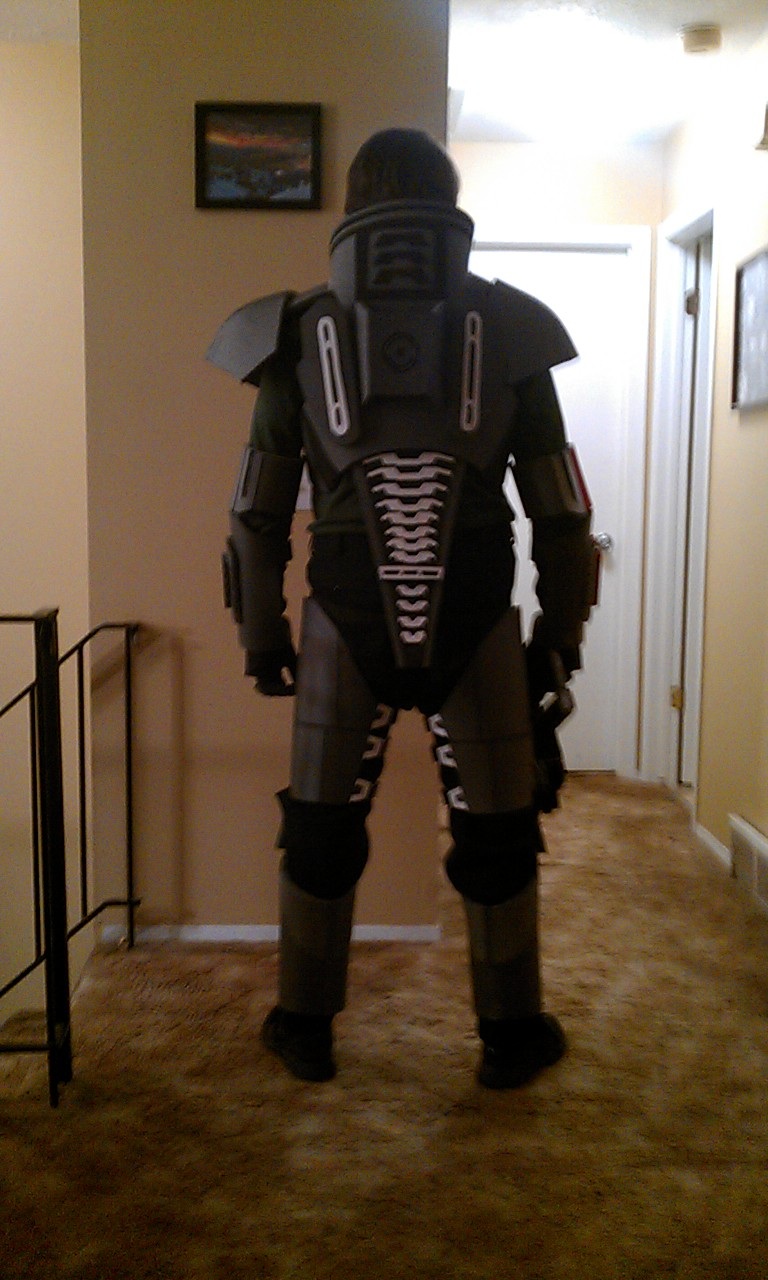
The back, by far, is my favorite section. Here's a play-by-play: 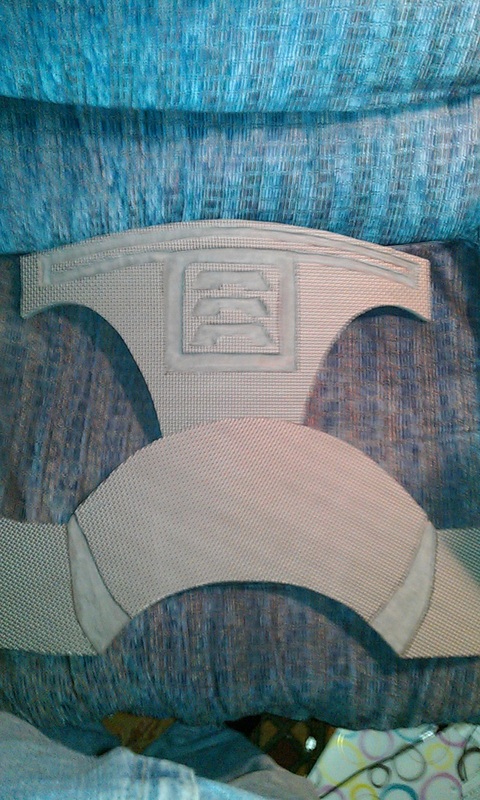 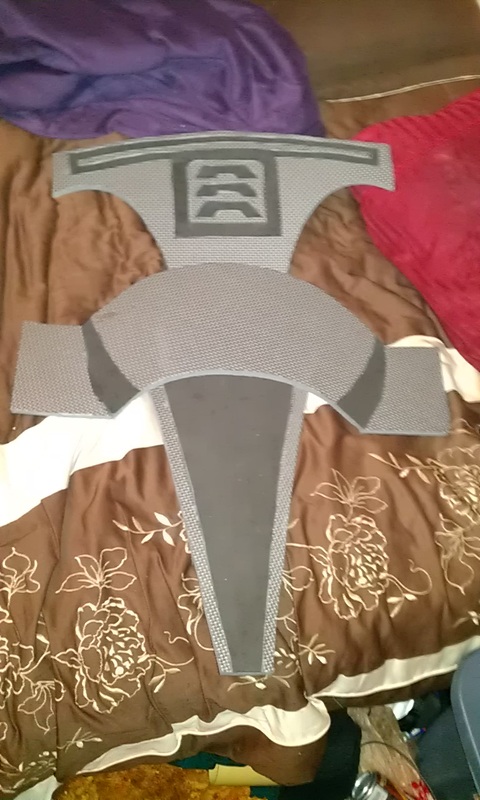 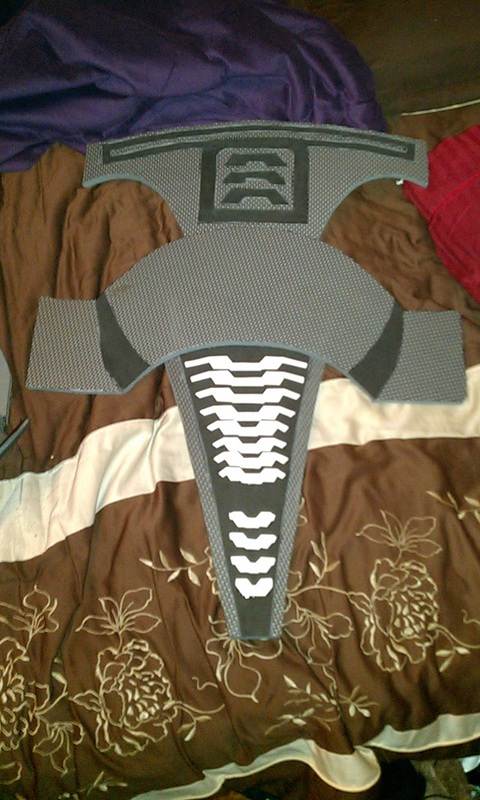 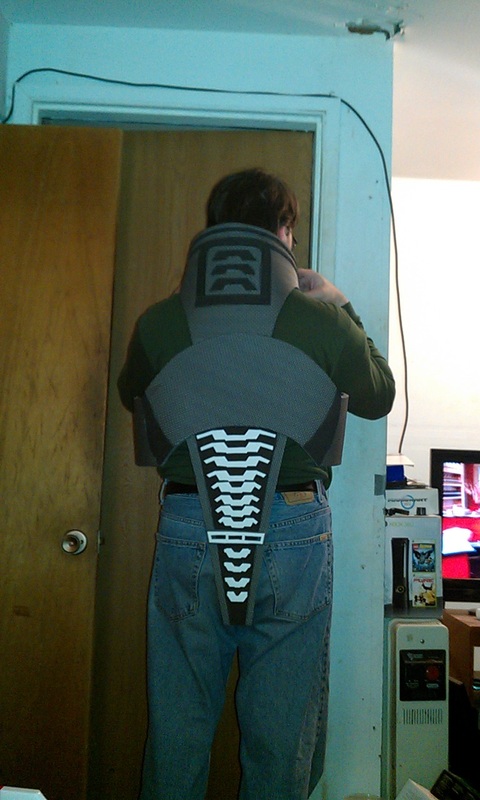 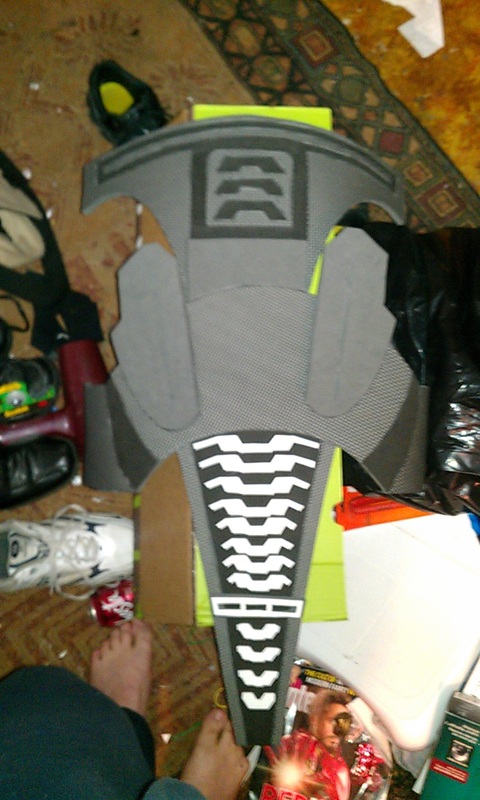 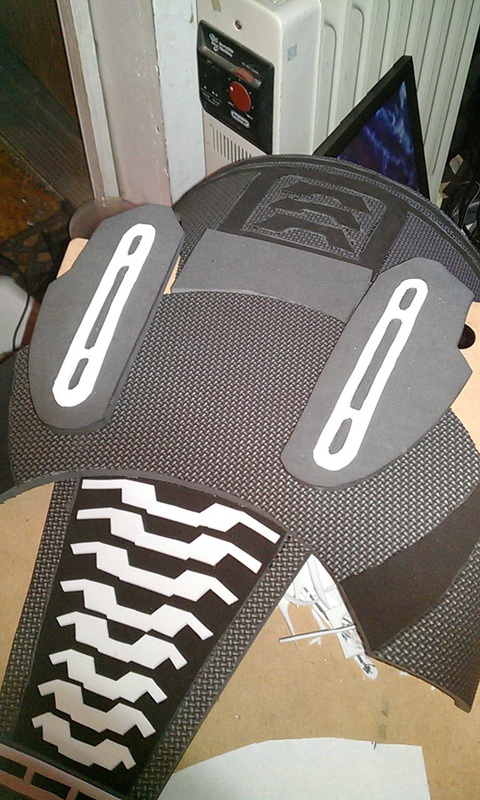 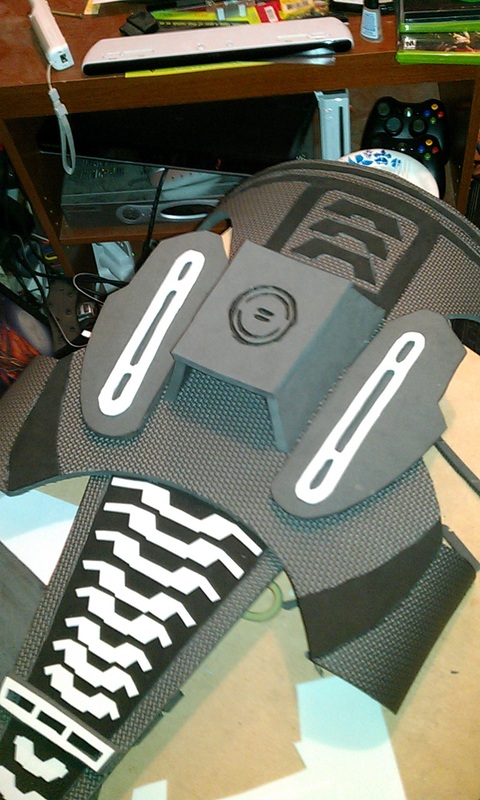 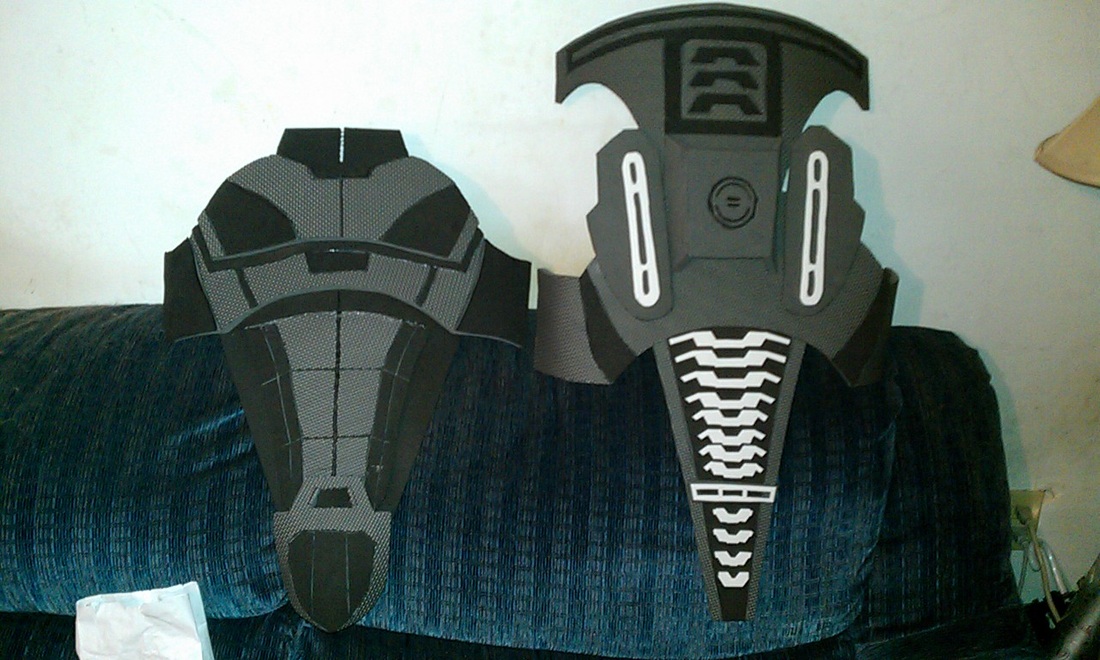 I'm really proud of how the back turned out. I was getting frustrated there, what with work and the lack of time I had, but that made me push even harder to get things done. Of course, at this point I had to wait for the straps, so I started working on the other parts. I won't go into detail on those yet, but I will show you the pistol I made! It's the M-3 heavy pistol. Yes, I know, the M8 rifle is the classic one, but I wasn't sure how much foam I would have left. I used the same foam for this and, though it didn't turn out 100% the way I wanted, it still turned out pretty friggin' awesome. I used another simple template: same forum, from GeneticSpartan. Here's the rundown: 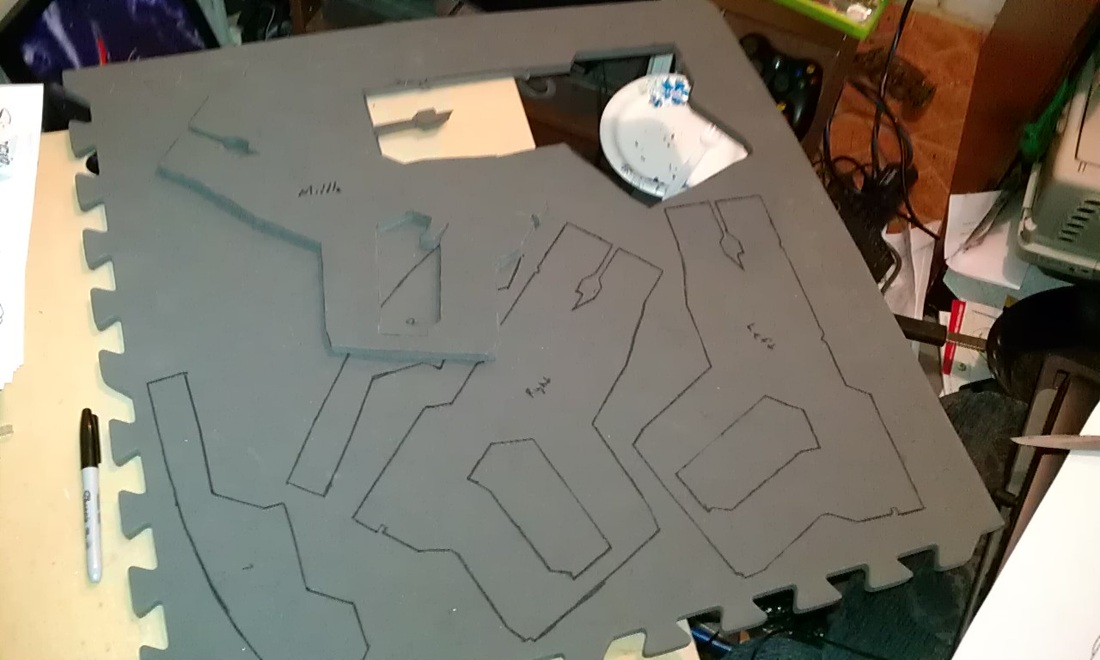 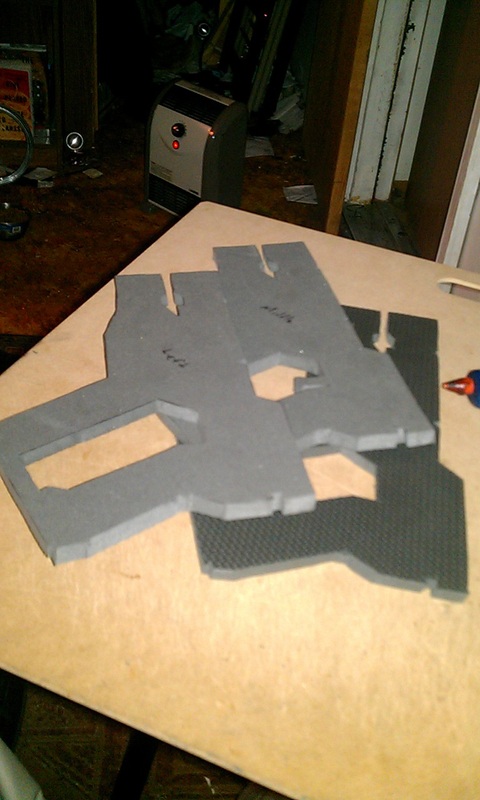 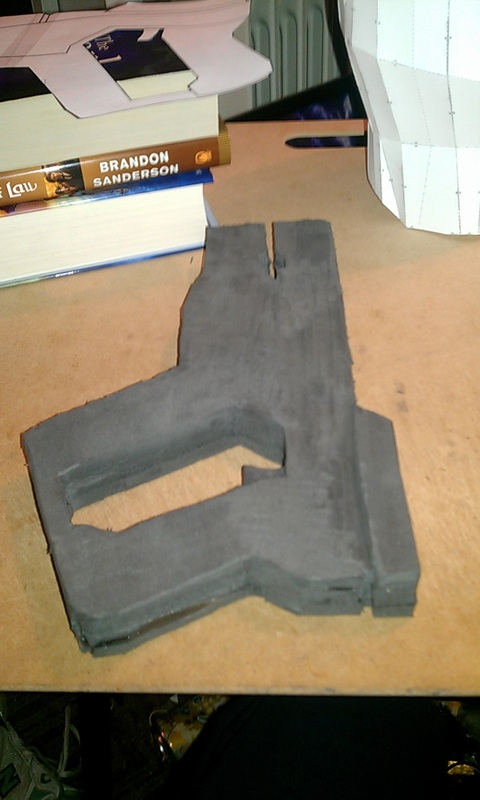 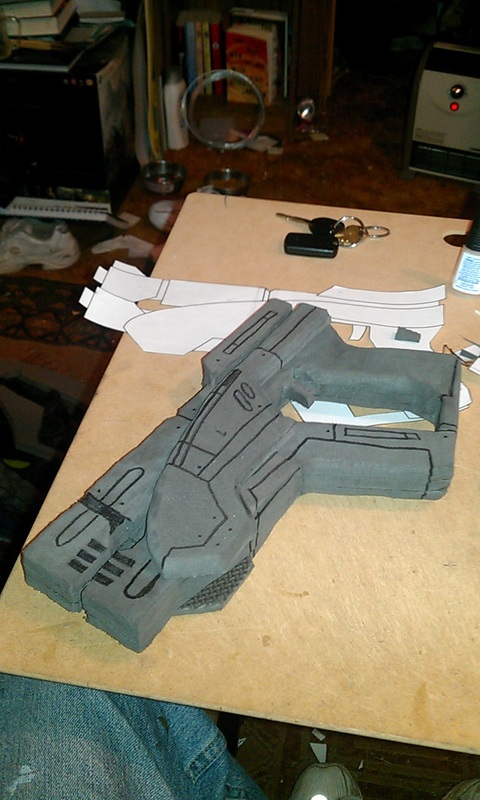 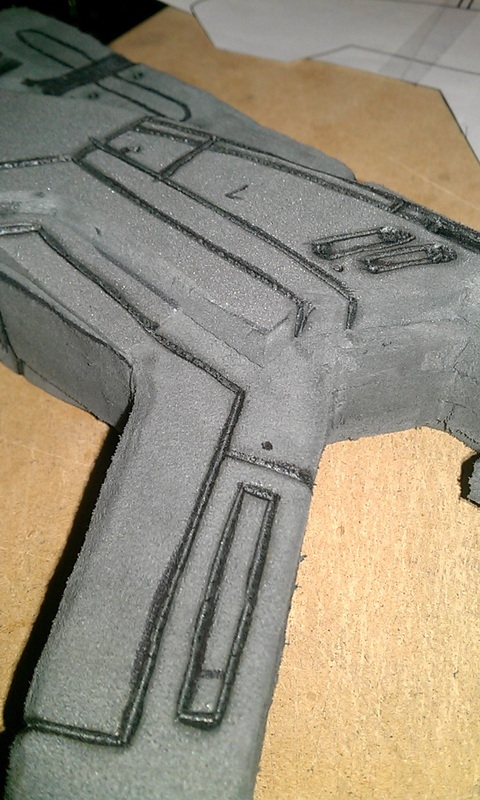 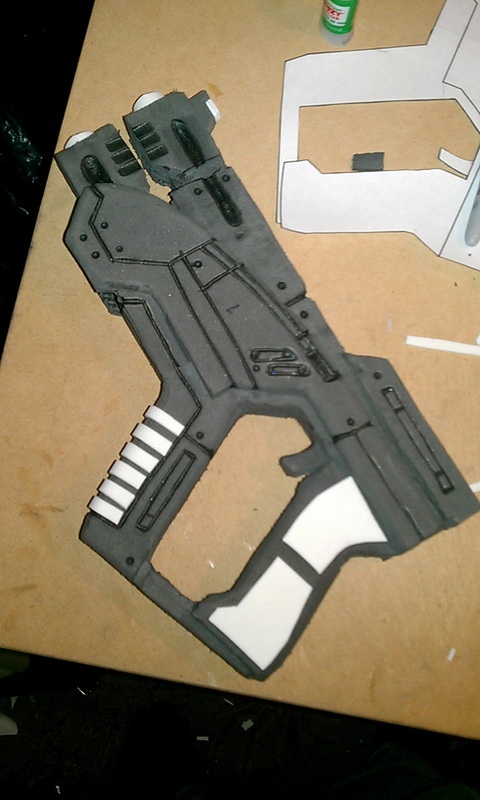 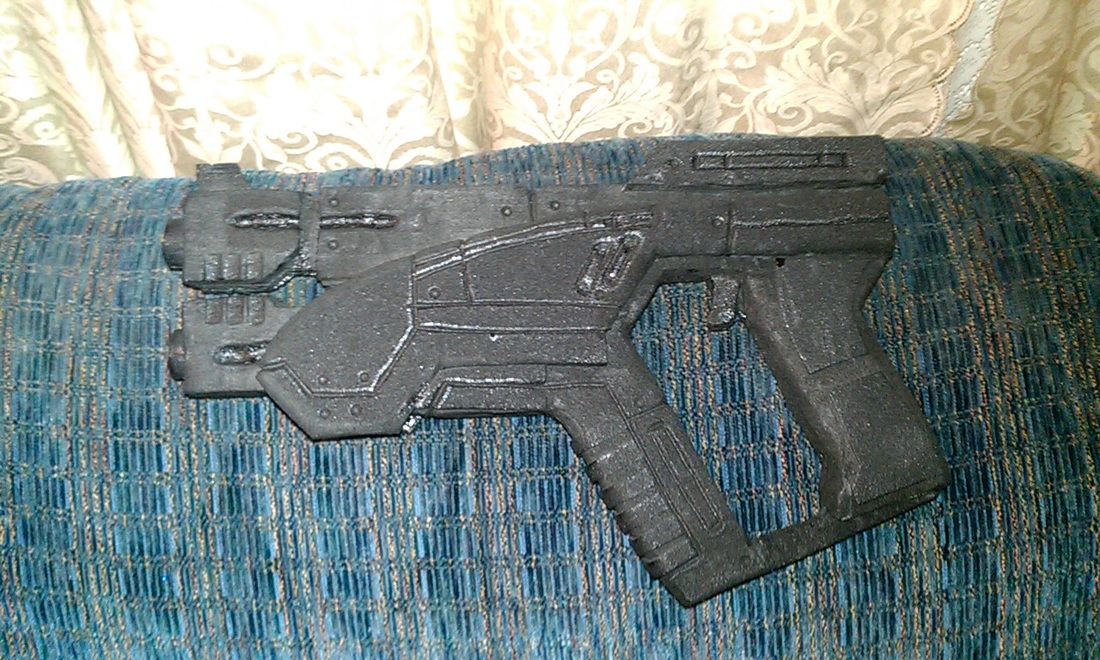 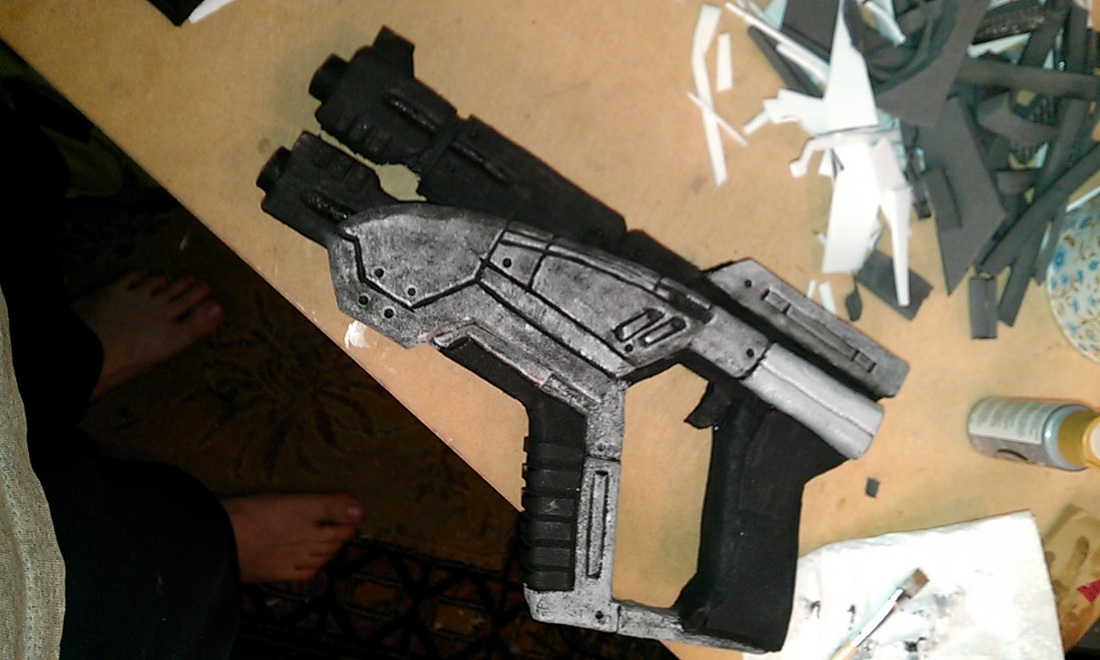 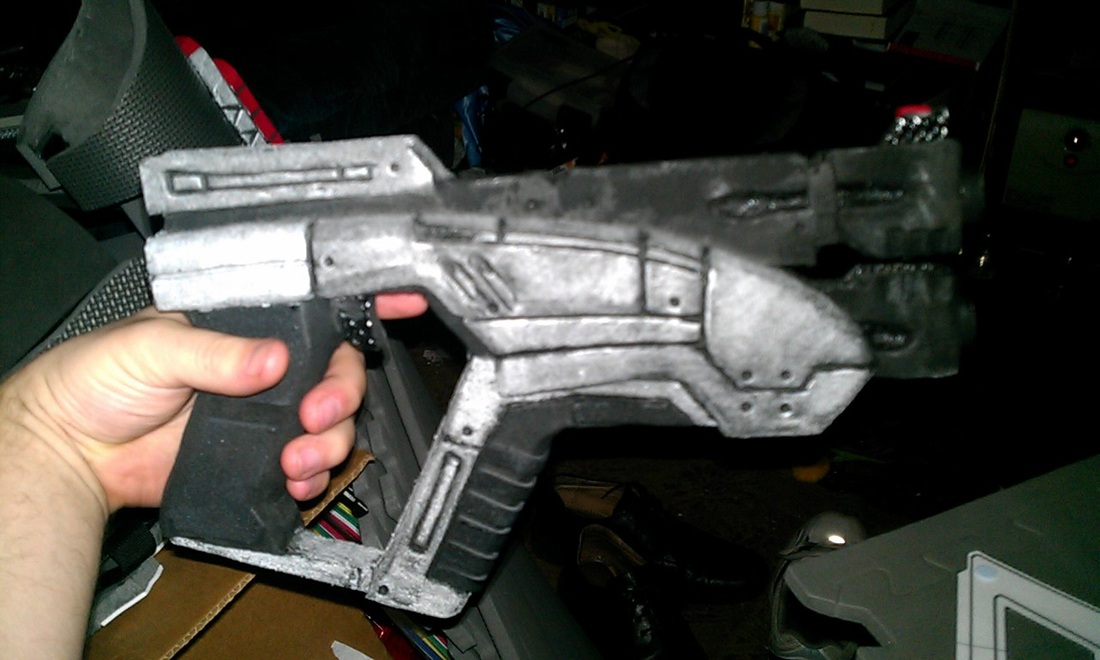 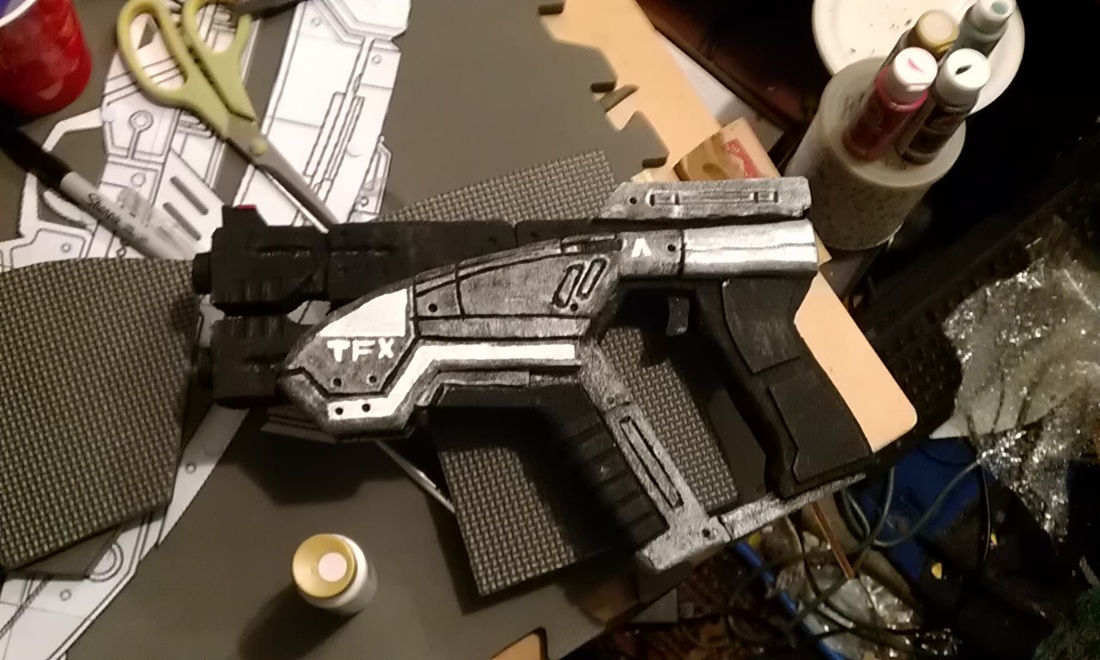 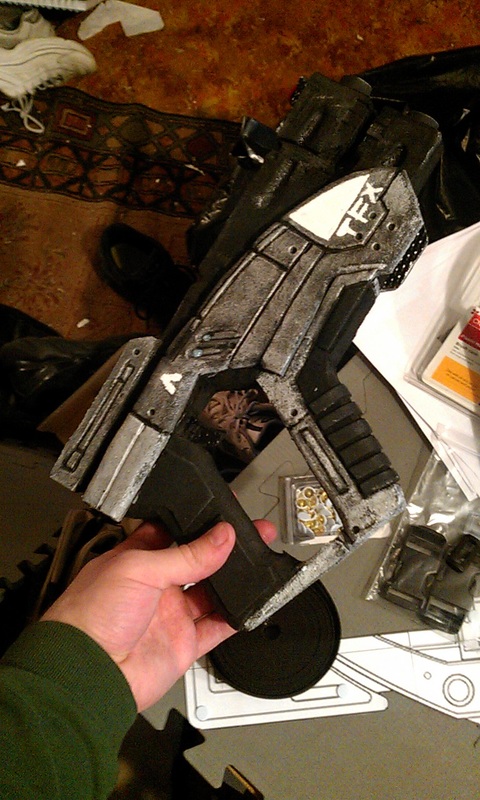 Same tools: dremel, exacto, wood burning tool, and hot glue (those books I used for weight). I think it turned out very nicely. Next one I make, though, will be cut out with a band saw - cleaner, more even, and I can cut out all three layers at once! :D Of course, during all this the straps came in, so I was working on both about halfway through the pistol. Here's me strapping the chest and back together: 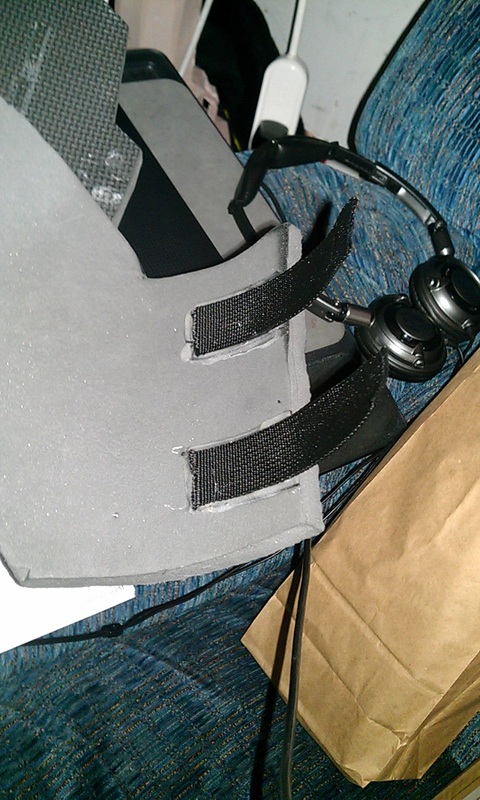 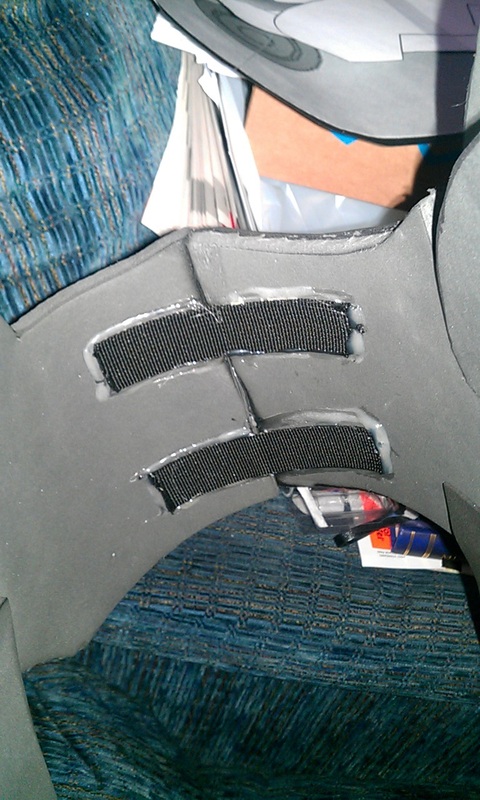 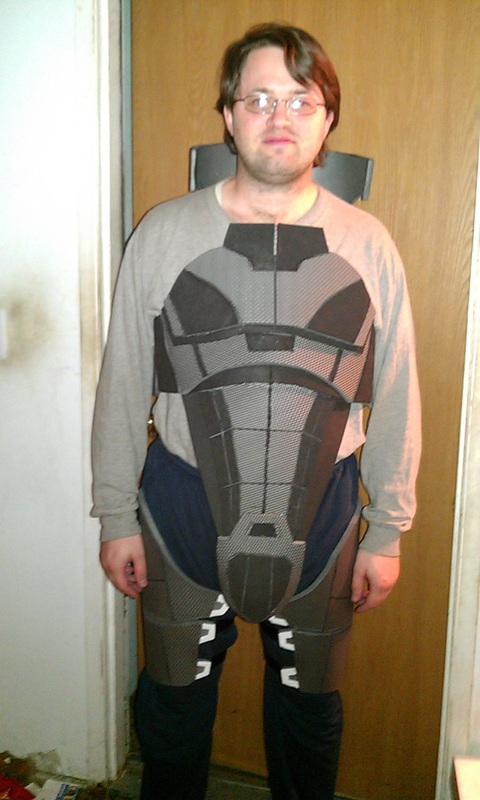 I overglued the straps, to make sure they didn't fall apart on me. They may still, but at least it'll last the two or three hours I'll be wearing it for the release party. I put buckles on the other side, so I could get in and out easier. I also strapped the thighs with buckles, which turned out decent (I only liked the detailing and the buckle sections, so I won't bore you with the rest of it). Now that the hard stuff was done, I started pumping out the last bits! 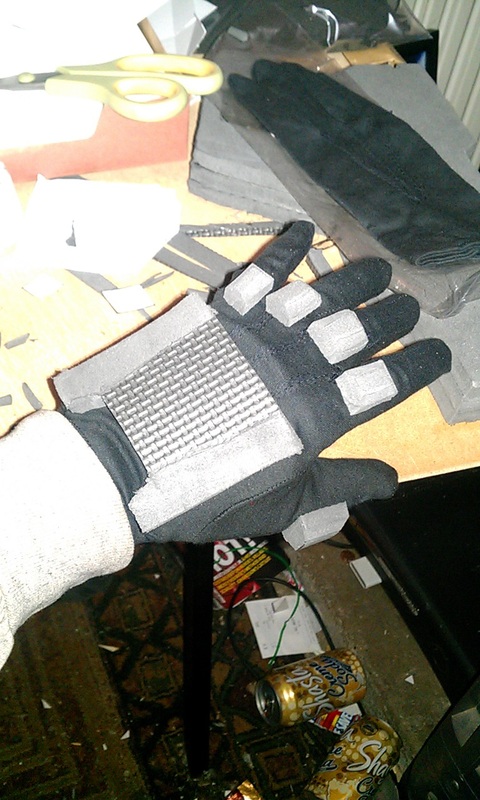 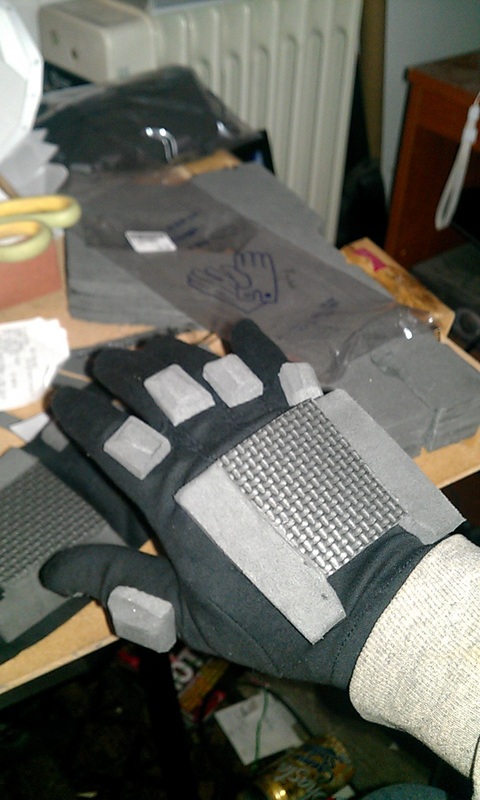 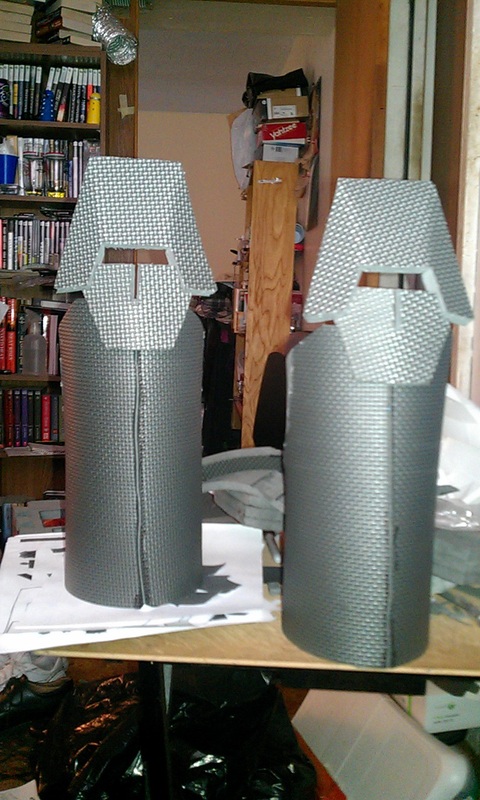 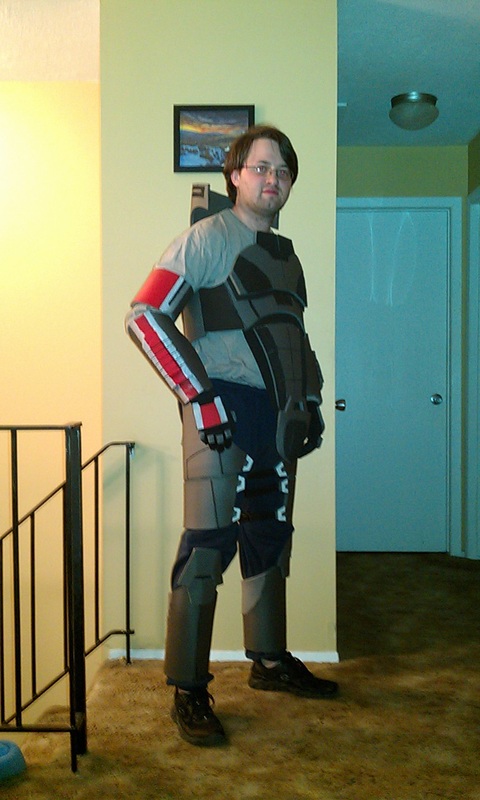  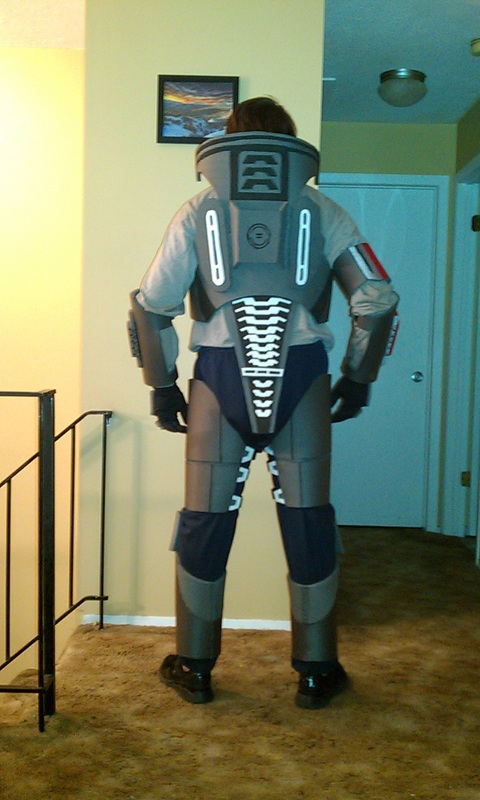 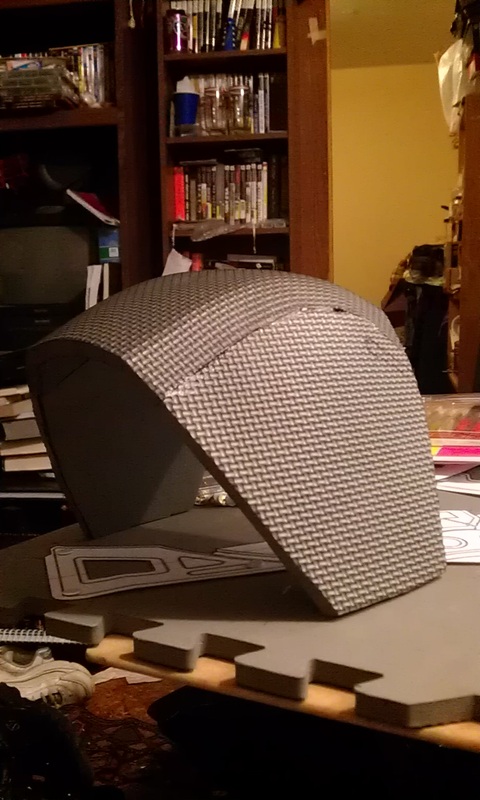 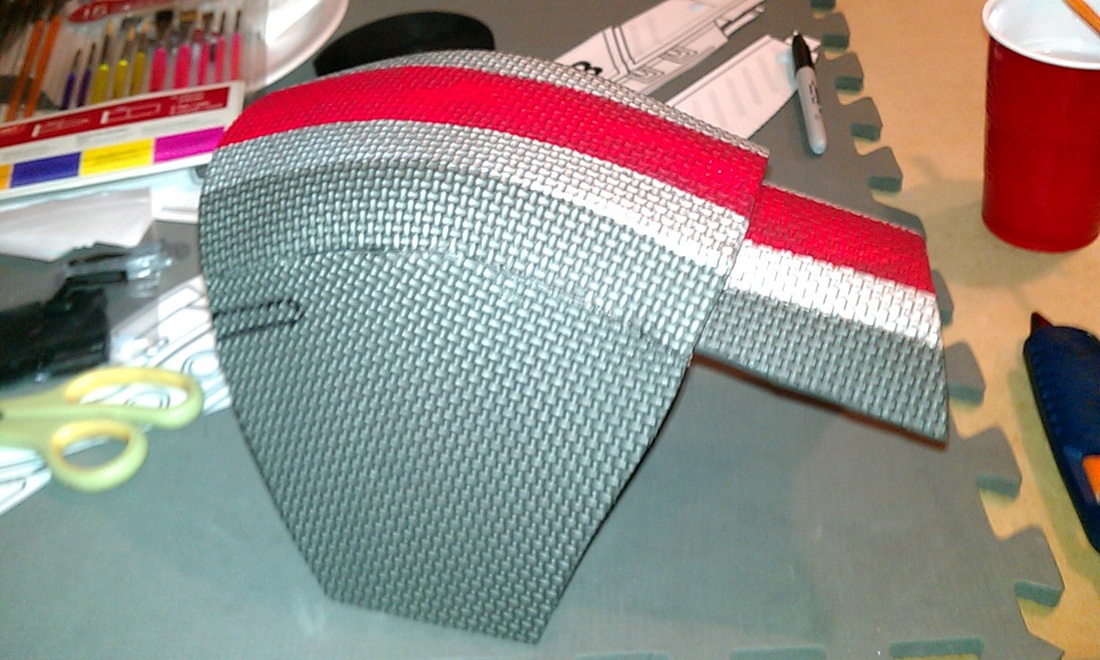 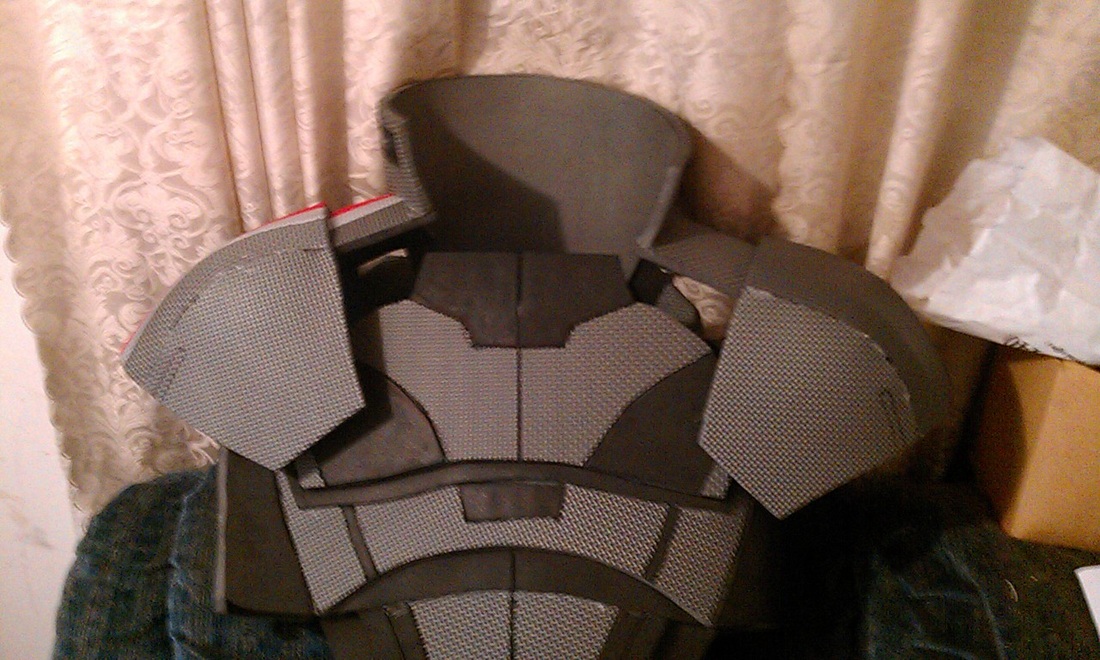 I used some basic acrylic to paint the stripe, all by hand since I don't have anything else. I have a red spray can, but no tape at the moment for a clear line with no overspray. The pattern is a great guide, though, so there were no problems keeping it straight. I know there are also better, more permanent ways to color the foam, but again, as this is only going to be used for a few hours at most, I'm not worried. And now, for the final shots! I only need to burn in some small details on the shoulders and add a strap to the biceps, but besides that the pistol and armor are complete! 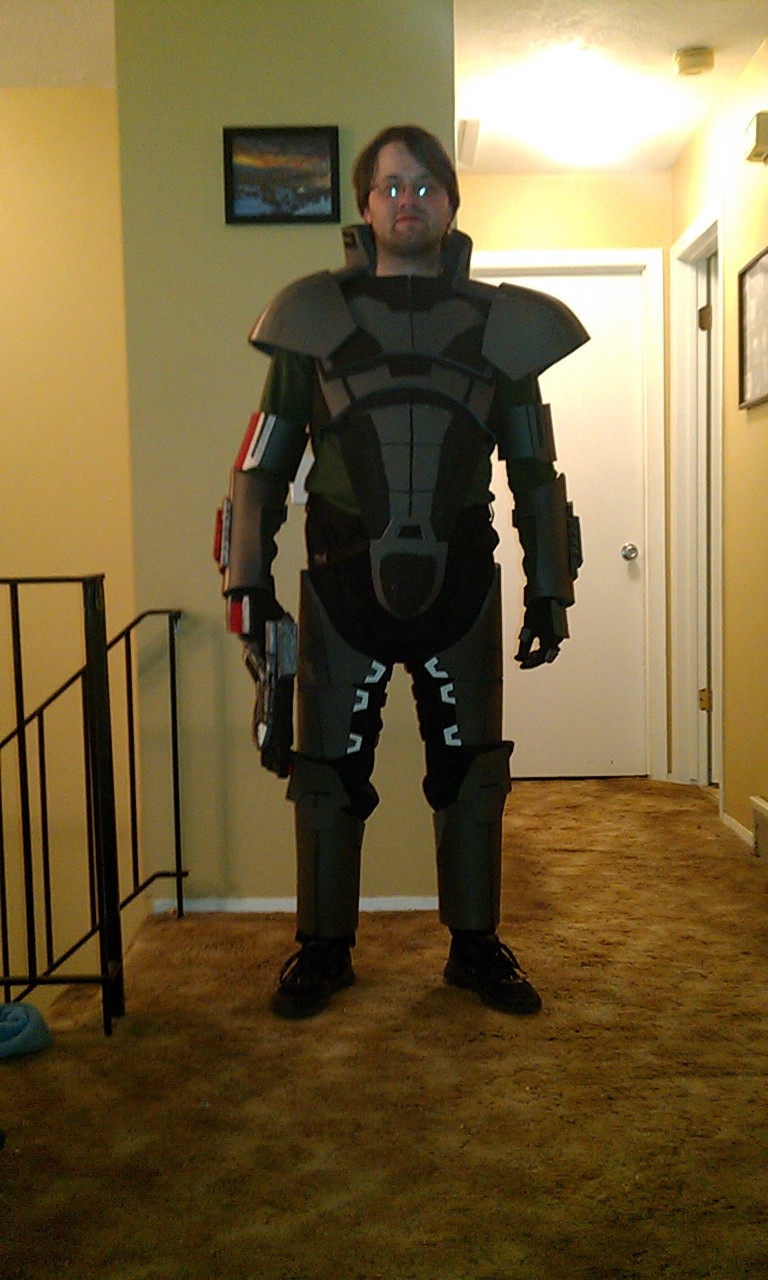
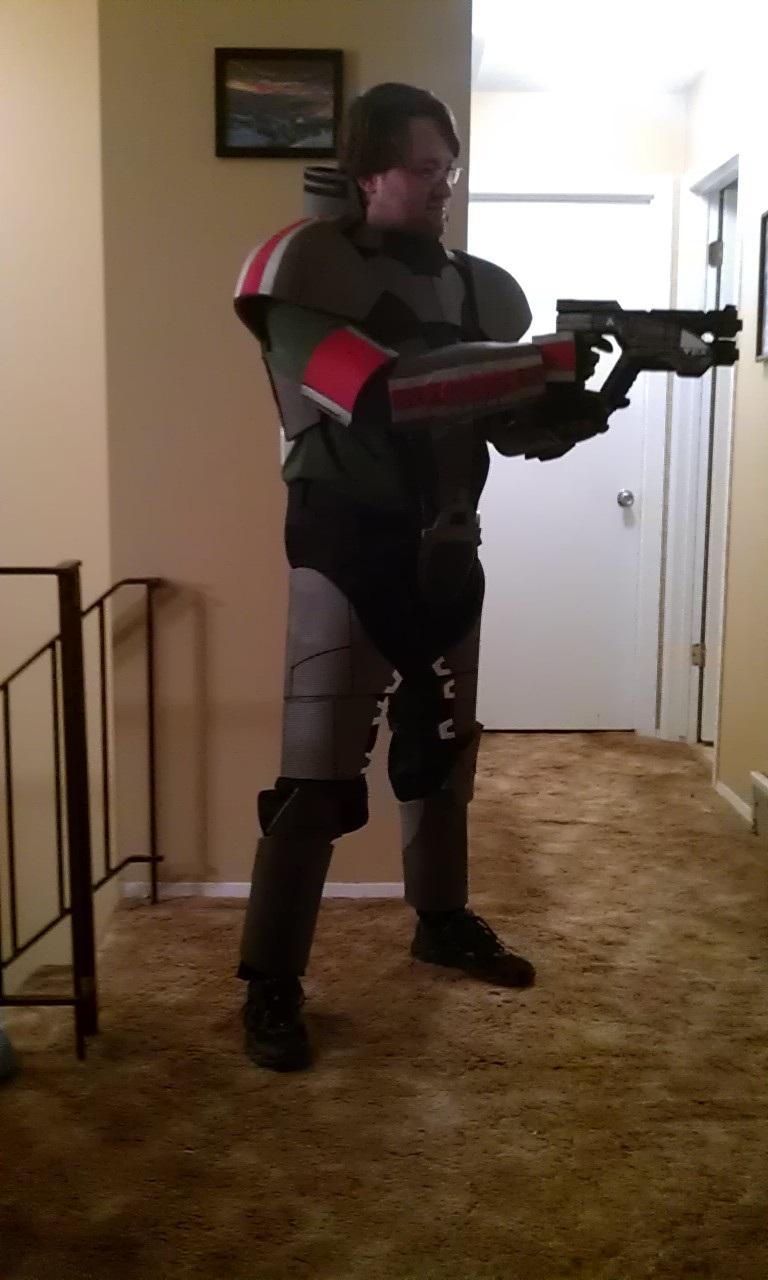
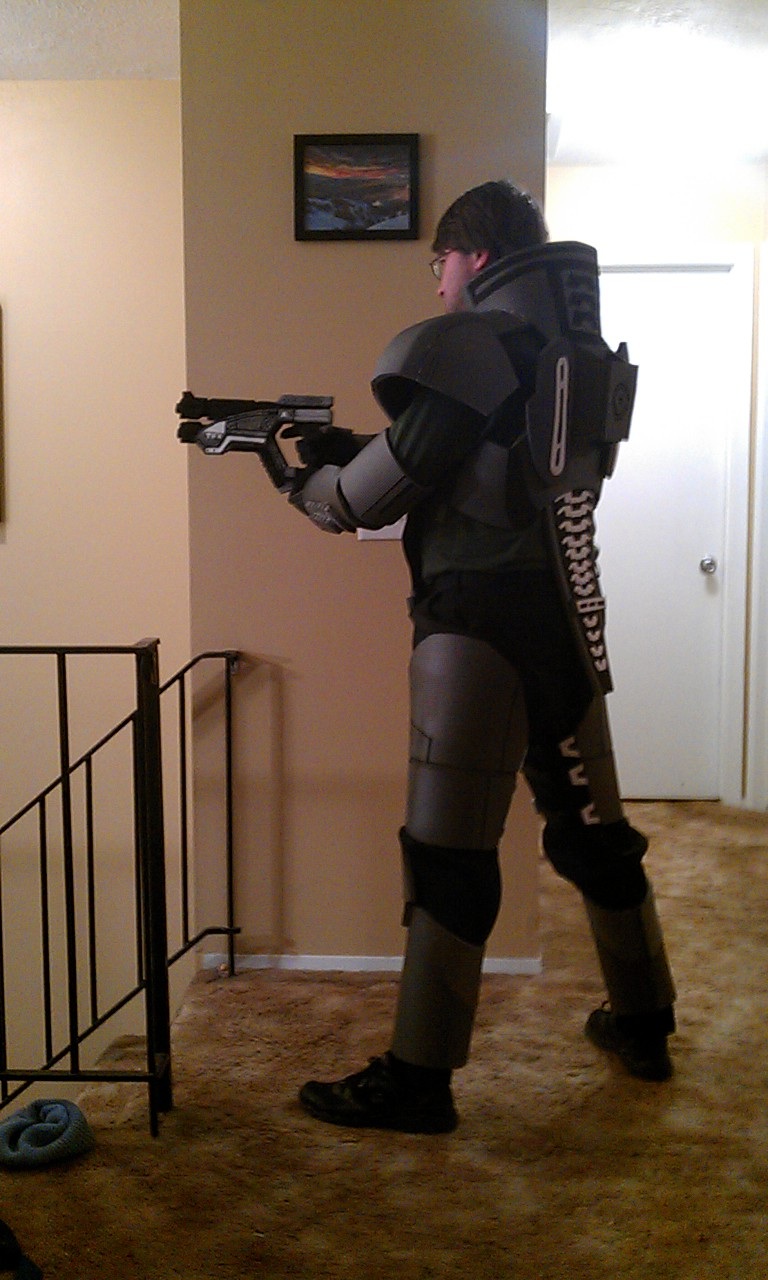
Couple of silly poser shots there at the end. I'll have a post soon with the photoshoot and higher quality pictures. Meantime, let's see if I can bust out the M8 in time!
Wanted to make sure everyone knows I am still here - just been working. I have another set of armor I'm working on where the deadline is much sooner, so I will have an official post about it soon. I'm still working on the Fallout stuff, so don't worry I haven't abandoned it.
It's too awesome to give up! :D Anyway, right now I'm just waiting on straps and buckles. Soon as they get here I will post a big update for ya! |
|
 RSS Feed
