|
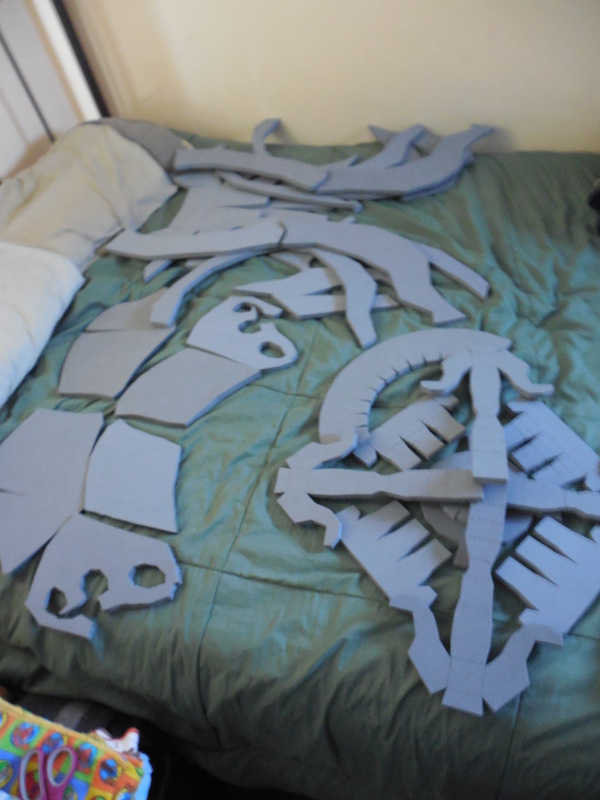
Oh boy. My first attempt at something massive. I'm daunted even writing this write-up about it. First, let me show you my inspiration for this massive thing. This is the giant robot that YouTube and WIRED Magazine got together with the Stan Winston School and Legacy Effects to make for San Diego Comic Con 2013. Whew. Did I get all those links? Okay. Anyway, what they wanted was a huge cosplay to bring to SDCC and show the world why practical effects are still a viable option. When I saw it, I said simply, "I'm-a make one!" This is one of the few times I've really absolutely had to make something, with the last big one being my first set of N7 armor for the ME3 release. This time, just like then, I immediately had a reason for it. My local convention, Anime Banzai, has a certain theme every year, and this year it was giant robots and mechs. So, I thought, what better way to fit the theme than with a giant friggin' robot? First up came the research. Lucky for me, SWS has a YouTube channel where they share a lot of great information. Right after SDCC YouTube held Geek Week, and every day of that week Stan Winston School shared a five to ten minute clip of the process they went through to make theirs. This made it a lot easier for me, since I wanted to make one that was similar enough to theirs, though maybe with less electronics and stuff. I also learned that while it only took them a month, they had over twenty people working on it. I had about two months to build, and just little ol' me. Undaunted, I set forth! 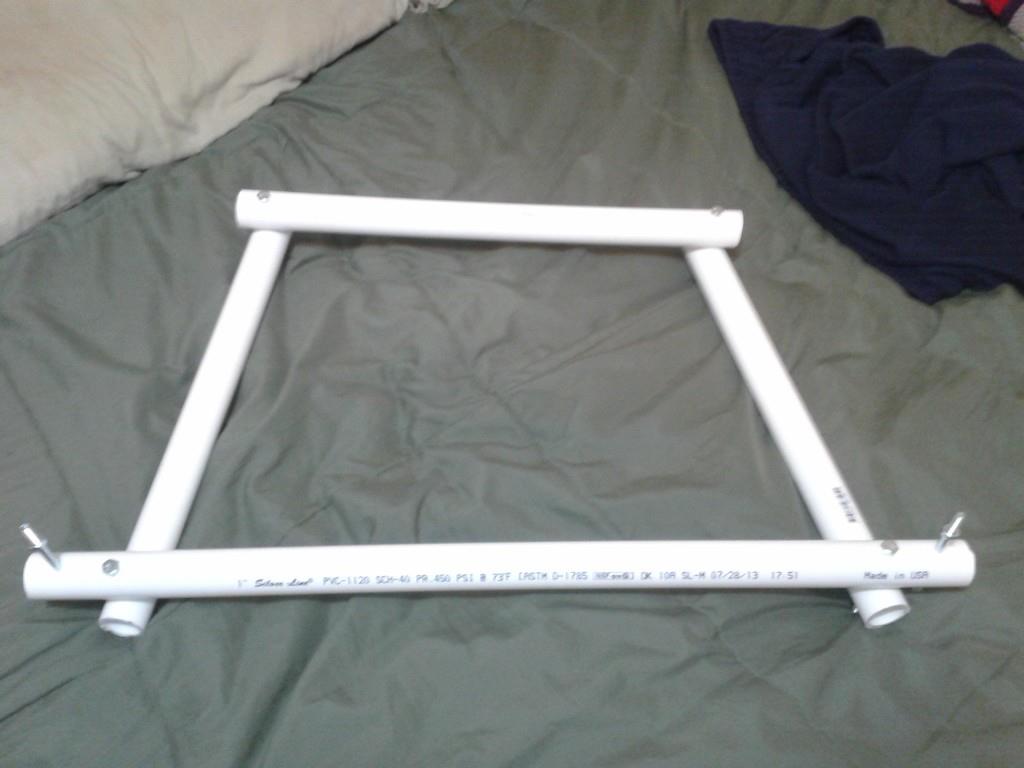
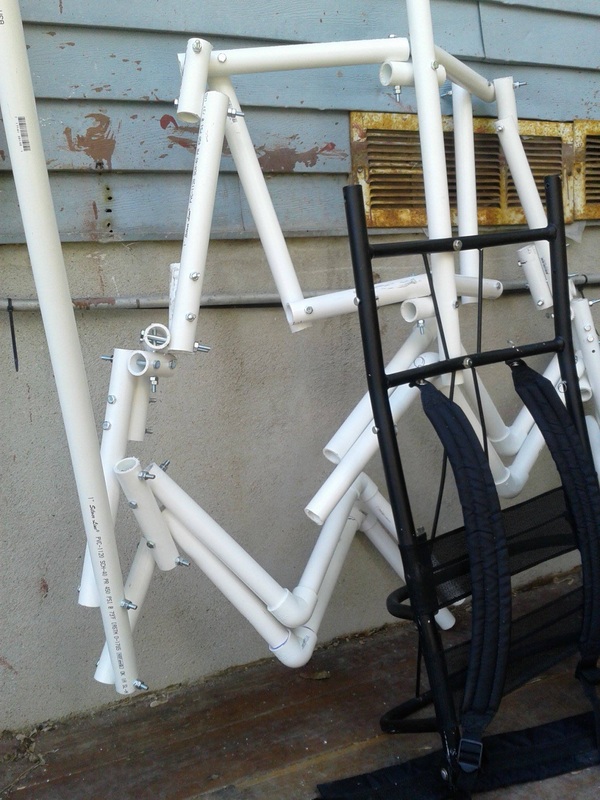
Right away I thought I had a problem, as this was the back and I initially thought it would need to fold forward a bit as I stretched with it. Turned out later to be more of a hindrance, but I was doing this on the fly. 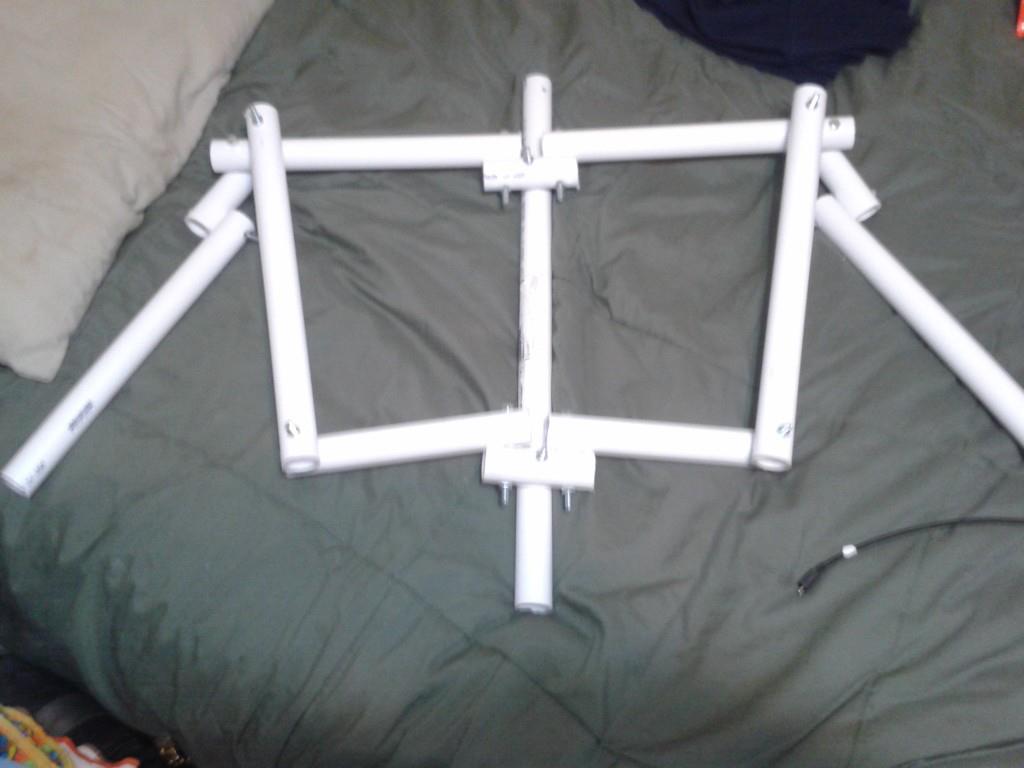
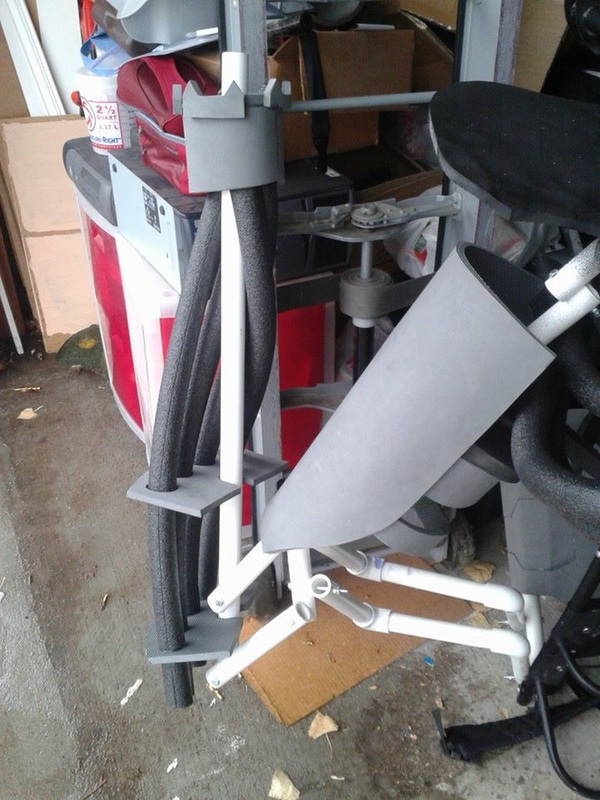
Put in a bar for the spine support and added an extra pipe at the top and bottom. This would allow for flexing of the back. I also initially had the shoulder bits at the top directly attached to the arm, until I realized they not only needed up and down movement but forward and reverse movement as well. 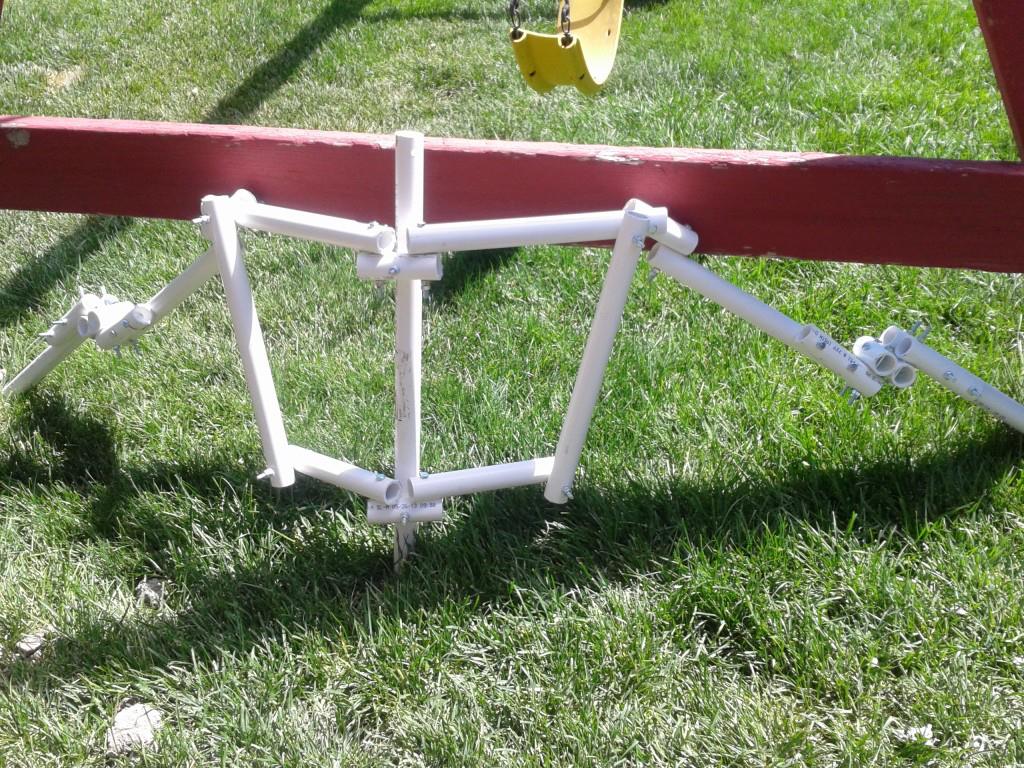
I had to start working outside here, since it was already way too big for the room I work in (back in my parent's house, very little room for anything unfortunately). The twisting motion for the arms was a pain to figure out, and quite a bit bulkier than I had wanted, but again it worked and I had to stick with it. 
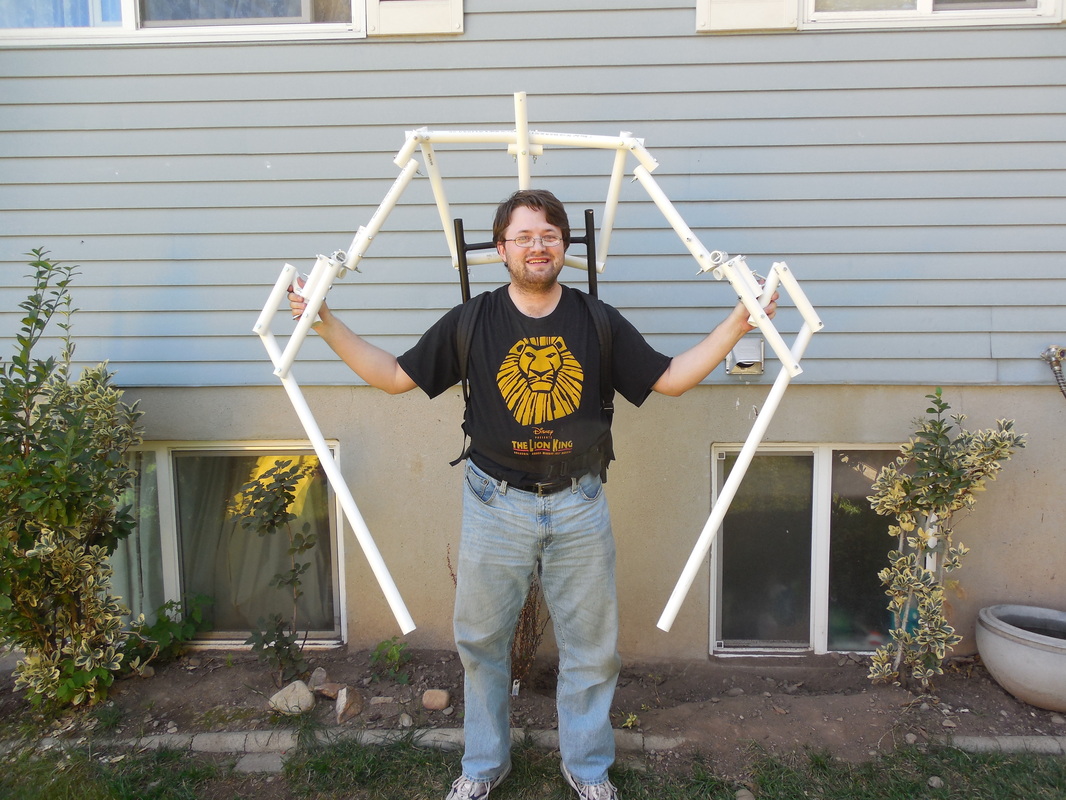
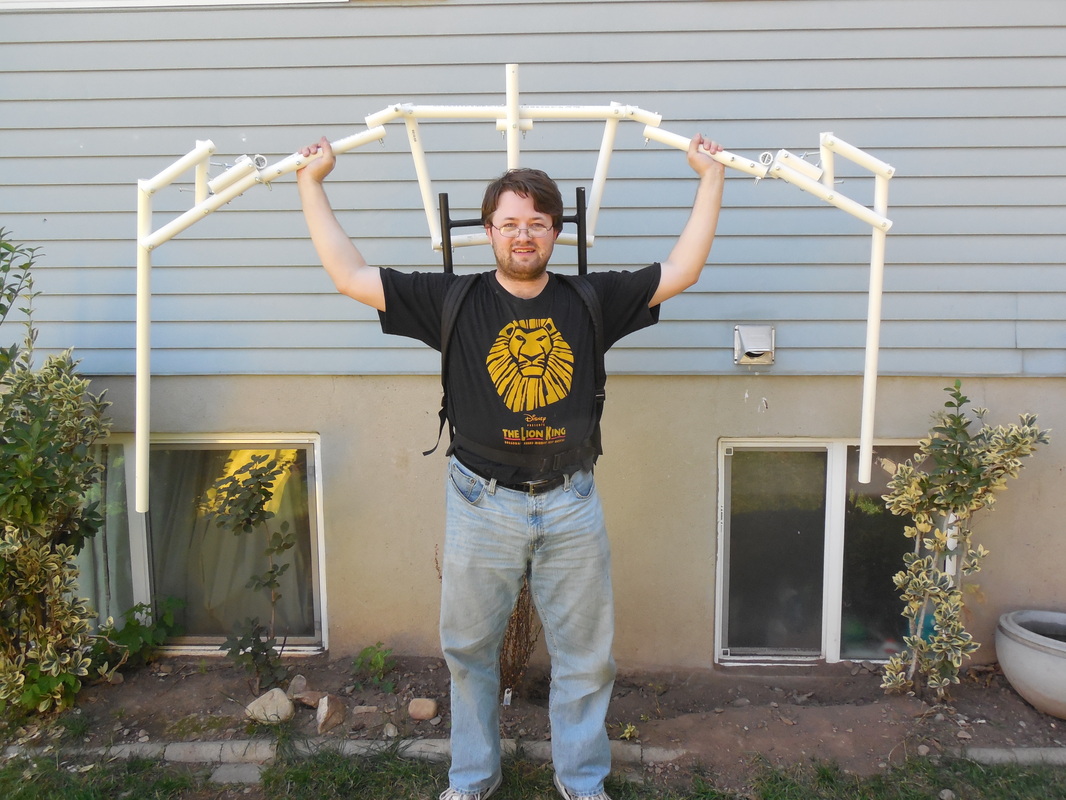
The elbow joint was easier, and demonstrates how the whole thing will work: a bunch of parallelograms! Keeps everything even, and makes movement 1:1 (hopefully). Now that the upper, massive arms were laid out and attached, it was time to secure it to me and start working on my arms, which would power them. 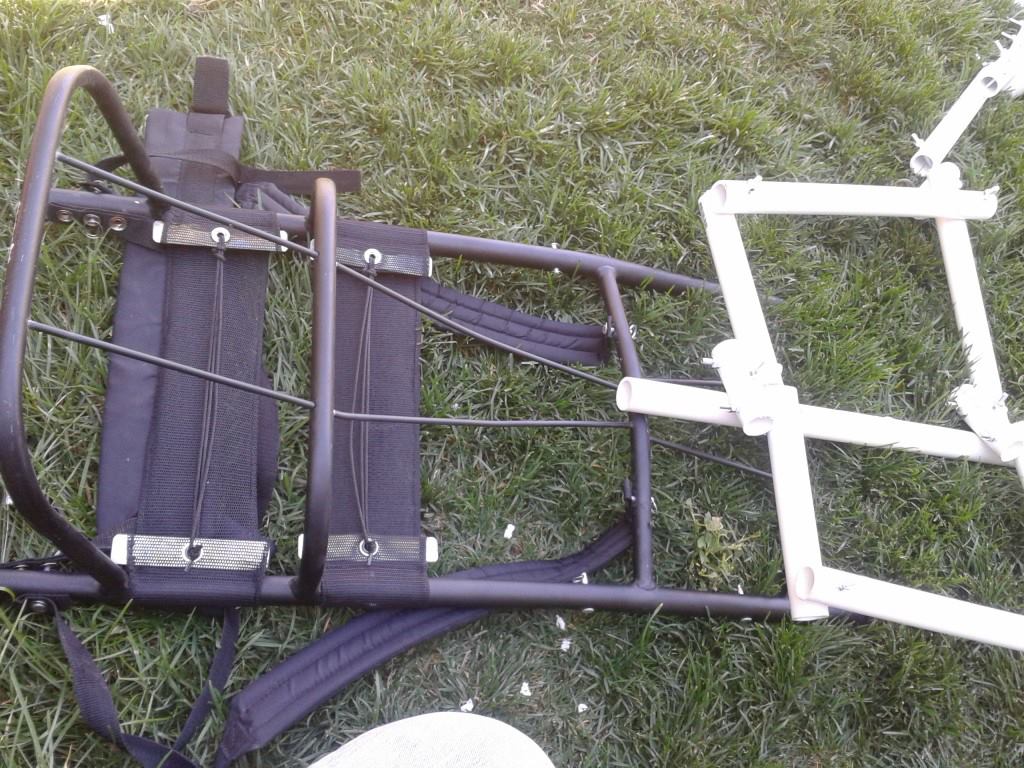
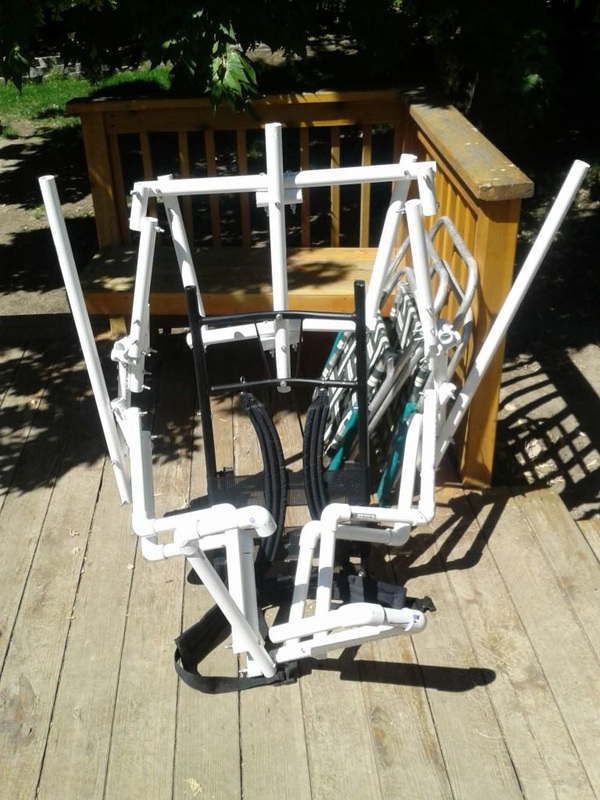
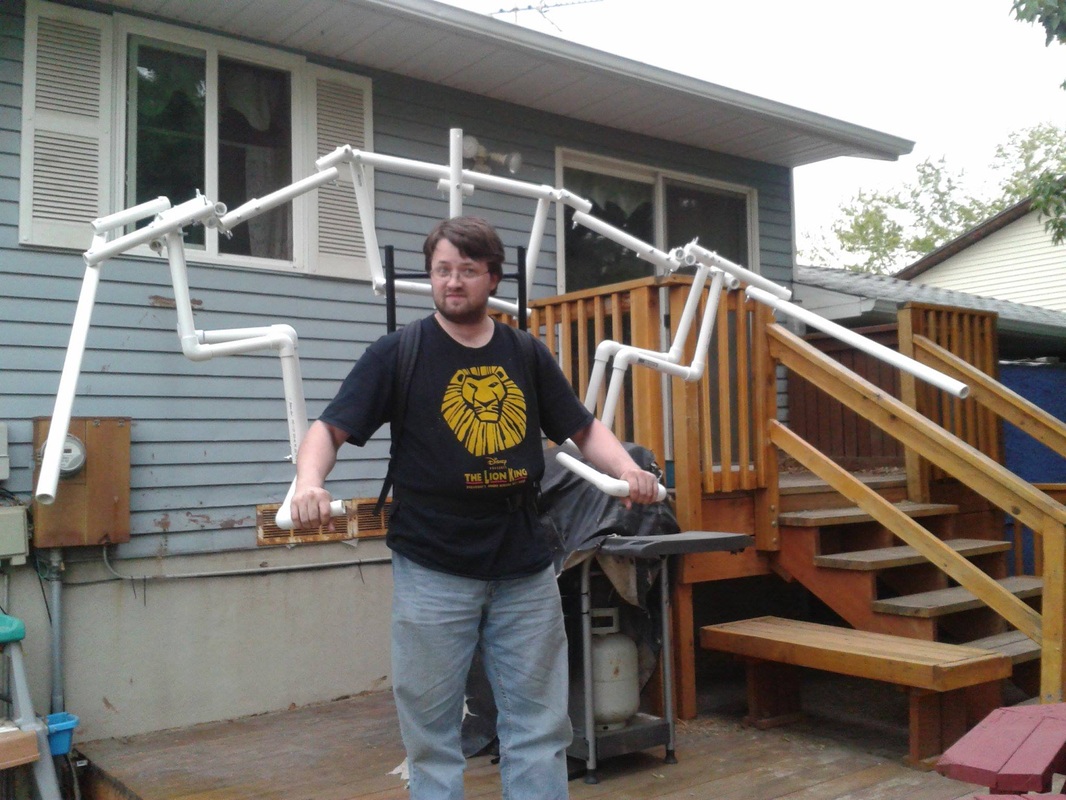
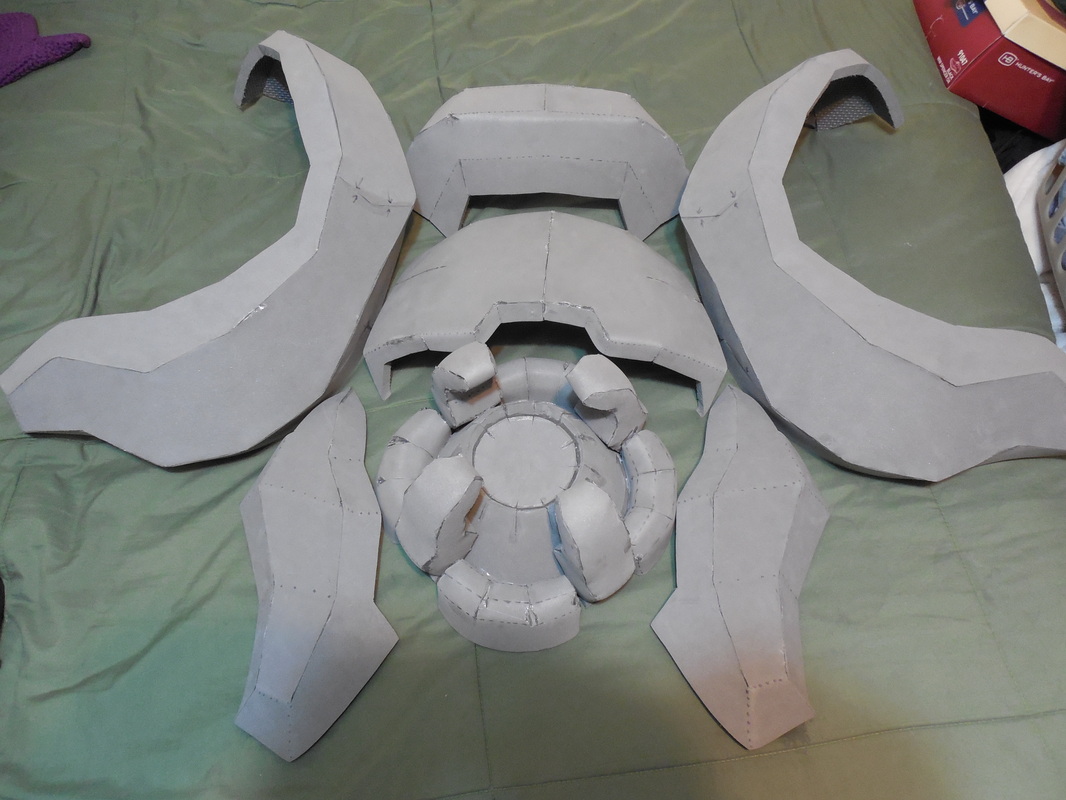
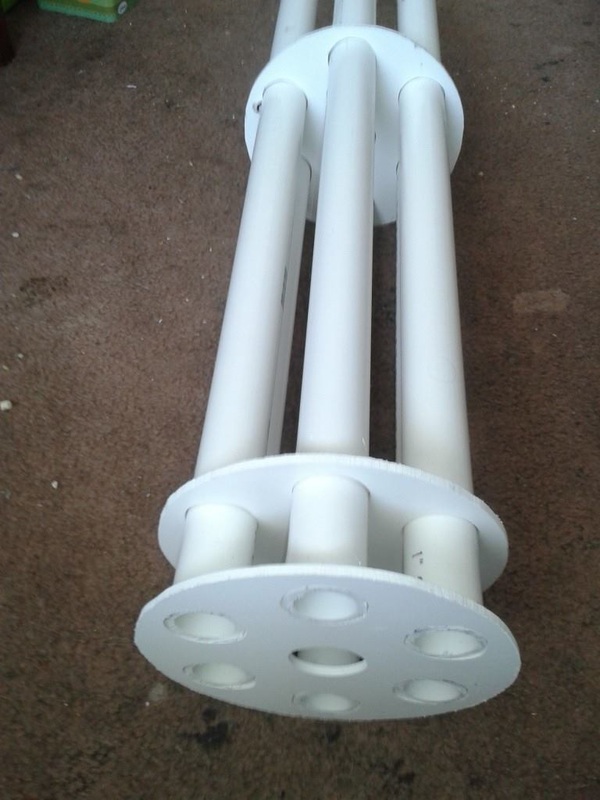
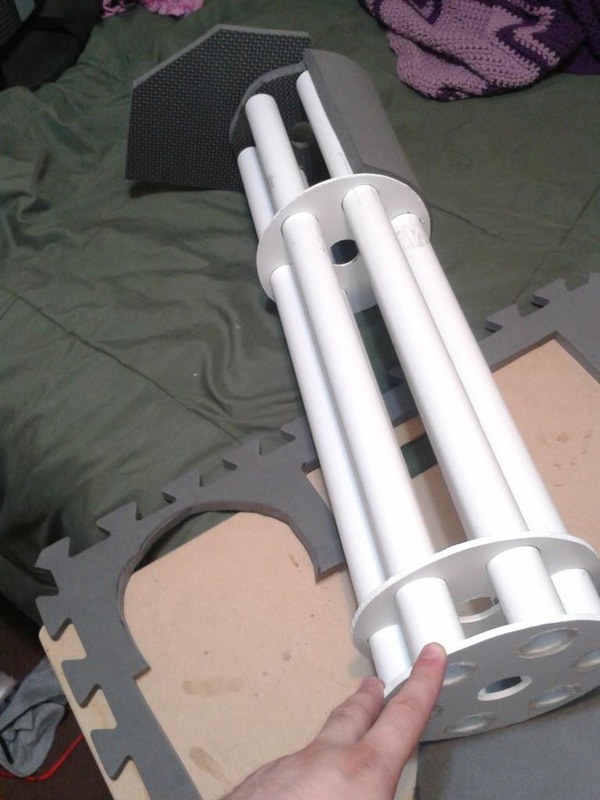
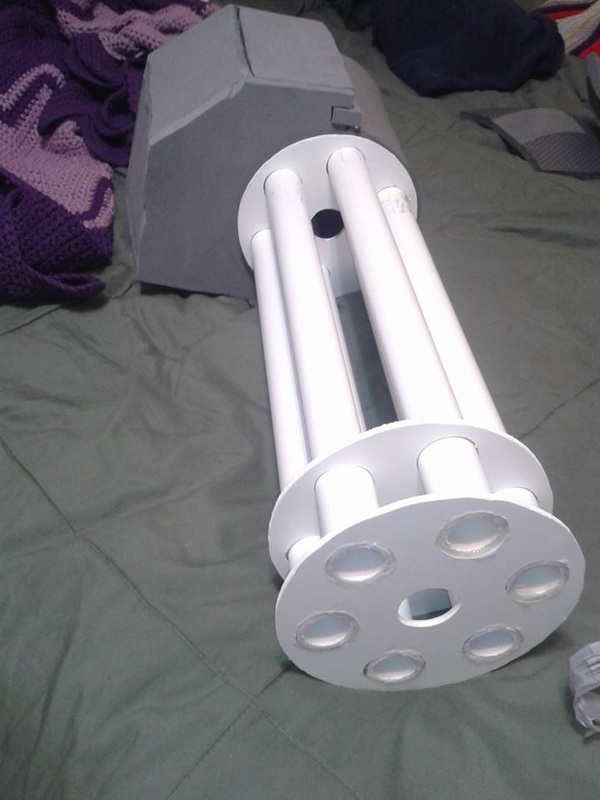
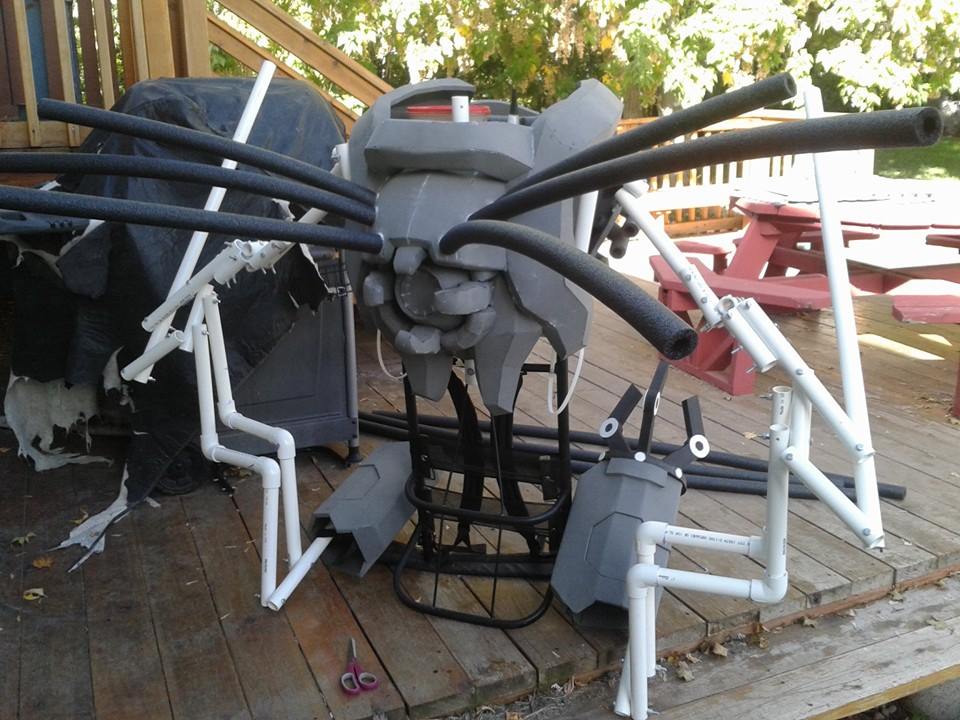
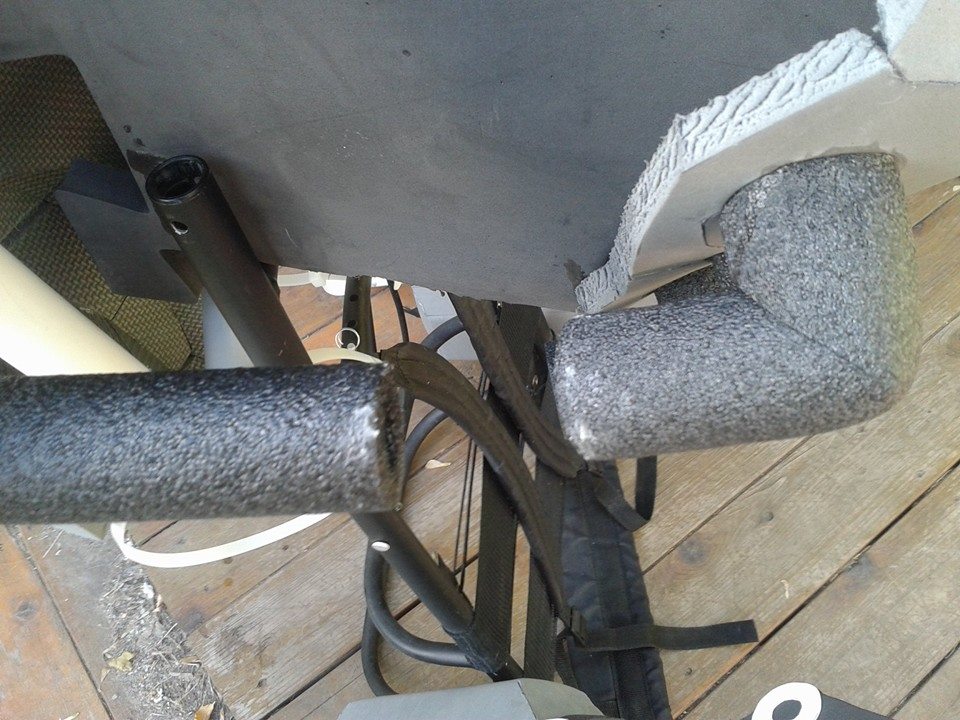
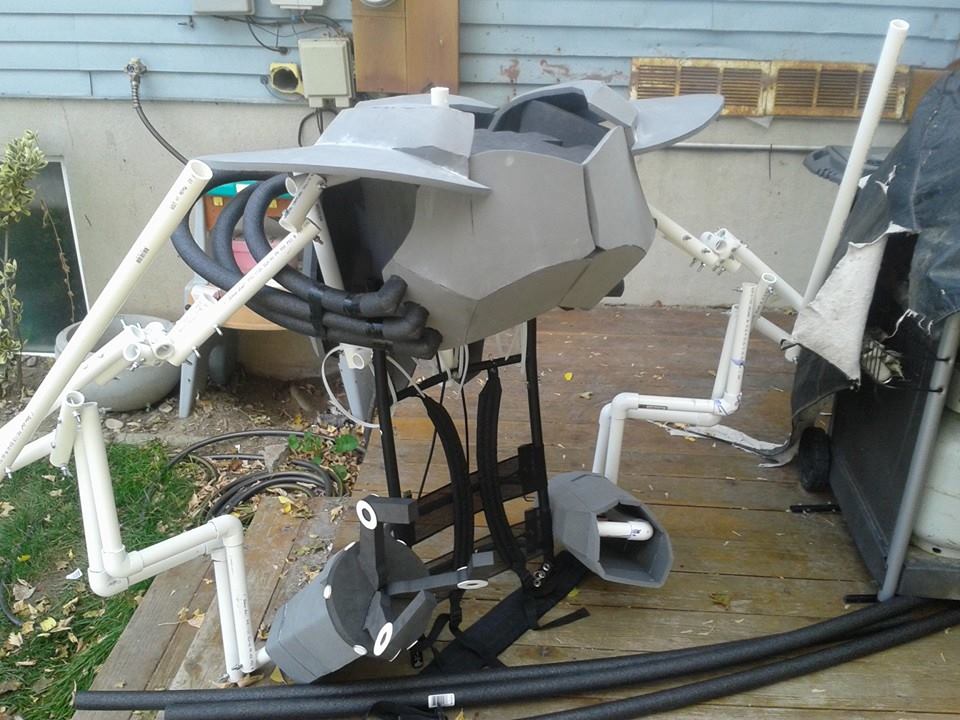
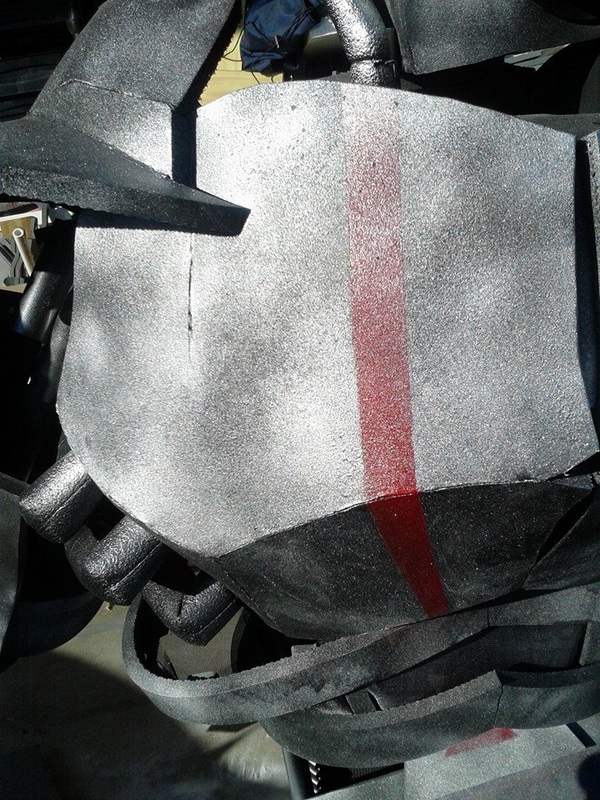
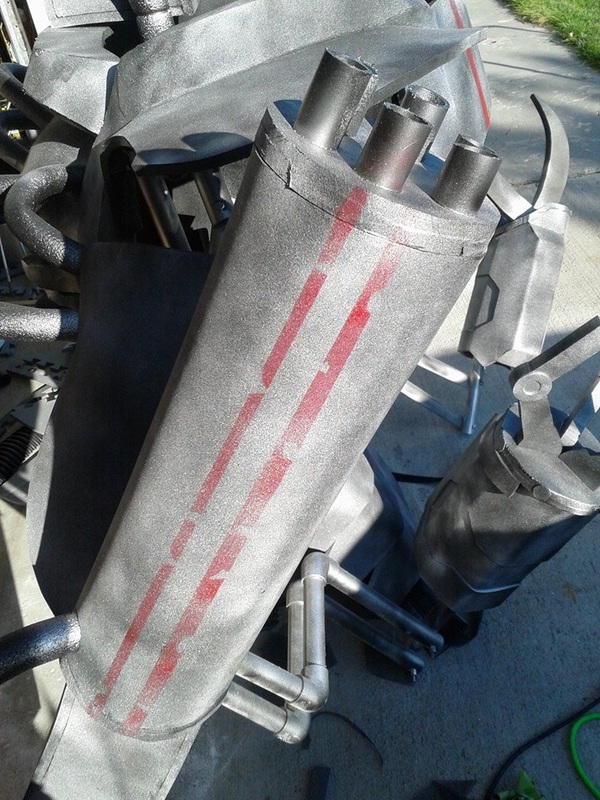
This was an idea my minion gave me. I was trying to figure out how to strap the frame to me in such a way that was both comfortable and strong. I had an old frame backpack that I hadn't used in years, which he suggested I used, so after making a few holes and screwing in some more bolts, it worked perfectly! This thing was already massive, and that was just the frame! I intended to also be on 18" stilts, but we'll get to that. For now, I had to have a way to move the massive arms. That meant attaching more pipes and making some handles. I connected two pipes to the back section of the elbows, then had to corner them each to the right distance so that it would line up properly. Again, flying by the seat of my pants, but it did what I wanted it to. Of course, this was where I started noticing problems with the back section, as shown in my first test video. Clicking, clacking, and a smack to the back of the head. Did some more work on the frame to clean up the movement, threw a couple straps on the arm handles to make it easier to control, and used industrial zip ties to hold down the back, then started to work on the stilts. For those interested, you can find the plans I followed here. Of course, I'd never used stilts like this before, and I discovered that you can't stand still very easily at all. What I wanted was these: drywall stilts that are adjustable and relatively easy to use, but they were well out of budget. I ended up scrapping the idea, though I still have the stilts. Anyway, when I scrapped that idea I started on the actual body of the robot. Thankfully as I went I determined stilts wouldn't have been a good idea anyway. First up was the upper back. This started as an amalgamation of several objects, which came together into the nice, large reactor powerstation. I really like how this part turned out. A great lesson was learned here as well, which will help with future foam projects. A while back a good friend of mine suggested filling seams with superglue, then powdering baking soda over that. This bubbles for a little bit, then turns hard as a rock, which fills the seam and can be sanded down smooth. I decided to try it out on several areas of the robot and, wouldn't you know, it worked like a charm! I'll definitely be using this technique in the future. Of course, with the robot, I left the solid mass on in places to look like a weld seam. All in the details! The chest was a lot simpler, but still had some sections on it I had plans for (namely the large holes you see). I also started throwing together the large right arm, in the form of a gatling, as well as starting the covers for the smaller arms. The gatling is made of 1/4" styrene circles, and six PVC pipes, which is not a good plan. I'll get to that in a bit though. Wearable progress thus far, and another test video! As you can see, the chest ended up being a lot higher than I intended, due to the frame backpack. My arms were supposed to be about where my head is on the thing, and the height of the chest is supposed to be there after I have the stilts on. Right here is about when I decided to forego the stilts, as it would have been way too unwieldy. Oh well! Finished up the large gatling and one of the smaller arms. Then came the fun part: attaching it all and filling out the details! For this section I used pipe insulation foam. Bendable, easily cut, and really adds to the ambiance. Unfortunately I found out I didn't have the right kind of glue to attach these, so I ended up using electrical tape to attach the hose to the corner, then more to keep them out of the way of the arms. The corners worked well in the holds of the chest, and I cut out more holes in the back for the long hoses, so that they wouldn't break off on a whim. I also threw on some basic shoulders, to help build it out and cover some of the framework. Then it came time to attach the gatling, and the problems started. The gatling fit exactly where I wanted it to, but it made the arm too heavy. I could lift it, but I couldn't move it up and down very well. In fact, the arm frame nearly broke, even after trying to add counterweight, and has been slightly bent downward ever since. Had to take it off the arm entirely. All was not lost yet, though, and after suggestions from many of my Facebook followers, I moved it to a more prominent position! 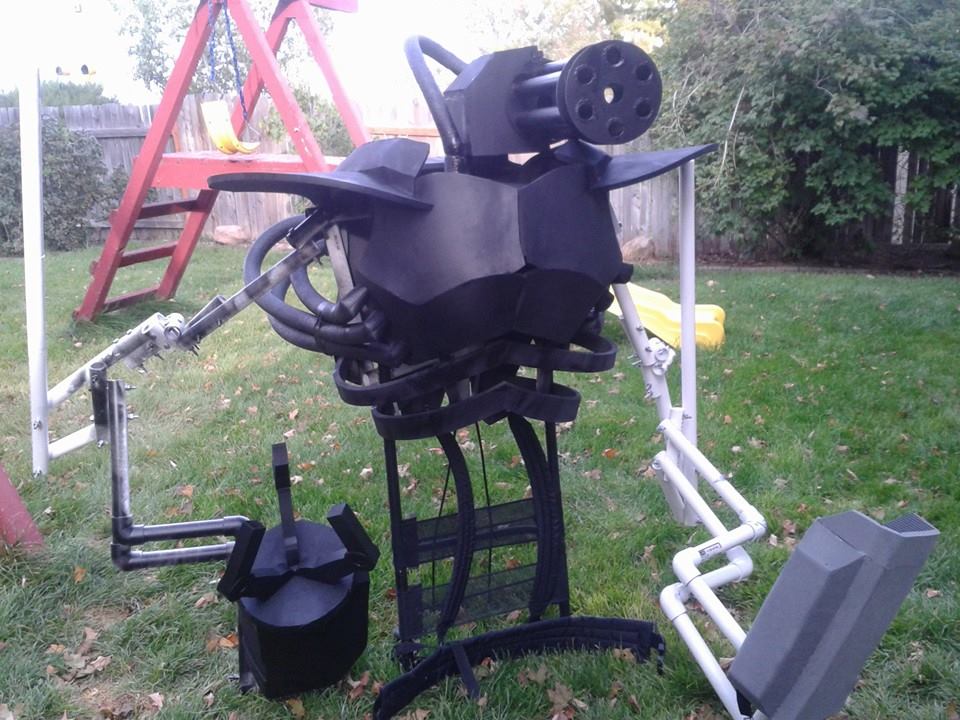
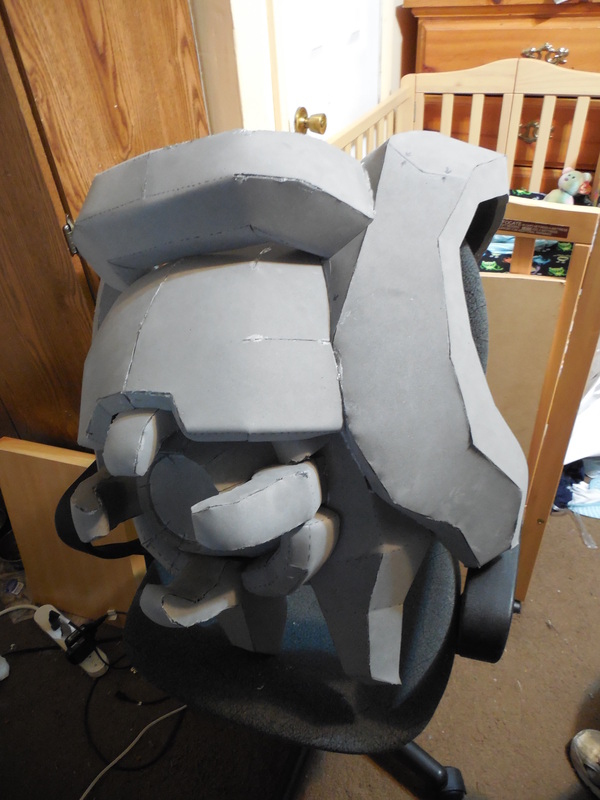
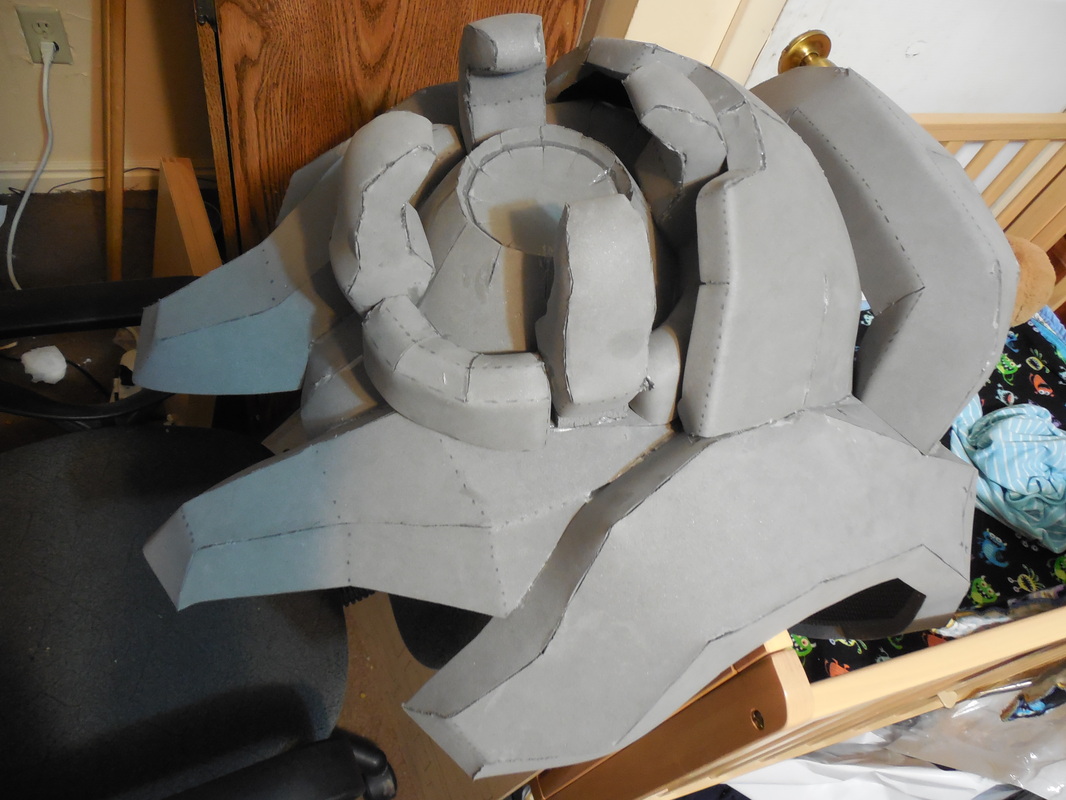
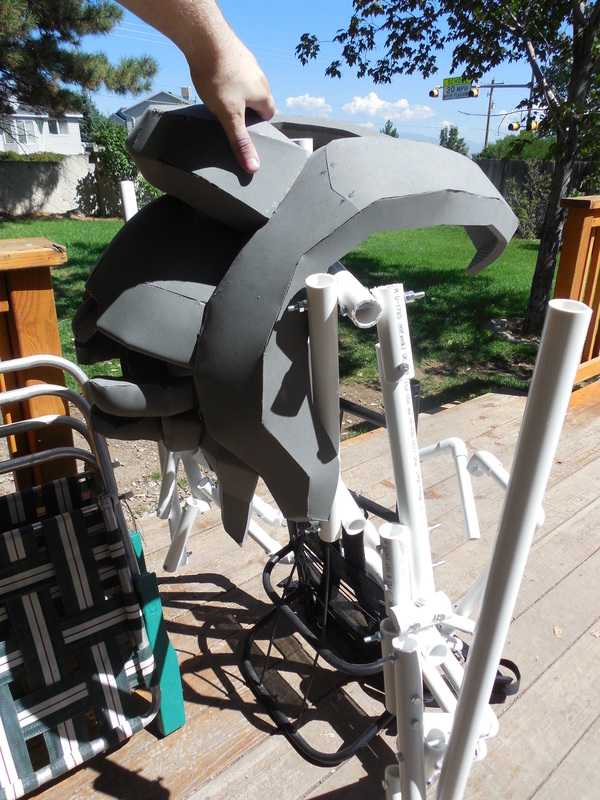
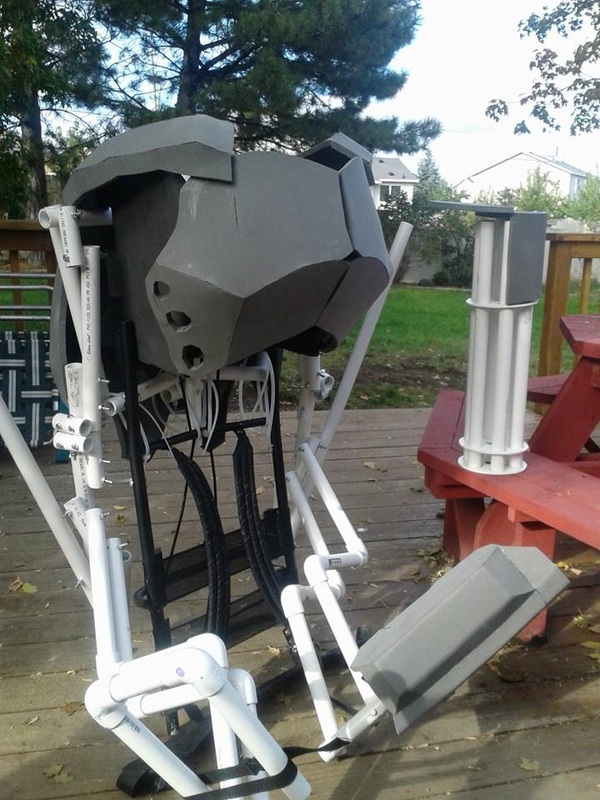
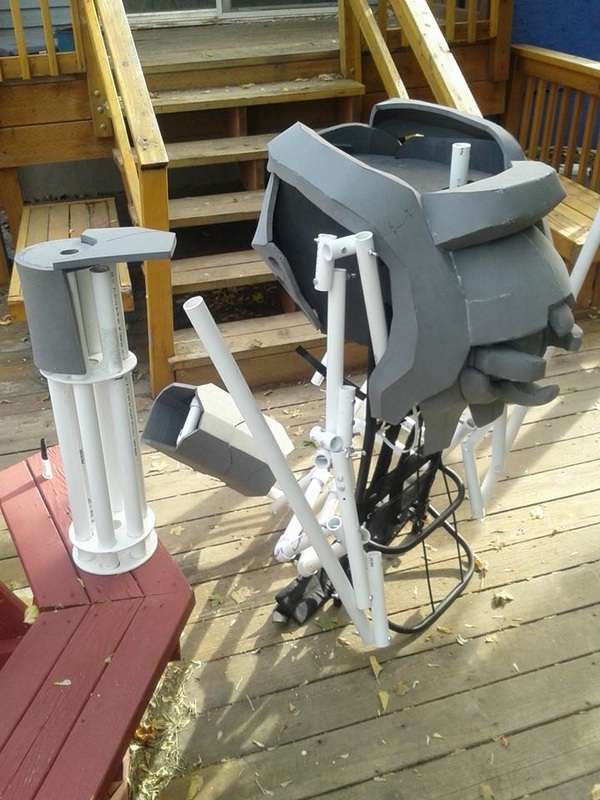
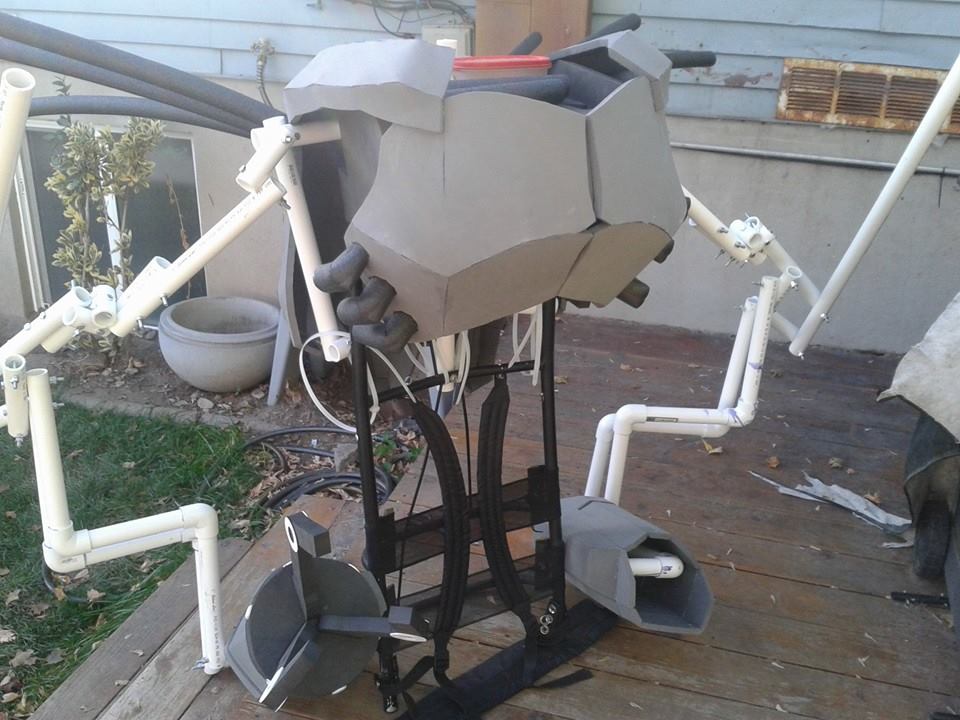
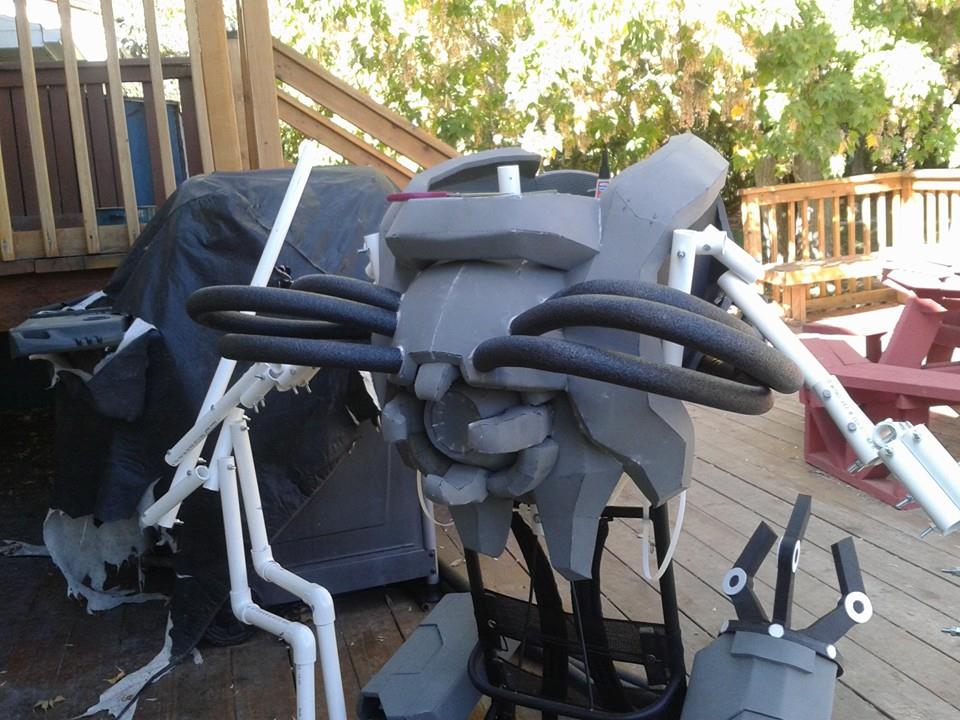
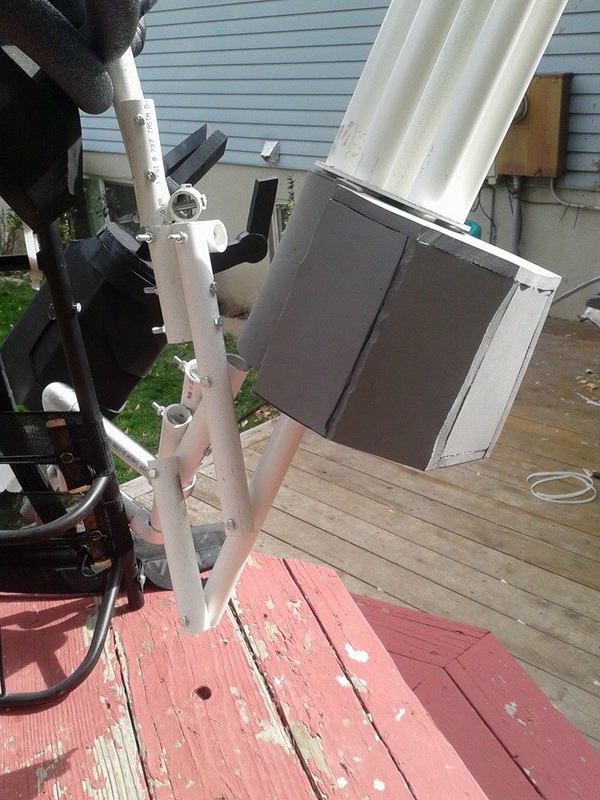
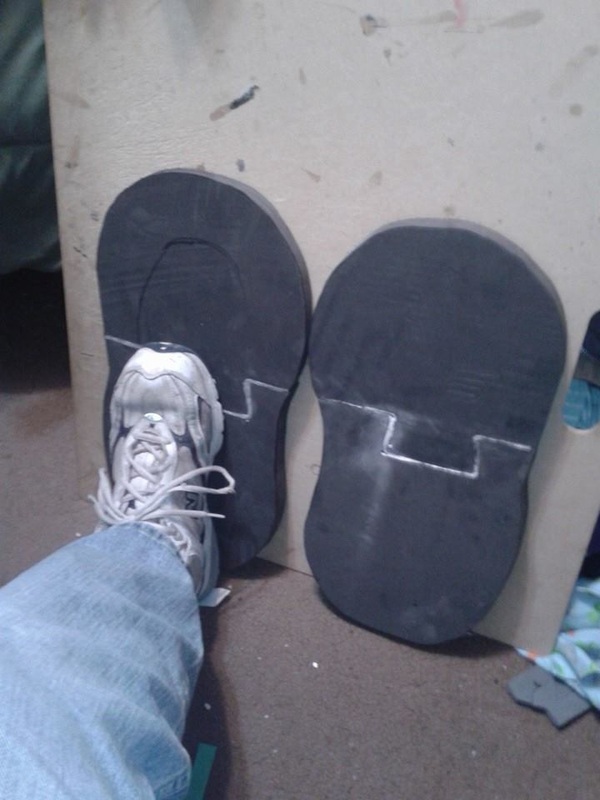
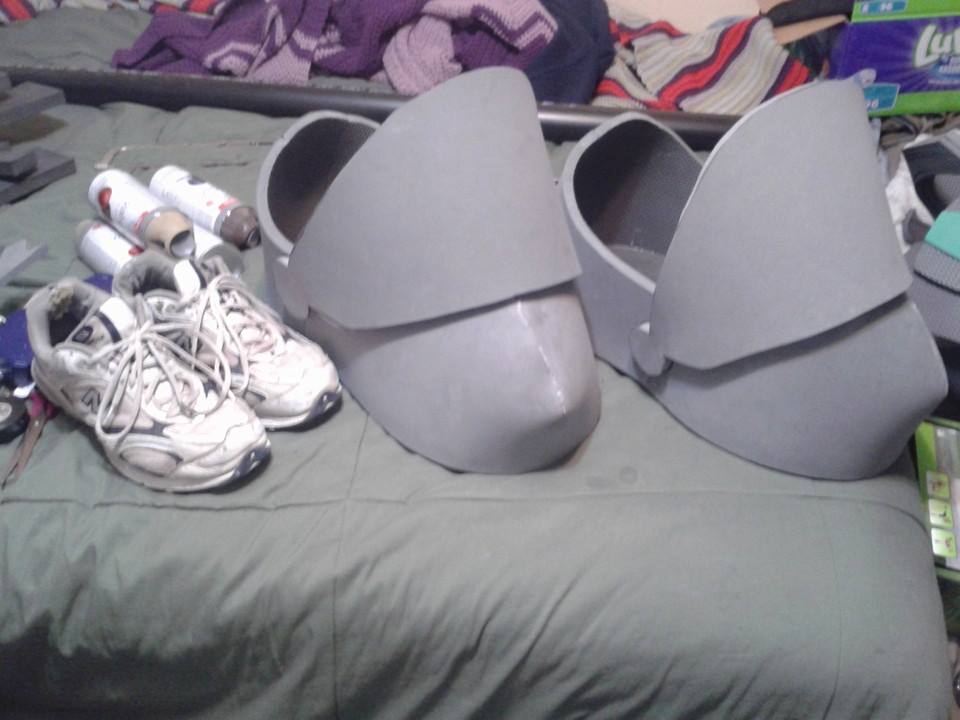
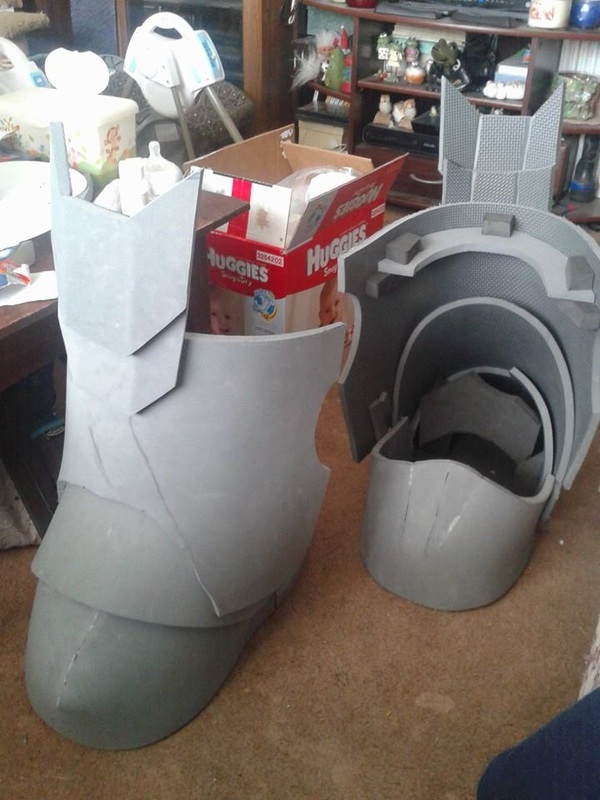
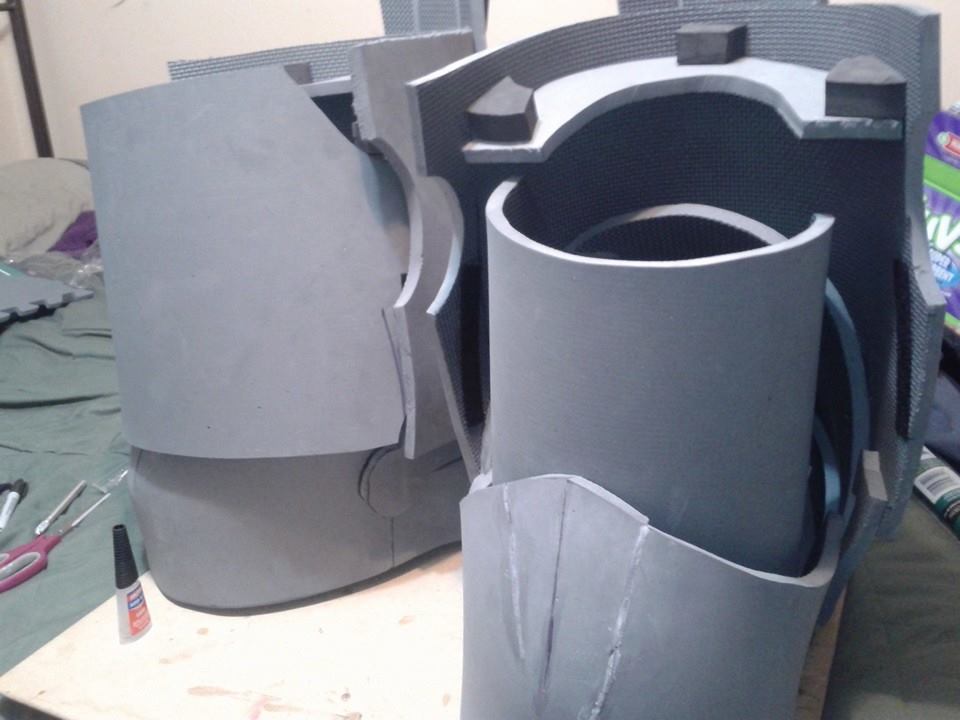
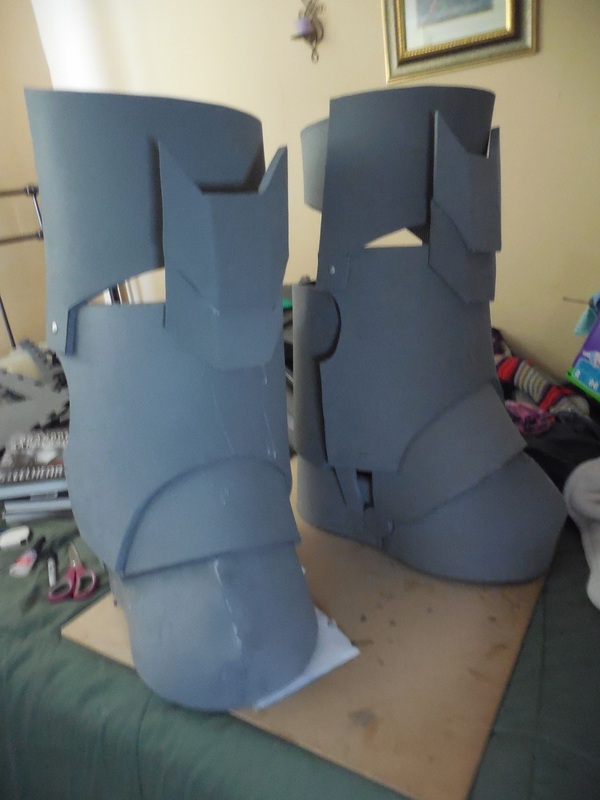
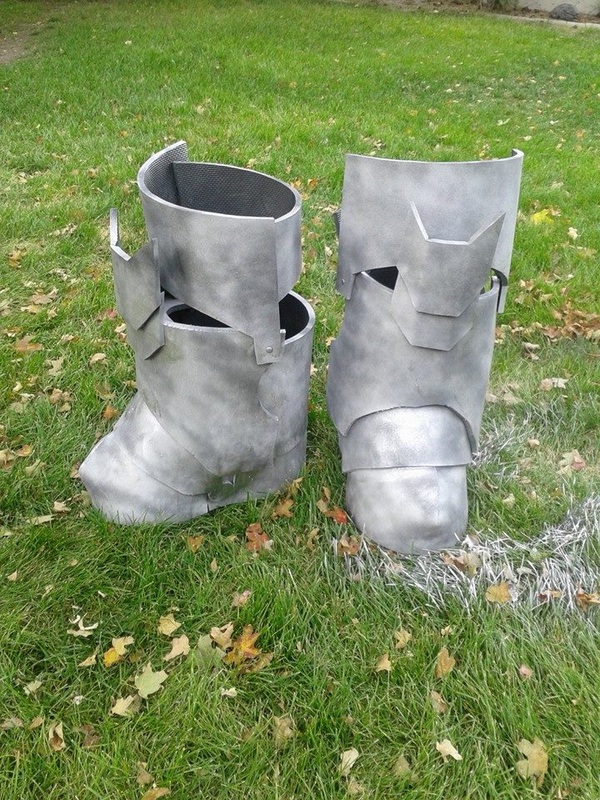
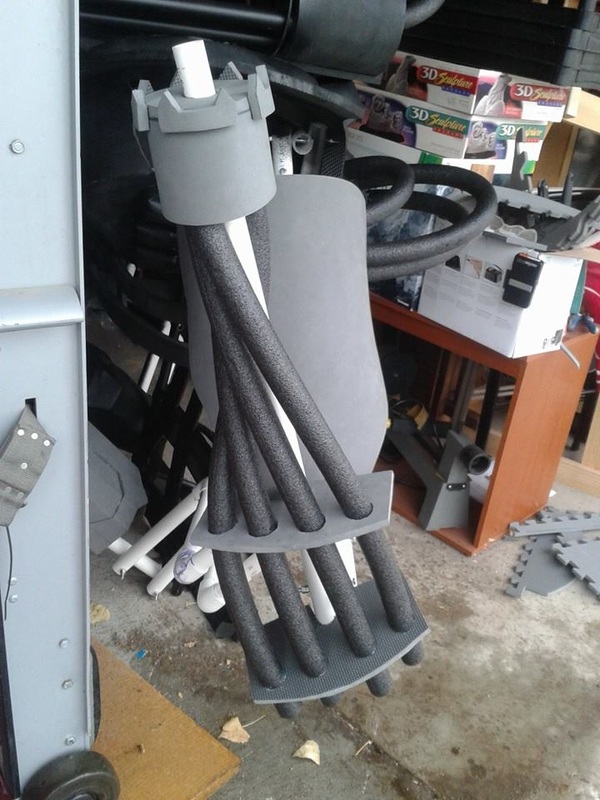
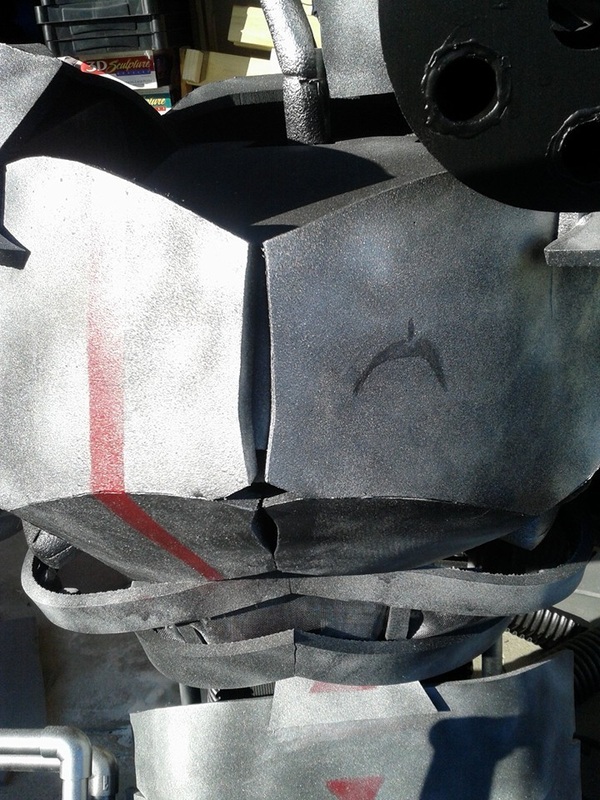
I still had to figure out what to do with the arm, but this helped me figure out what to do with the spine support pipe that had been sticking out like a sore thumb on top. You can also see that I have added some rib-like pieces, to help cover my head a bit to add to the illusion. Test vid of silliness, go! Moar claws! :D Getting down to the wire, so unfortunately from this point on I had to take a few shortcuts. What you've seen so far, in its entirety, is (in my opinion) the only really great looking portion. Not that the rest is bad - it's just obviously rushed from here on. A few other problems cropped up too, so there's that. Anyway, two weeks to go, so I pushed out the legs. They're more like massive boots, naturally, but I added a bit to the top. I used 1" thick EVA foam, to make it more comfortable to walk on, then built up from there. I did build up some supports that I could slip my shoes into and still walk with, which you can kind of see in the third picture. I also built up walls in the back that could be removed via velcro, to again make it easier to get in and out. (Later on I just removed the velcro and glued it, since it was easier and faster to just lift my feet straight into it. That and the velcro didn't stay on too well.) For the top bit, above the knee, I made a taller section to help cover the upper legs. This also had a velcroed back section (which was also eventually glued straight on) and a pair of chicago screws to make it easier for me to move around in. Once all that was done, it went straight into the plasti dip, then sprayed with Krylon Metallic Silver with an overspray of Metallic Black, to give it a worn, aged look. This became the overall scheme of the robot. Then came the large arms, with a different sort of minigun on the right and a laser-like contraption on the left. I actually kinda like how the laser thing turned out. I also threw on a curved portion over the bicep section to cover up the massive connection that was the rotation bit. The power went out as I was starting work on the lower back, to cover up the massive rear side of the frame backpack. It was late when I started, but thanks to the outage I had to finish it up the next day, which was about a week before the convention. Grrr. Luckily I was able to use some more of the corrugated pipe I had (only came in six foot lengths, and the Wall Safe barely needed eight inches). It didn't cover it all the way, but it worked and, again, I liked it. I also threw in some plastic mesh for screen doors and windows into the rib area, to again cover up my head better but still allow me to see out. 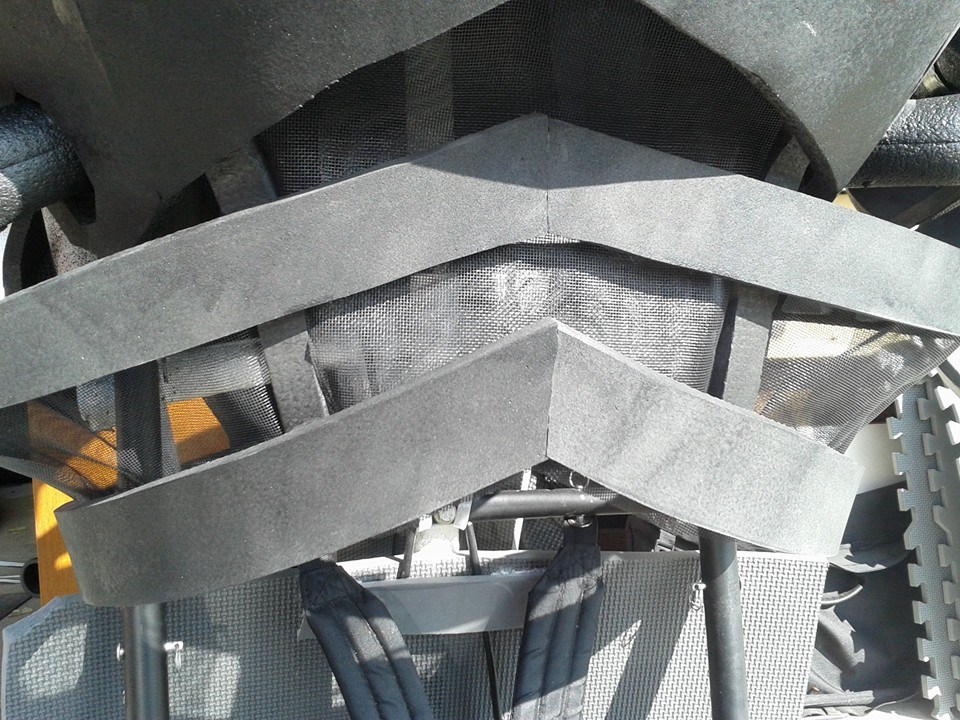
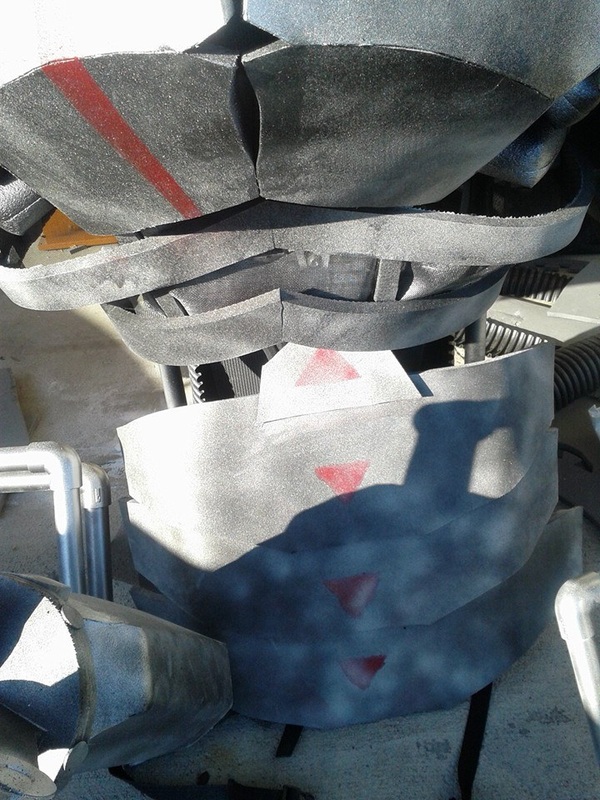
Threw together a quick ab cover, finished up the small left arm's claws, and all but the head was assembled! 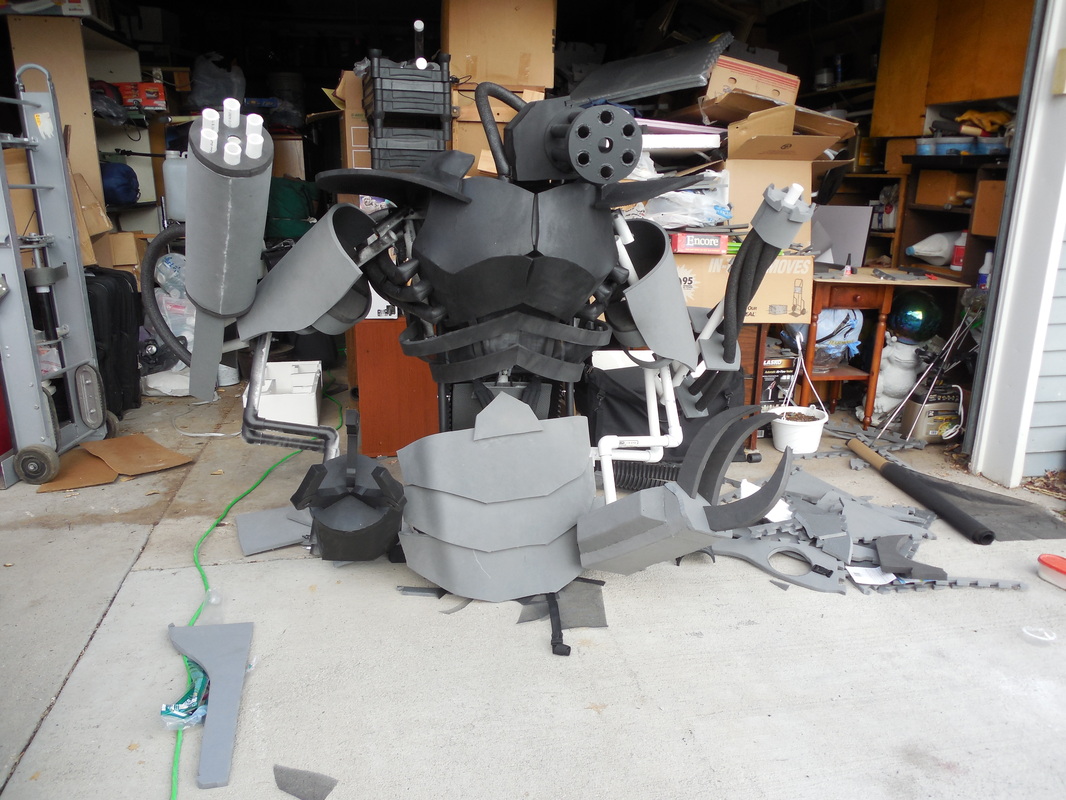
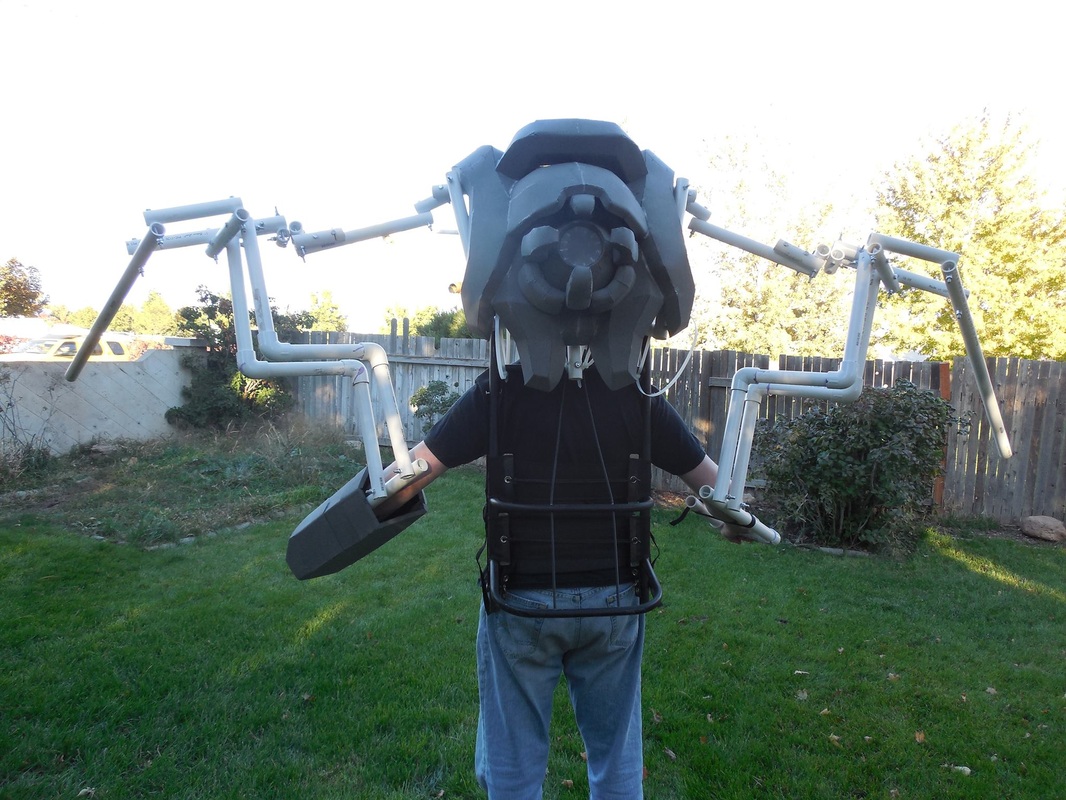
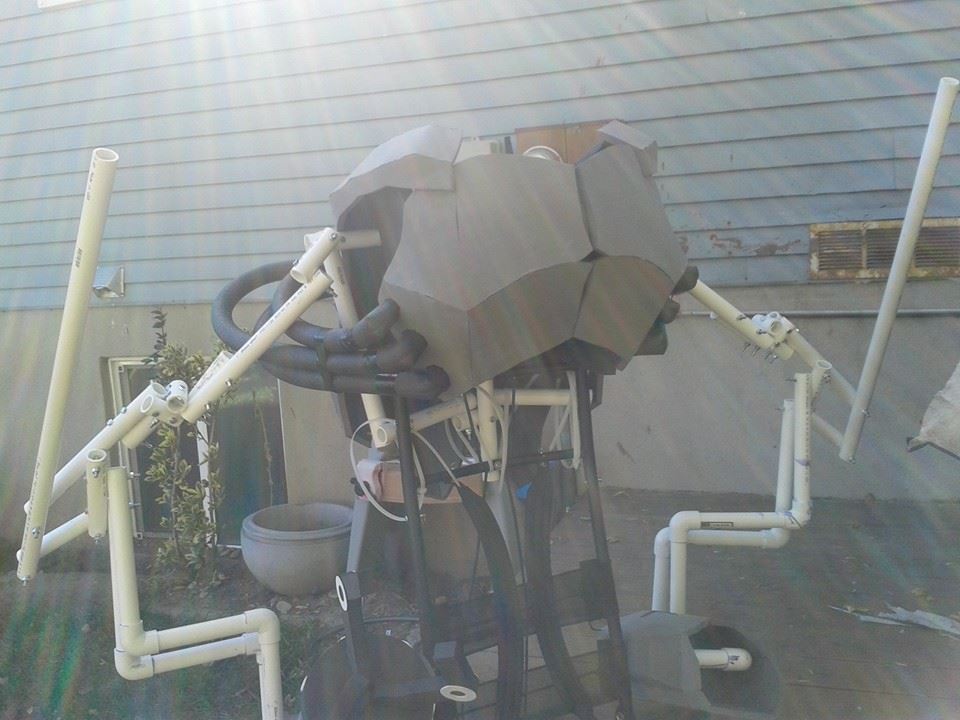
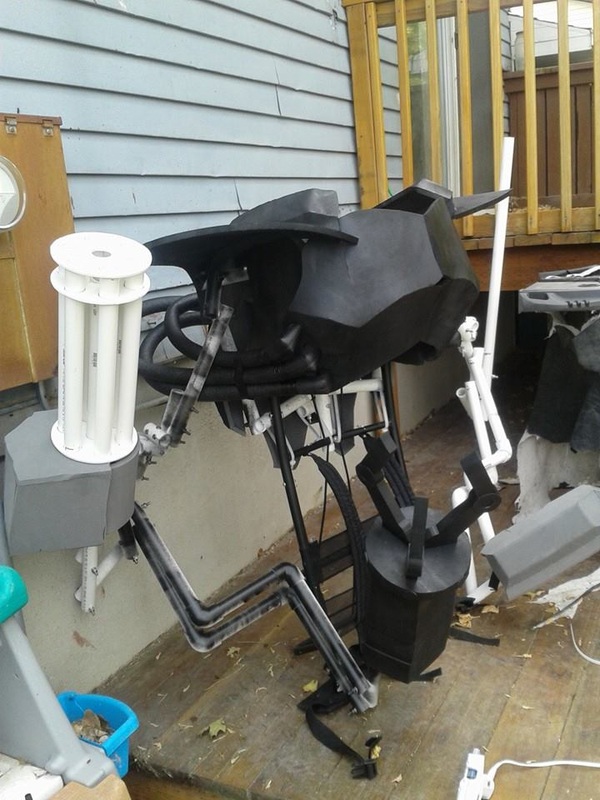
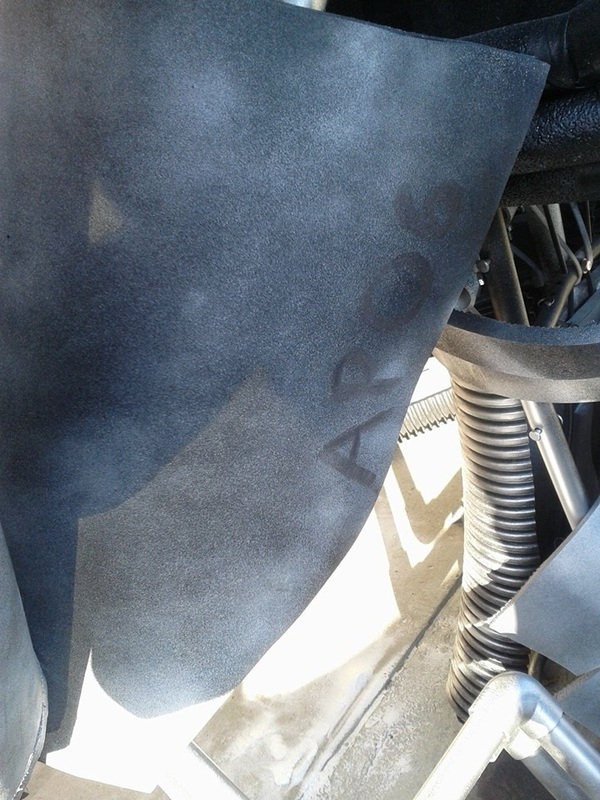
This is the final video I have of it, pretty much fully assembled, which also shows the back. I've got other videos which I'll share later, but here's mine: Still no head, but shortly after this video I had it all painted and ready for detailing. 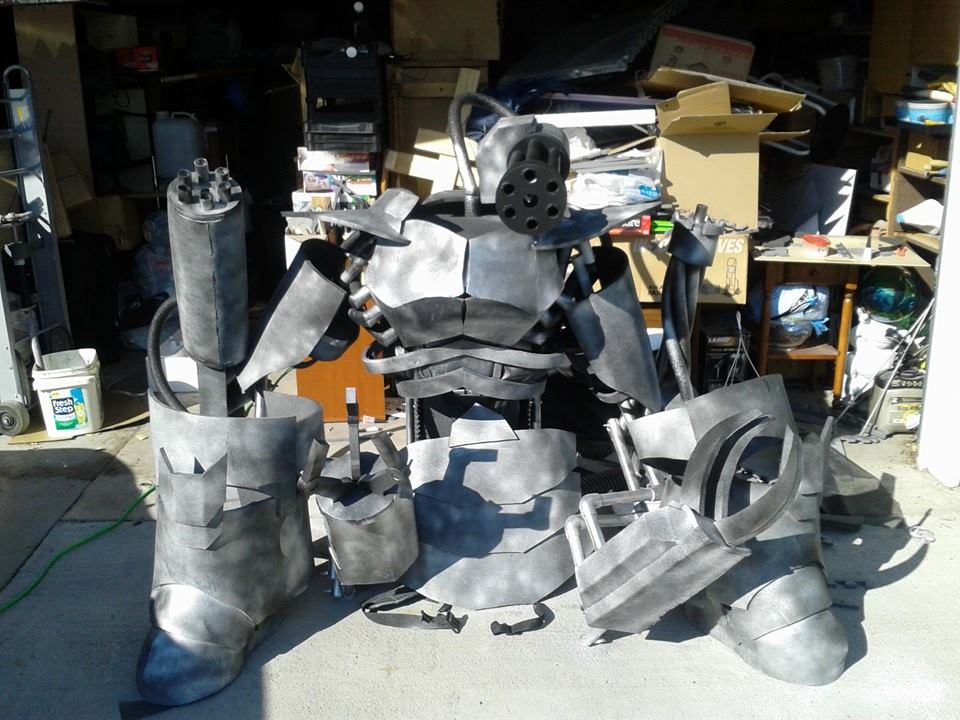
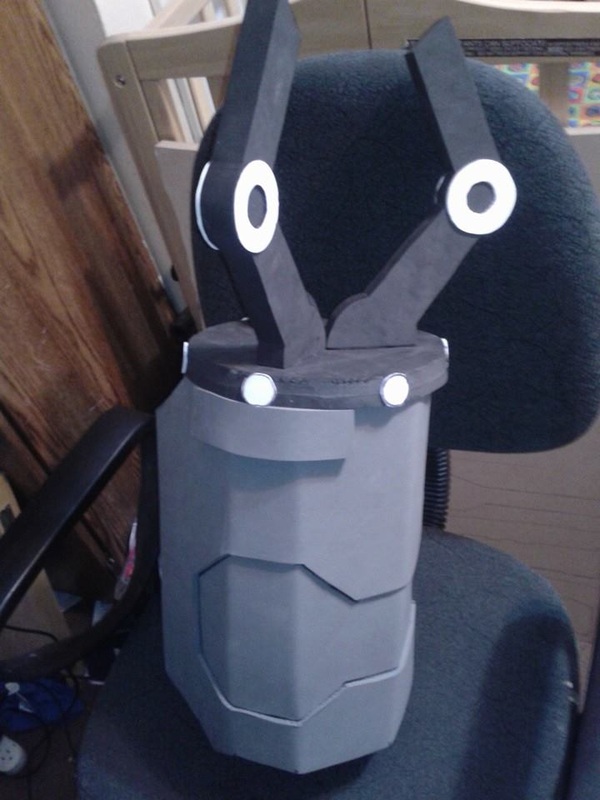
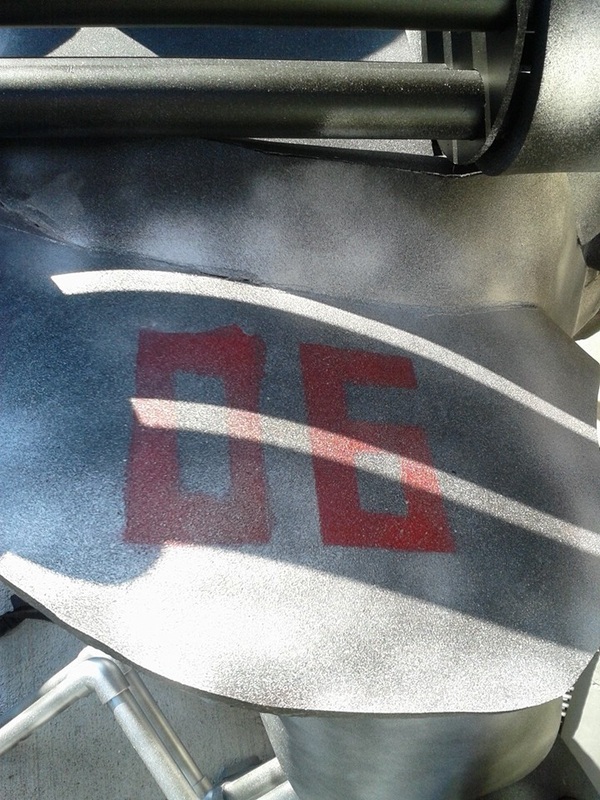
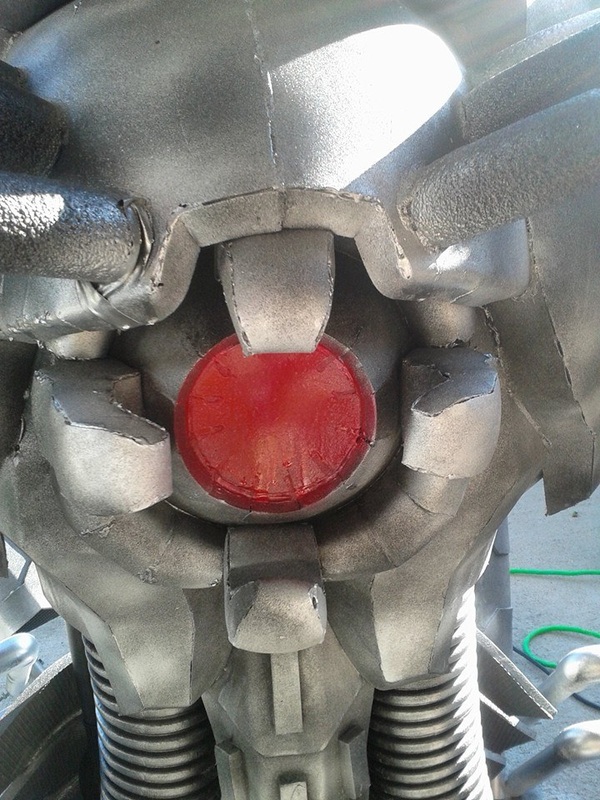
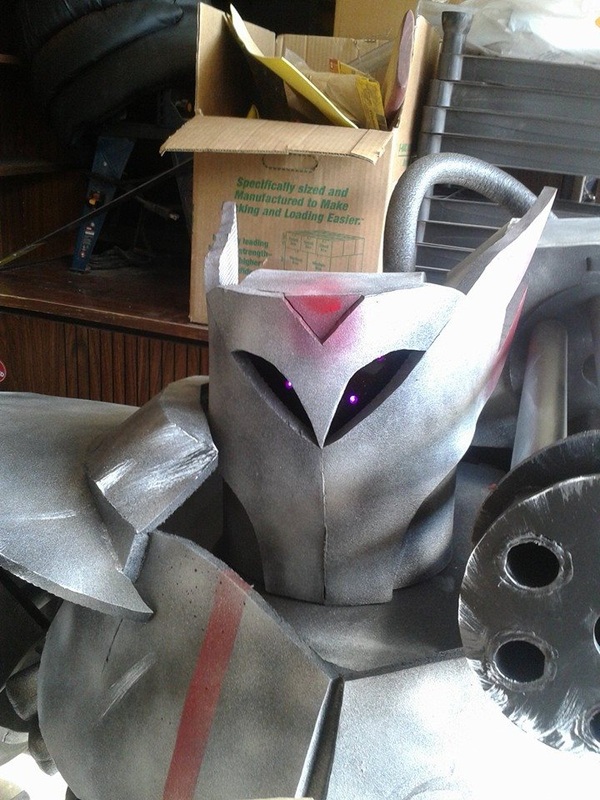
Home stretch! Threw a bunch of tape around, marking off areas, including some that wouldn't be easily seen (like a giant 06 on the upper part of the left shoulder). I've always been under the belief that the most important details are the ones no one will ever see, which helps me remember to hit everywhere with something: weathering, decals, small parts, whatever. Then came the head. This one came out of nowhere - no design, no idea, nothing. The eyes are made from scrap acrylic from the Tali helmet, with LEDs glued in to the back. In hindsight, the eyes look a bit derpy, and I should have put the two LEDs on the same line or next to each other. Oh well! What's done is done. I finally threw on a few layers of weathering, with a bit of brown, white, black, and some bits of a darker silver here and there to really make things pop. With that, the robot was complete! Out of nowhere, one of the convention heads contacted me to see if I'd be willing to come be on a live news broadcast promoting the convention, so I said yes! That got me really excited, though unfortunately this caused some problems with the robot due to the transportation. Unfortunately, all they had was a pickup truck, and the tie-down web I borrowed from my father squished down the gatling (once again, always the gatling) and tore off the pipe going from it to the upper pipe. A few other spots got squished or tore a little, which needed repair afterward. Grrr. Here's the link to the news broadcast, though! http://www.4utah.com/story/convention-promotes-japanese-anime-and-culture/d/story/LV9EJRJhyU-PhqKhe2KBCQ It was still really cool and a lot of fun, and there was even a point where they were talking to one of the staff and it zoomed in for a great shot of my shop name! It was cool. Anyway, got home, fixed the damaged areas, removed the gatling for the final and ultimate time, moved the head back to center, and the robot ended in its final form. With nearly a week to spare! 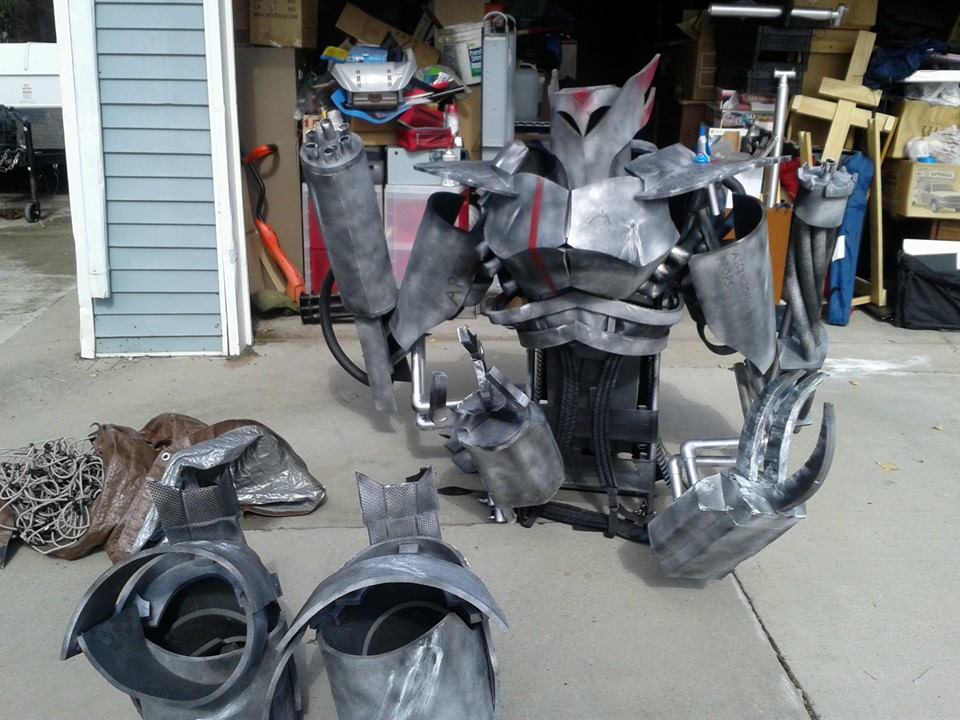
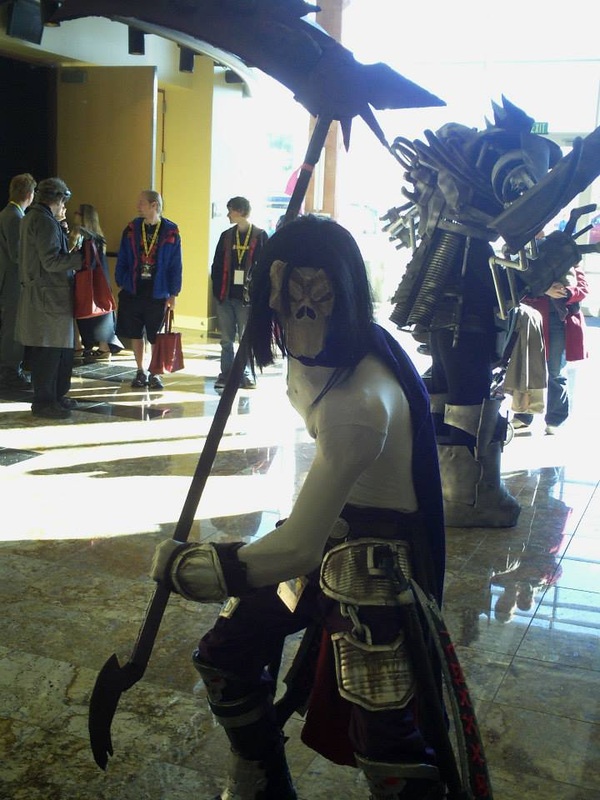
Had a blast at Anime Banzai, though I was pretty much entirely in my robot. Wore it for about two hour stints, and rested just as long, just so I wouldn't kill myself. Here's a few pics I really liked from the event, with more that can be found on my Facebook page as well as in the Photo Gallery! Hope you guys enjoyed this (rather long) build! 
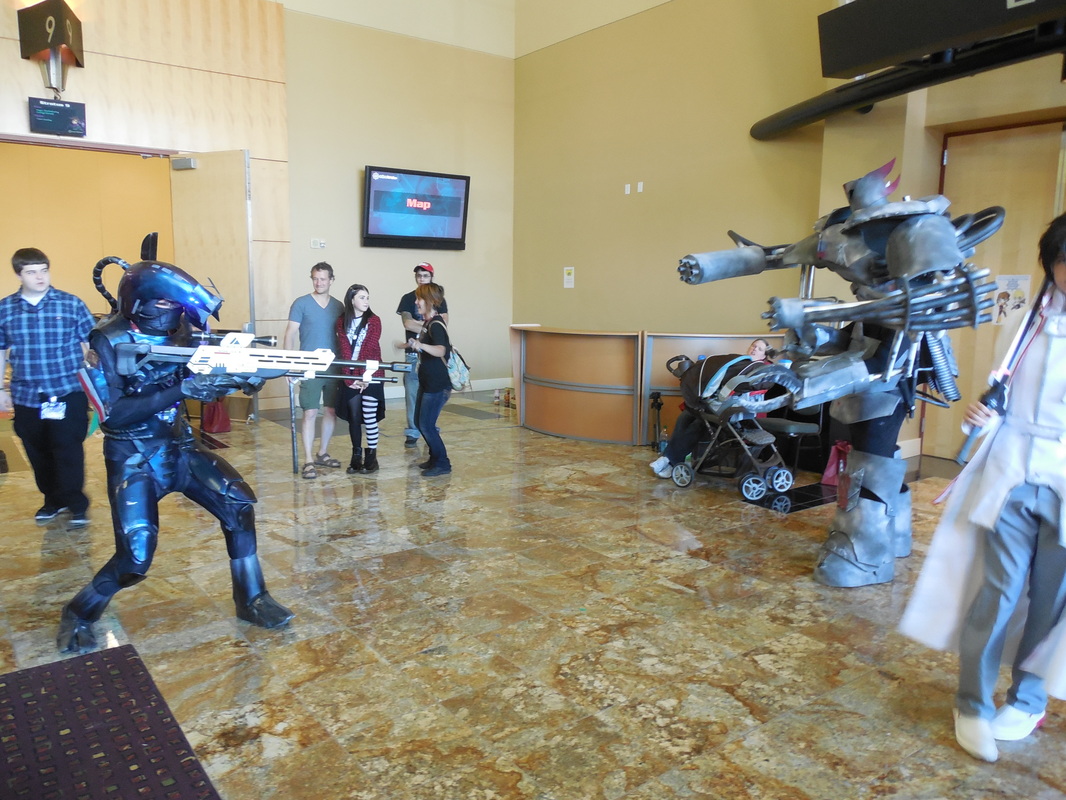
Legion! (Zach, from Quantum Entanglement Props)
Only actual live shot of the back I have....
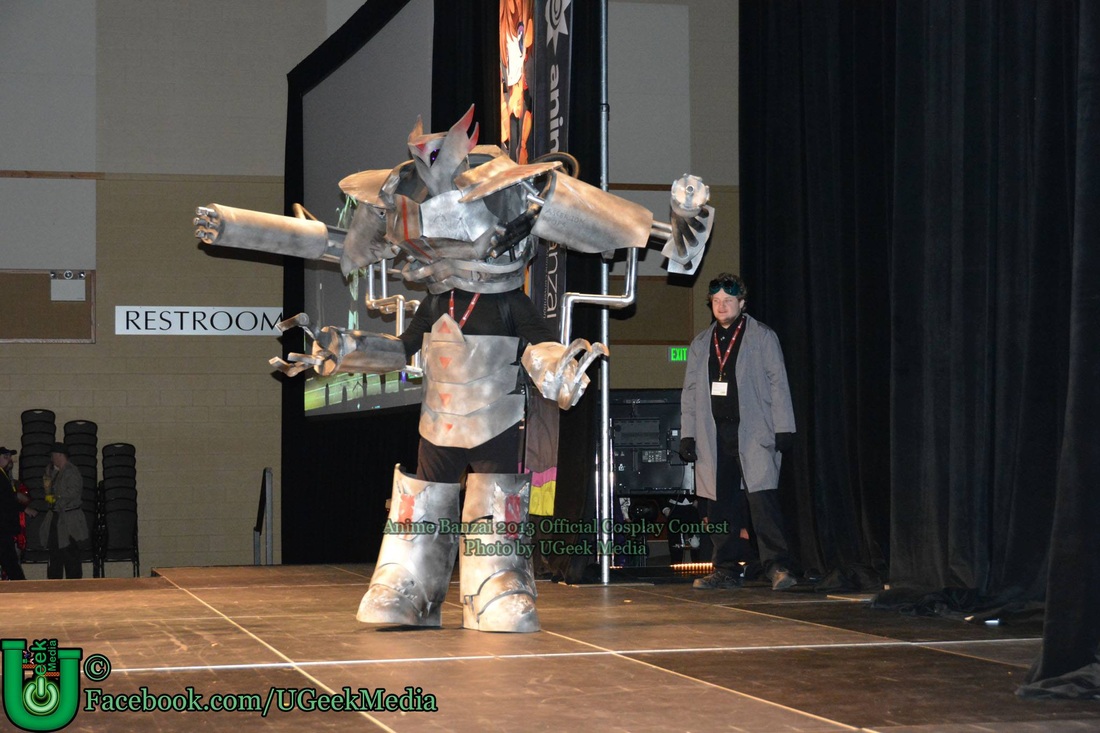
Cosplay Contest live on stage! (Brother in background as my handler)
4 Comments
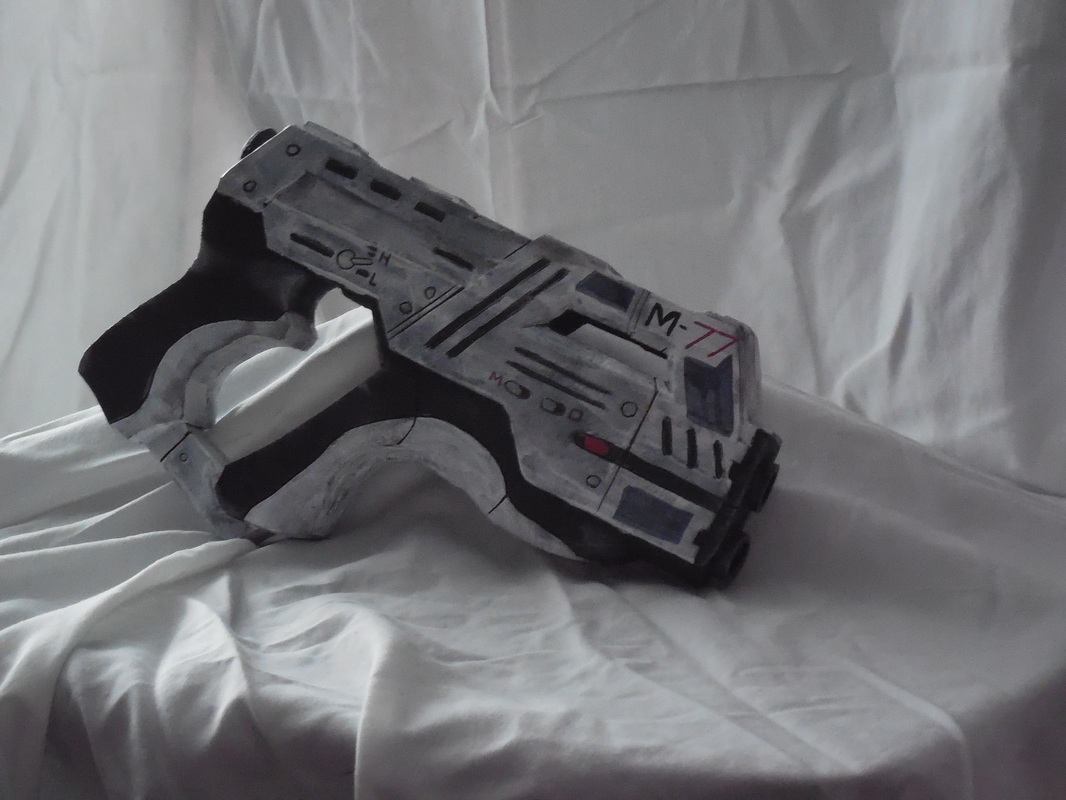
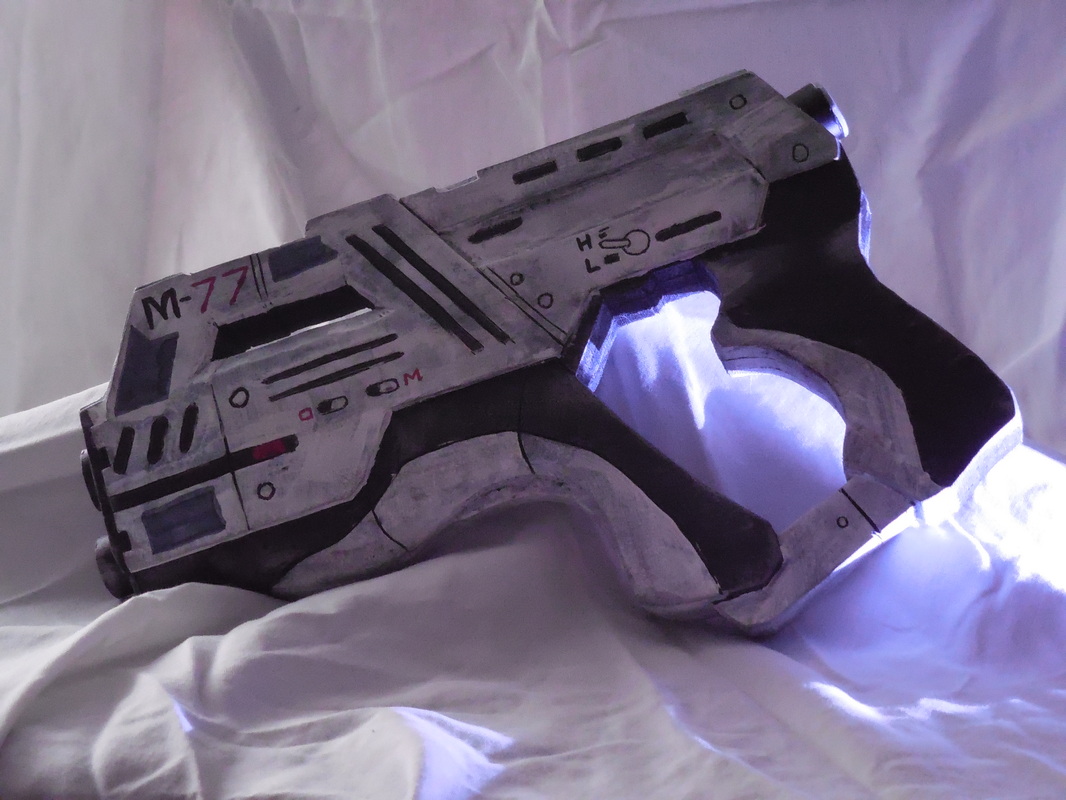
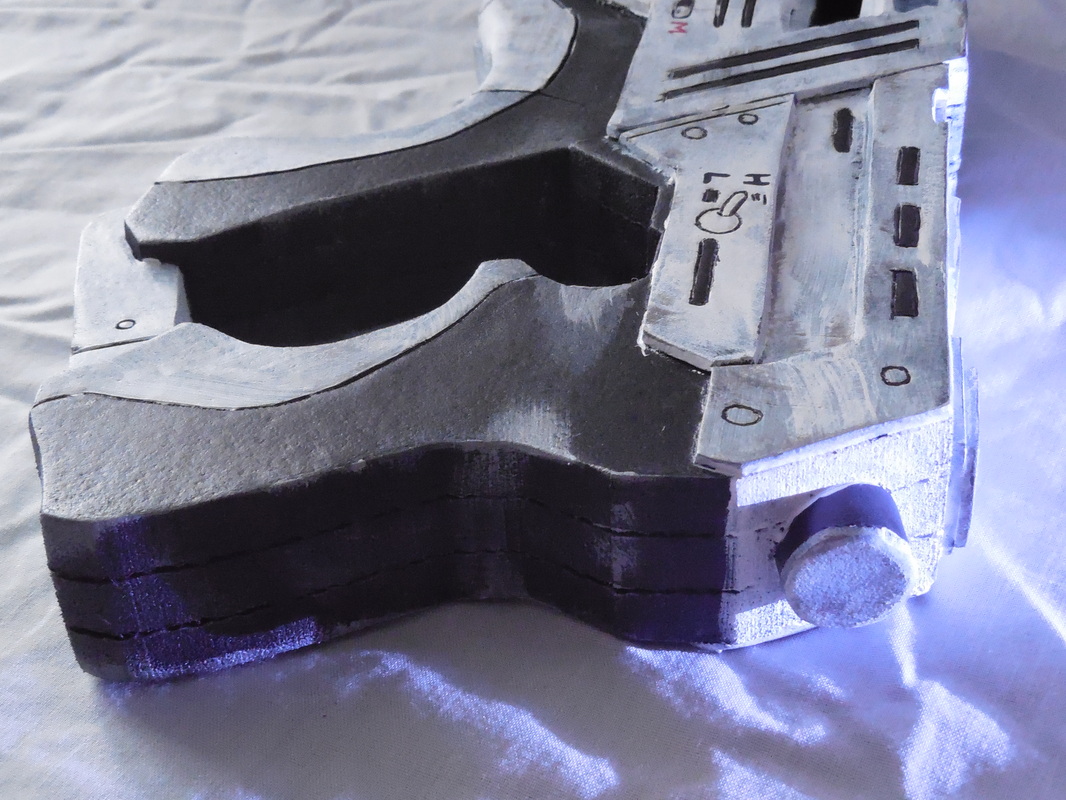
This build has seriously turned into one of the absolute easiest builds I have ever done. It'll be hard pressed to beat it, given how despite the heavy detailing it came together in just a few days. You may also know this one by the regular version: the M-6 Carnifex. 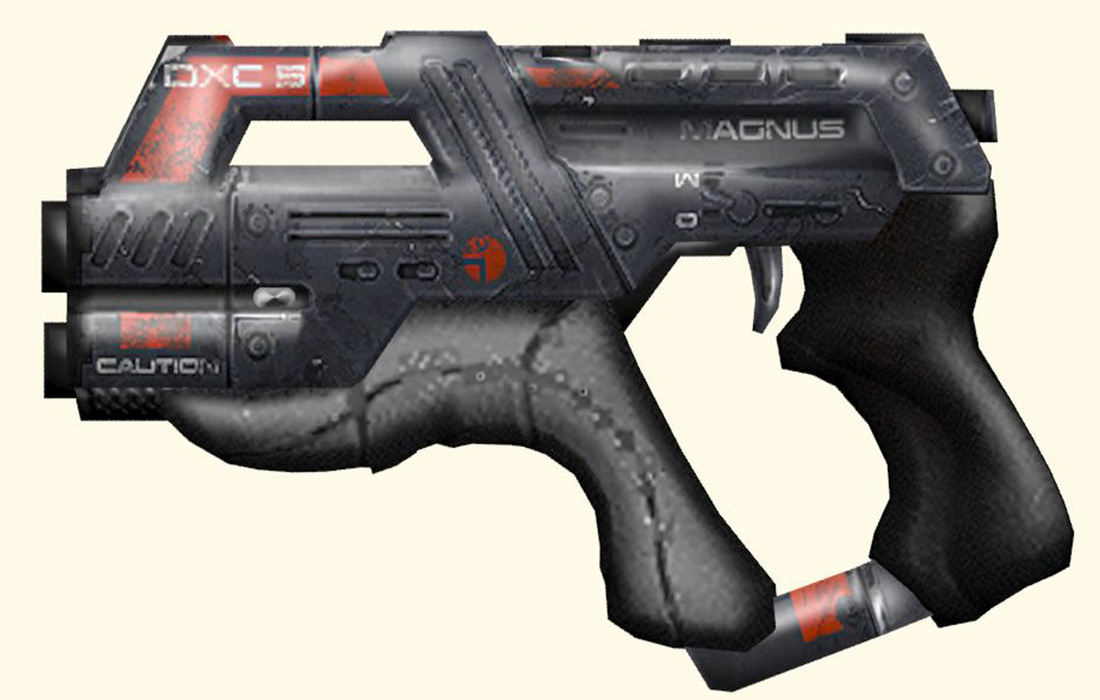
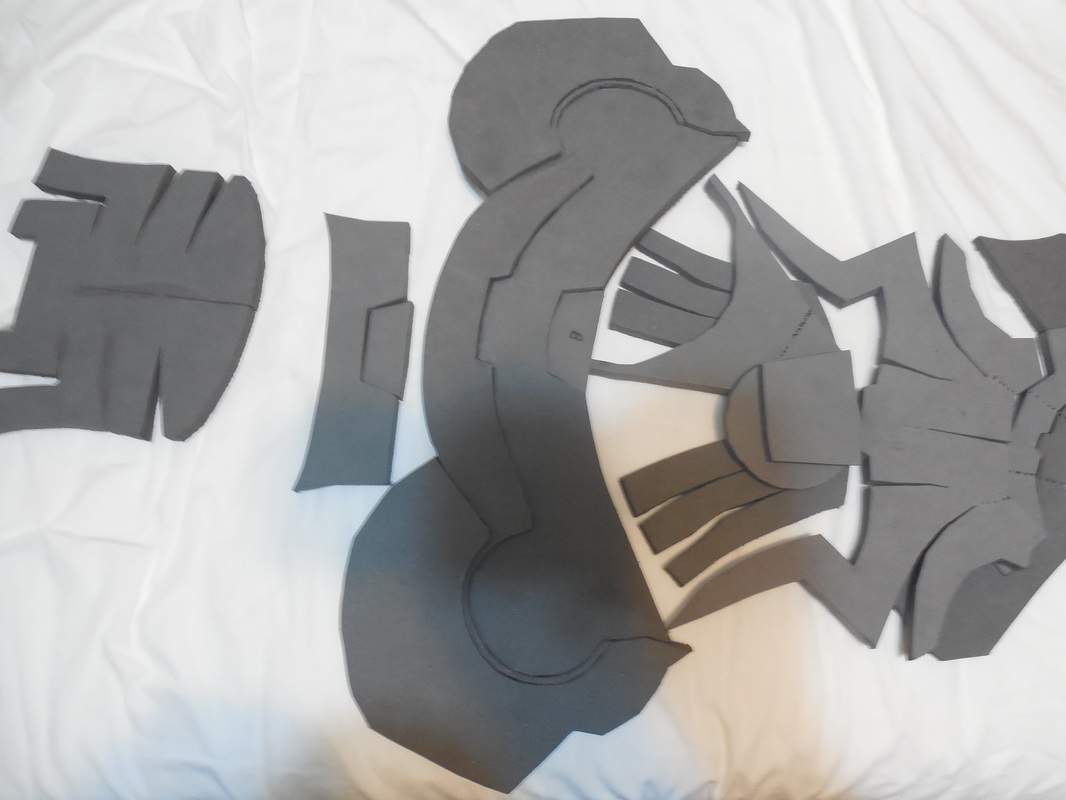
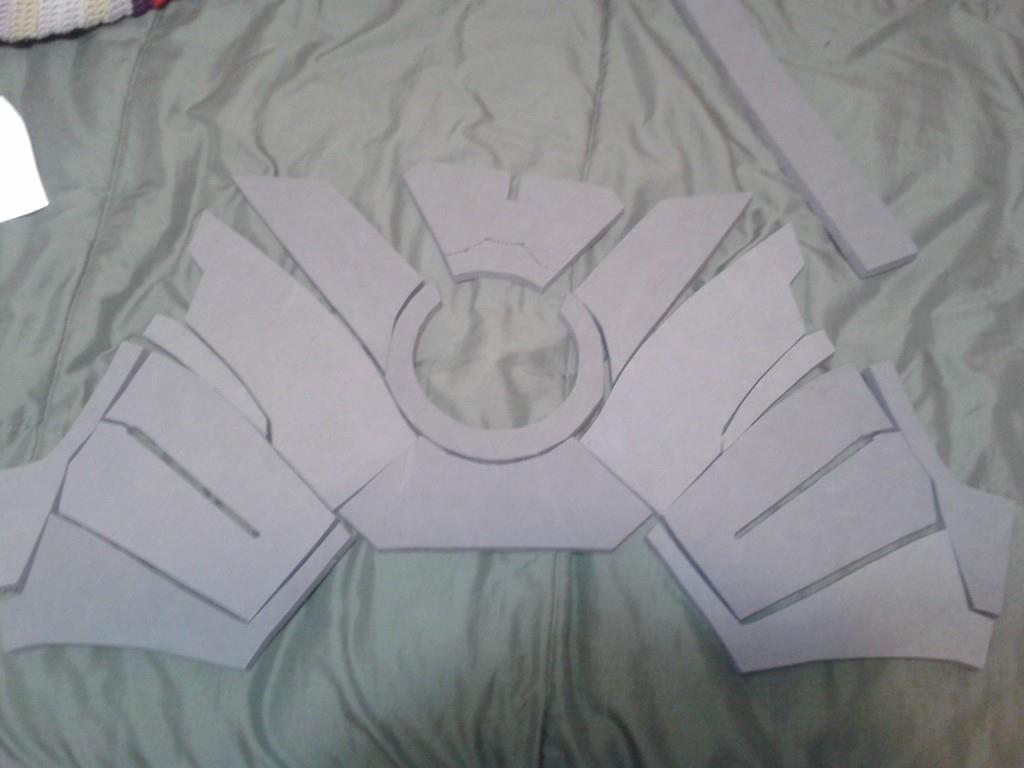
The two pistols are virtually identical, the only difference being the color and the decals. Two guns in one! Even though there are several other prop makers who have made this particular pistol, and quite a few of them made blueprints that are up for sale, I decided to take a crack at it and make my own blueprints (which, coincidentally, are up for sale). Once those were done, it was time to start cutting out the foam! I did this one in the same manner I do the M-8 Avenger: lots of puzzle pieces. 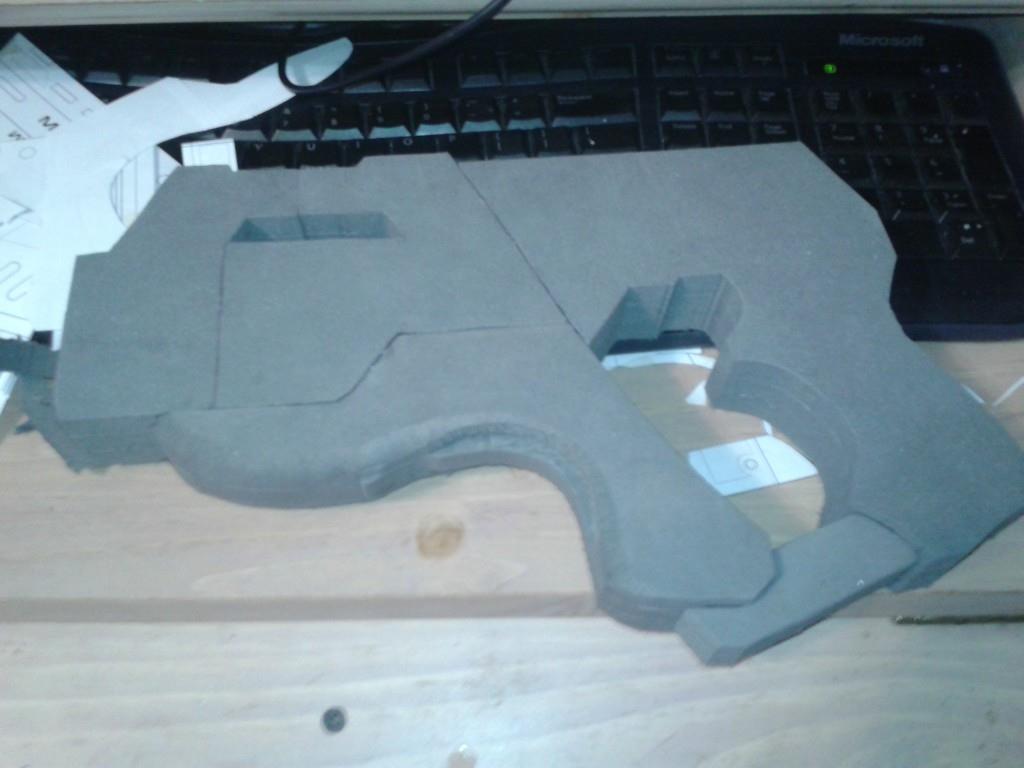
Sorry for the terrible pictures on this one - only had my phone on hand and was trying to finish it quickly. As you can see, there are five major sections. This helped quite a bit, especially in the open areas around the top and the grip portion. Once that was done, I started slinging the craft foam! 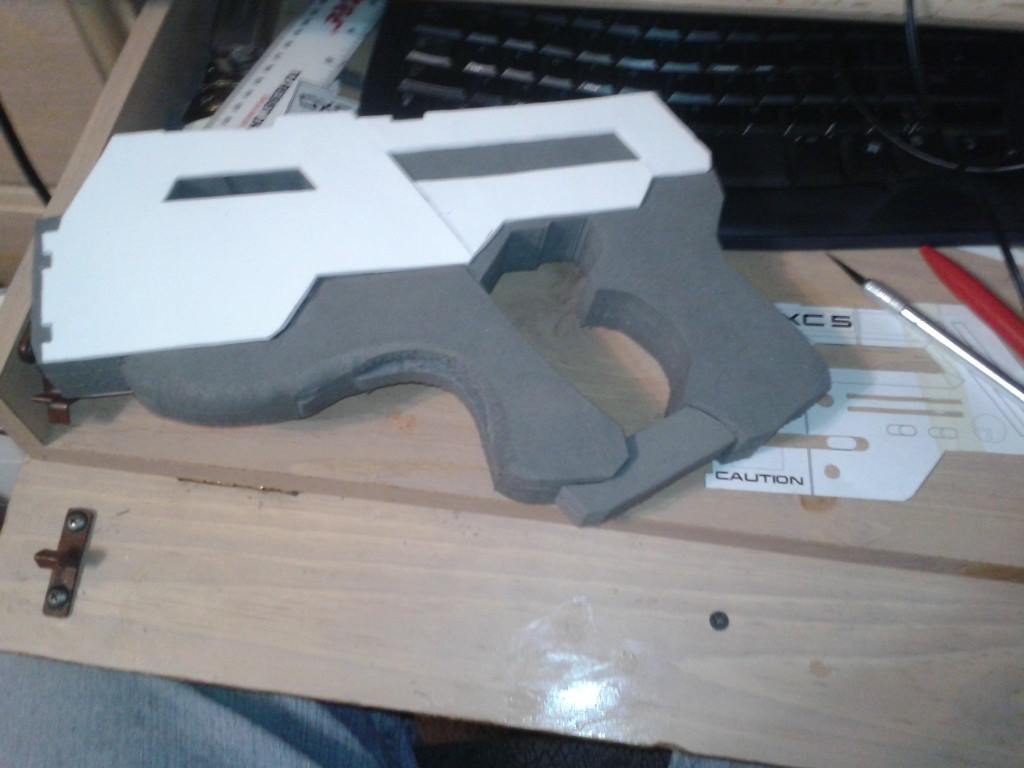
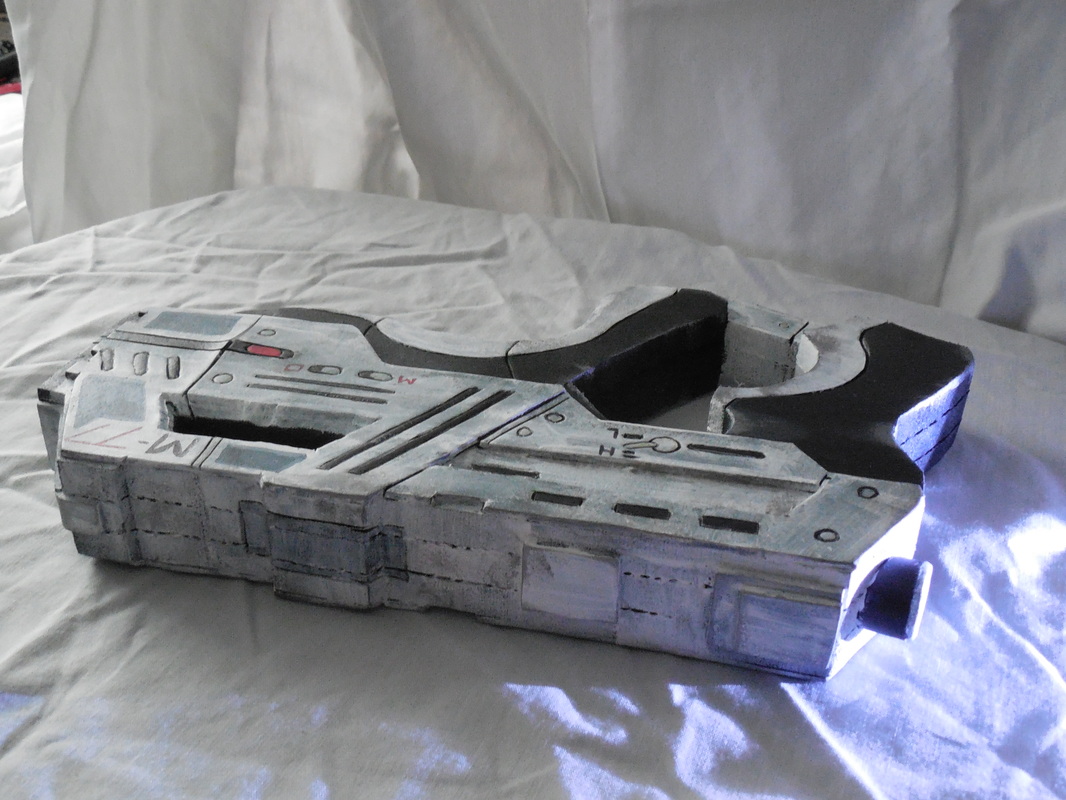
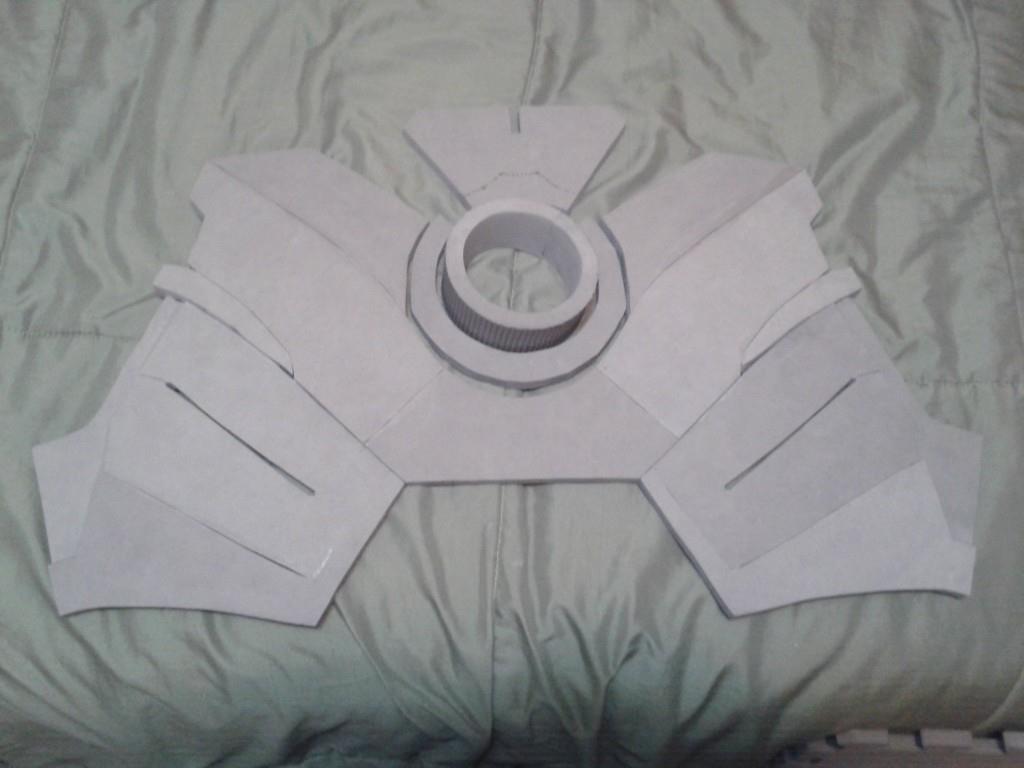
When making things out of EVA foam, craft foam is a great way to build up details. This build is no exception, with the top half and some details around the top being easily handled by adding a layer of it. Once that was done, I decided to try out something new for the details. On previous builds, I've always used a wood burning tool to etch in lines and valleys, using the dremel for deep bits. The burning tool makes a nice, thick, solid line, though sometimes it gets away from you. This time, I used a trick I learned from WM Armory: score in the lines lightly with a sharp hobby knife, then take the heat gun and go over it all. This makes a much cleaner line, with much less of a chance to slip up and burn through the wrong thing. 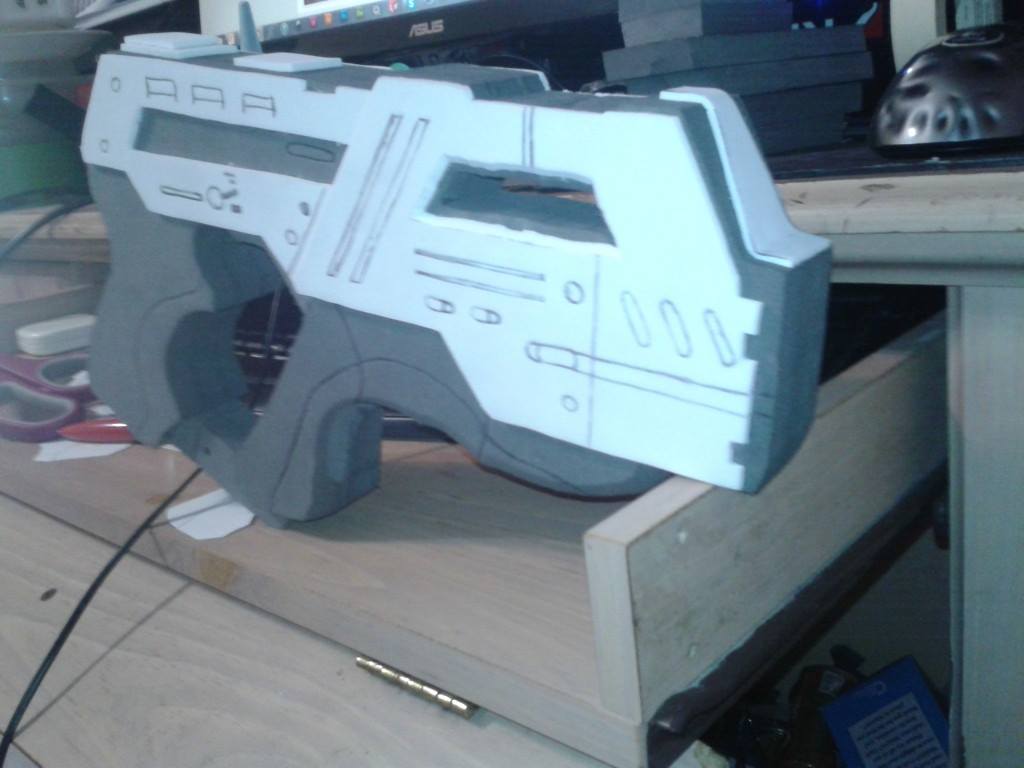
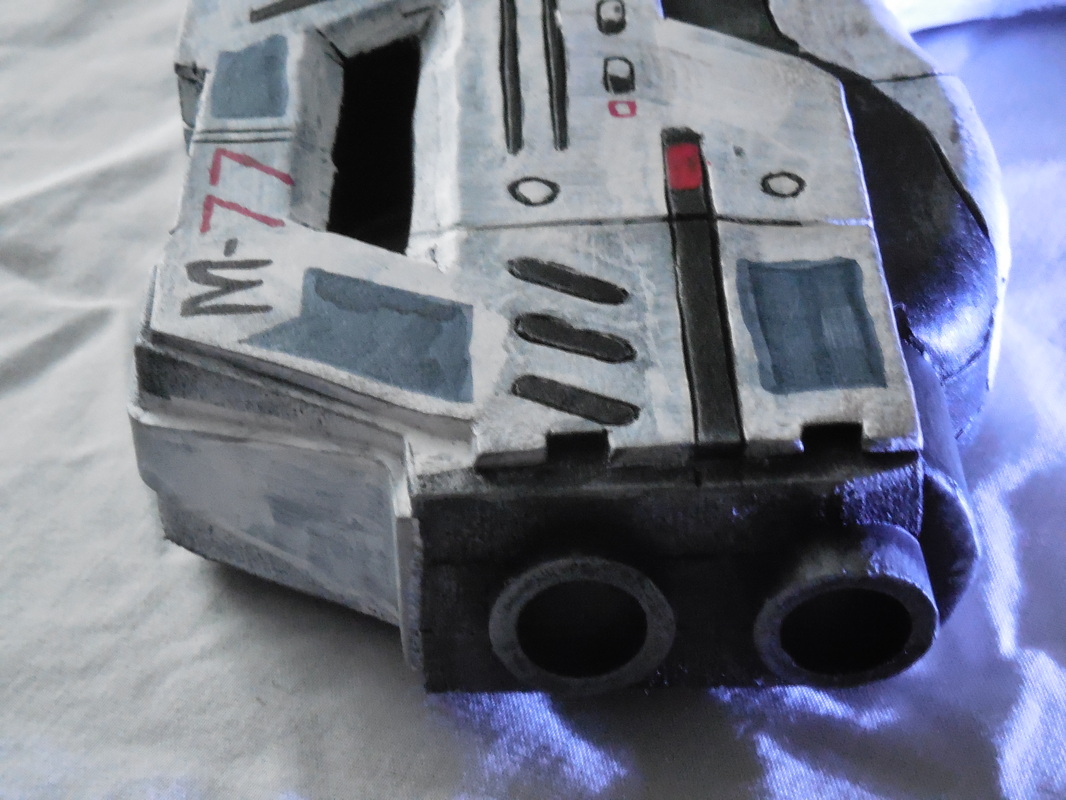
It's also really cool to watch it happen. Here's a video I shot doing the same to a section of an M-8: Now that that was done, all I had to do was add the pipe bits for the barrels, the base of the front, and the thermal clip in the back, and it was ready to paint! 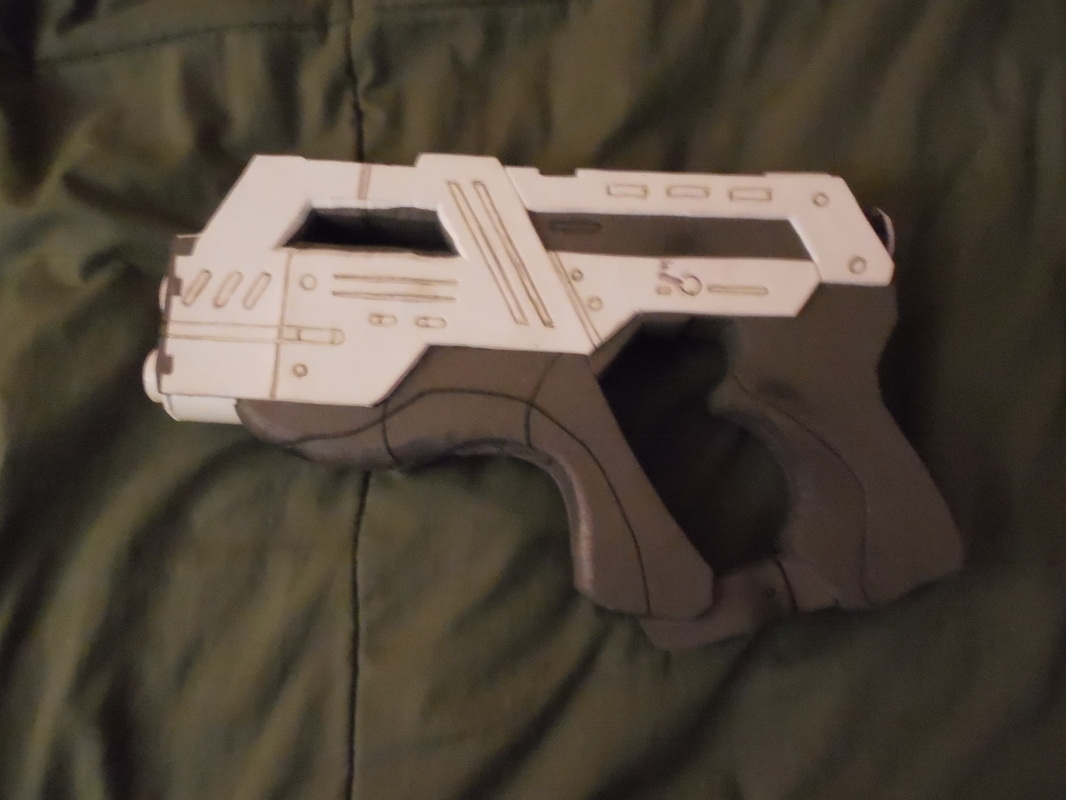
The top bit is cleaner than it looks, just had some issues with the craft foam. It looks better after the standard plasti dip, as do all the etched lines: 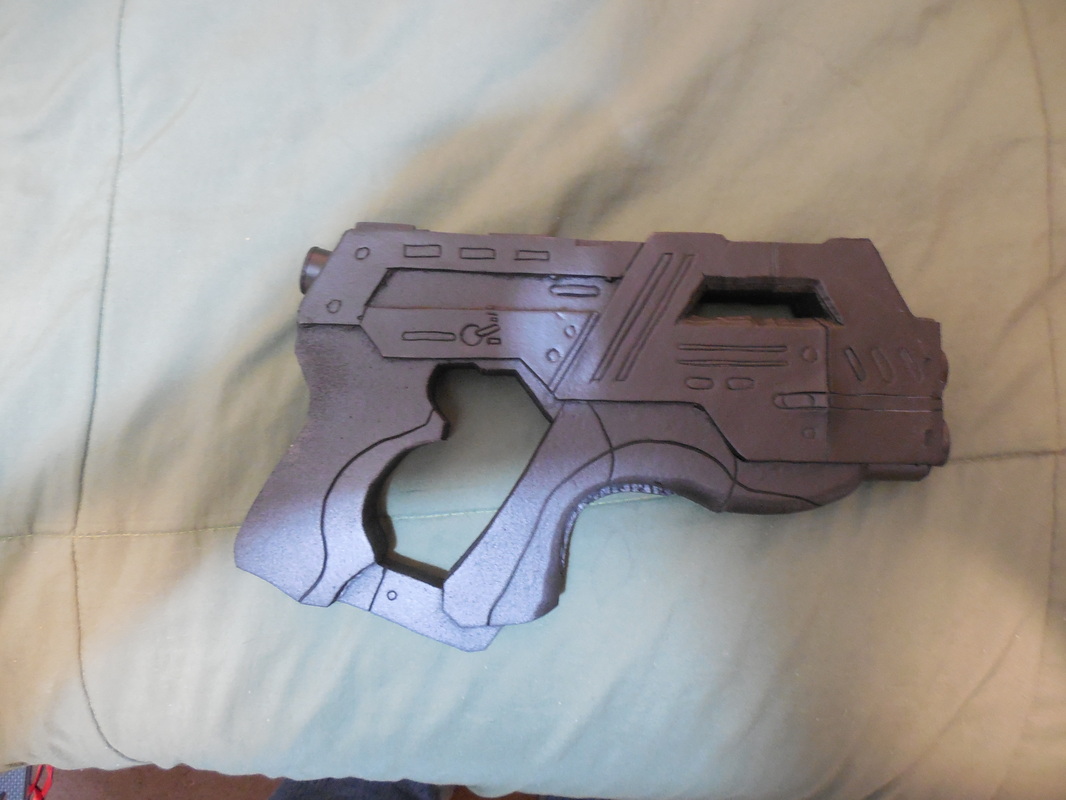
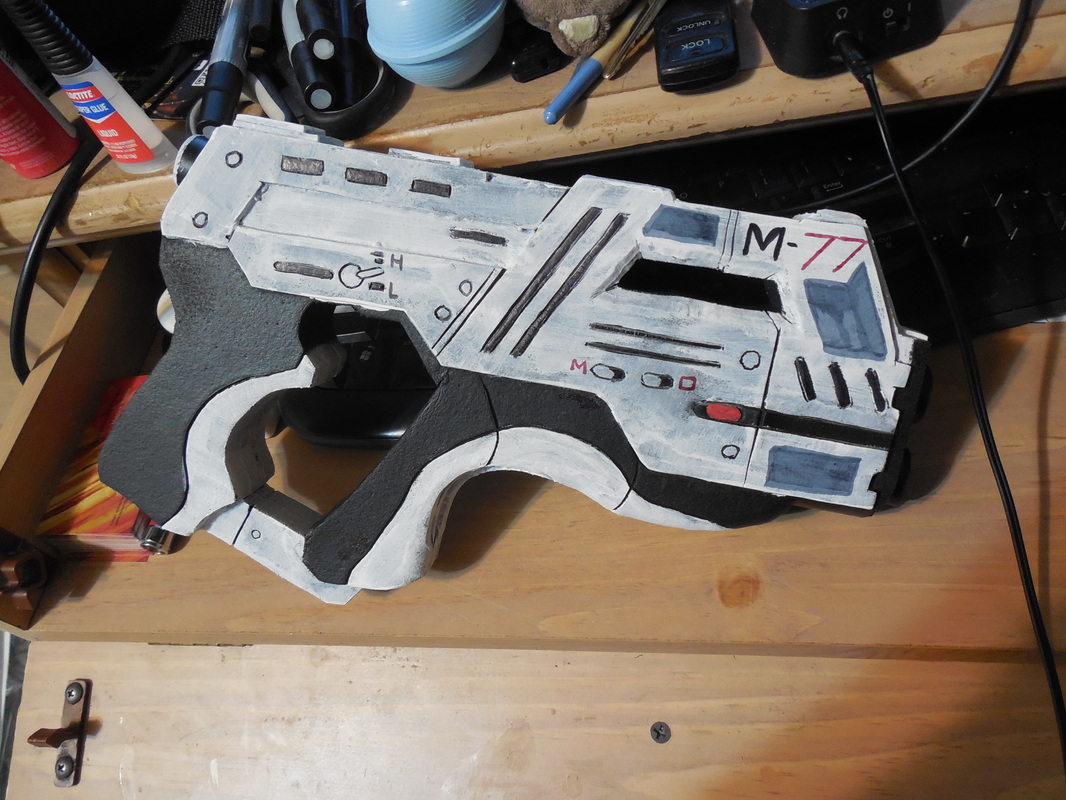
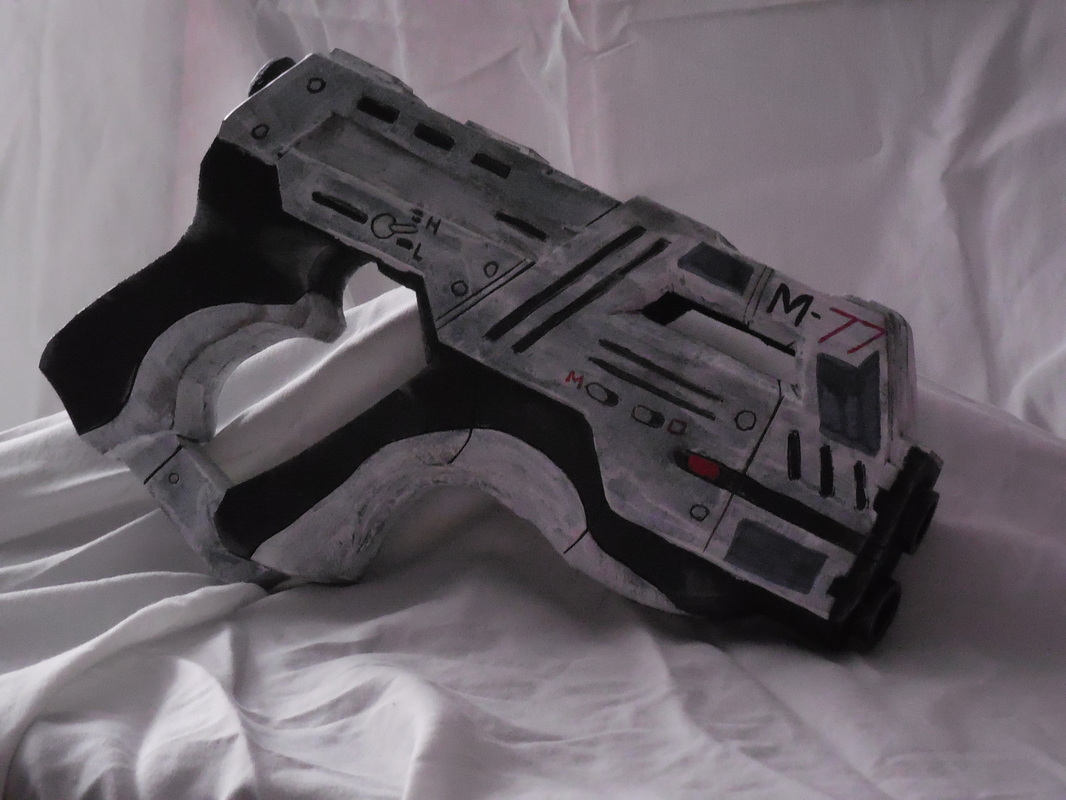
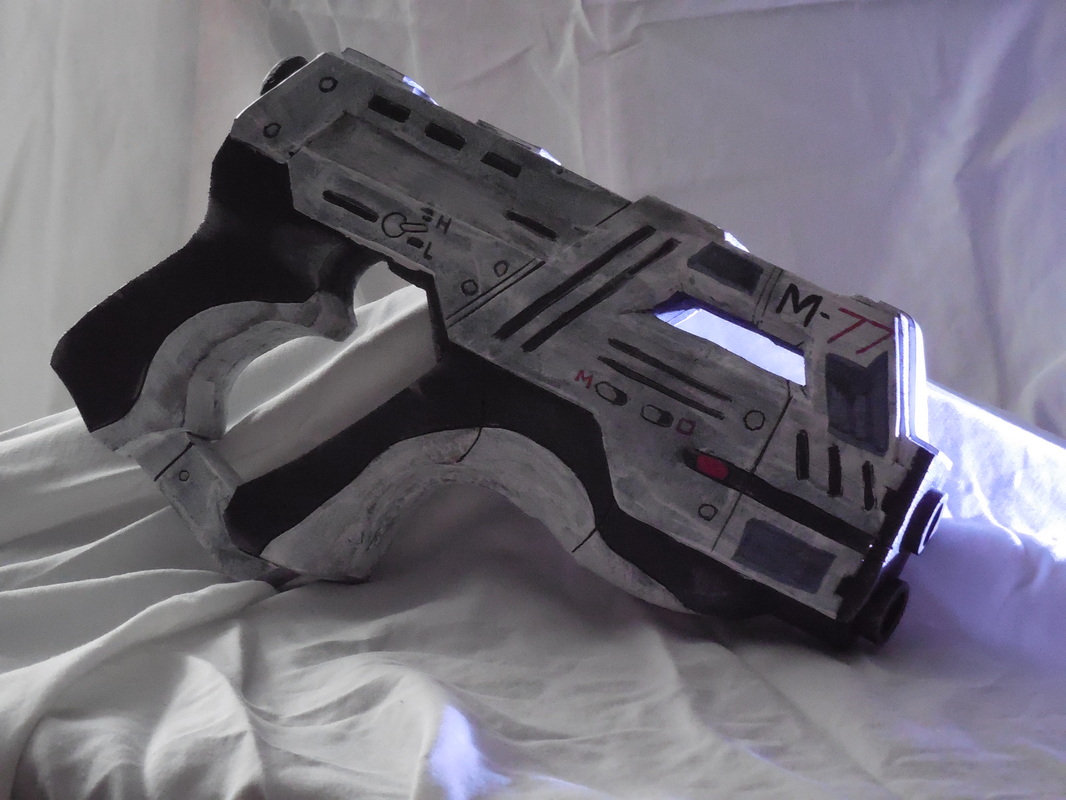
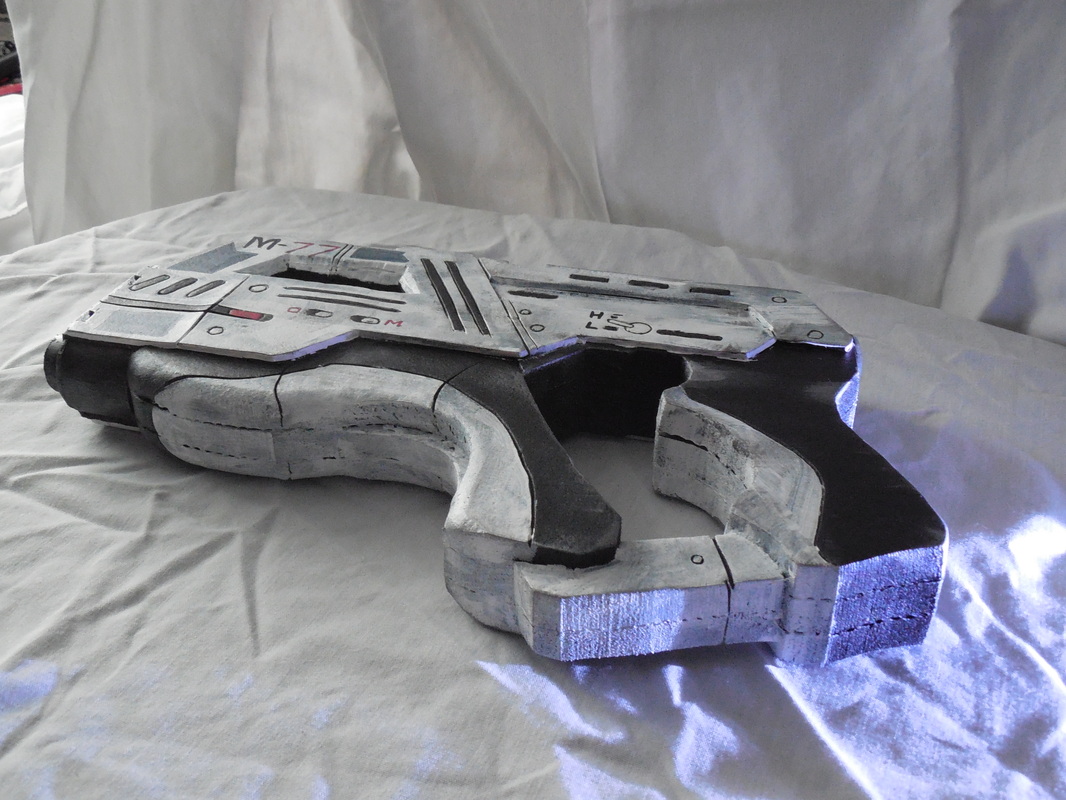
I don't have any pictures of the rest of the painting process, but everything I painted by hand. No vinyls again, so the decals are by hand as well. All things considered, though, for such a fast build I'm really happy with how it all came out! Some final shots of the Paladin, quick shots in bad lighting: I also have some shots of the customer who ordered it, who looks absolutely awesome in her Kasumi outfit! You should check it out, over in the Customer Appreciation section of the Photo Gallery!
Got a commission request a while back for a Tali helmet from Mass Effect. Some issues abounded, some lessons were learned, all the while my son had been born recently and occupied more of my time than anticipated. Top that off with someone else completely screwing me over money-wise (with PayPal's help of course), and this build just backfired. But I'm getting ahead of myself. 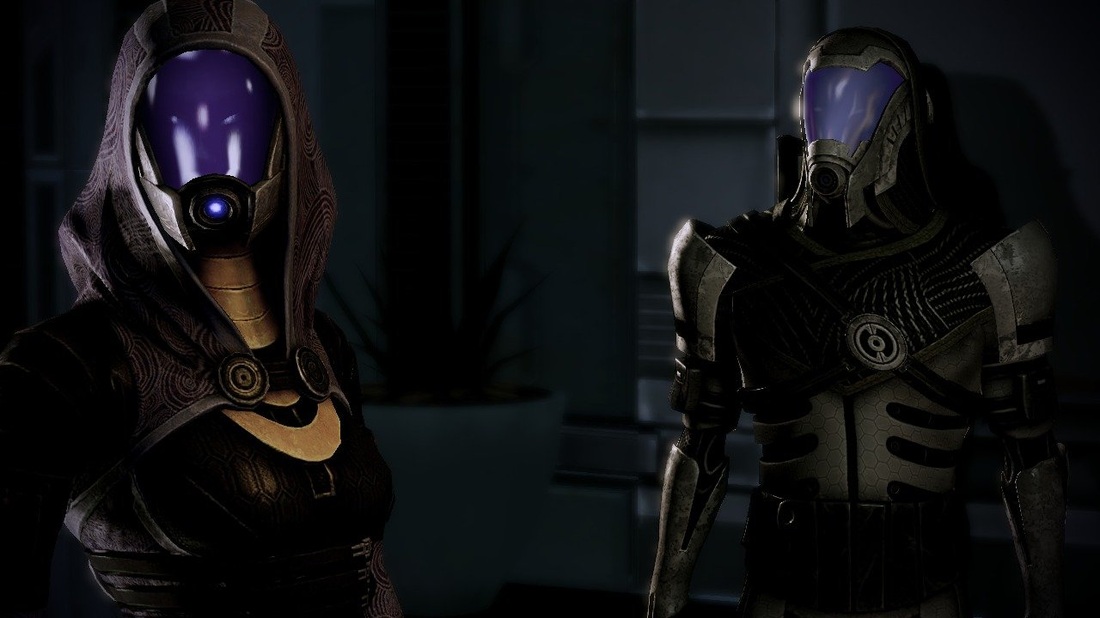
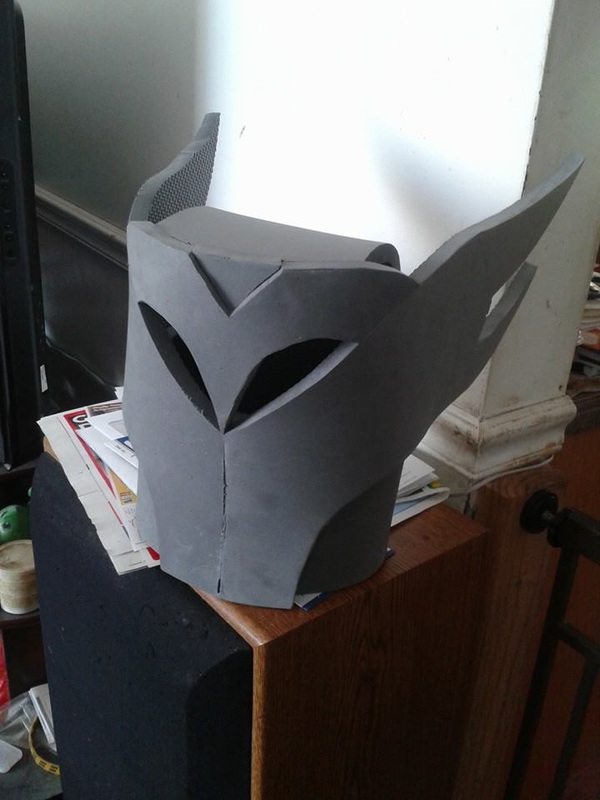
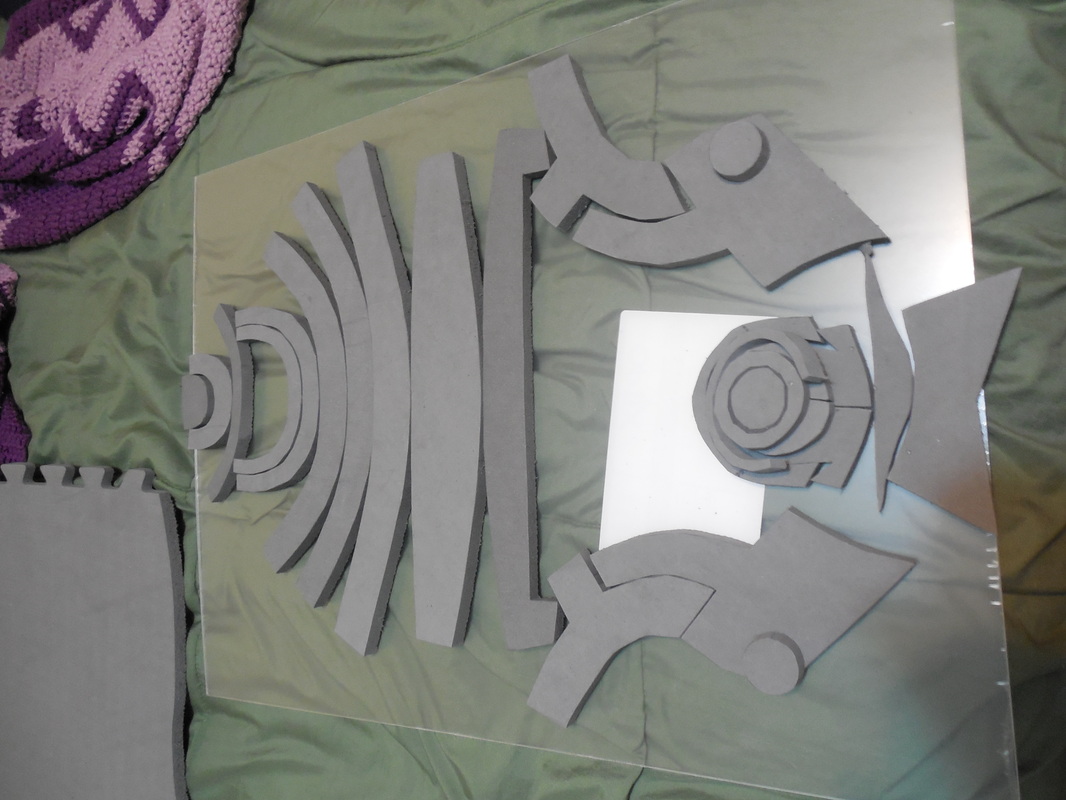
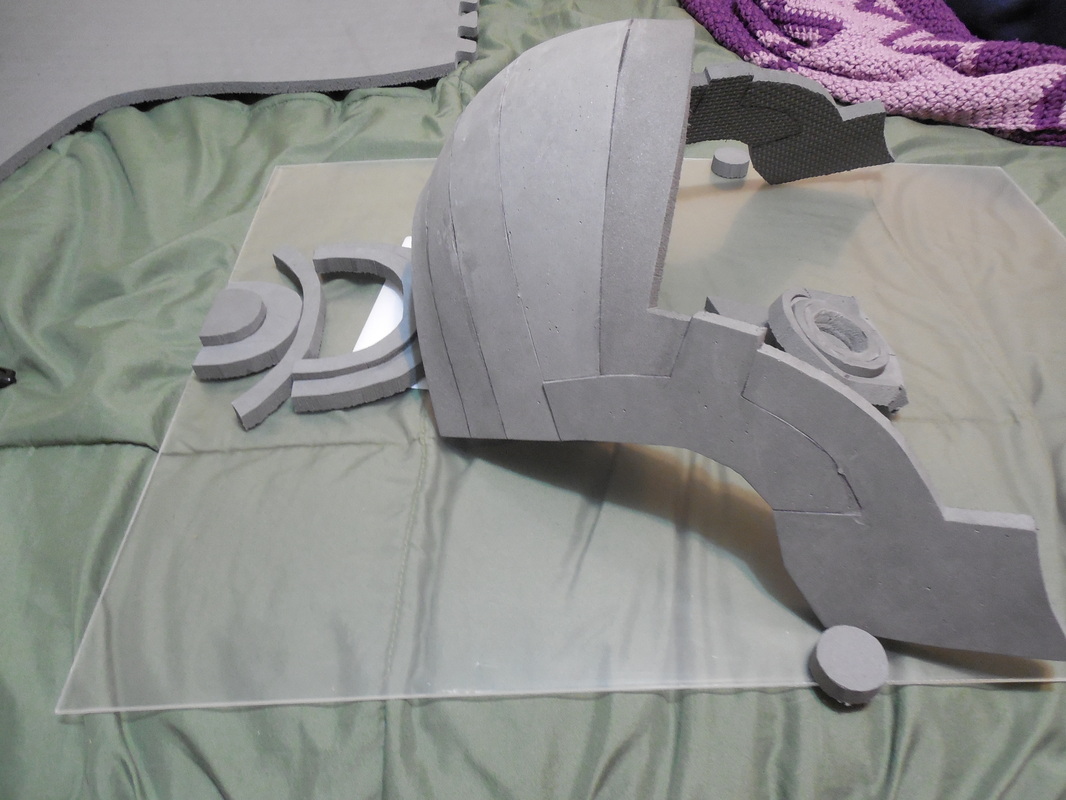
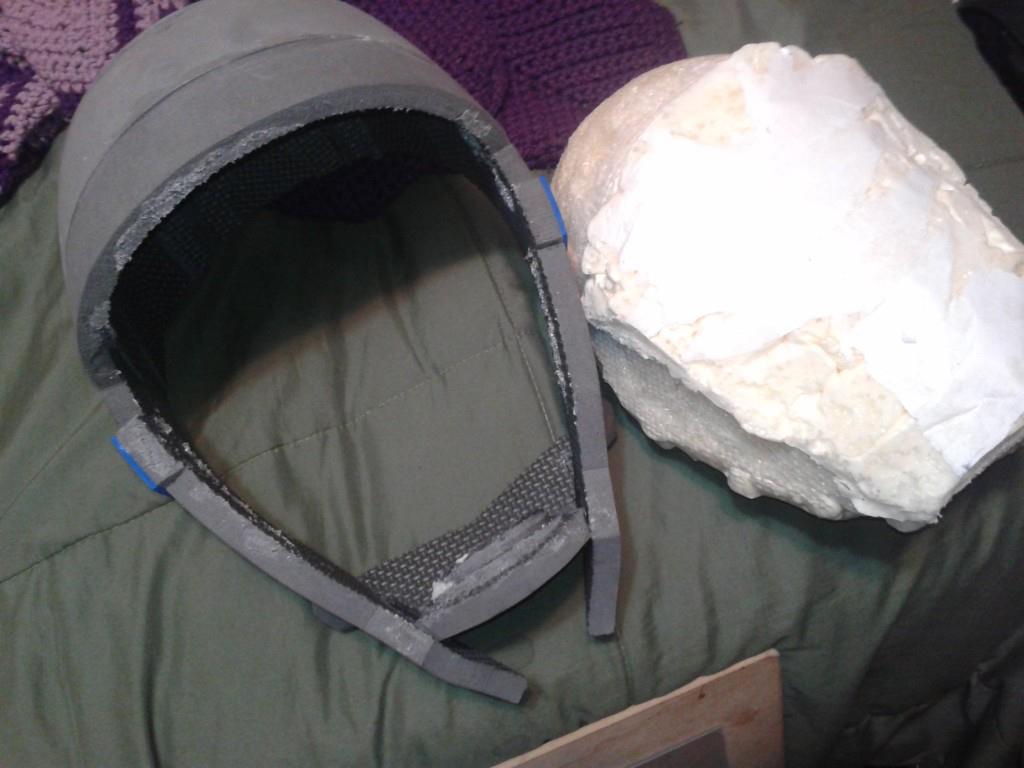
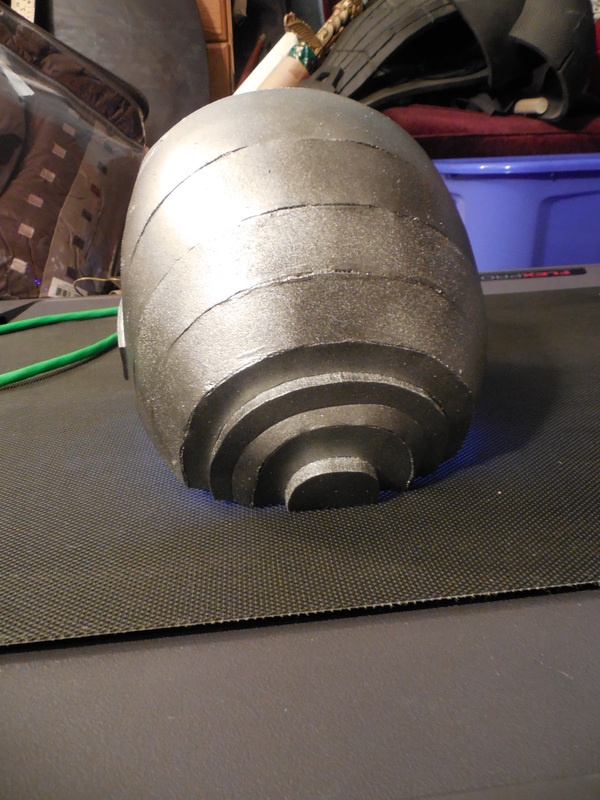
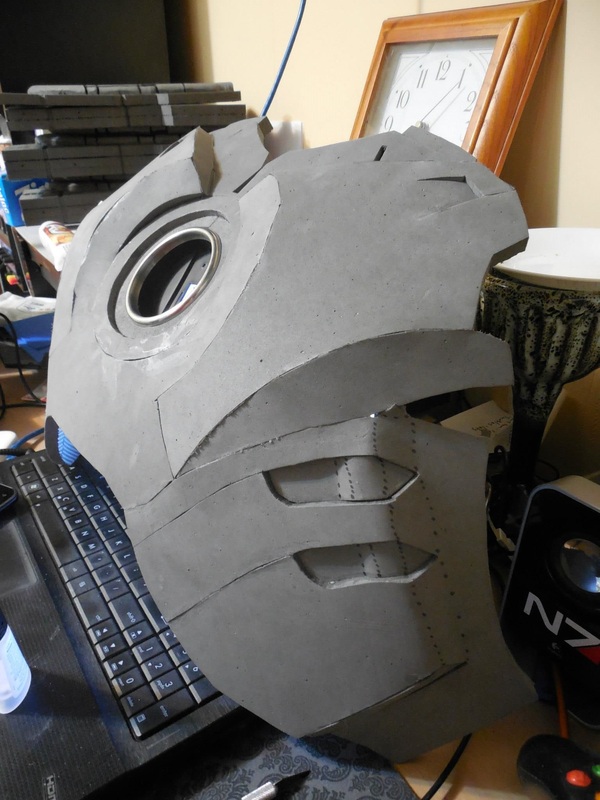
This one started off simple enough. I found a good 3D rendering image that I could size the helmet with, and a pepakura file I adapted to foam myself. Once all that was set, I got to foaming. This portion was quick, coming together a lot faster than I thought it would. I had to angle some of the back pieces and parts of the mouth bit, but it was assembled in no time. I also threw on some craft foam on either side, for added depth. 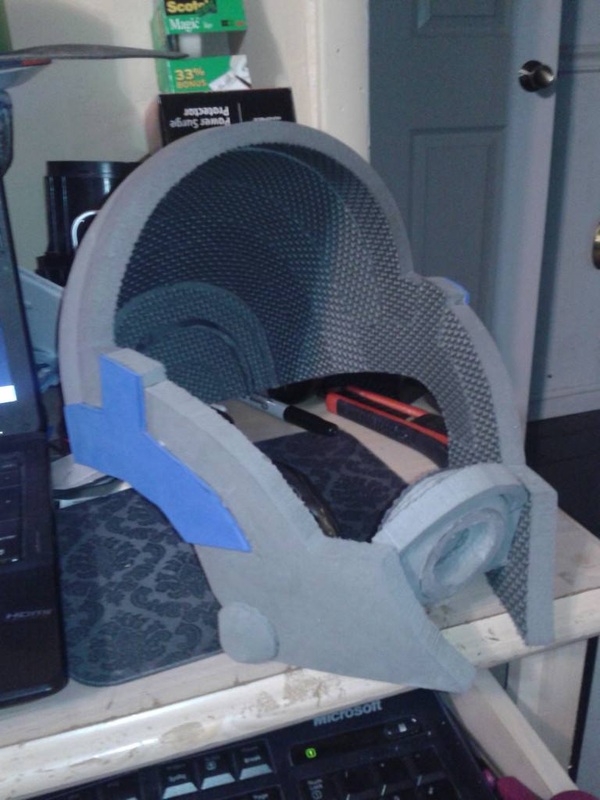
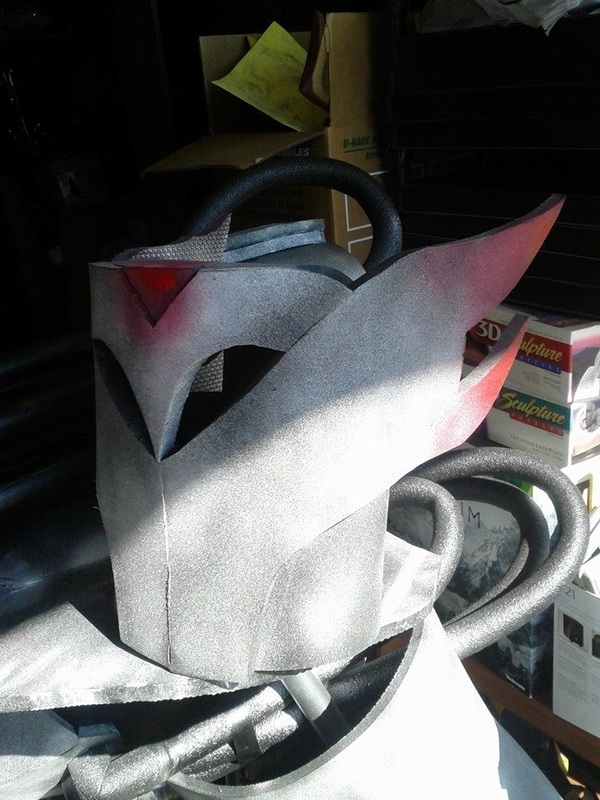
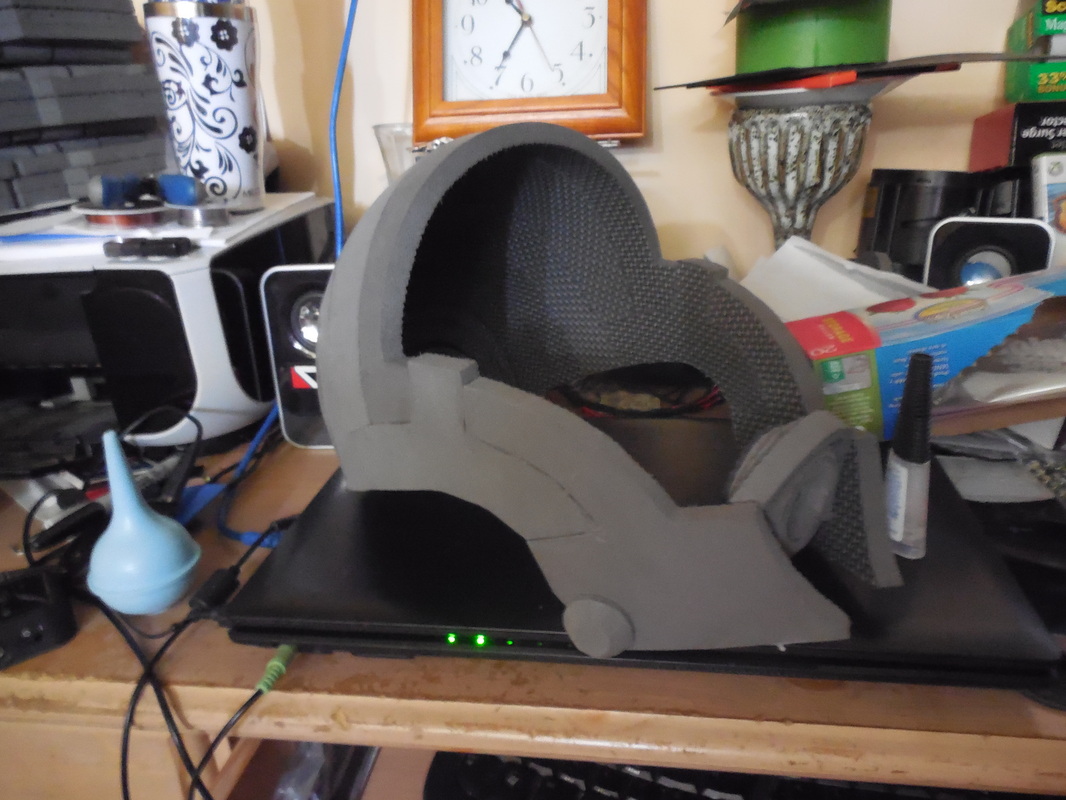
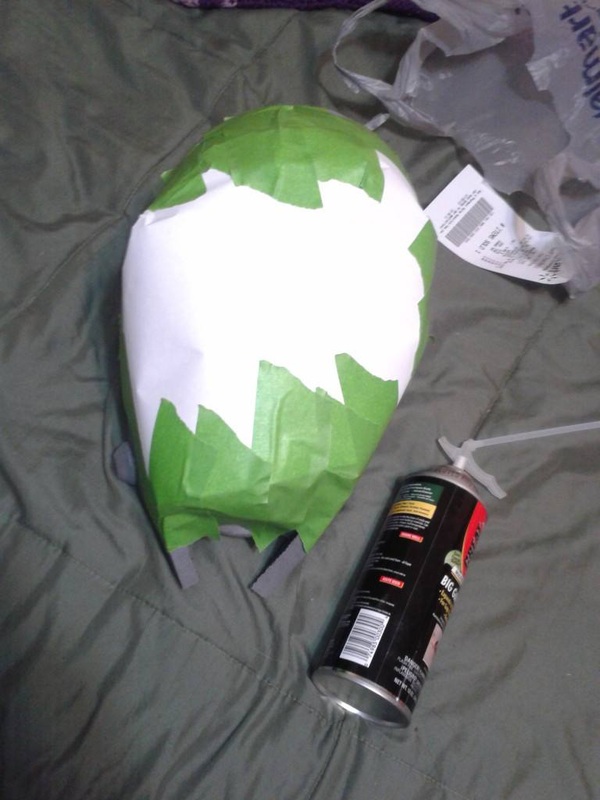
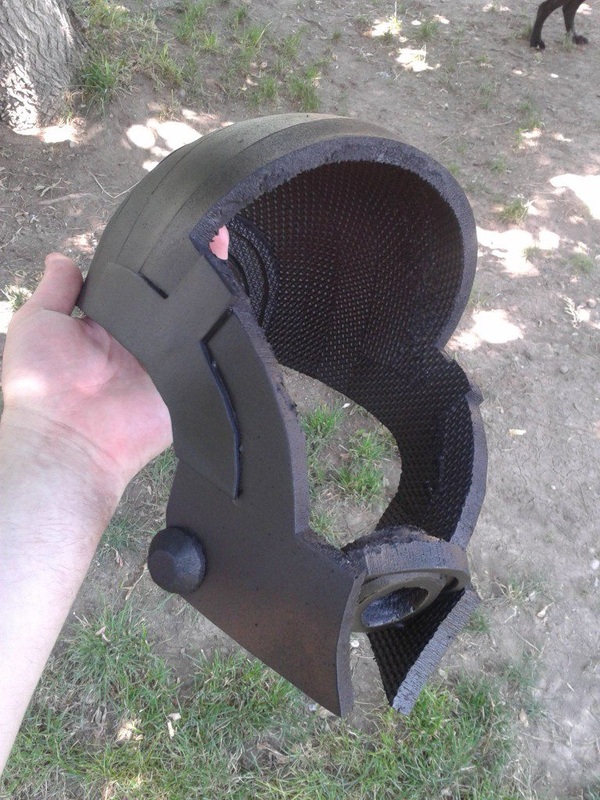
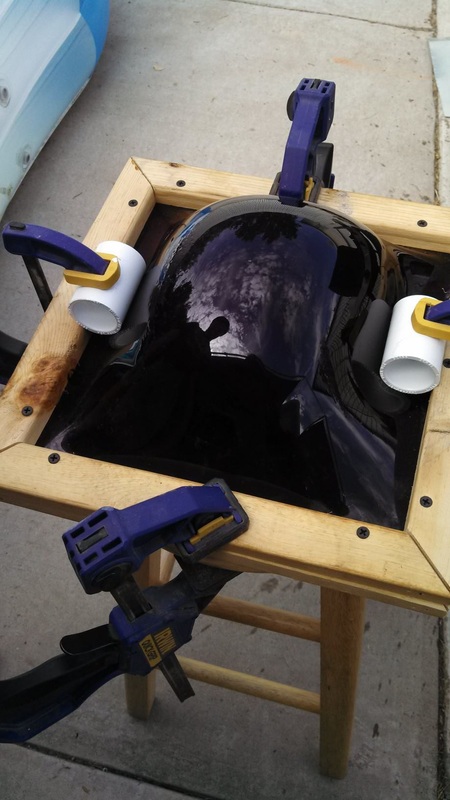
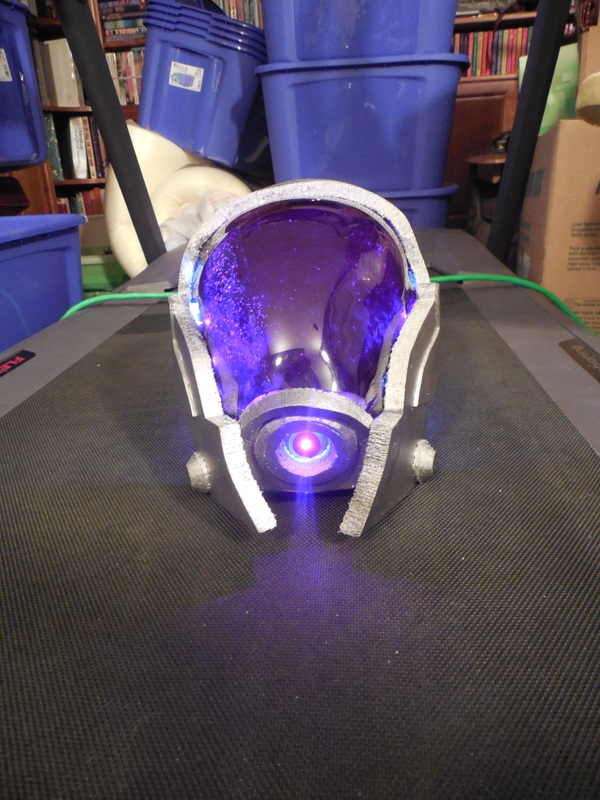
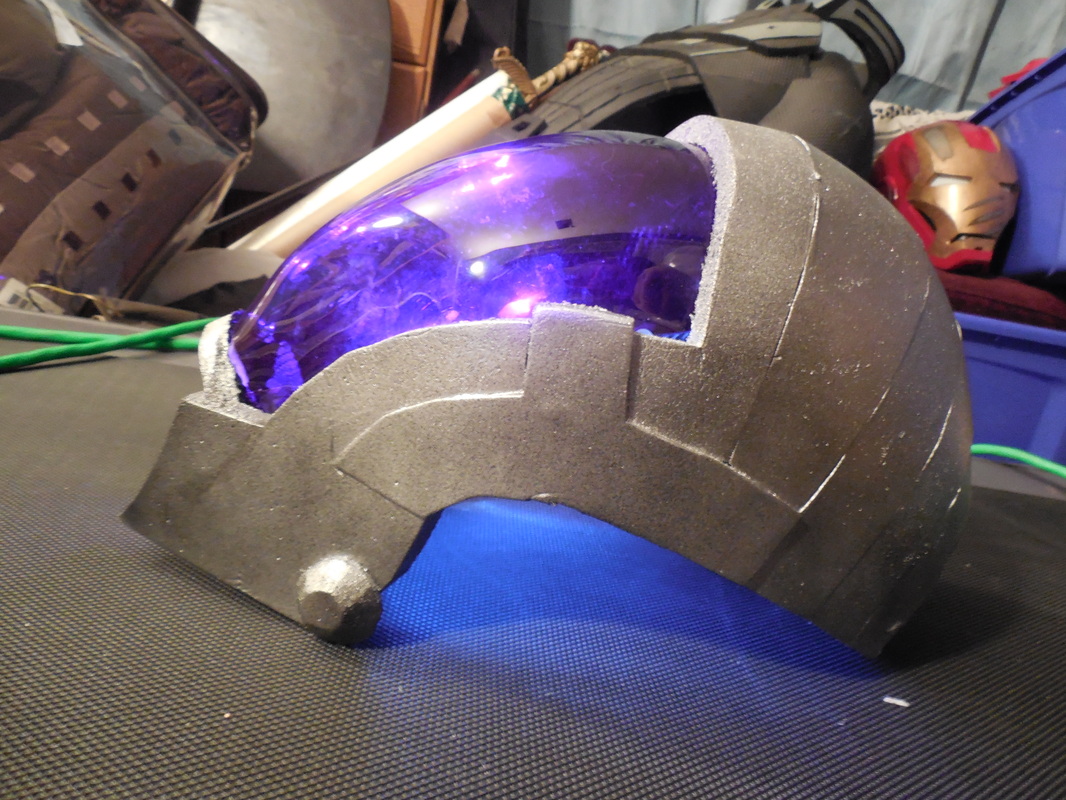
This was where things got interesting. Now I had to make a form for the visor, and I didn't have anything that would work properly: no clay, nothing solid for a shape, nothing. So, I decided to improvise. I took a couple sheets of paper, taped them up on the inside, and sprayed in Great Stuff, the expanding foam. Well, it worked, but it left a residue inside the helmet that I couldn't fully remove, it was full of bubbles, and I still had to cut it down to the proper shape. For the moment though, I put that bit aside and worked on the final stages of the helmet. This bit was simple, once again: plasti dip as always to seal the foam, a layer of Krylon Hammered Black for a bit of texture, then layers of silver metallic. I also lightly misted a black metallic over it, to add depth and simulate age, with a little bit of weathering. You can see some of the detail best on the far right shot, though you'll be able to see it better later. Back to the visor. I finally got the foam shaped right, though it wasn't as rigid as I knew I needed. I found a local shop that sells an awesome translucent purple acrylic sheet, though it was thicker than I had hoped. Got two sheets just in case. First I tried papier mache to strengthen the foam buck, though the dogs tried to eat it (I got to it in time). That didn't last past the heat gun, unfortunately, and the closest I got to a visor shape was this: 
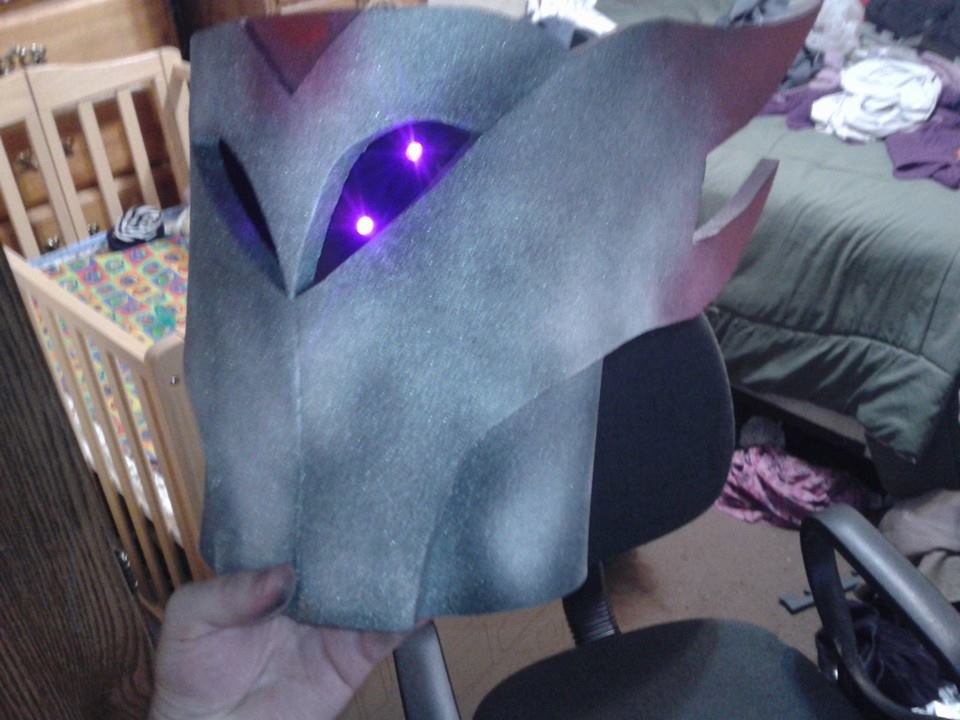
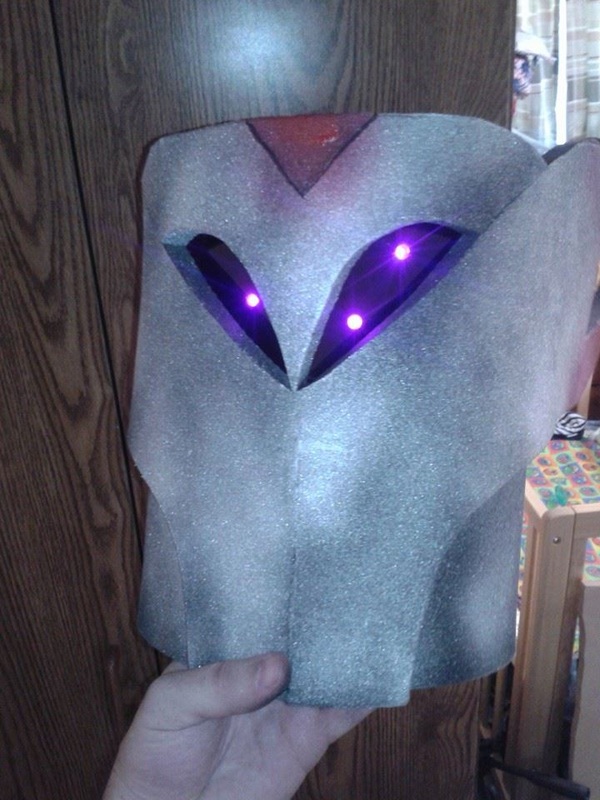
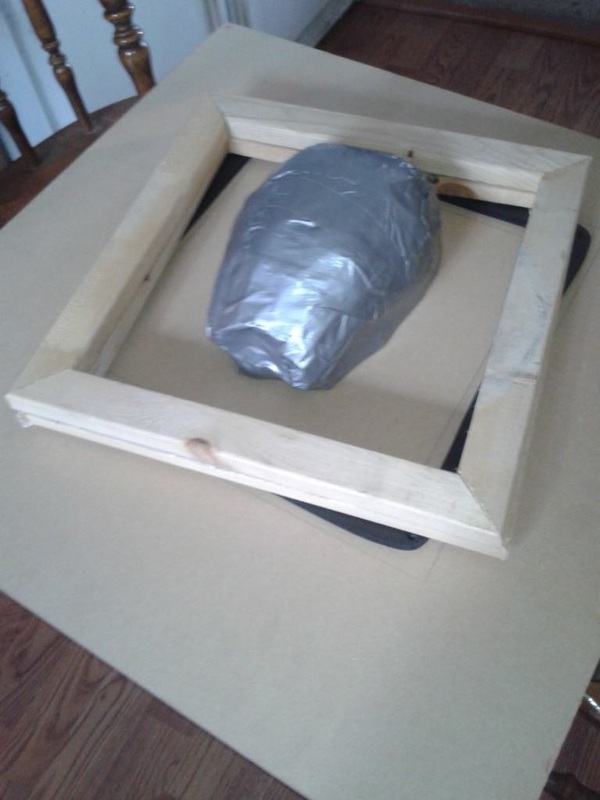
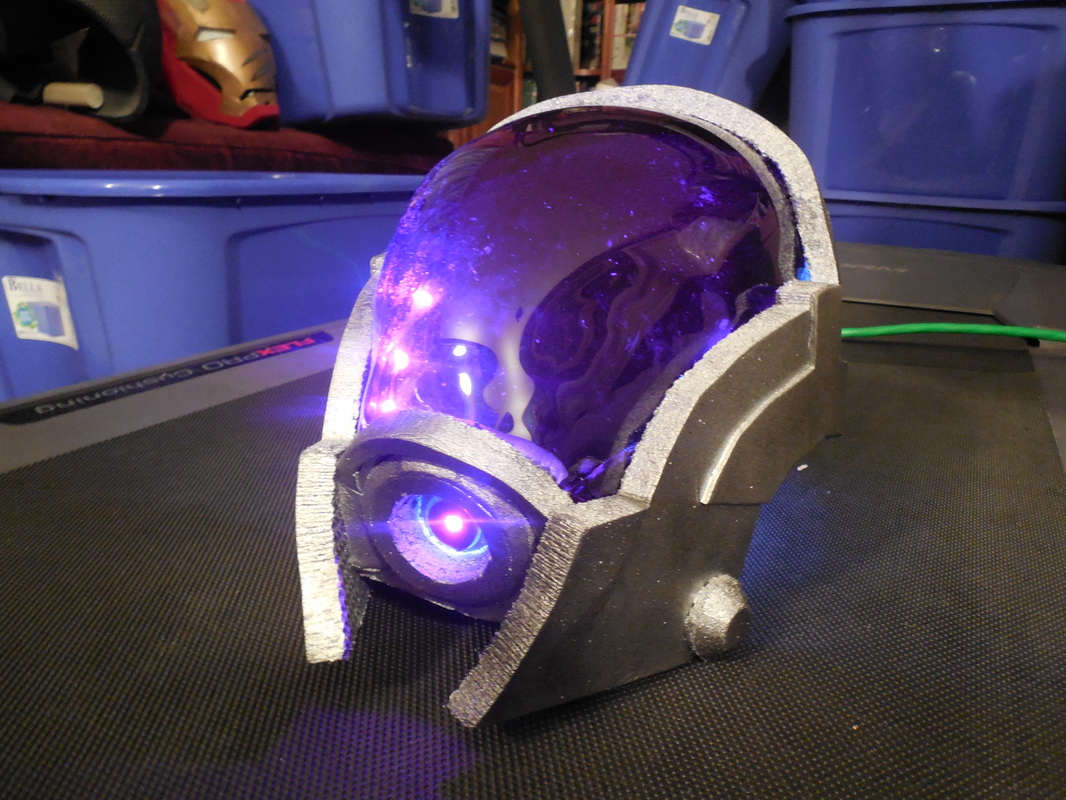
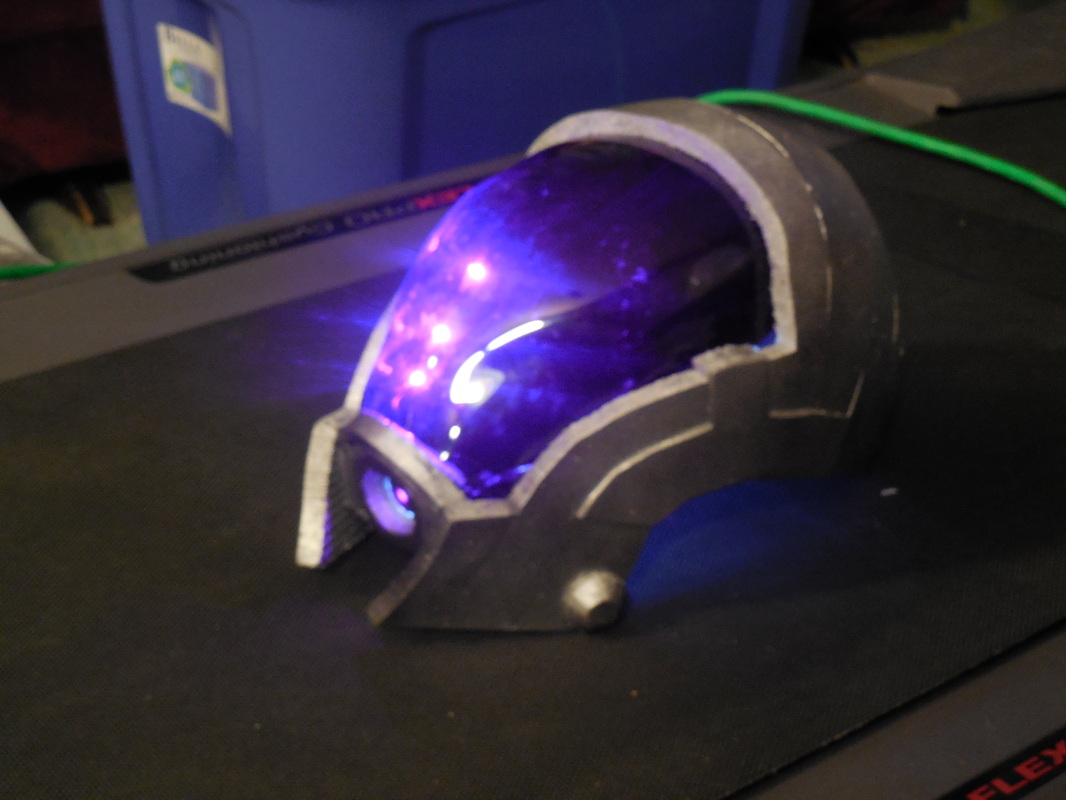
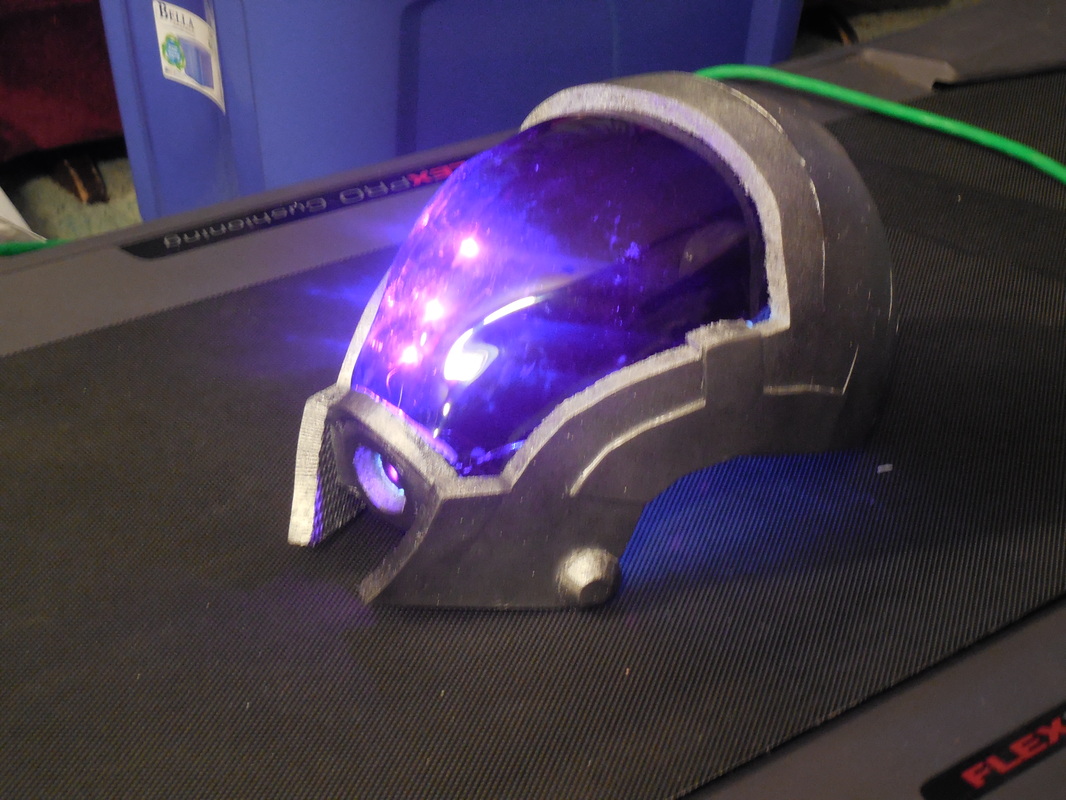
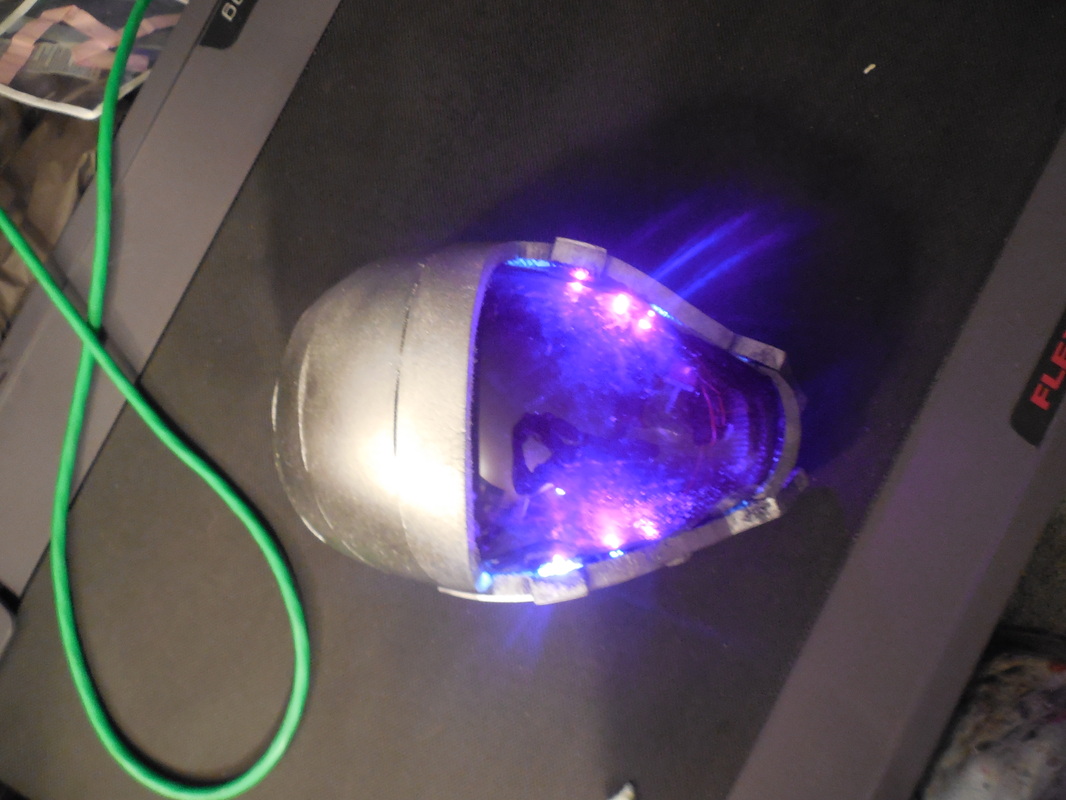
Tried that three times before I tried our oven, which for some reason just wouldn't heat the whole sheet evenly. Finally I covered the buck in duct tape, which was a better strengthener, though parts of it tried to melt on me.... After a while I gave up, ready to spend money to get a company to do it for me. My good friend Zach at Quantum Entanglement Props saved my day though, offering to help me out. Neither of us have a vacuum former, but he had enough experience from his day job to know some tricks we could try. Drove up to him, cooked up the sheet in his grill... ...and finally got it forced down to the proper shape. Now all I had to do was cut it a little longer than the helmet opening, and things would be smooth sailing! Unfortunately I nicked a couple spots, namely in the back left corner and a piece on the front right cracked. I was running out of time, and if I didn't get this to the customer that day it wouldn't make it in time for the convention. They wanted lights too, so I threw those in as quick as I could. The most glaring one is picture number seven, where you can see the opening in the back corner. However, I thought this would be hidden well enough by Tali's hood, though obviously not completely. When I sent it out, I sent a message of apology, and that I wanted them to at least have something for the convention while I made a better one to replace it. Unfortunately, this was apparently not enough. The customer was livid, and demanded I refund her.
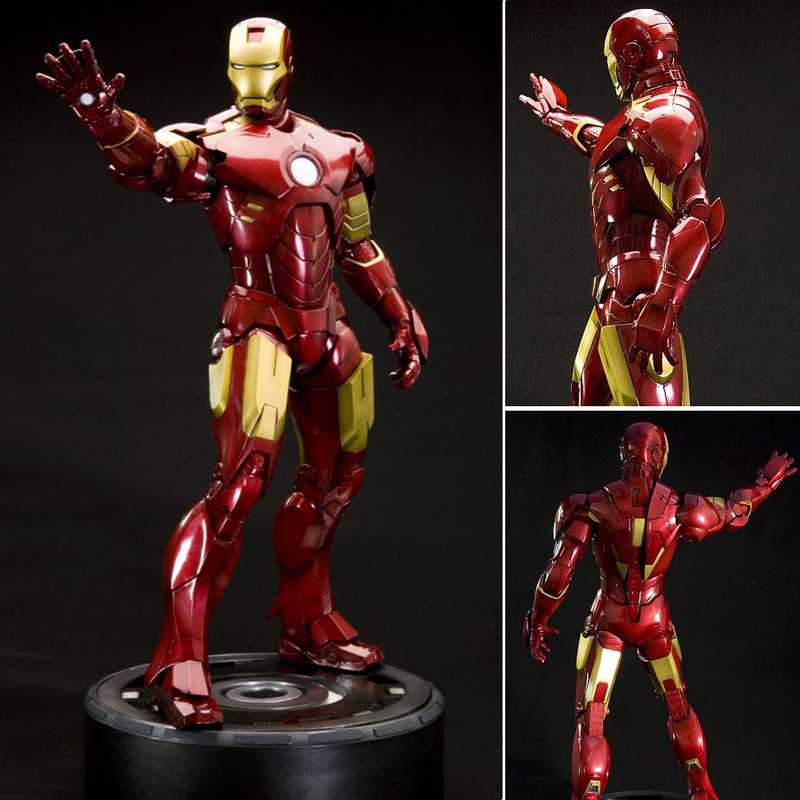
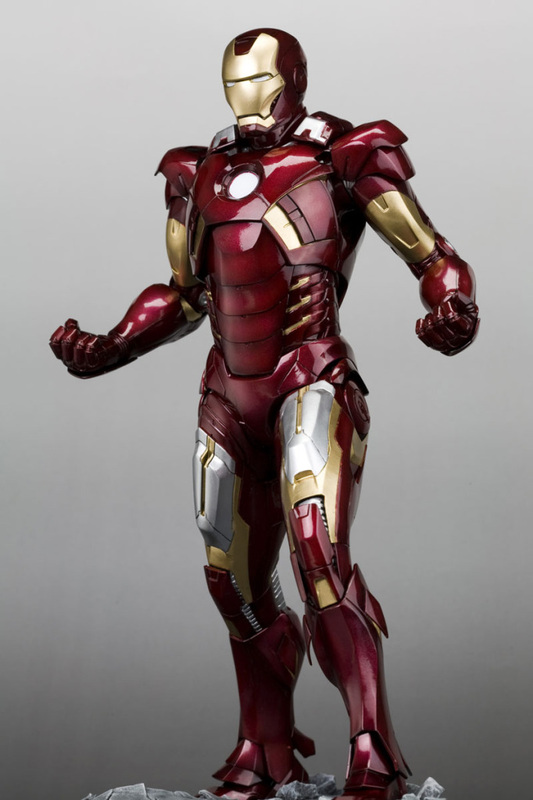
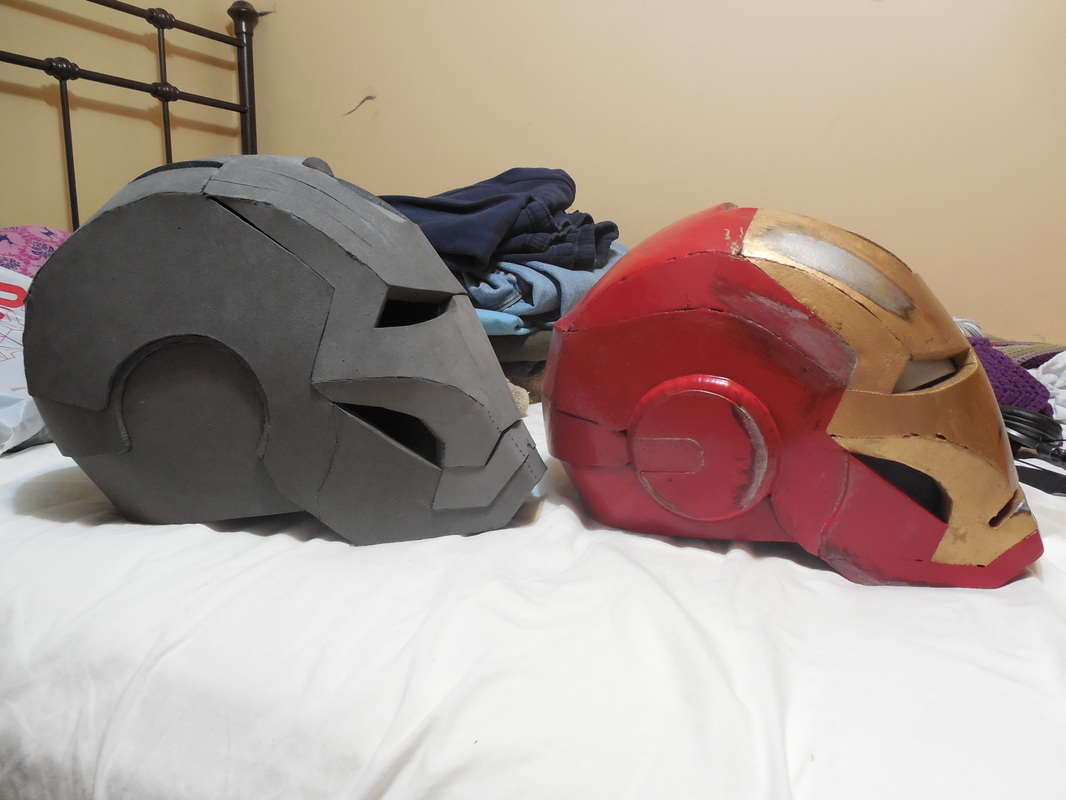
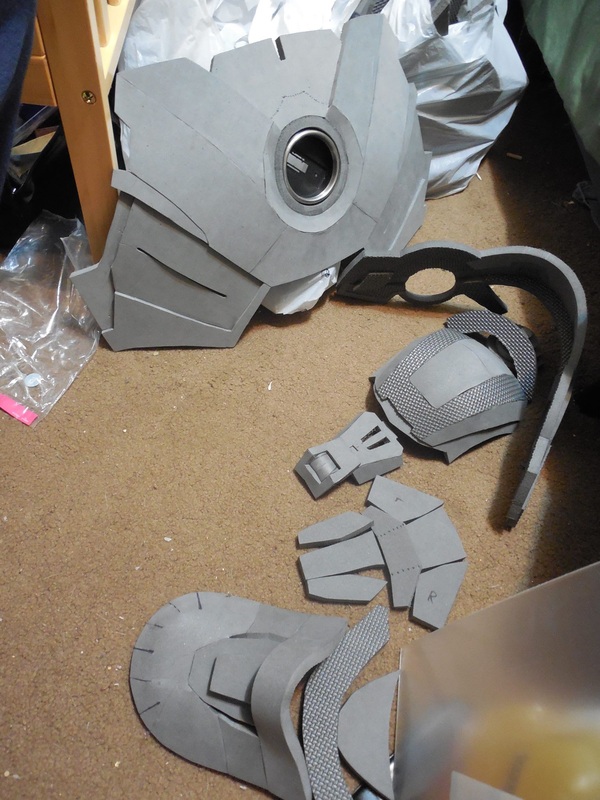
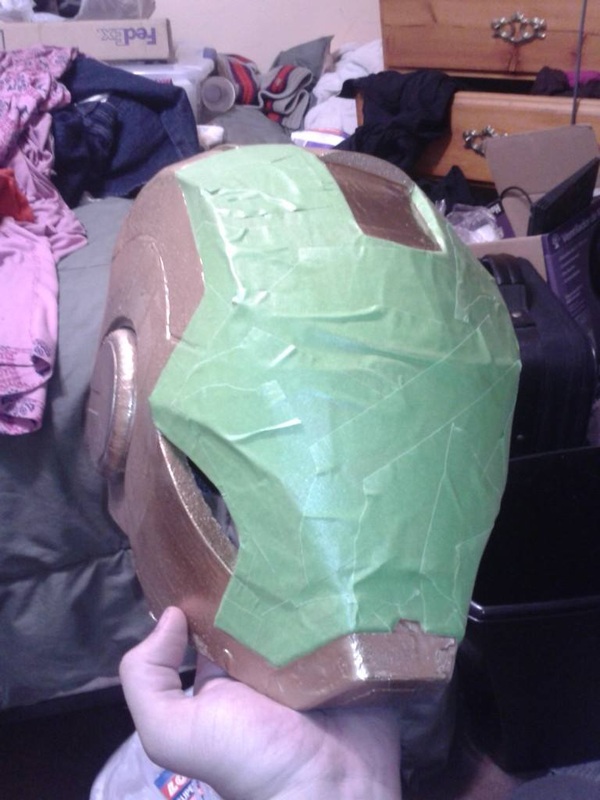
The biggest complaints, of course, were the crack and the hole, but they also had things to say about the quality. "Wasn't worthy of DragonCon" and that it looked "like a four year old made it" also came up. They complained about the back, the seams, that wouldn't be seen even once. Eventually they demanded their money back, and have since returned it. So, now I have a Tali helmet made of foam, with a visor that, though it does have those two problems, is passable and replaceable in the future. I will absolutely admit that I could have made it better, but there it is. If anyone is interested in purchasing it, I am taking offers. Please send me a message through the Contact page, if you wish to talk more regarding this item. And now, for something not Mass Effect! Been commissioned to make an Iron Man Mark IV suit out of foam, so I decided to do two at once - one for them and the Mark VII (from Avengers) for me. As you can see, there are some major differences between them as Tony upgraded movement, software, you name it. I think the Mark VII looks the best so far (yes, even compared to the newest movie), and since he's always been my favorite, I want one! For this build I started with the helmets. The first one I made was too round and too small, but it worked in a pinch for a Tony Stark cosplay as a carry-around prop. This started, as before, from a pep file adapted for foam. 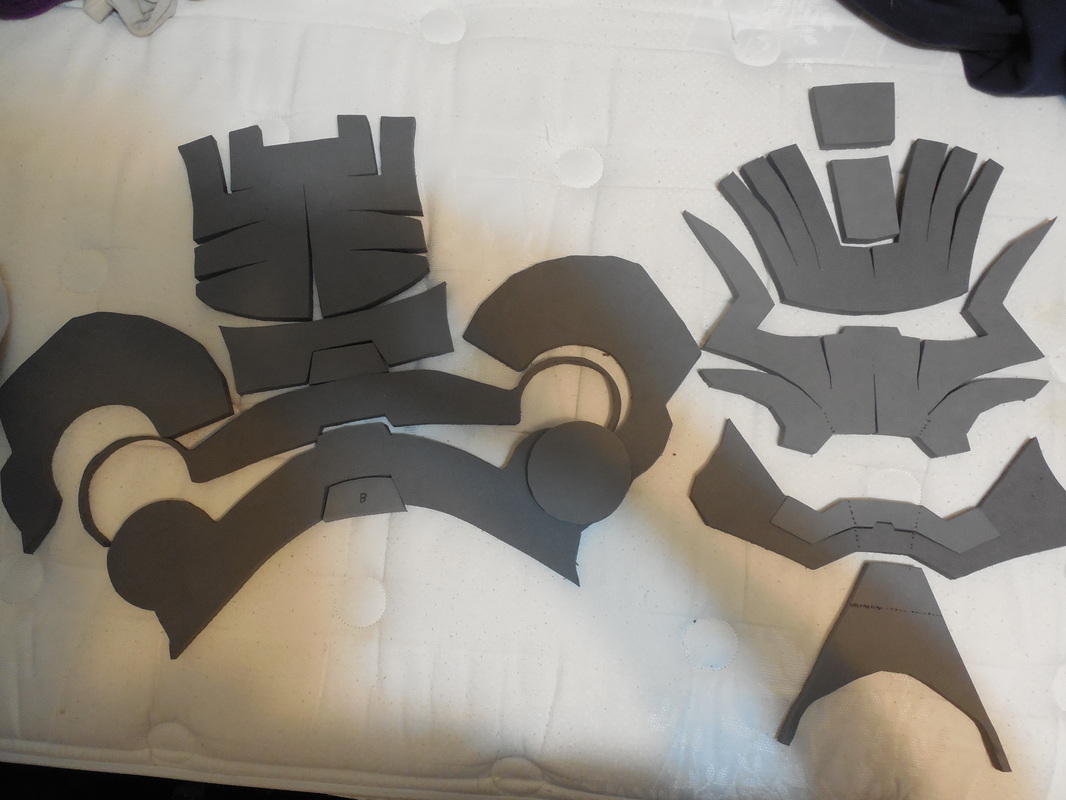
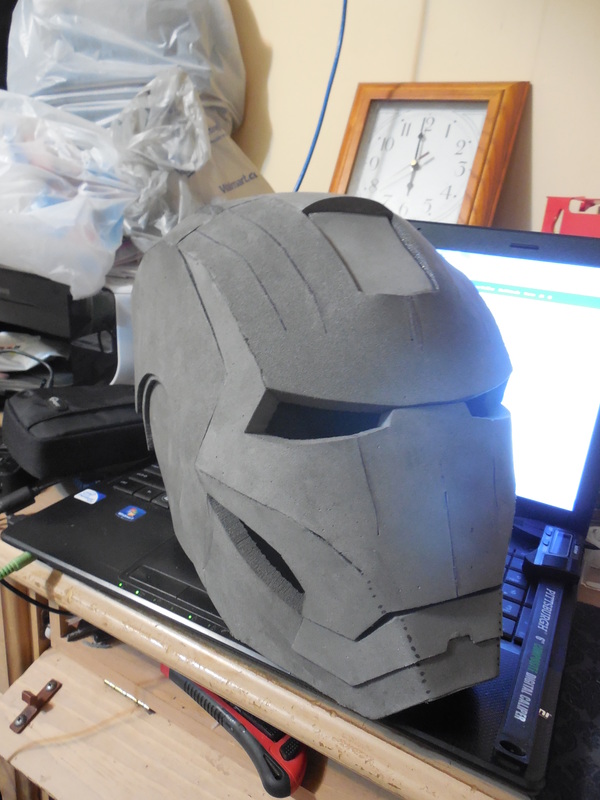
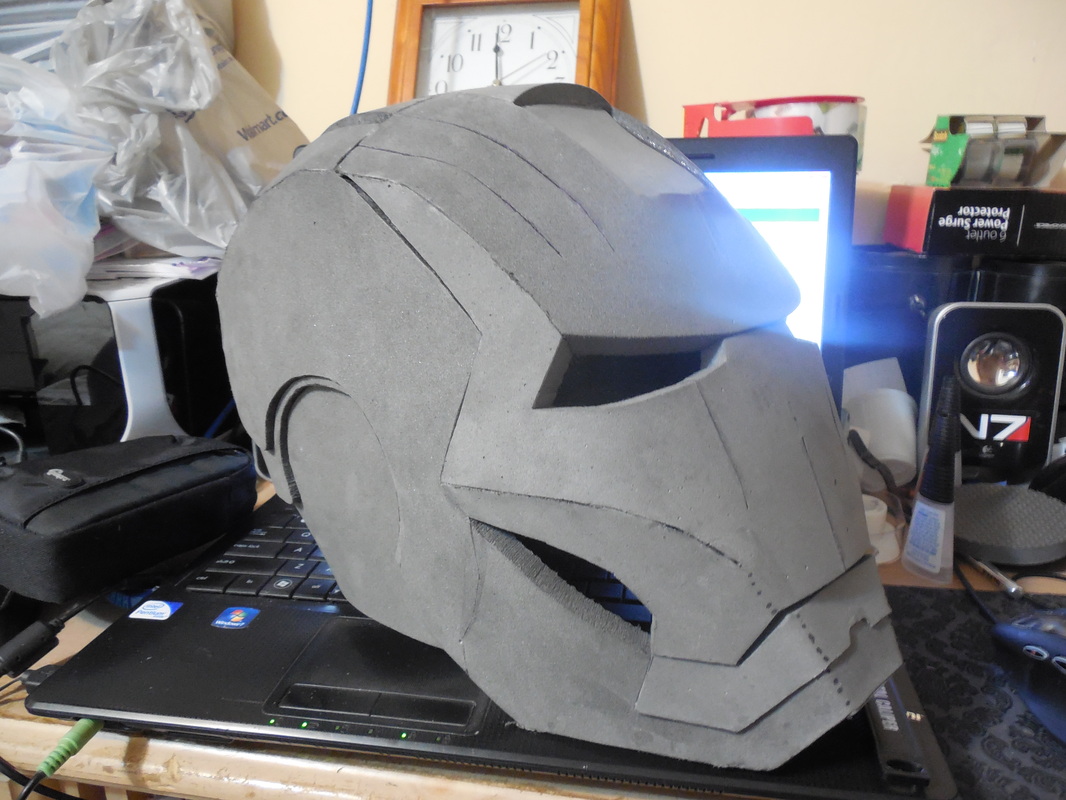
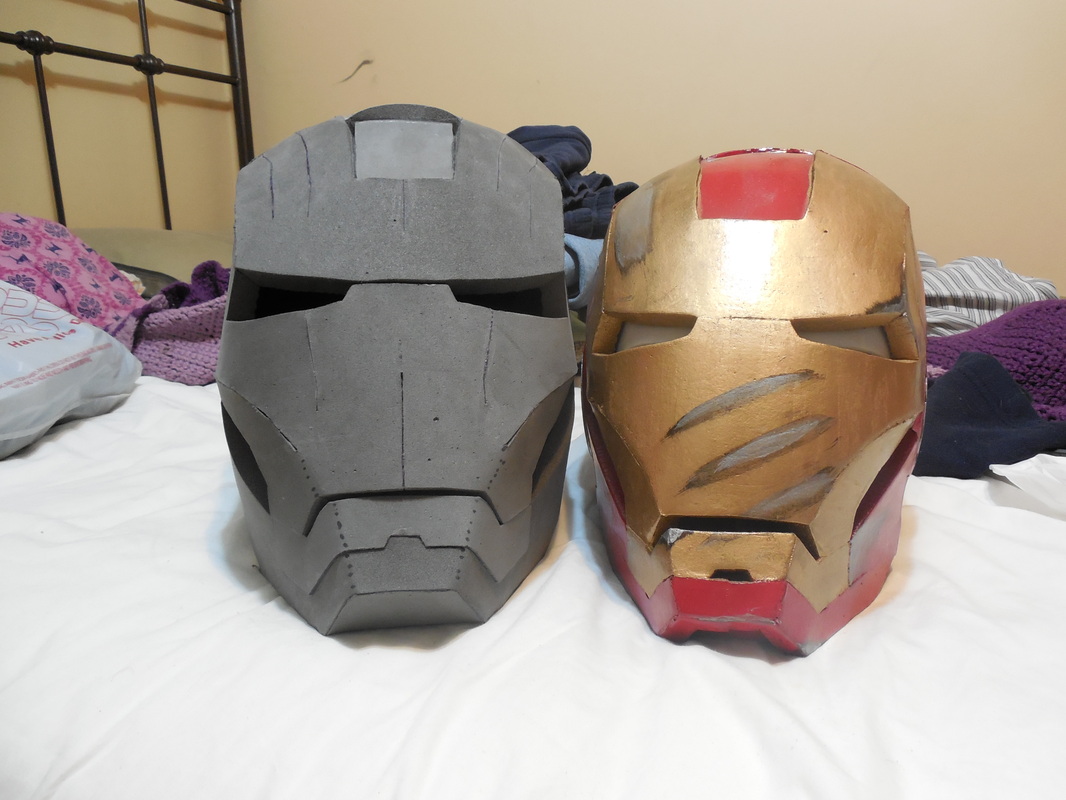
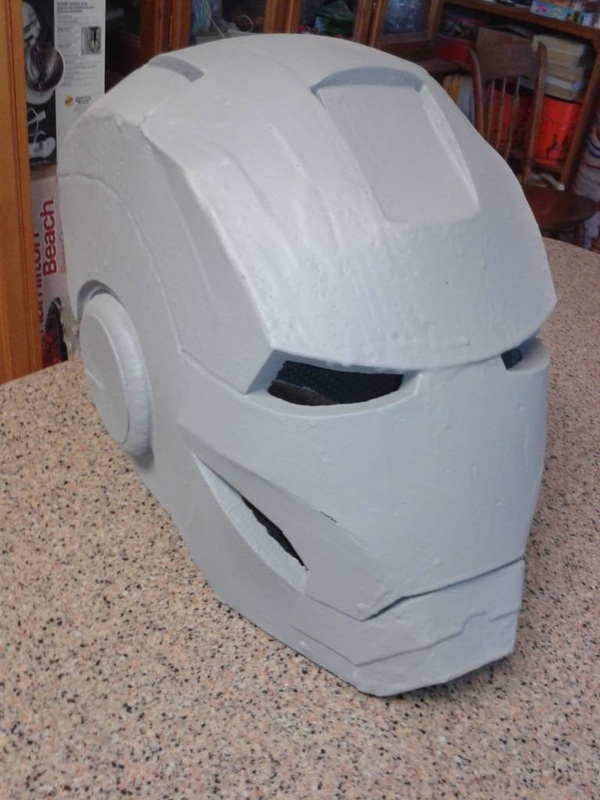
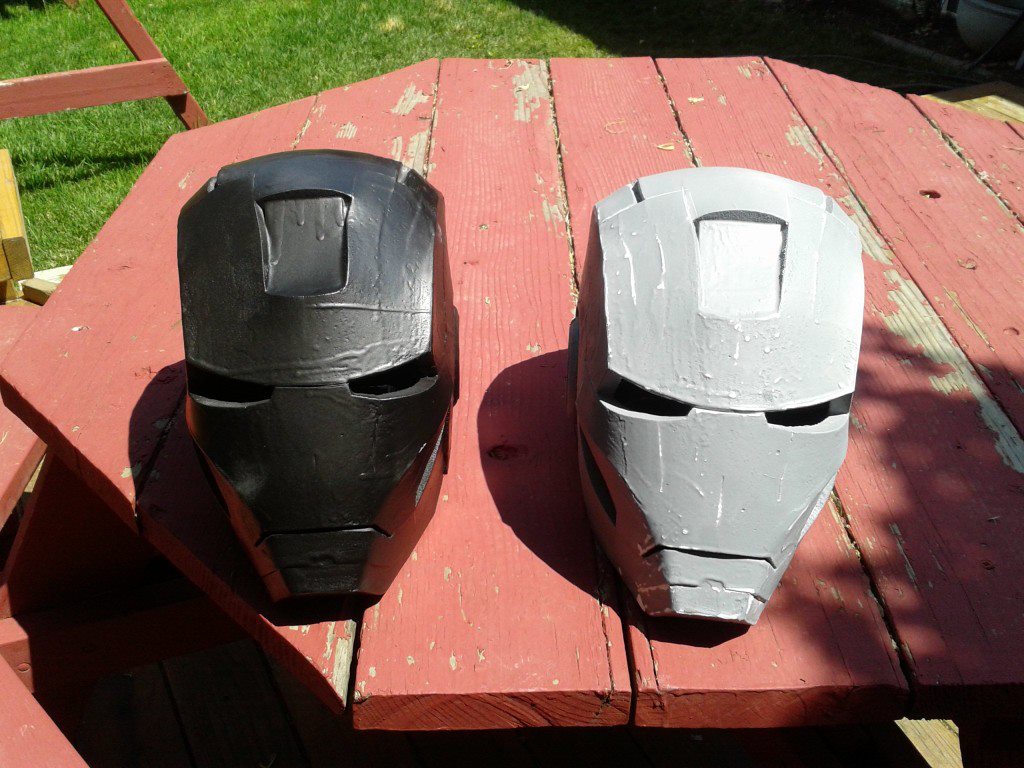
As you can see, several pieces fit together quite well, but others will need some work. For these, I used my great little tiny belt sander, angling certain edges to give a harder corner. The dotted lines you see are spots I took an xacto knife to, cutting valleys almost all the way through to fold up but remain a single piece. This saved on gaps and holes when gluing the foam. The final product: Astute fans will notice that this is the Mark VI helmet. The Mark IV is similar with some slight differences in the screw locations, and the Mark VII has a different chin altogether. I, personally, prefer the look of the Mark VI, so for my Mark VII build I'm going with this one - at least for now. The Mark IV though will get the proper treatment. As for the first helmet attempt, here are a few comparison pics to demonstrate how off it was. As you can see, the new one is not only bigger, but is a better sculpt overall. Cleaner, harder lines, better profile, and looks a lot closer to the mark than the old one. Not that I hate the old one - it just doesn't look quite as good. After that was ready, it was time to throw on the ear pucks. These I made with foam again, rounded down with my table router, and a shaped piece of 1/16" styrene (remember those For Sale signs?) on top for detail. 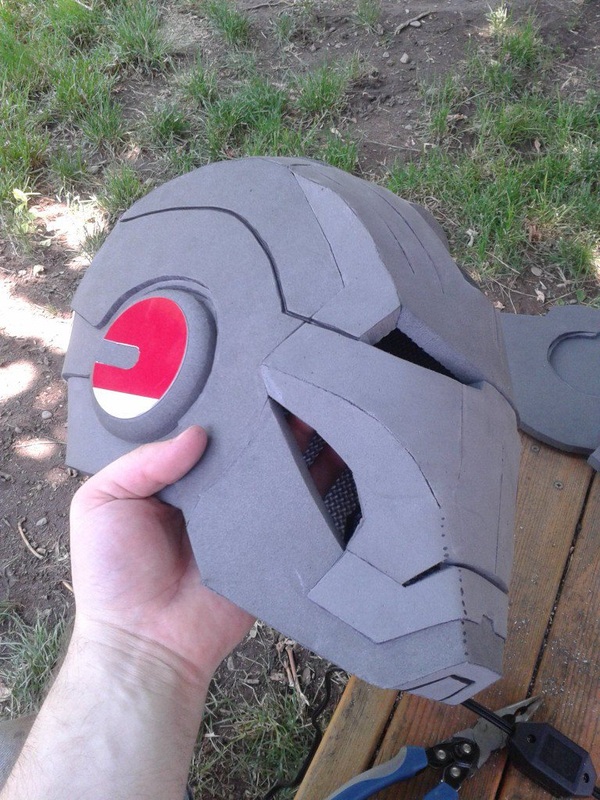
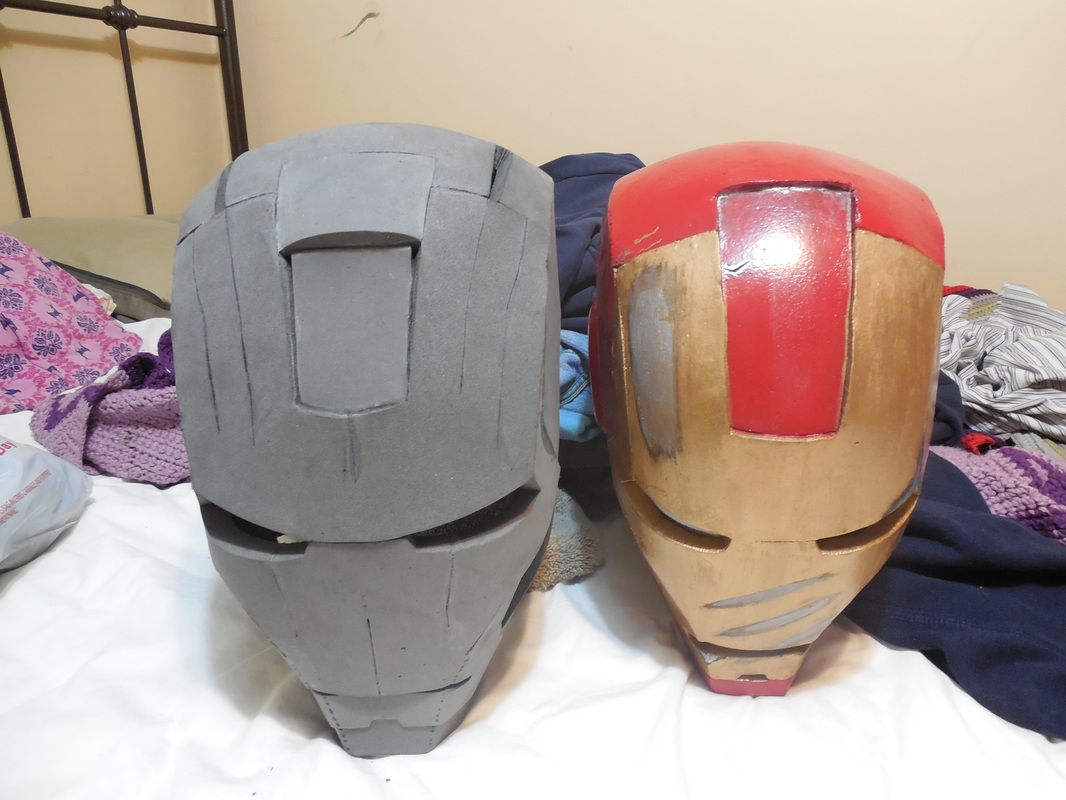
Once those were put together, I started sanding down edges and etching in extra details, like the line on the side of the face and the chin bits. Two helmets, assembled! 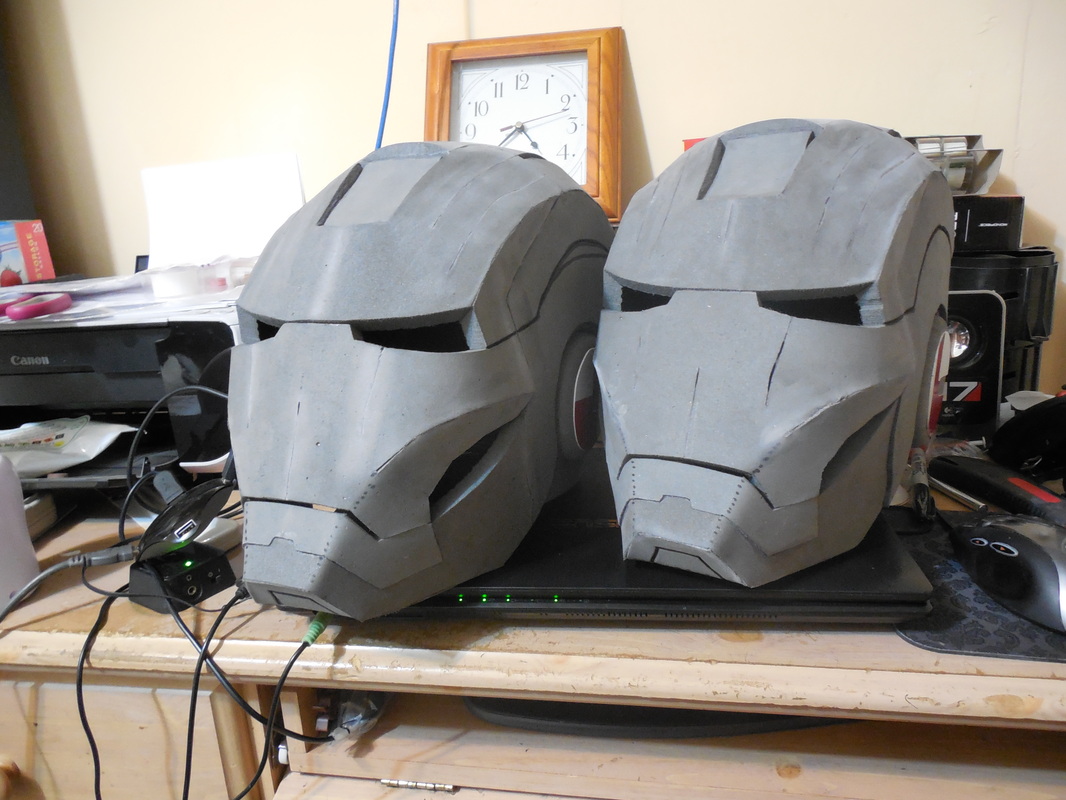
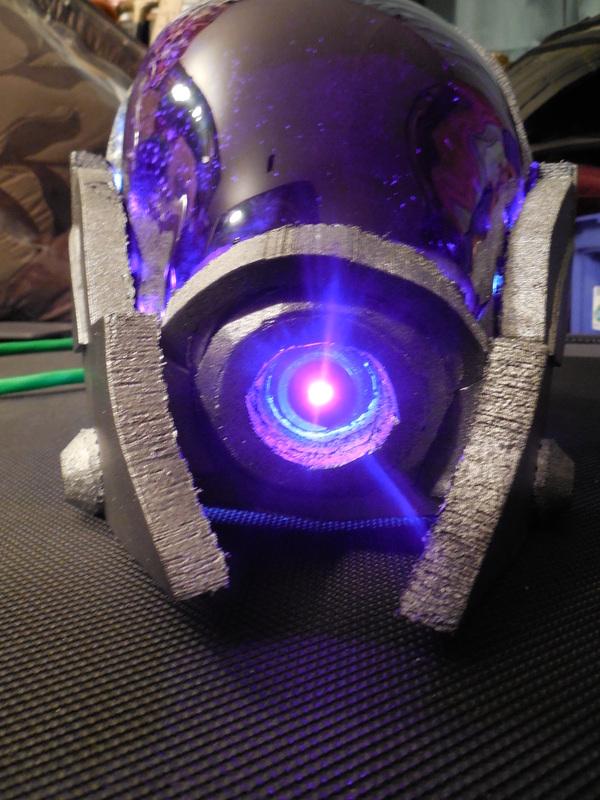
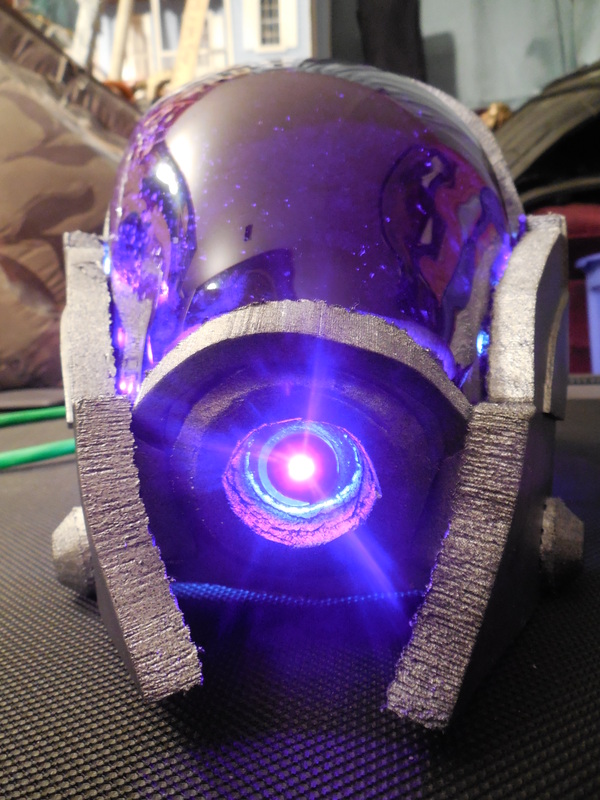
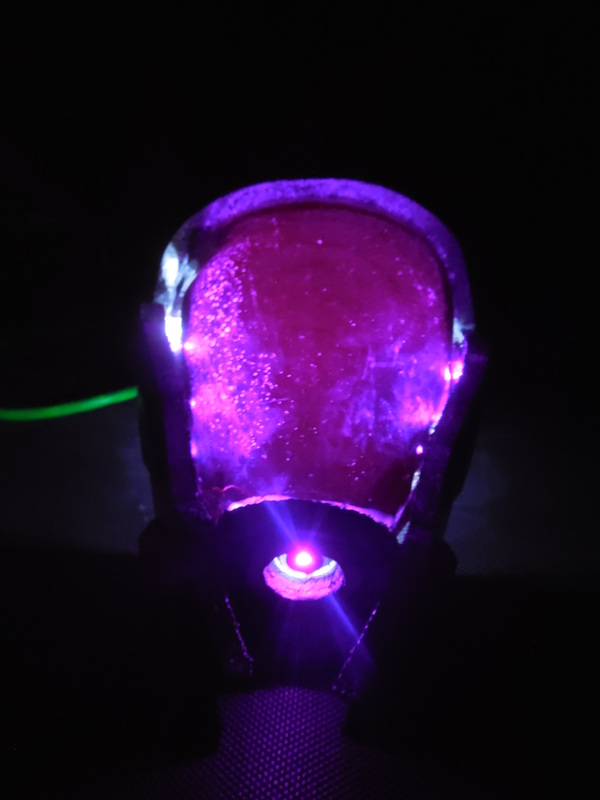
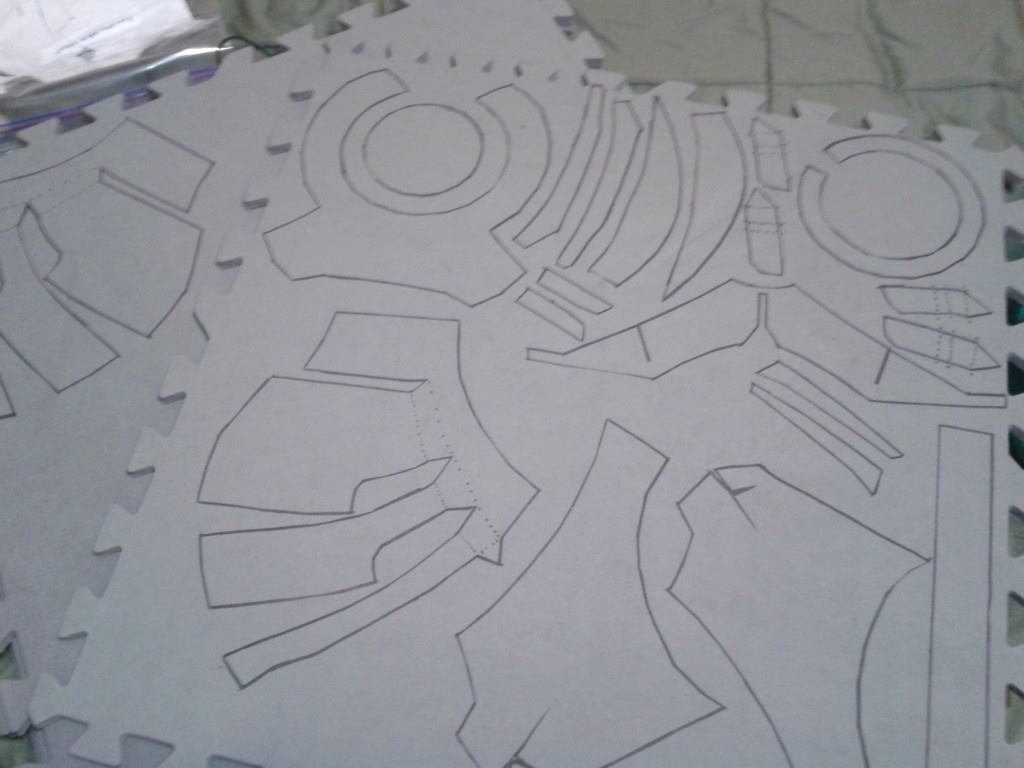
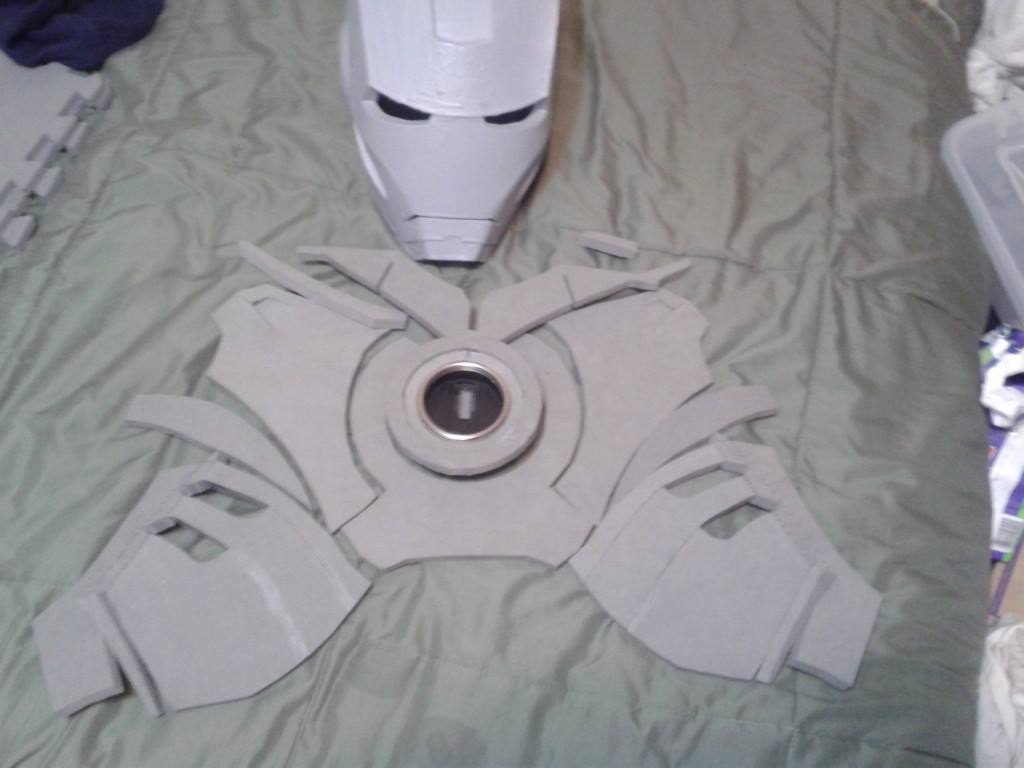
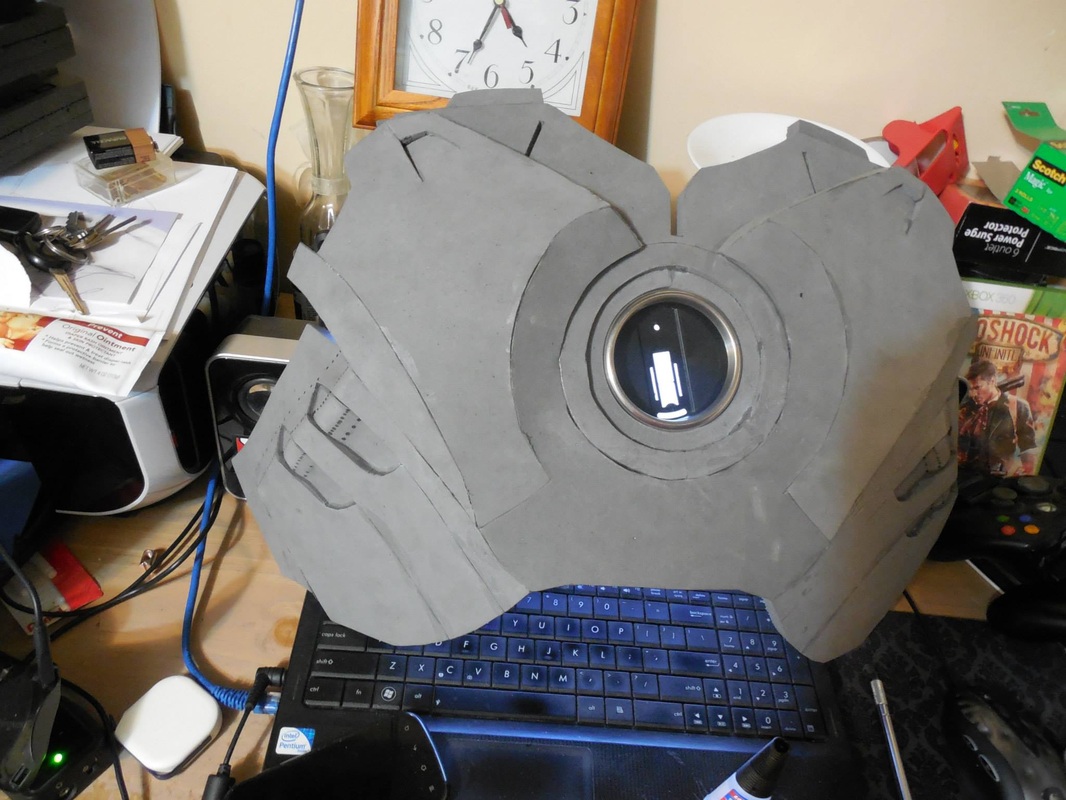
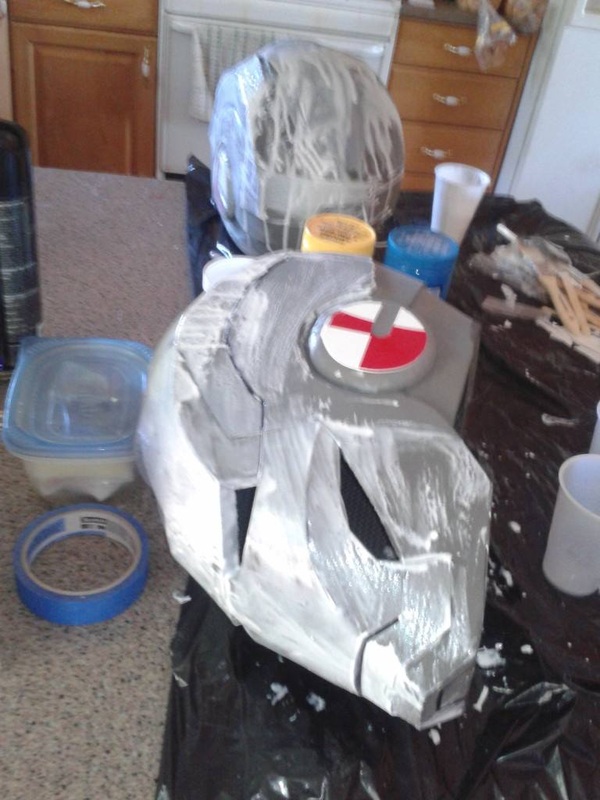
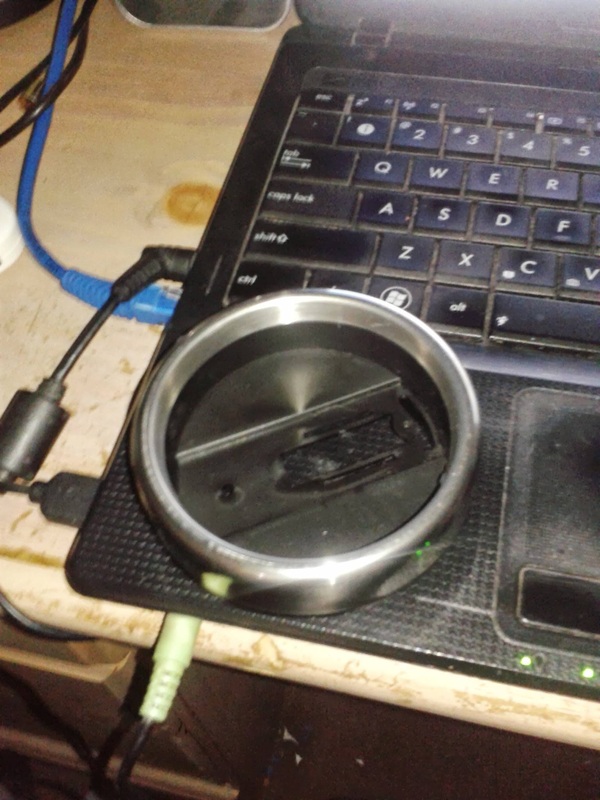
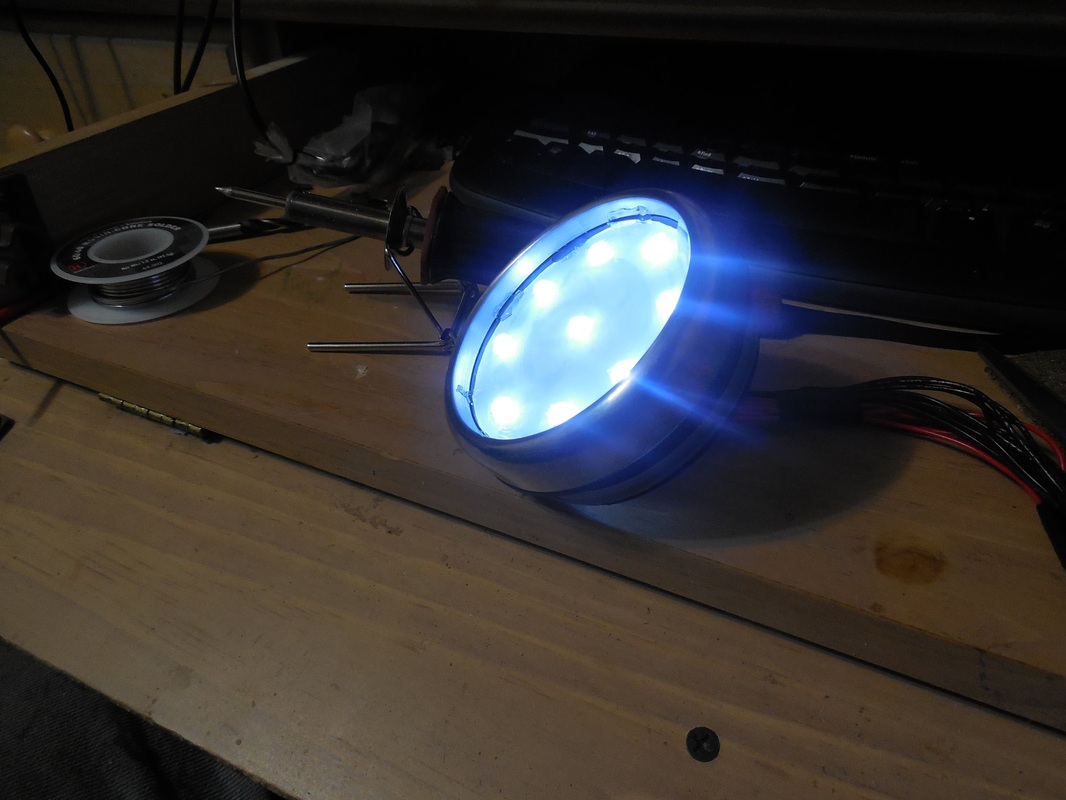
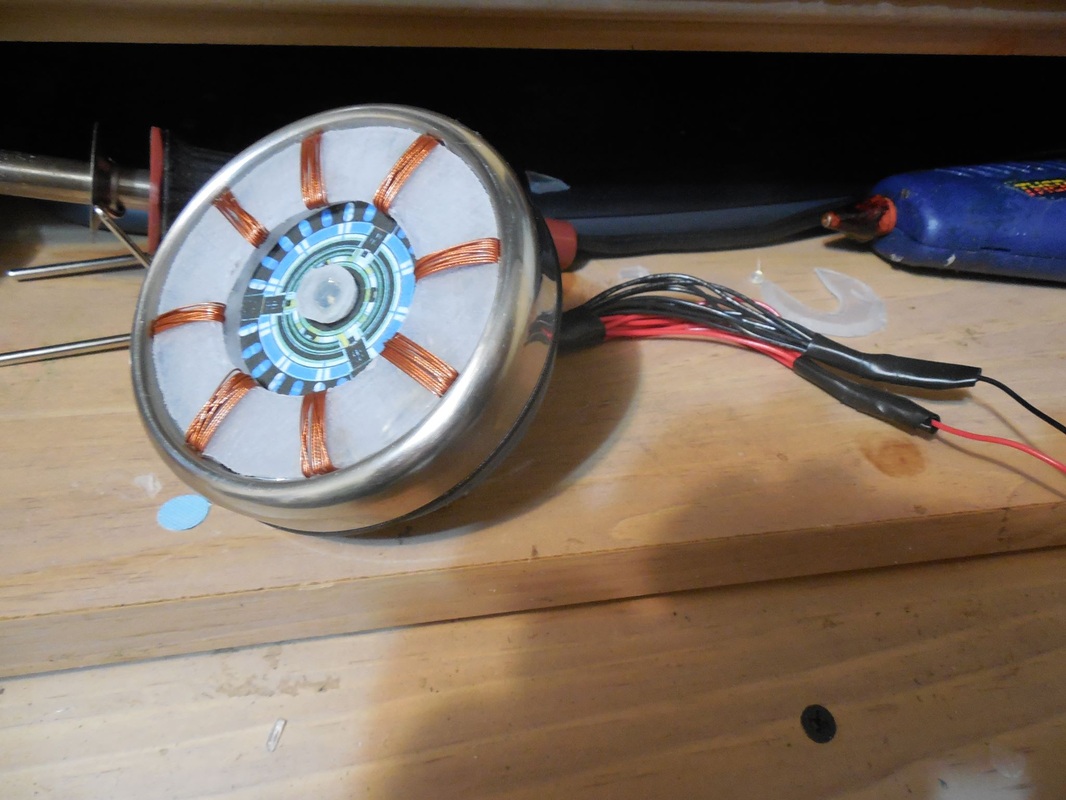
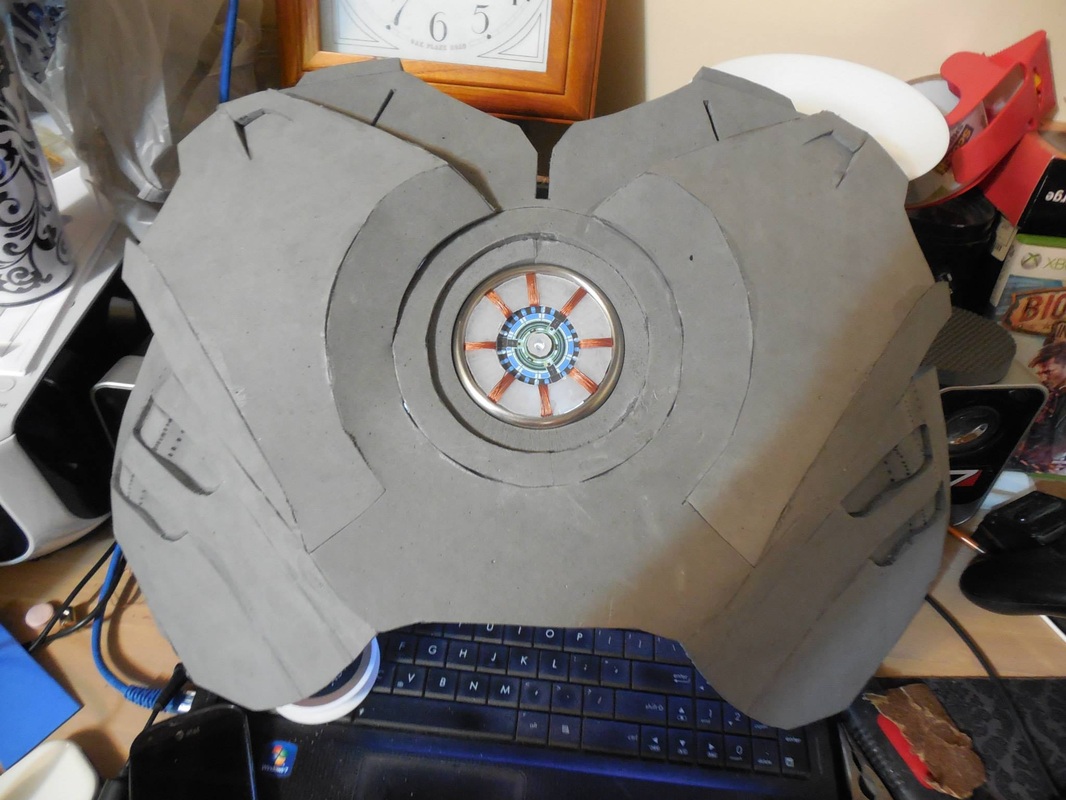
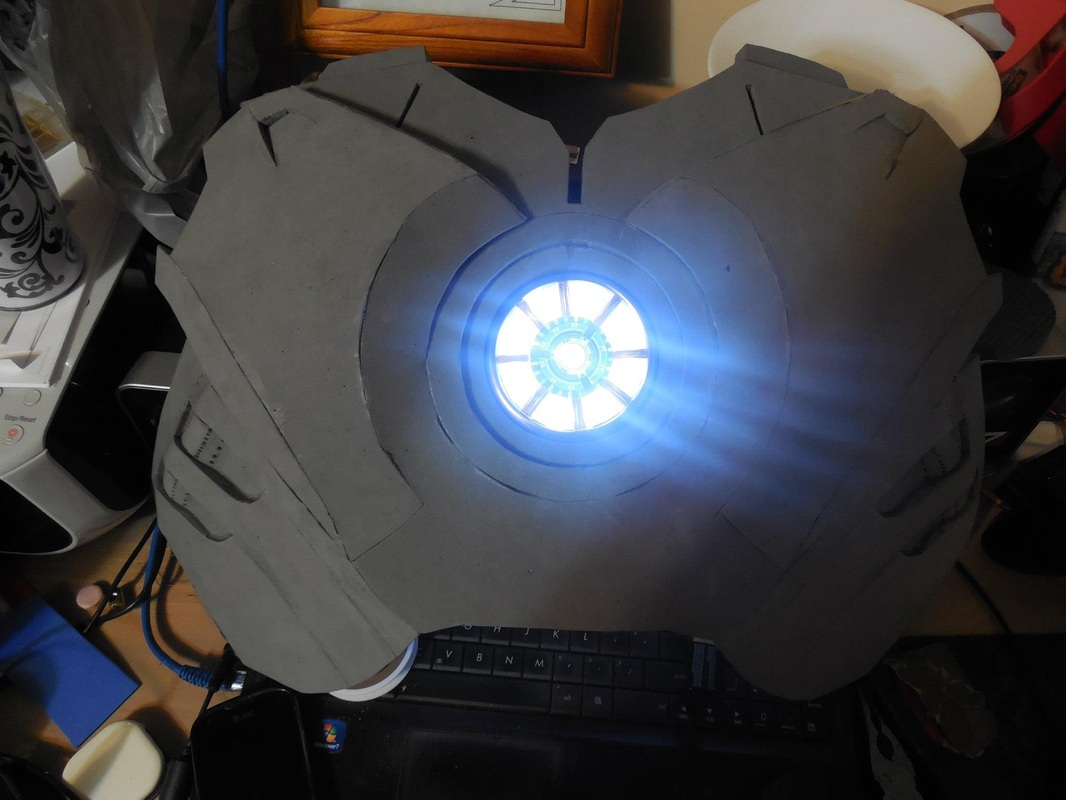
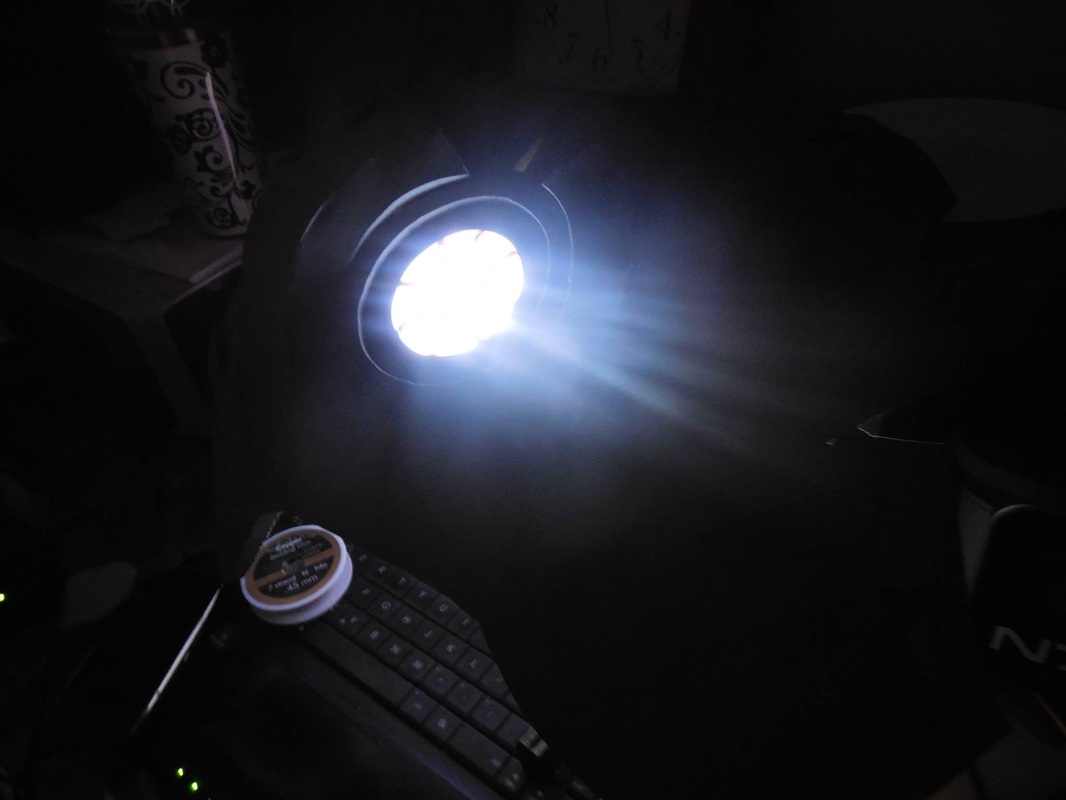
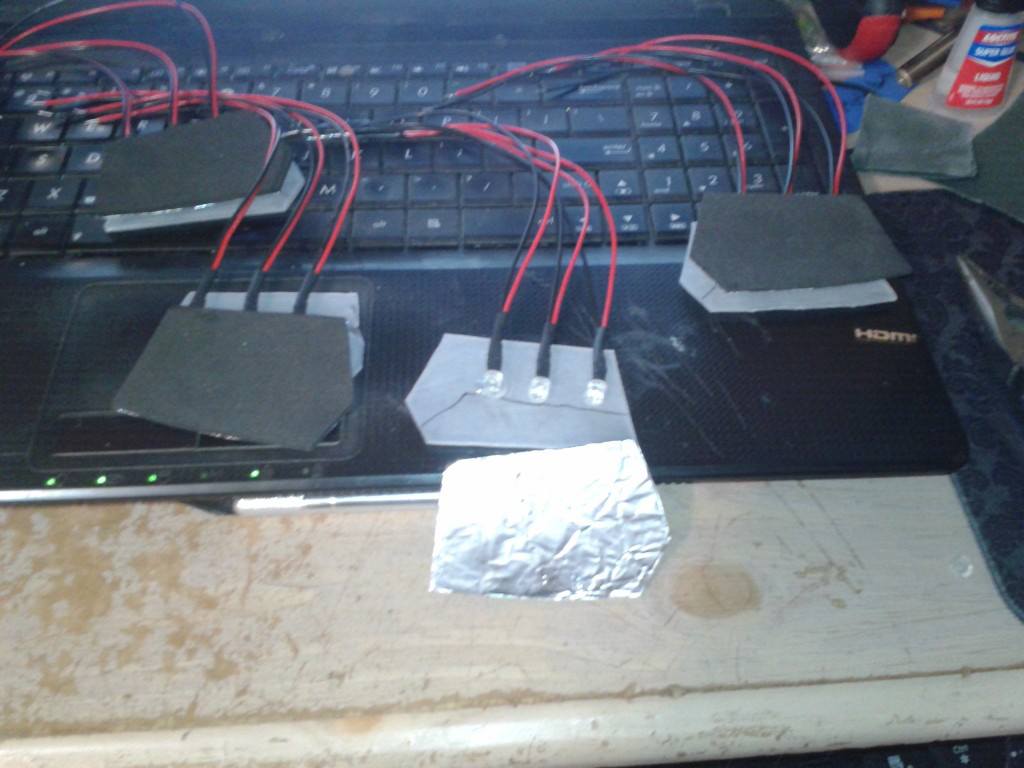
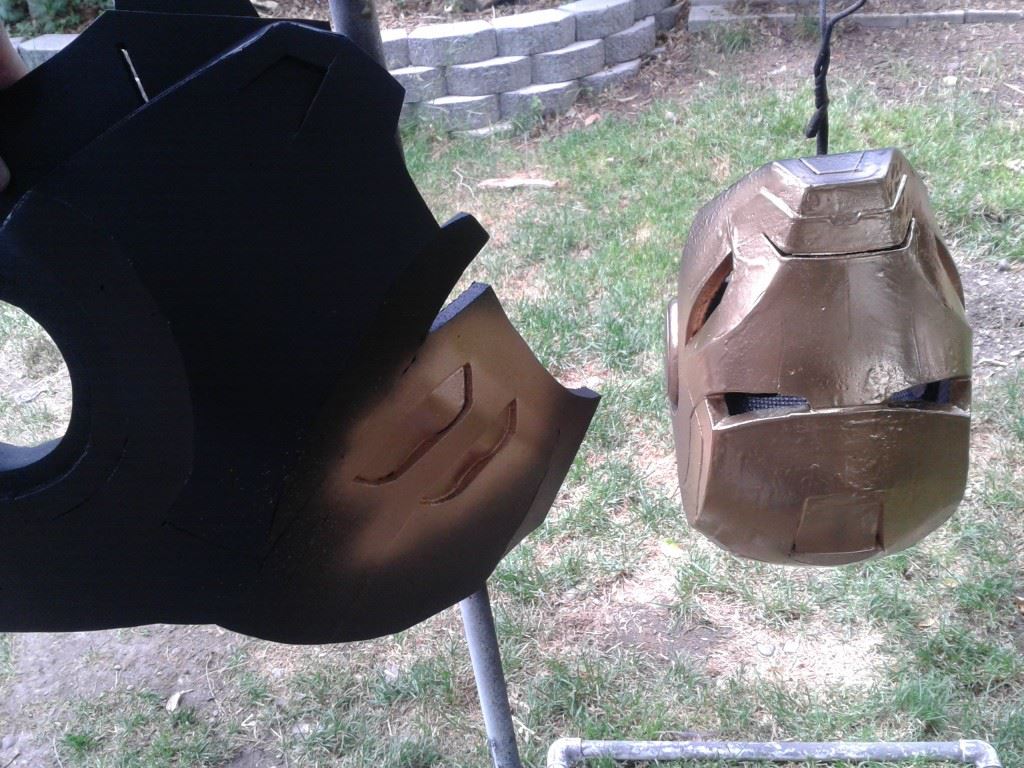
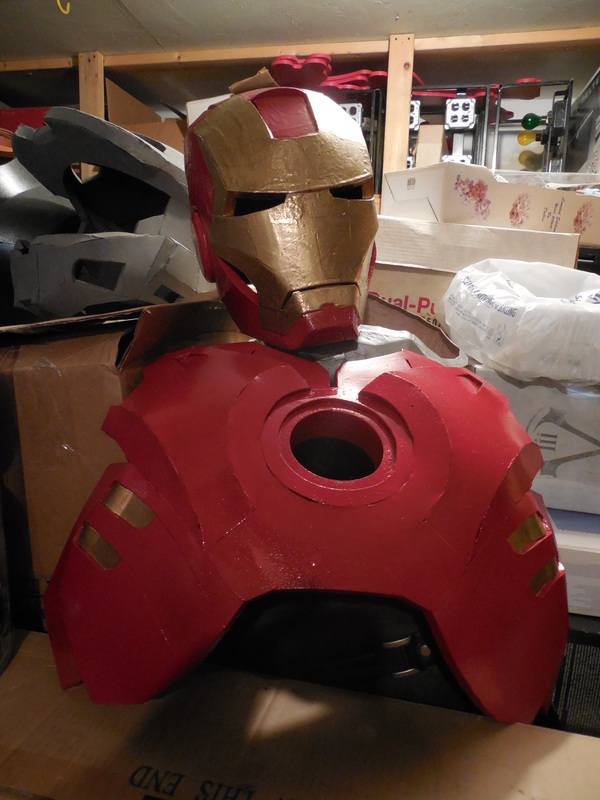
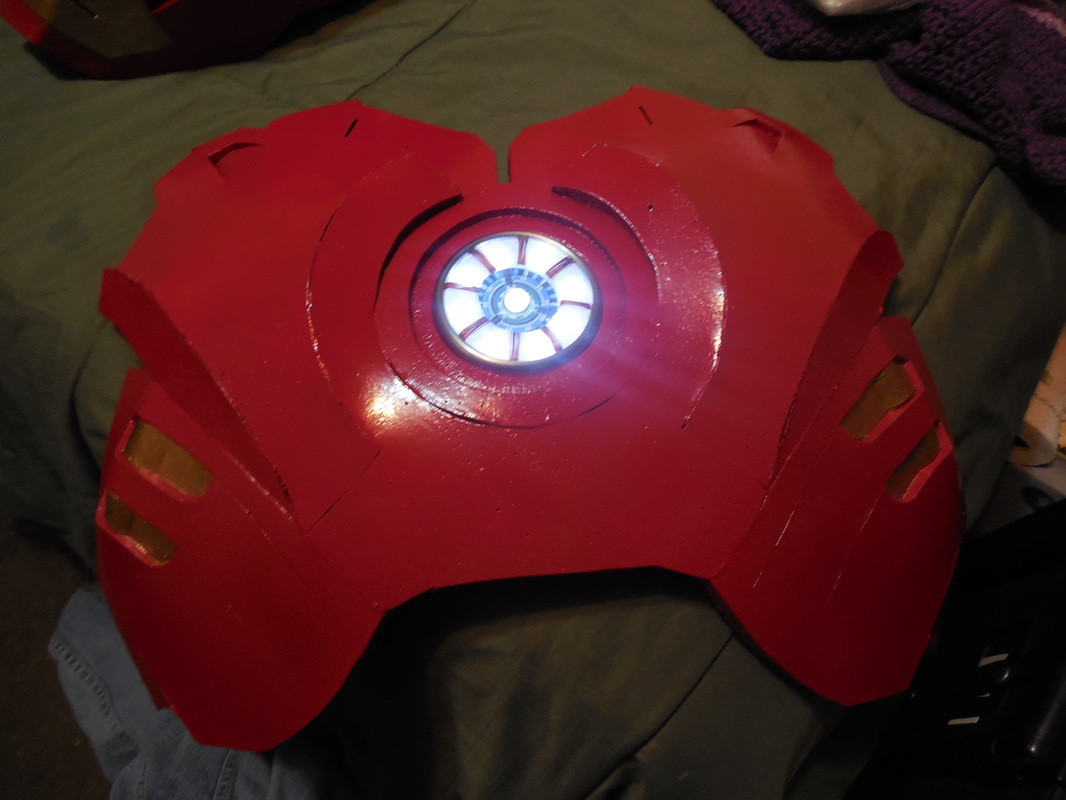
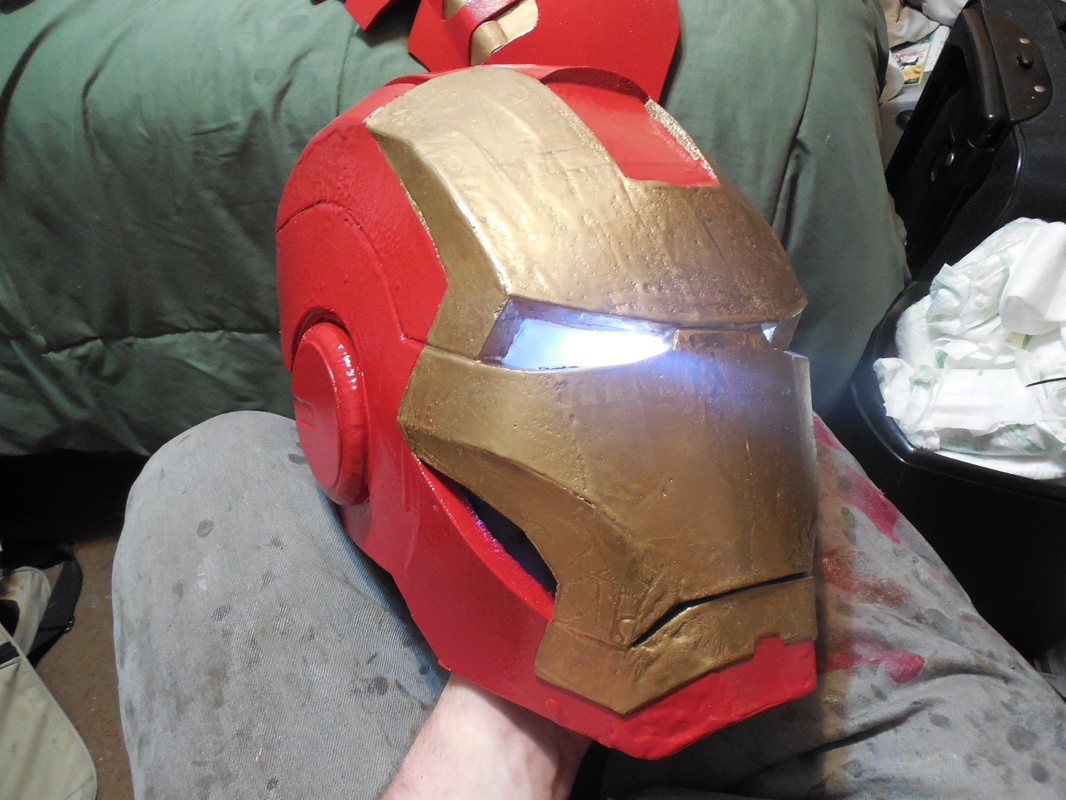
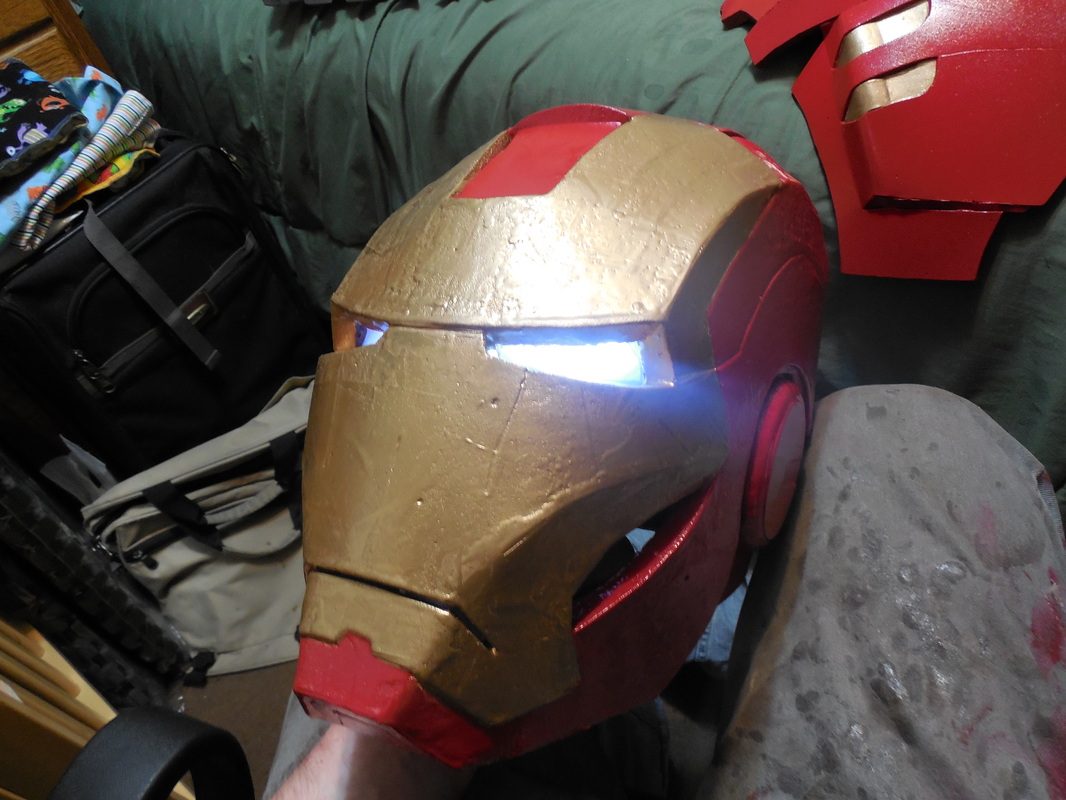
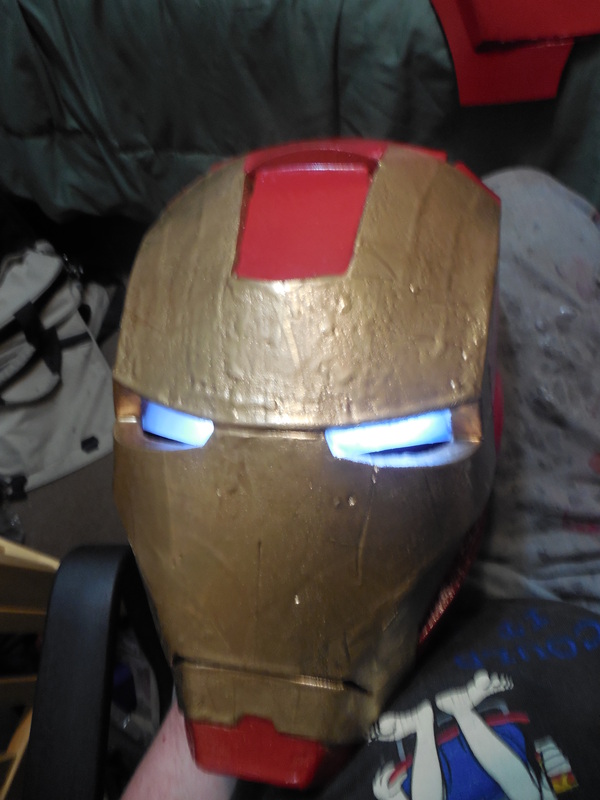
Then I started on the chests. Again, these both have different designs, so I couldn't just make both and do some small adaptations. First off, the Mark IV. Lots of curves and folds in this one, so it was a bit harder to get everything even. The center part of the chest moves in like three different directions too, so that made things interesting. I used the mini belt sander to get the angles right again, and it turned out just like I wanted. :) The Mark VII was easier: (Shown with random N7 Helmet build) Lots more basic shapes, meaning easier making but I'll have to wait to paint until the back section is ready to attach. Needs the curve to be just right! The helmets, if you're wondering, were both being painted while I worked on the chest pieces. Since I'm making two suits at once, and one is for a customer, I'm trying to multitask as much as possible to speed up the process. Now, there were quite a few seams I wanted to cover, so I tried out a new technique: resin. Of course, I thought that meant polyurethane, and now know that means Epsilon, so watch and learn from my sad mistakes. When I spread the resin, it dripped everywhere and left long lines and bumps. Of course, it was 105 degrees outside, which made the normally 15 minute cure time turn into 2, so I couldn't spread those well enough. Drip marks everywhere, wasted resin left and right, I was not a happy camper. I pushed on though, priming it for sanding. That took forever and barely worked, so I decided to test paints on them while I gathered funds to get Mod Podge to smooth that all out. Before that, though, I took a break from foaming and decided to have a go at the Arc Reactor and the lighting for the eyes! Everything you see in the above pictures came from recommendations by The Heroes Workshop, headed by Stealth (an awesome Iron Man cosplayer with a YouTube channel full of great tips and tricks). The wall and casing for the reactor? A coffee tumbler lid. The LEDs are diffused by a piece of plastic from an old tote, sanded and scratched up on the back side, as well as the higher outer ring. The inner detailing on the reactor is a print out of a high-resolution shot of the actual reactor, cut out and glued in, and the copper wiring is simple copper colored wire from Walmart's craft section. It's cheap, it looks good, and it works. In person you can still see the individual lights, but as you can see in pictures it shows up perfectly diffused. For the eyes, it's the same plastic sanded up, backed with black craft foam that has tin foil attached. This spreads the light a bit better, and keeps it from blinding the wearer. Back to the painting.... Painted the gold first, since that was easier to tape off on the helmet and the inset sections on the chest. On the chest is just plasti dip, unlike the helmets, since I didn't want to risk wasting more resin and having it look terrible again. After the red was dry, the tape came off. Chest looks great, and the reactor fits perfectly snug without any adhesive. As I mentioned before, the helmet is not complete and the eyes are not yet attached, but this gave me a good chance to test the fit, which worked wonderfully. There are a lot of tape lines all over it, but I'm not worried as I still need to clean it up a ton (as you can see).
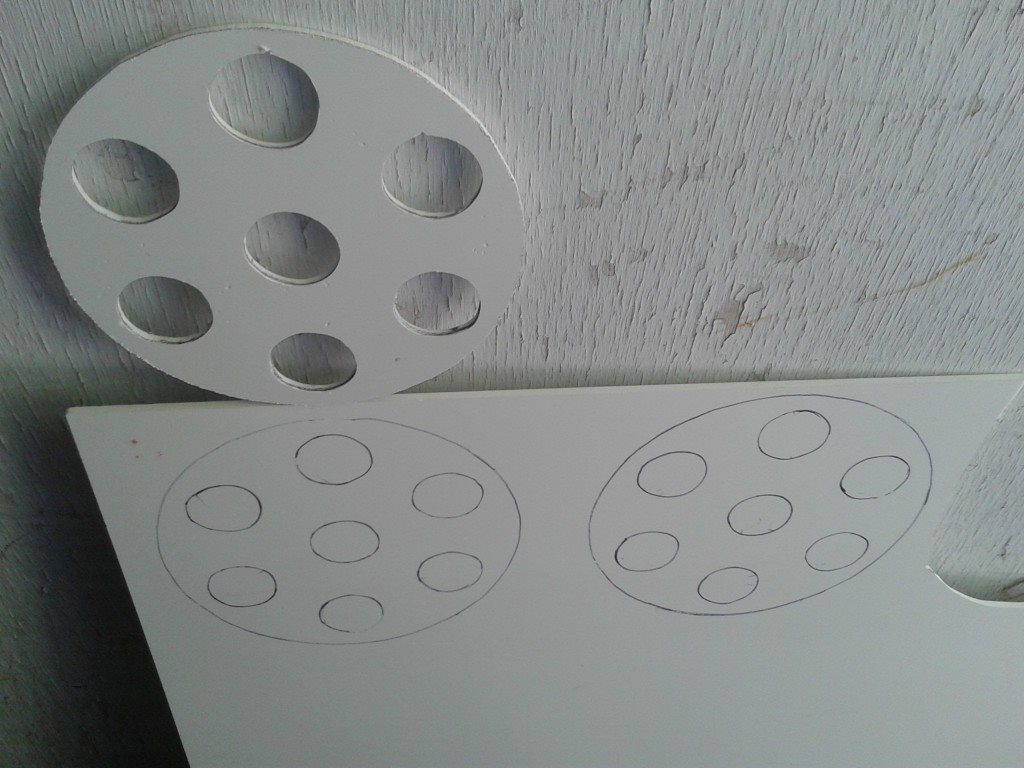
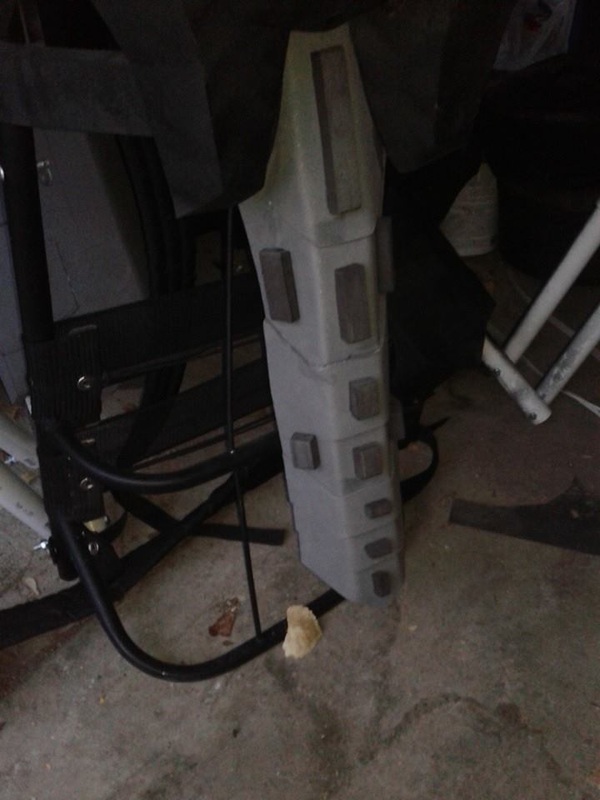
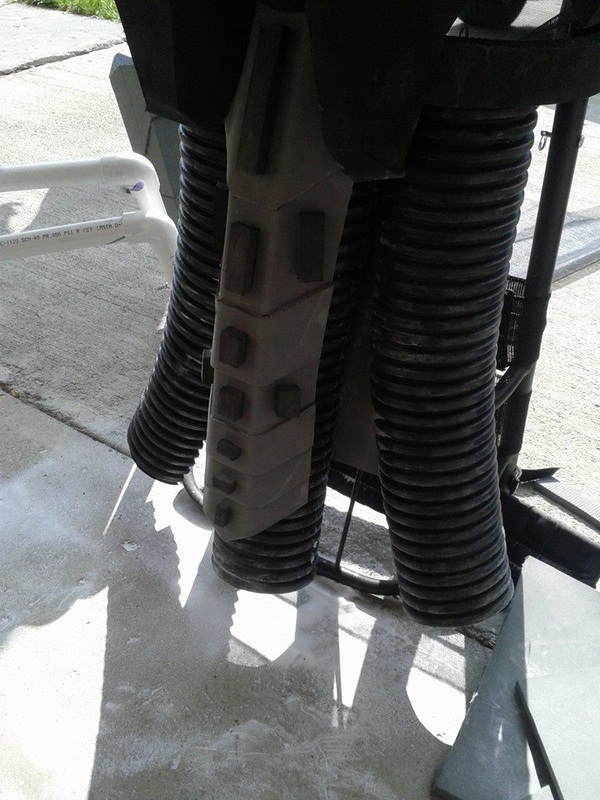
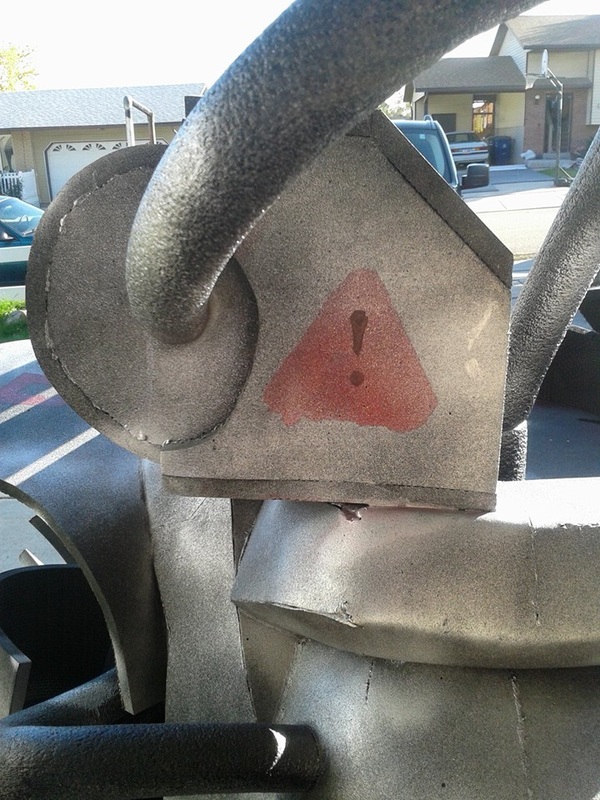
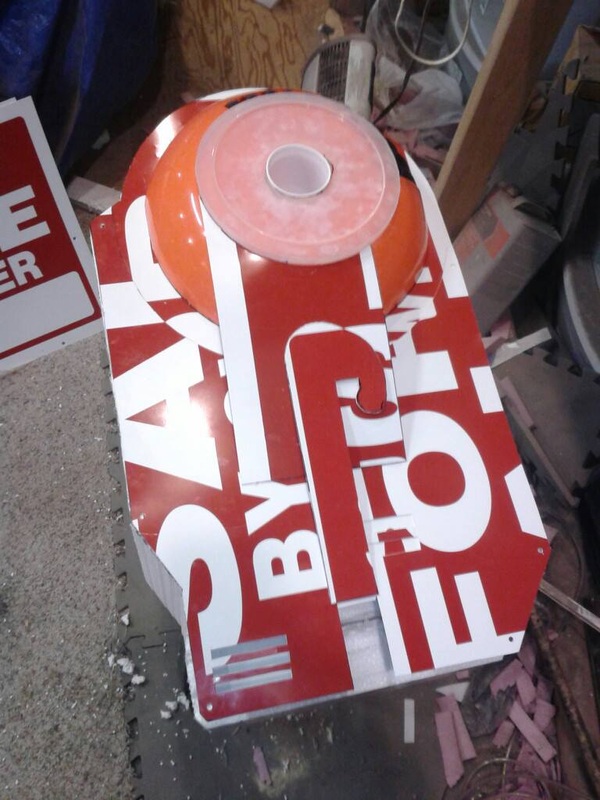
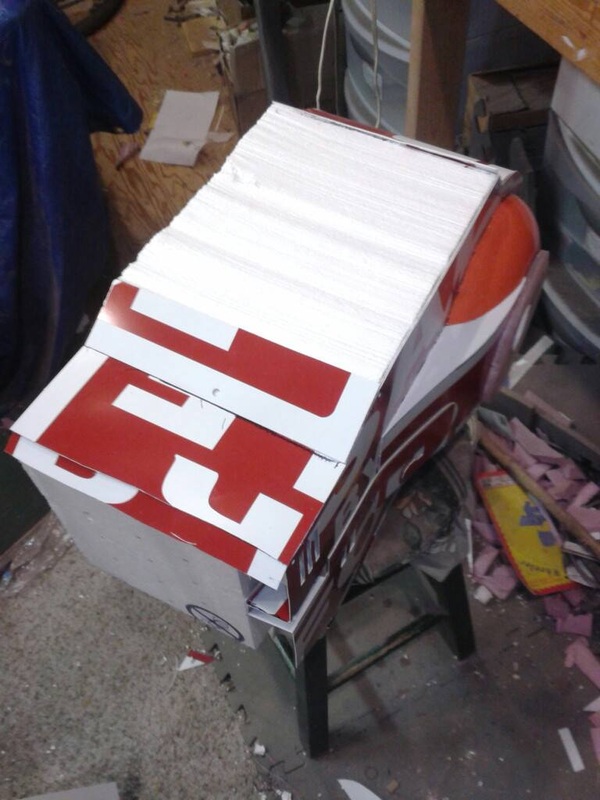
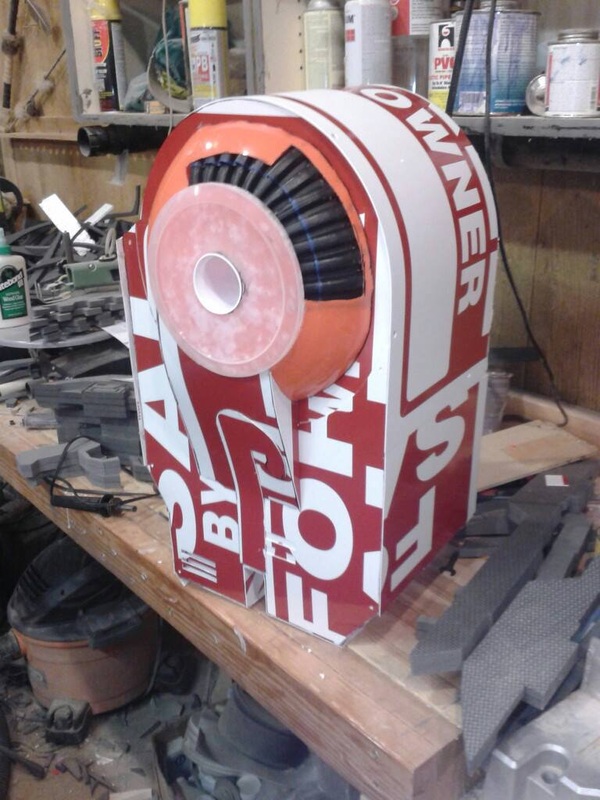
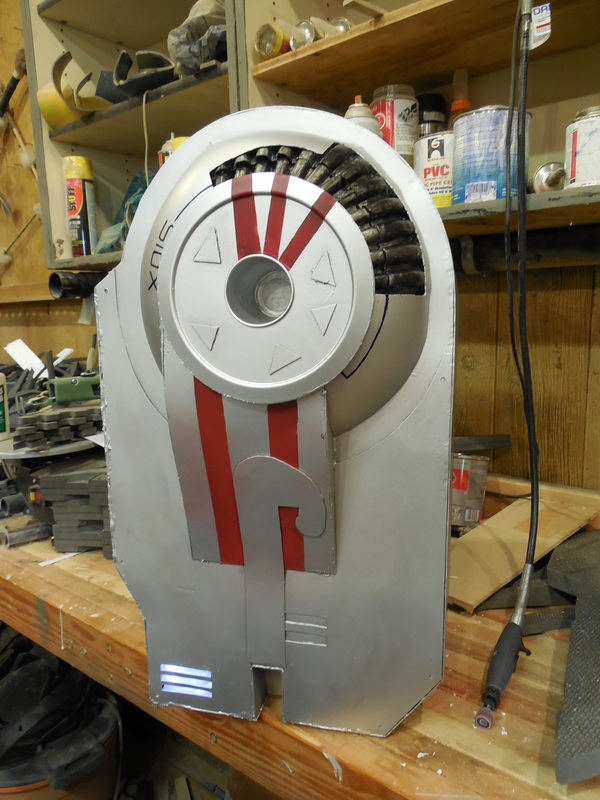
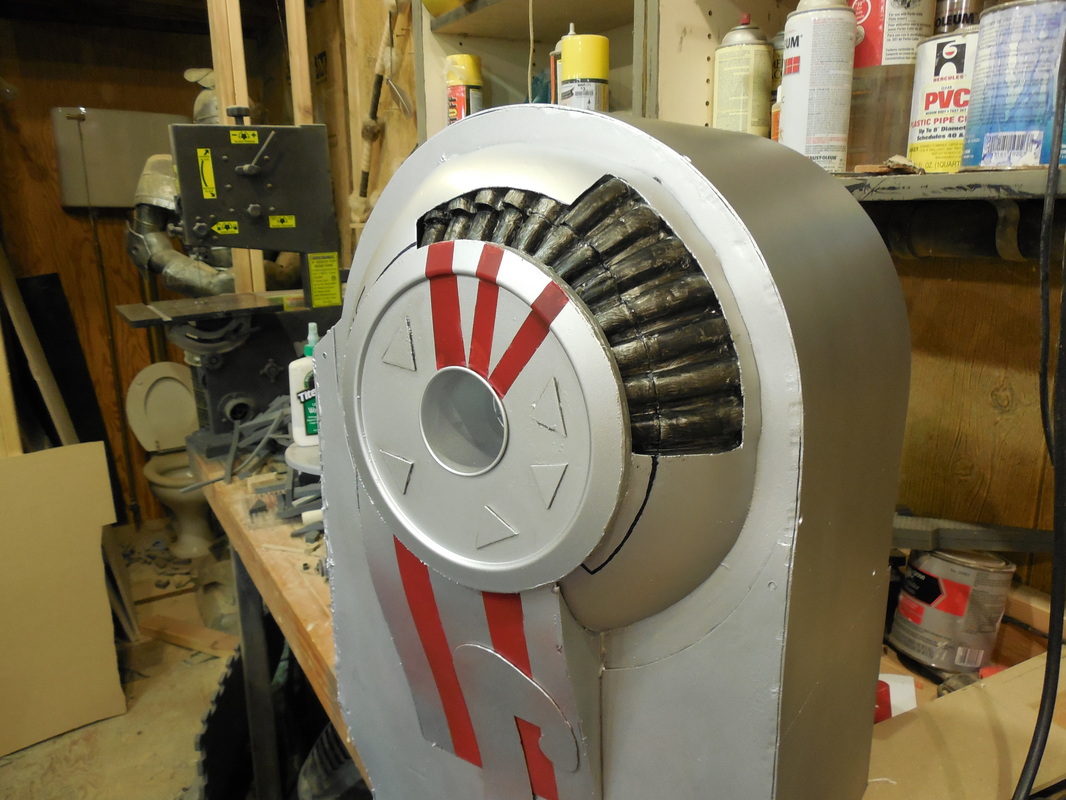
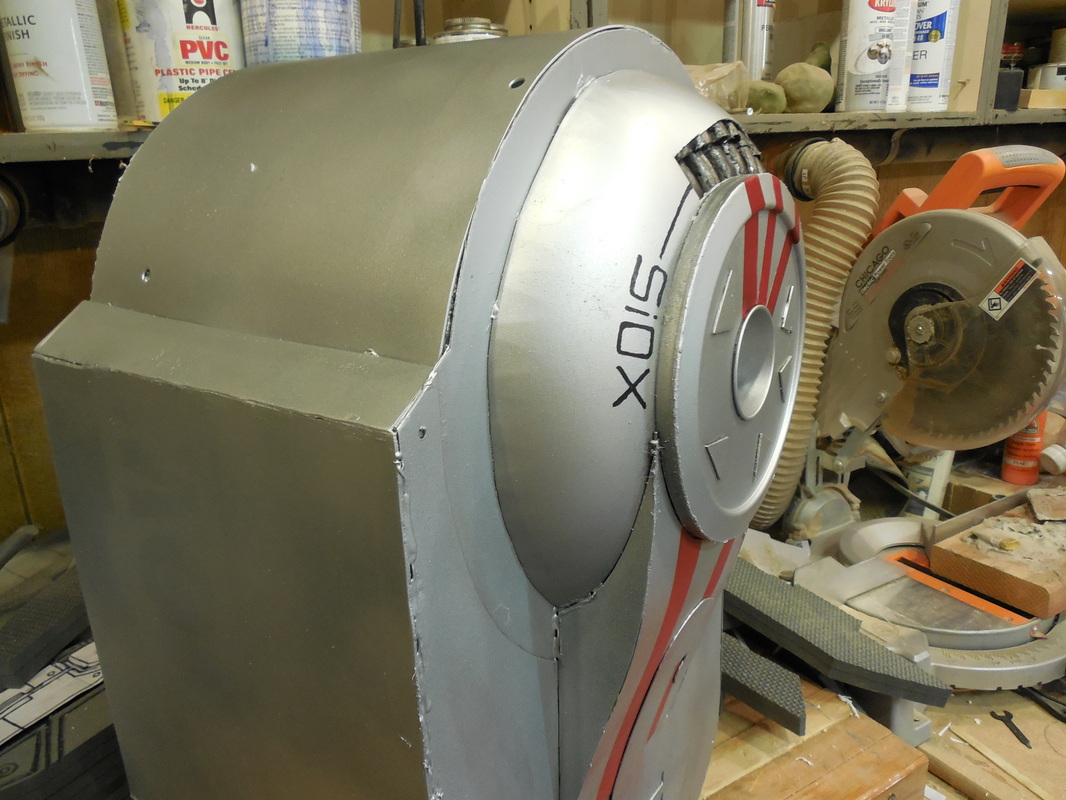
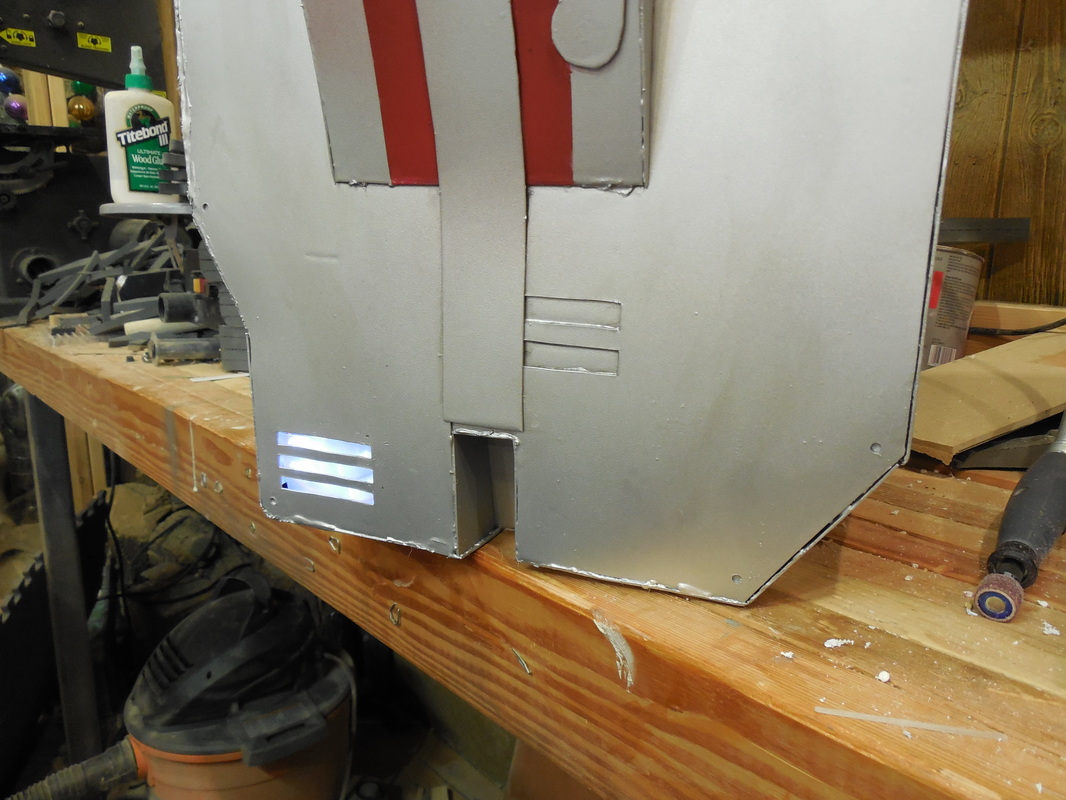
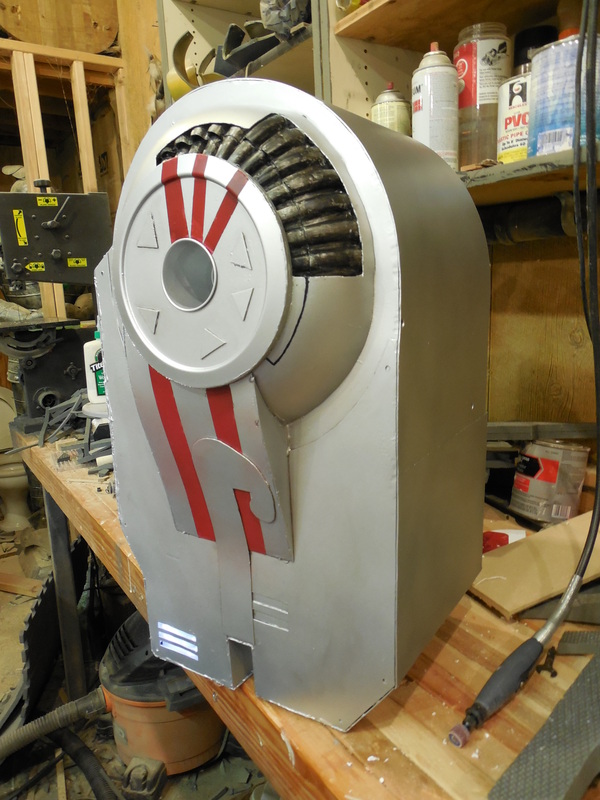
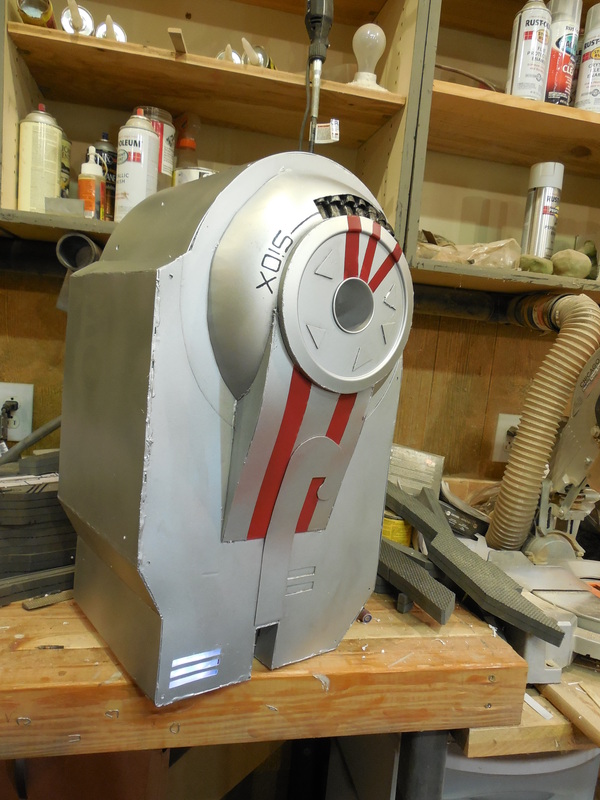
Unfortunately I haven't done any work on either of them in several months, as the person who commissioned me originally has dropped out of contact. They wanted the helmet by the release of IM3, but have only paid the deposit with nothing since. If they haven't made any more payments by the promised completion date, you may see at least one of these helmets up for sale. We shall see though! I will definitely post more updates on this when I have a chance to make more of mine. Onward! And a twofer! The awesome guys at Embrace Eternity also wanted me to make the Wall Safe we are all so familiar with. Many a credit was hacked from these, as will many more! 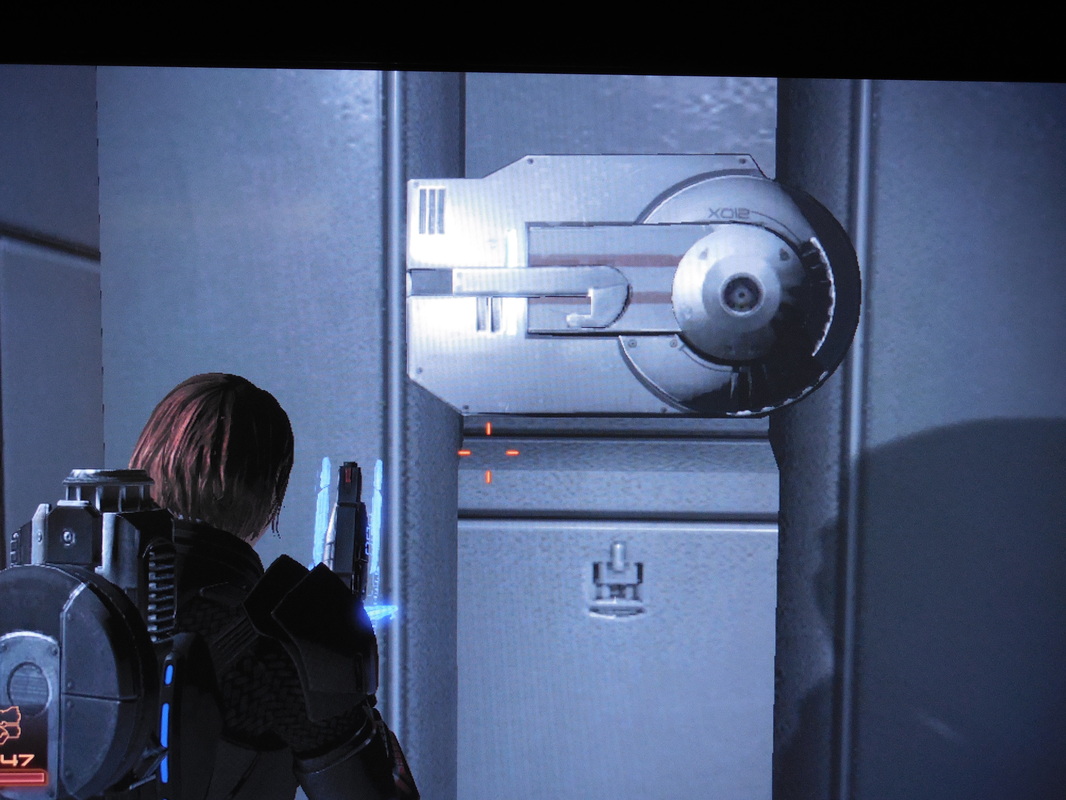 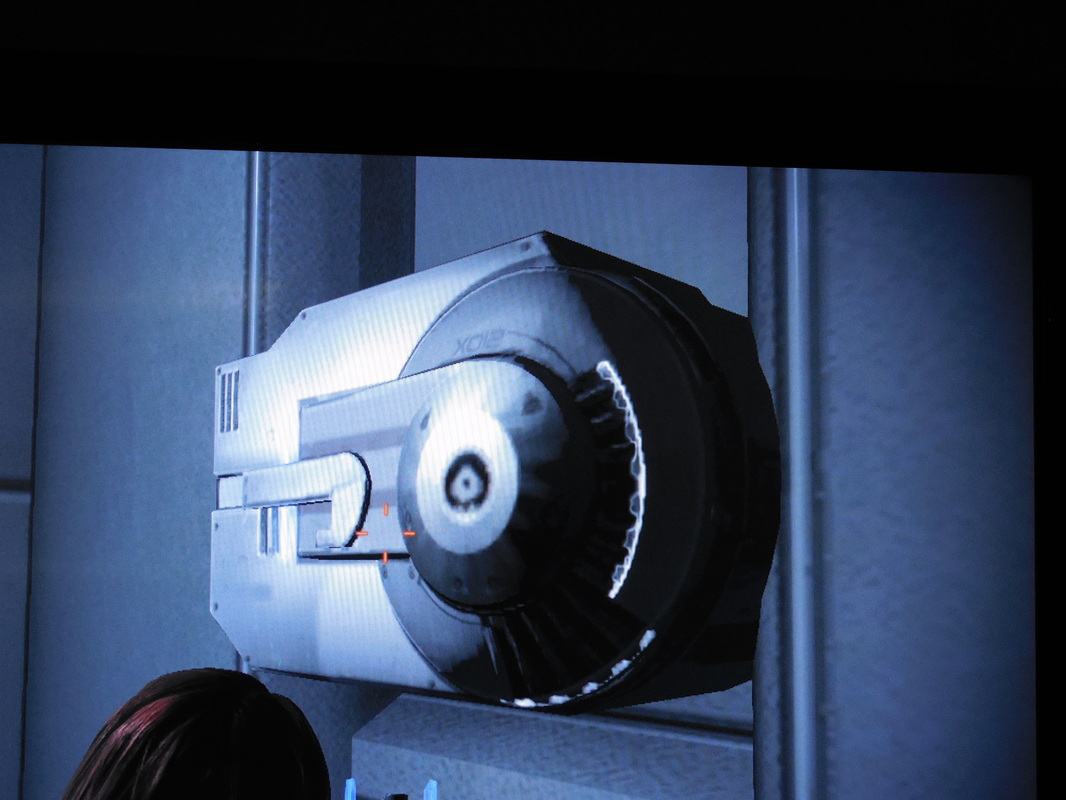 There are quite literally zero good shots of this thing online, so I had to load up the games (aw darn) and play them (so sad) until I found one I could take a few shots of (found one already? Dang it!). I'm sharing both shots I personally took so that anyone else who wants to take a stab at this can, and to make the internet less empty of its sight. For this one, I was asked to just make a static prop. Nothing fancy, just something they could use in various scenes. This meant no moving parts, which made it a lot easier. That also meant I could take some small liberties, so long as it was similar enough to the in game version. I started off by making a small wooden box out of MDF, drilled four holes, and tossed in some carriage bolts and wing nuts to secure to set pieces. 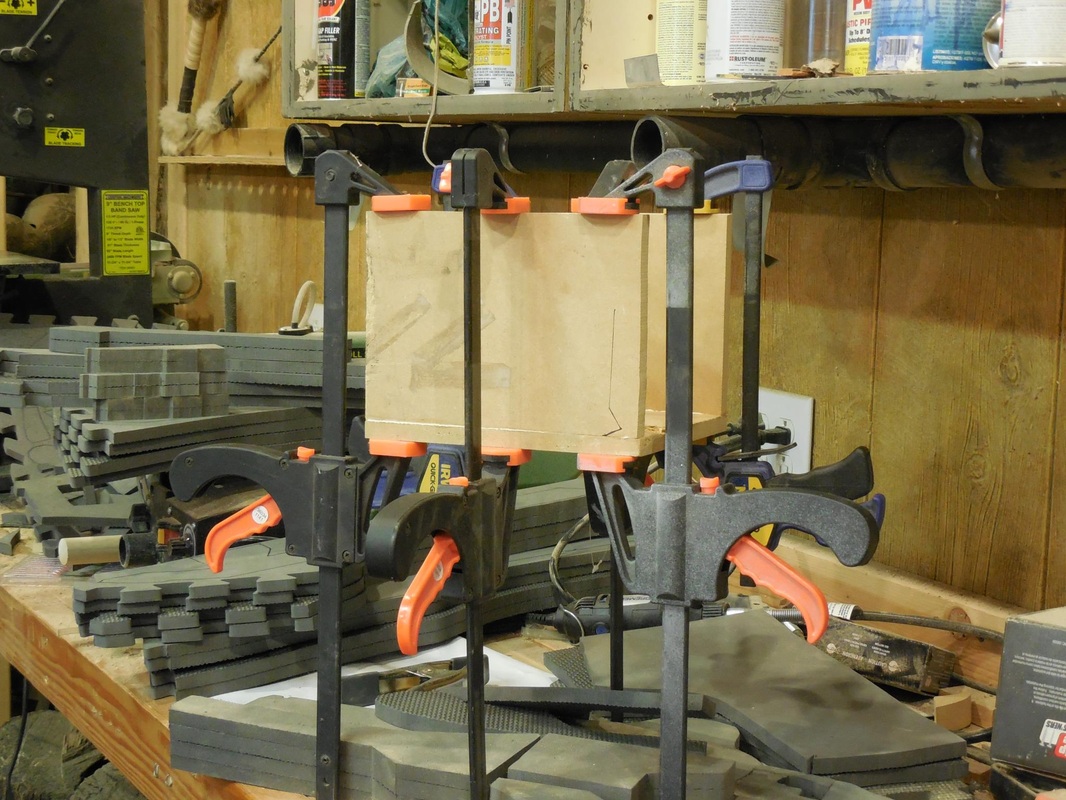 This would be sturdy enough to both hold up the safe and stay on the wall, and be simple enough to move to different sets with little issue. Once the box was done, I used it as the base and started throwing styrofoam at it. 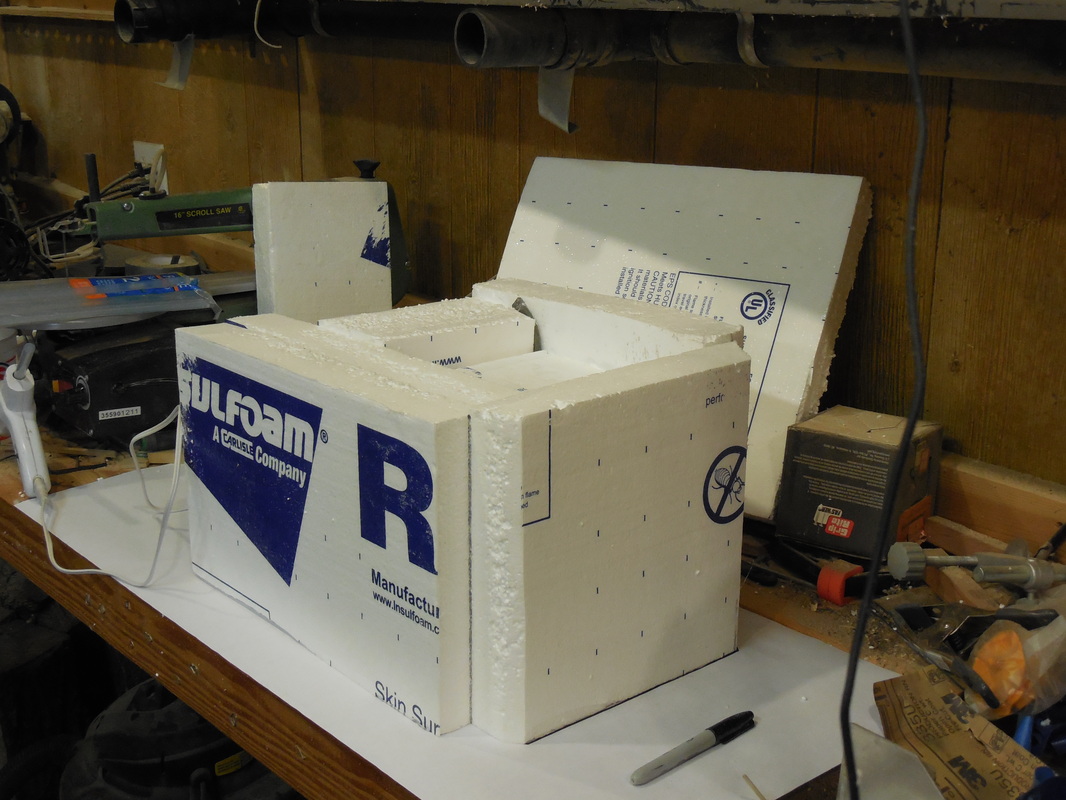 I chopped pieces out quickly with the band saw and a large box cutter, roughly shaping out what I needed. This left me with a big block of styrofoam, and me wondering how to cut it more to shape. 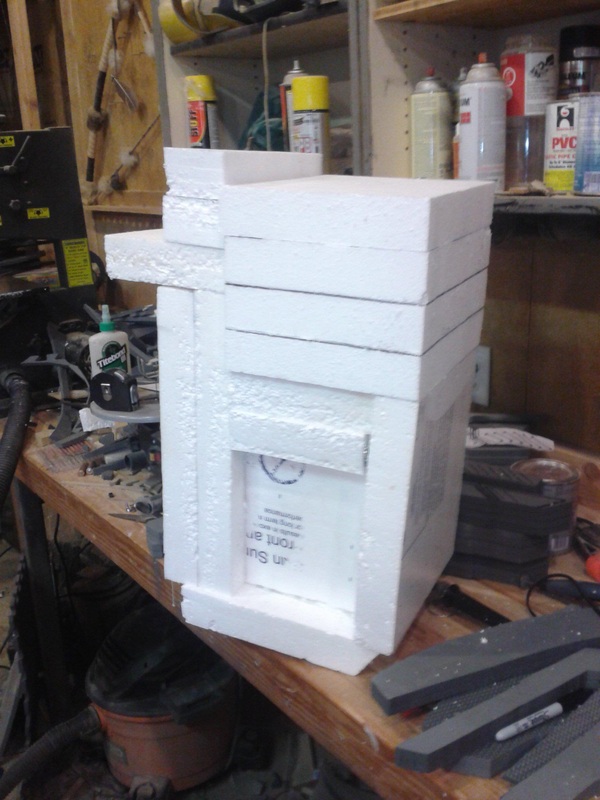 I scoured the interwebs, and found a few cheap and quick ways to make a hot wire table, since this was definitely going to be the best way to cut it all. The one I used is found here, though that certainly isn't the best/only one out there, so if you want to make one, Google is your friend! ;) Once that was made, I went about shaping the styrofoam core to something more like what it should actually look like. 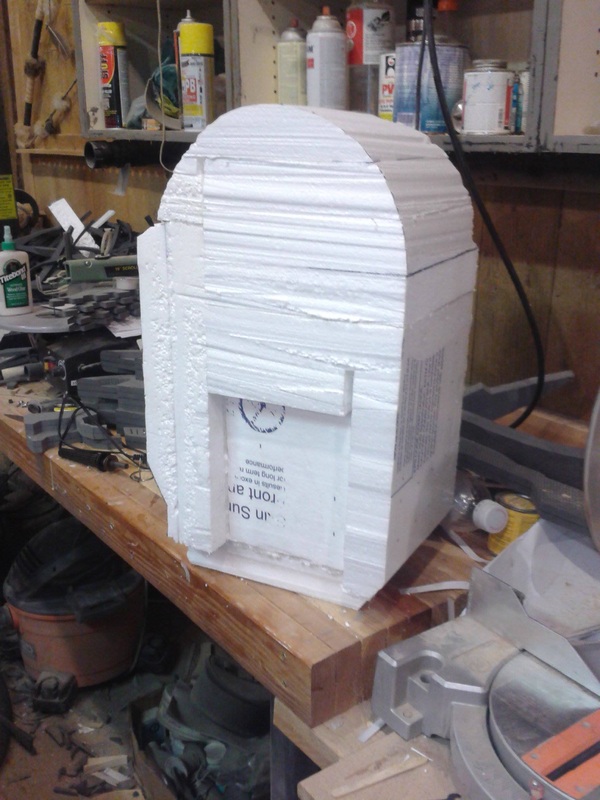 I didn't feel comfortably skilled making the dome with the hot wire, so I went to the local thrift store to find something that would work. Lo and behold, I found a large orange bowl, commonly used for Halloween candy. Bought it for a dollar, went home, and it worked perfectly! So, I cut off the bottom, carved out a couple small openings, grabbed an old lid and cut it open, and threw in one of my small 5 oz mixing cups. I glued all that together with a corrugated pipe, and attached it to the core. 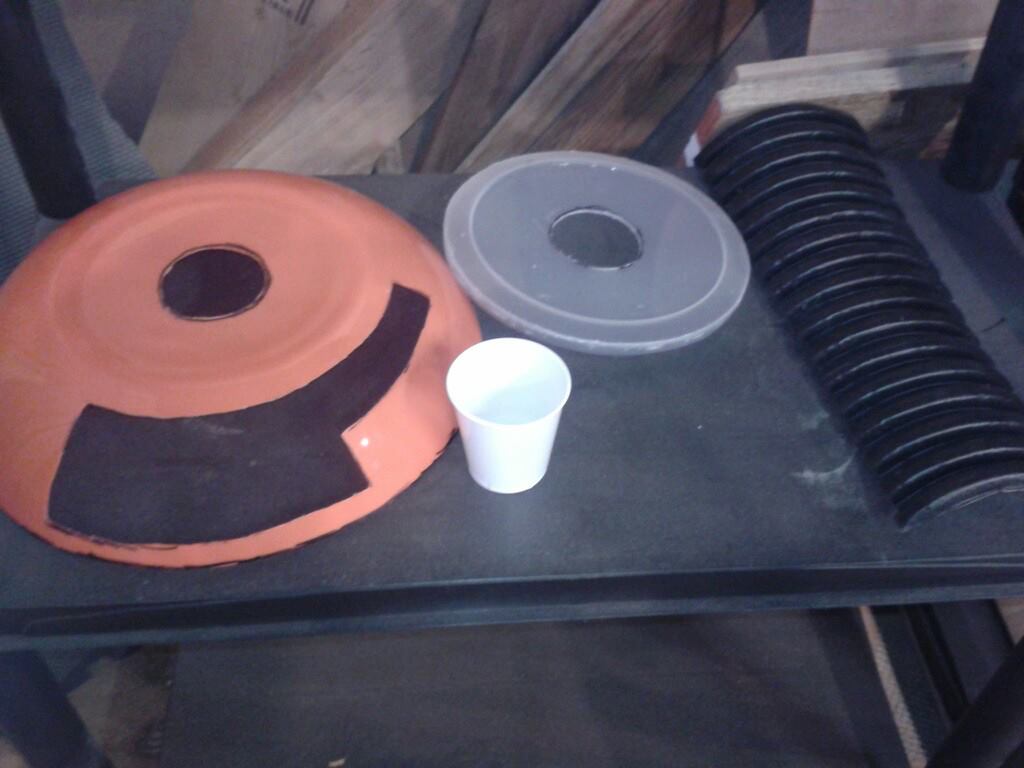  Oh, hey look! More signage! You guessed it: more 1/16" styrene was thrown about literally everywhere around the foam core. This was both for detailing and because the spray paint eats up styrofoam very easily. Spots where there are holes in this one were drilled in on the front, and the ones on the sides were filled in where appropriate. Some I left, to add to the assembled look. After that, sanding and some cleanup on edges were done with a dremel, then came time for paint! 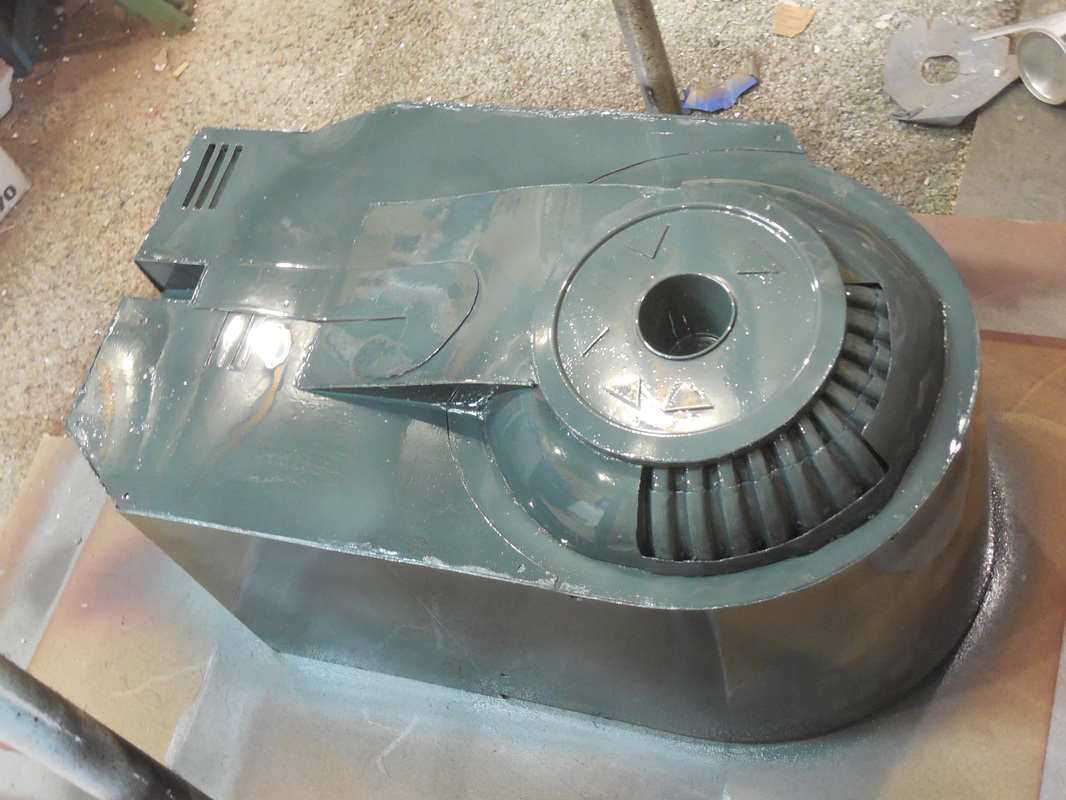 Pardon the shiny, most of these paint shots were taken while it was still drying (stupid me). I started with a darker gray primer on this one, three coats again, then sprayed some red in the middle, dried it, taped it off, and went over everything with a straight silver rather than the hammered. Again, this one didn't need to be fancy. 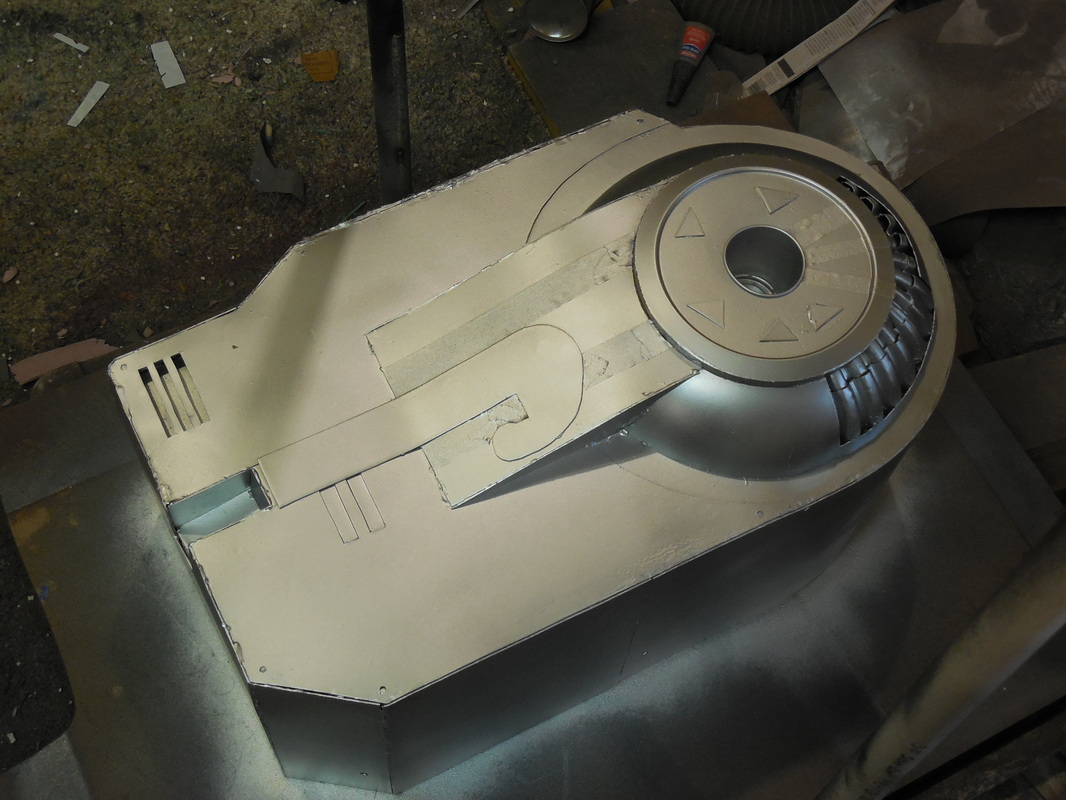 Once that had all dried, I took off the tape to reveal the red striping, then started on the black section on the top. 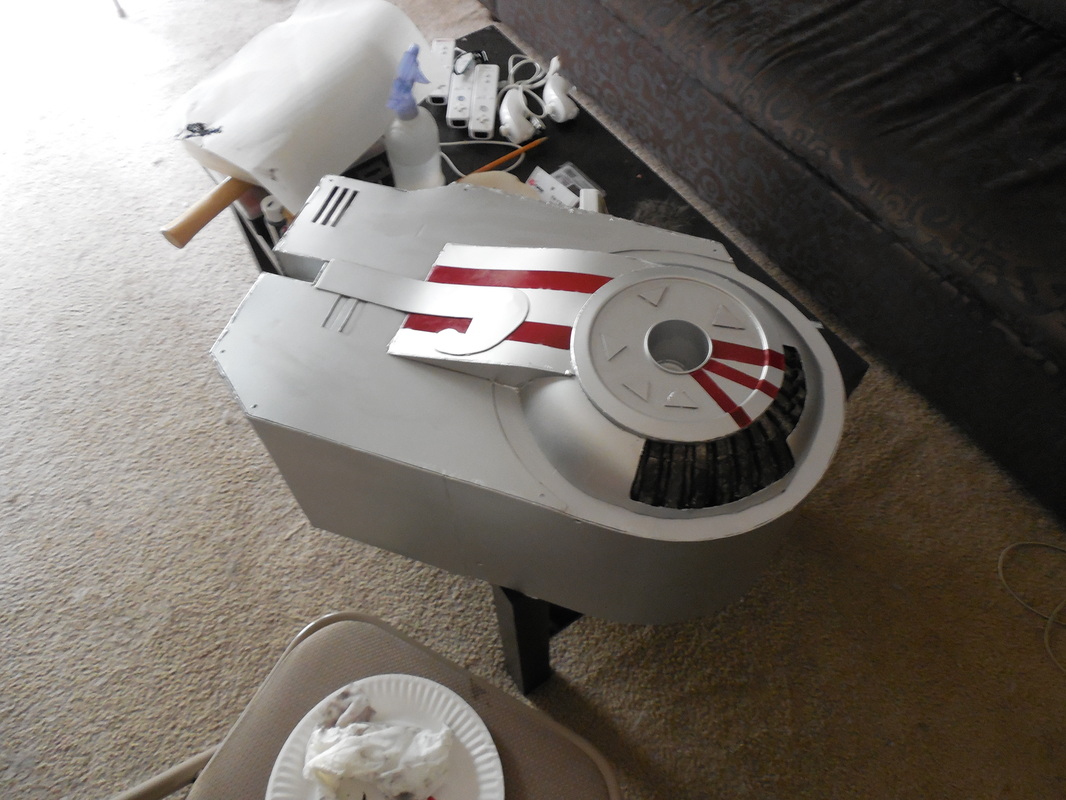 Didn't have vinyls or anything to mark off the decals, so I carefully hand painted them. After that, I threw in some LEDs to the bottom vent, hanging the battery pack into the wooden box, and it was done! I'm not 100% happy with it, since it's not nearly as clean as I would have liked it to be. It isn't a big deal though, since this is just a background prop that won't be getting any major screenplay. The fan page for the film did release a teaser shot though! 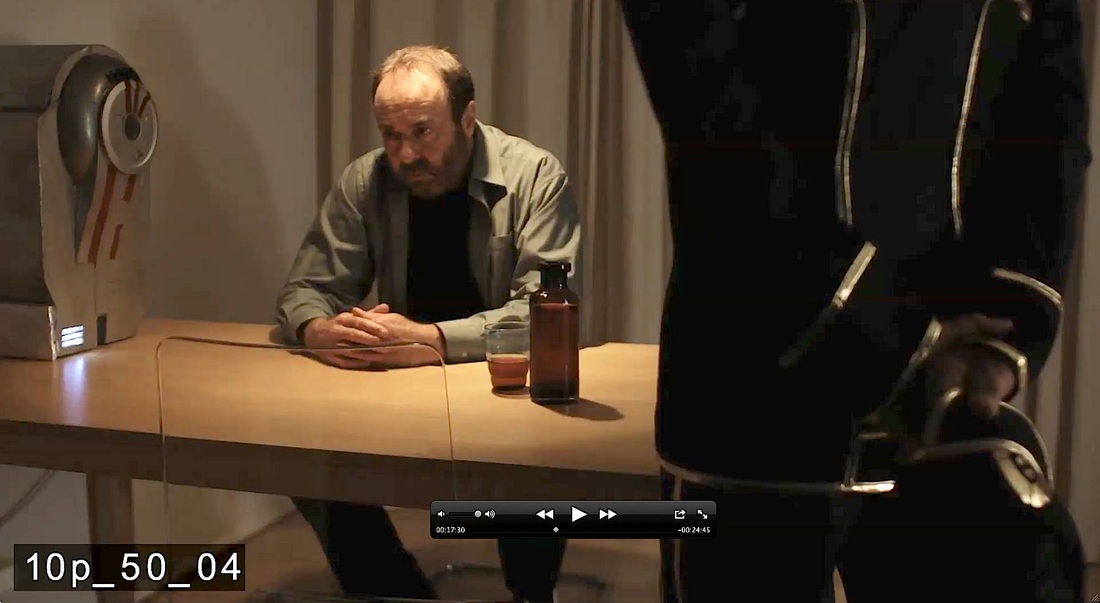 Tickled pink when I saw that. Made this just a bit more real - it was actually happening!
Seriously, check out their page. They've got a ton of cool things in the works, and should be finishing up filming soon if they haven't already! |
|


 RSS Feed
