|
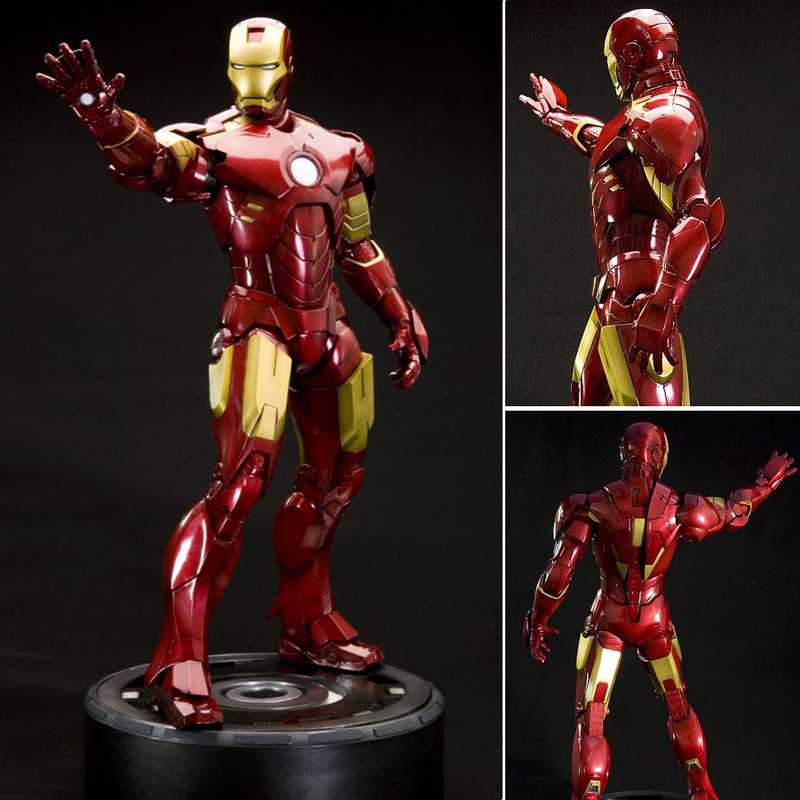
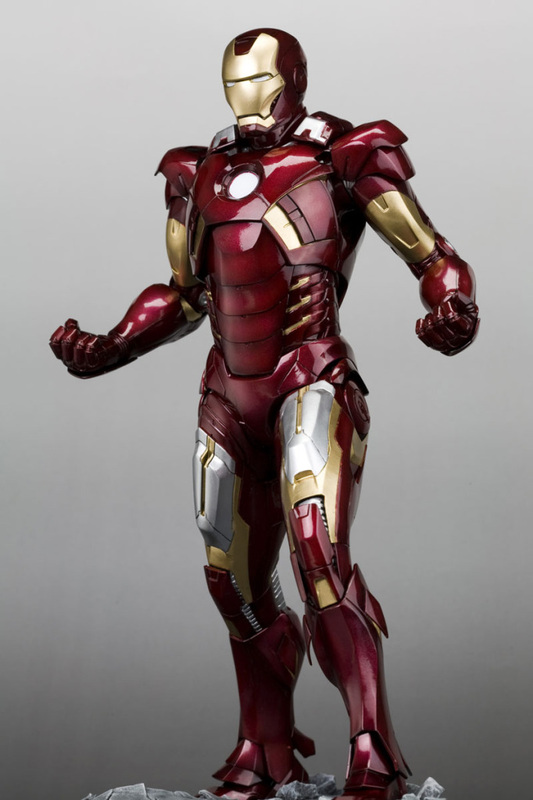
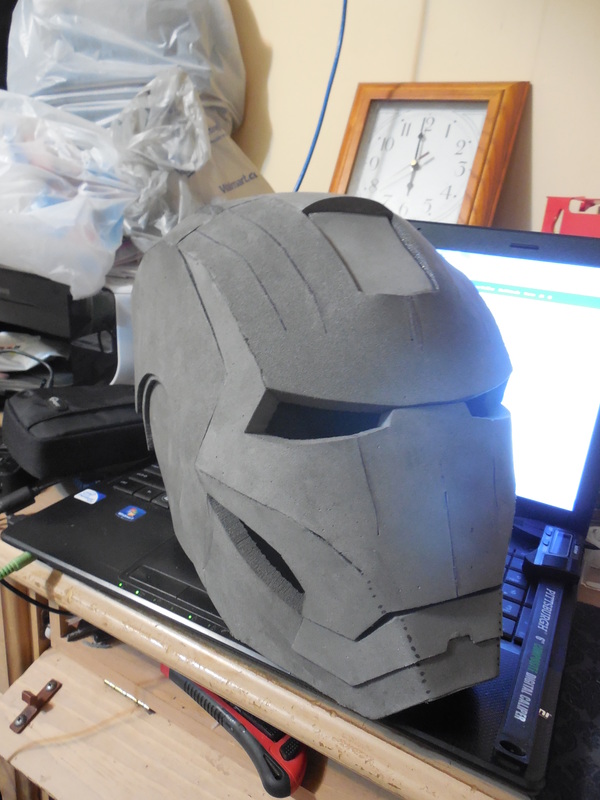
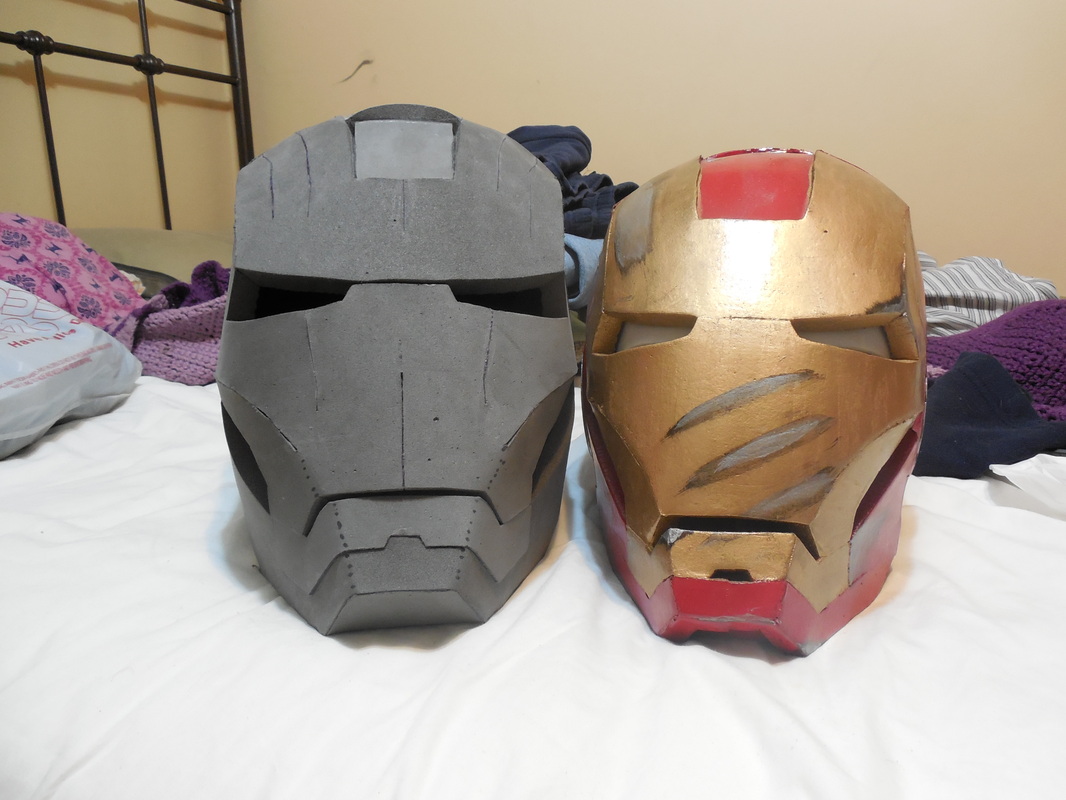
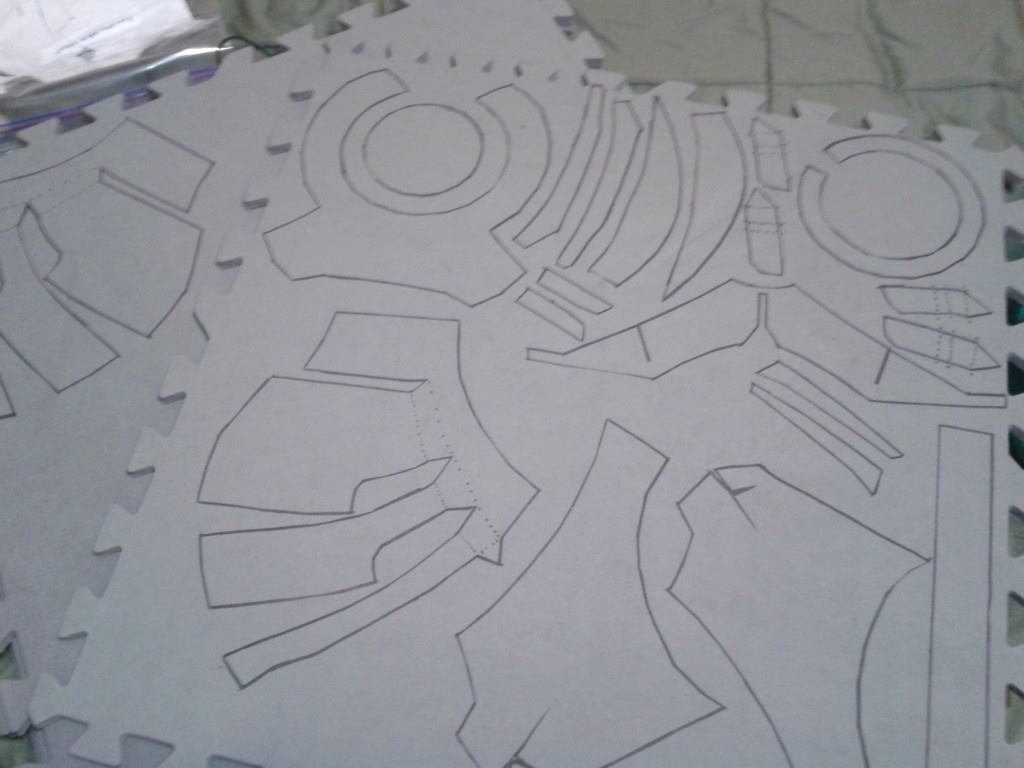
And now, for something not Mass Effect! Been commissioned to make an Iron Man Mark IV suit out of foam, so I decided to do two at once - one for them and the Mark VII (from Avengers) for me. As you can see, there are some major differences between them as Tony upgraded movement, software, you name it. I think the Mark VII looks the best so far (yes, even compared to the newest movie), and since he's always been my favorite, I want one! For this build I started with the helmets. The first one I made was too round and too small, but it worked in a pinch for a Tony Stark cosplay as a carry-around prop. This started, as before, from a pep file adapted for foam. 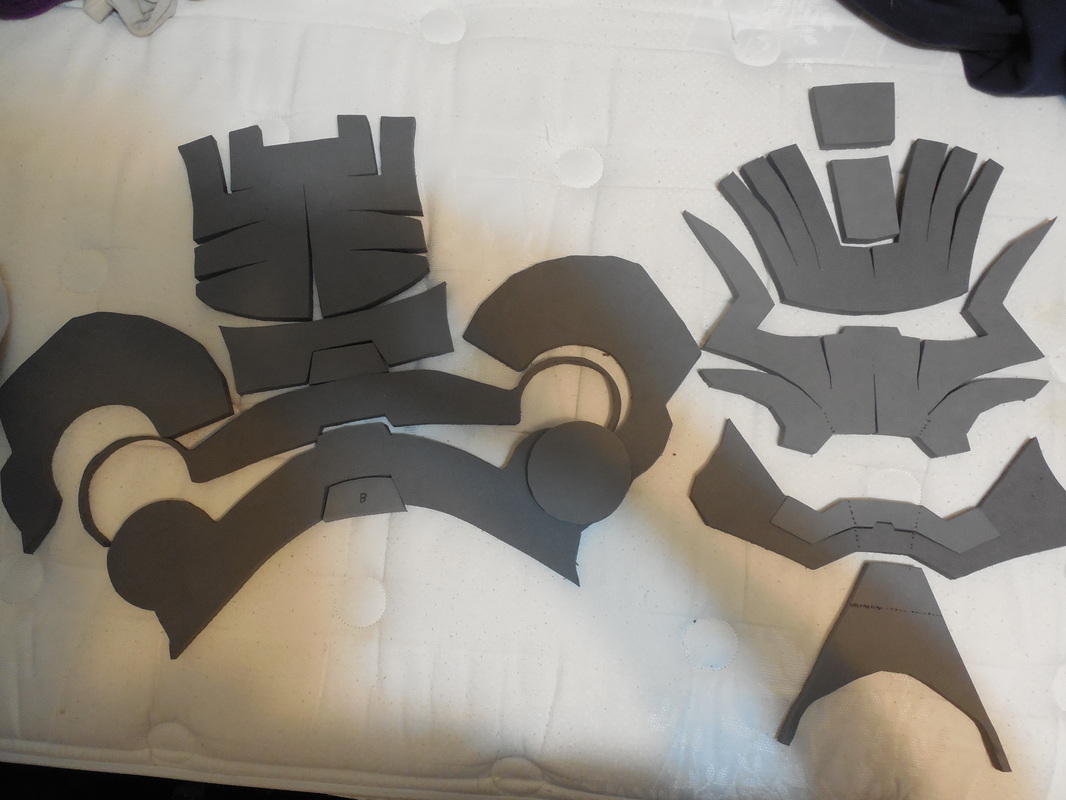
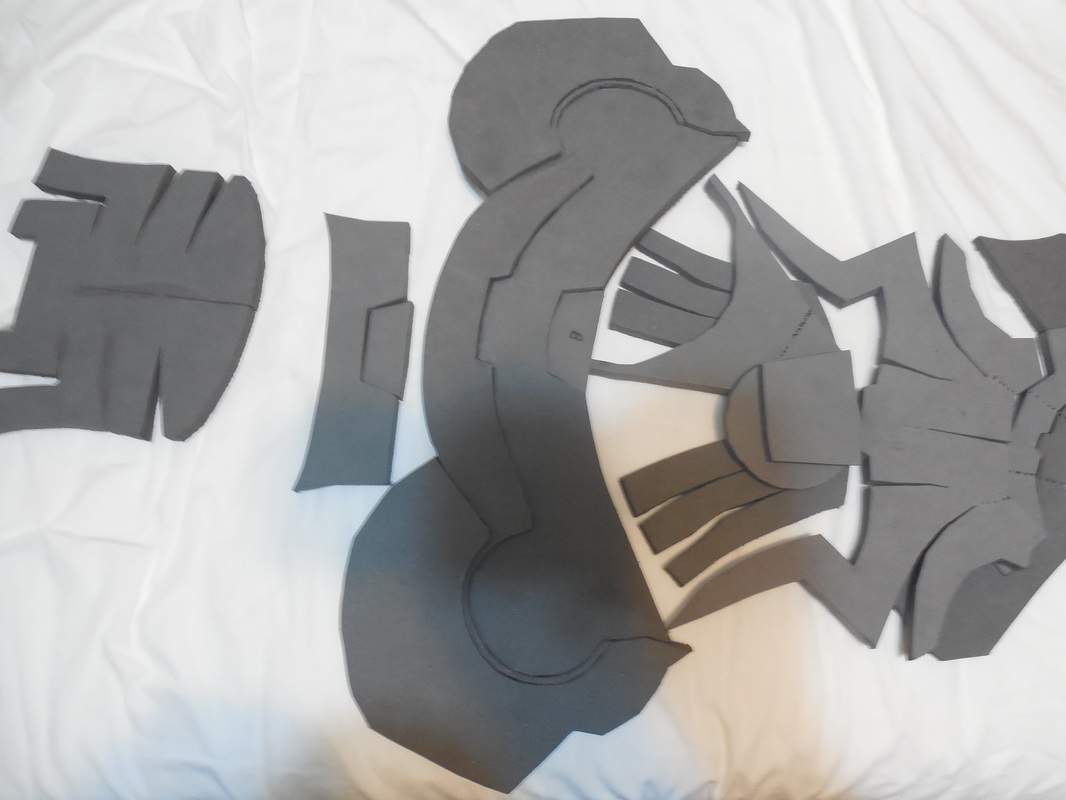
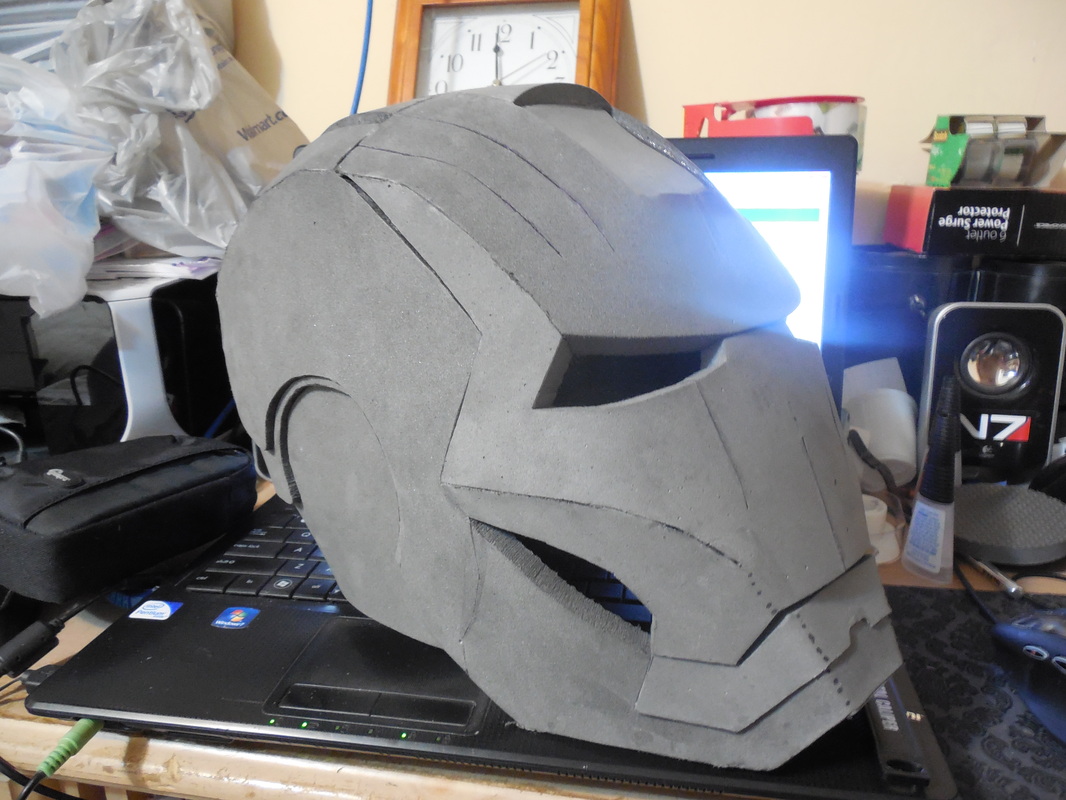
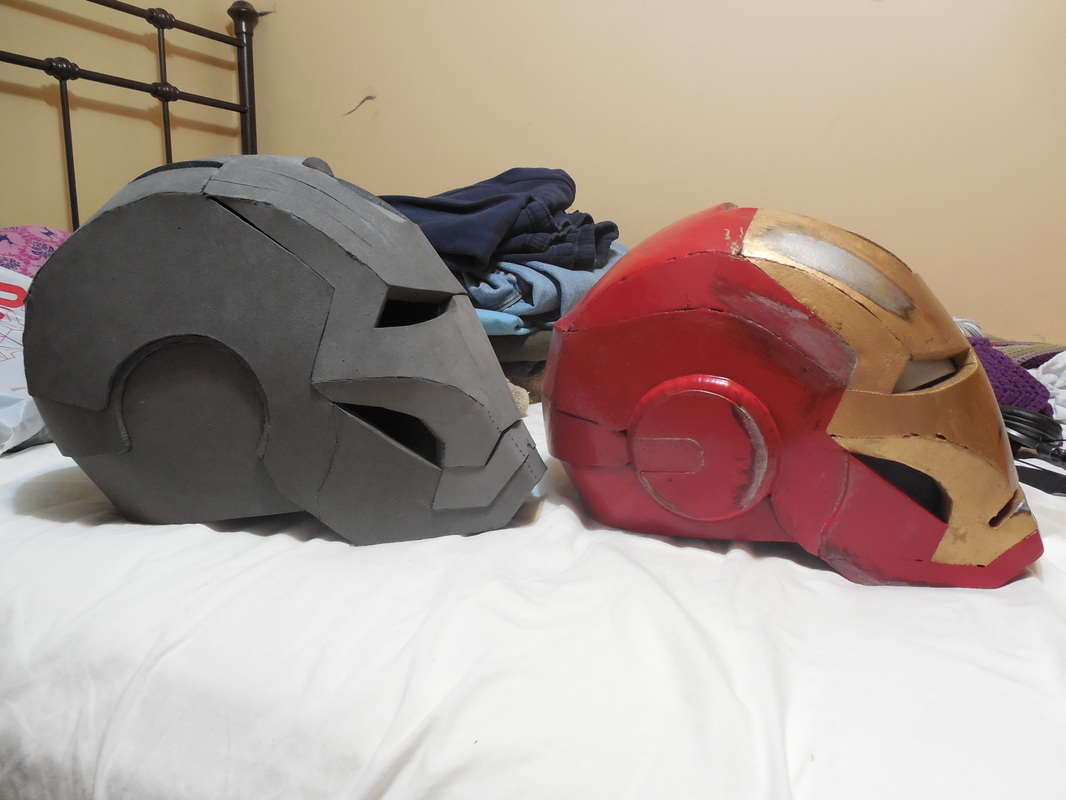
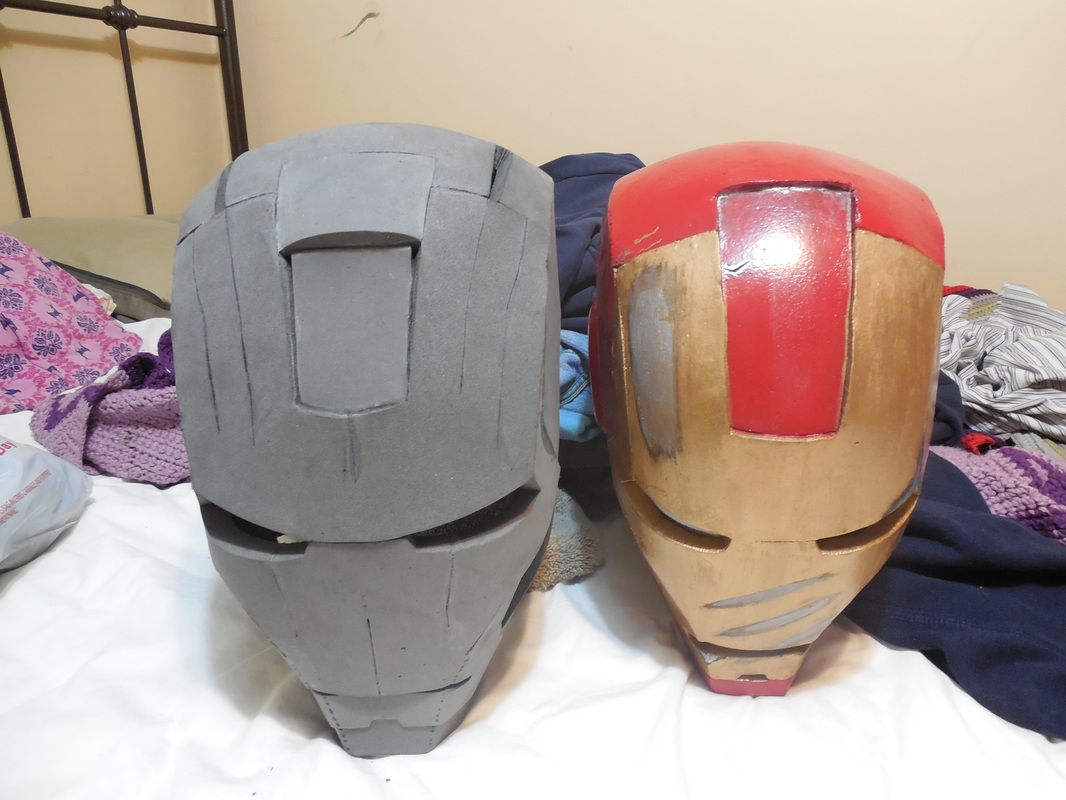
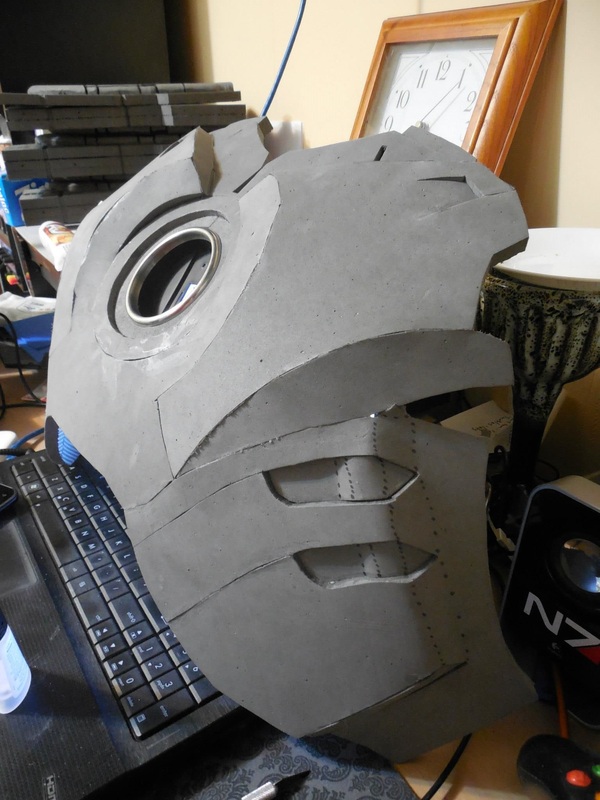
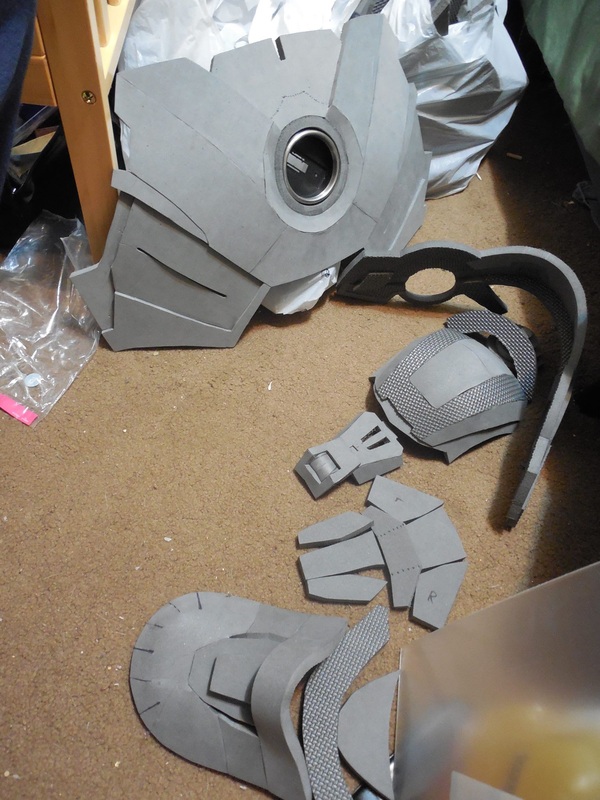
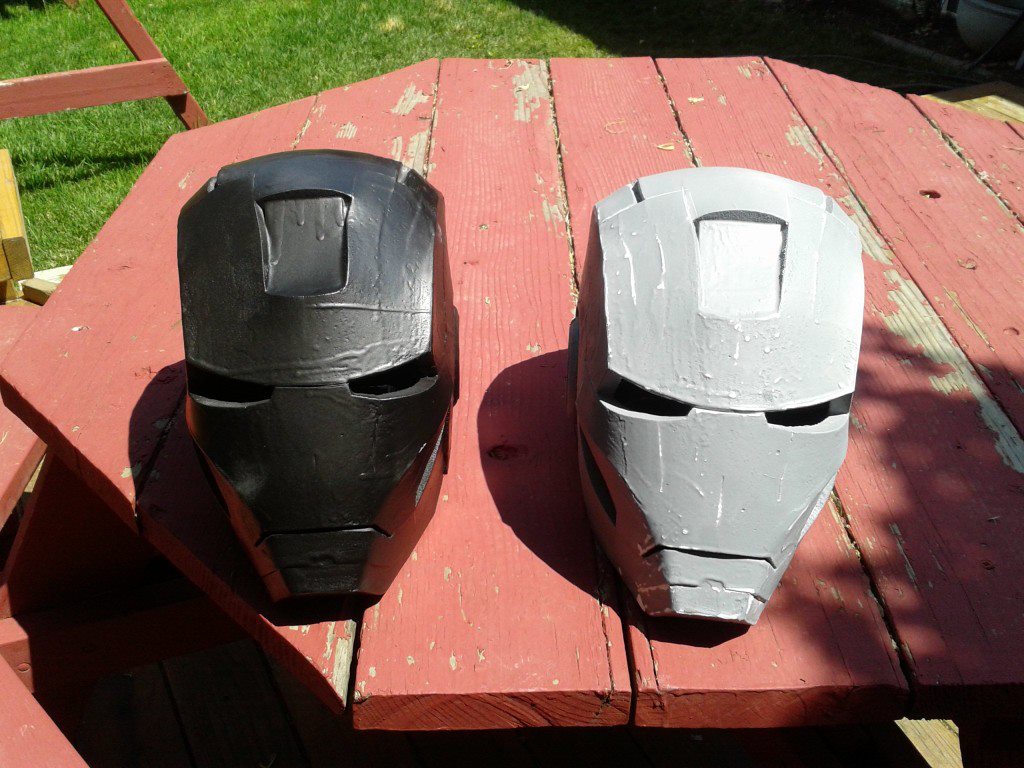
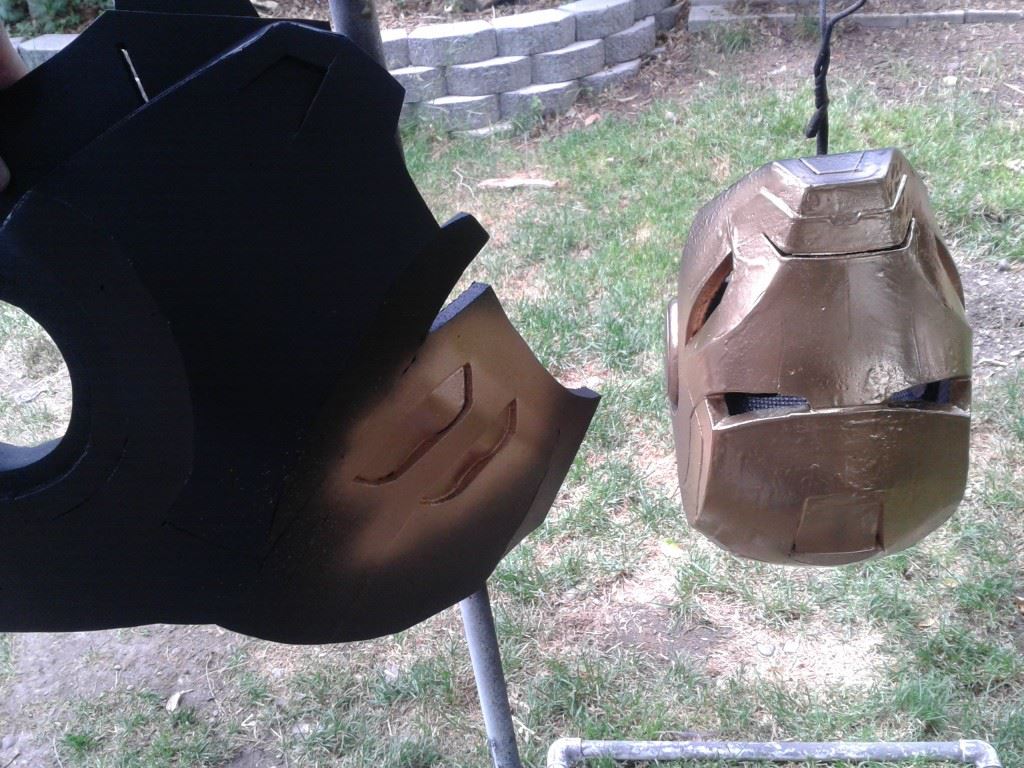
As you can see, several pieces fit together quite well, but others will need some work. For these, I used my great little tiny belt sander, angling certain edges to give a harder corner. The dotted lines you see are spots I took an xacto knife to, cutting valleys almost all the way through to fold up but remain a single piece. This saved on gaps and holes when gluing the foam. The final product: Astute fans will notice that this is the Mark VI helmet. The Mark IV is similar with some slight differences in the screw locations, and the Mark VII has a different chin altogether. I, personally, prefer the look of the Mark VI, so for my Mark VII build I'm going with this one - at least for now. The Mark IV though will get the proper treatment. As for the first helmet attempt, here are a few comparison pics to demonstrate how off it was. As you can see, the new one is not only bigger, but is a better sculpt overall. Cleaner, harder lines, better profile, and looks a lot closer to the mark than the old one. Not that I hate the old one - it just doesn't look quite as good. After that was ready, it was time to throw on the ear pucks. These I made with foam again, rounded down with my table router, and a shaped piece of 1/16" styrene (remember those For Sale signs?) on top for detail. 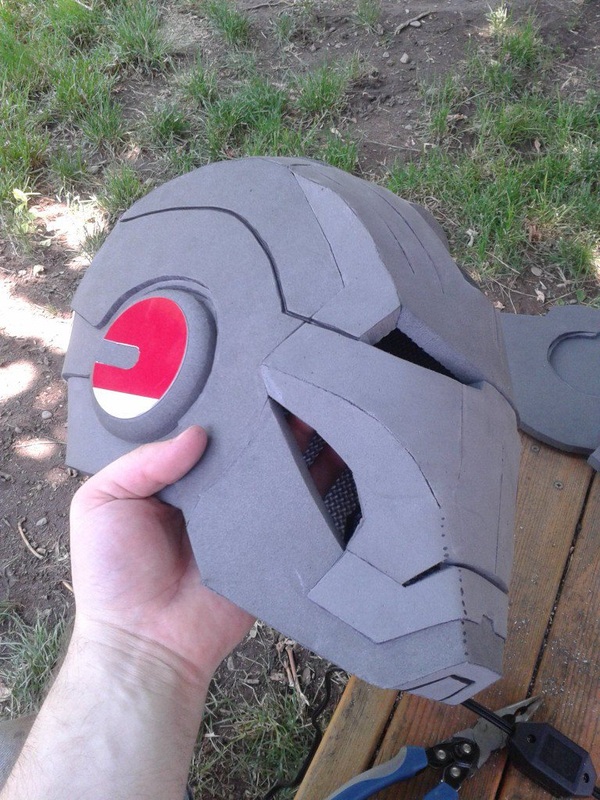
Once those were put together, I started sanding down edges and etching in extra details, like the line on the side of the face and the chin bits. Two helmets, assembled! 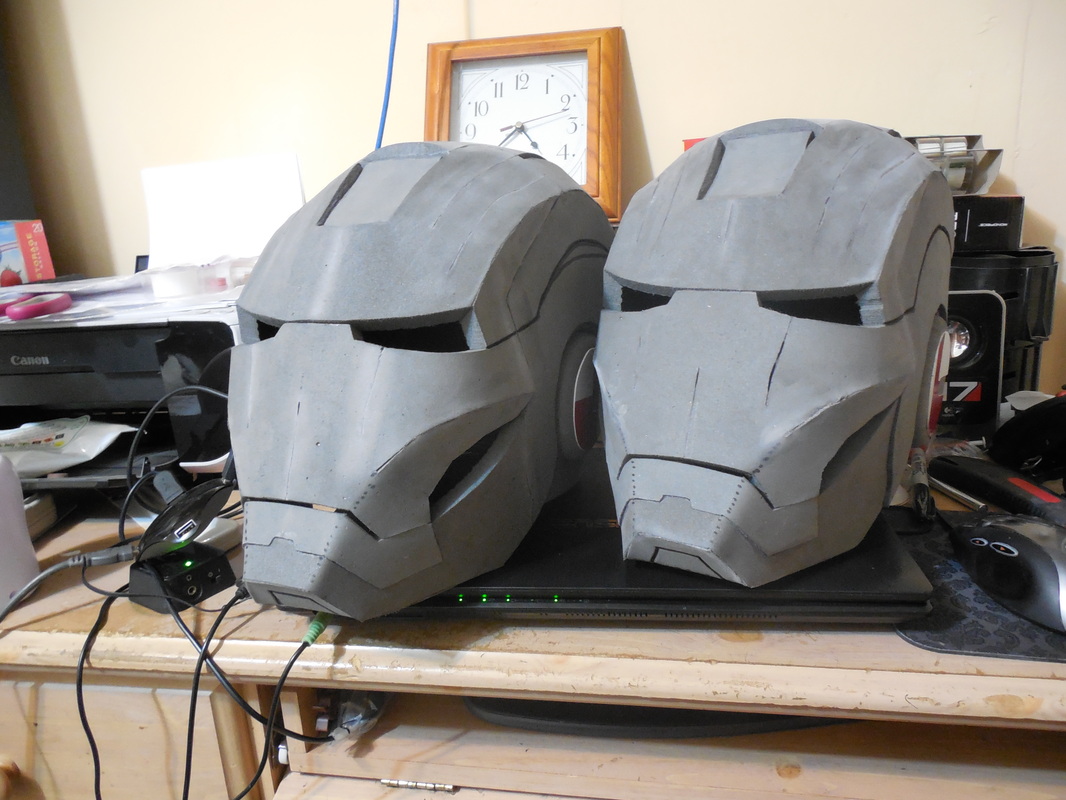
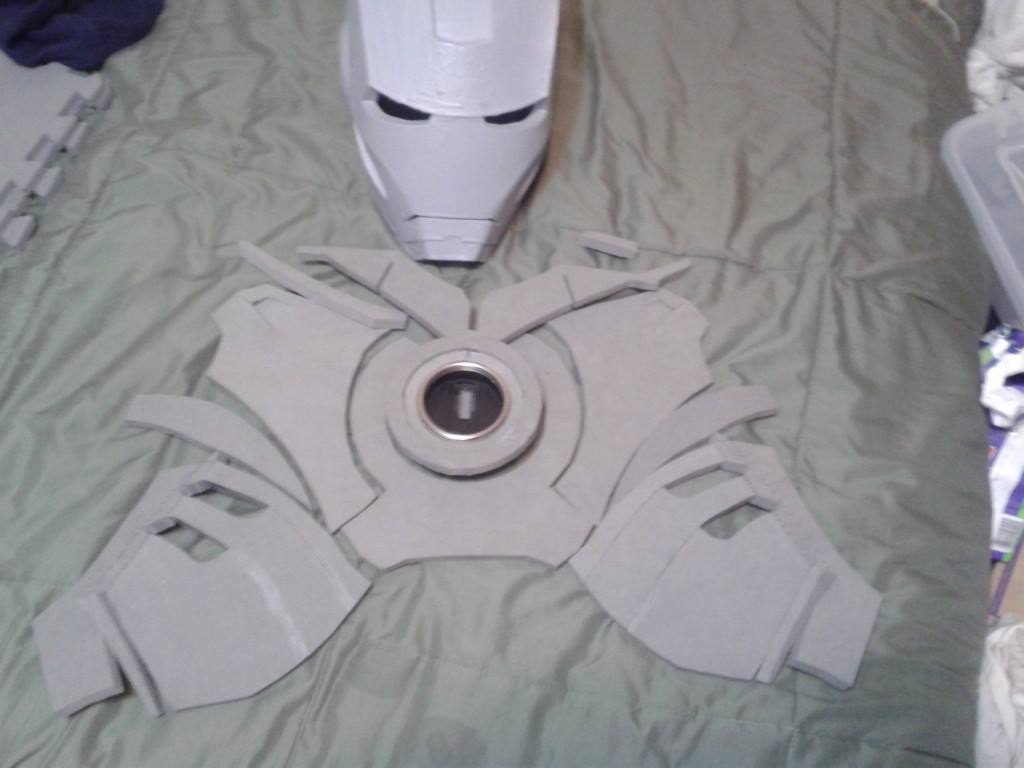
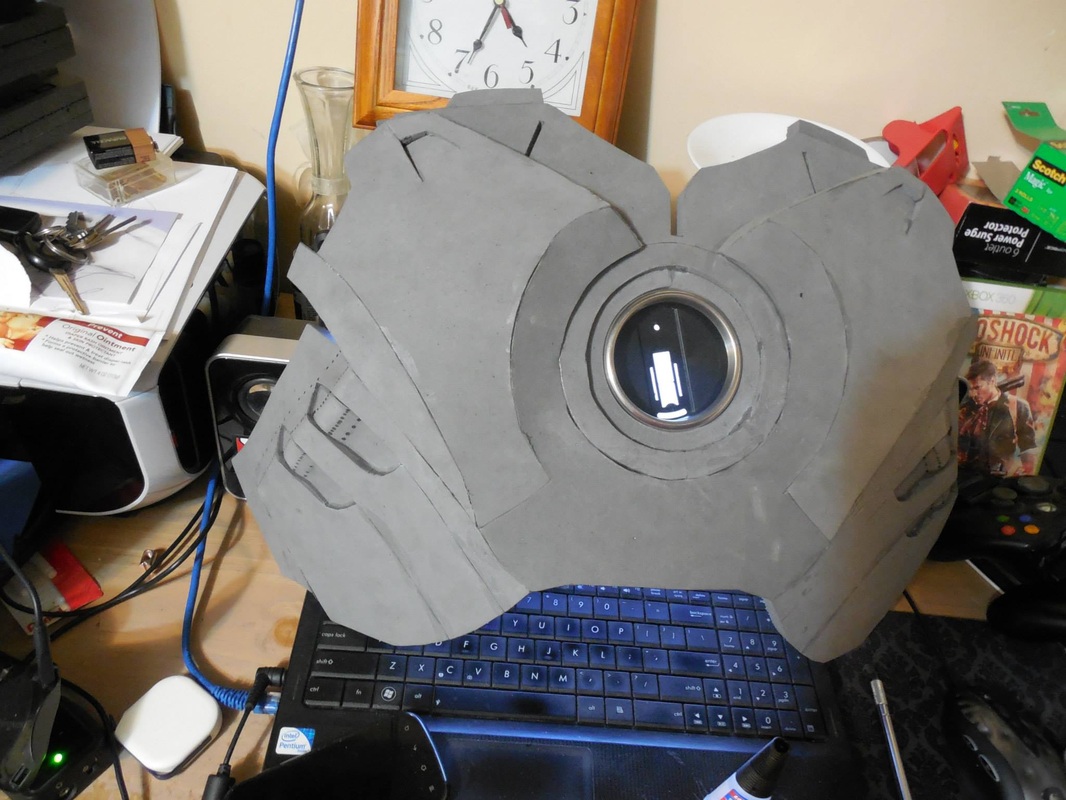
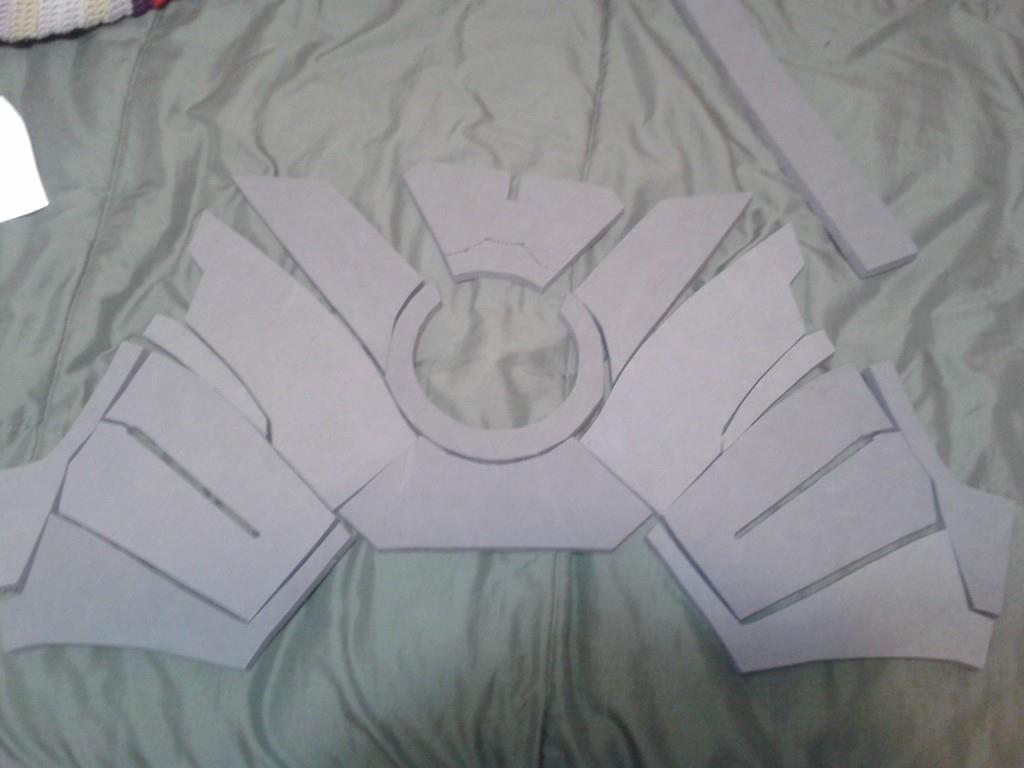
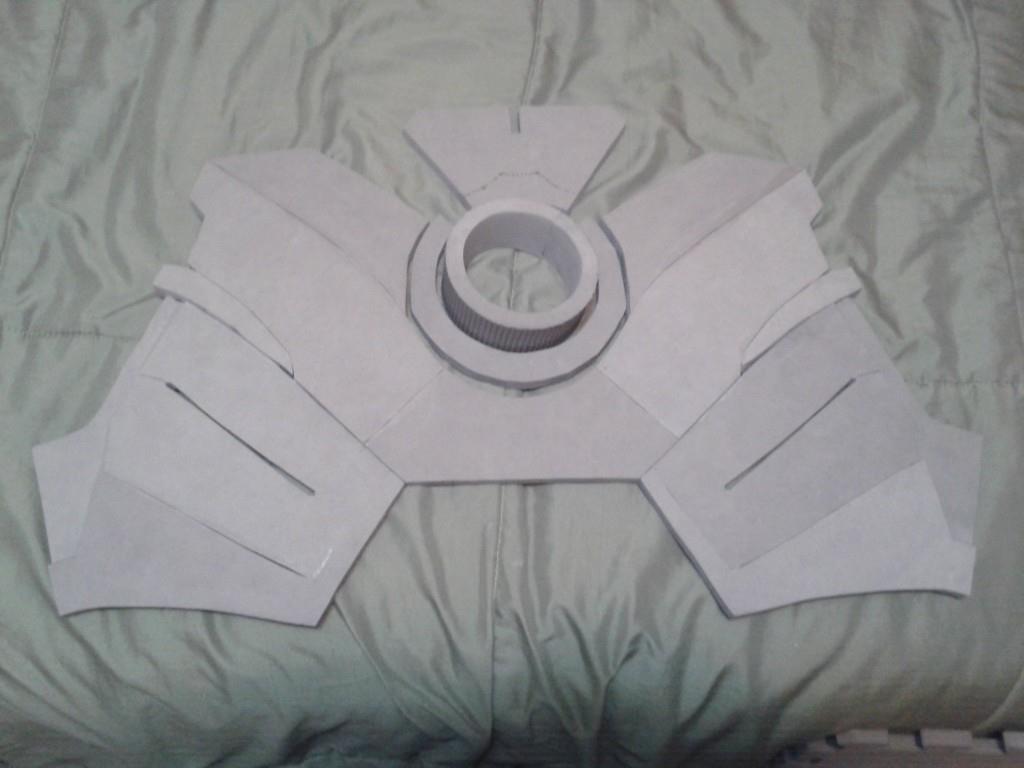
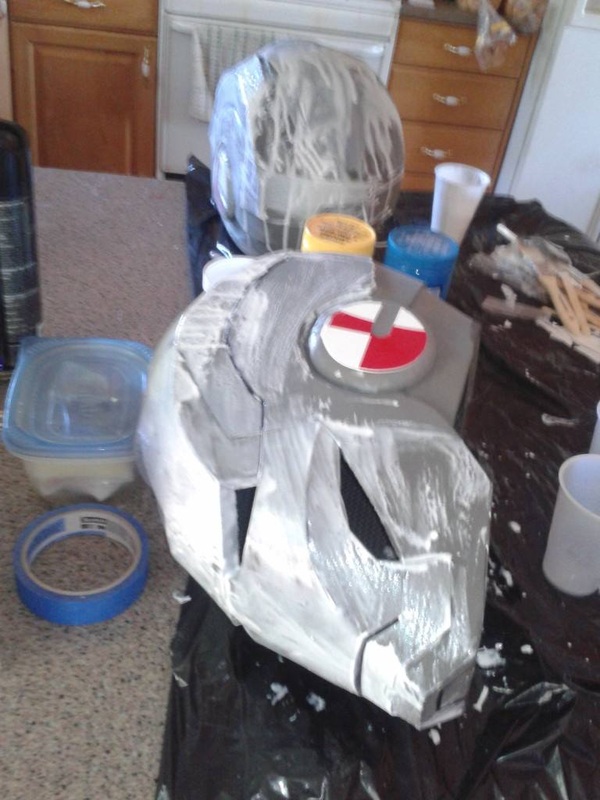
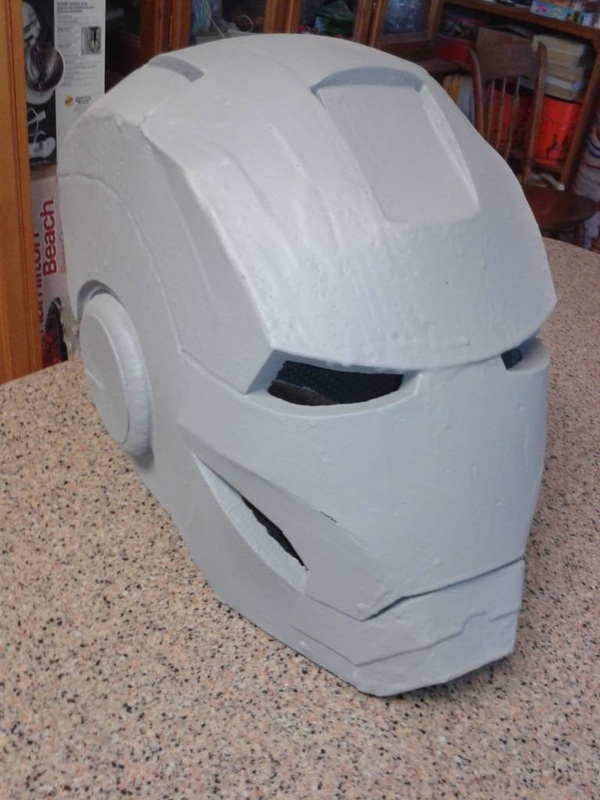
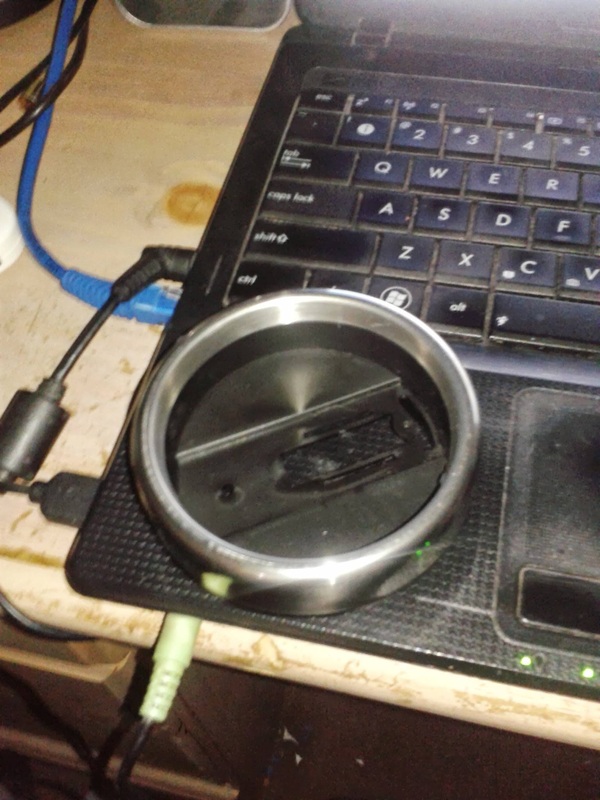
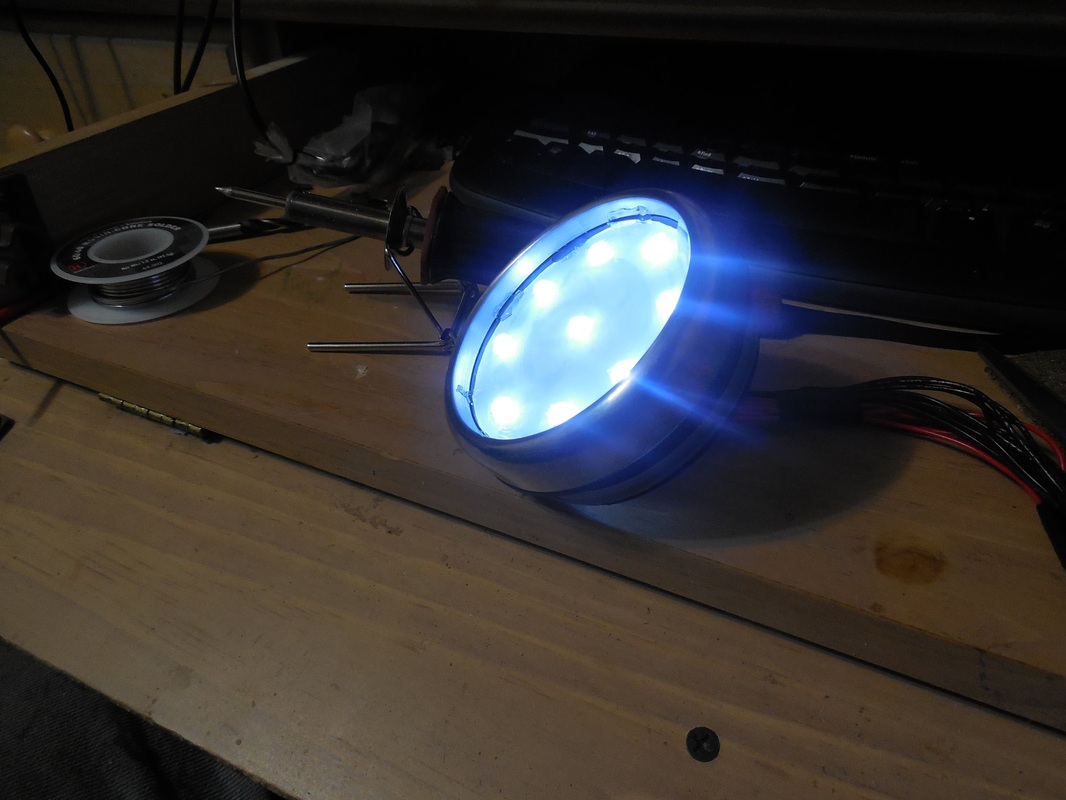
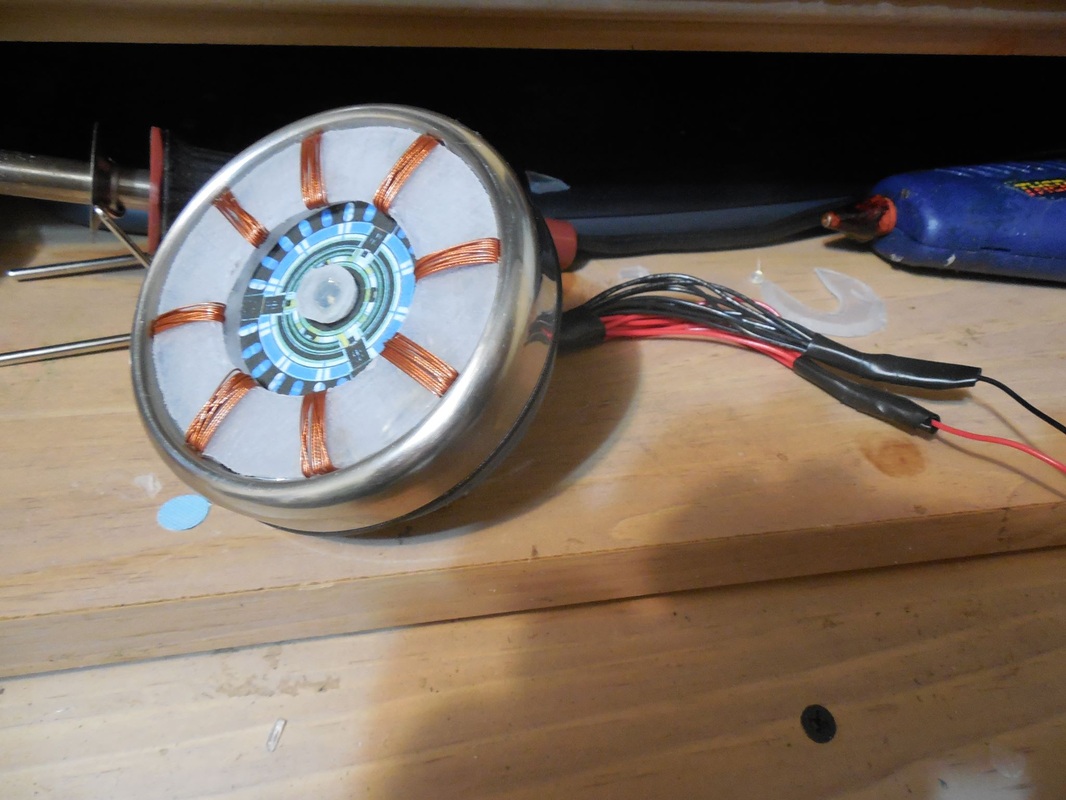
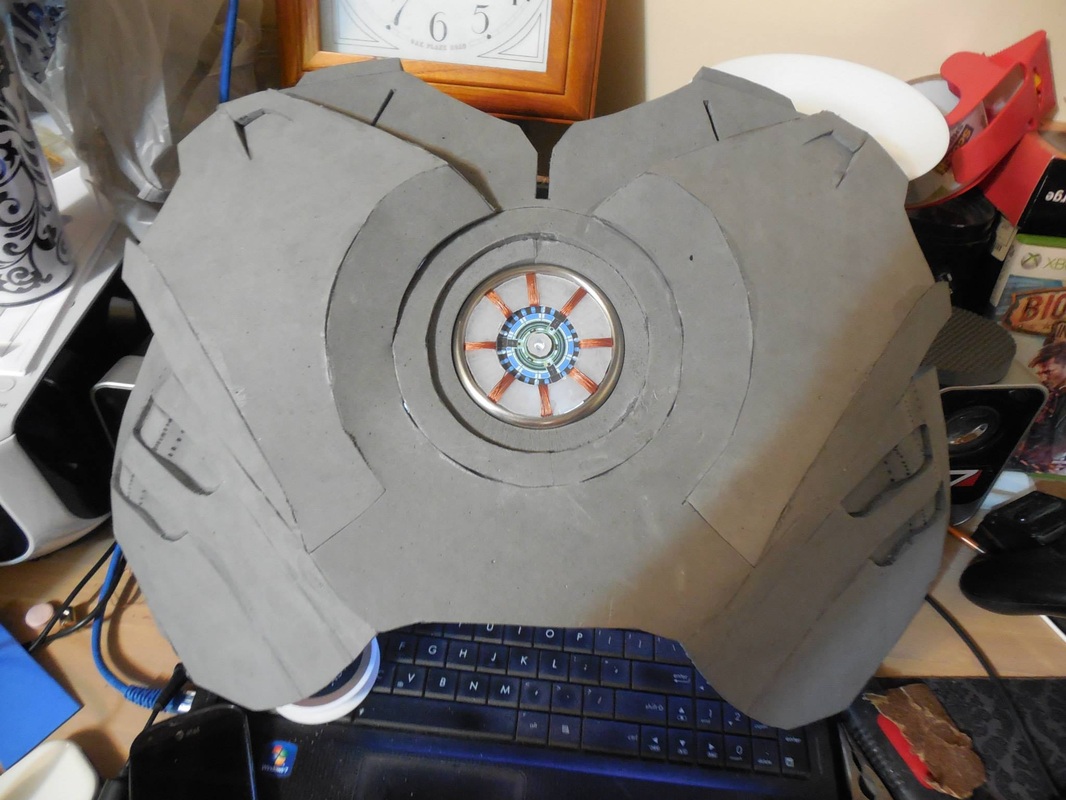
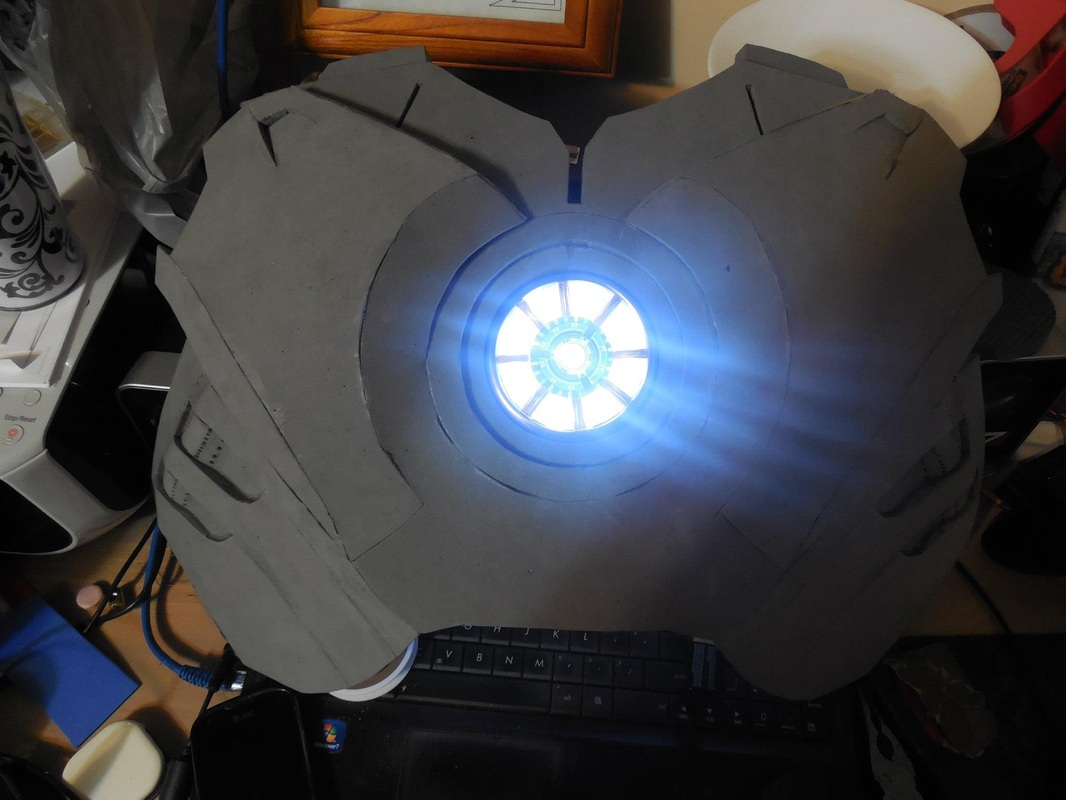
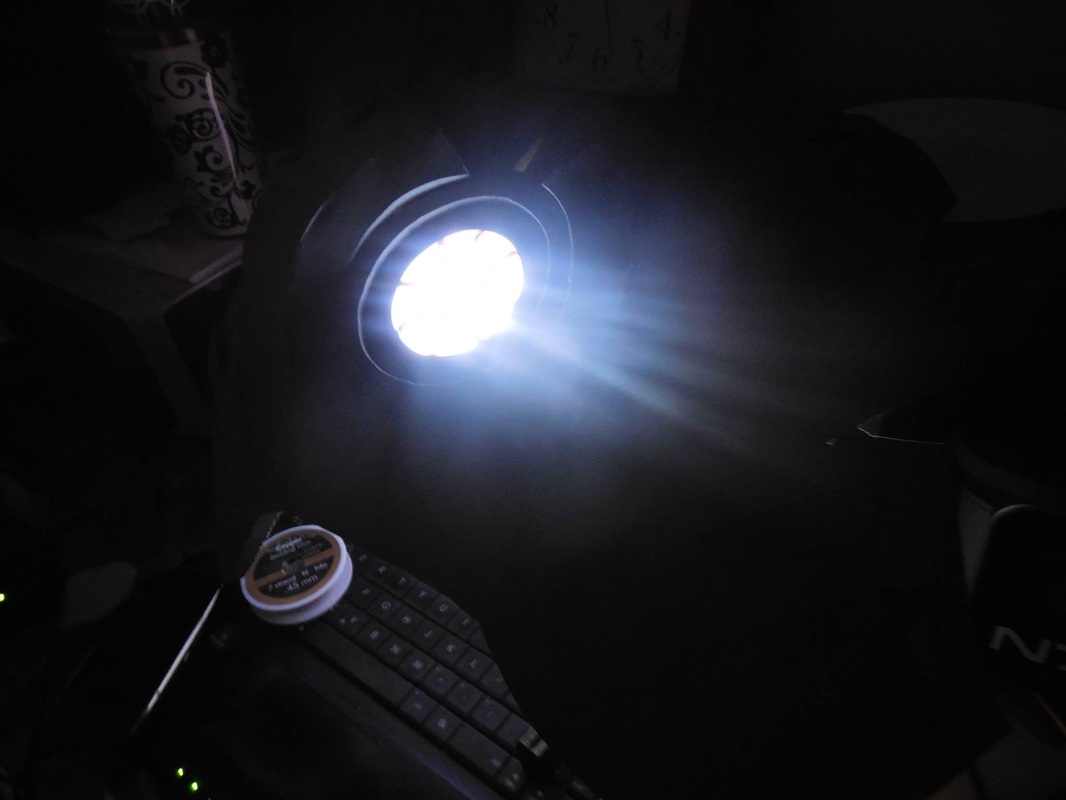
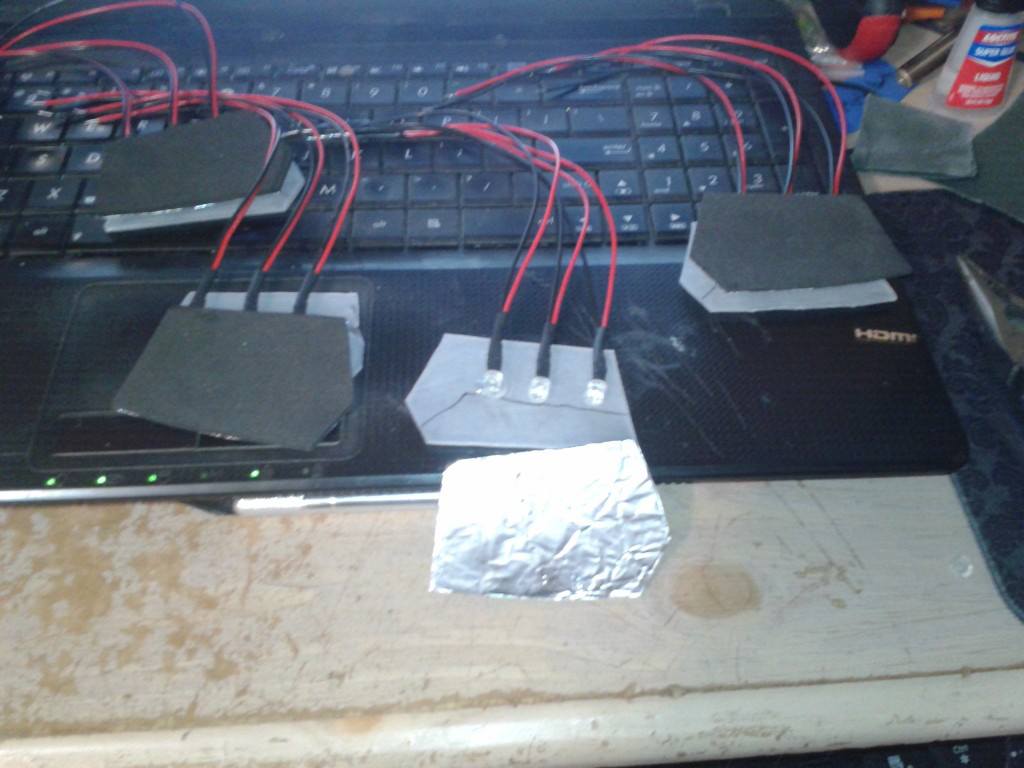
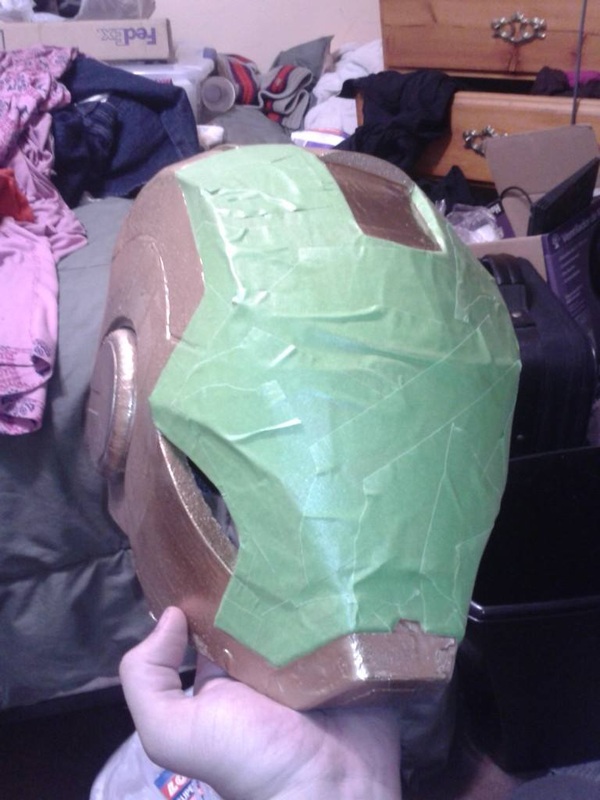
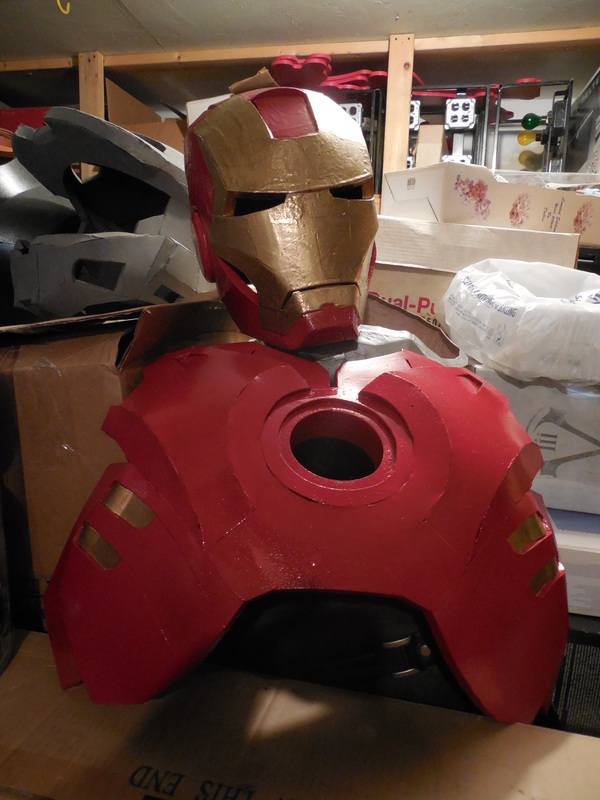
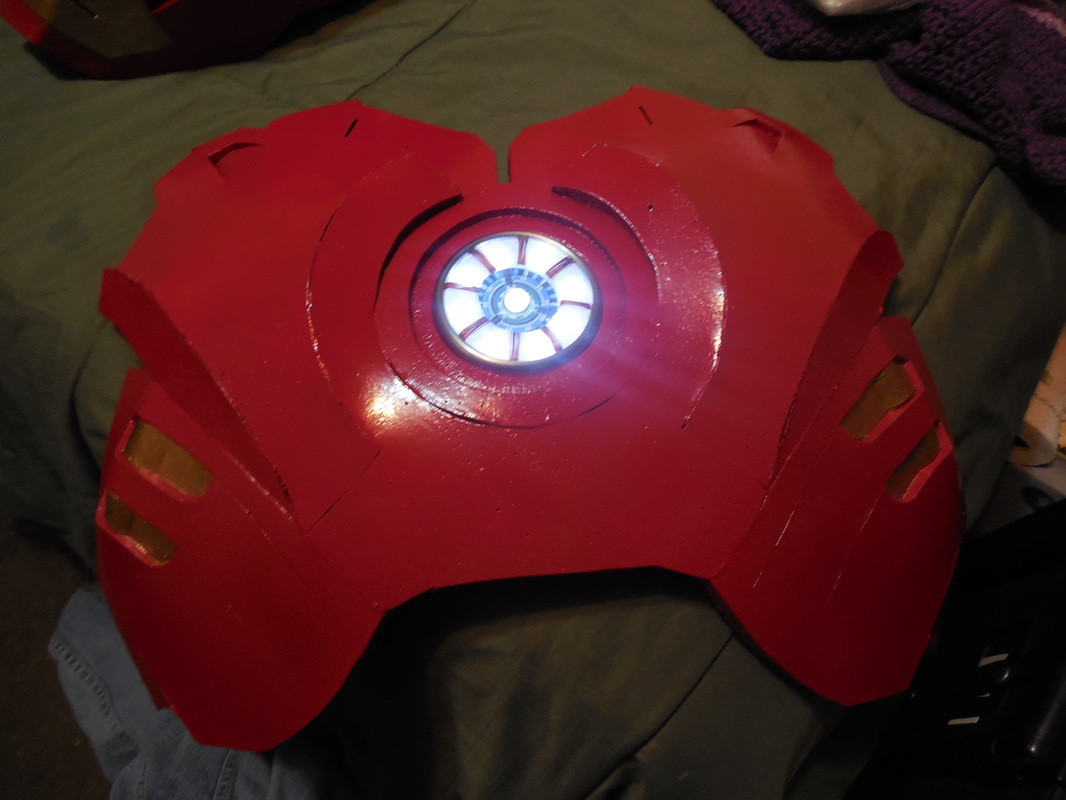
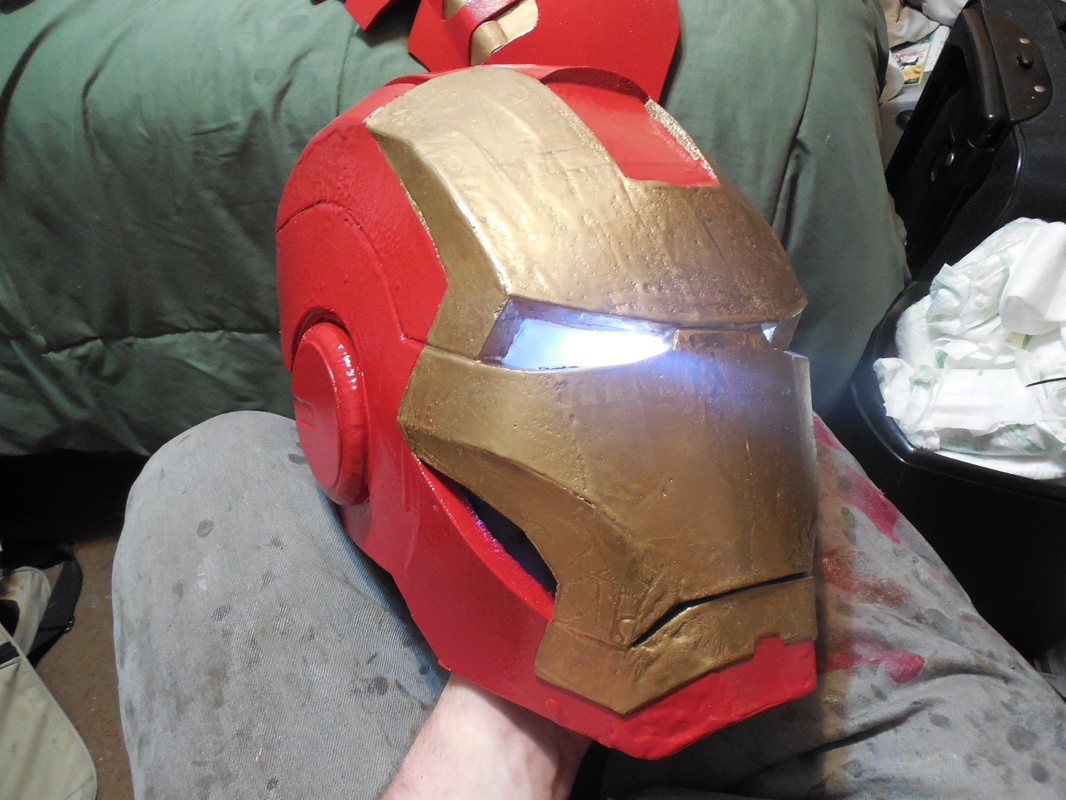
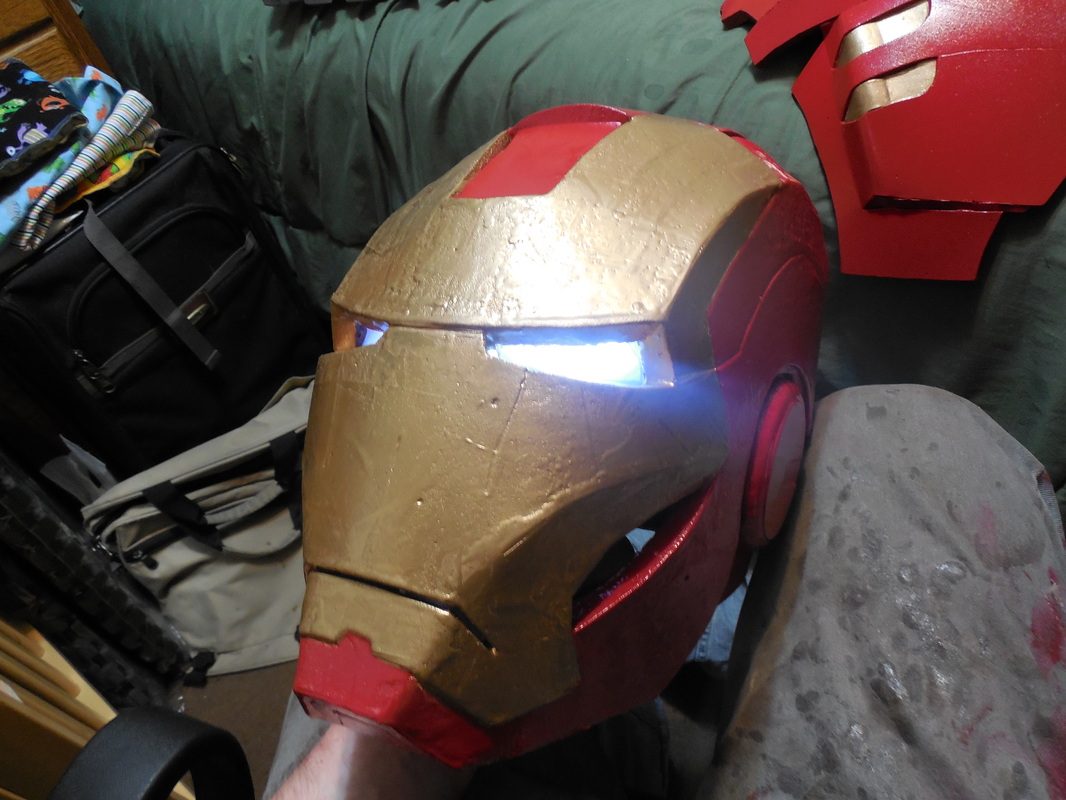
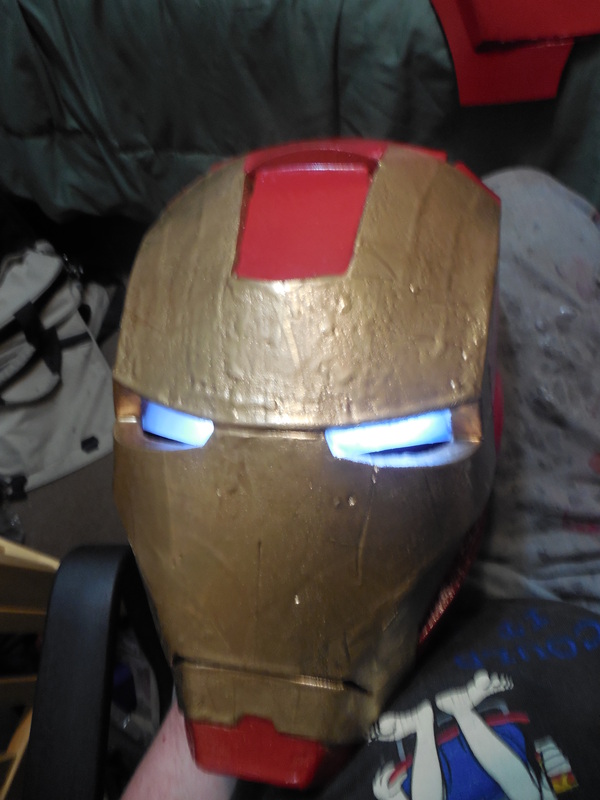
Then I started on the chests. Again, these both have different designs, so I couldn't just make both and do some small adaptations. First off, the Mark IV. Lots of curves and folds in this one, so it was a bit harder to get everything even. The center part of the chest moves in like three different directions too, so that made things interesting. I used the mini belt sander to get the angles right again, and it turned out just like I wanted. :) The Mark VII was easier: (Shown with random N7 Helmet build) Lots more basic shapes, meaning easier making but I'll have to wait to paint until the back section is ready to attach. Needs the curve to be just right! The helmets, if you're wondering, were both being painted while I worked on the chest pieces. Since I'm making two suits at once, and one is for a customer, I'm trying to multitask as much as possible to speed up the process. Now, there were quite a few seams I wanted to cover, so I tried out a new technique: resin. Of course, I thought that meant polyurethane, and now know that means Epsilon, so watch and learn from my sad mistakes. When I spread the resin, it dripped everywhere and left long lines and bumps. Of course, it was 105 degrees outside, which made the normally 15 minute cure time turn into 2, so I couldn't spread those well enough. Drip marks everywhere, wasted resin left and right, I was not a happy camper. I pushed on though, priming it for sanding. That took forever and barely worked, so I decided to test paints on them while I gathered funds to get Mod Podge to smooth that all out. Before that, though, I took a break from foaming and decided to have a go at the Arc Reactor and the lighting for the eyes! Everything you see in the above pictures came from recommendations by The Heroes Workshop, headed by Stealth (an awesome Iron Man cosplayer with a YouTube channel full of great tips and tricks). The wall and casing for the reactor? A coffee tumbler lid. The LEDs are diffused by a piece of plastic from an old tote, sanded and scratched up on the back side, as well as the higher outer ring. The inner detailing on the reactor is a print out of a high-resolution shot of the actual reactor, cut out and glued in, and the copper wiring is simple copper colored wire from Walmart's craft section. It's cheap, it looks good, and it works. In person you can still see the individual lights, but as you can see in pictures it shows up perfectly diffused. For the eyes, it's the same plastic sanded up, backed with black craft foam that has tin foil attached. This spreads the light a bit better, and keeps it from blinding the wearer. Back to the painting.... Painted the gold first, since that was easier to tape off on the helmet and the inset sections on the chest. On the chest is just plasti dip, unlike the helmets, since I didn't want to risk wasting more resin and having it look terrible again. After the red was dry, the tape came off. Chest looks great, and the reactor fits perfectly snug without any adhesive. As I mentioned before, the helmet is not complete and the eyes are not yet attached, but this gave me a good chance to test the fit, which worked wonderfully. There are a lot of tape lines all over it, but I'm not worried as I still need to clean it up a ton (as you can see).
Unfortunately I haven't done any work on either of them in several months, as the person who commissioned me originally has dropped out of contact. They wanted the helmet by the release of IM3, but have only paid the deposit with nothing since. If they haven't made any more payments by the promised completion date, you may see at least one of these helmets up for sale. We shall see though! I will definitely post more updates on this when I have a chance to make more of mine. Onward!
1 Comment
|
|

 RSS Feed
