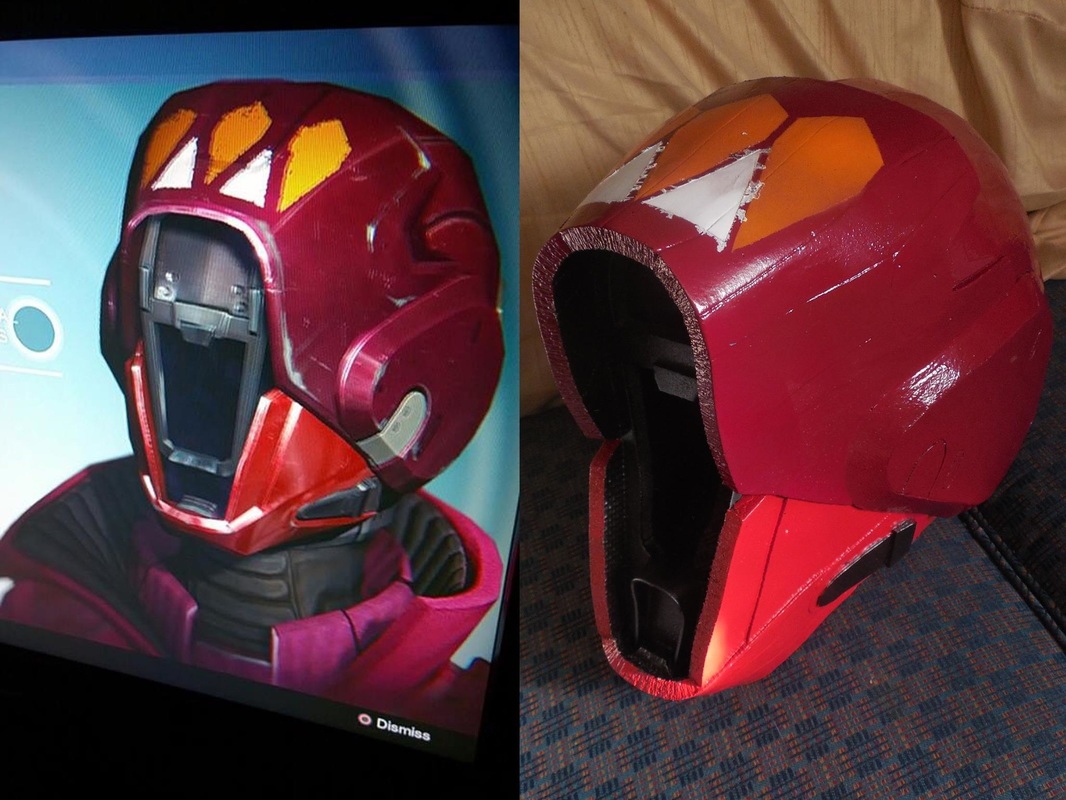
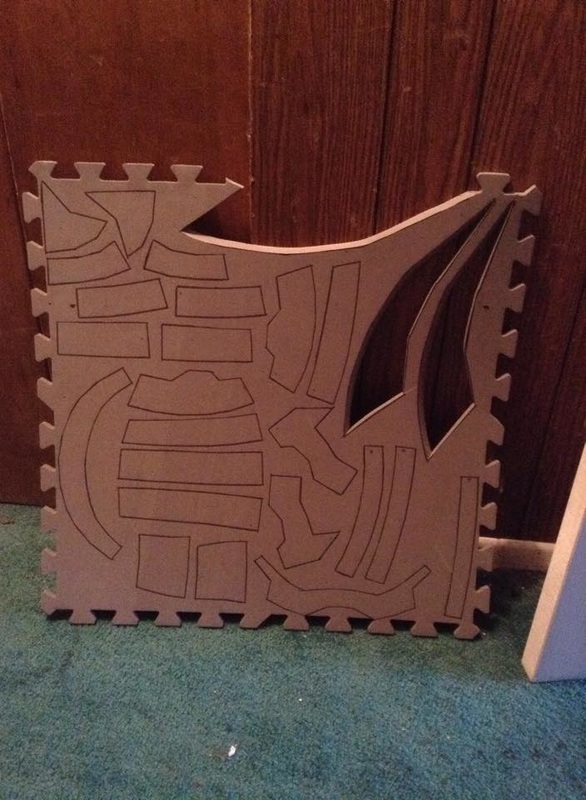
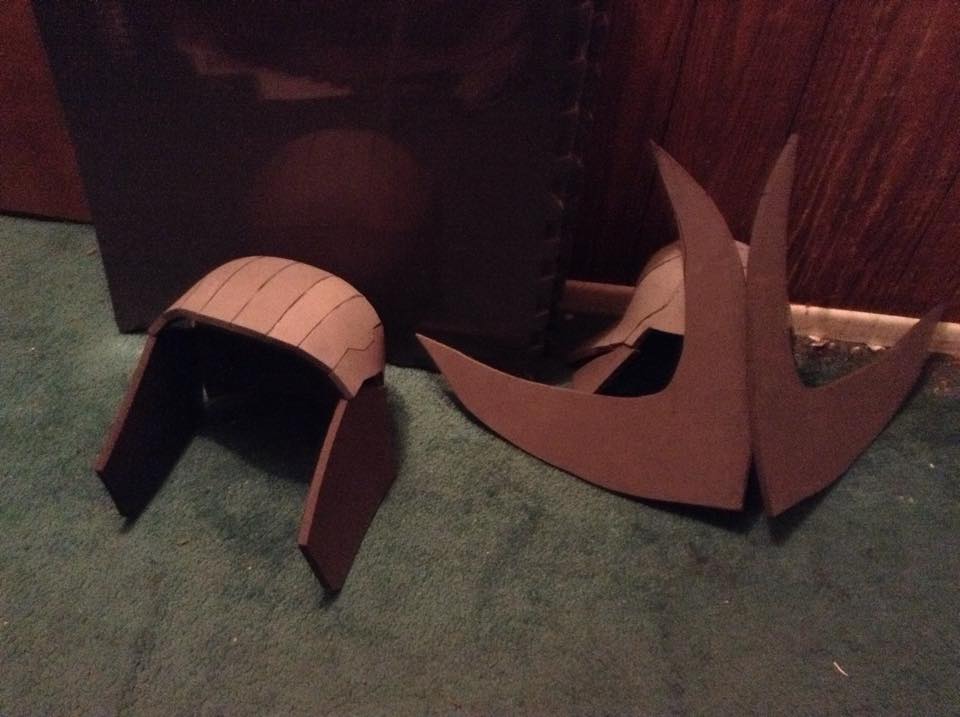
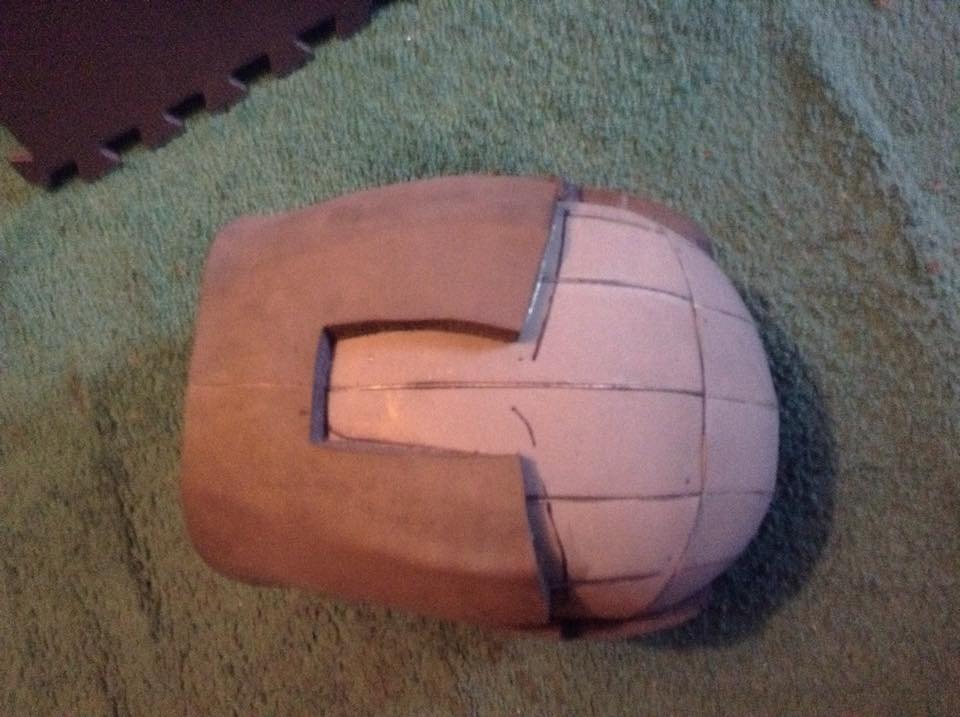
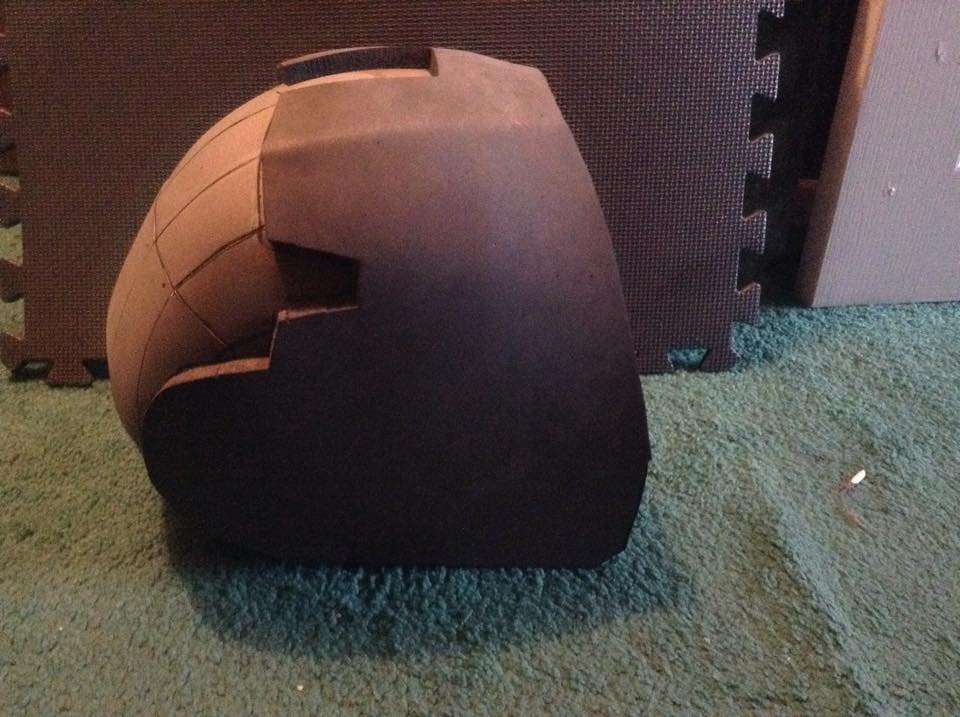
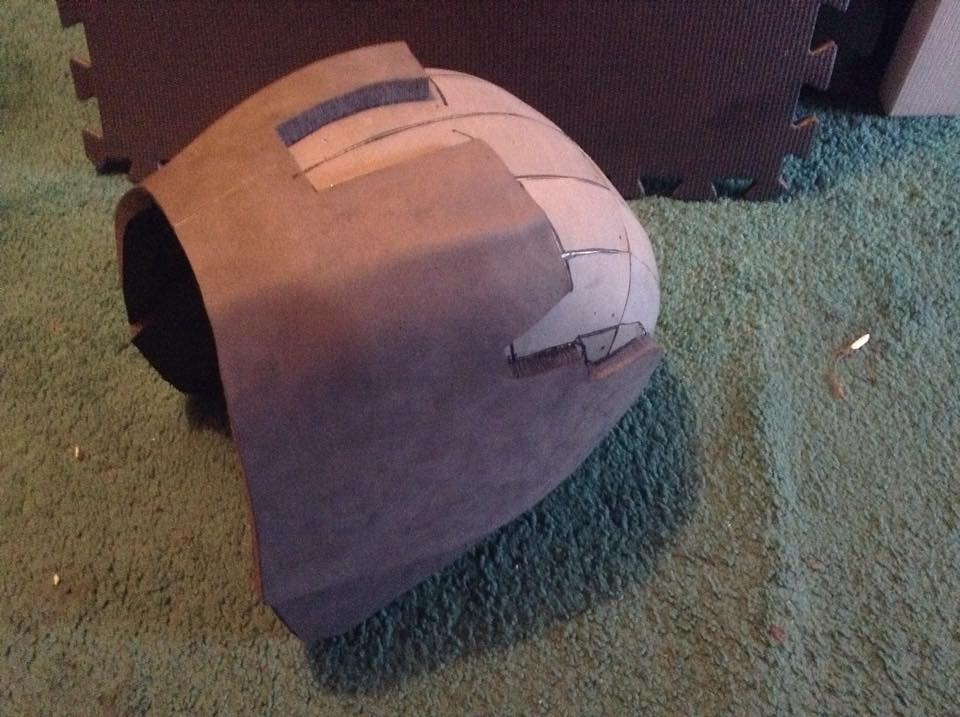
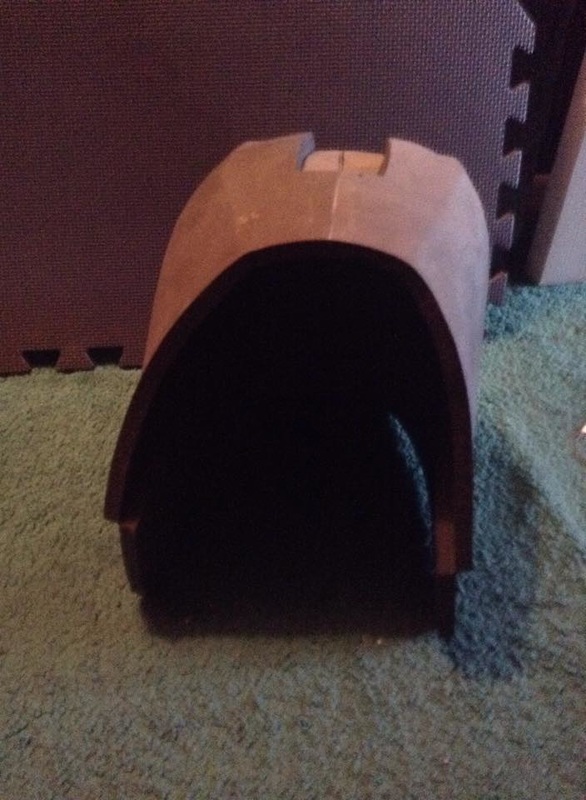
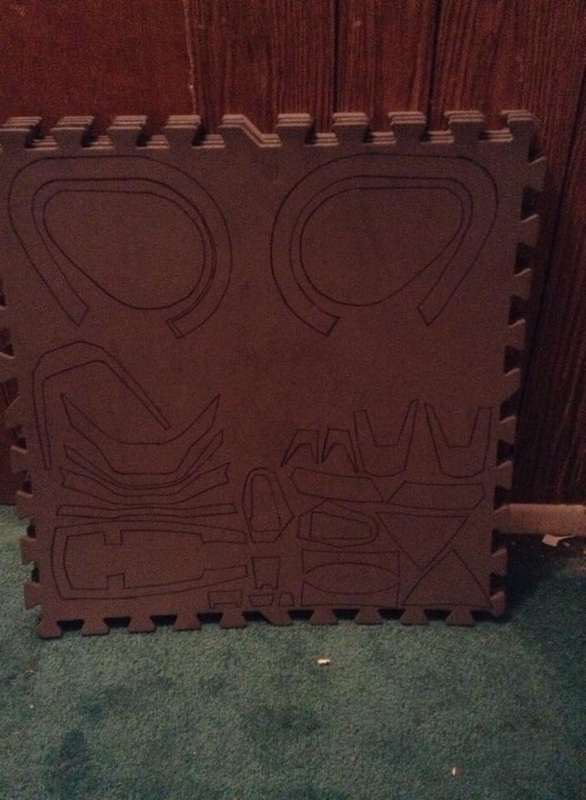
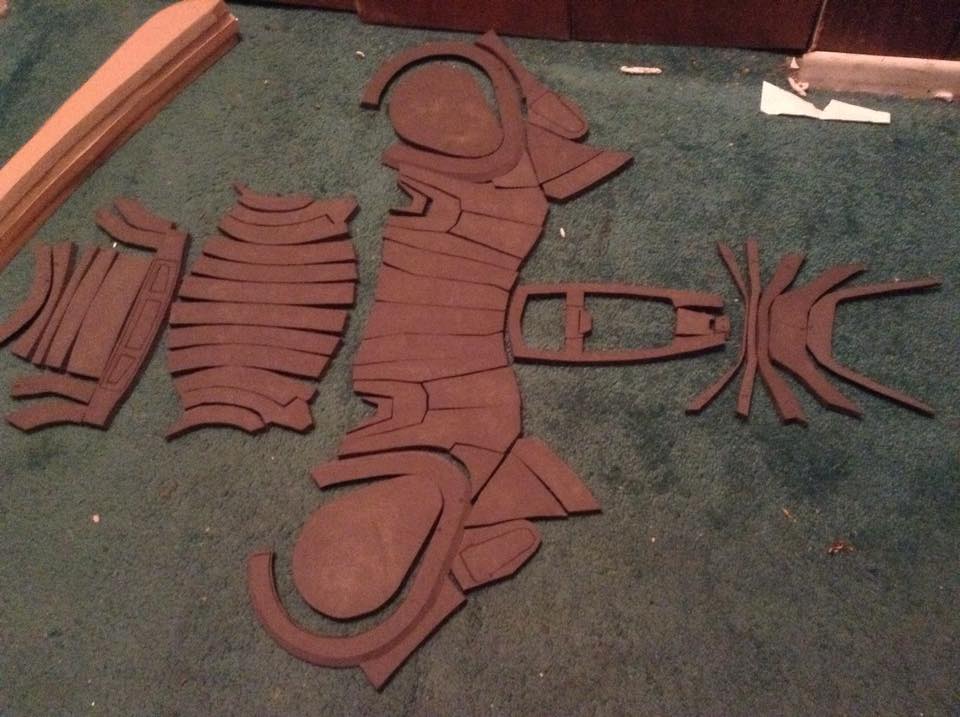
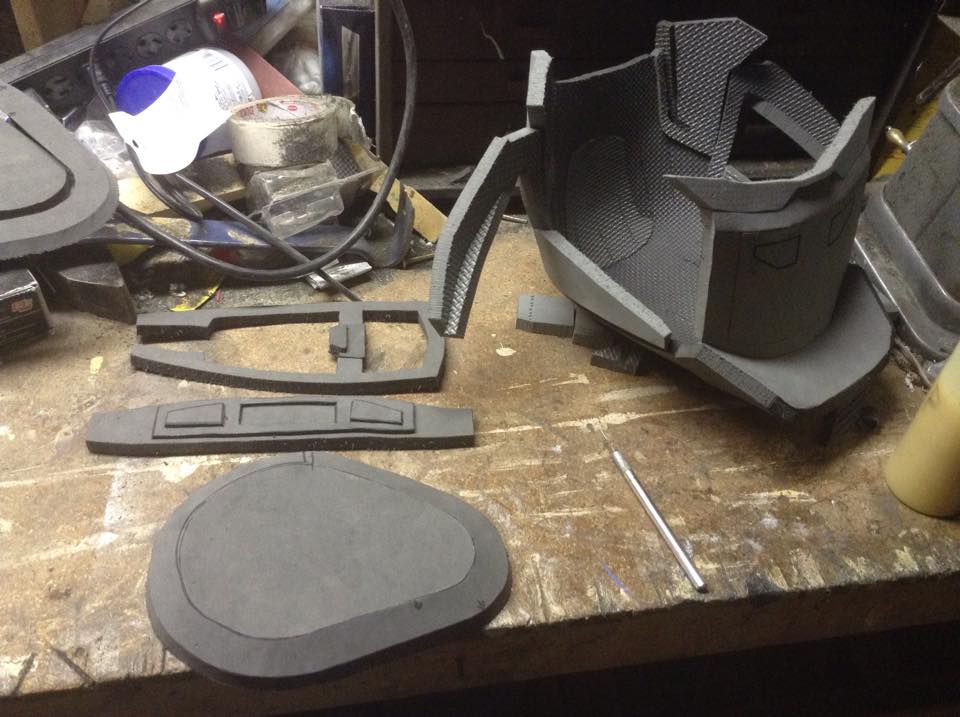
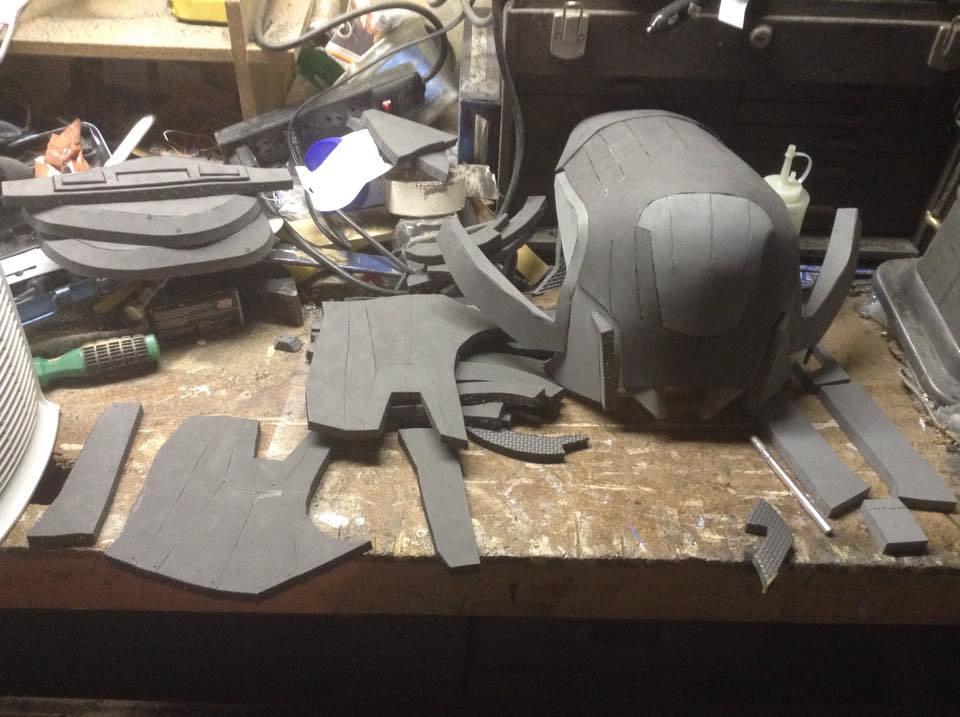
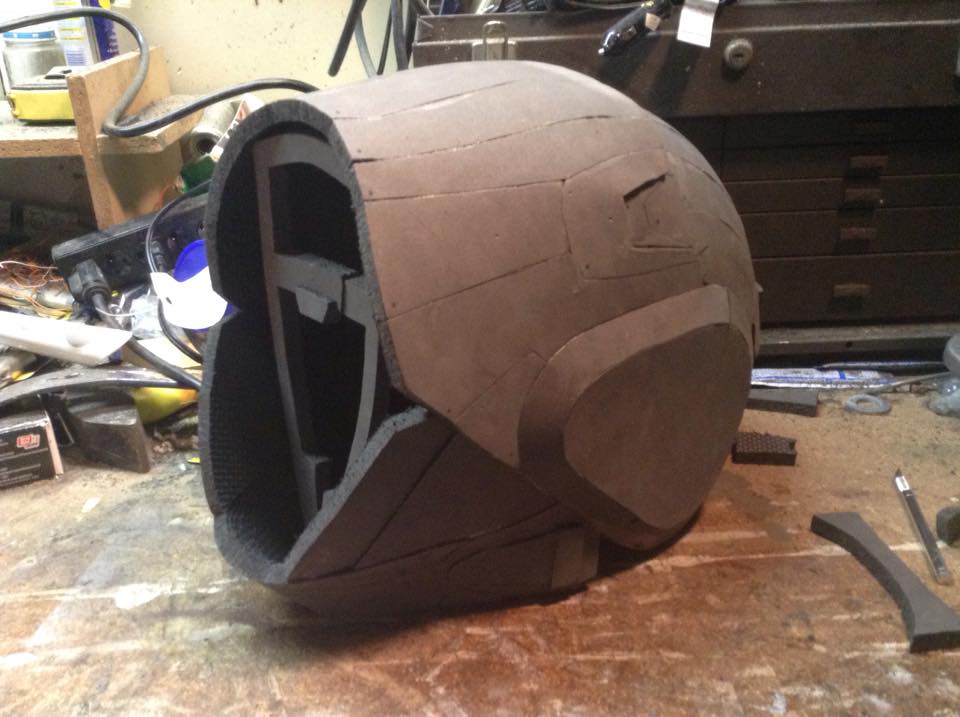
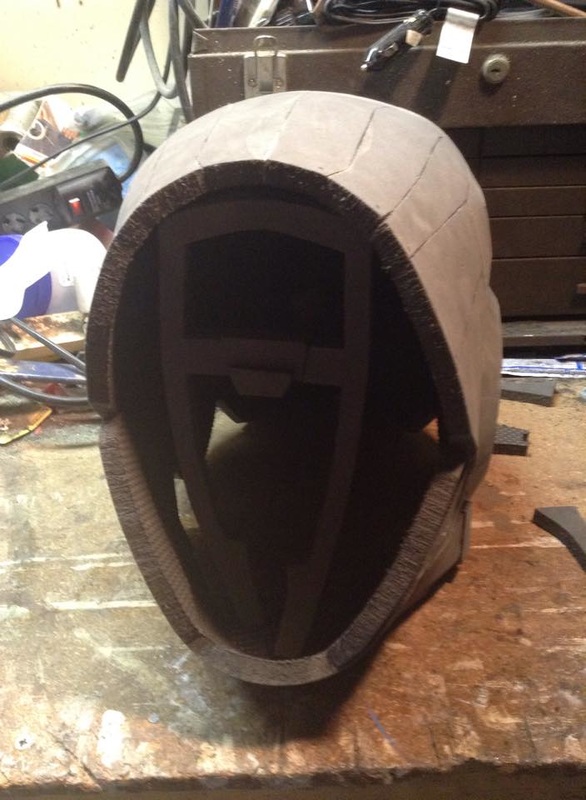
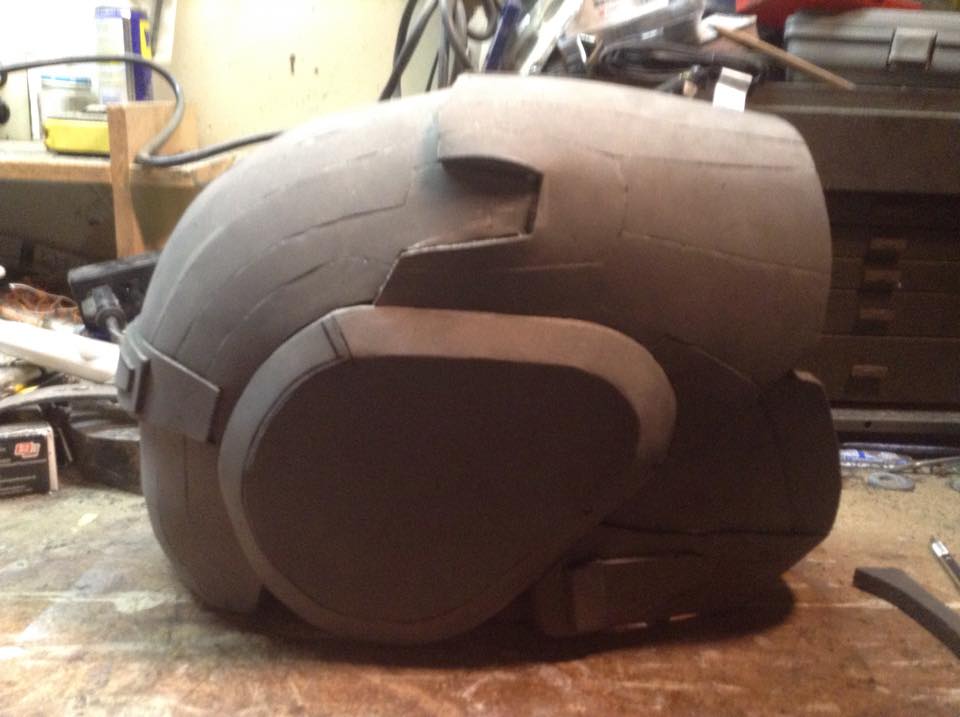
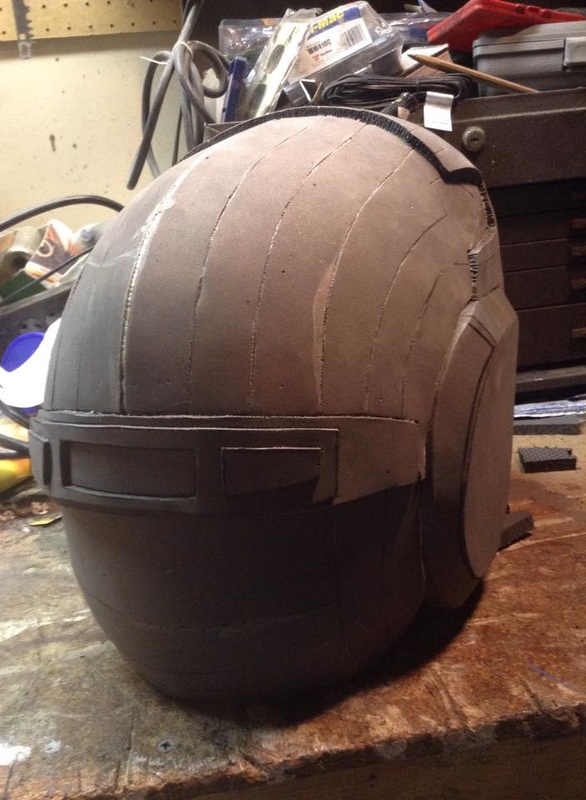
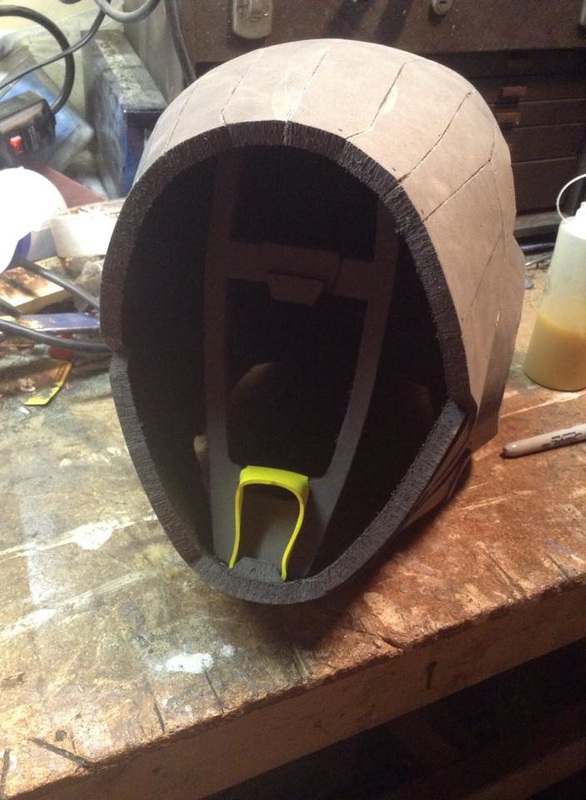
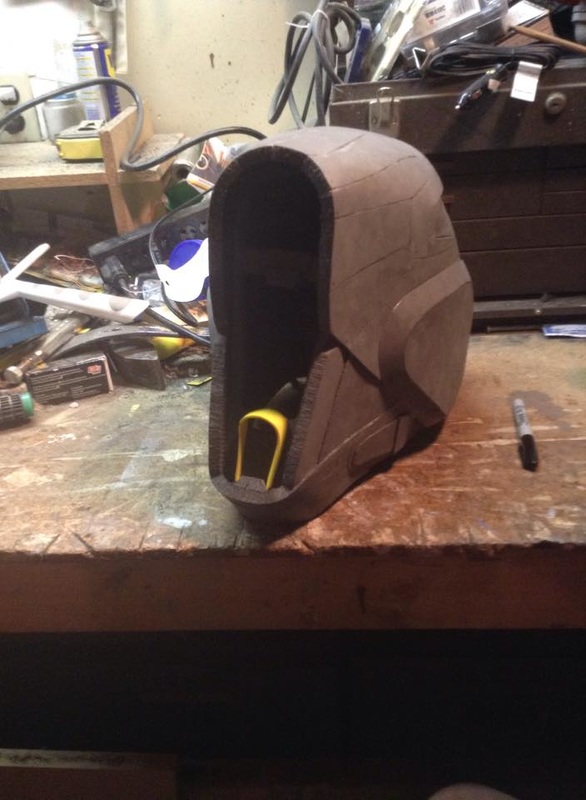
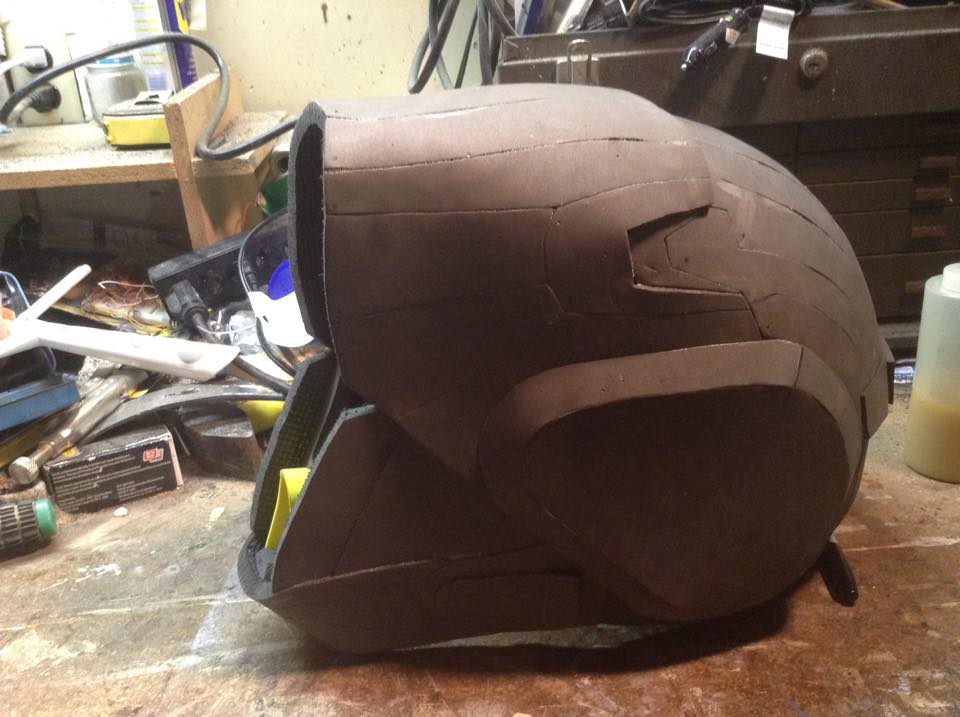
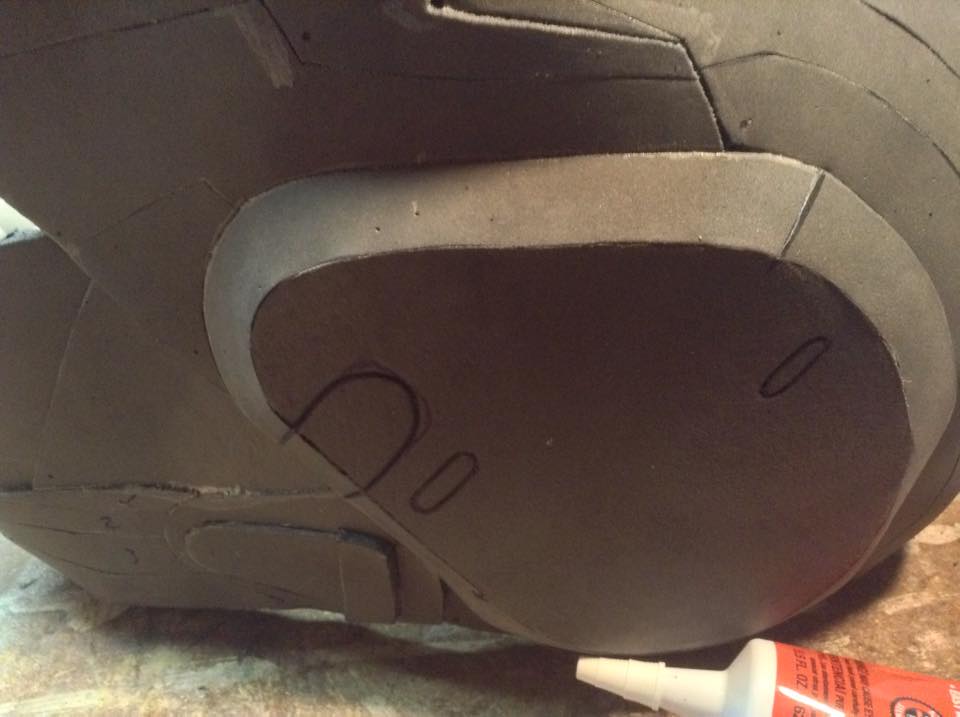
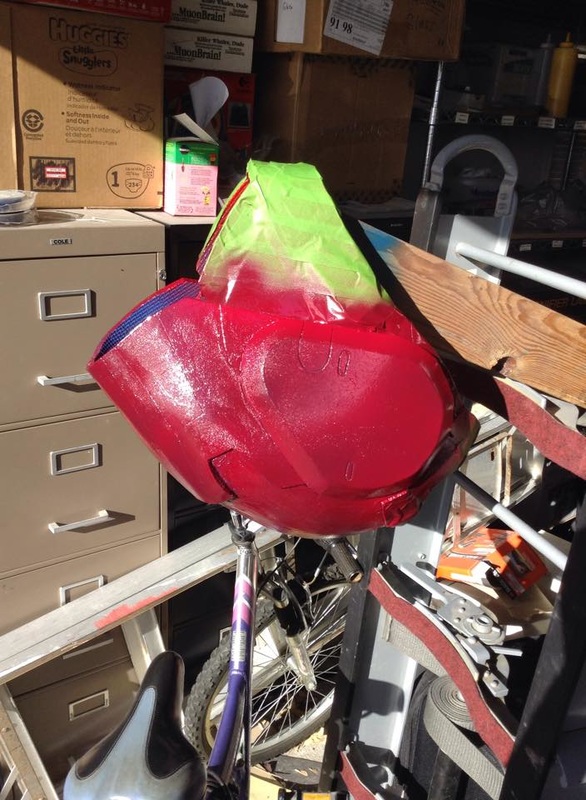
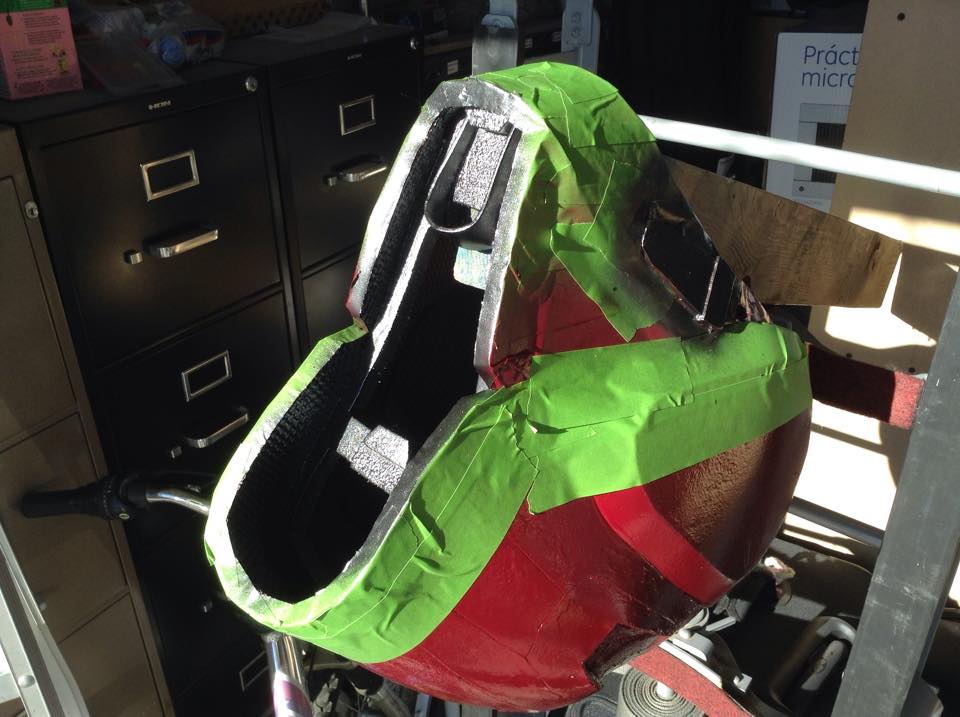
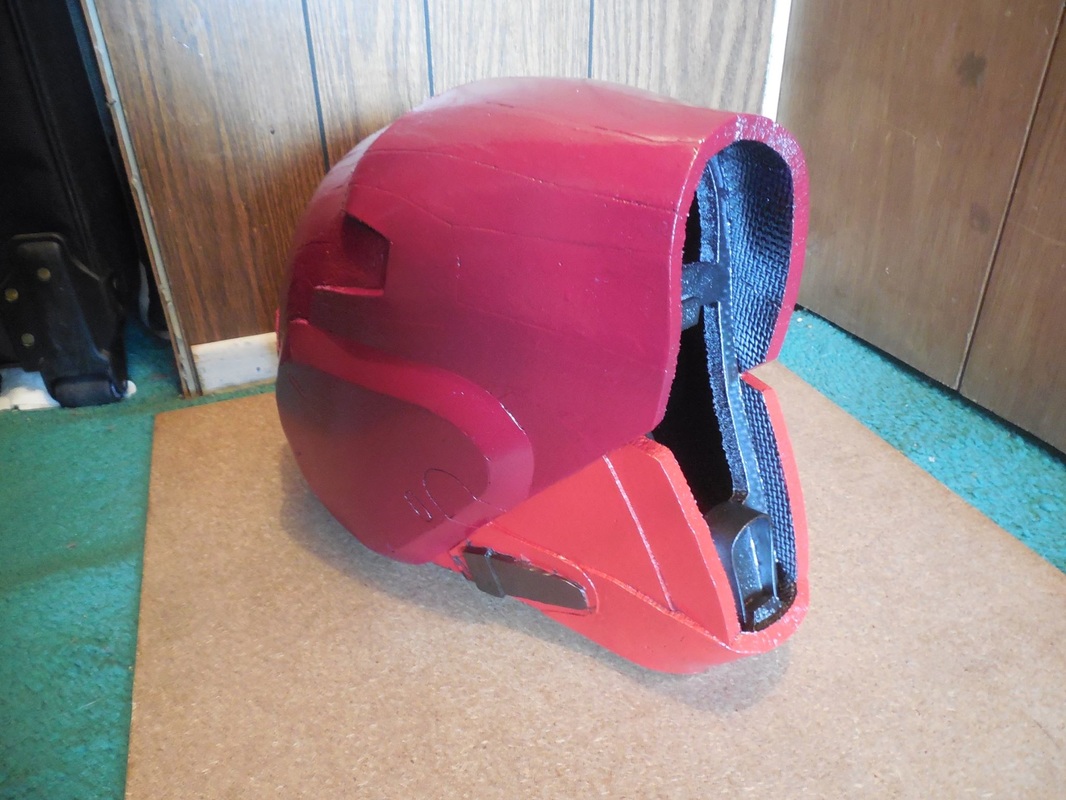
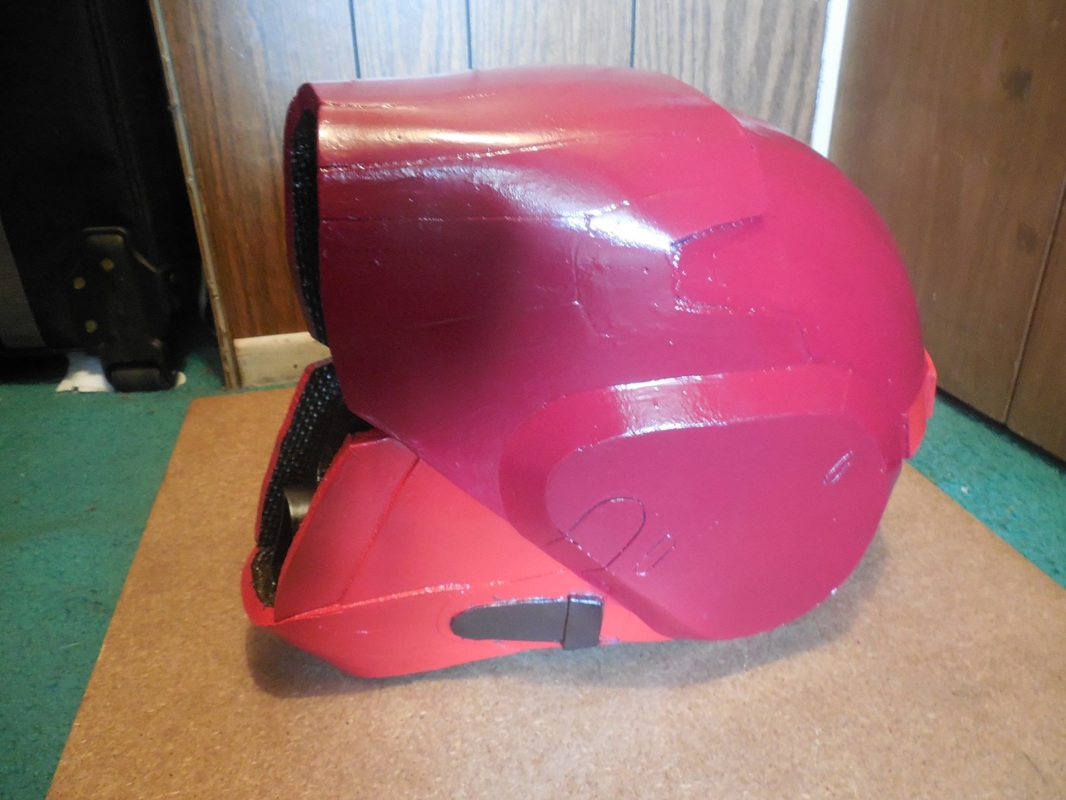
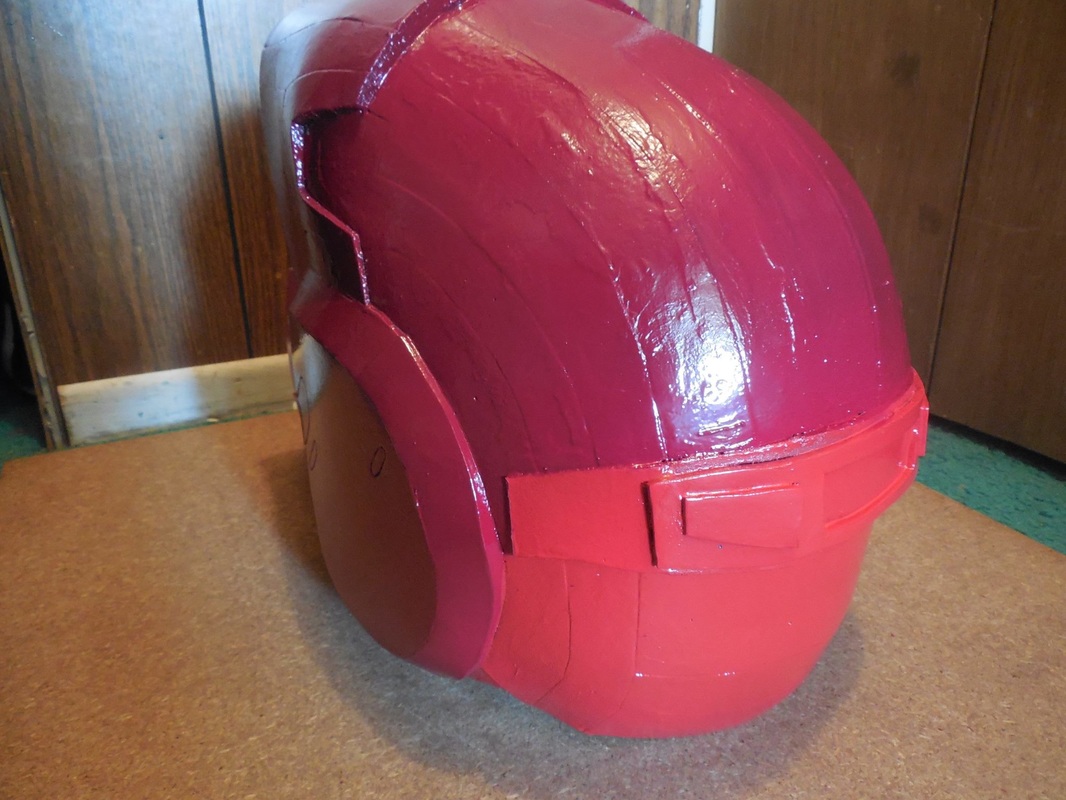
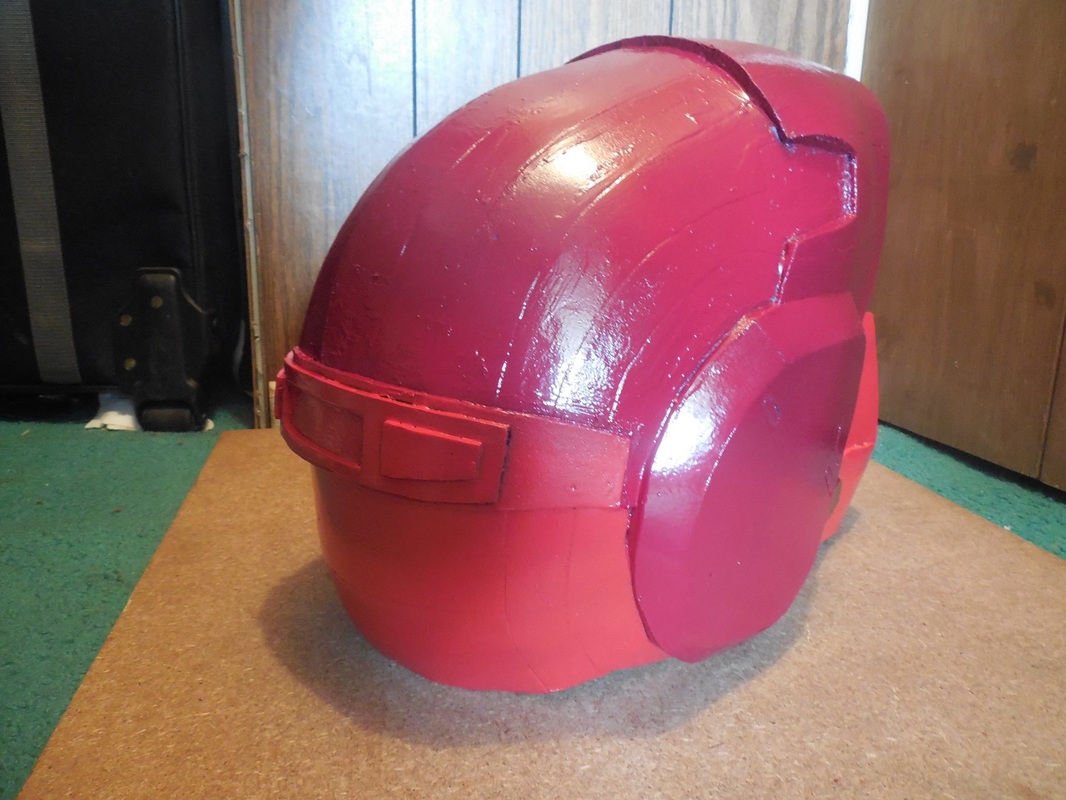
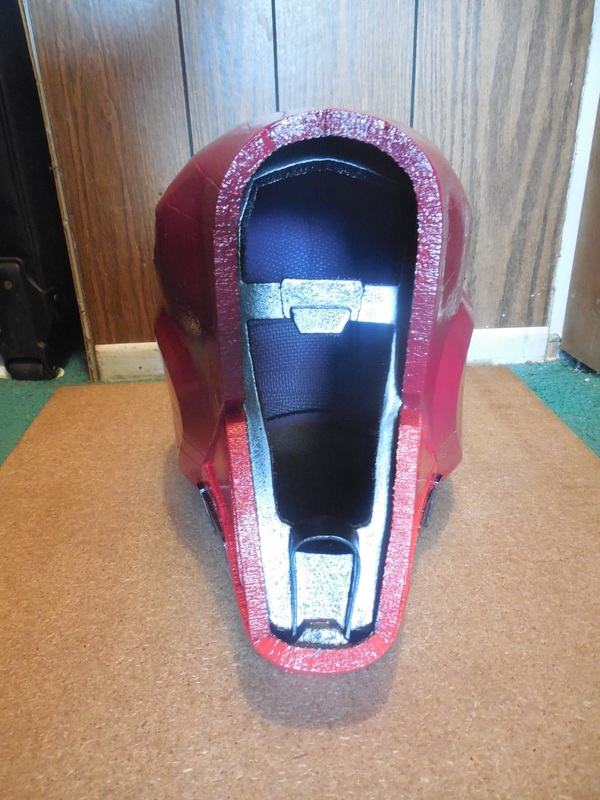
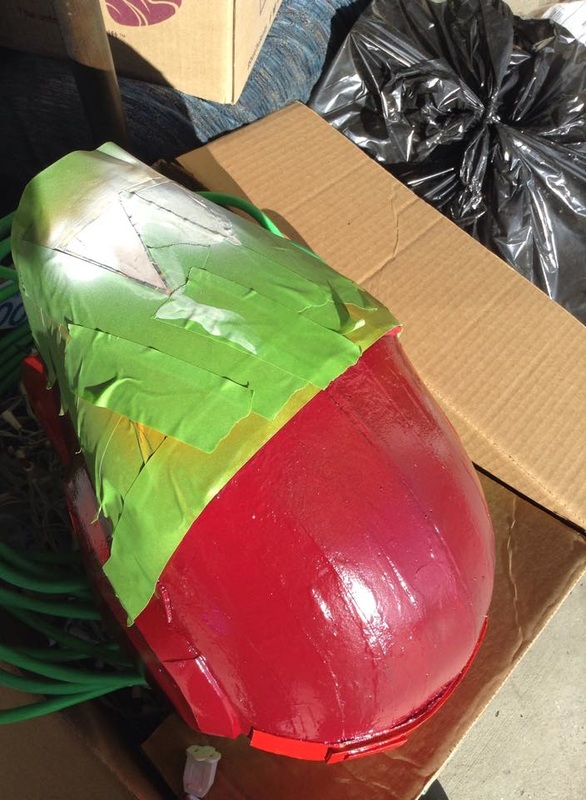
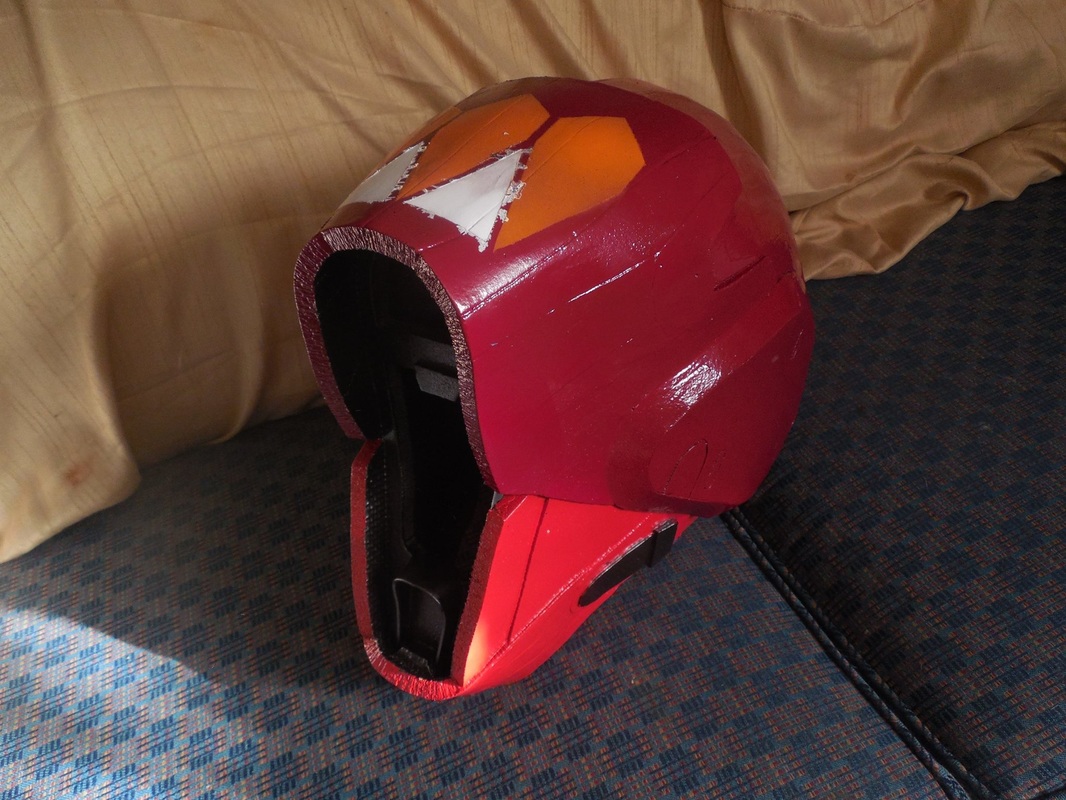
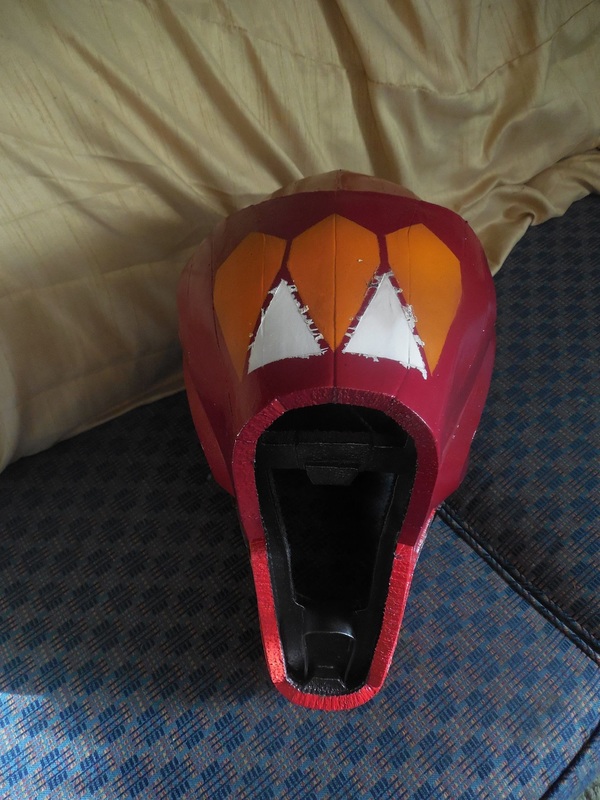
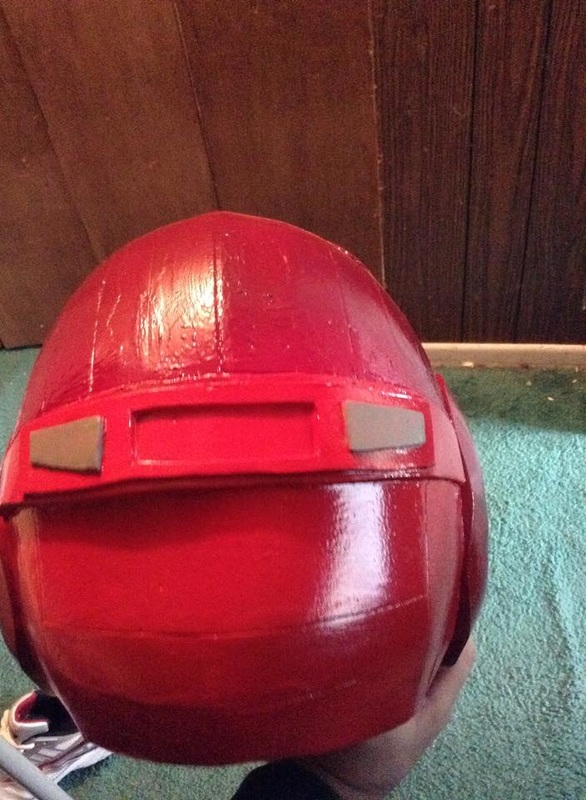
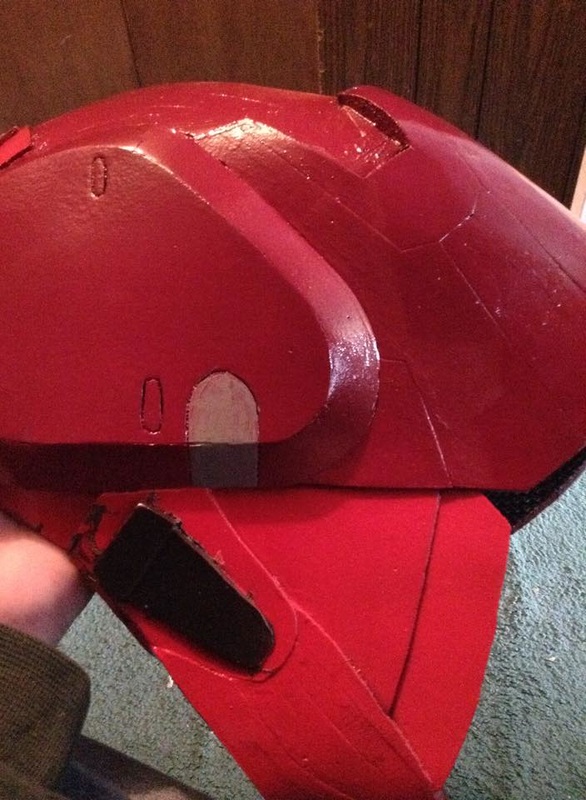
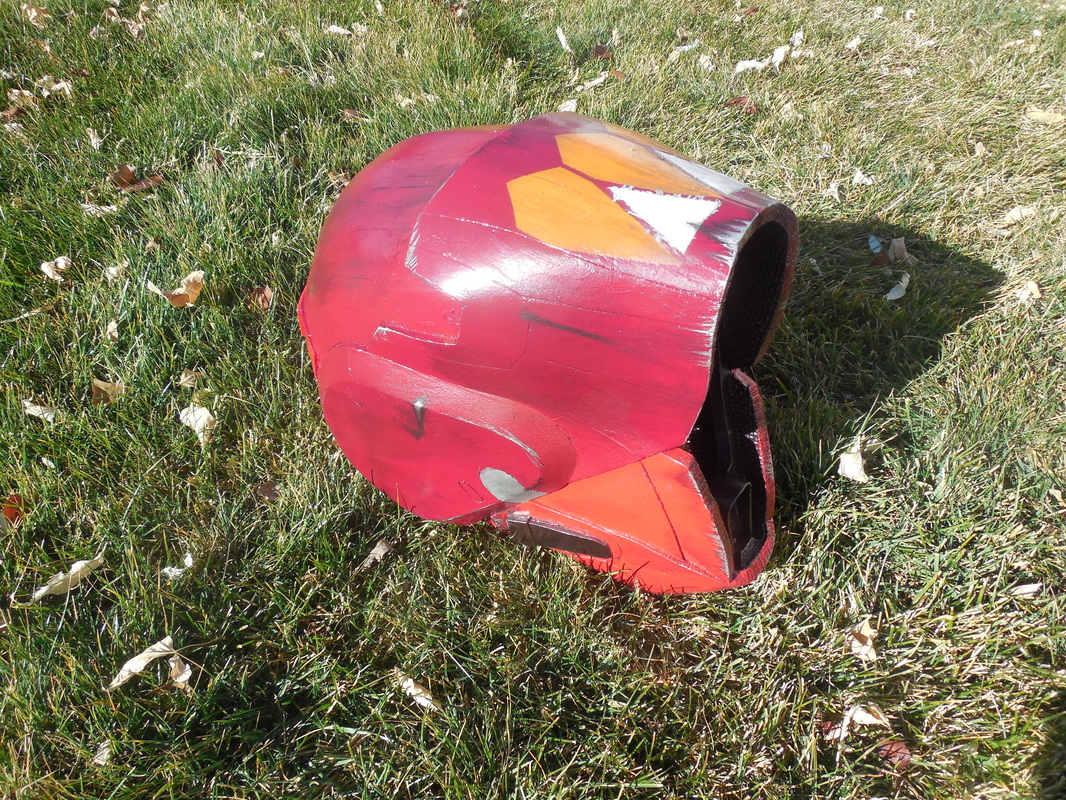
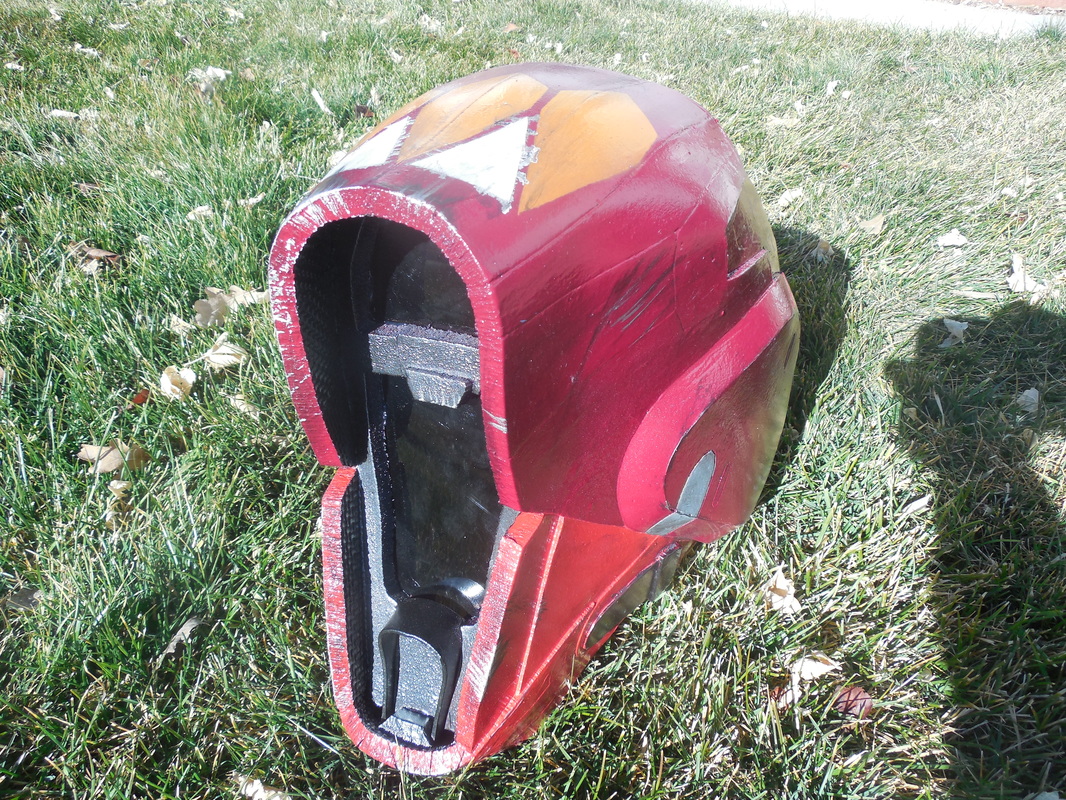
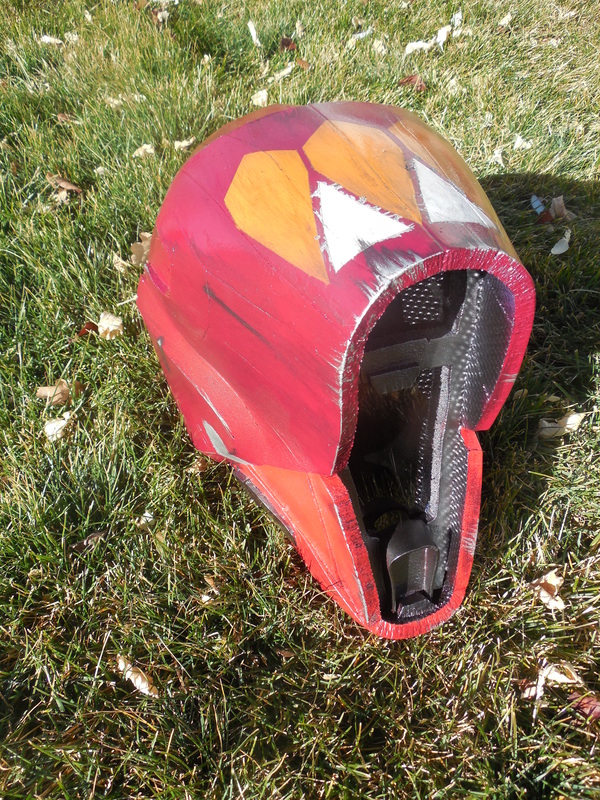
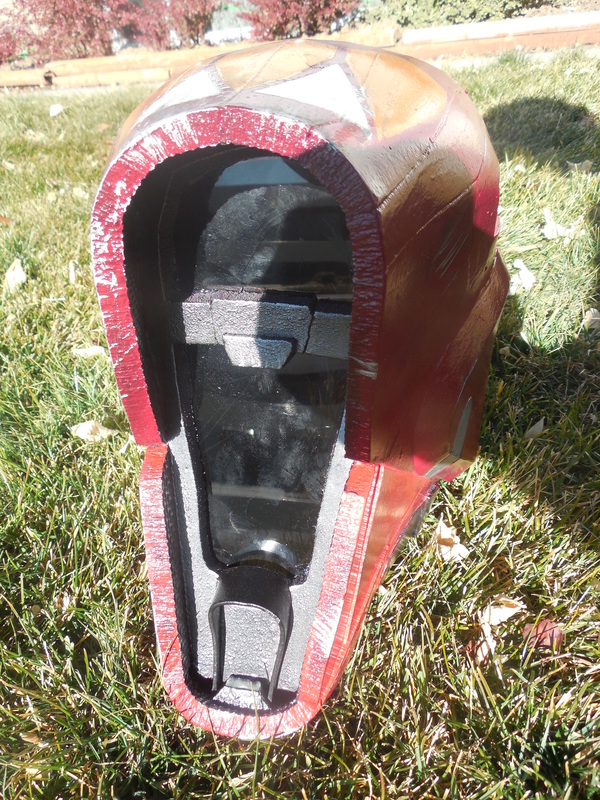
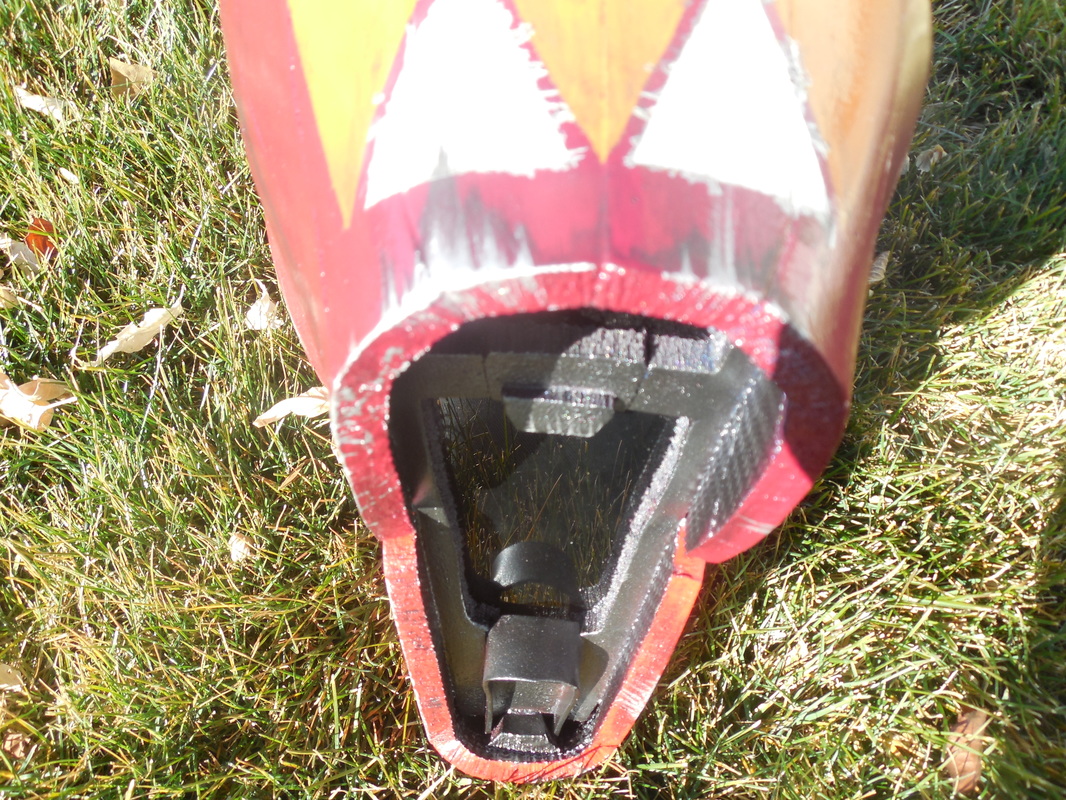
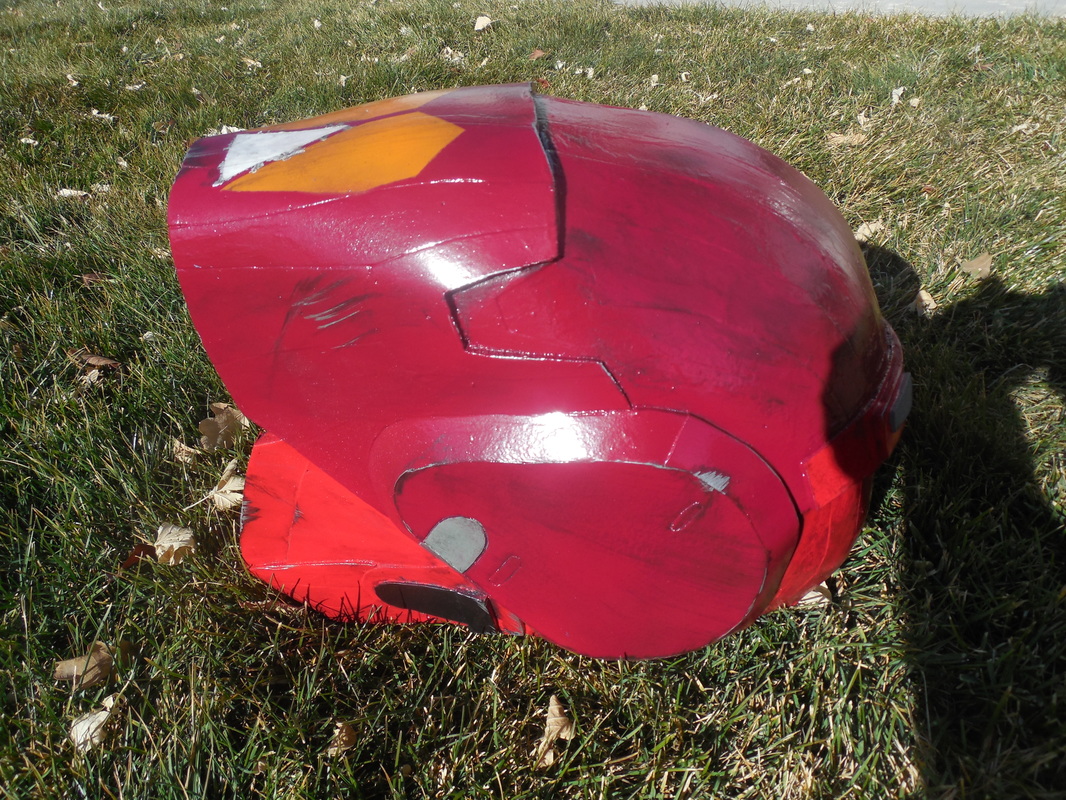
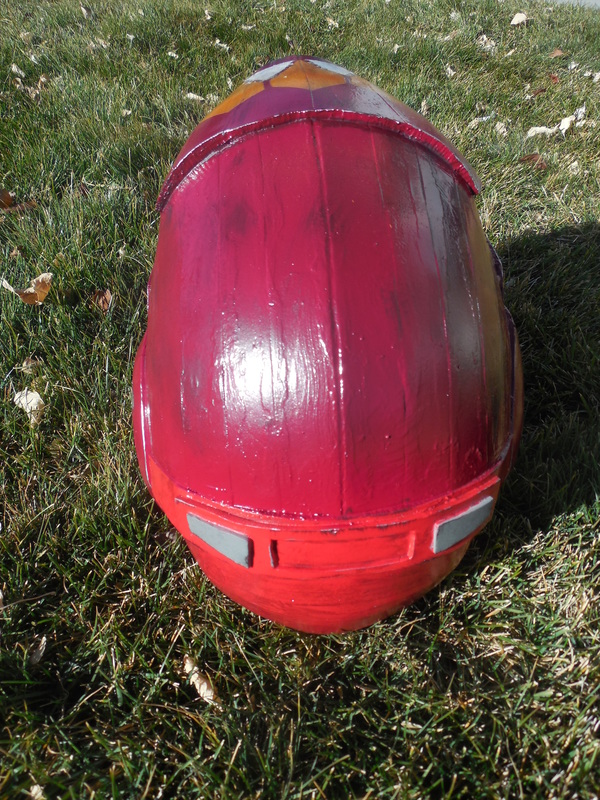
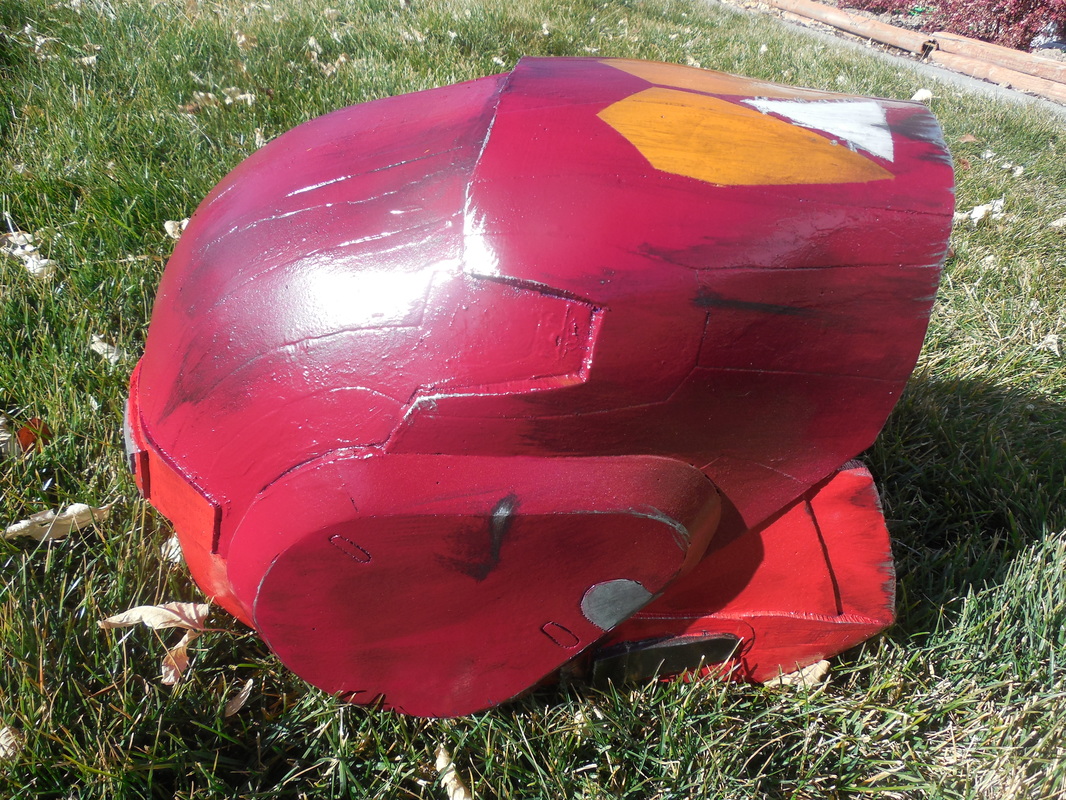
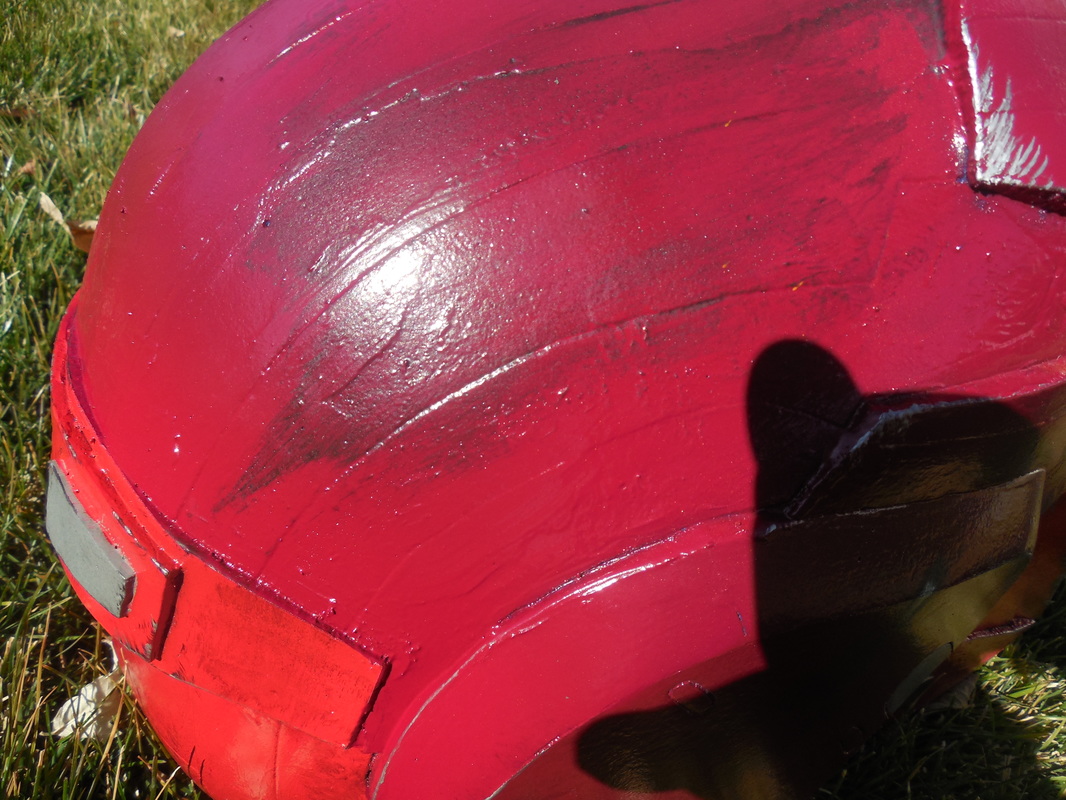
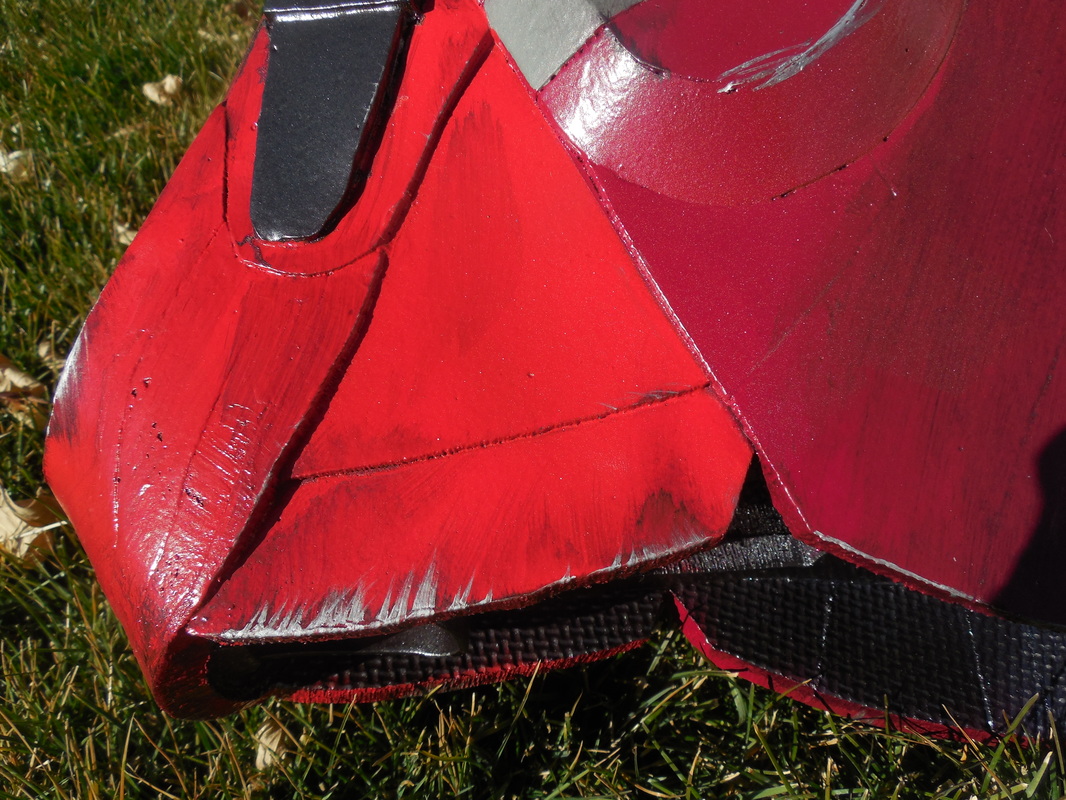
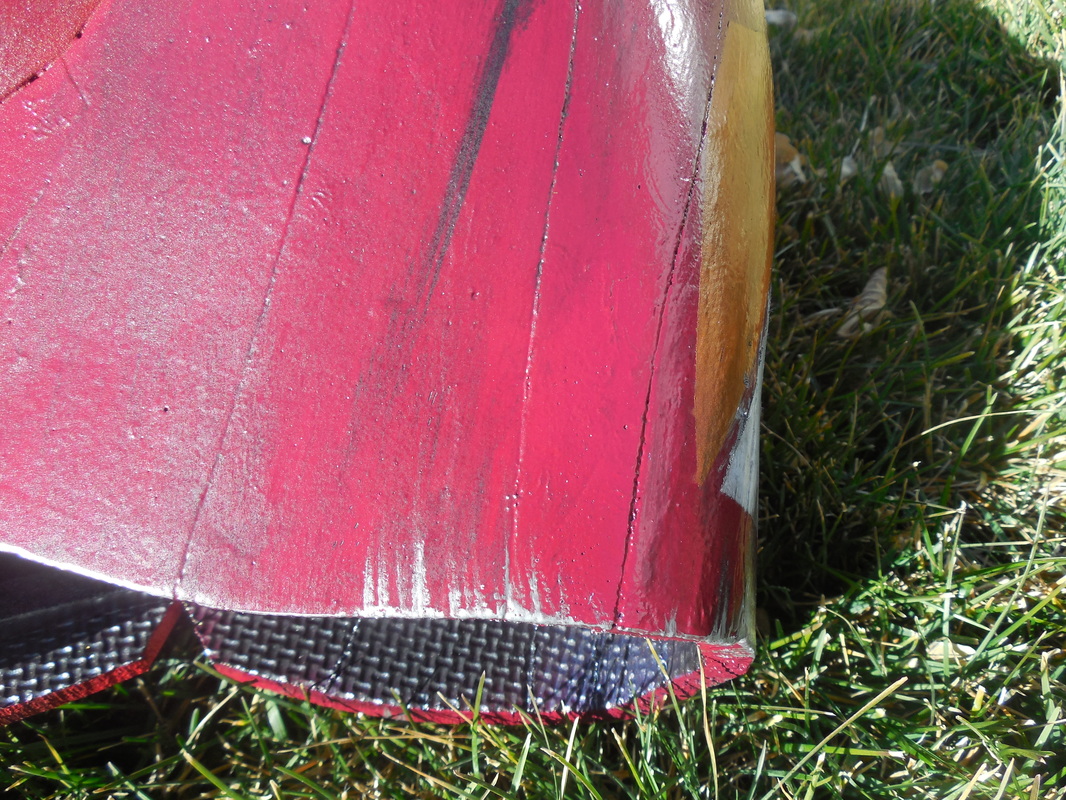
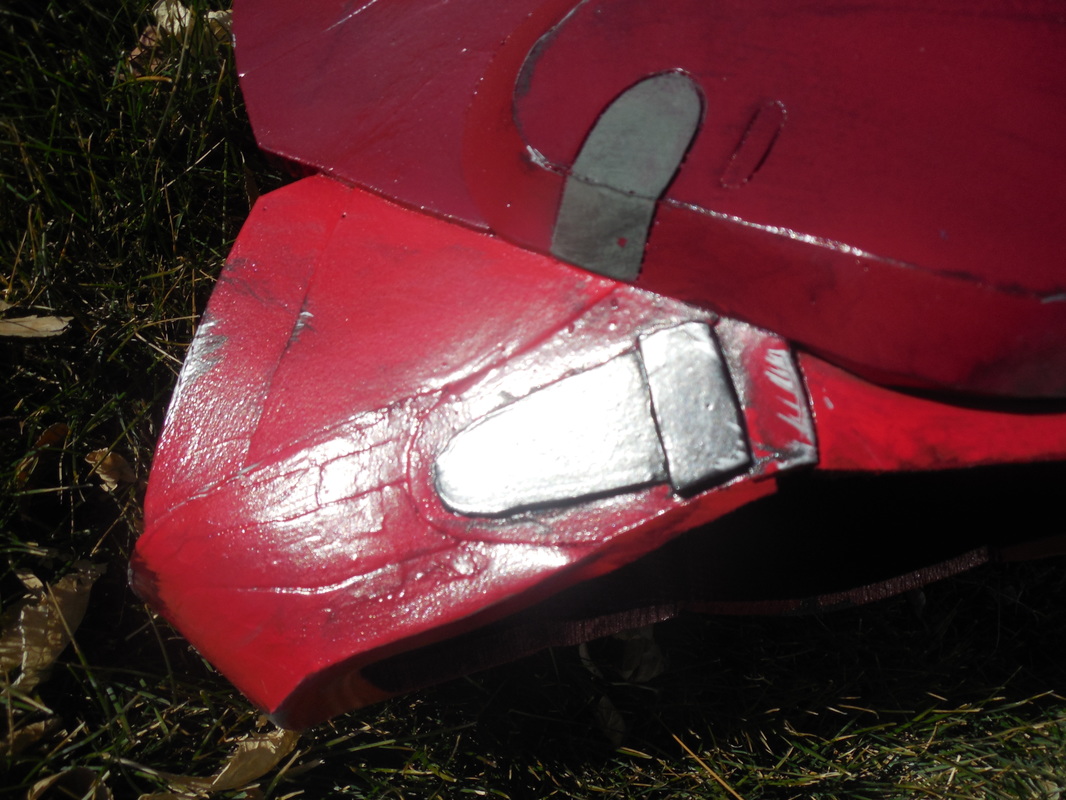
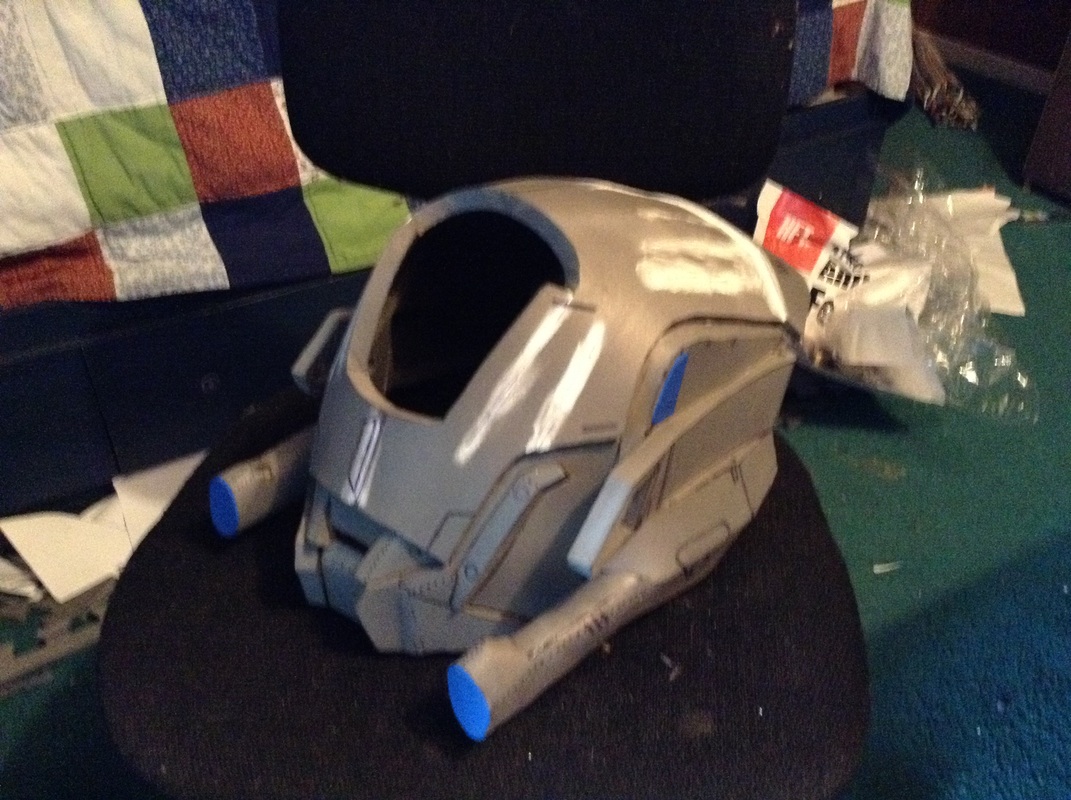
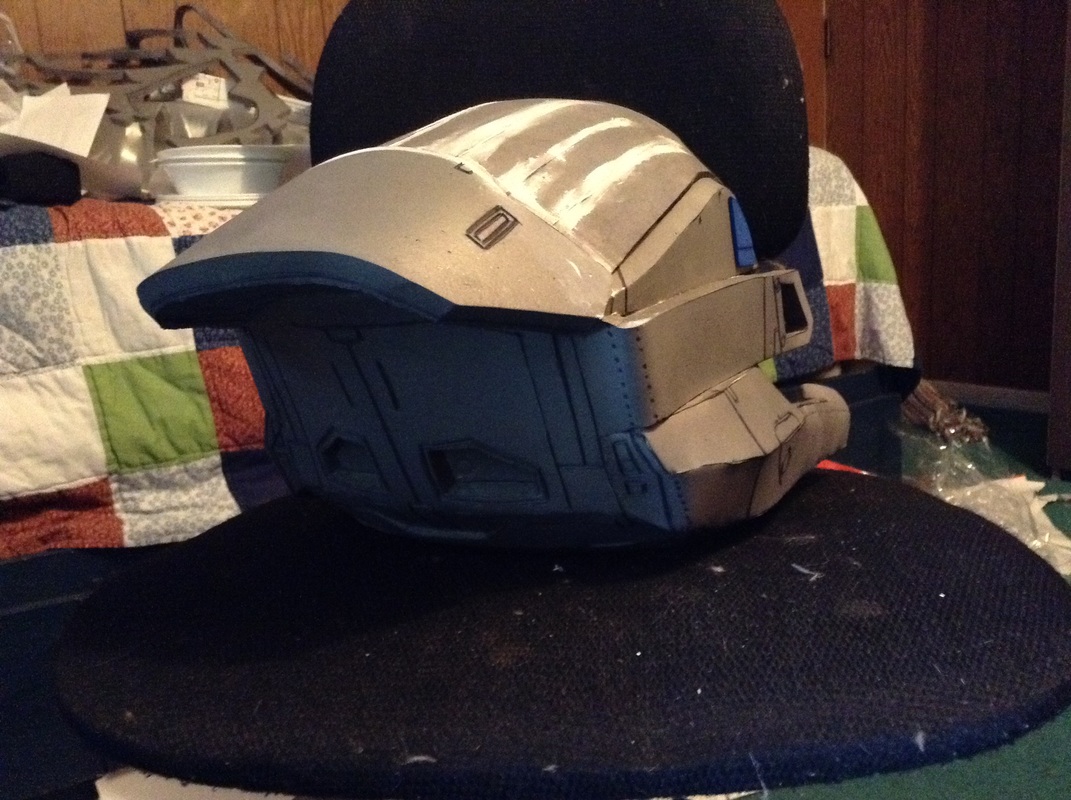
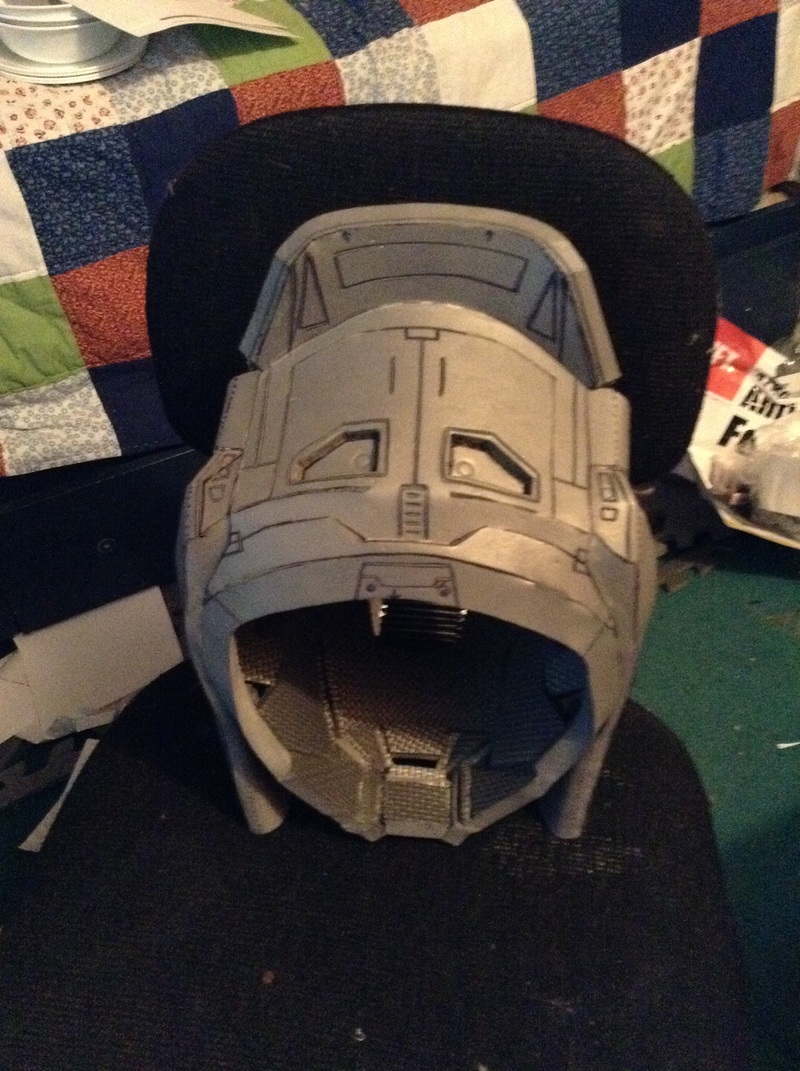
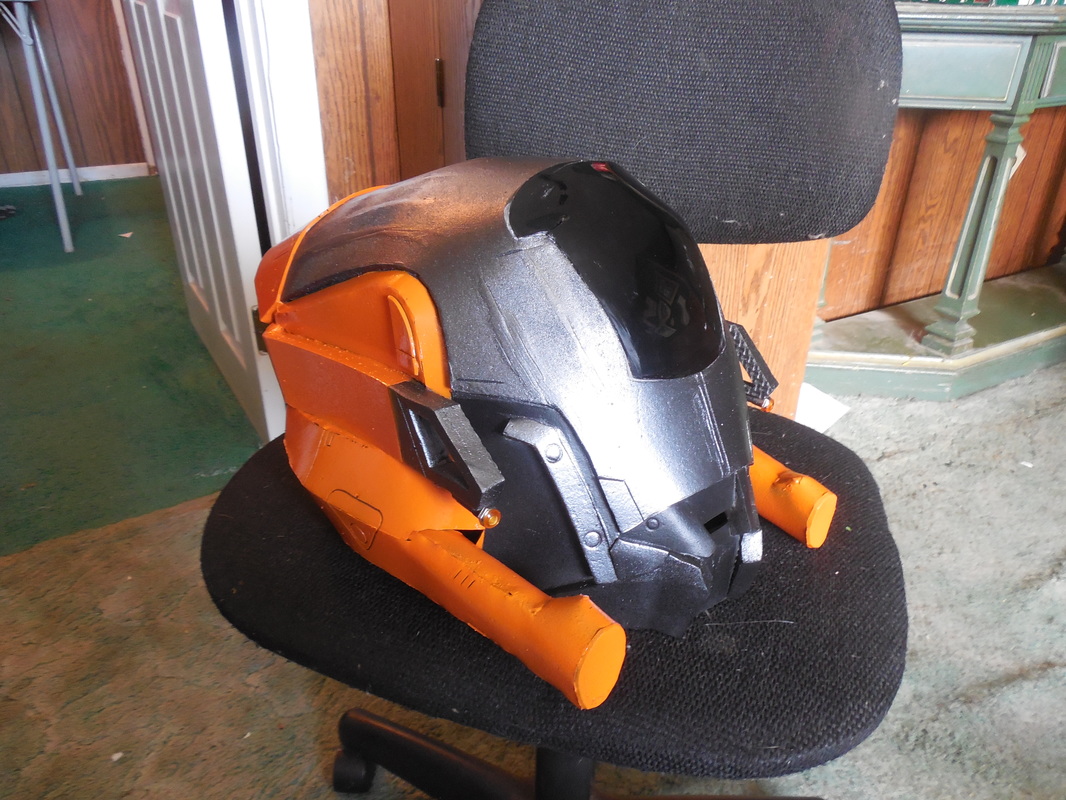
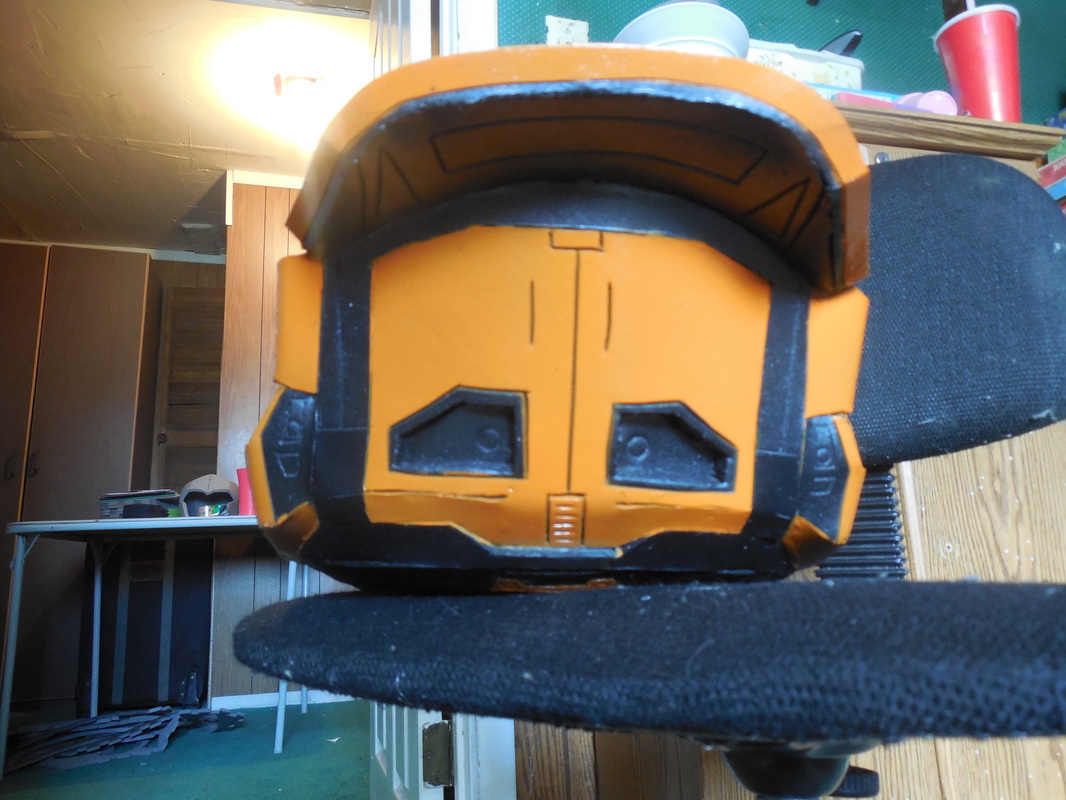
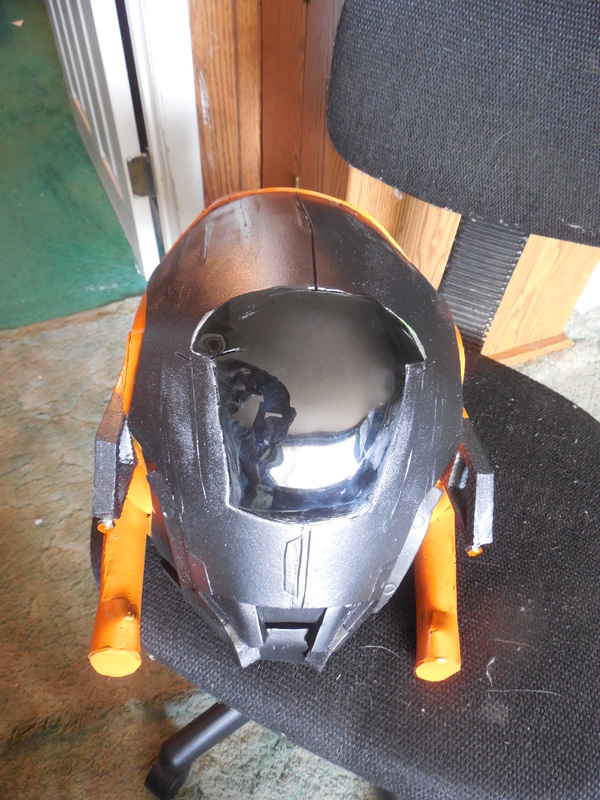
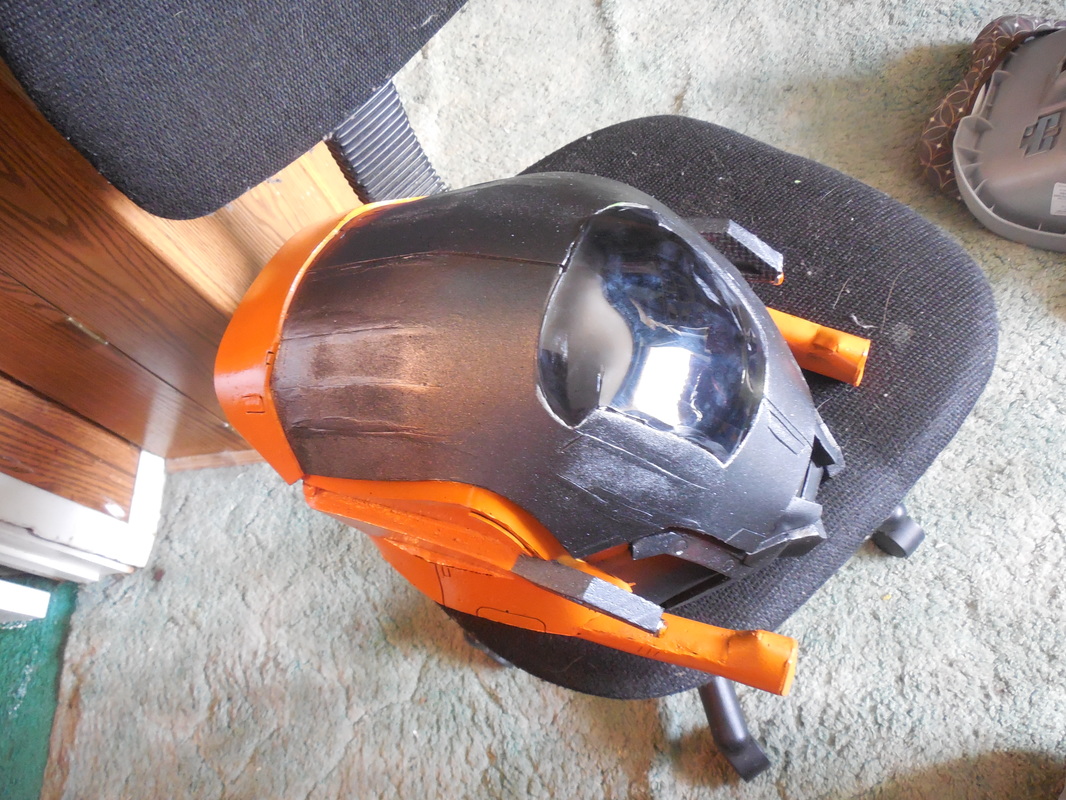
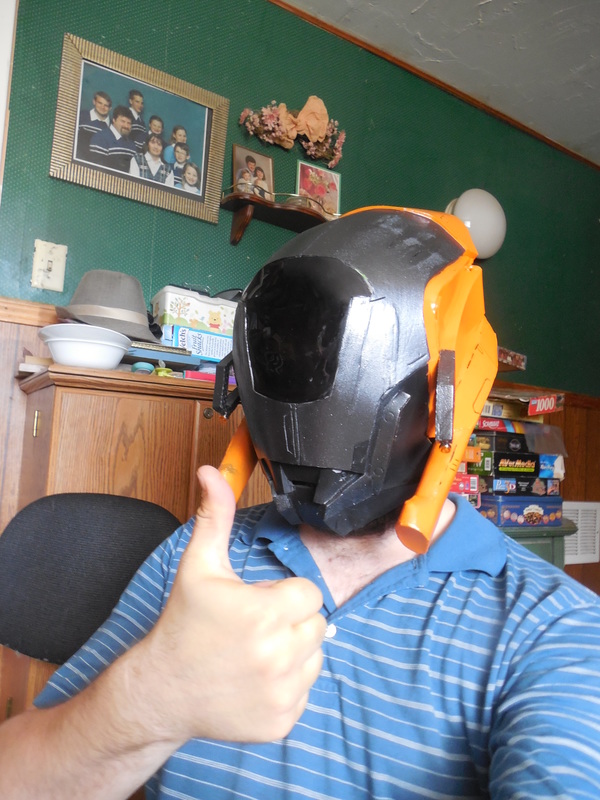
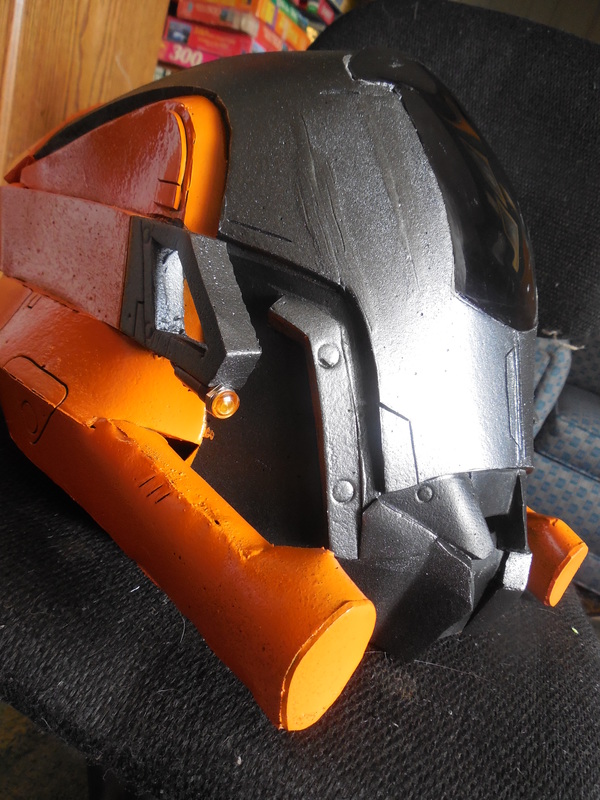
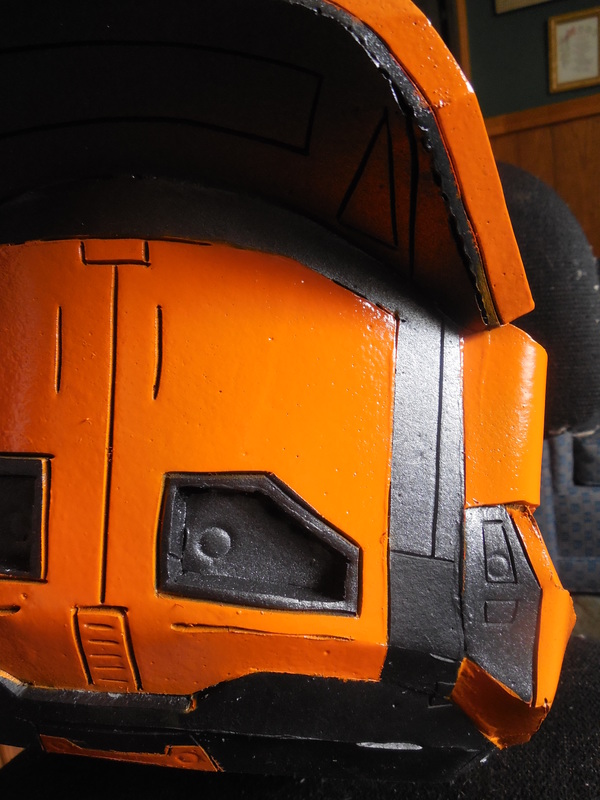
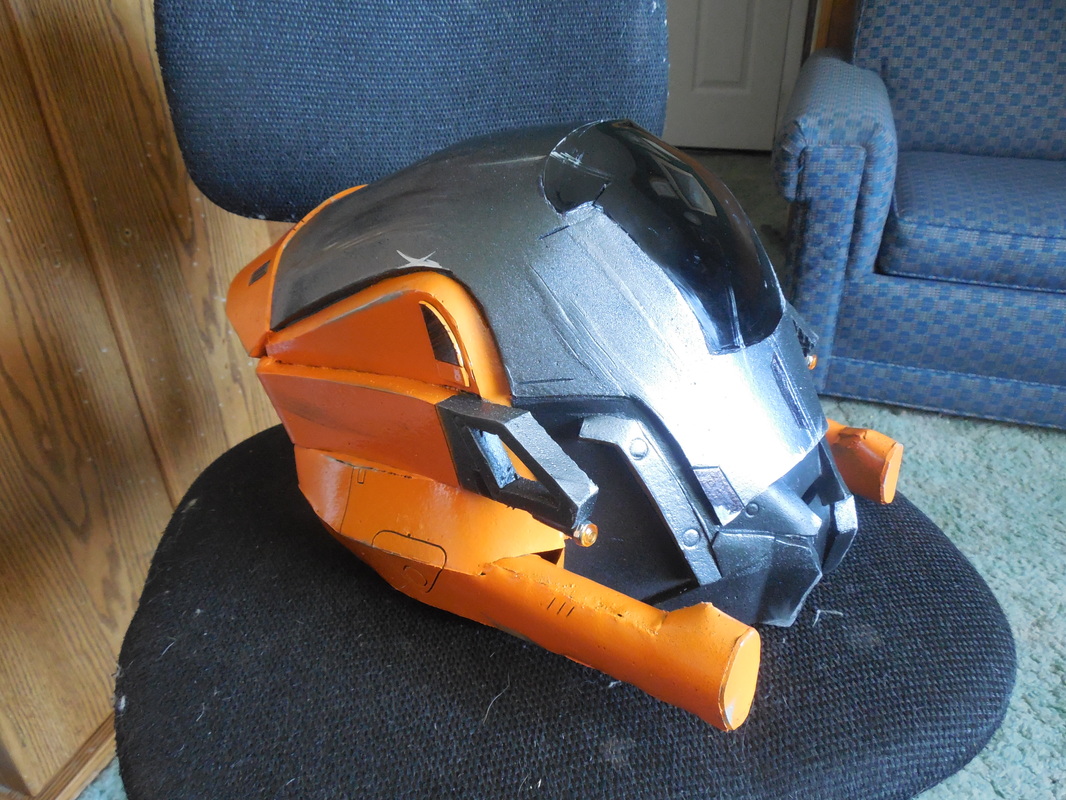
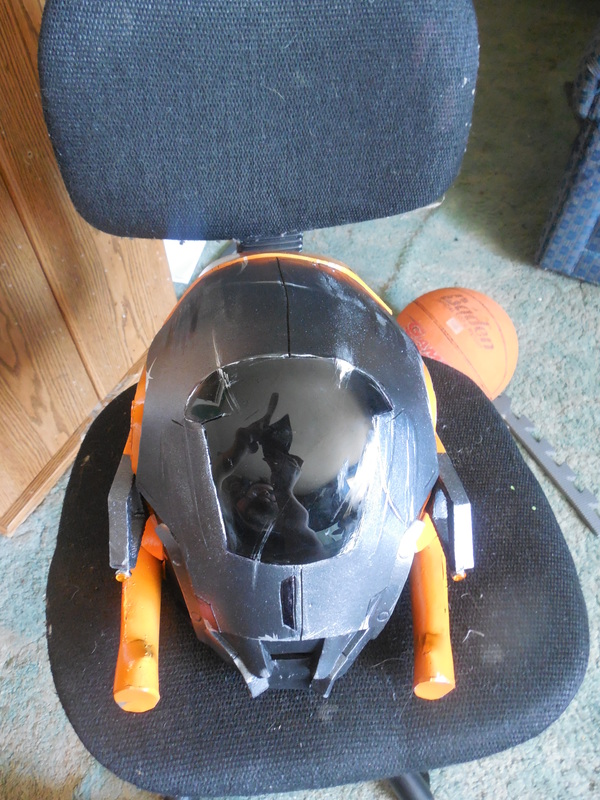
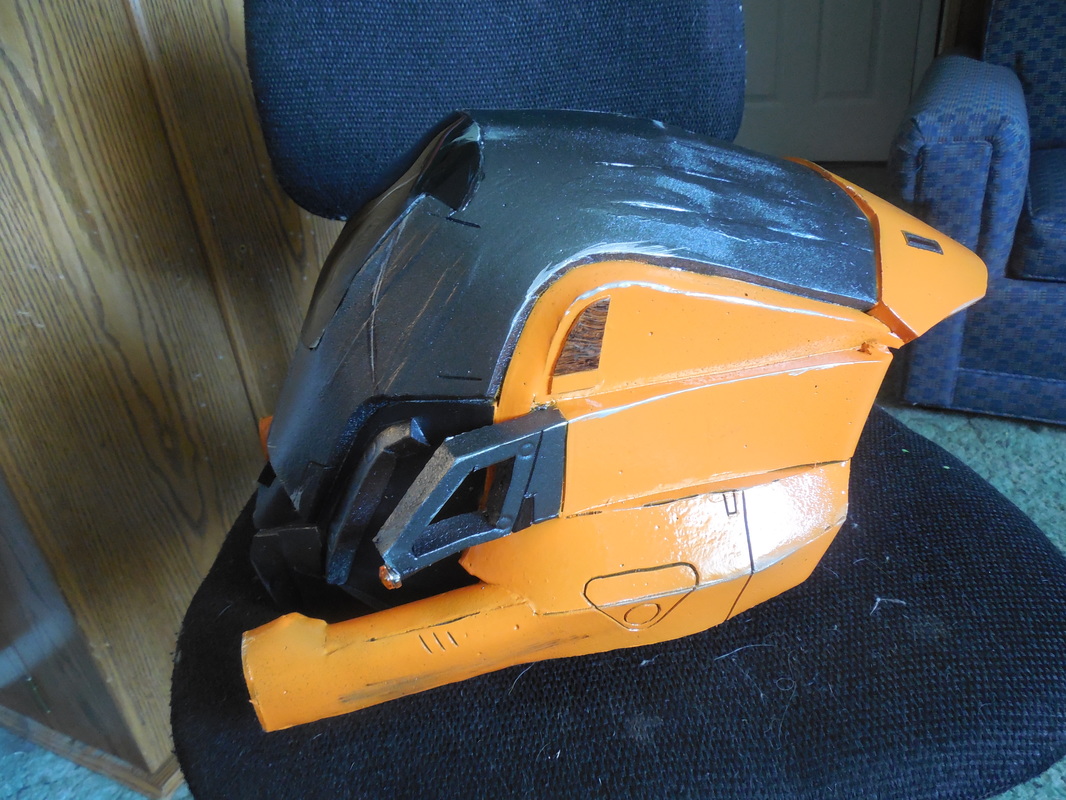
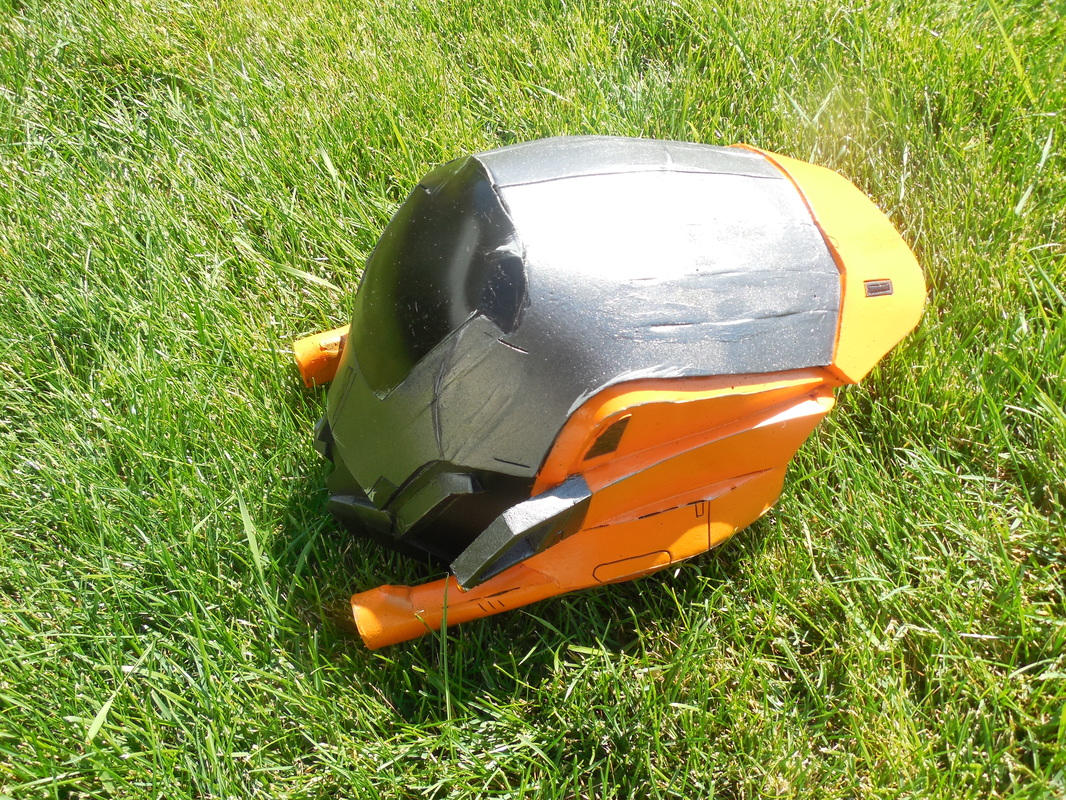
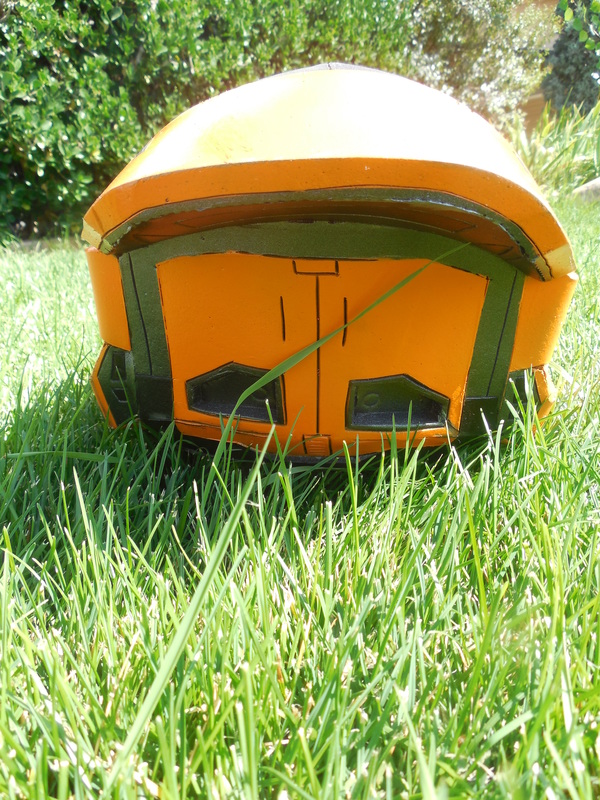
 After building the foam Titan helmet for Extra Life ATX, they came to me for a second helmet. This was a special helmet for one of their game casters, who plays a Warlock and really liked the Chroma Vow helmet her character was wearing at the time. For this one, I did a lot of the same things as the rest of my builds, though I started off in a different direction since I couldn't find any proper patterns online anywhere (lack of time meant pep files, but there weren't any out there yet for this one). So, using a standard Warlock helmet file, I opted to attempt to modify it on my own, freehanding the front half. Unfortunately, I didn't have very much experience freehanding, and should have done something similar to the Original Helmet series I made, and it ended up being misshapen and uneven. By this time though, someone had finally made a proper pep file, and I was short on time so I adapted it to foam and started again. (Remember that Titan helmet. It'll be important later!) Already things were looking much better. I was kind of disappointed that my attempts at making the patterns/freehanding had failed, but glad that the redo worked. Sooooooo much better! Attached the last of the visor section pieces, then glued everything down. After that, did the hobby knife/heat gun trick to add the finer details. Did a terrible job at filling the seams with Kwik Seal, then opted to cover the whole thing with Mod Podge since I was out of Plasti Dip at the time. 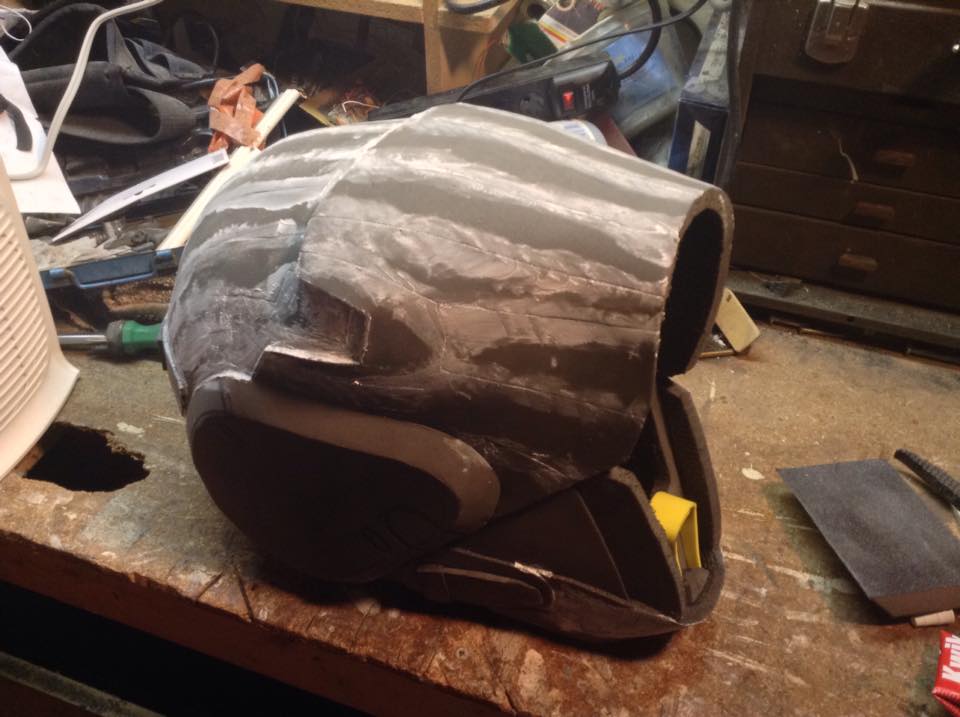 Painting it was a whole new level of interesting. First with the Mod Podge instead of Plasti Dip, then with a few coats of blue primer, since I was out of any black. 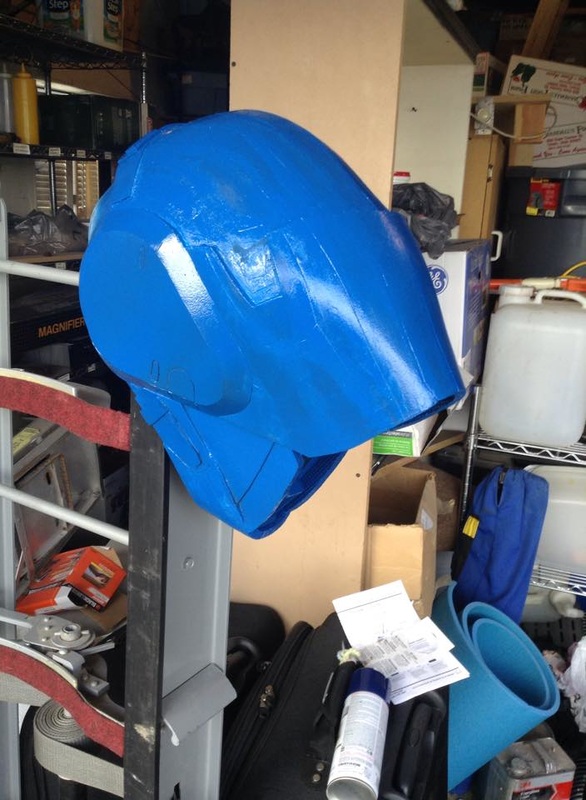 The rest of it was pretty normal, once I could start on the reds. Did the lowest level color first, let it dry, then masked it off and did the next level up with a darker red. After that, more masking, followed by the same gunmetal for the inner visor area and cheek things - what is it with buckles and cheek things, Bungie? Once that was all set, I masked off the top to do the pattern. The orange went on splendidly; the white not so much. I wasn't expecting it to come out as fast as it did, nor as watery, and as a result it bled a ton. Not a *huge* deal, but it really bugged me at the time. Also painted the fine detail areas. Then came the final step: weathering! Black washes with acrylic to start off, then I went over spots a bit heavier with black, dark grey, and silver drybrushing. Worked it into the bleeds around the white, to blend it in a bit better. After all that, a few clear coats to seal it all in. 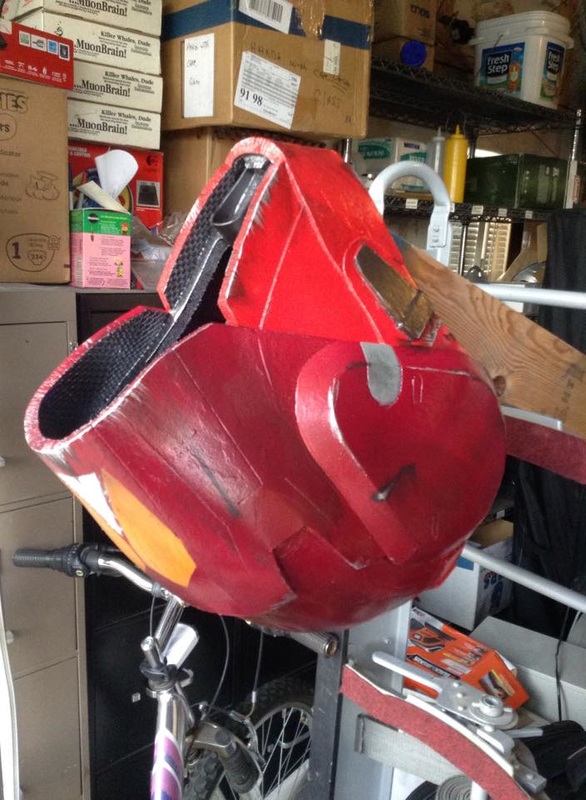 Installed a sheet of smoke grey acrylic inside, so that she could see out of it while she was streaming, and with that I was done! Hope you guys enjoyed this build, it was definitely a learning experience.
2 Comments
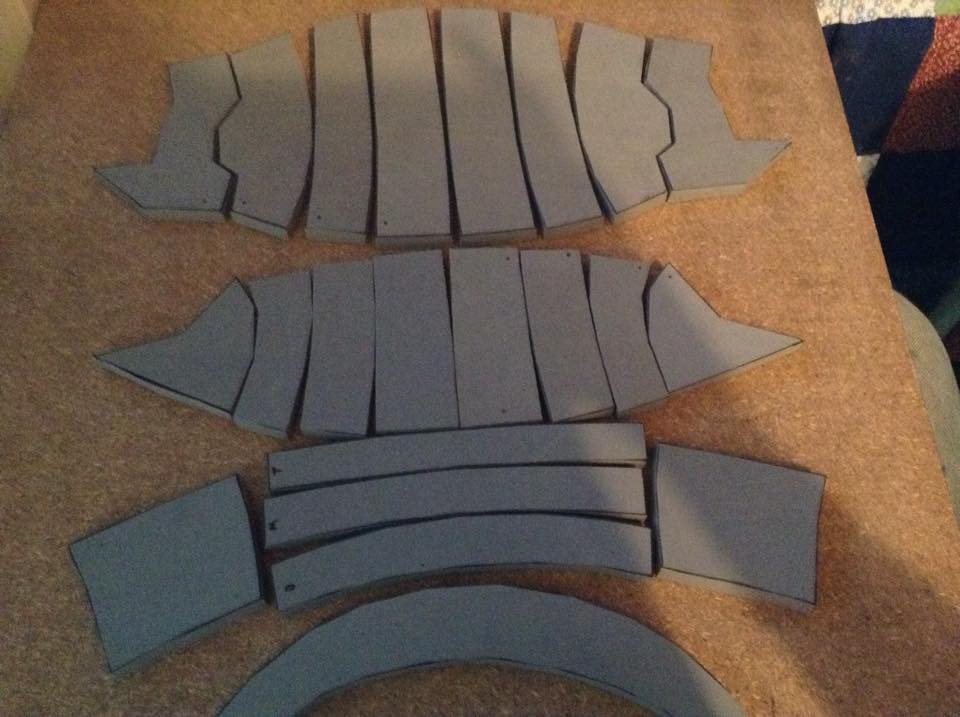
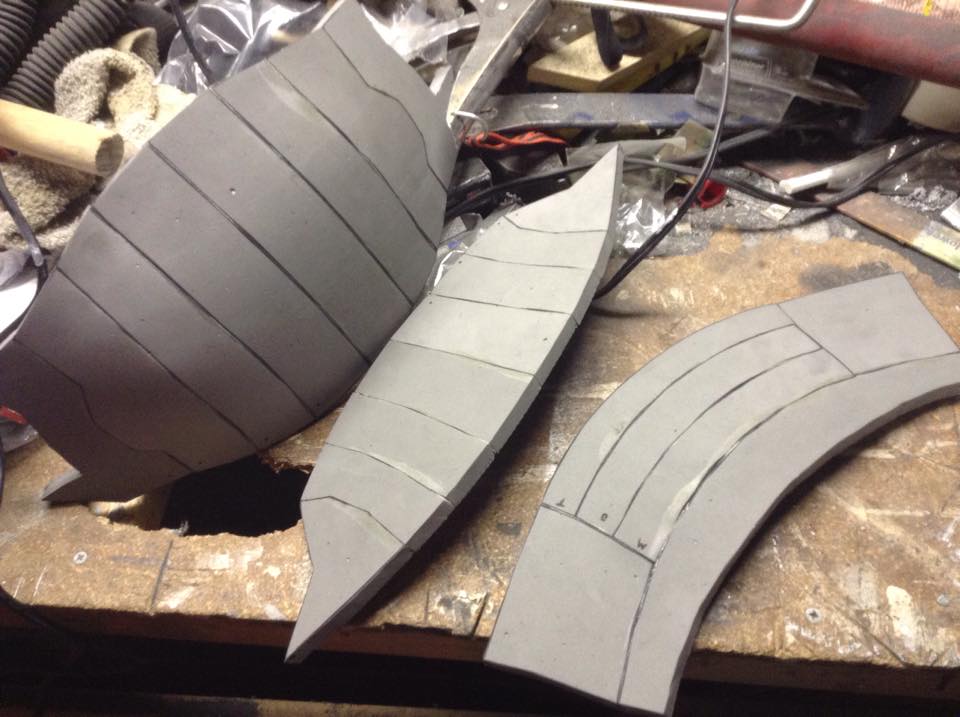
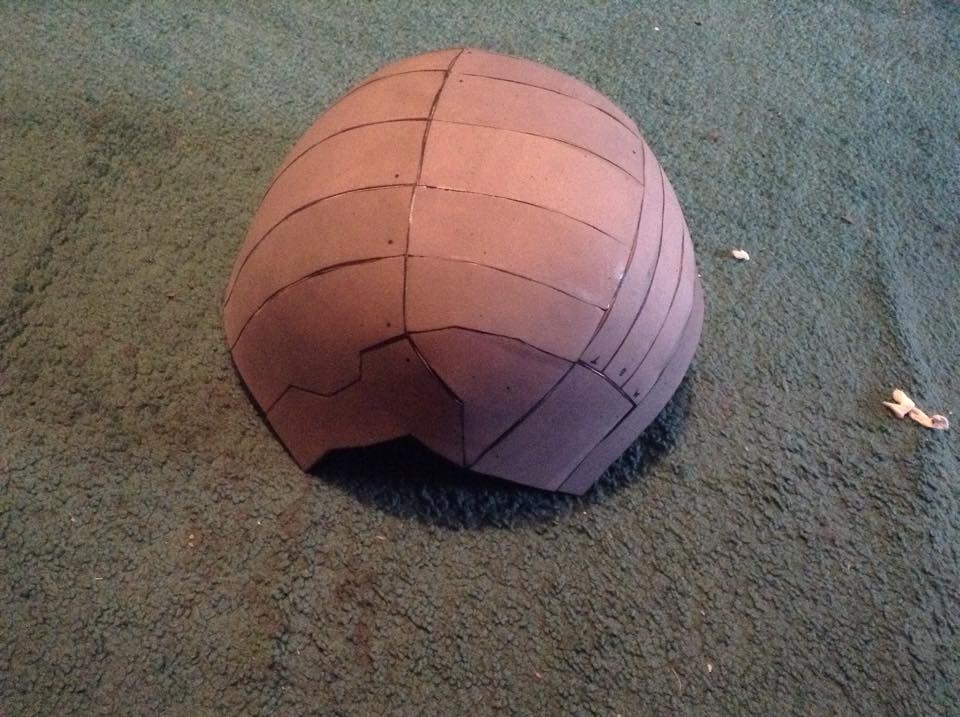
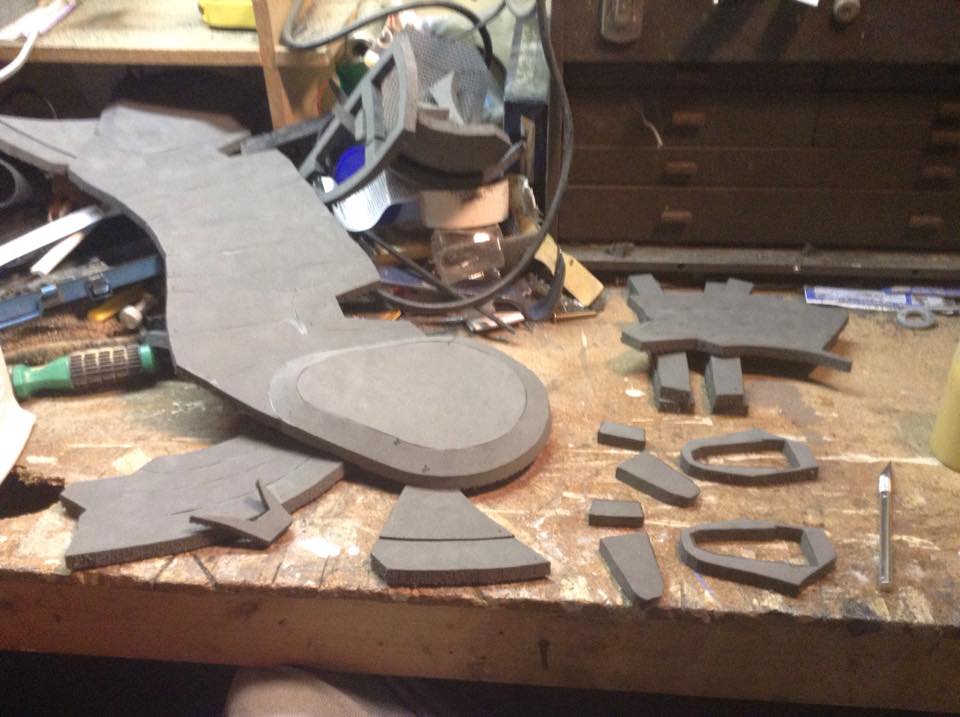
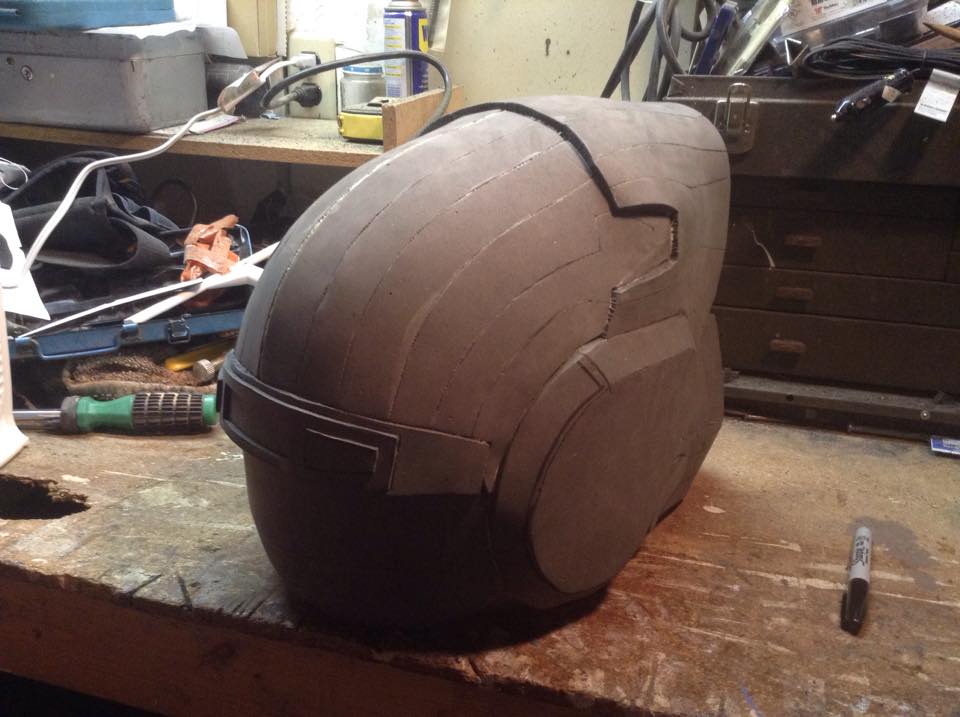
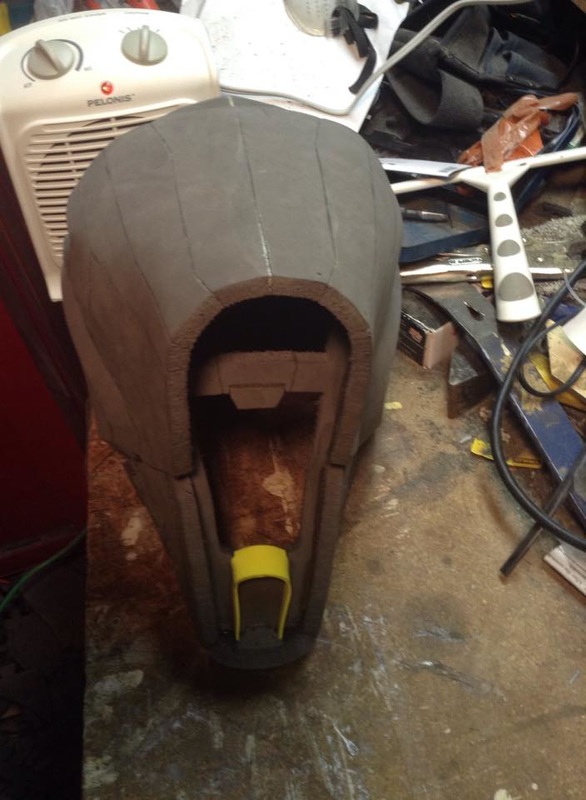
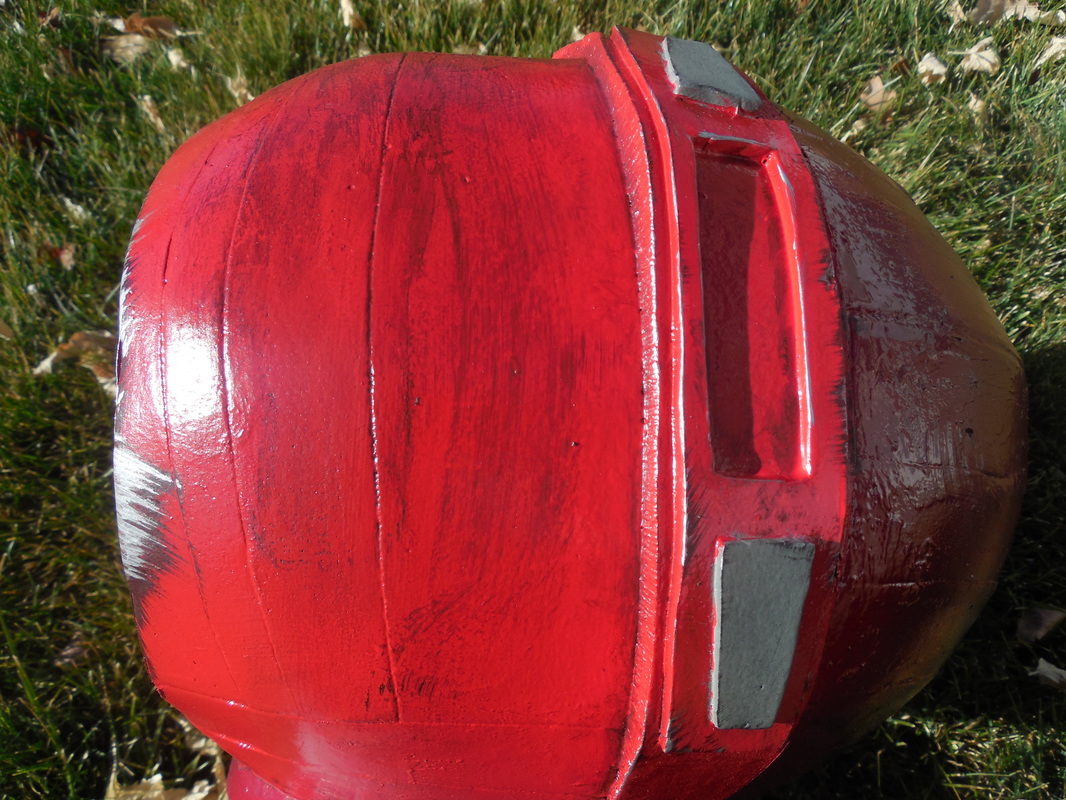
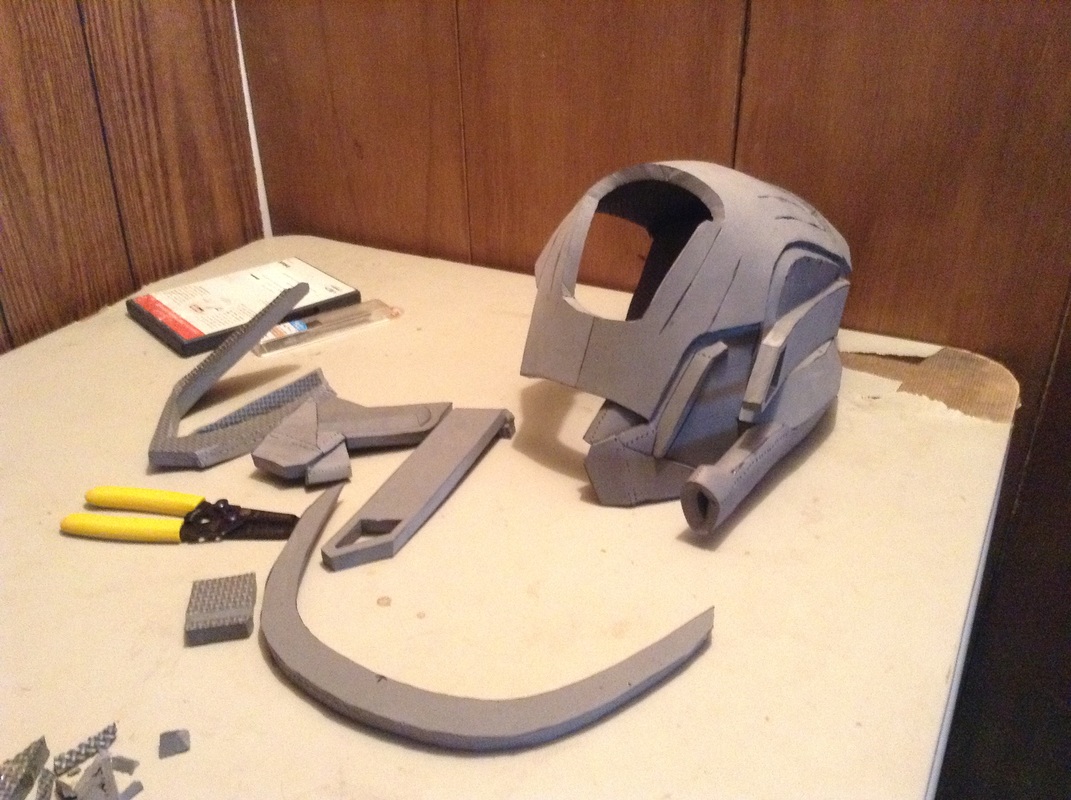
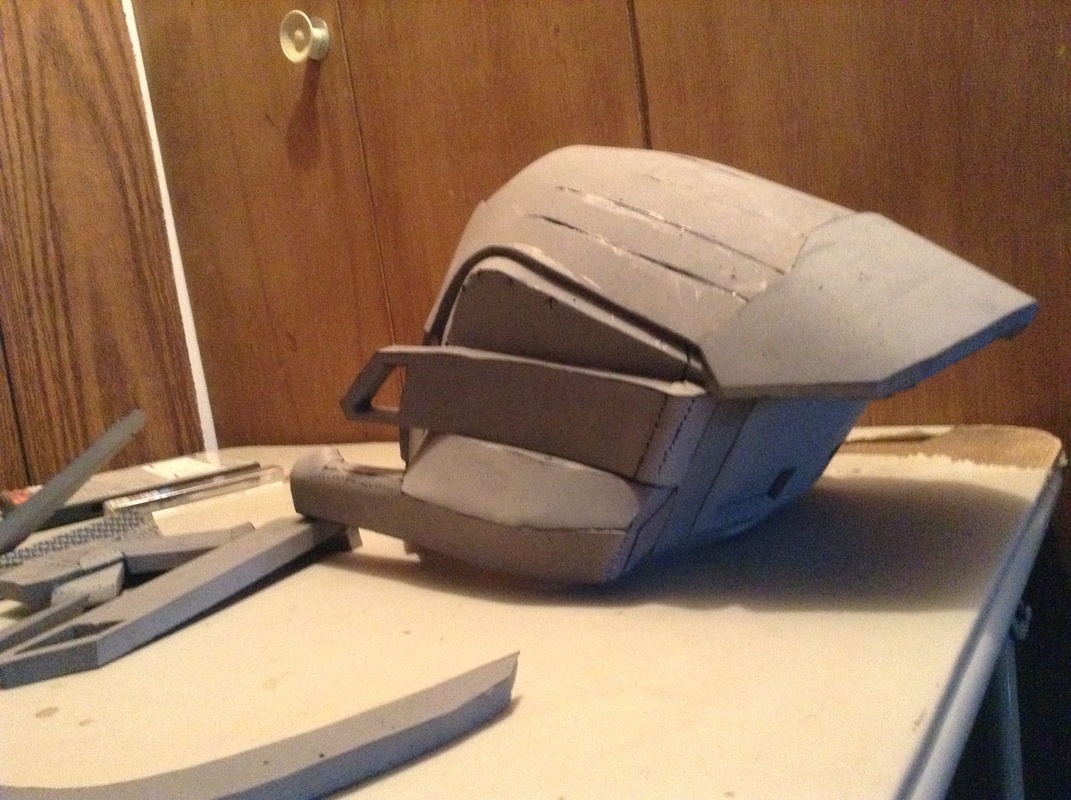
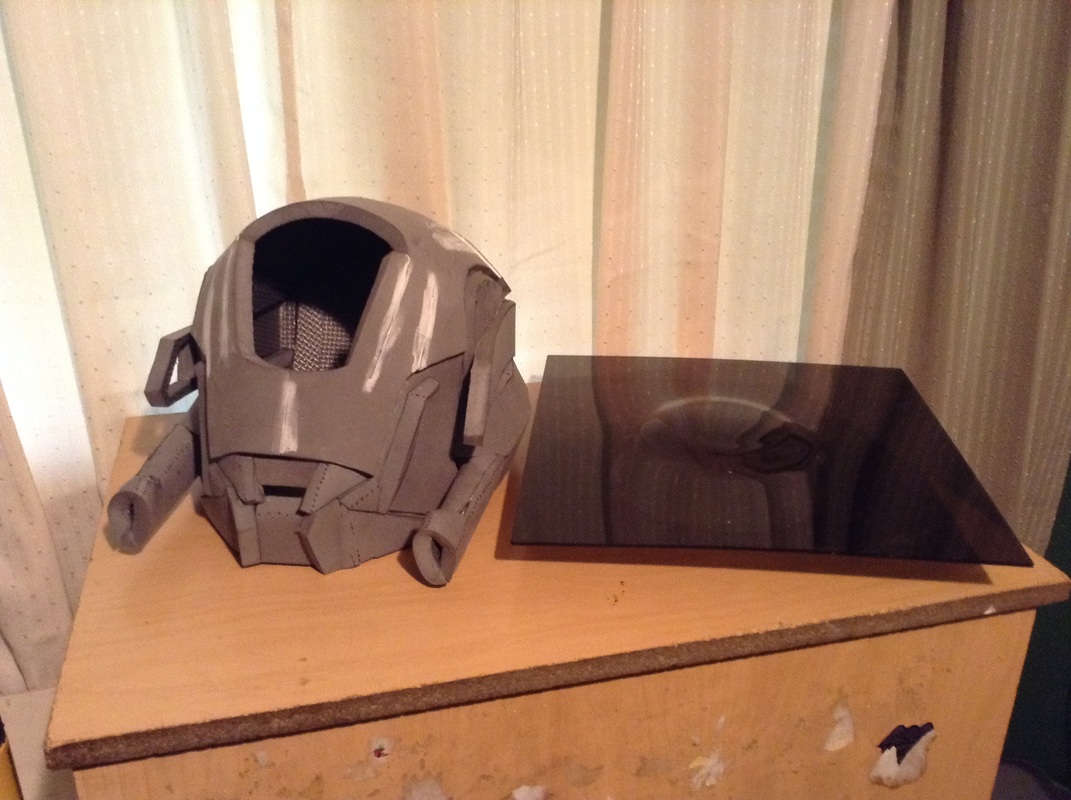
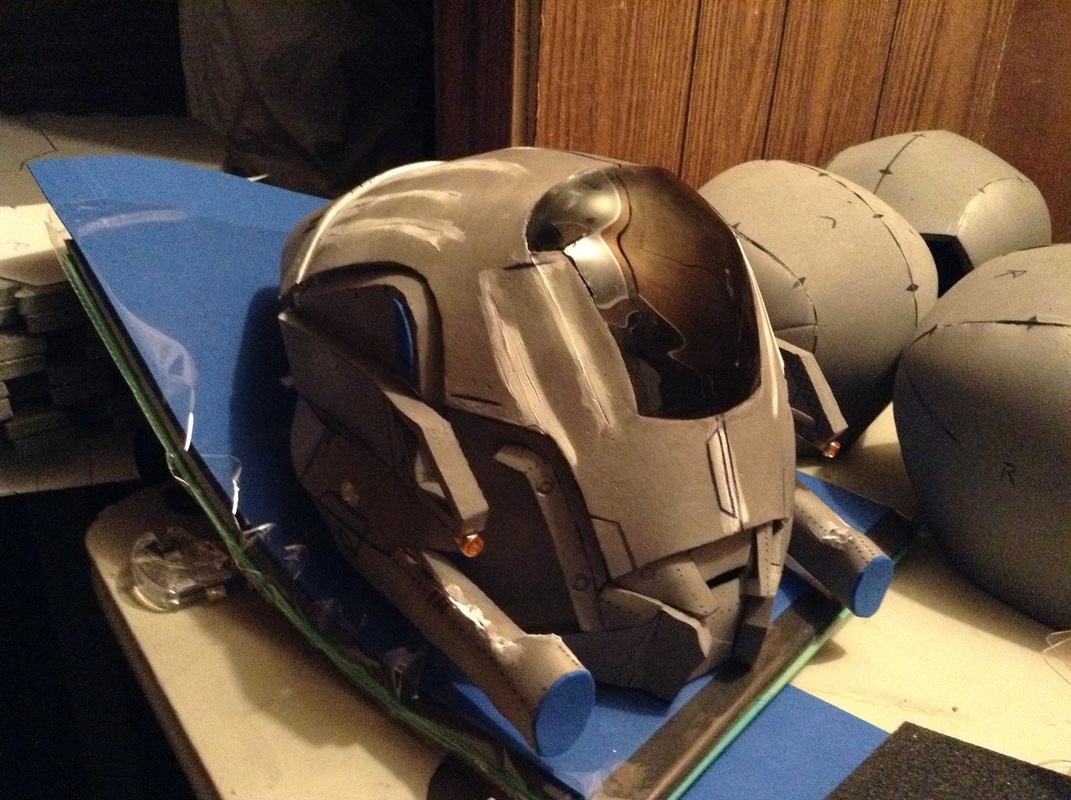
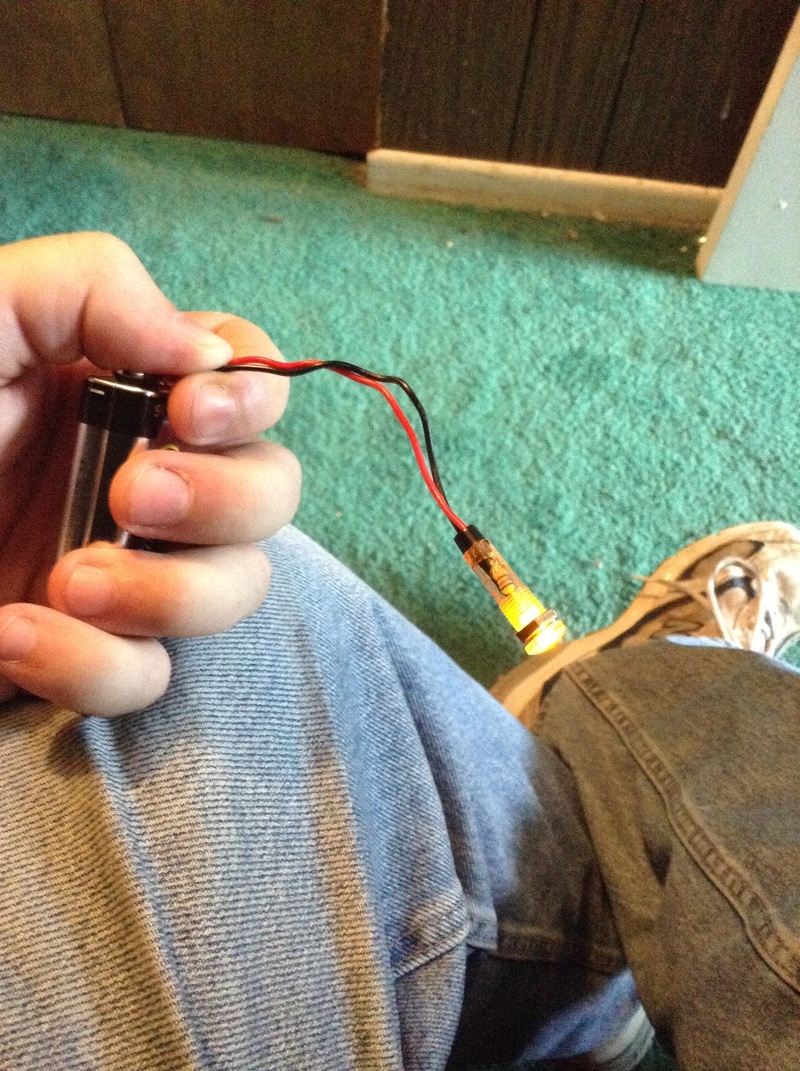
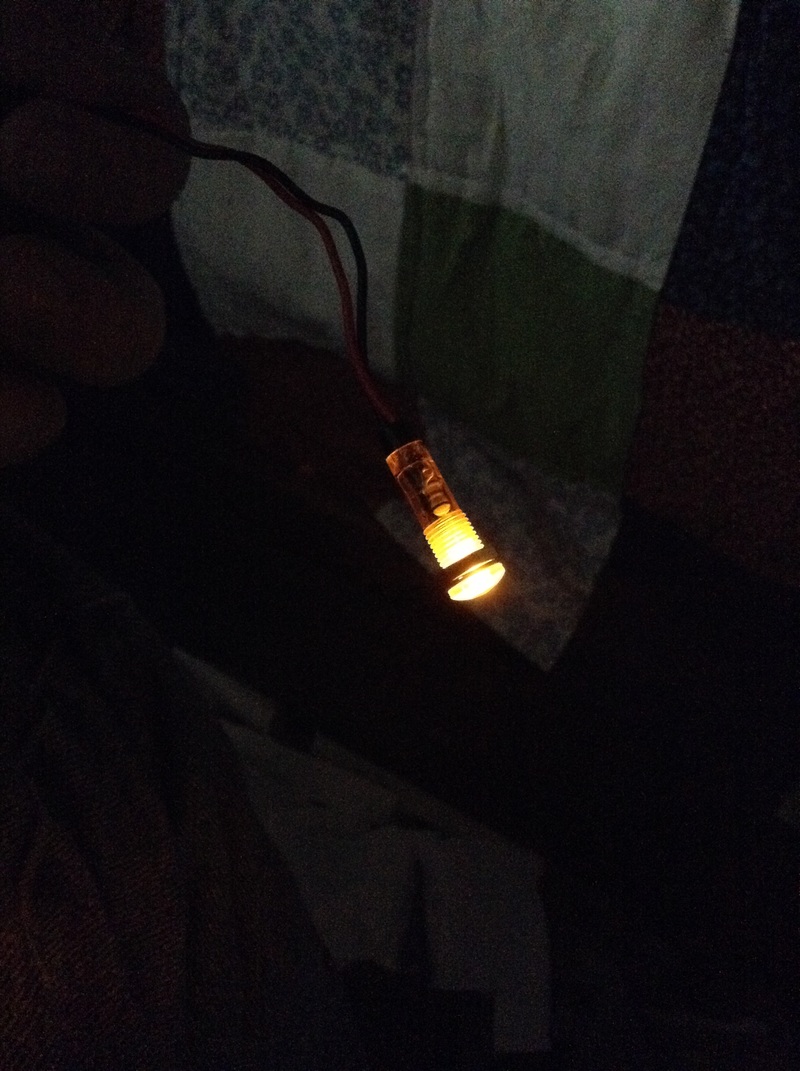
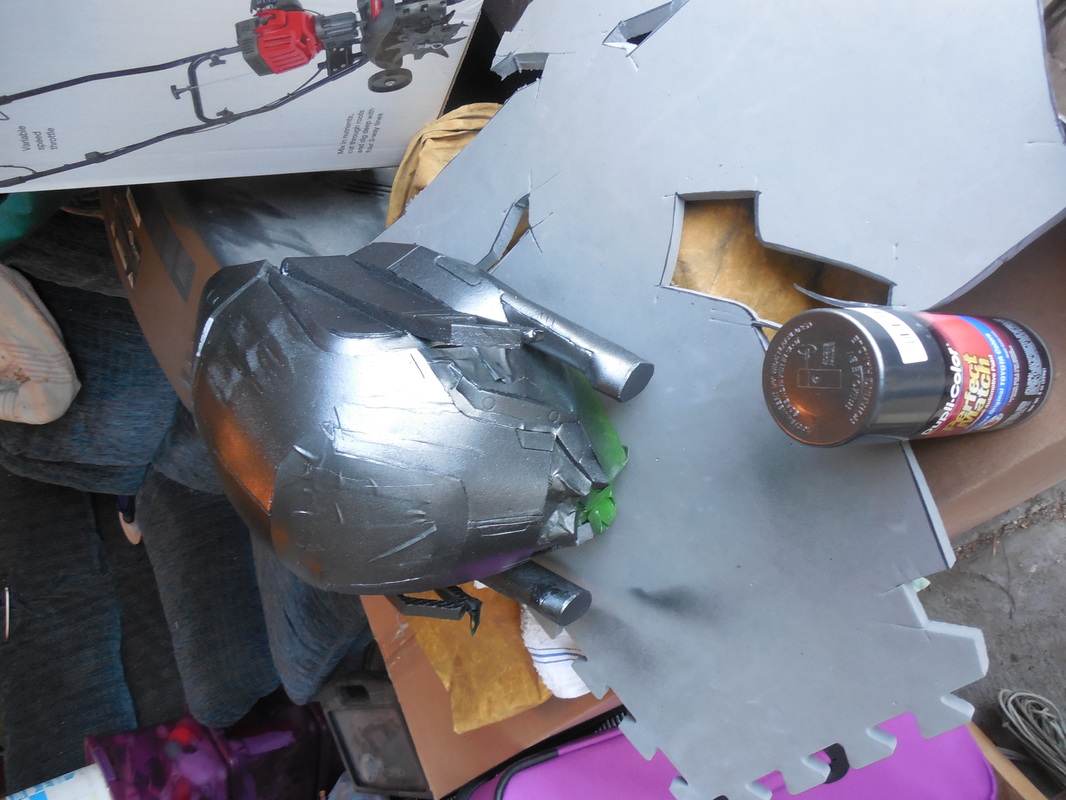
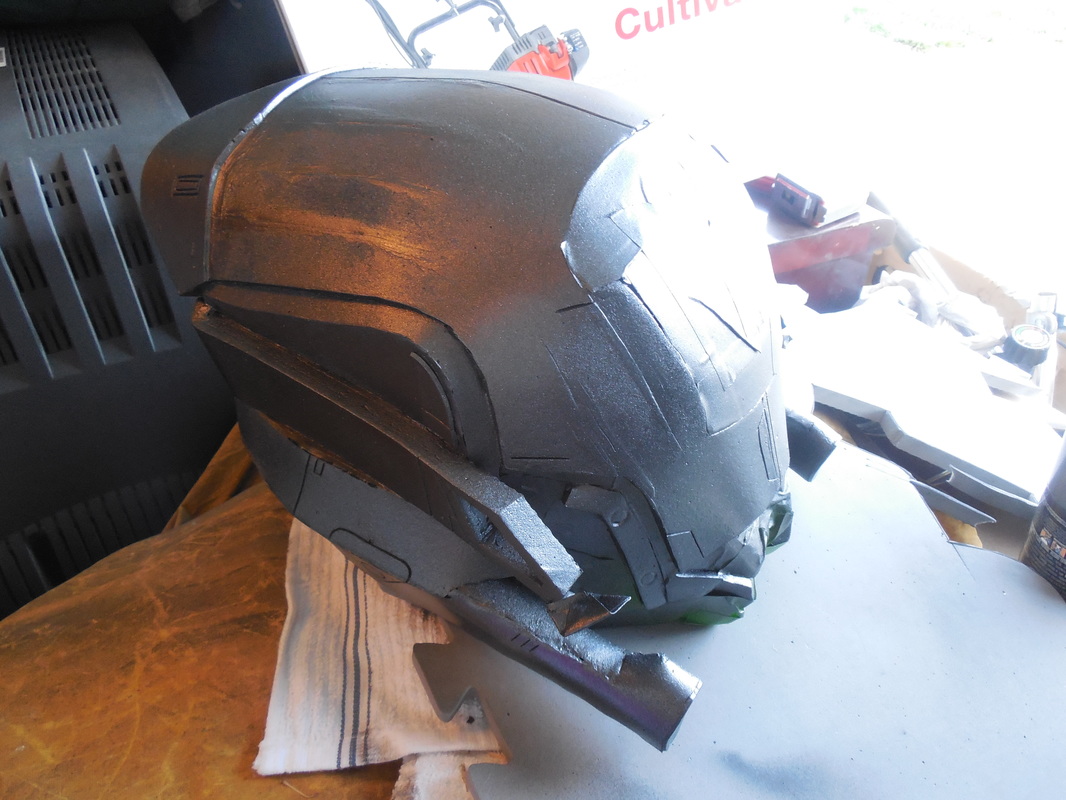
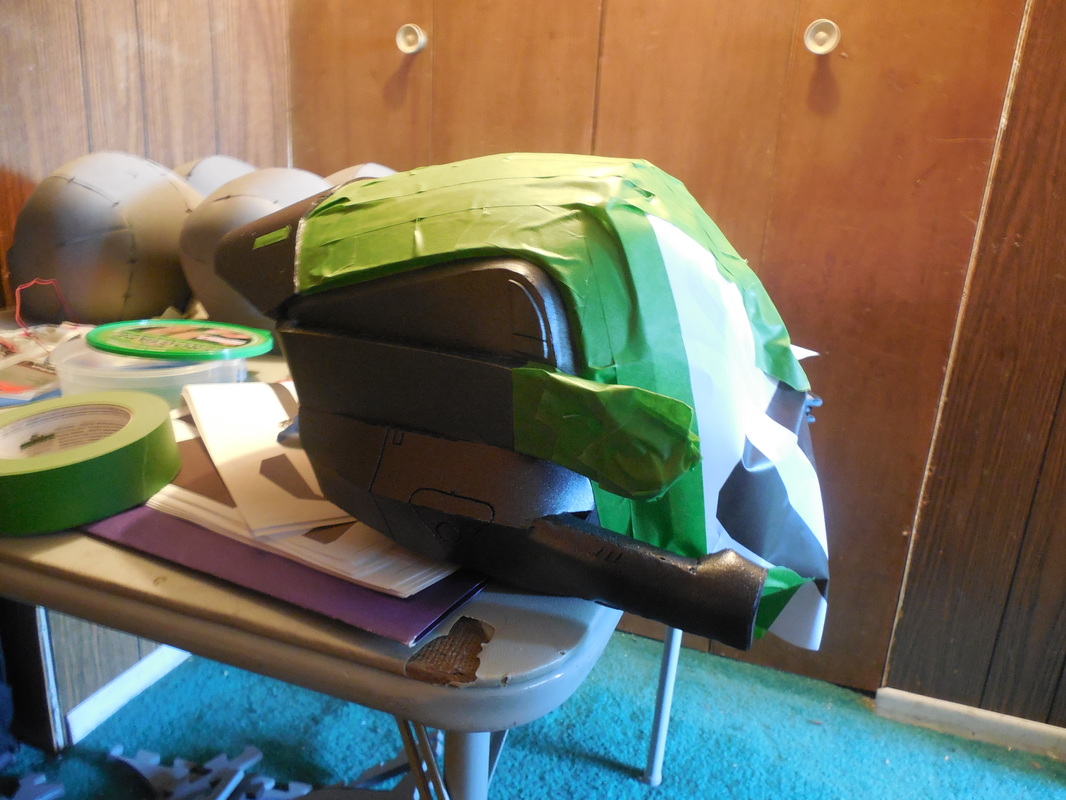
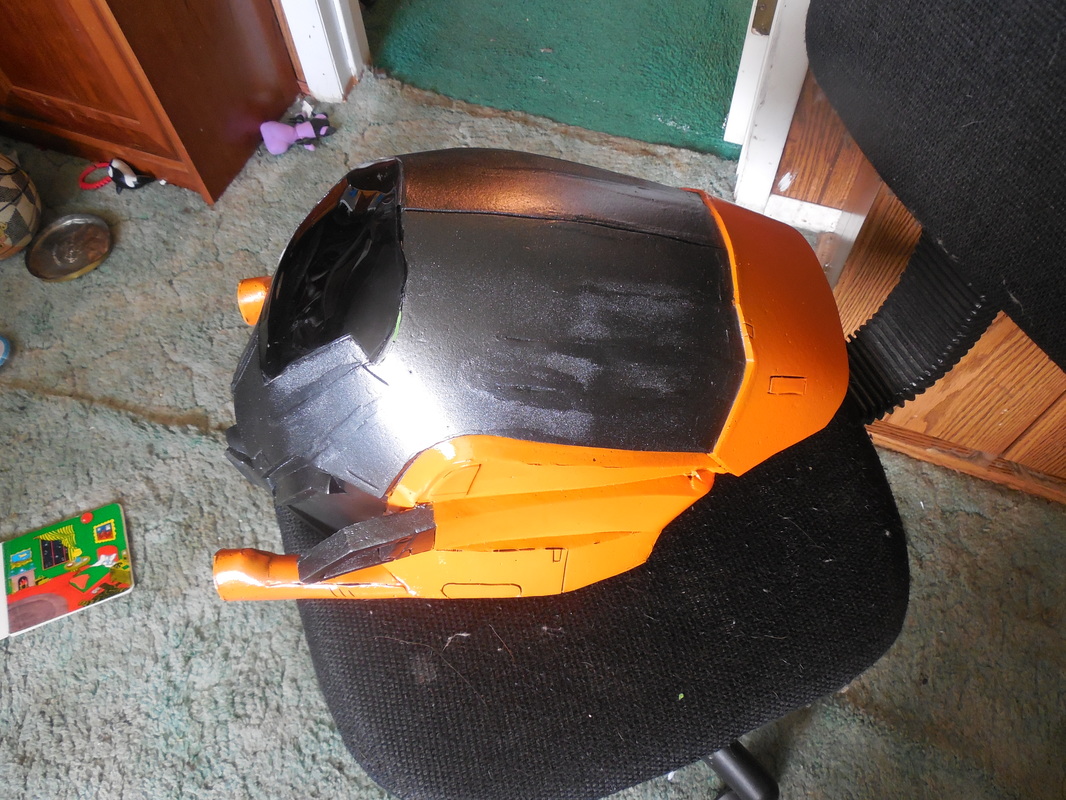
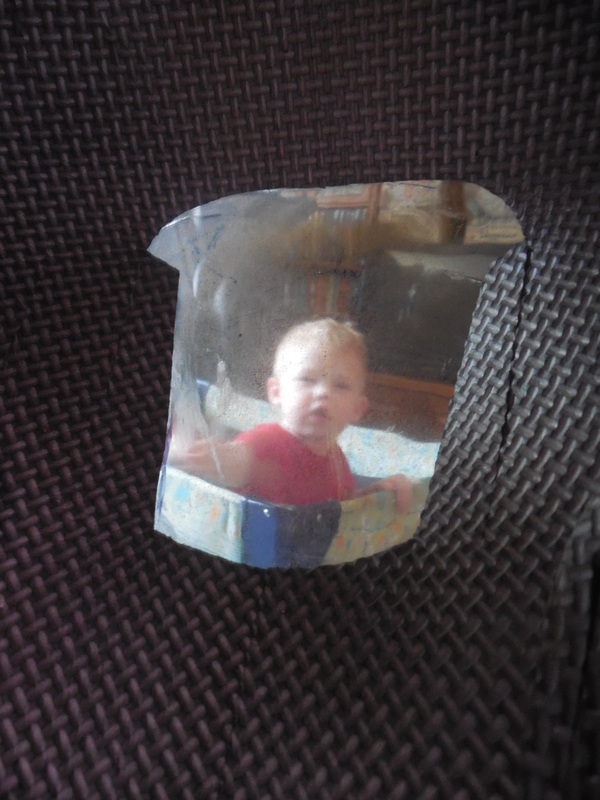
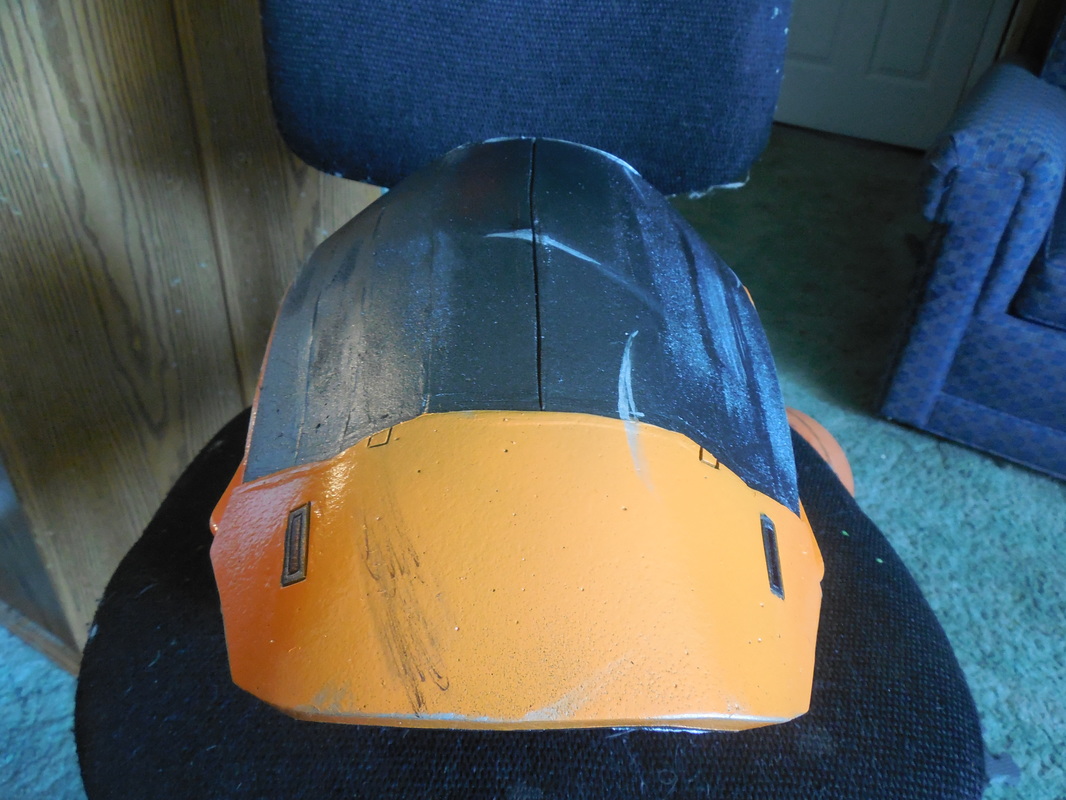
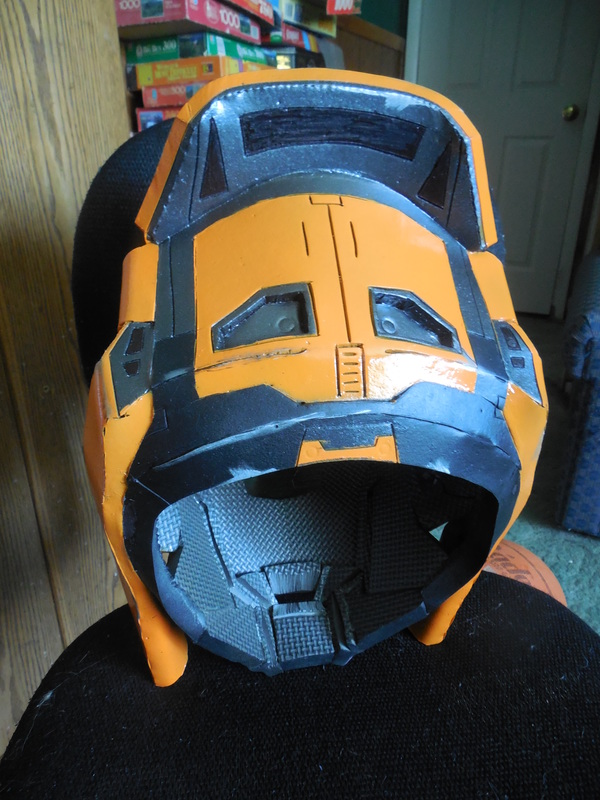
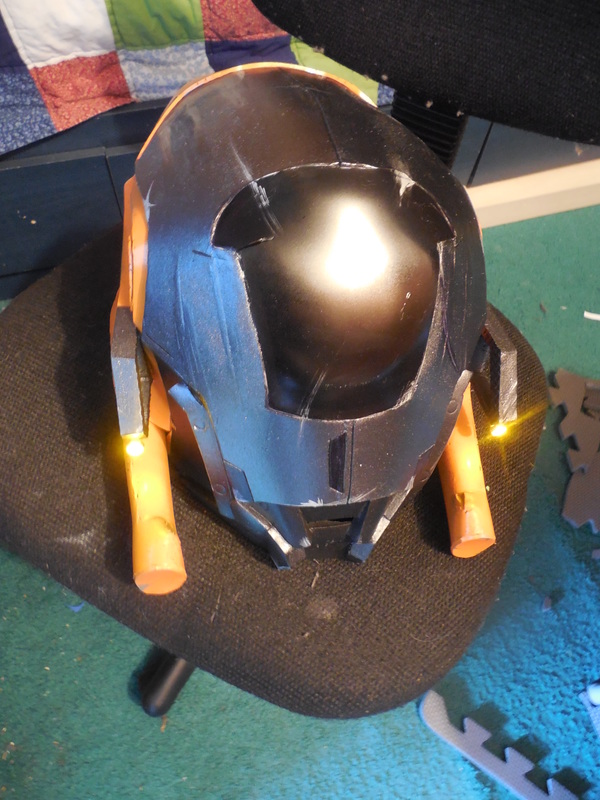
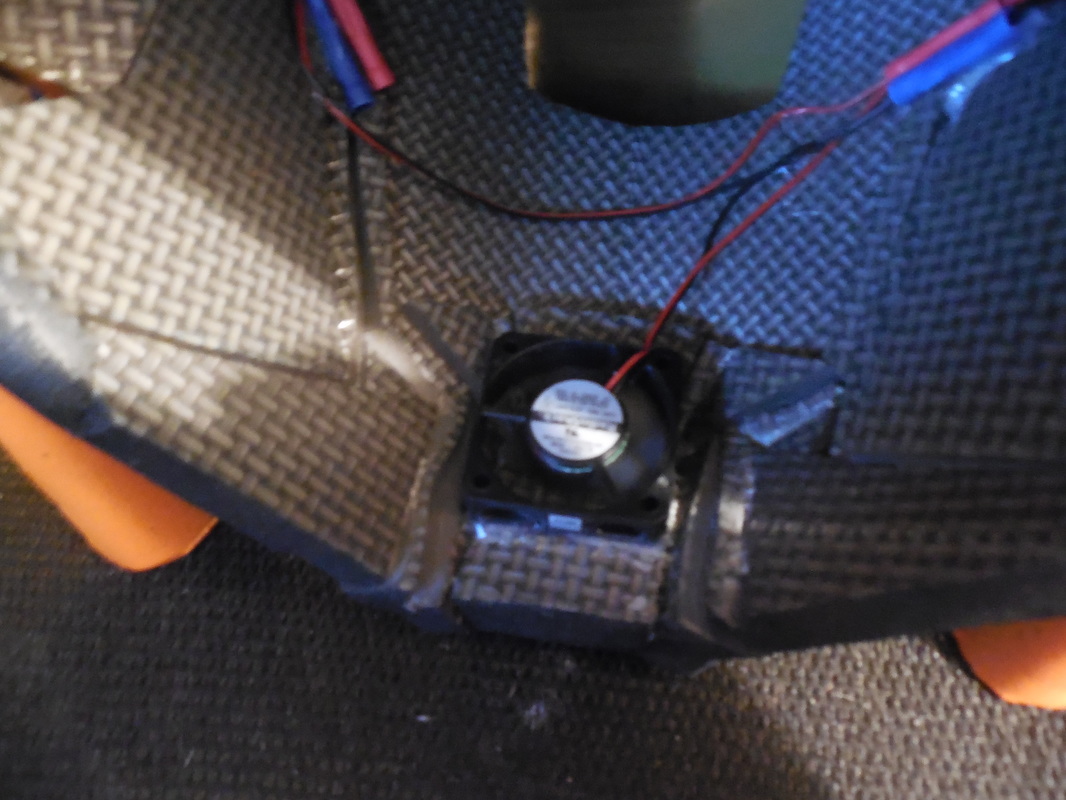
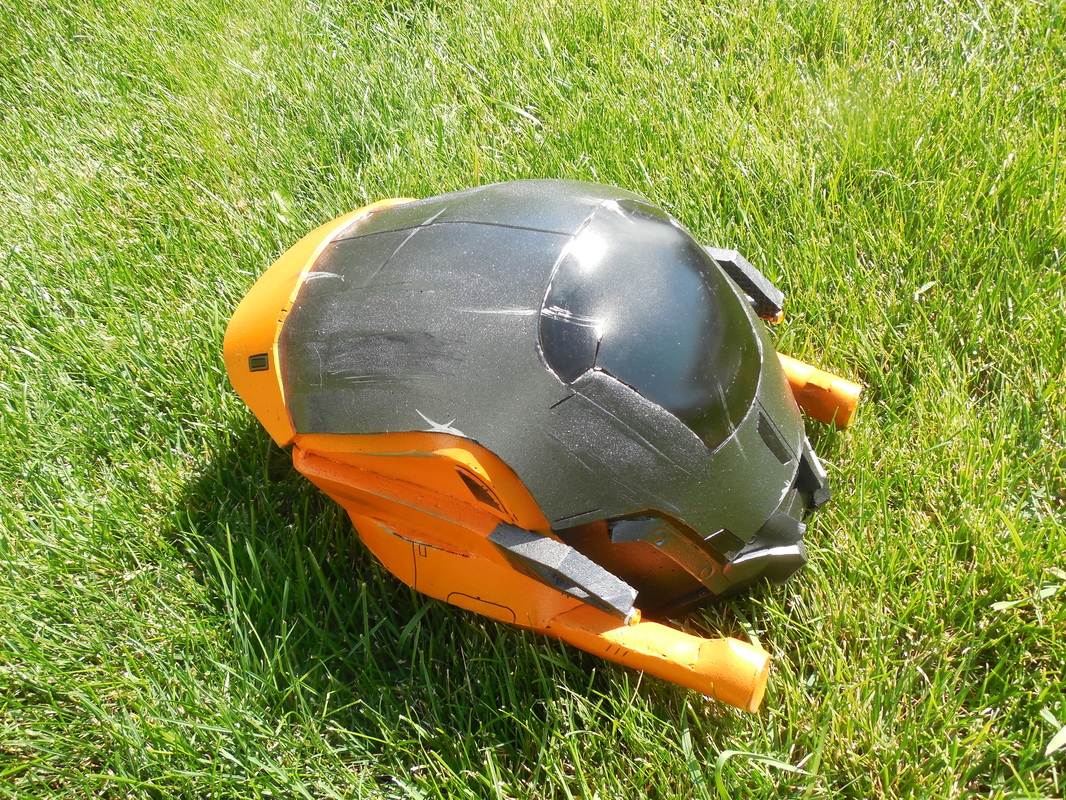
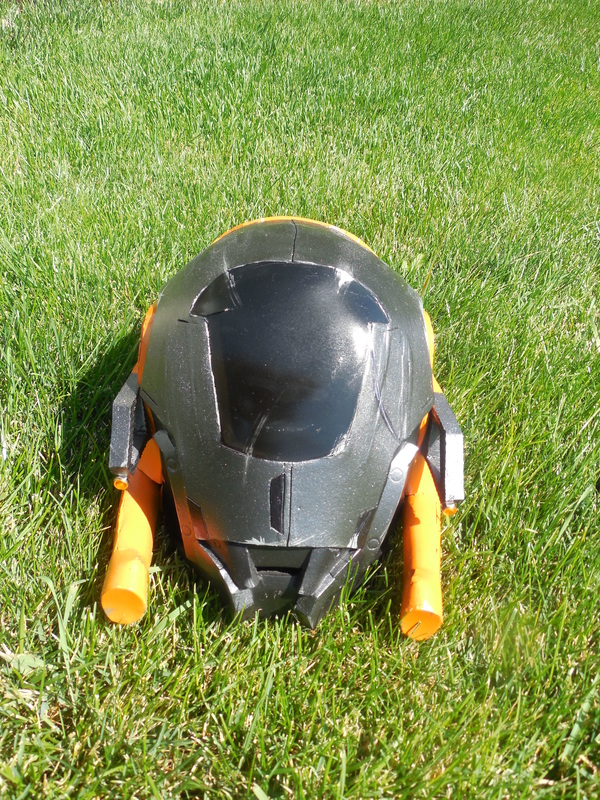
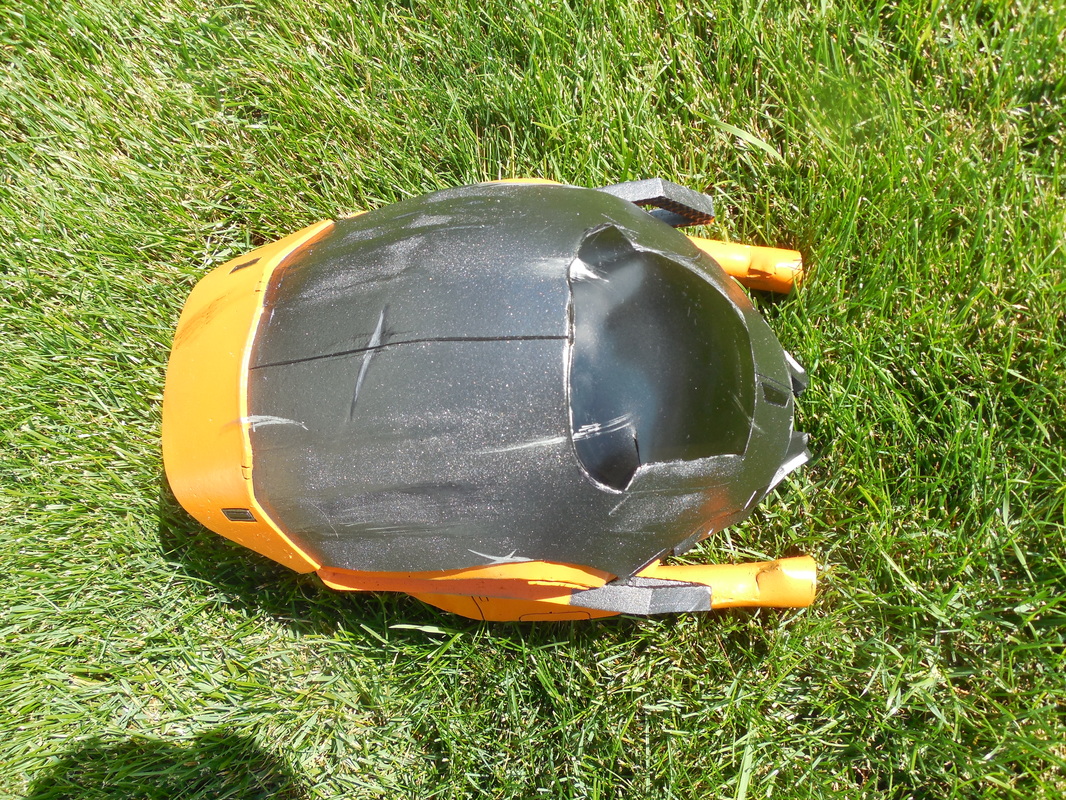
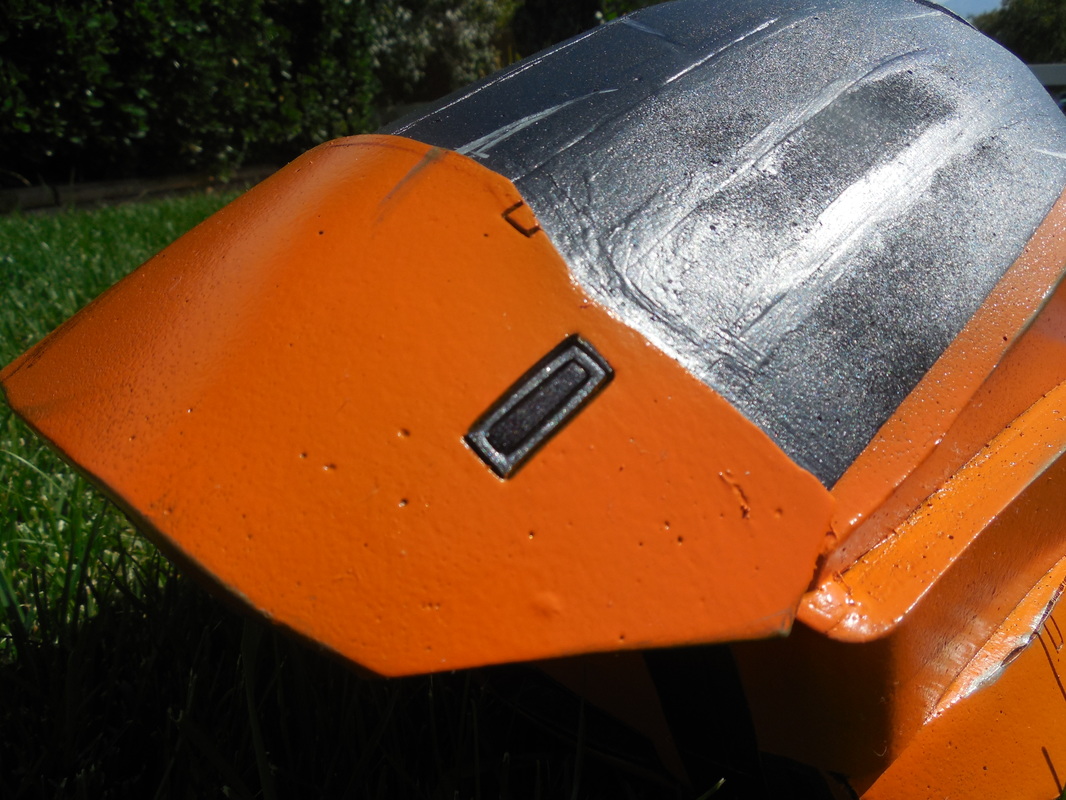
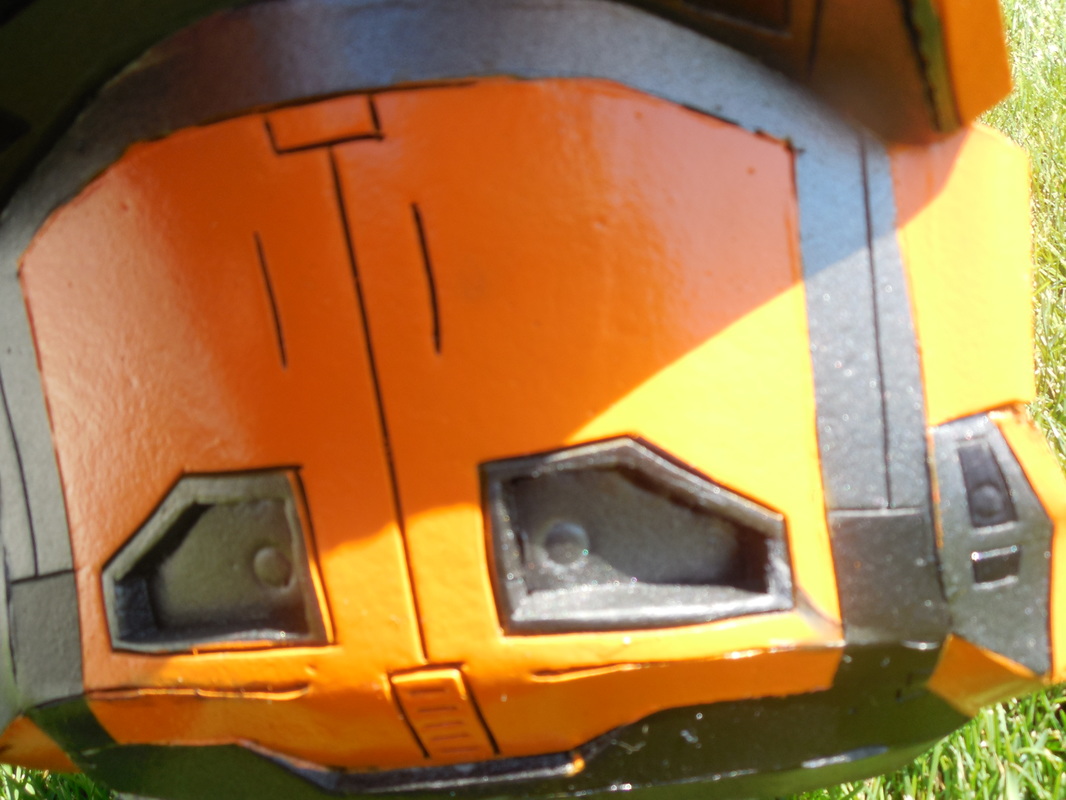
 Around the same time that I was working on the Sword of Ahrah, I was pumping out a bunch of different helmets. The first of these helmets was the Titan helmet from Destiny, for the awesome guys at Extra Life ATX. I opted to make it out of foam, like I do, but mostly because they wanted it light and durable since lots of people would end up wearing it at events and they wanted to cast games in it as well. This turned into a very interesting build, so let's get started! 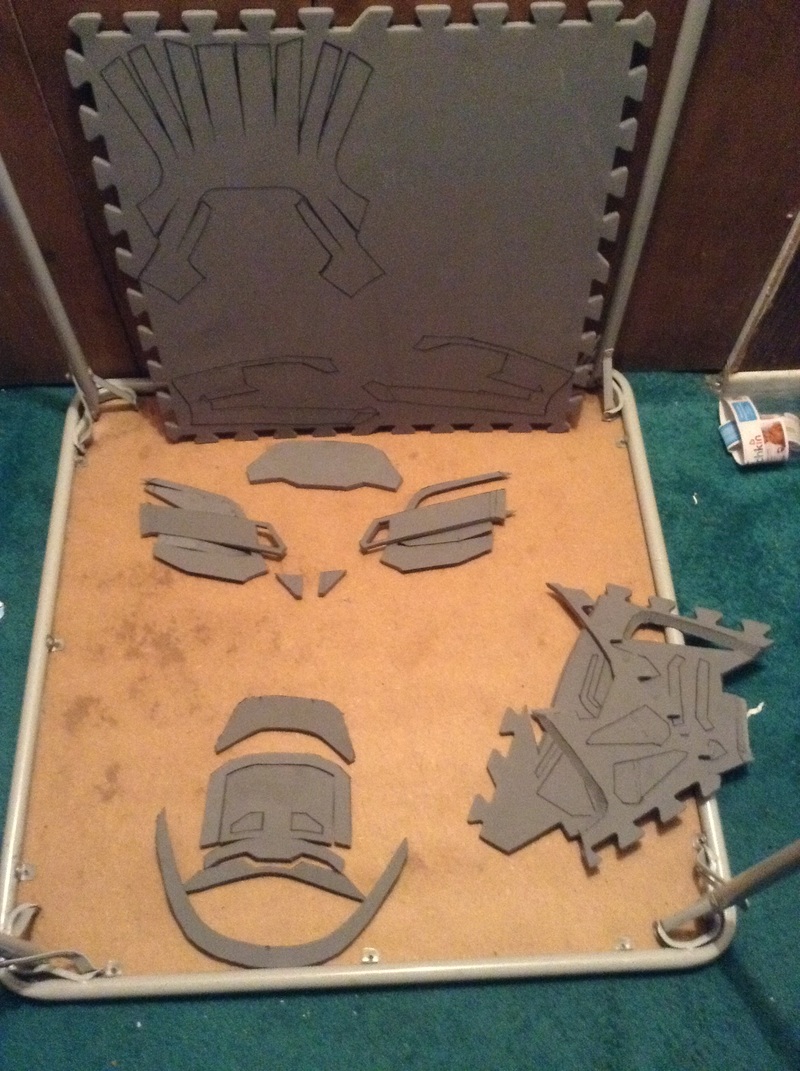 Started off as normal: prep the pieces, trace them to foam, cut them out, the glue them all up with contact cement. I had to do some major work on a few of the pieces, like the crest at the back. The underside piece needed a heavy angle cut, and the turkey legs (as I affectionately call them) needed huge trenches and grinding down to even fit together. Eventually, however, I prevailed! Got it all cleaned up, took it outside, and filled the seams as best I could with some sandable, paintable caulk. 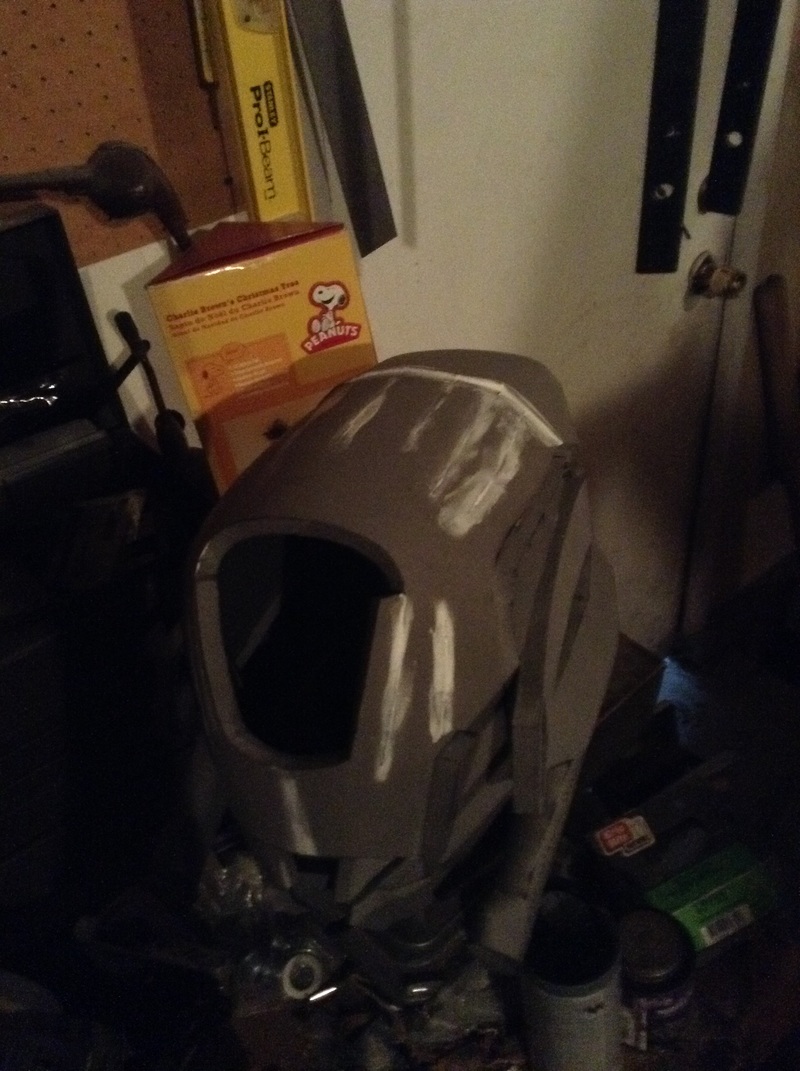 Once that set, I sanded it as smooth as I could, then brought it back in and used some craft foam to fill the front holes in the turkey legs. I also grabbed some smoke grey acrylic from my local supplier, used my heat gun over a ceramic bowl to stretch it to shape, and cut a visor out. I also used the xacto knife/heat gun trick to etch in all the detail lines. A light scoring and some quick passes make excellent and clean etchings! After that I grabbed a couple orange lights from my local Radio Shack (this was long before they closed down), and wired them up, along with a fan for later. Now it was time for paint! Wrapped up the fronts of the lights, leaving the back to be painted over. Also taped up the visor. Then, threw on my favorite foam sealer, Plasti Dip! 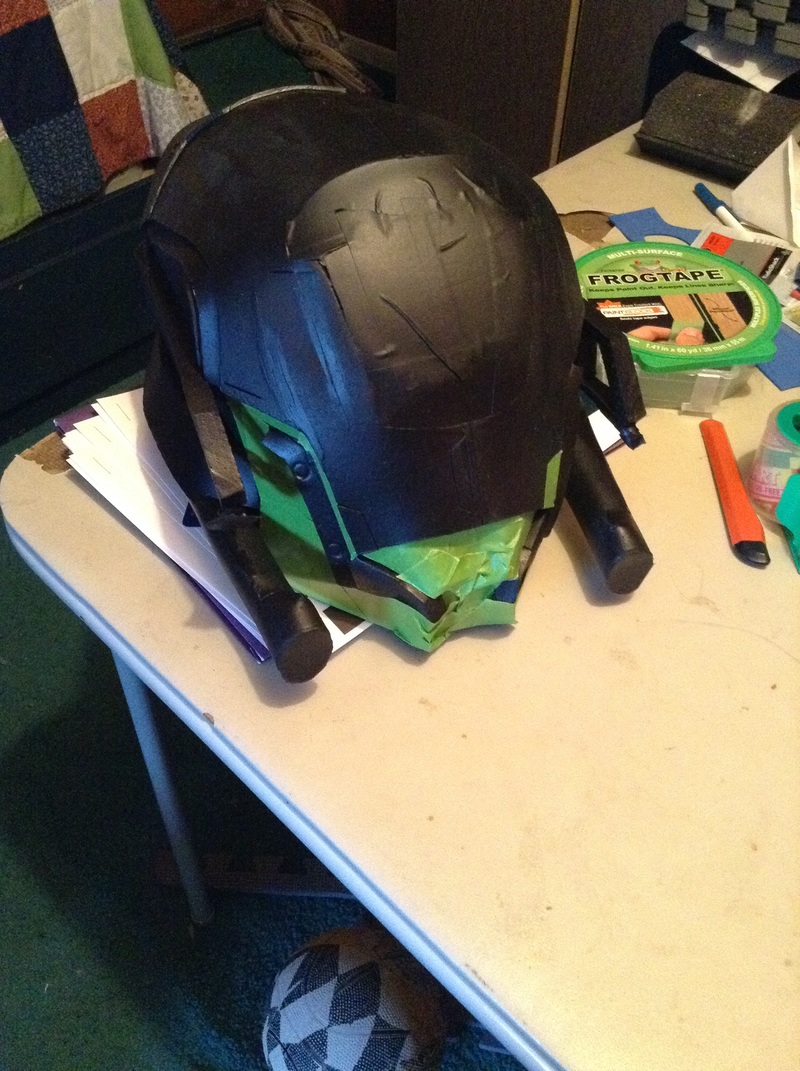 Taped up the areas I wanted to keep black, as you see above, then grabbed an automotive gunmetal grey and went to town. More tape, and then came the primary color: orange! Cameo of my son, as viewed from the inside of the helmet. Looking great so far! Next came everyone's favorite part, weathering! I did a variety of things, from dry brushing to a dark acrylic wash, and added some color to a few of the details to highlight them better. I also finished installing the fan behind the hole in the front, so that the wearer could have some better air circulation and keep the visor from fogging too much. Threw on a final clear coat to seal it all in, which was unfortunately my folly as I forgot to tape up the visor again. It ended up being really hard to see out of, but I was so excited to get it to them I didn't test it before I shipped it. Looks awesome, but I failed on the end result of them being able to stream games wearing it.... Still, they loved it, and I loved making it so much I decided to make another one! But that's a tale for another blog! Here's some final shots of the Titan helmet. Hope you enjoyed! |
|


 RSS Feed
