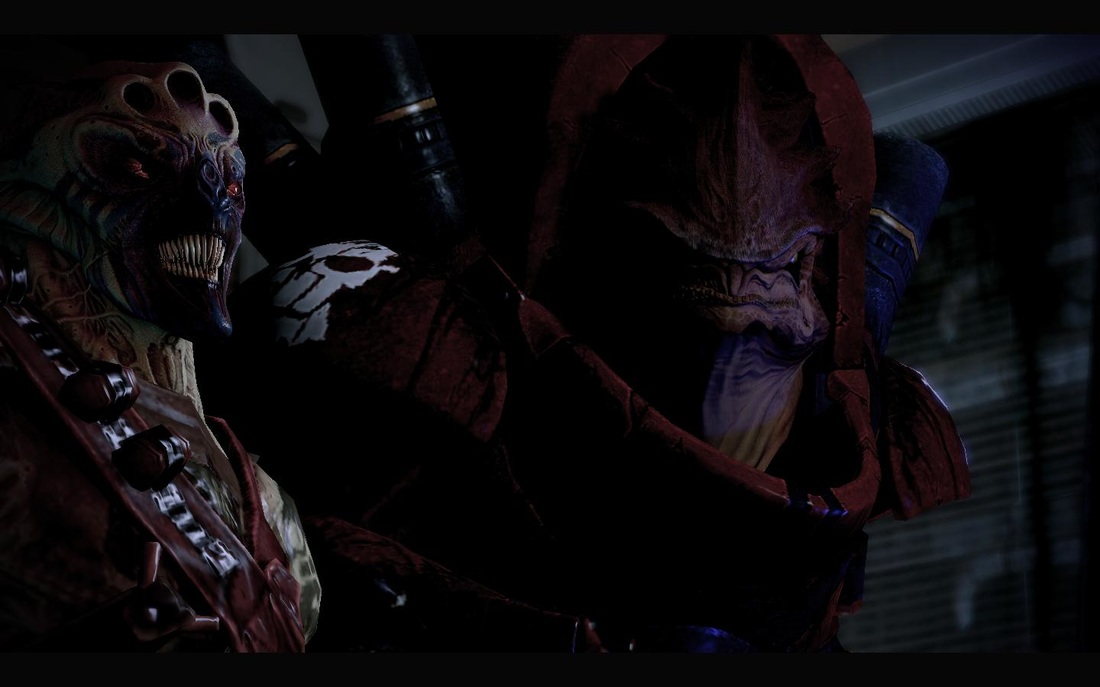
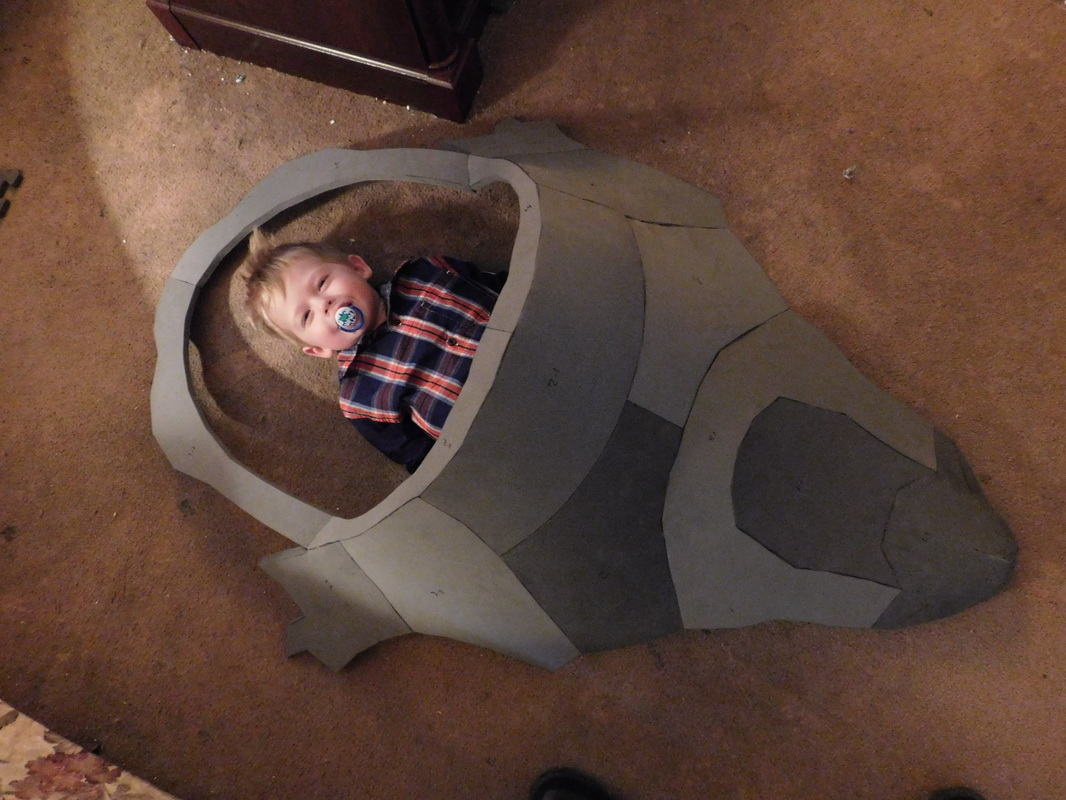
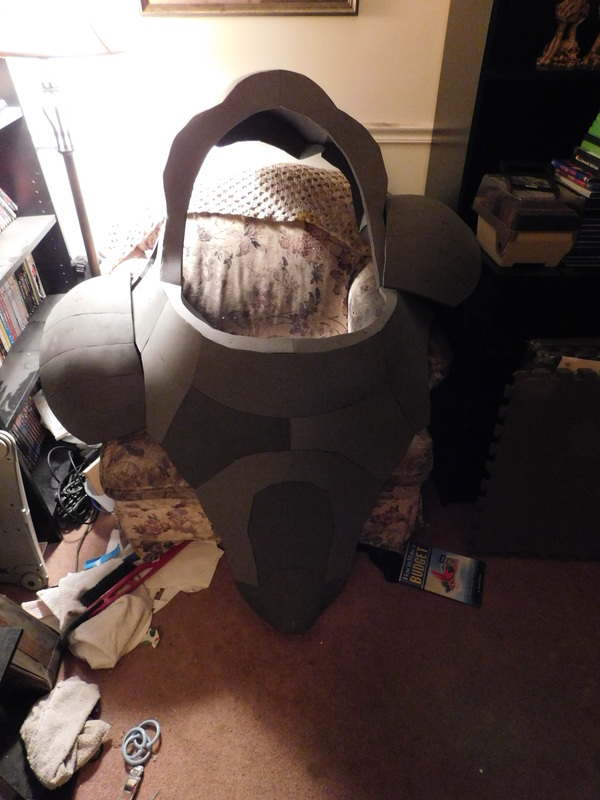
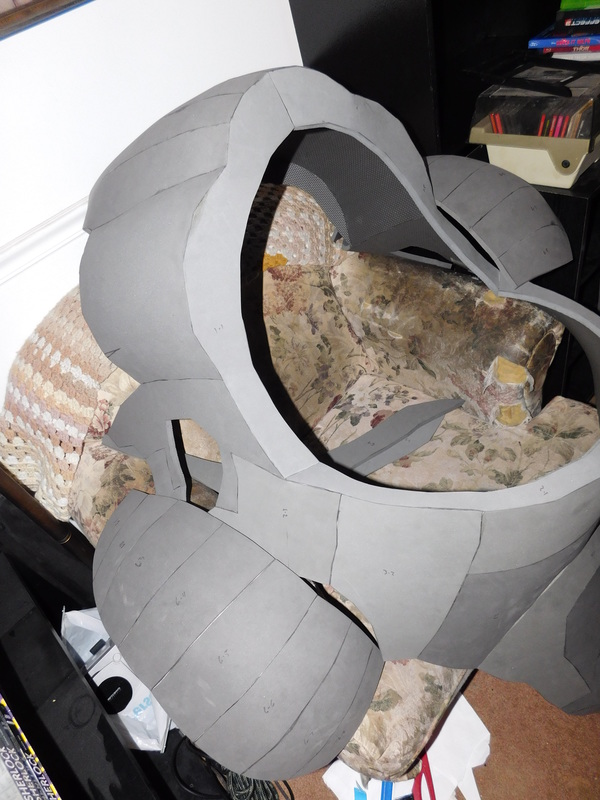
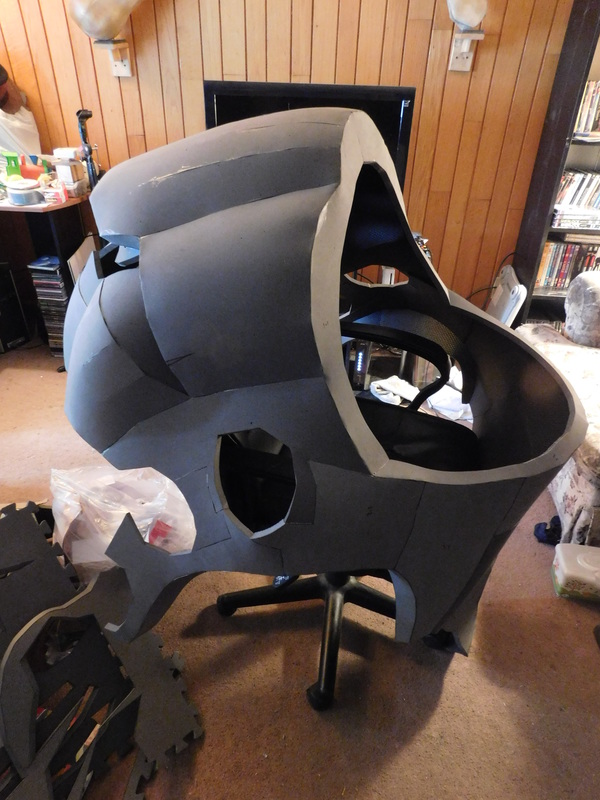
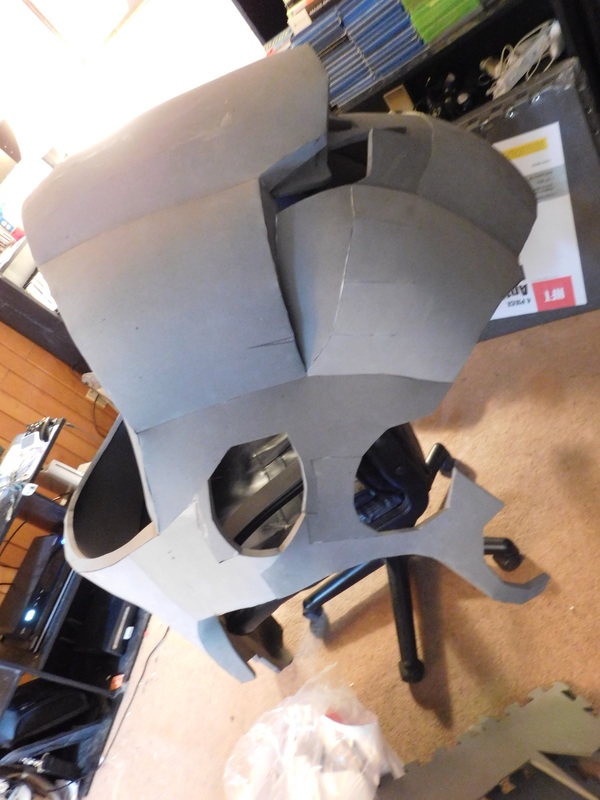
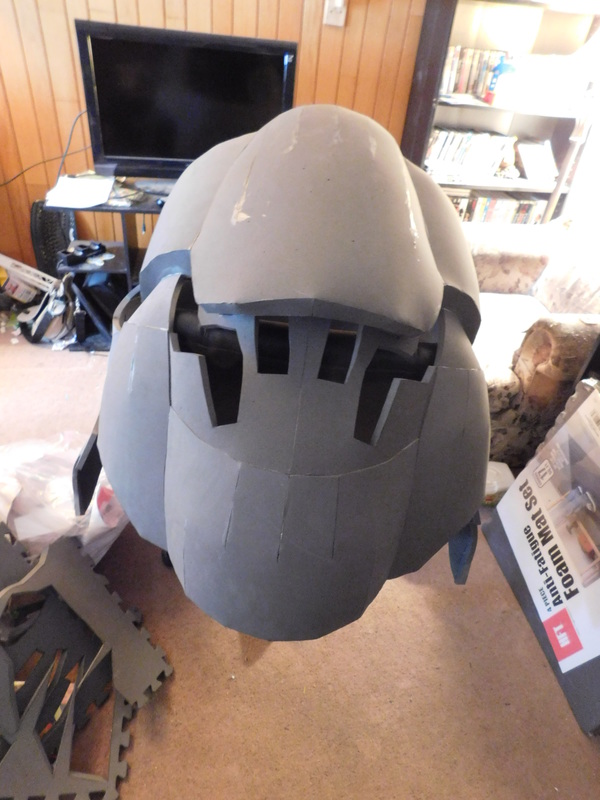
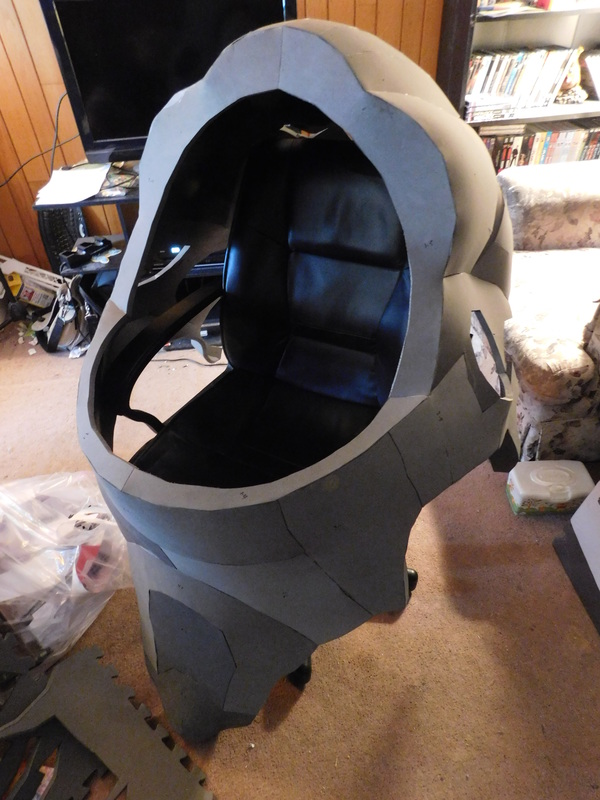
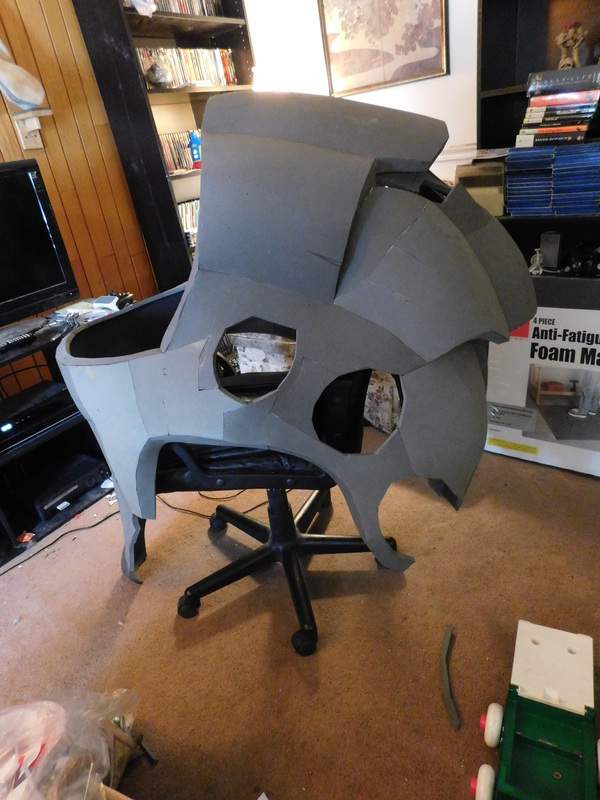
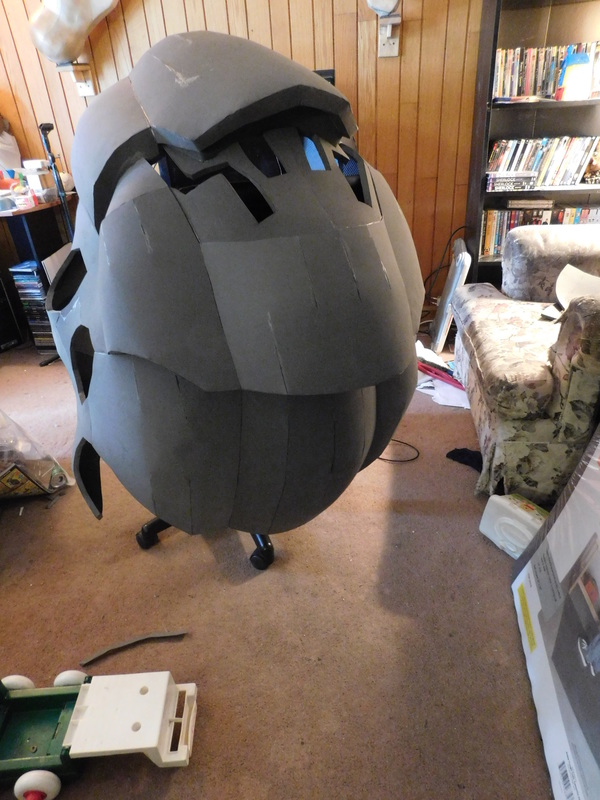
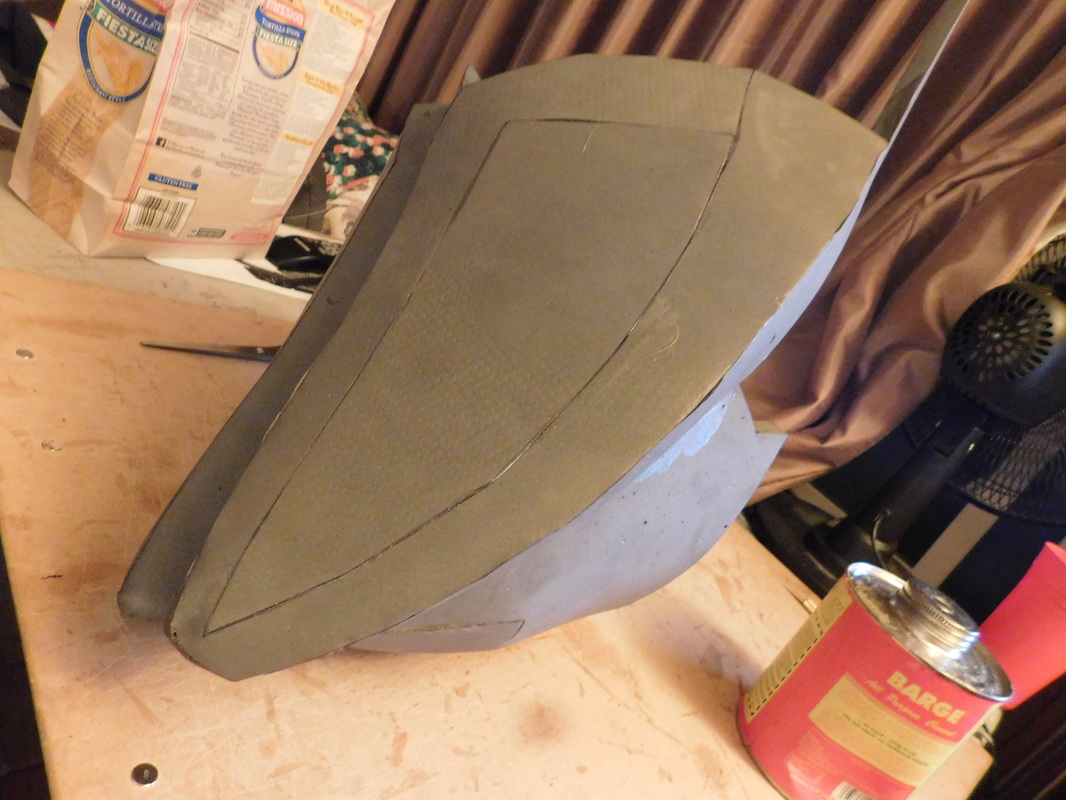
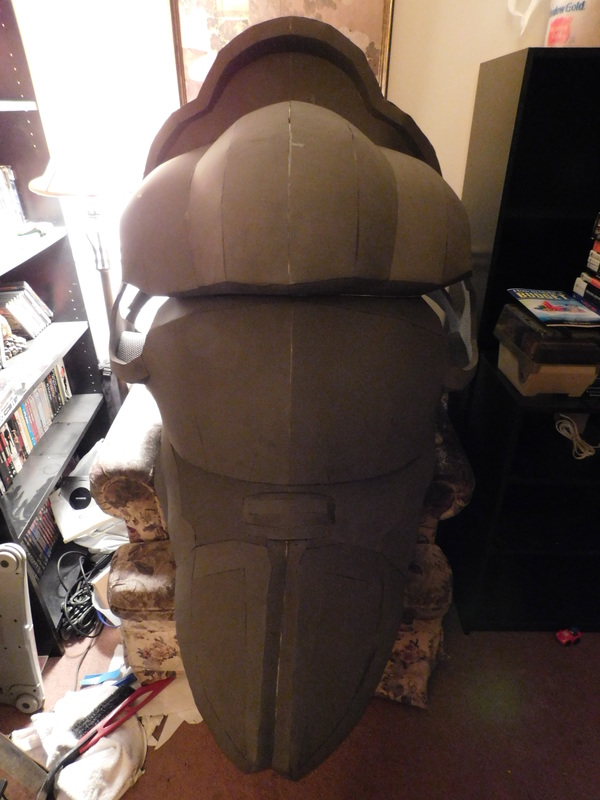
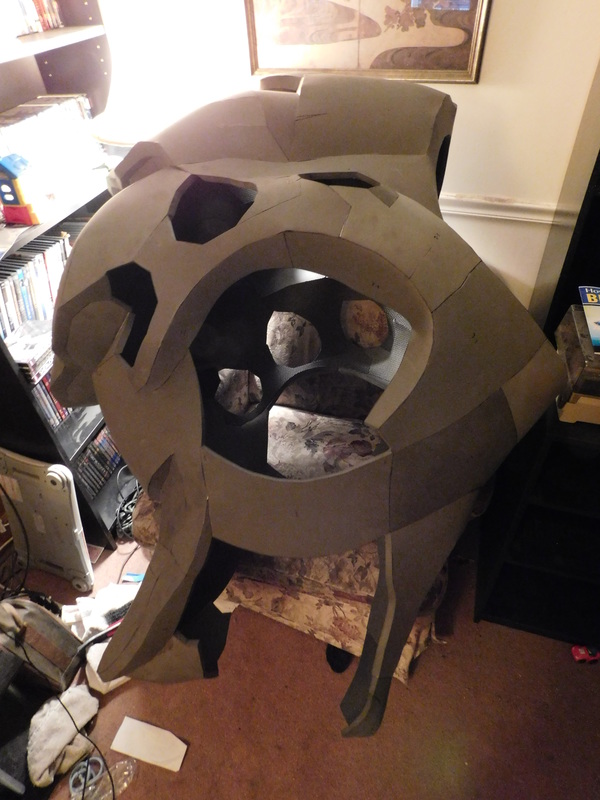
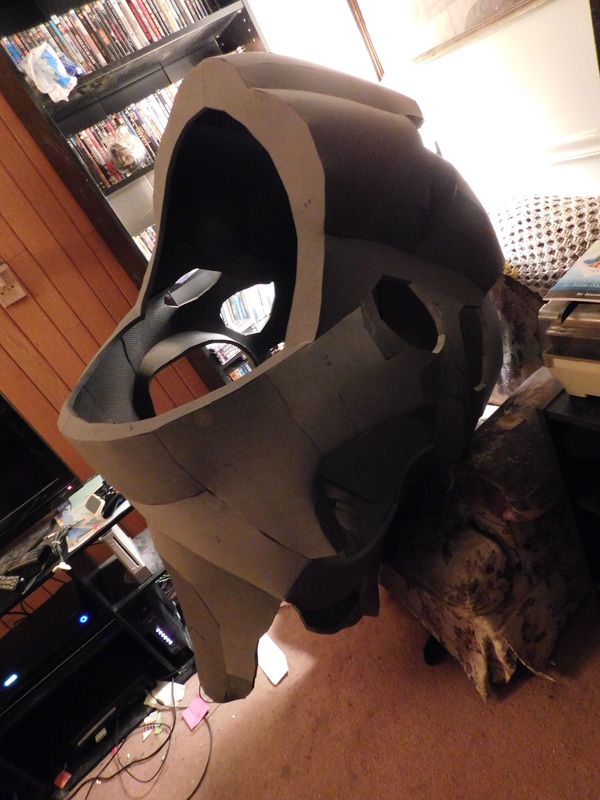
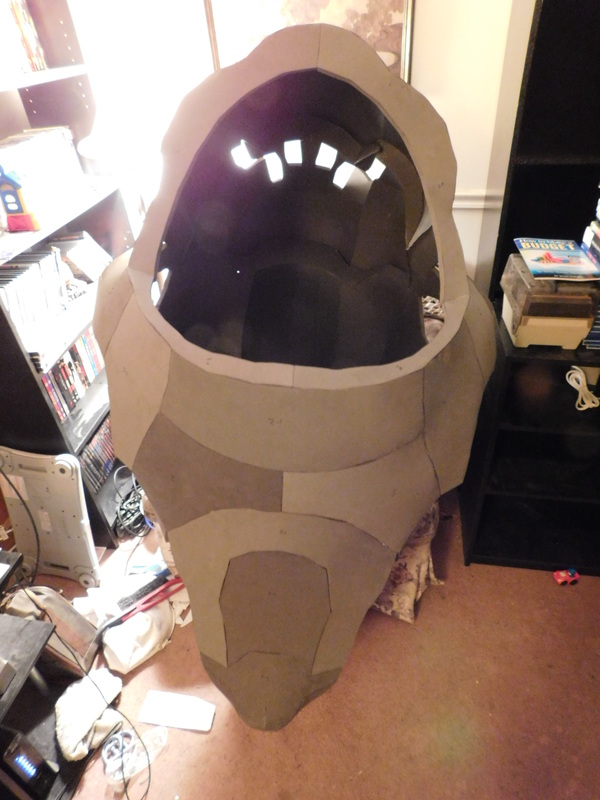
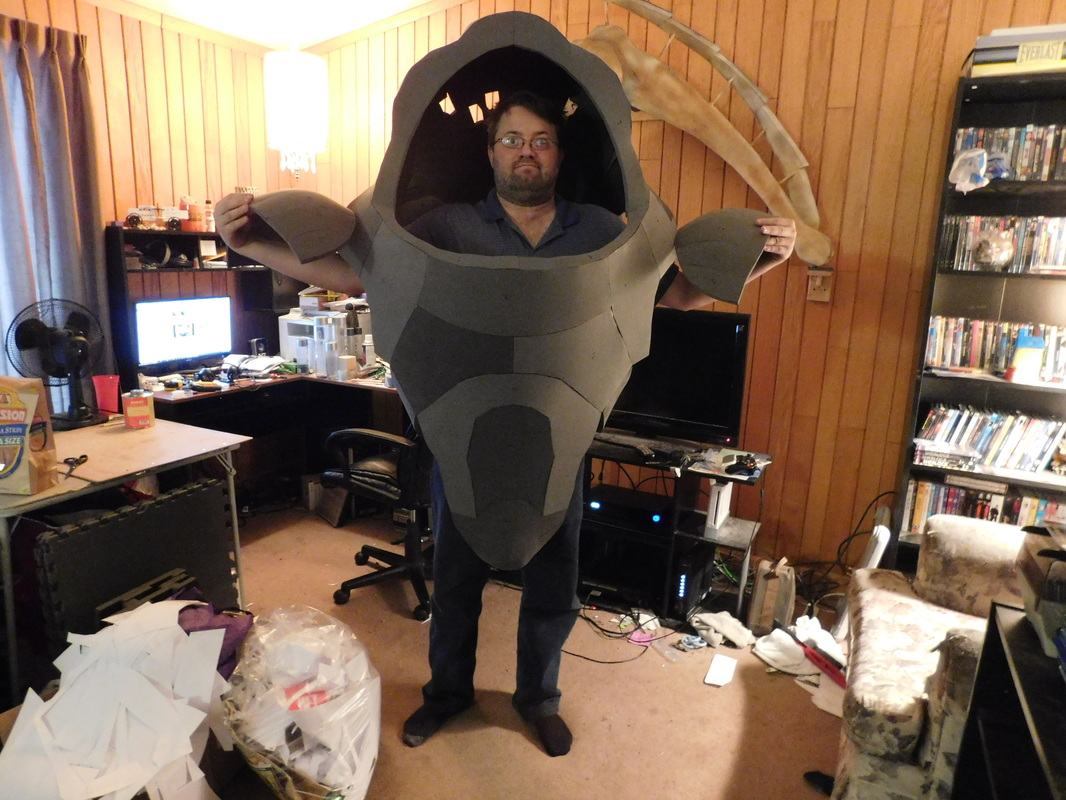
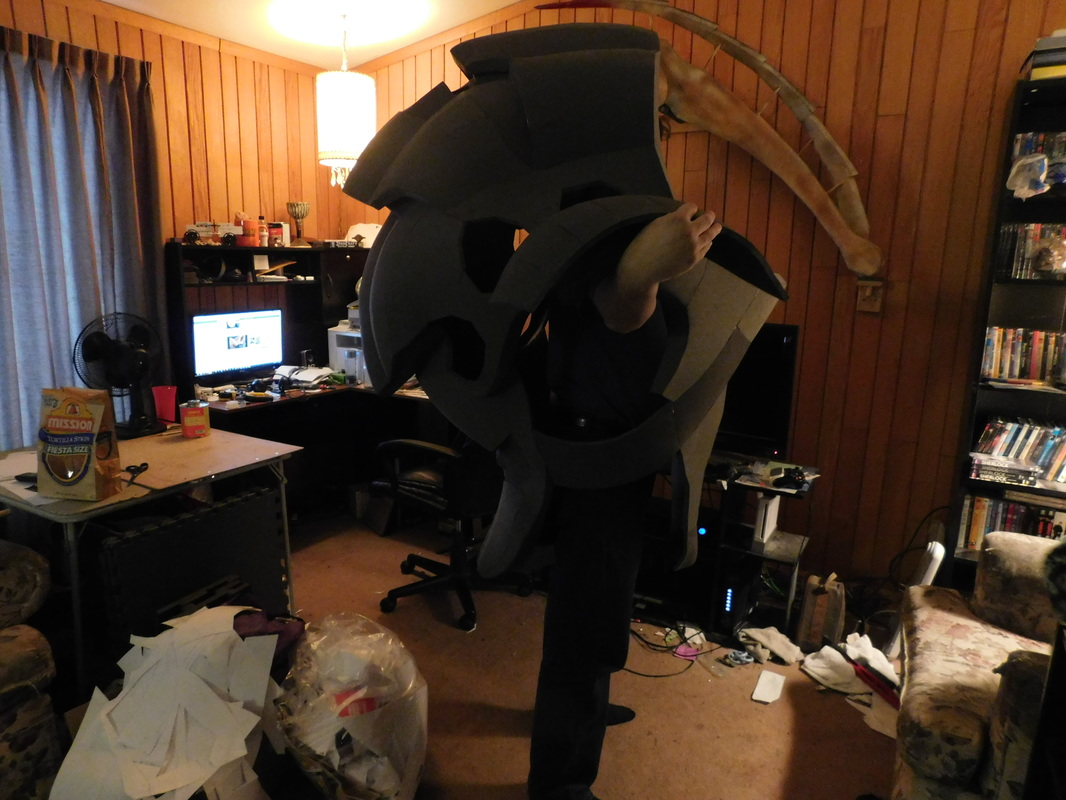
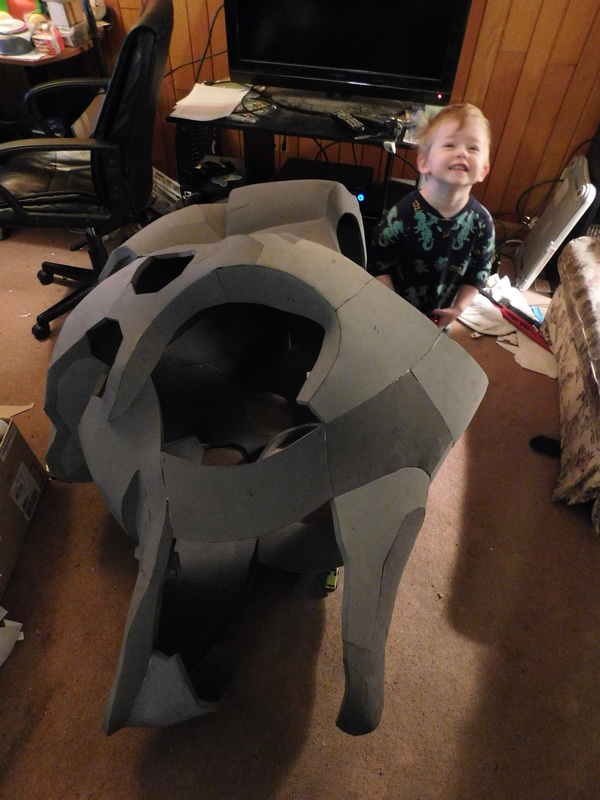
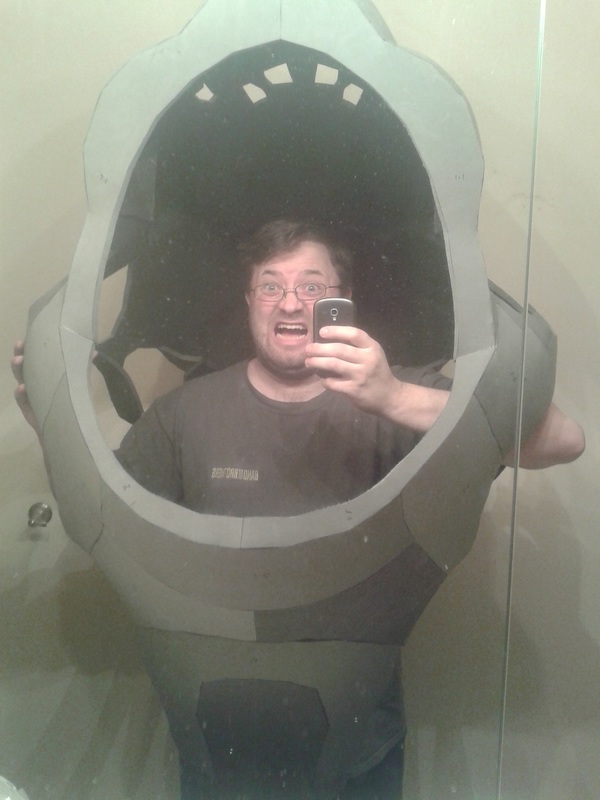
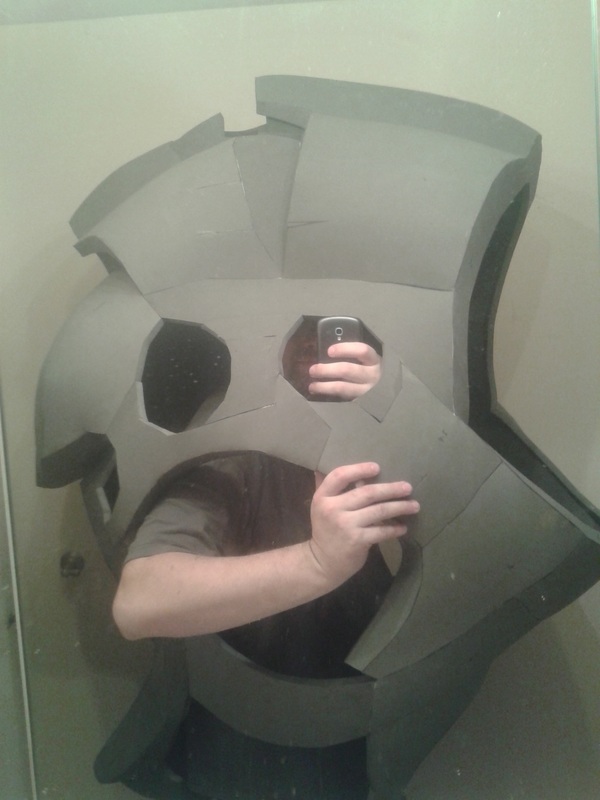
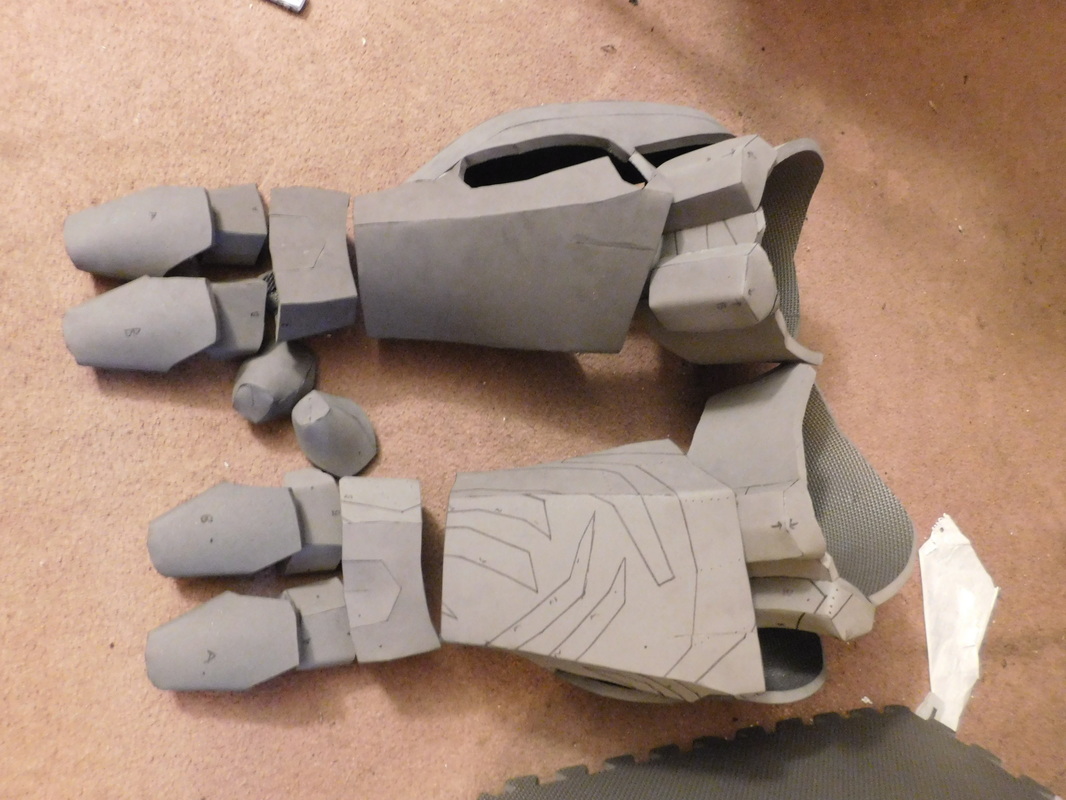
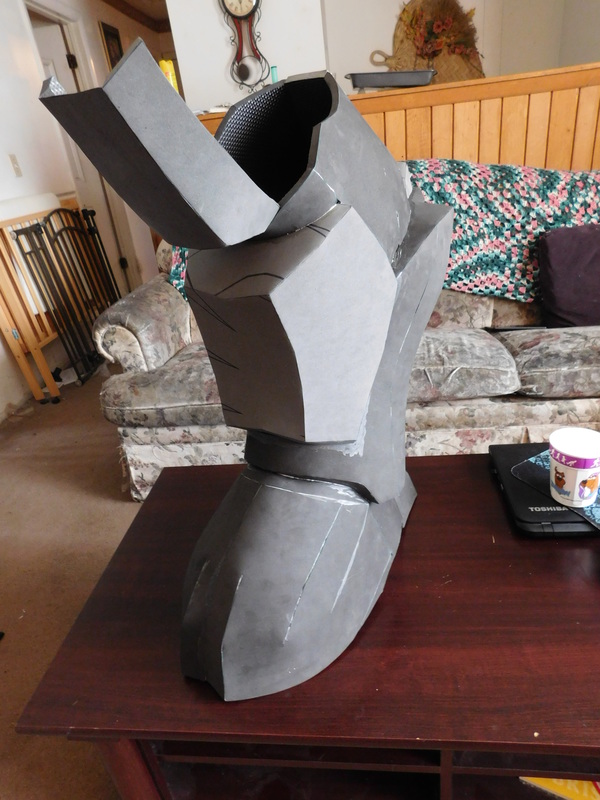
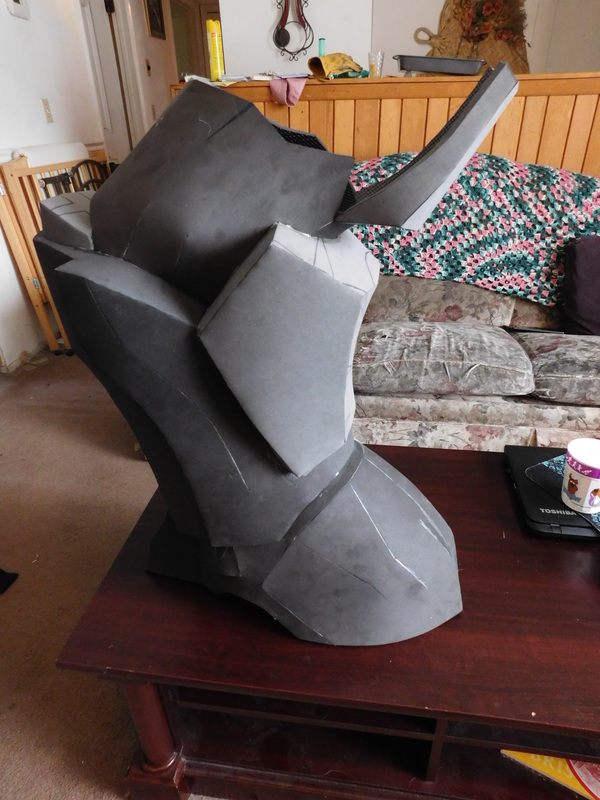
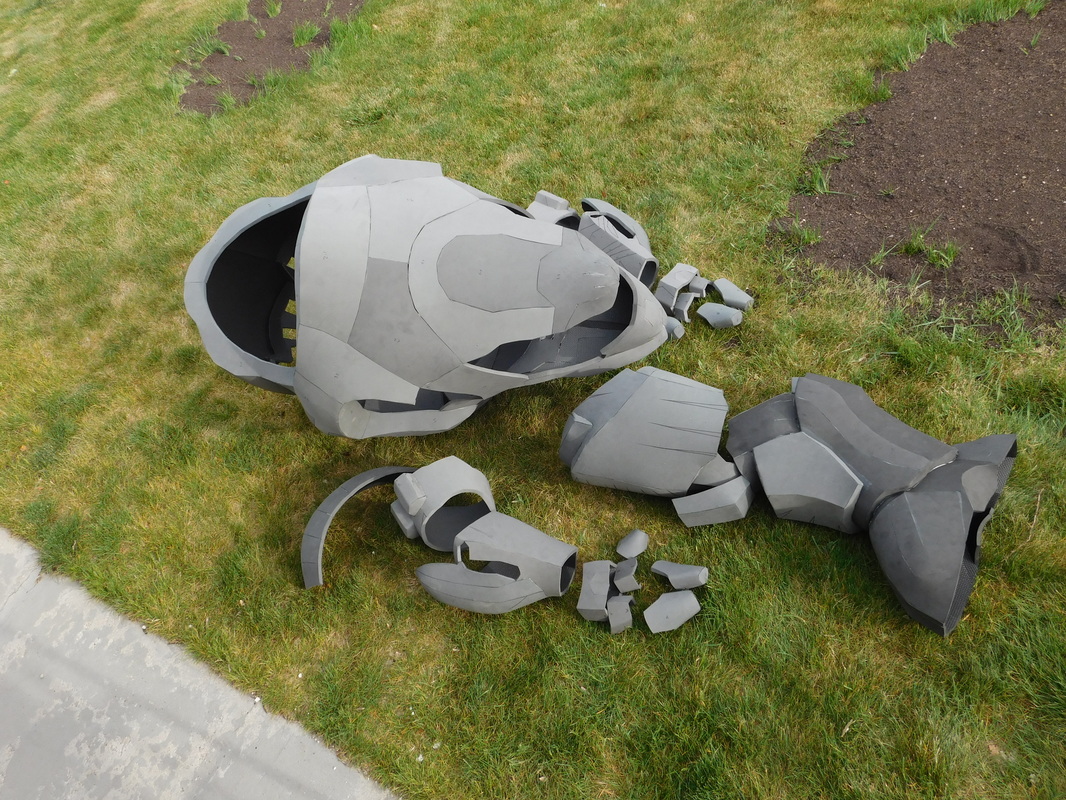
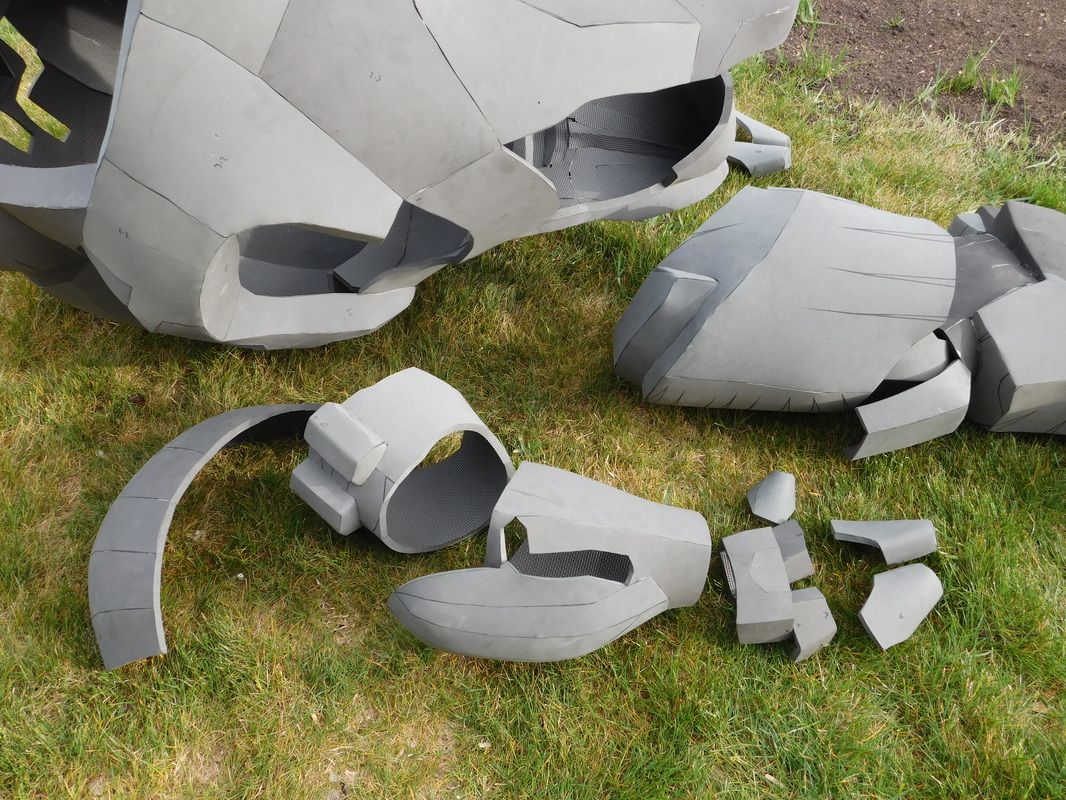
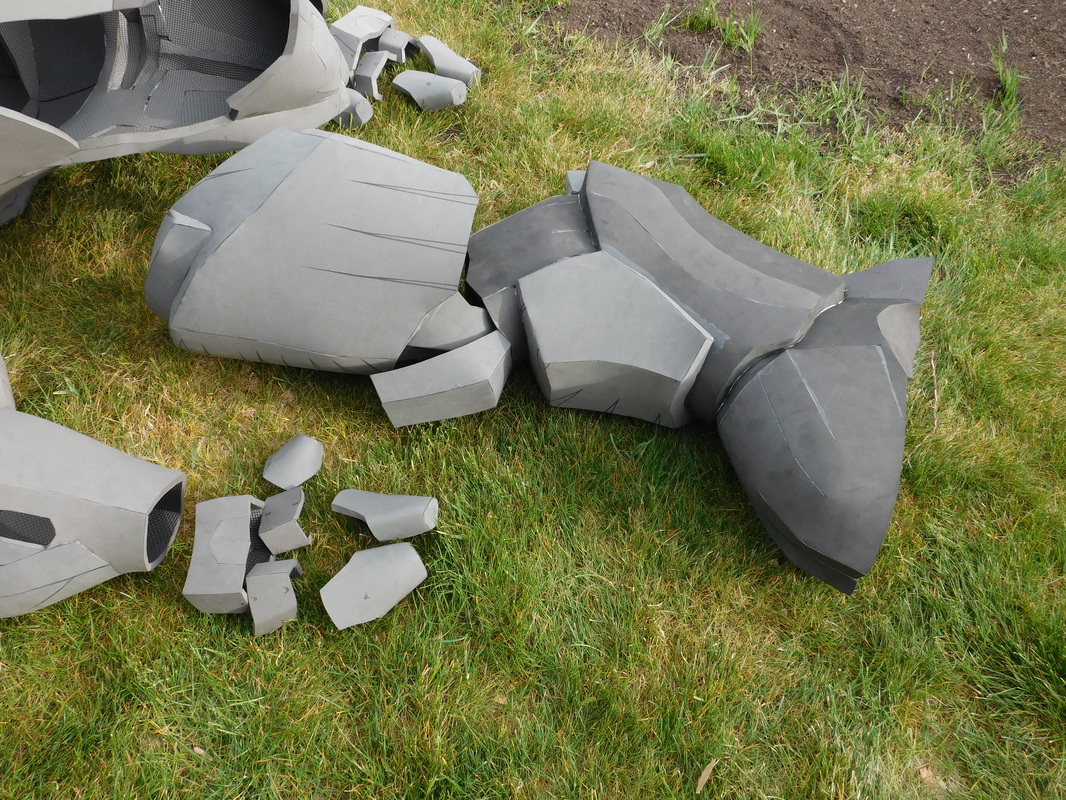
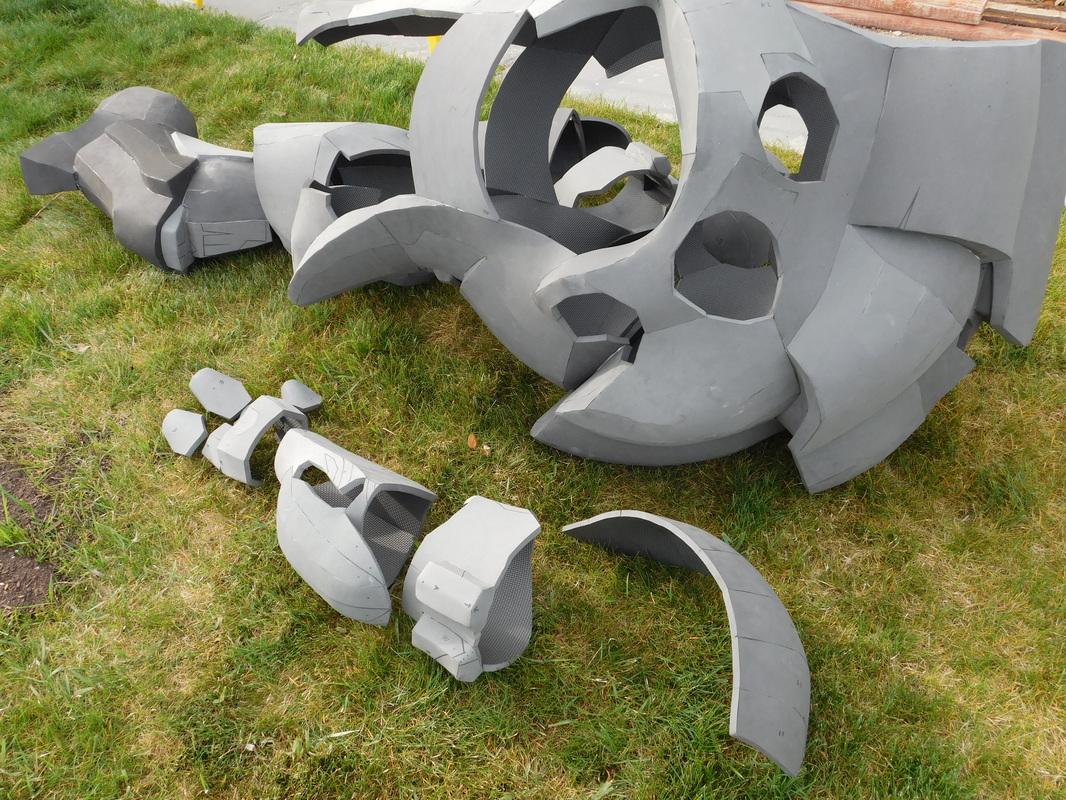
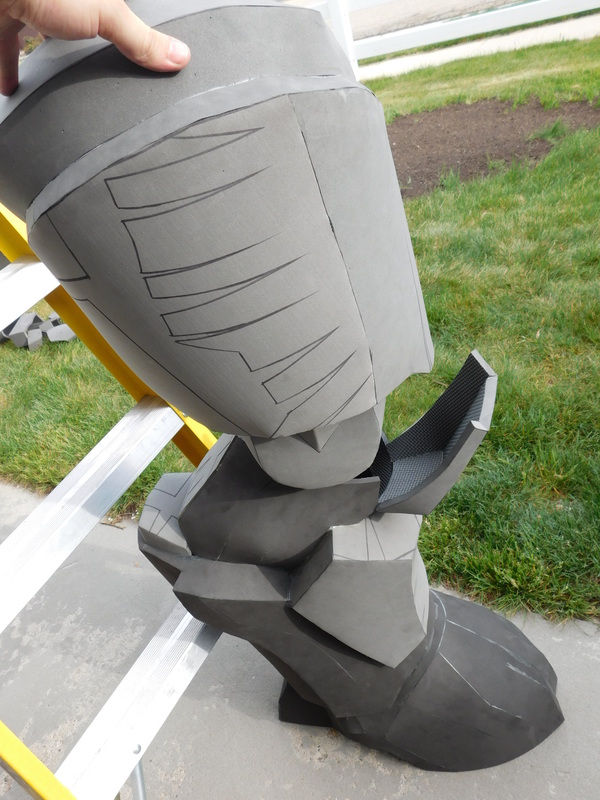
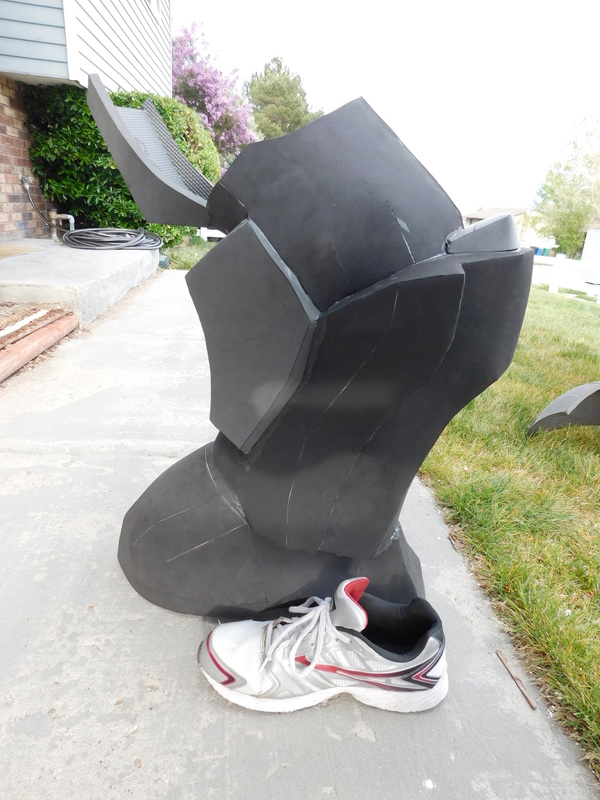
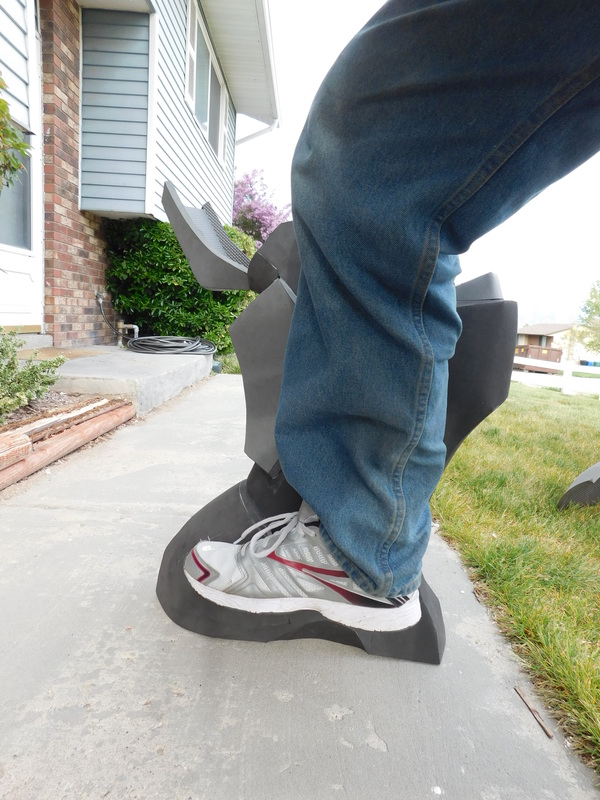
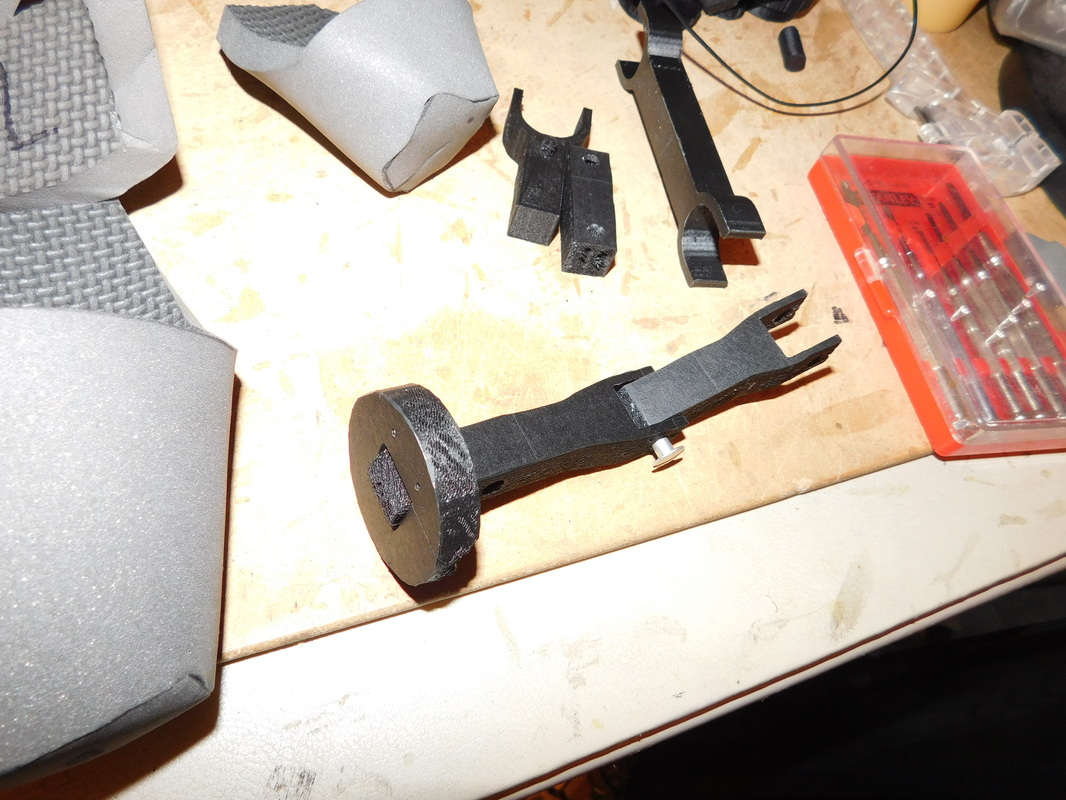
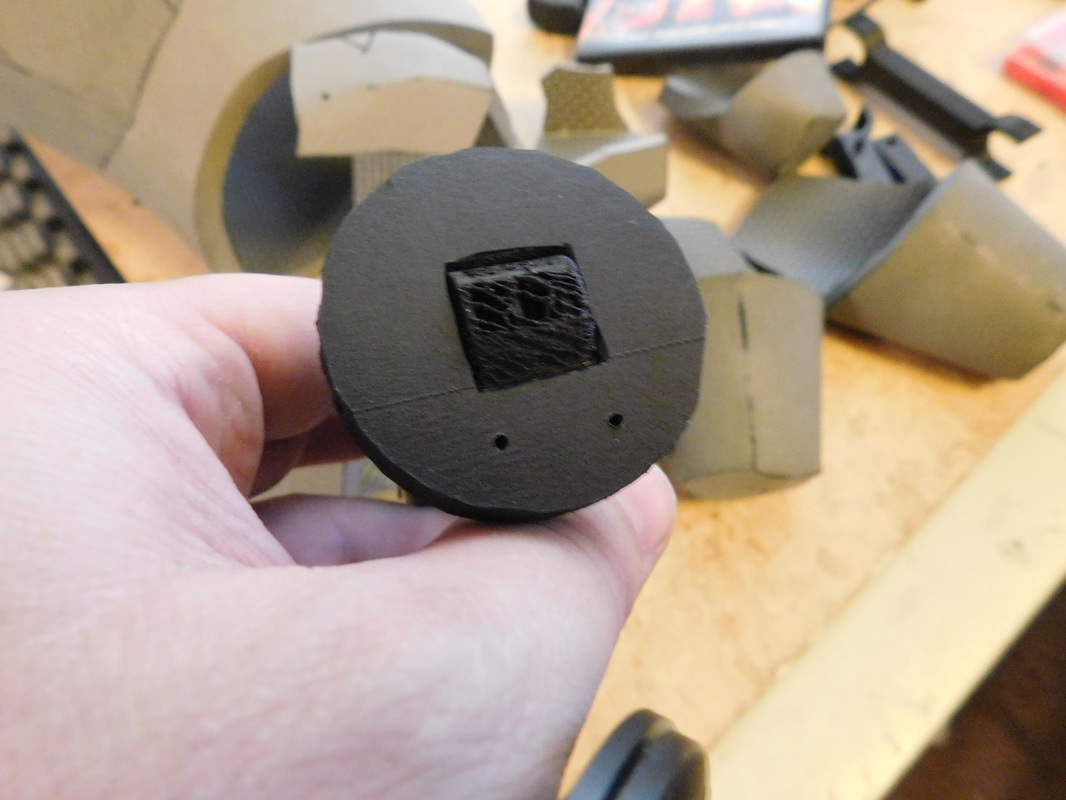
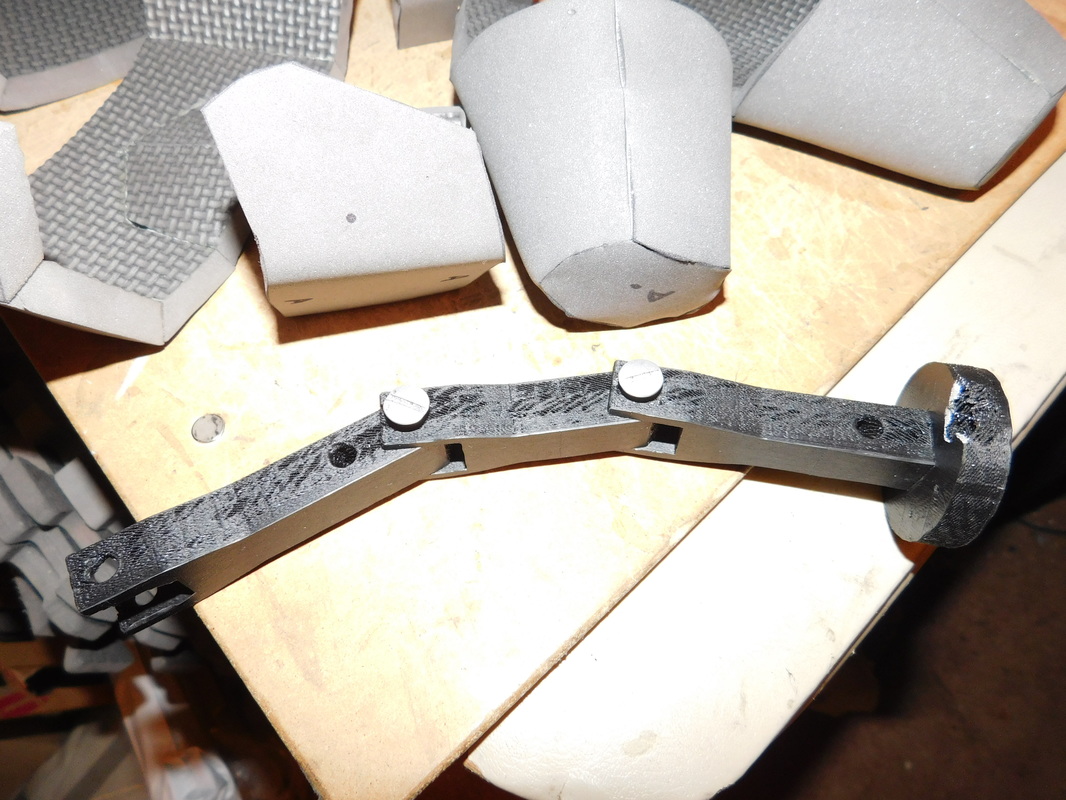
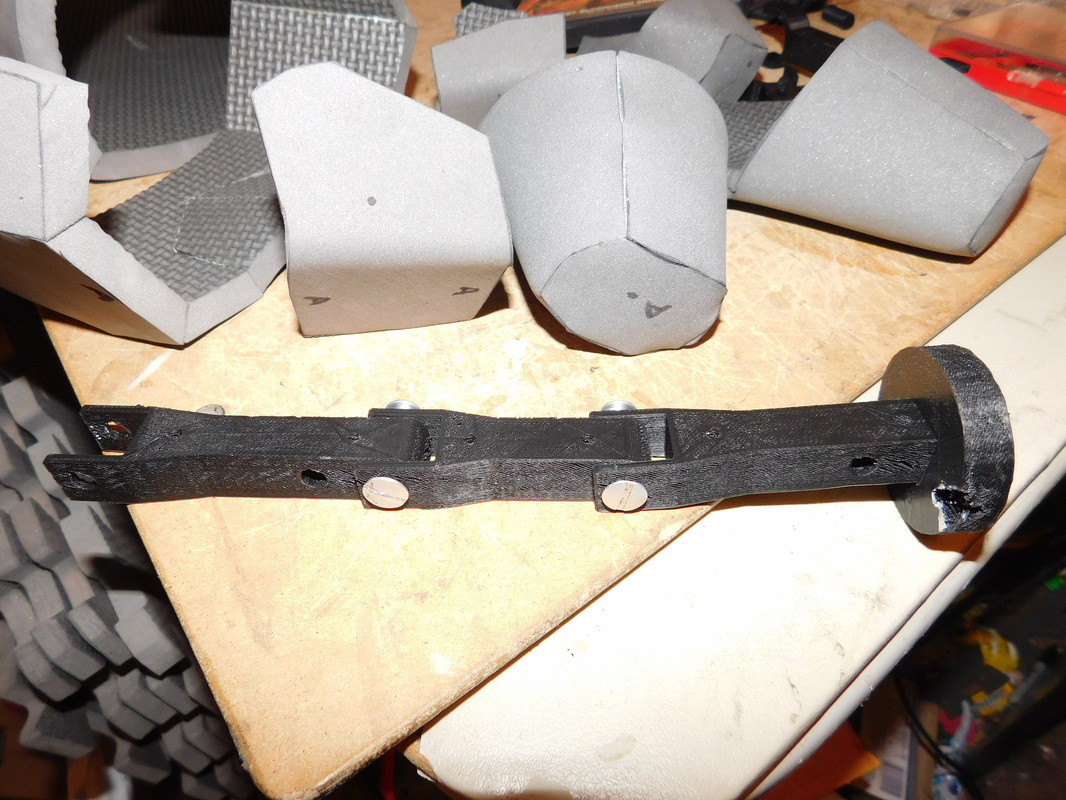
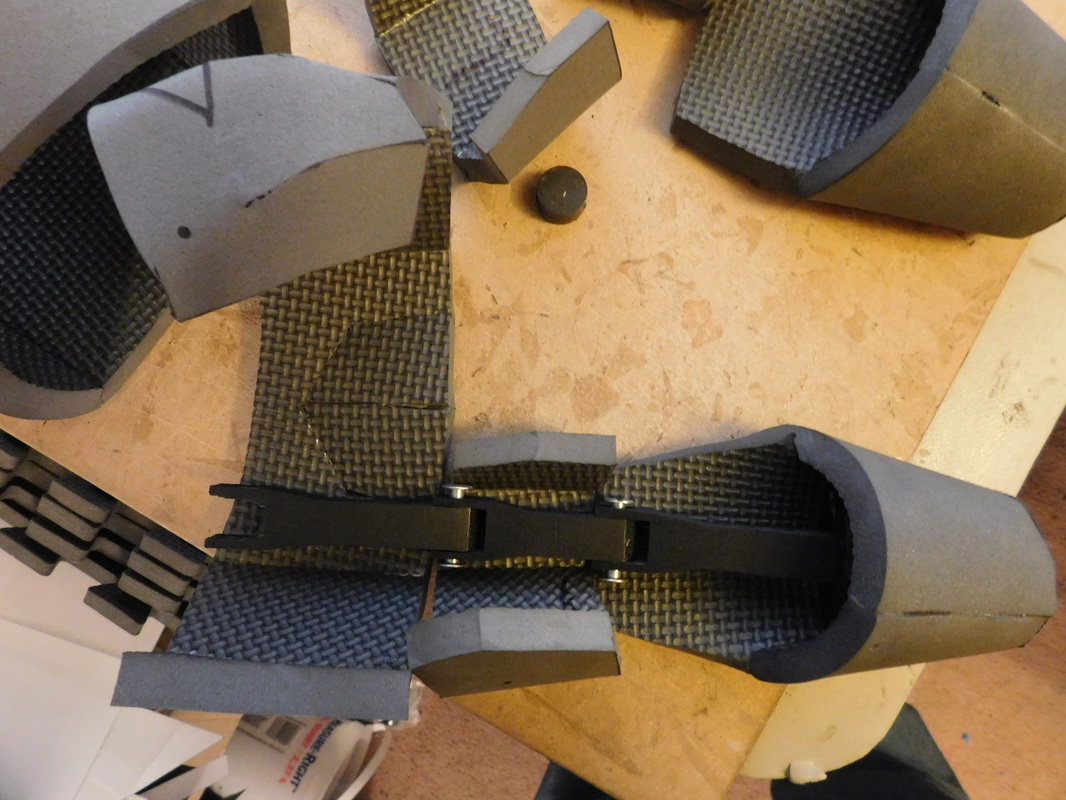
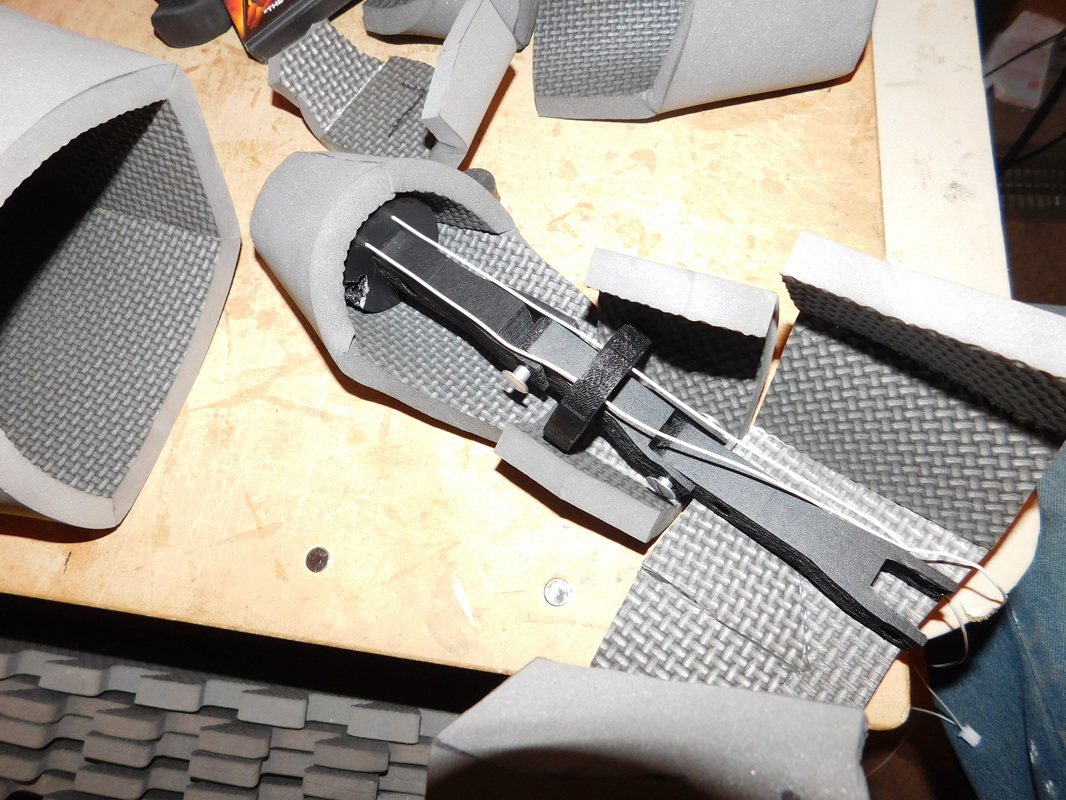
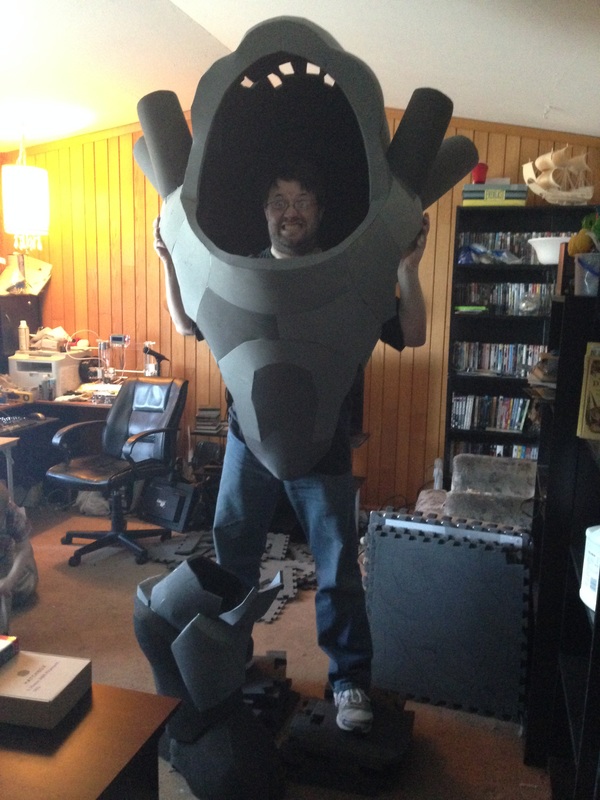
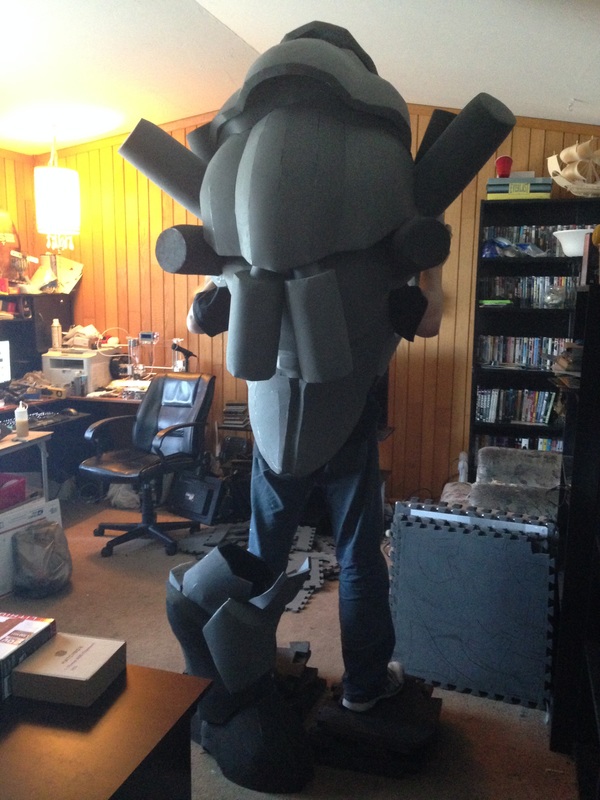
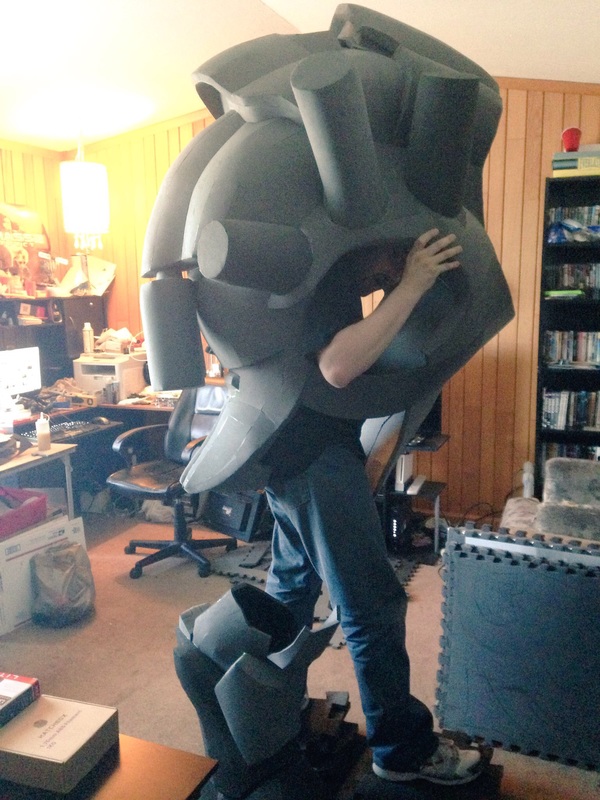
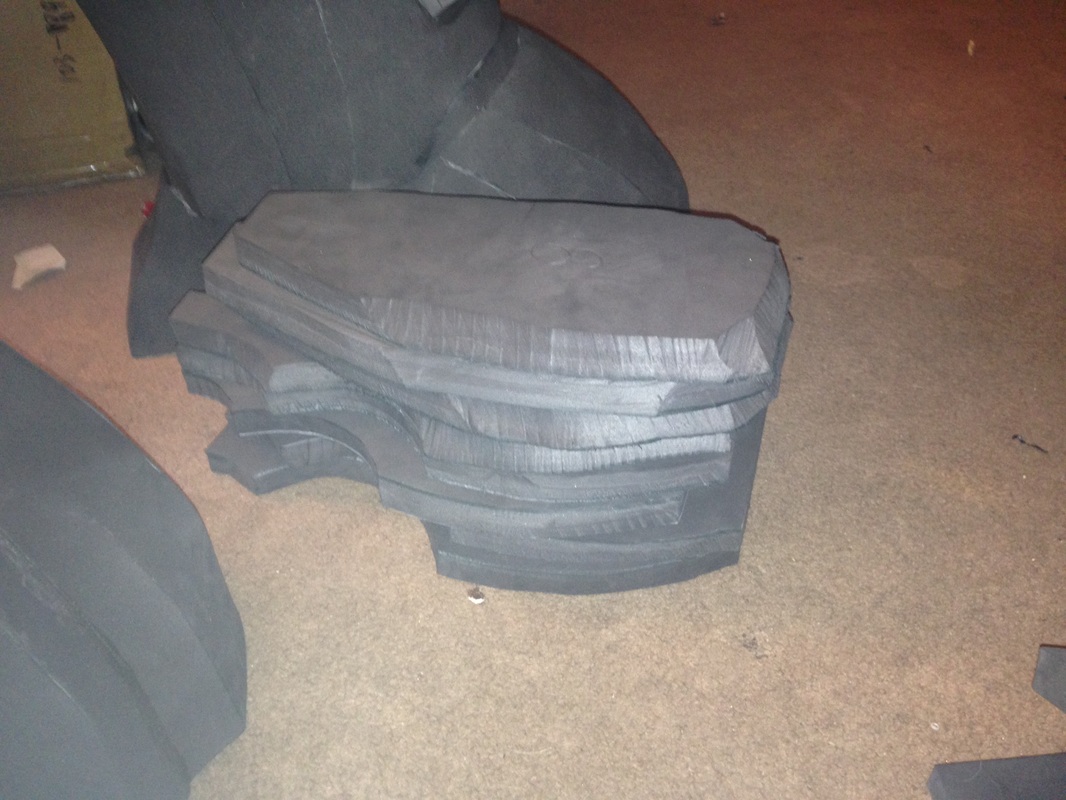
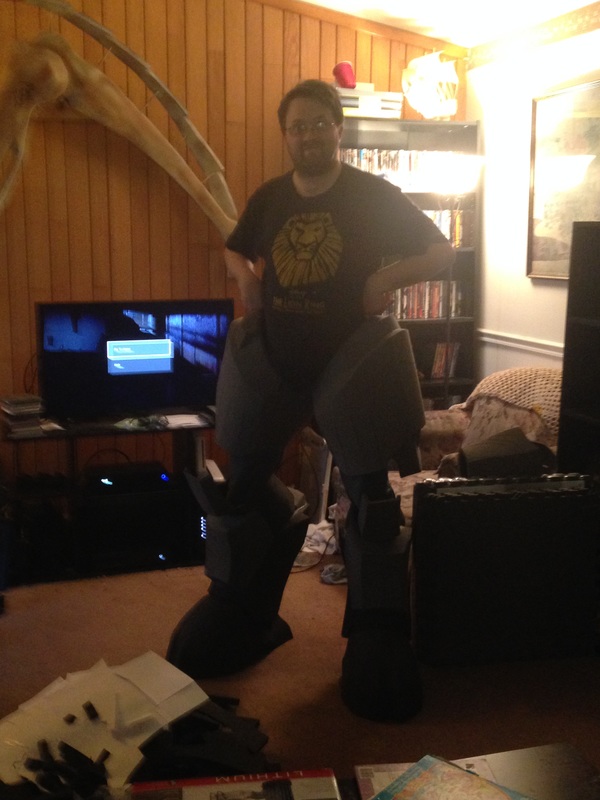
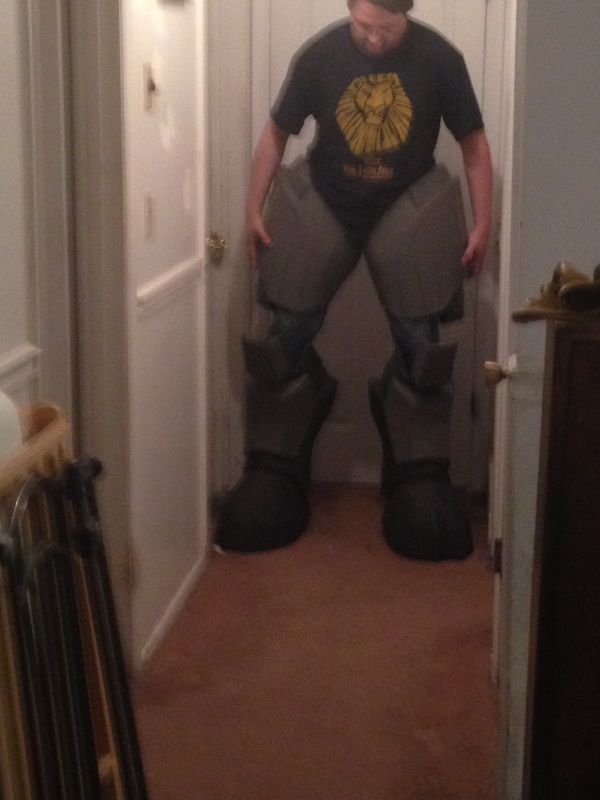
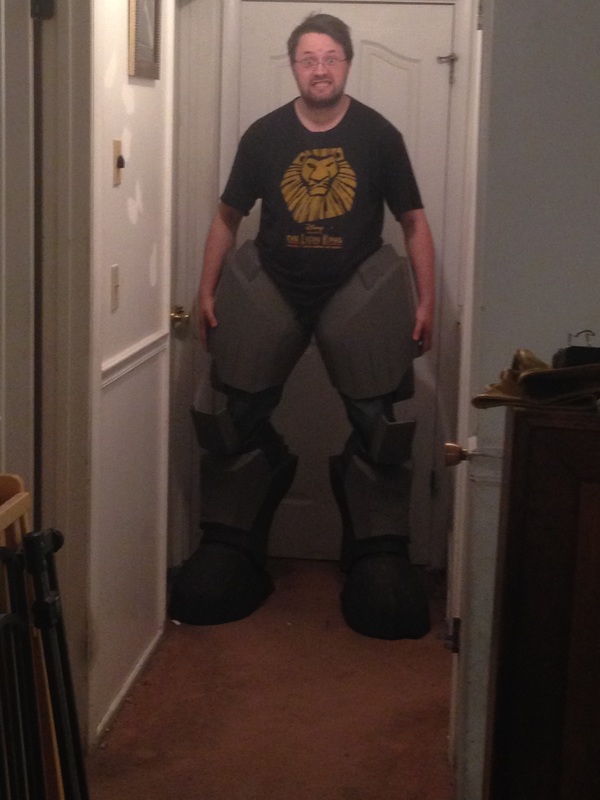
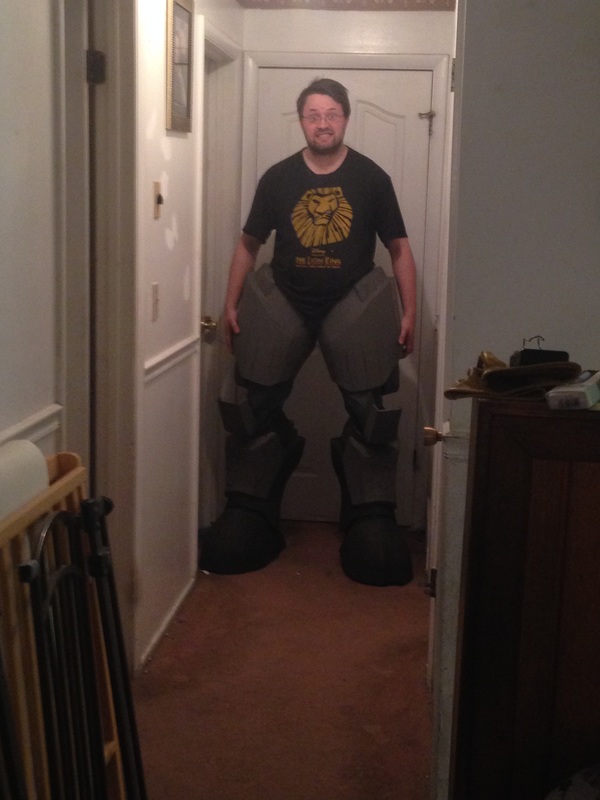
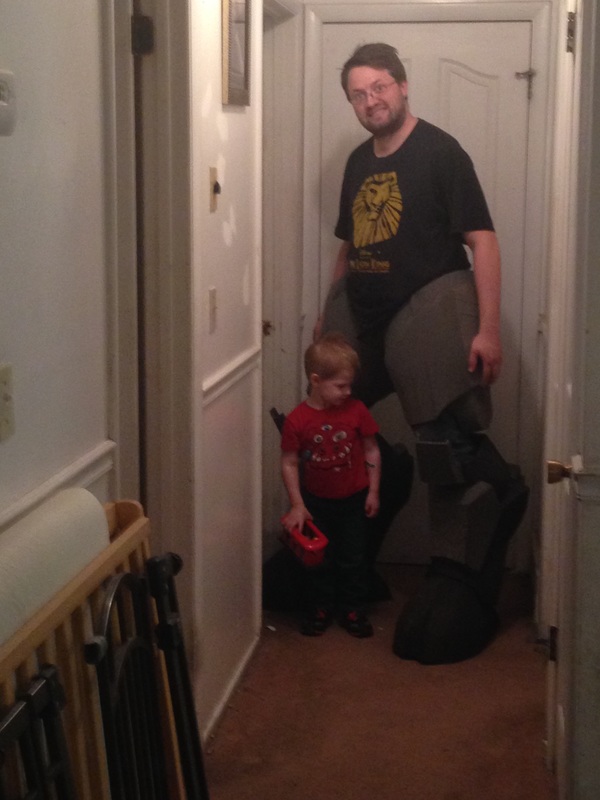
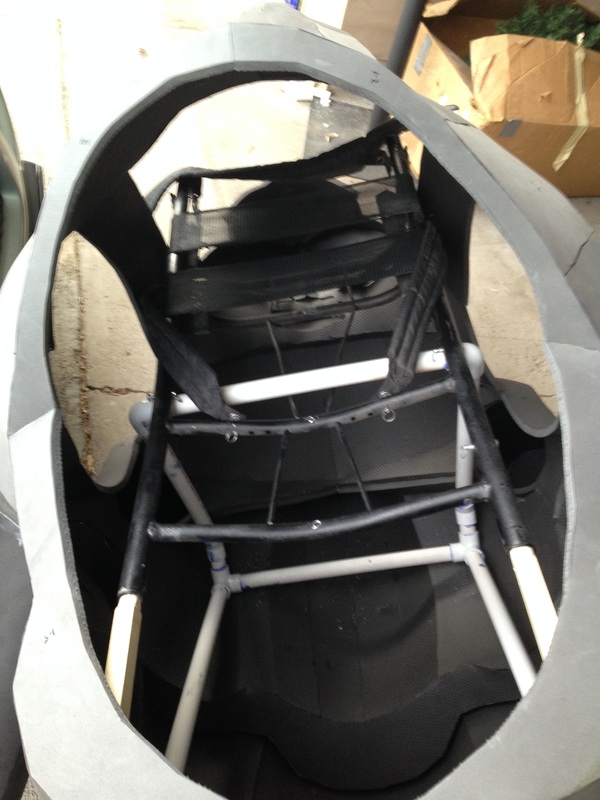
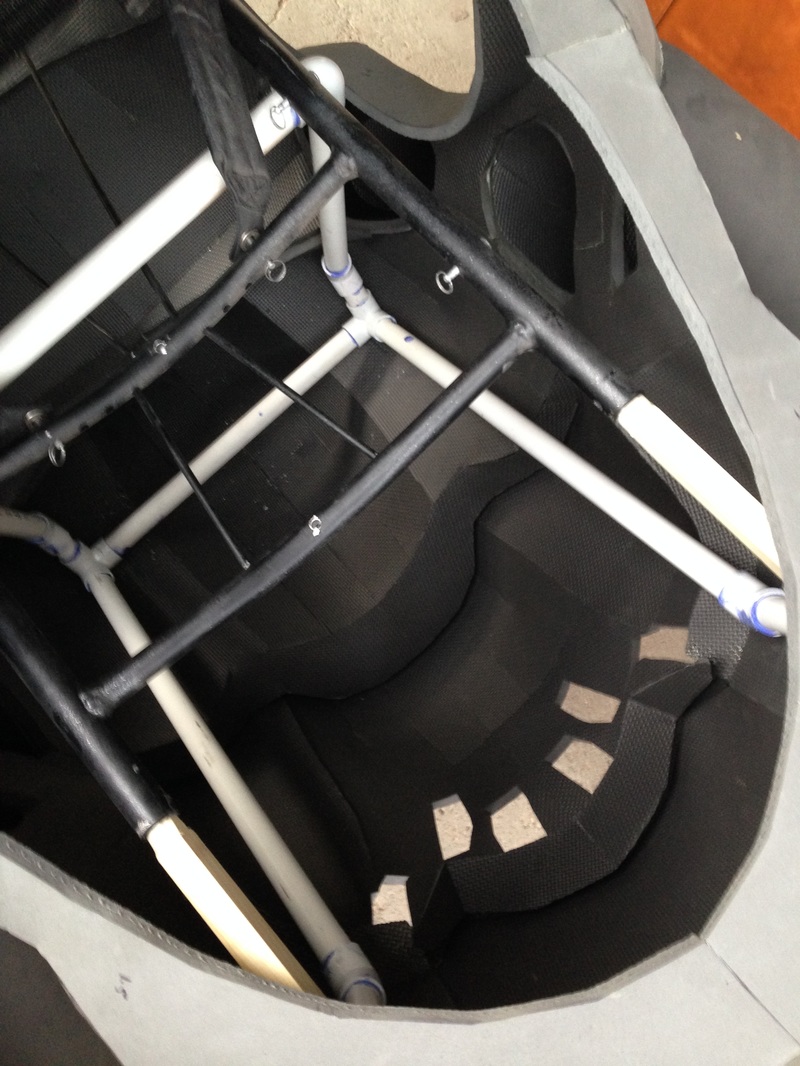
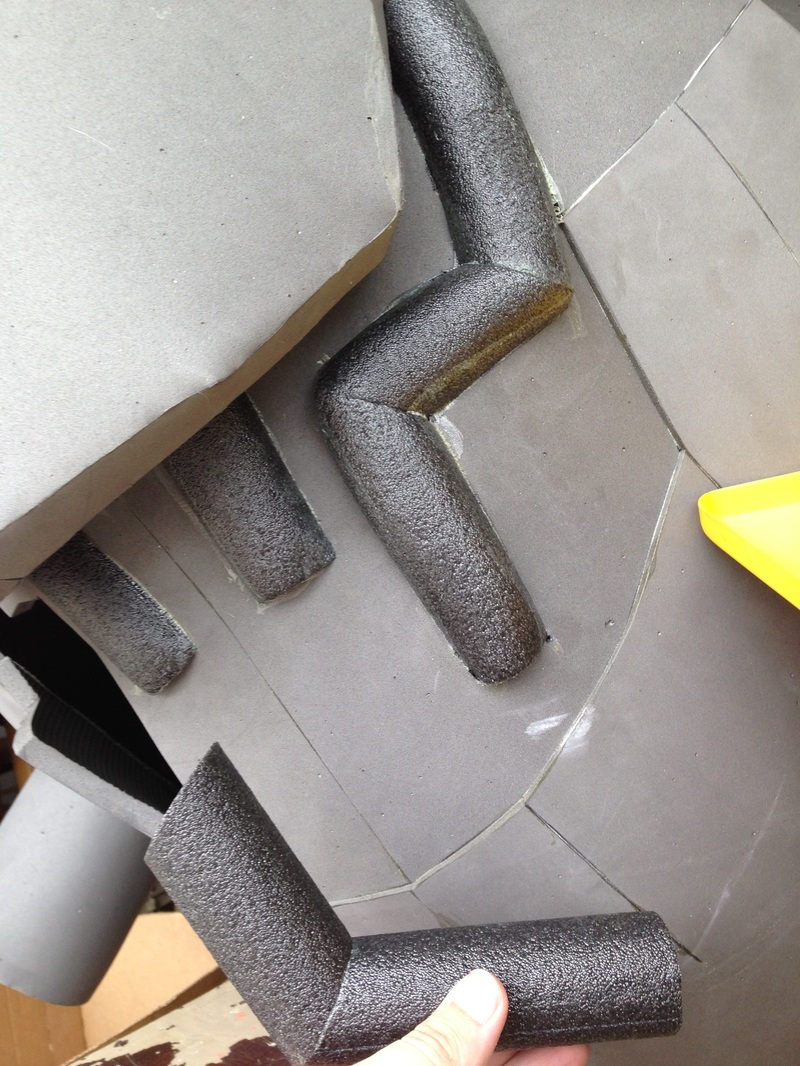
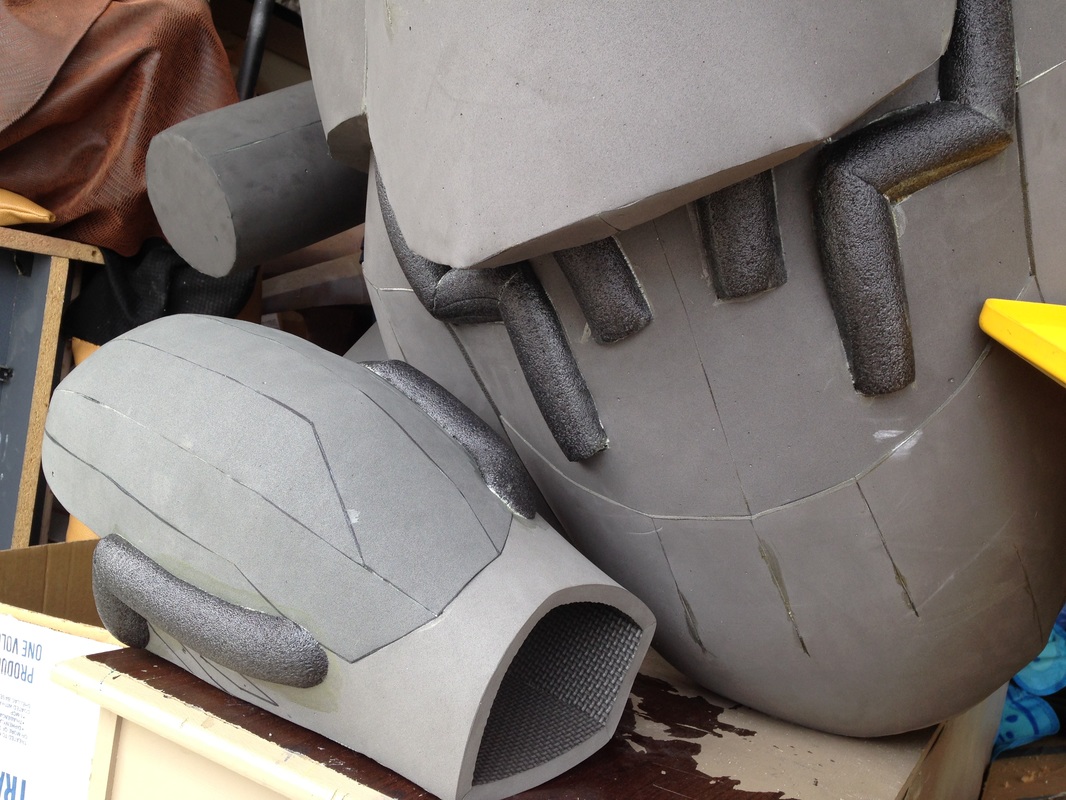
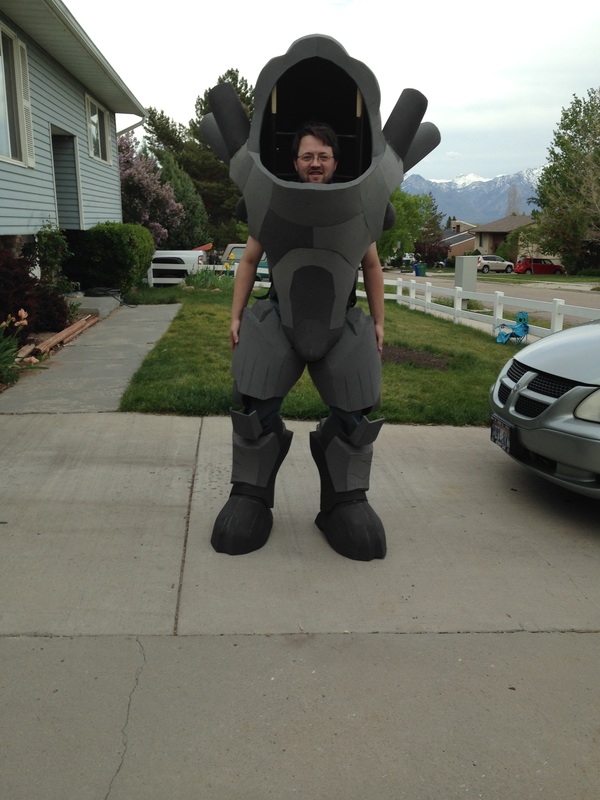
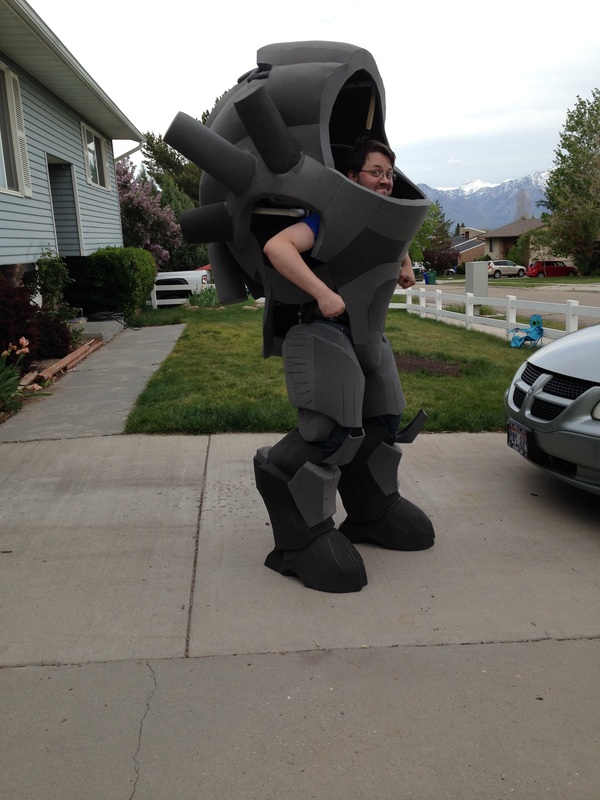
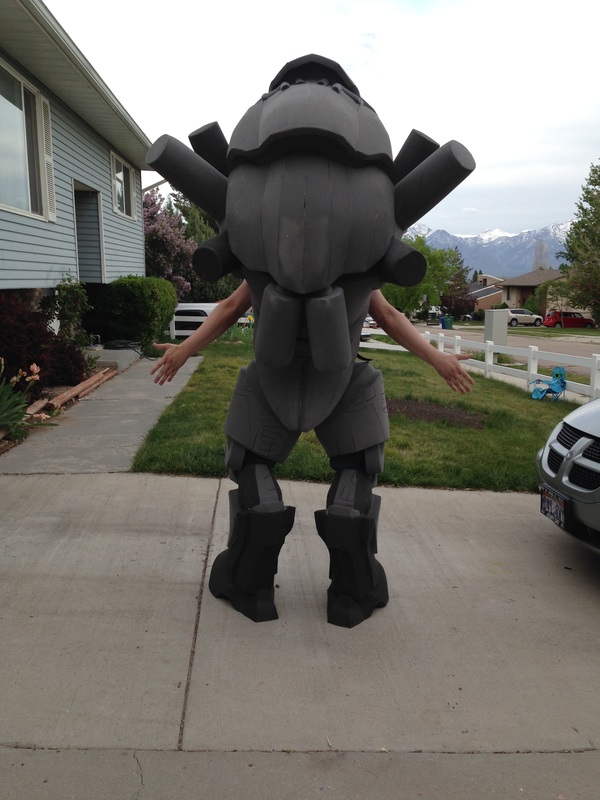
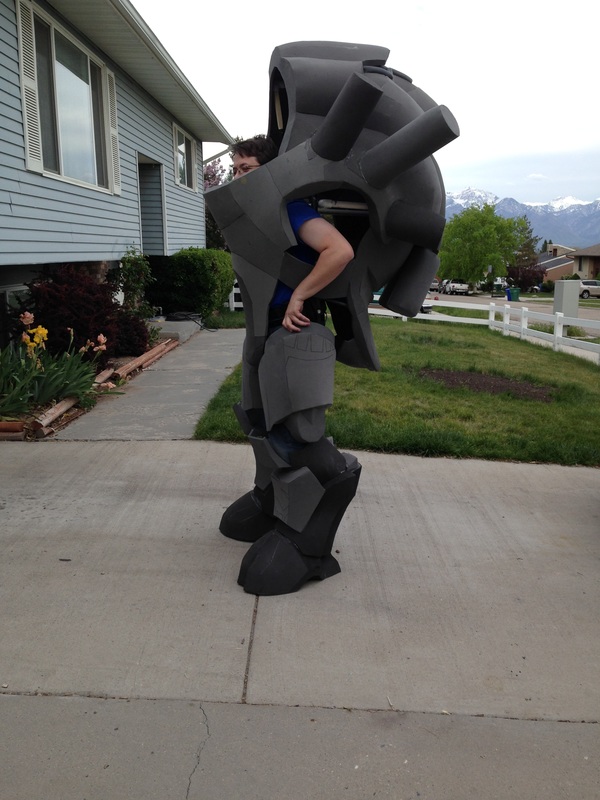
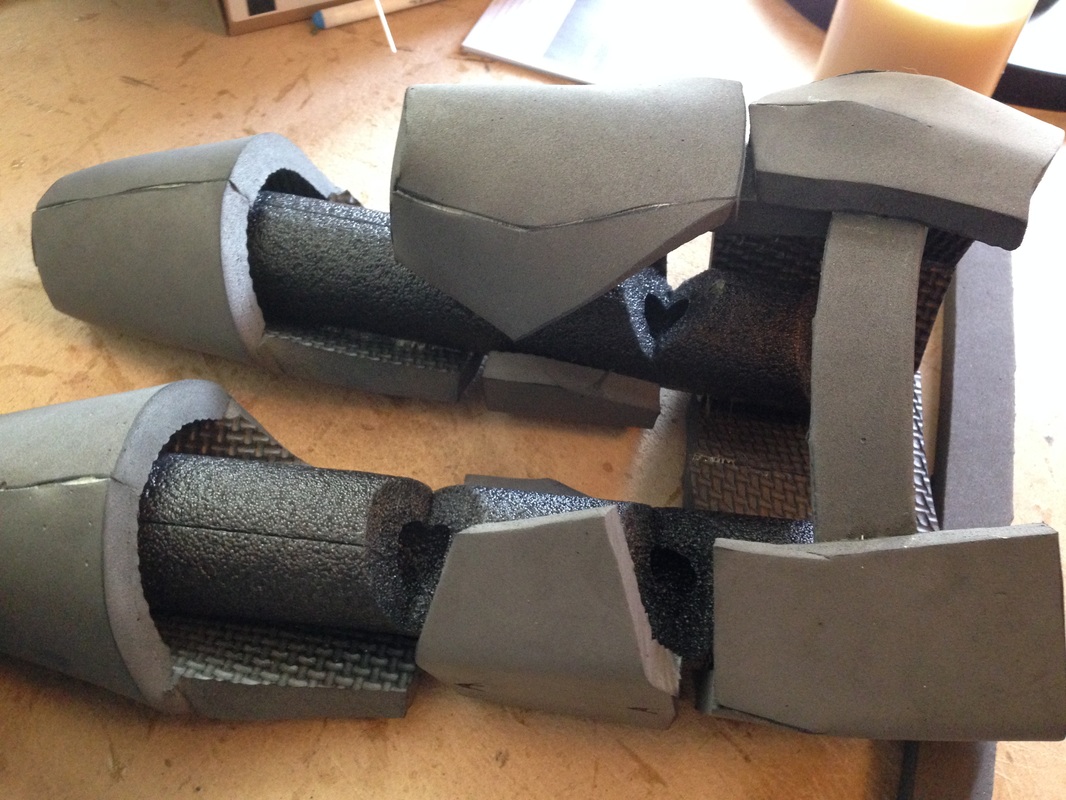
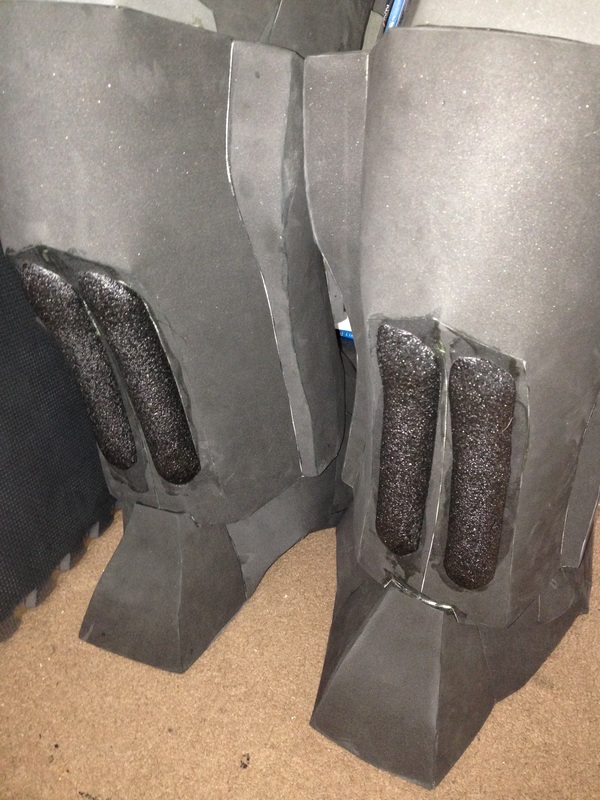
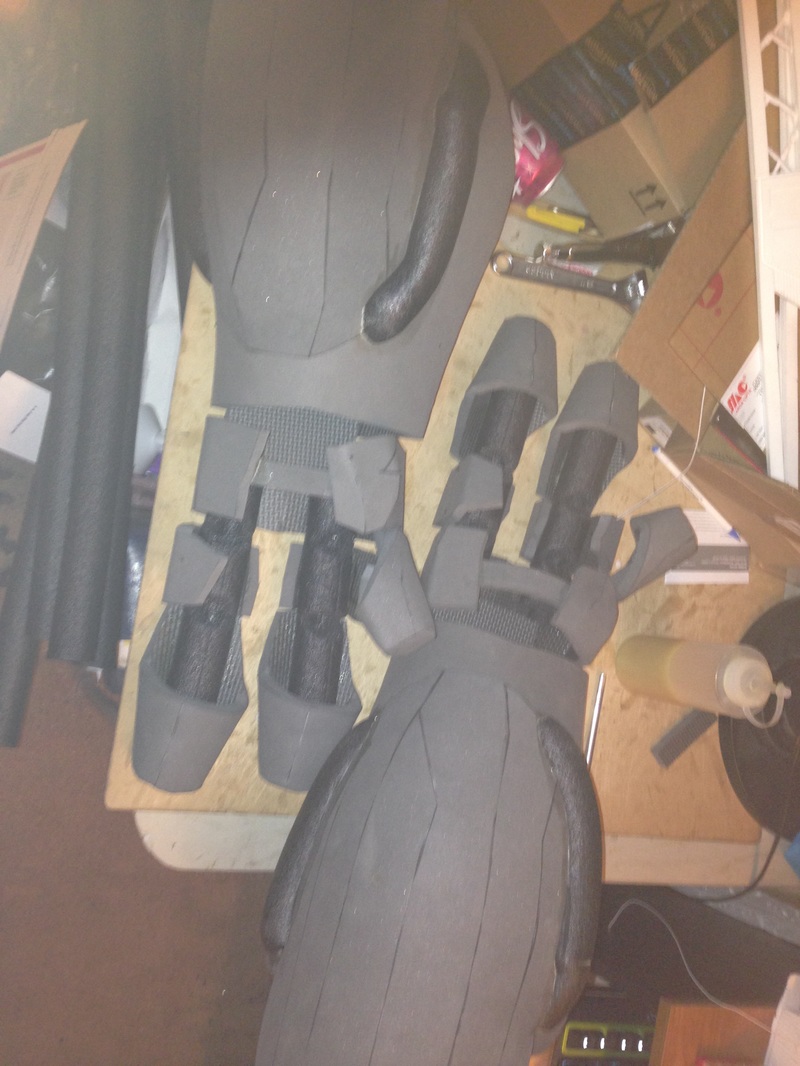
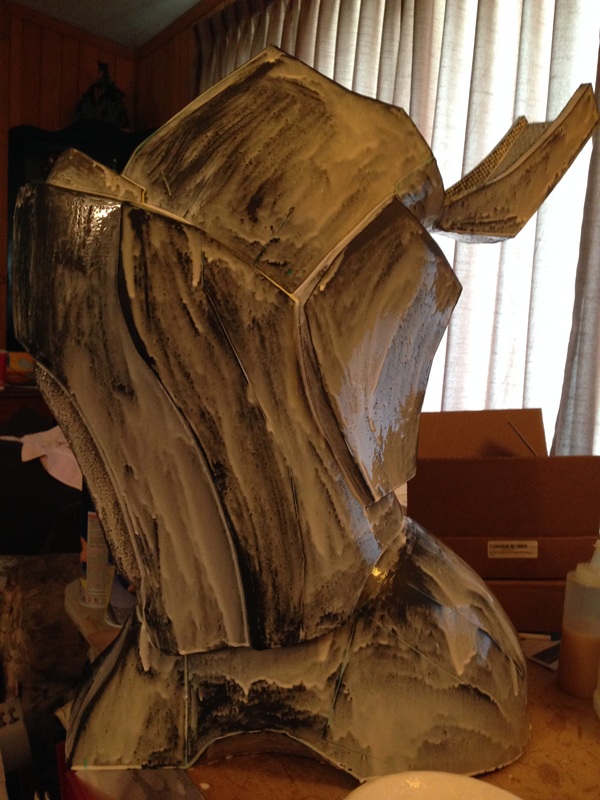
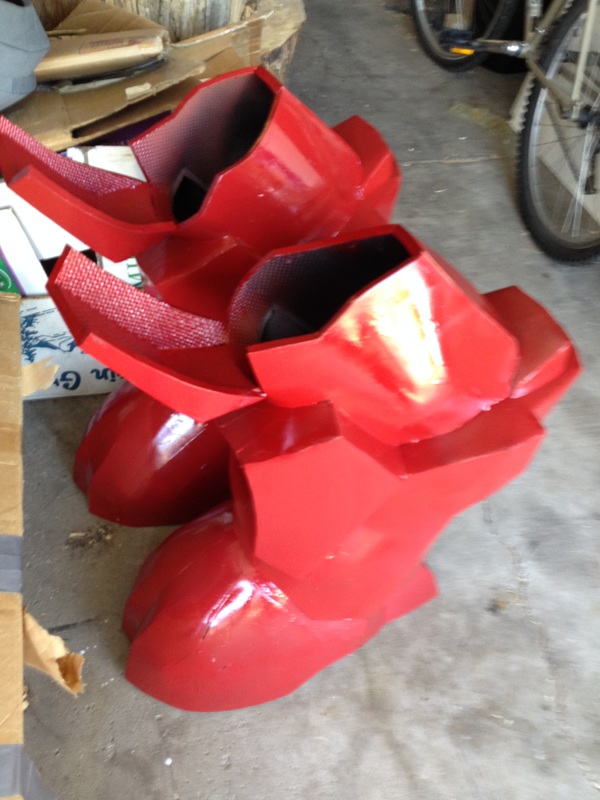
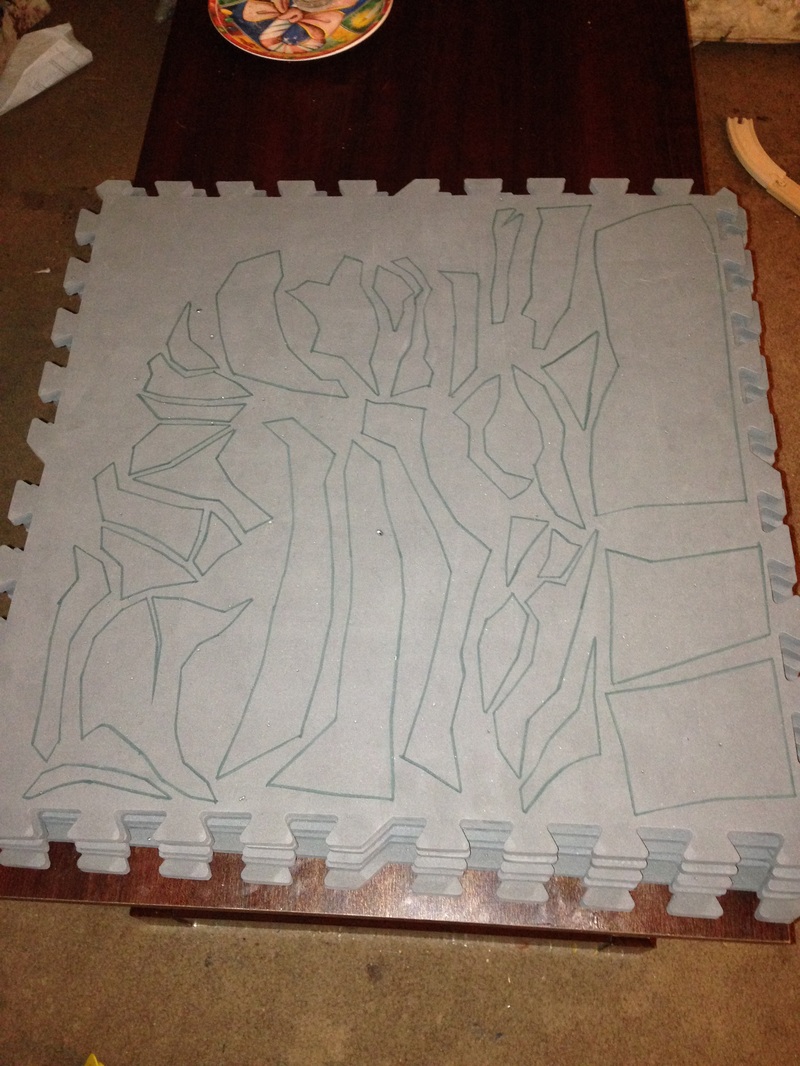
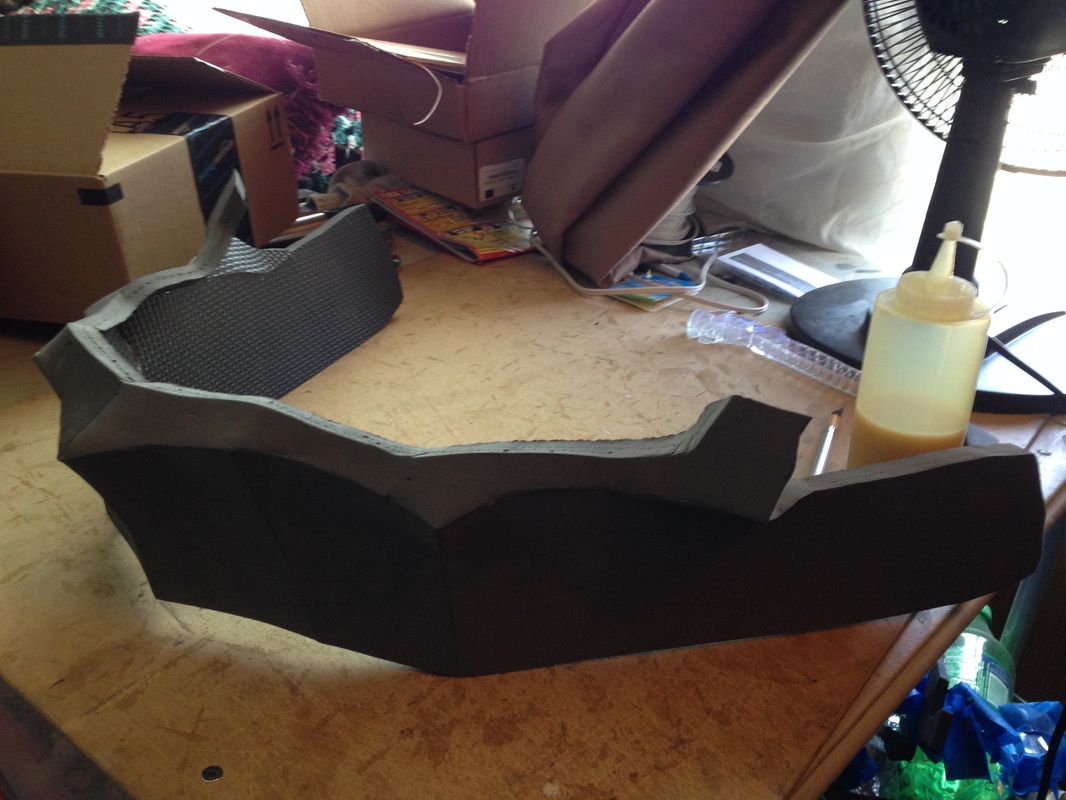
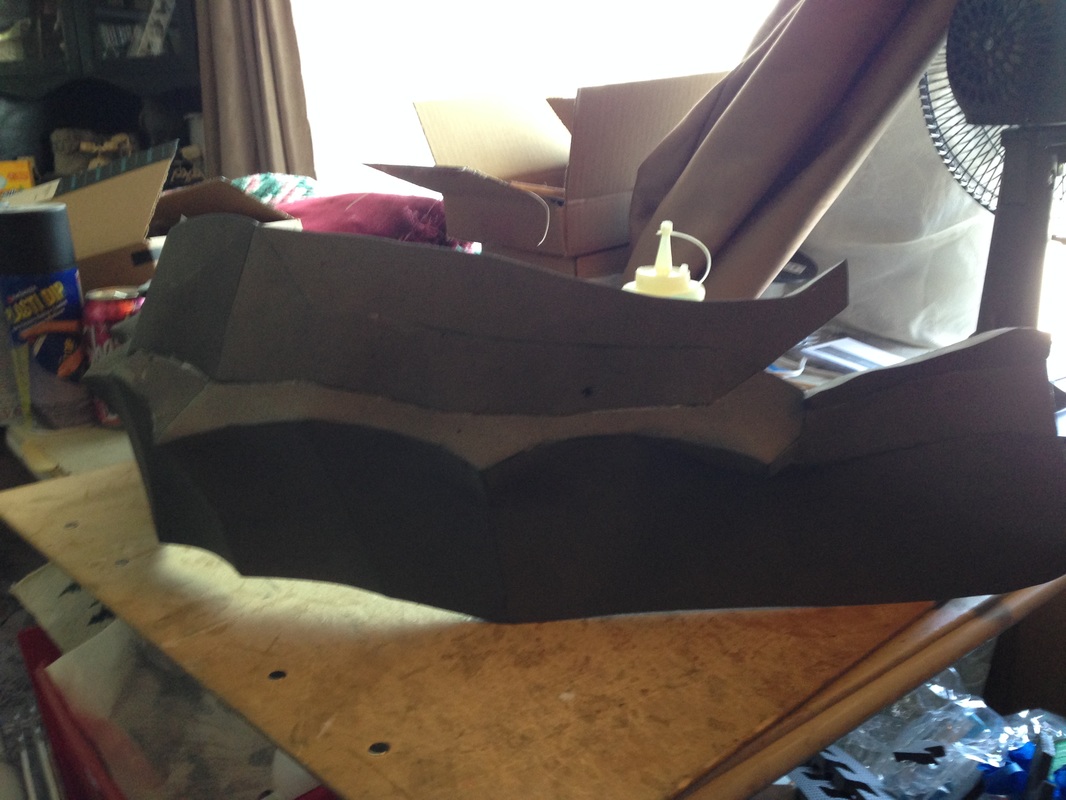
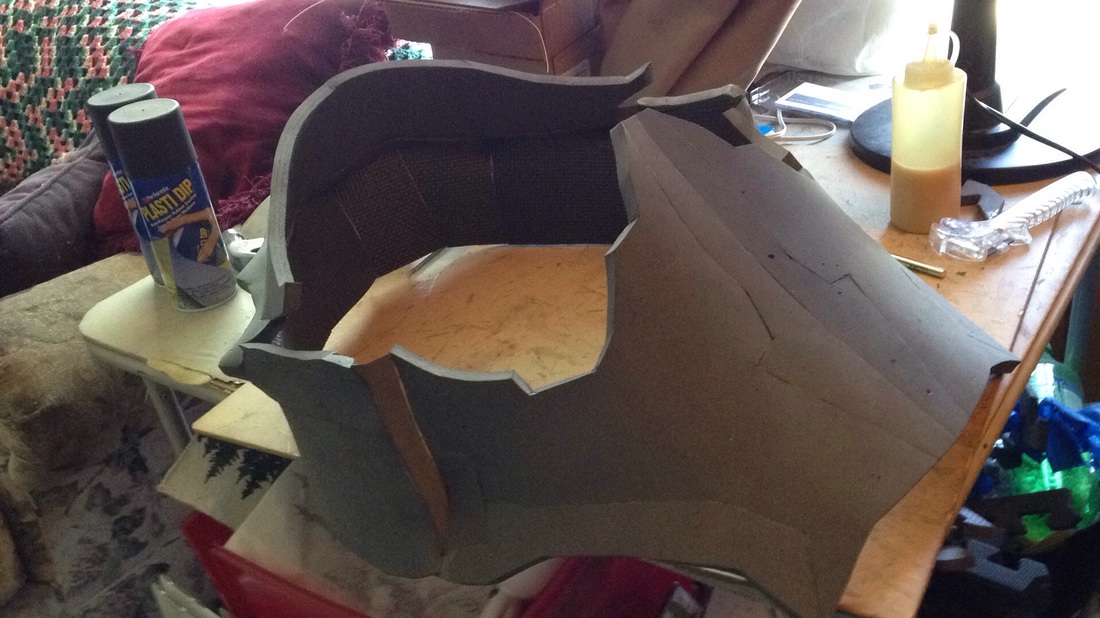
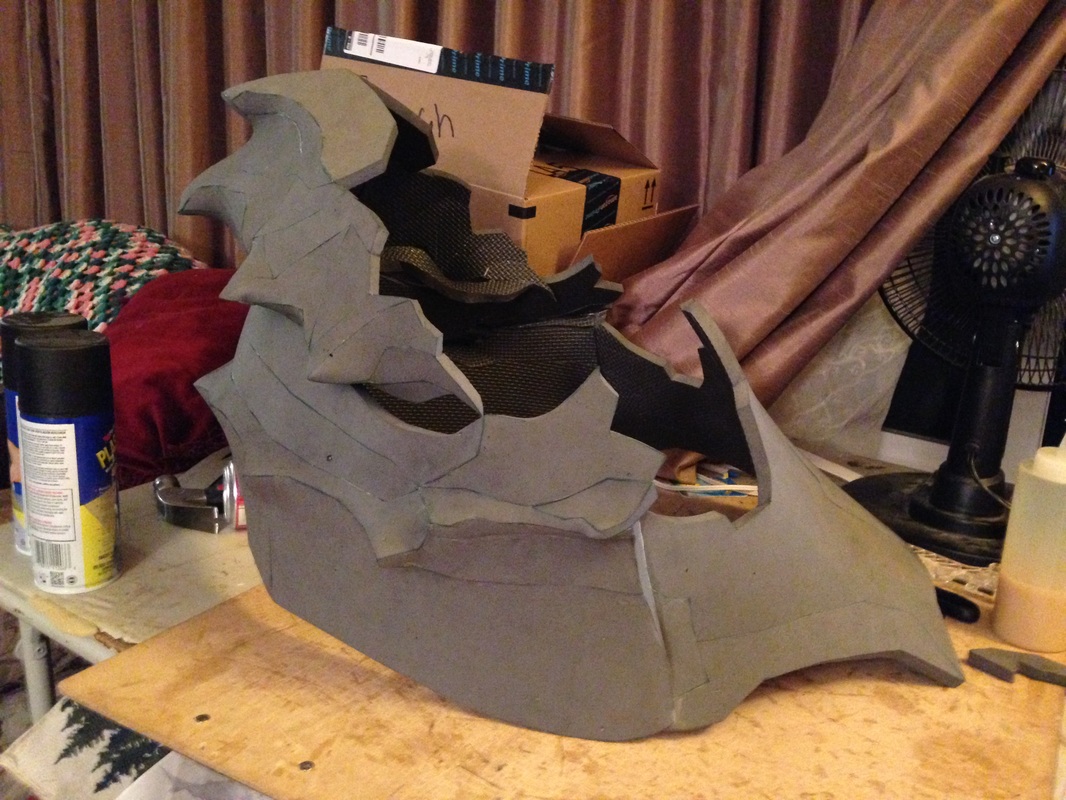
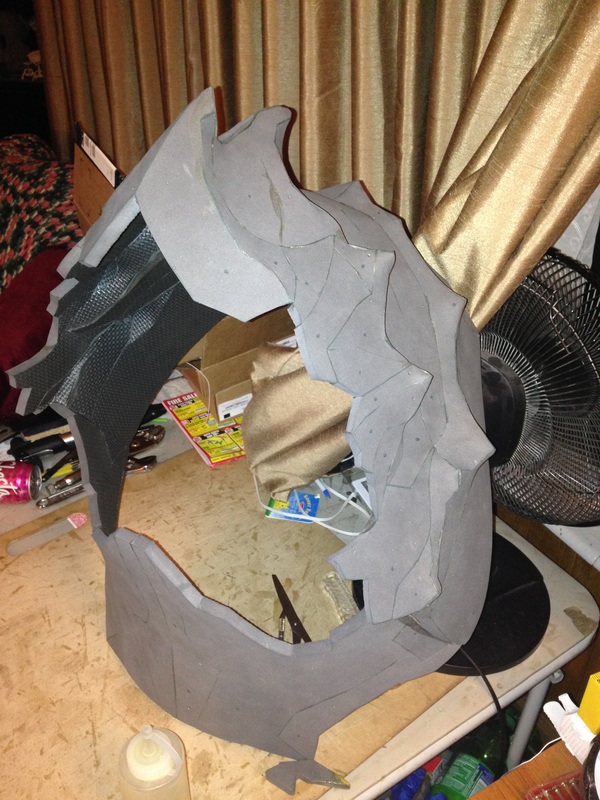
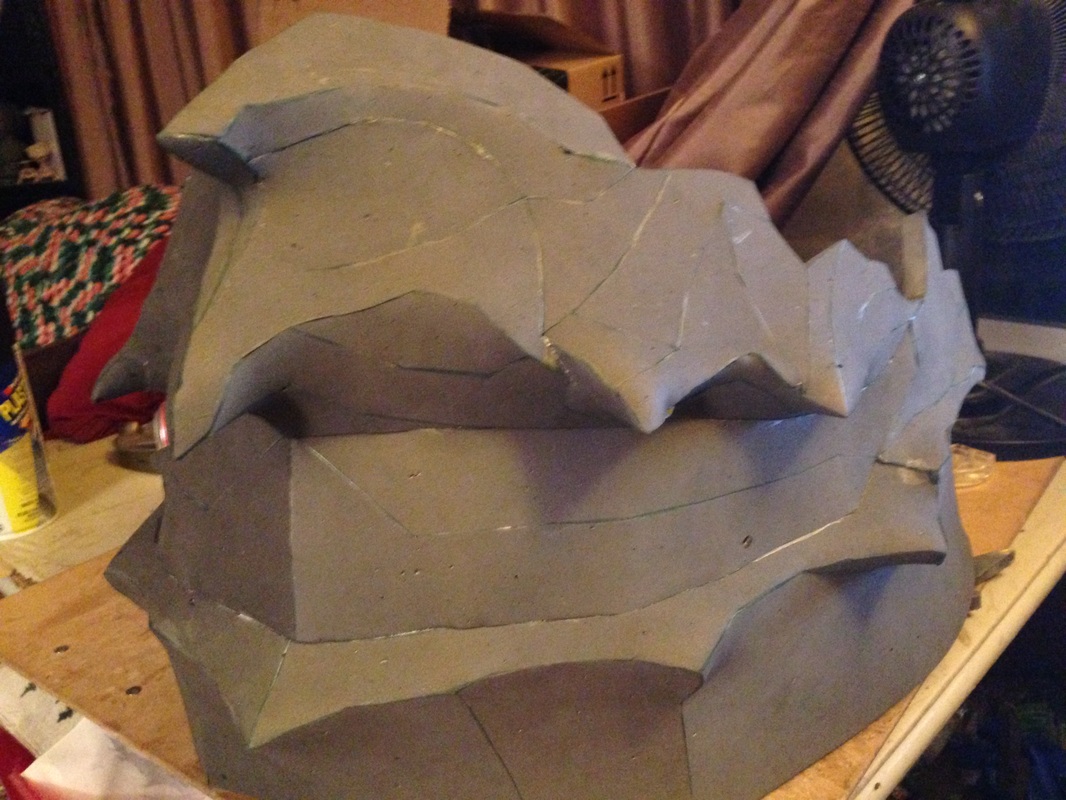
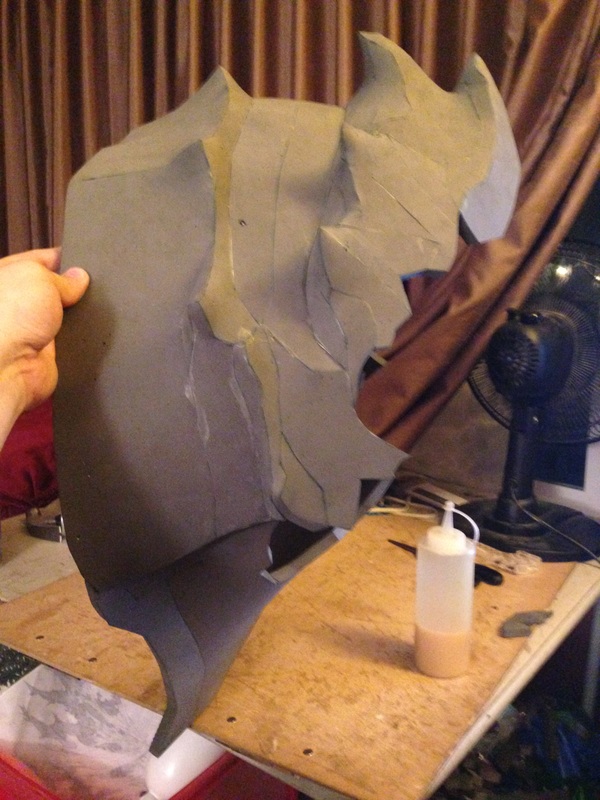
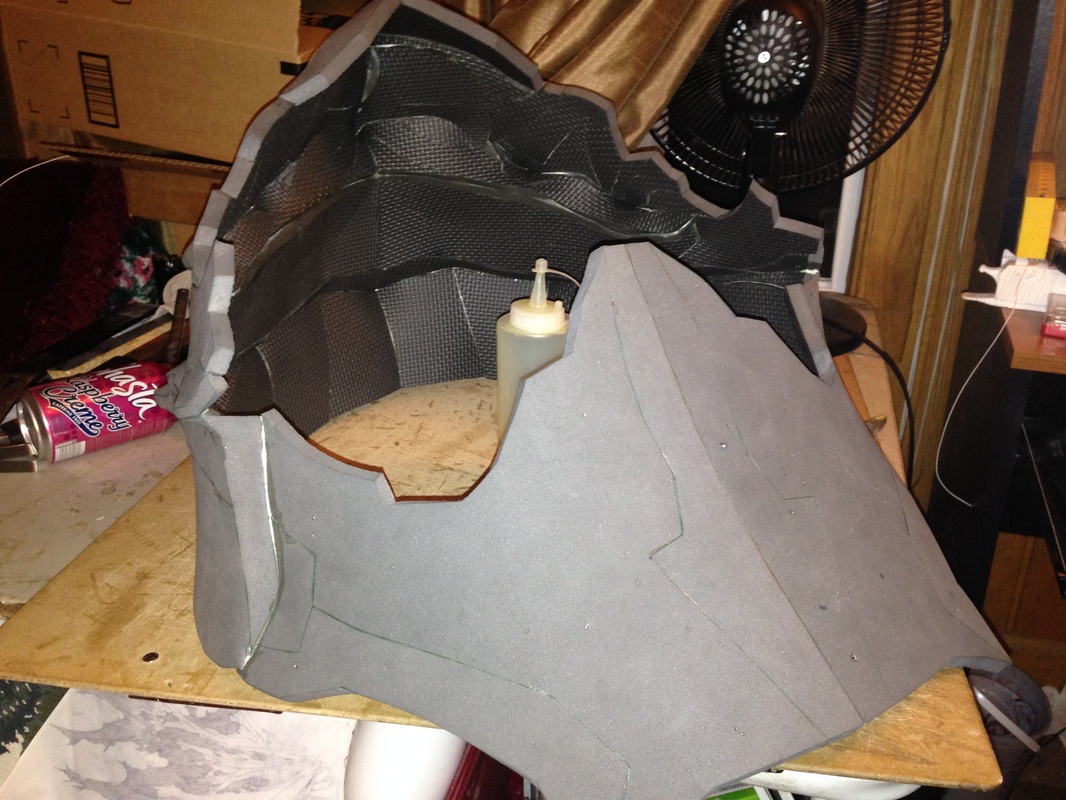
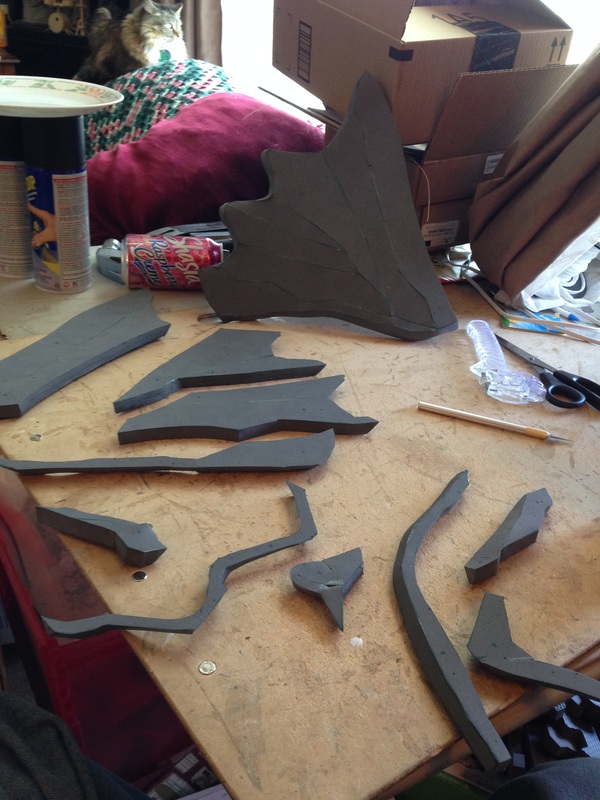
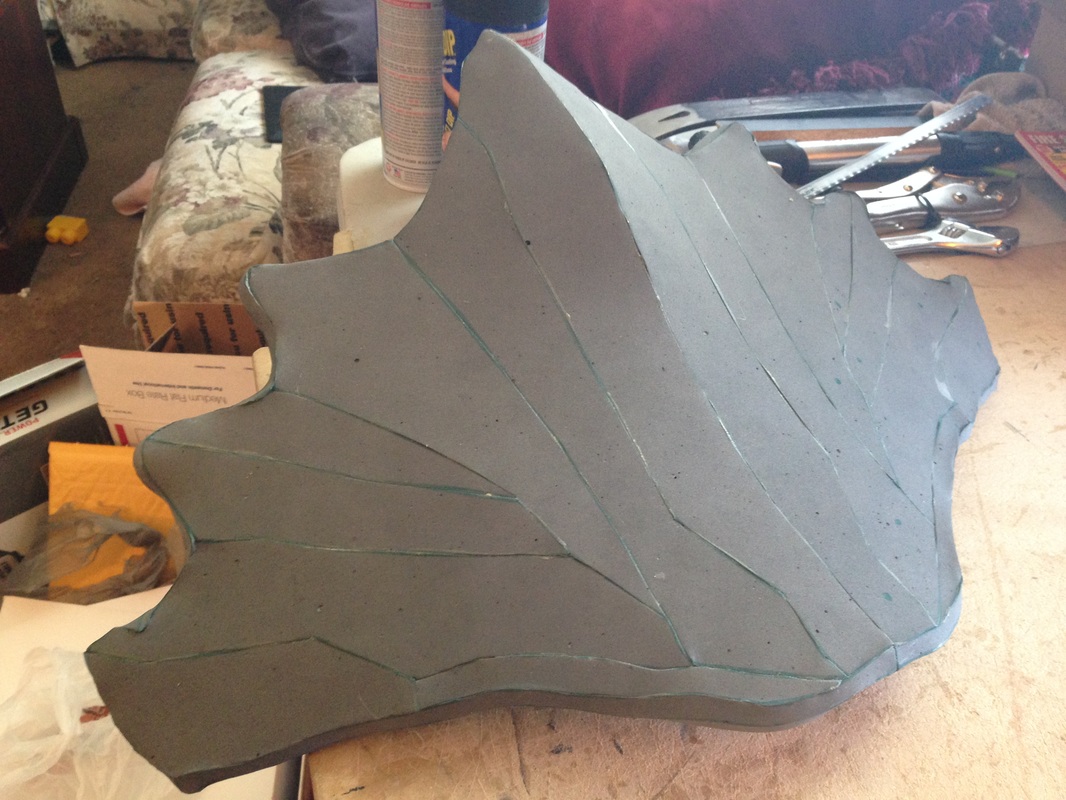
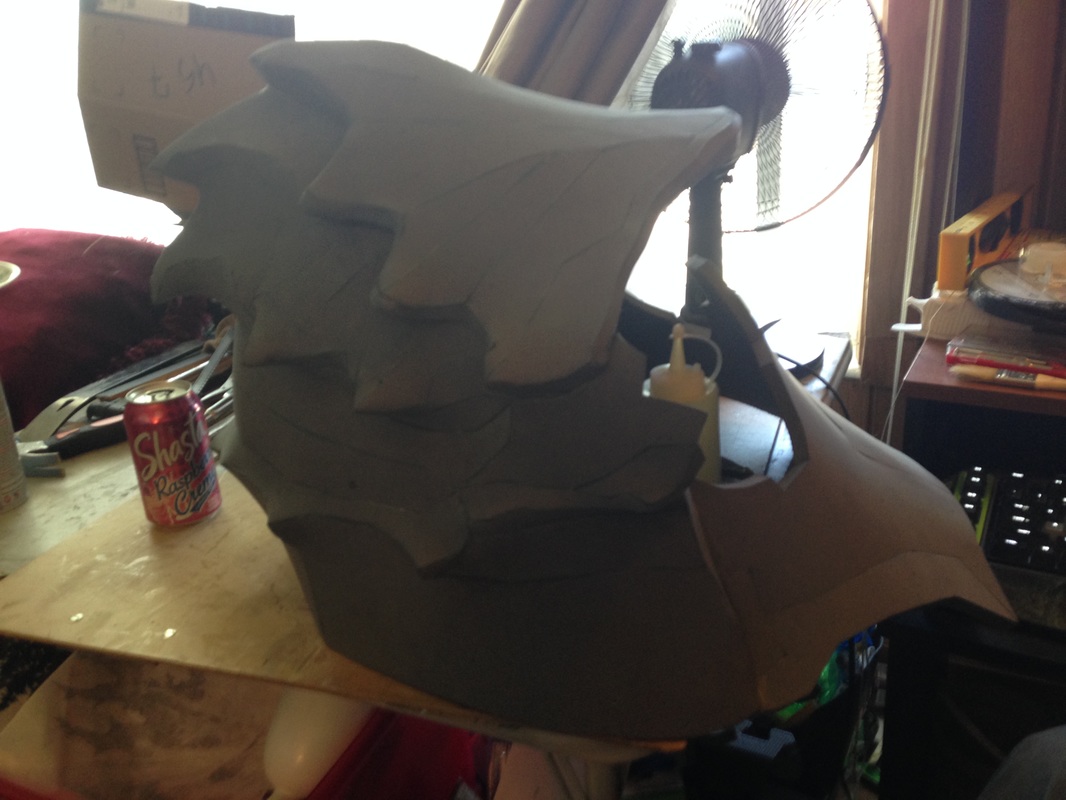
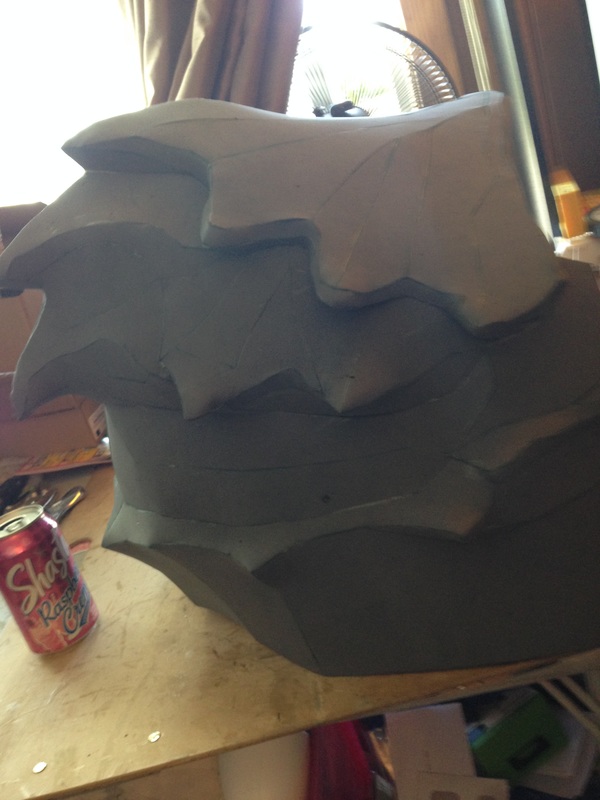
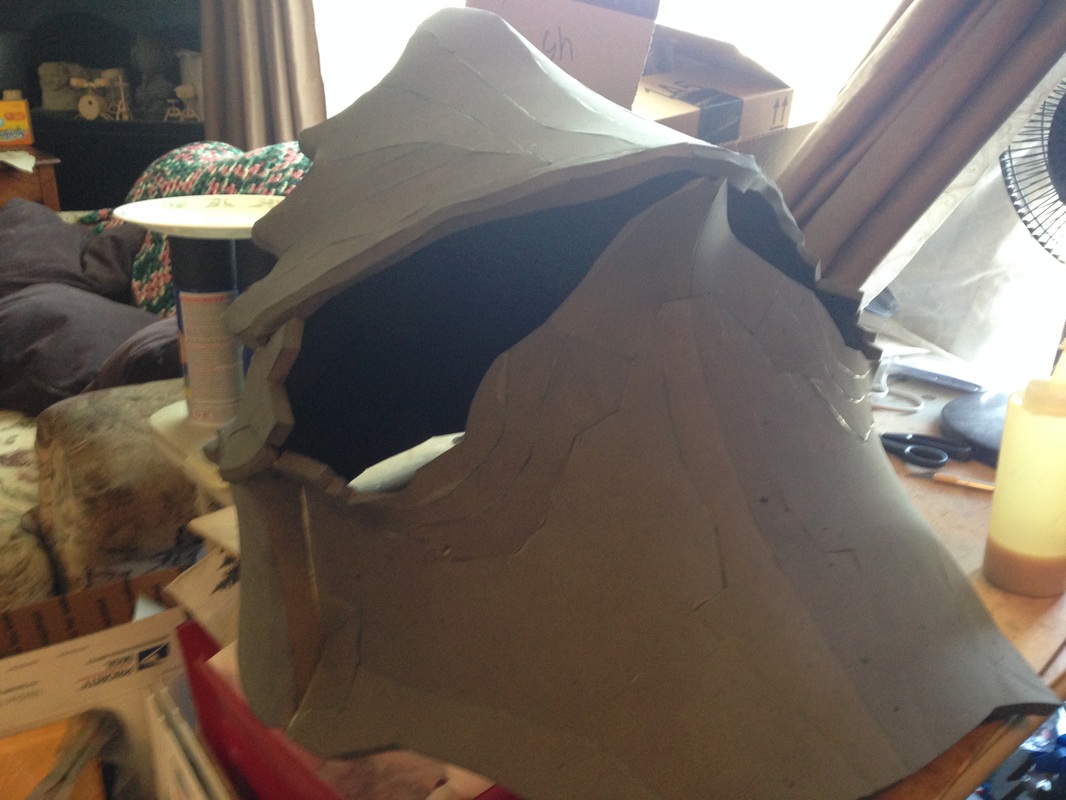
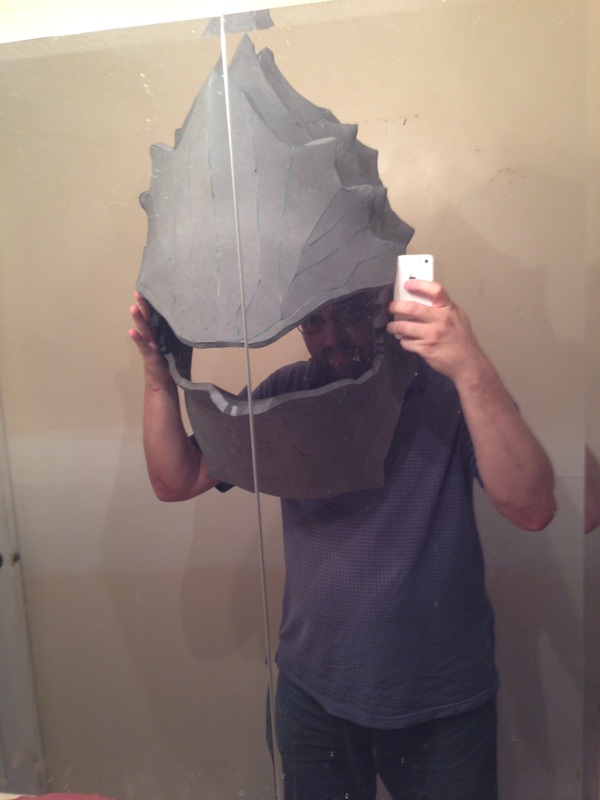
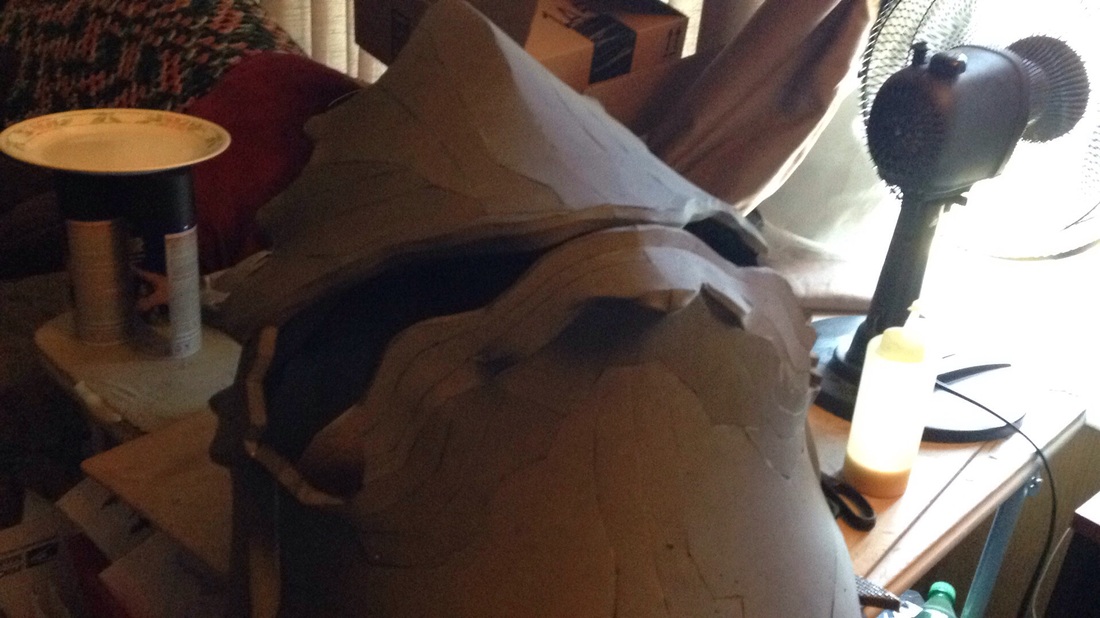
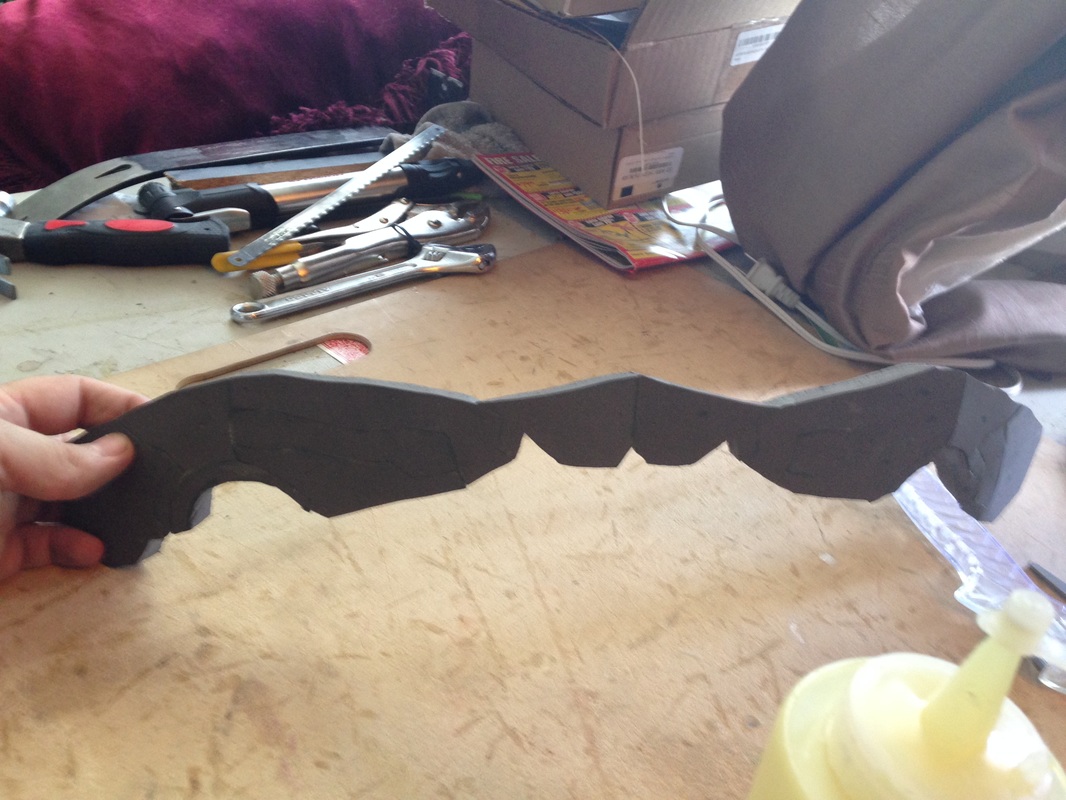
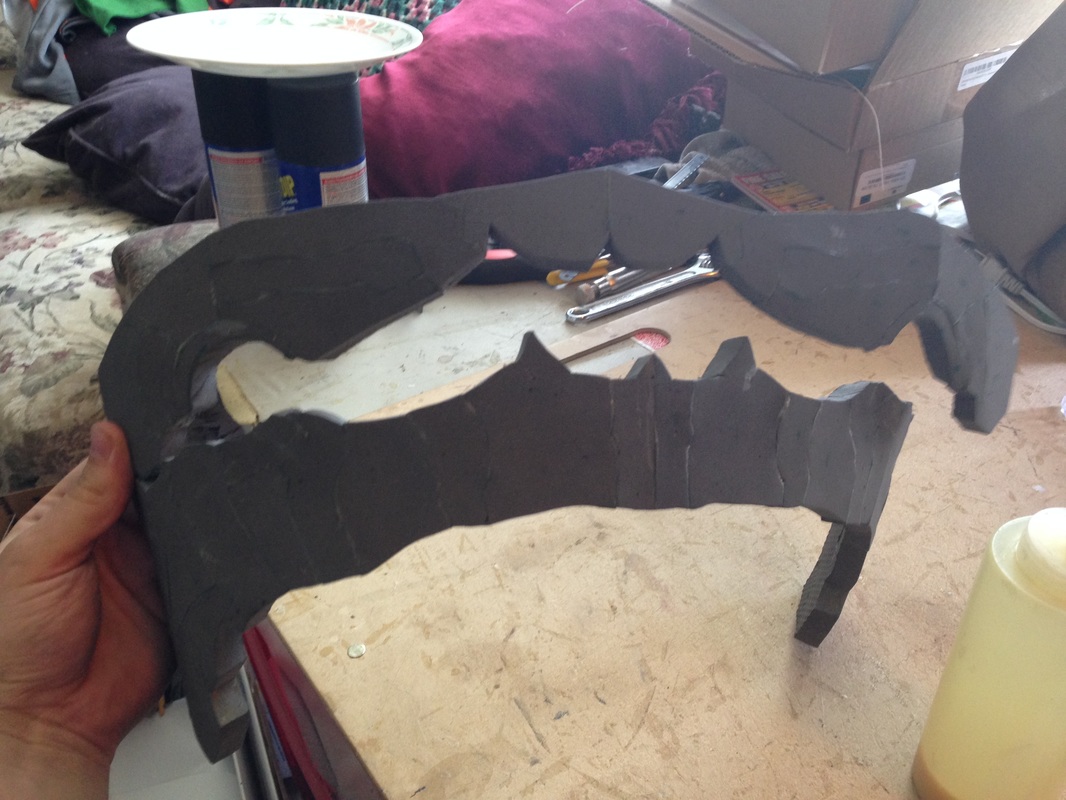
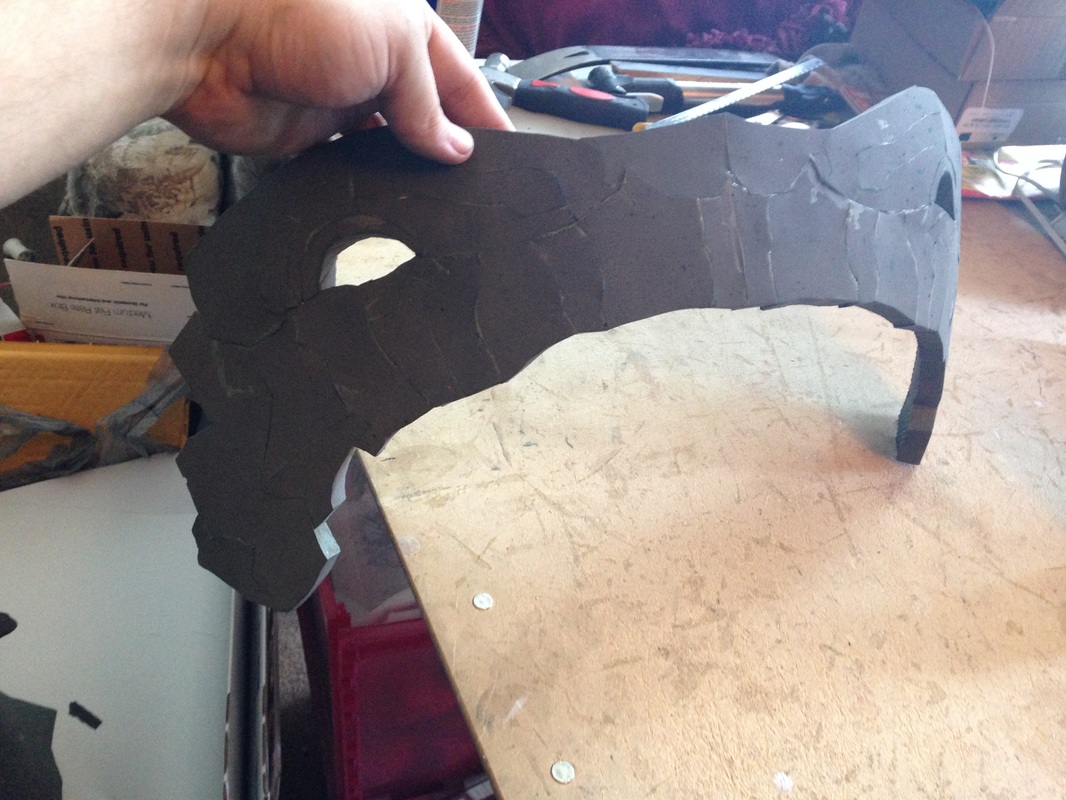
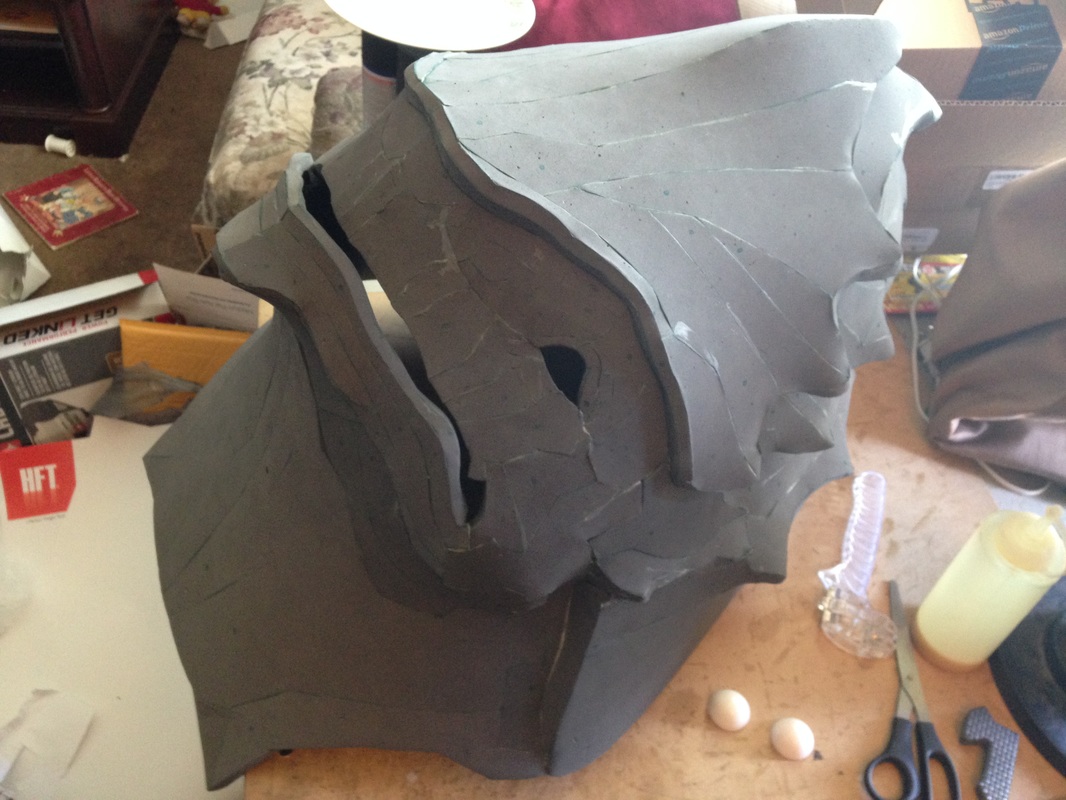
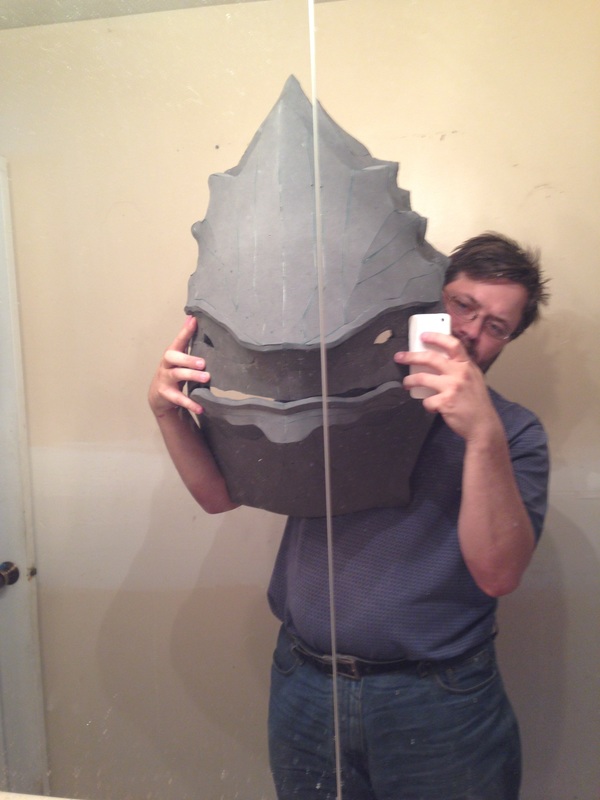
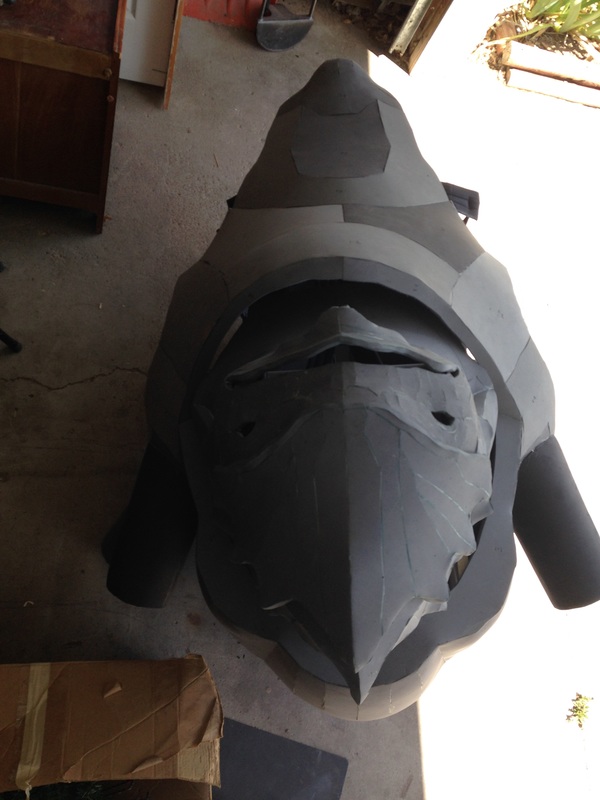
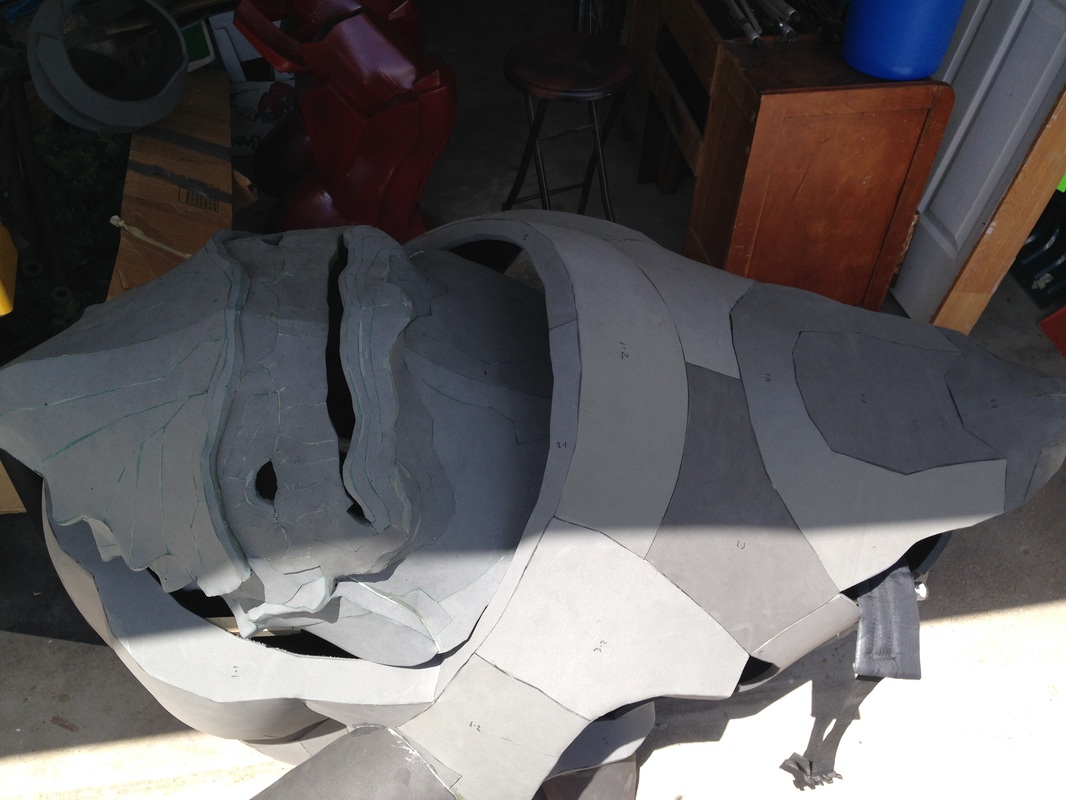
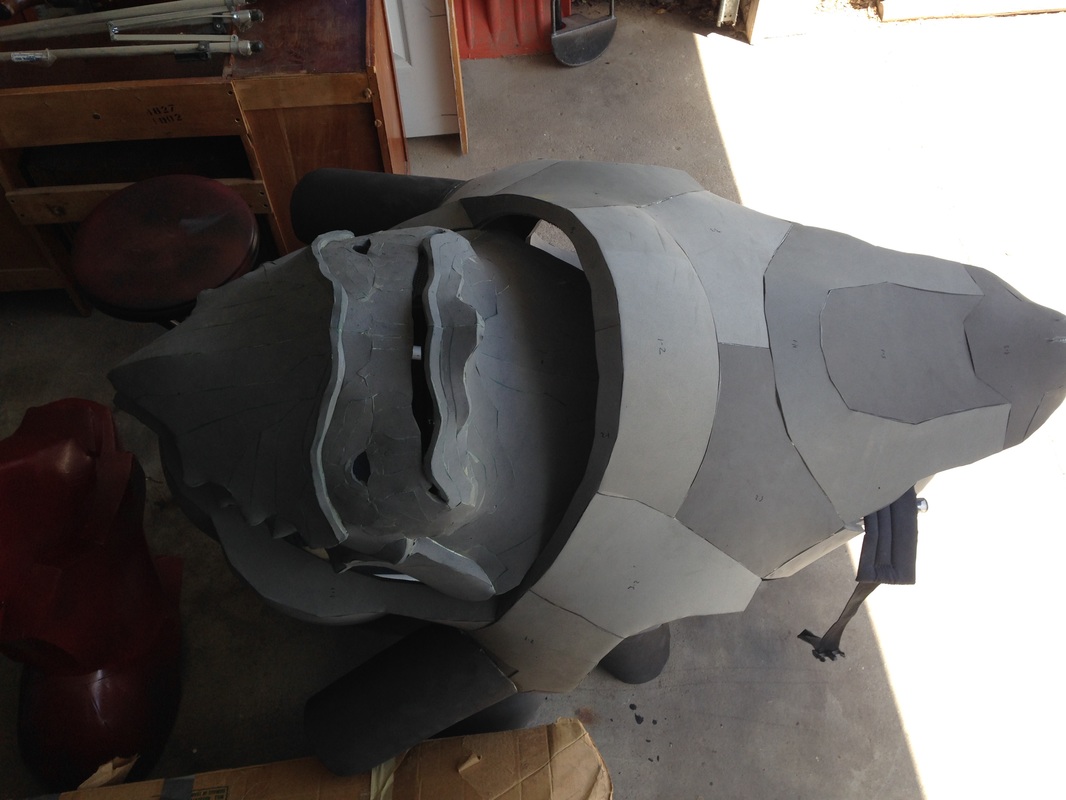
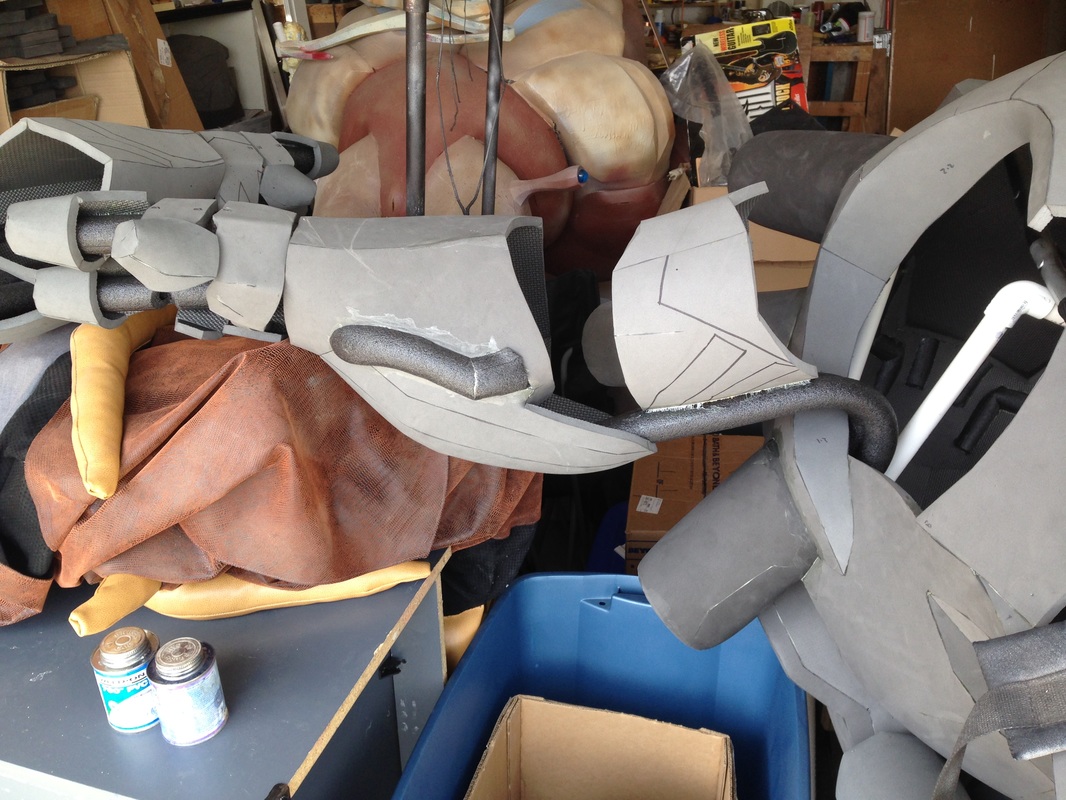
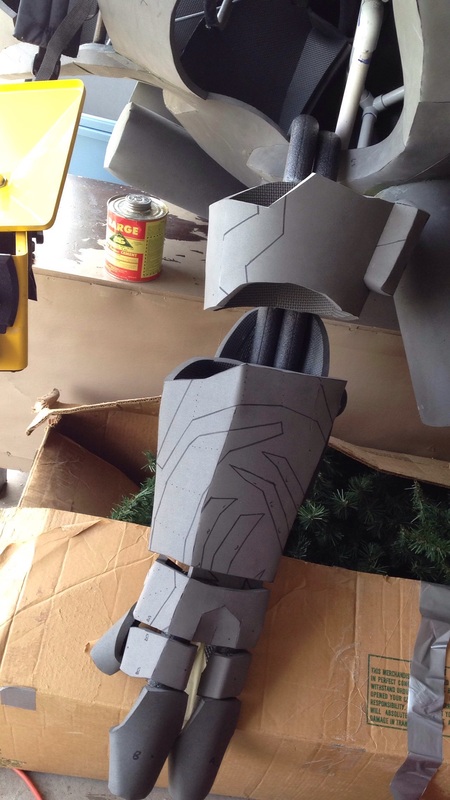
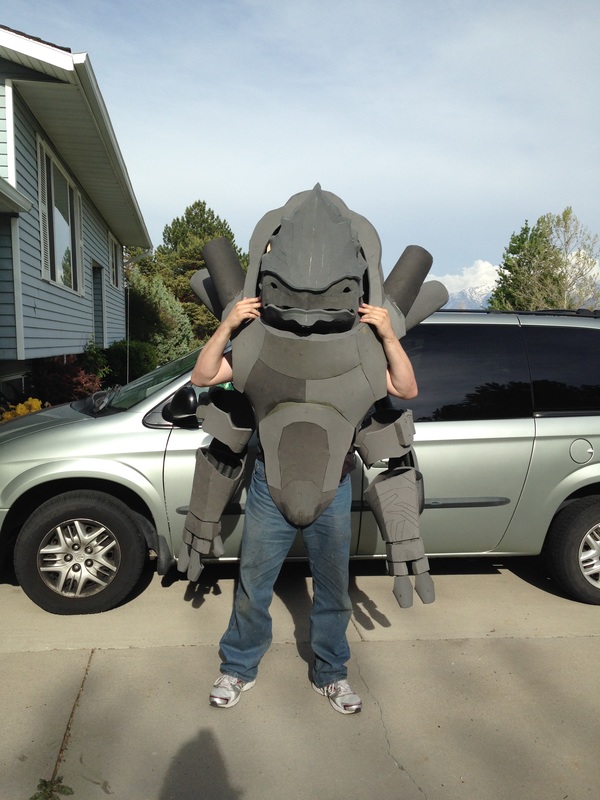
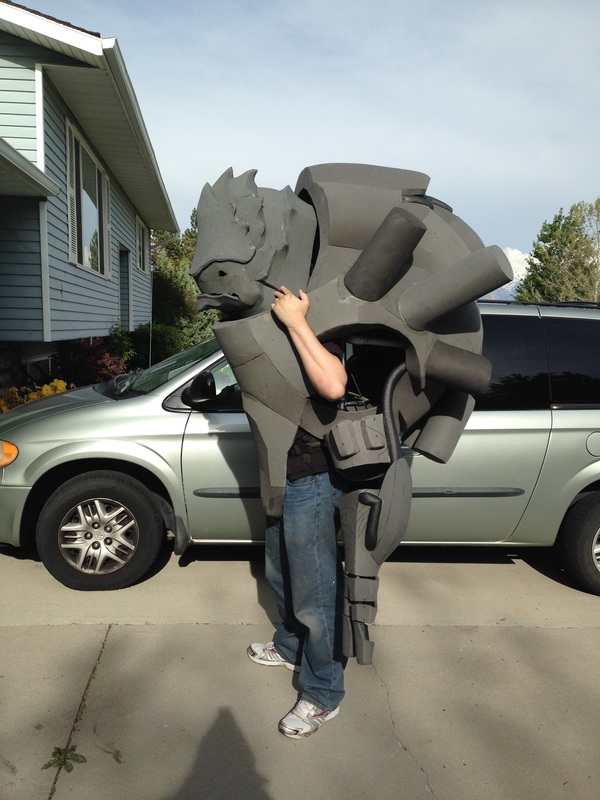
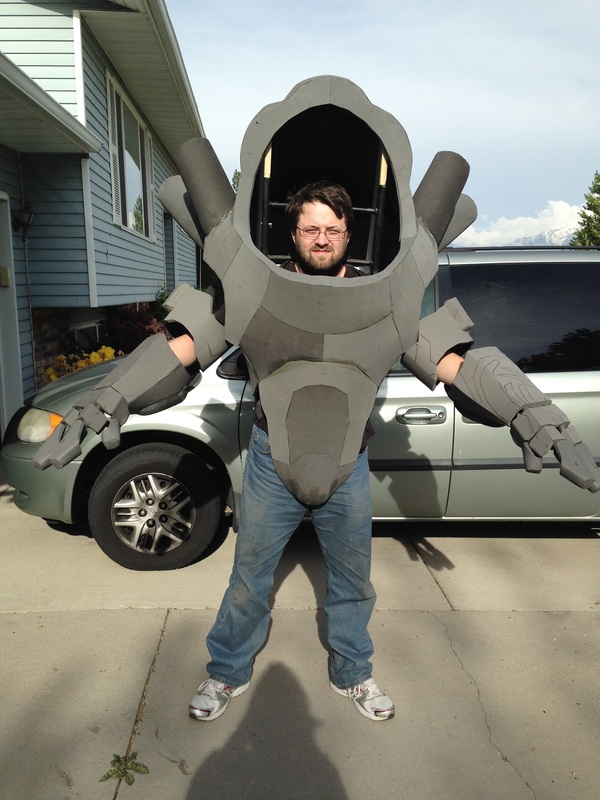
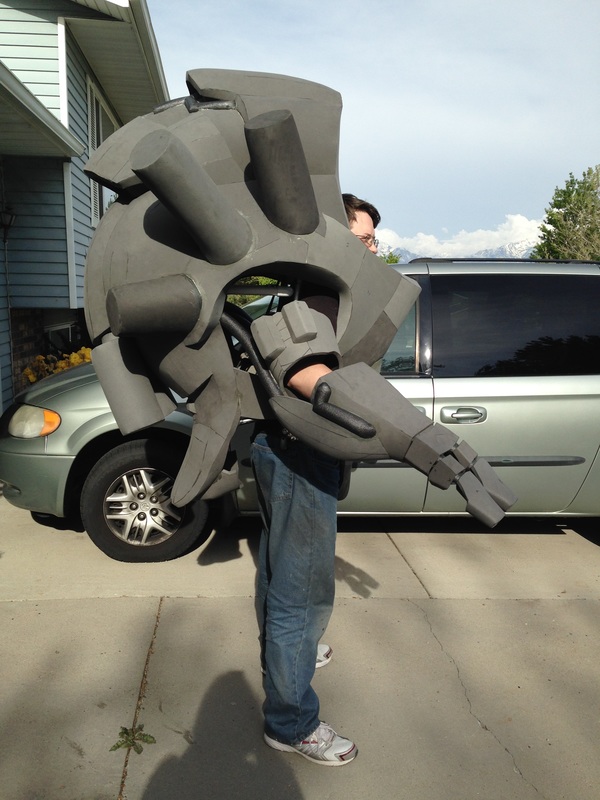
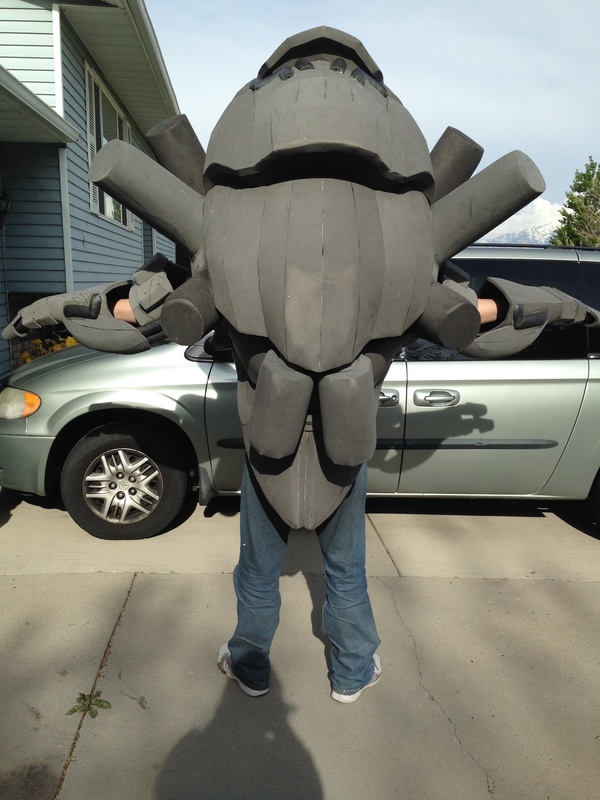
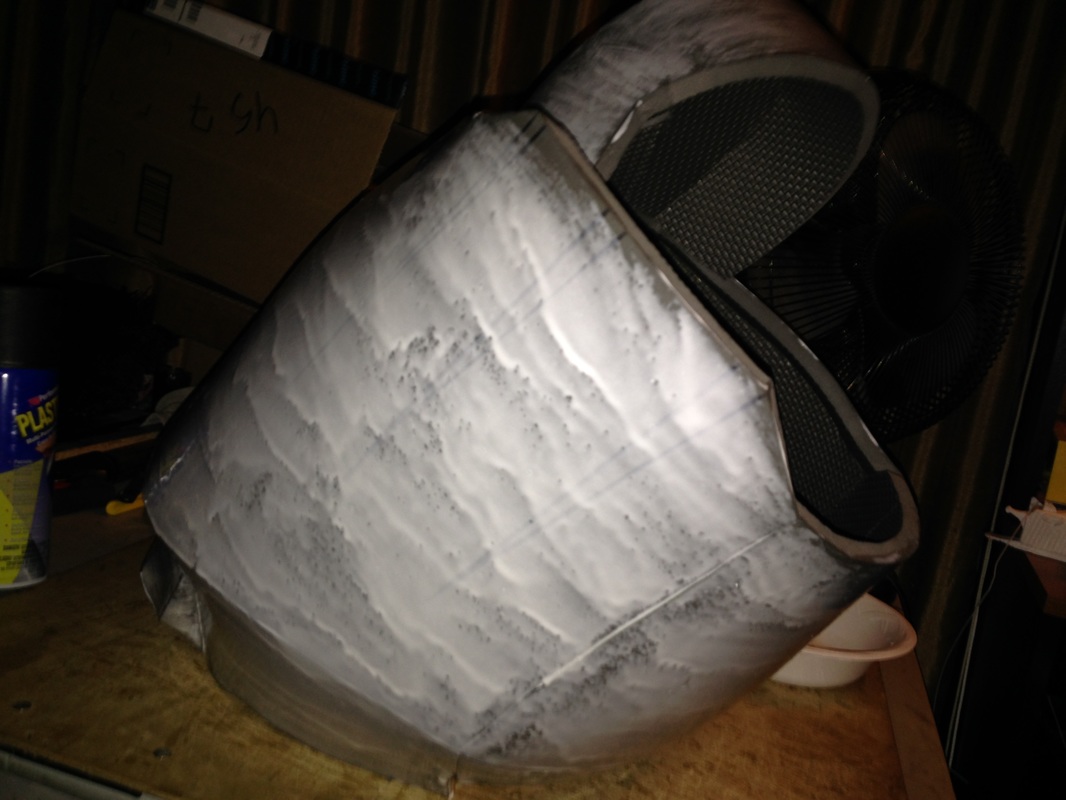
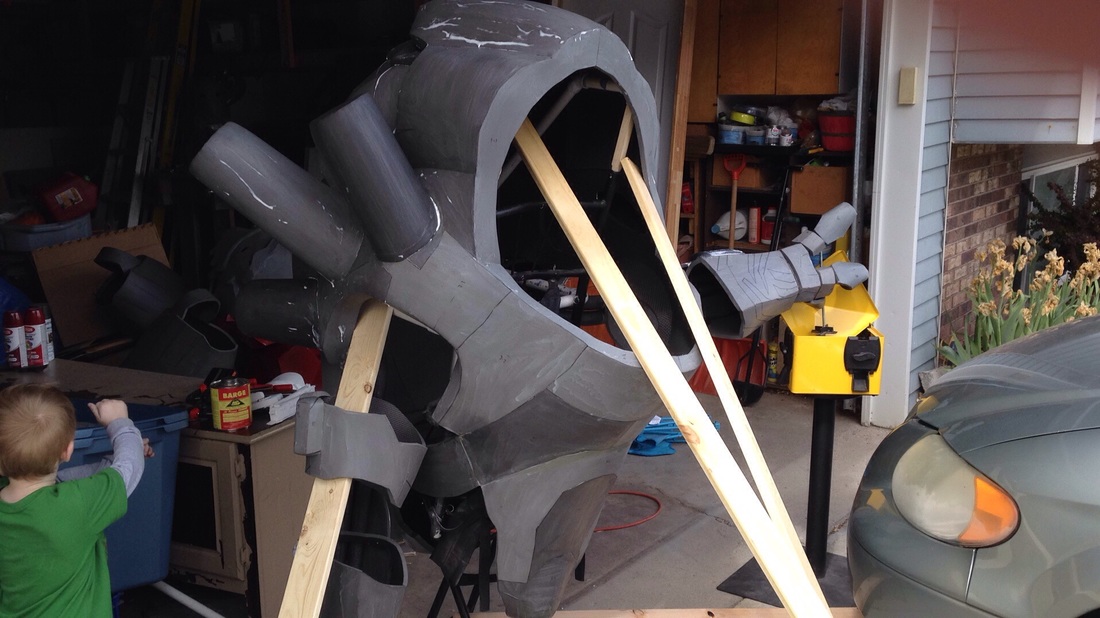
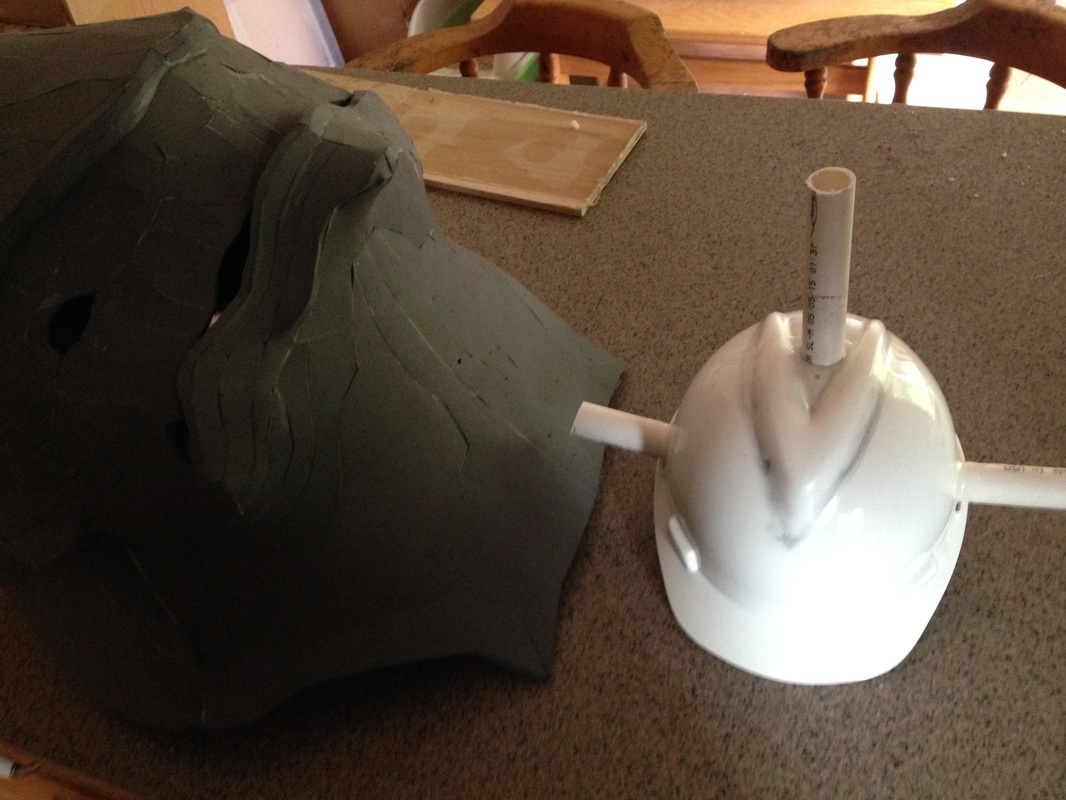
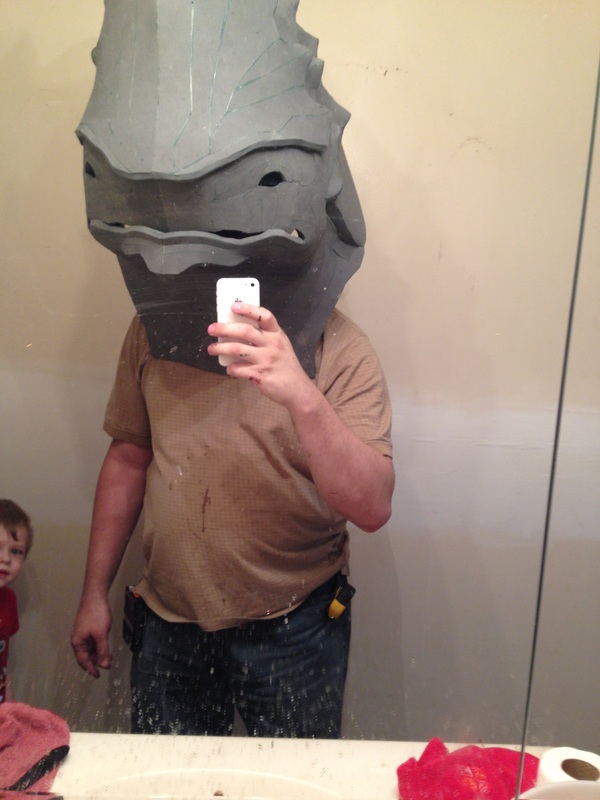
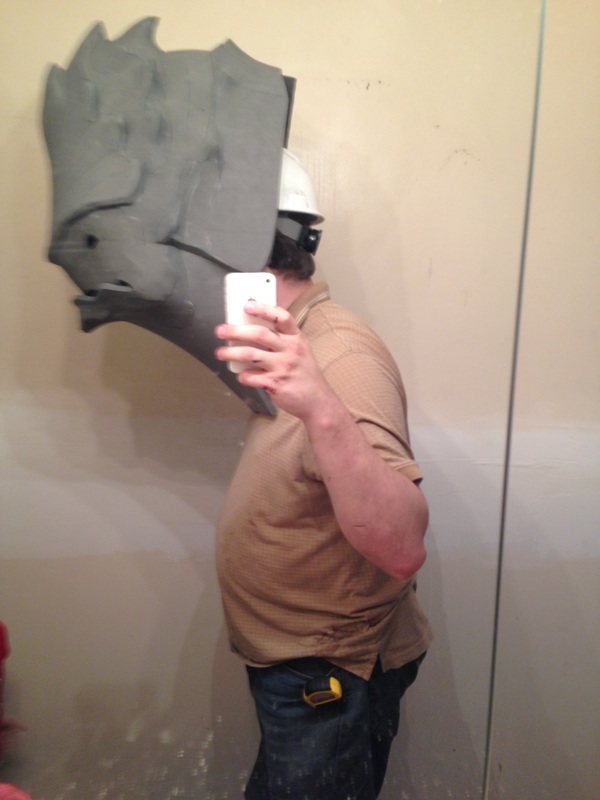
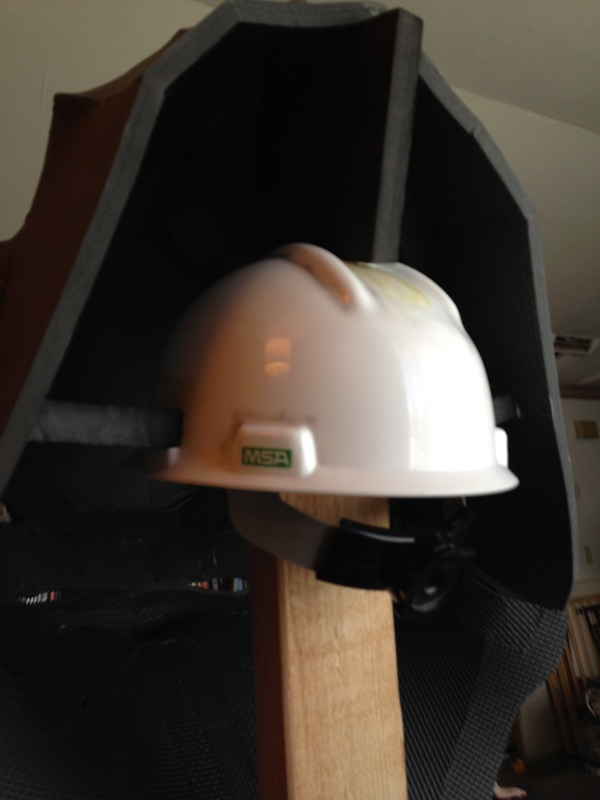
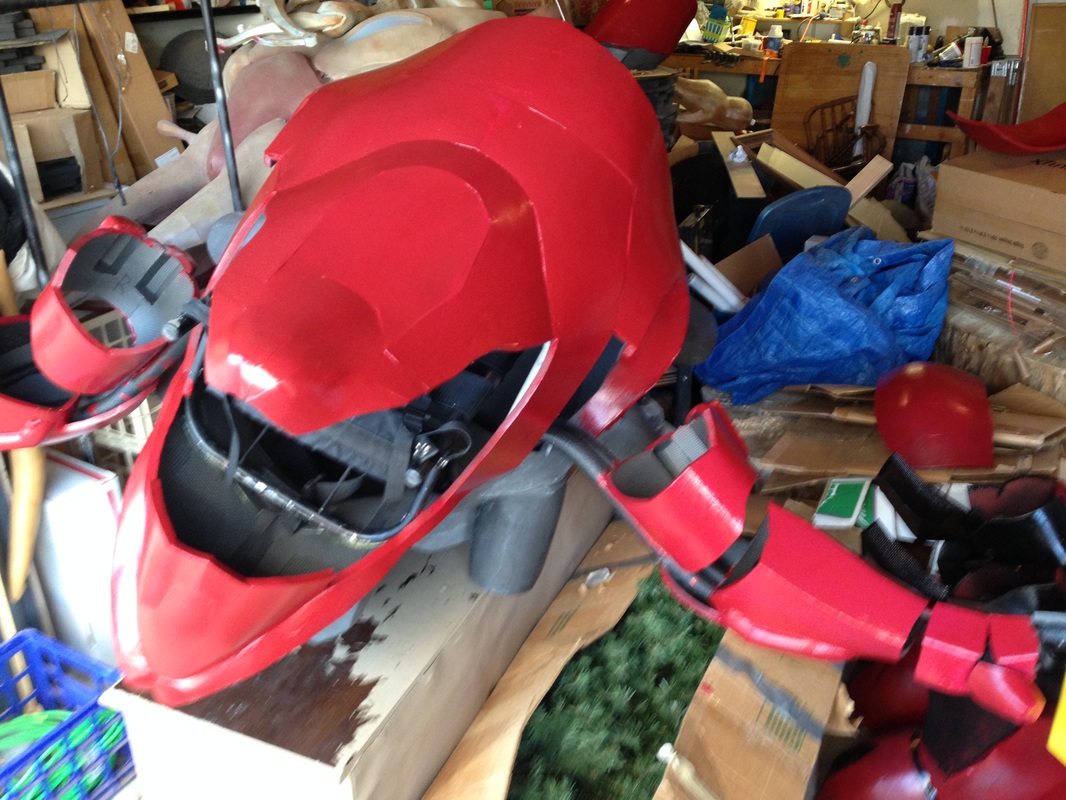
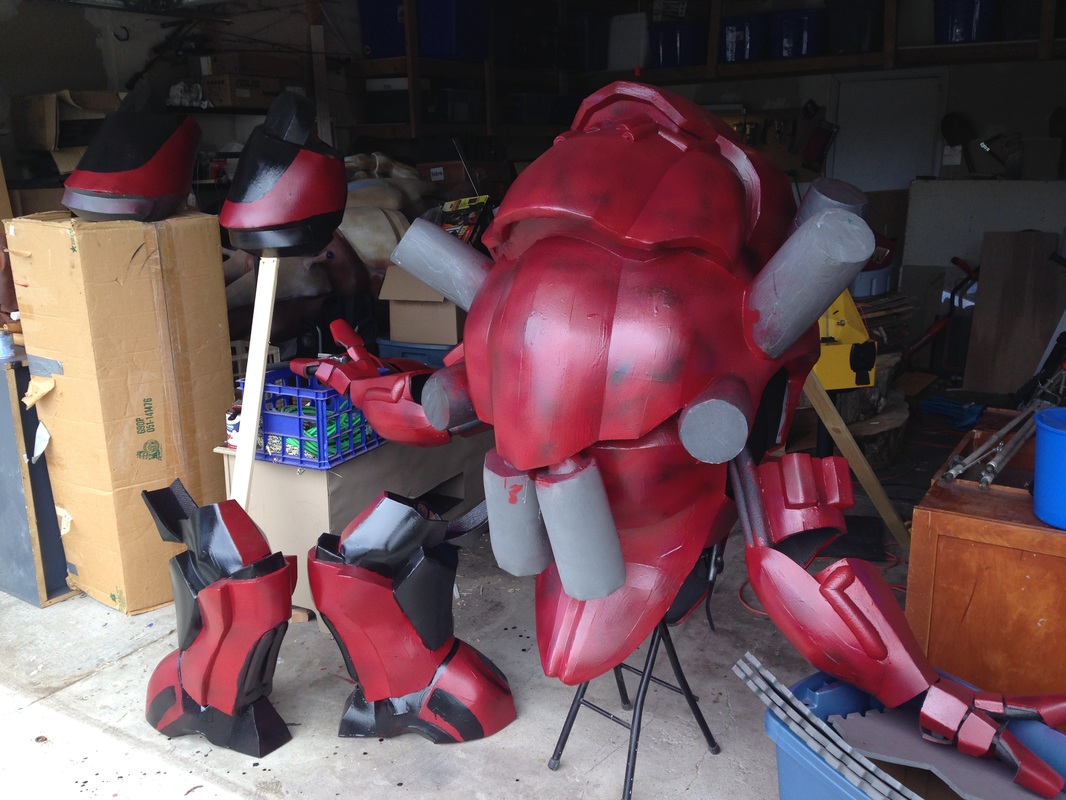
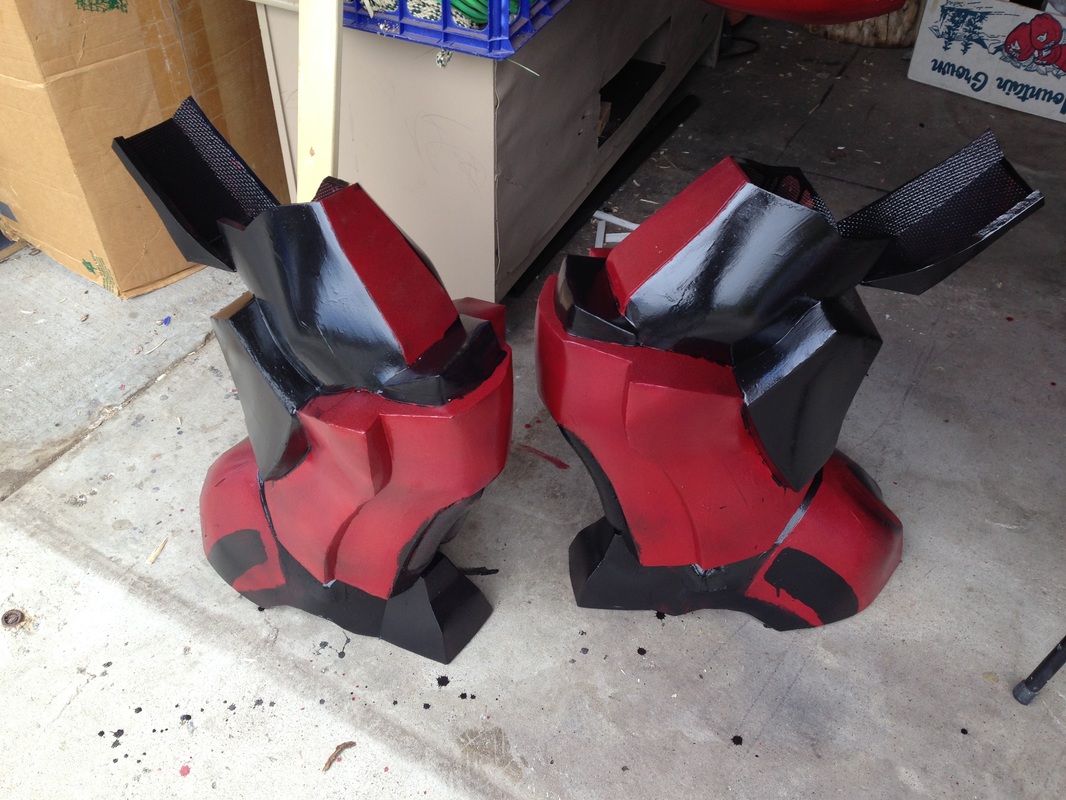
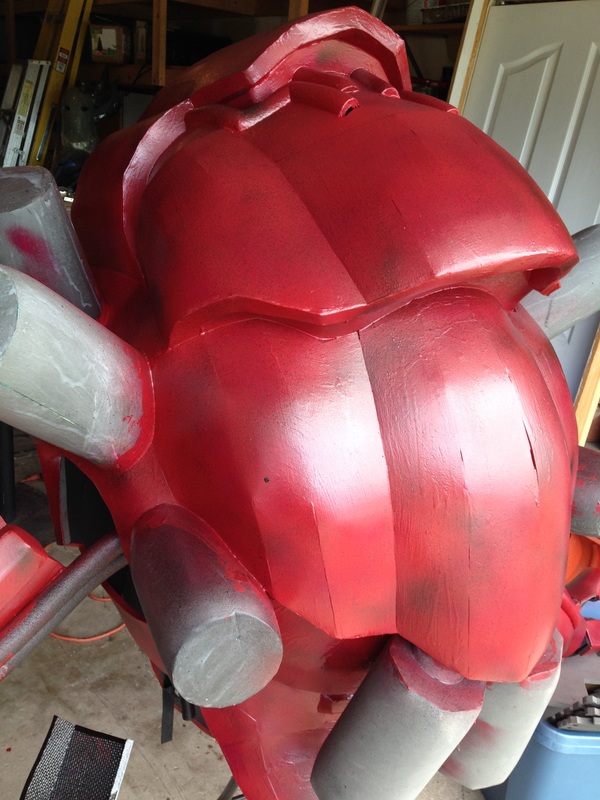
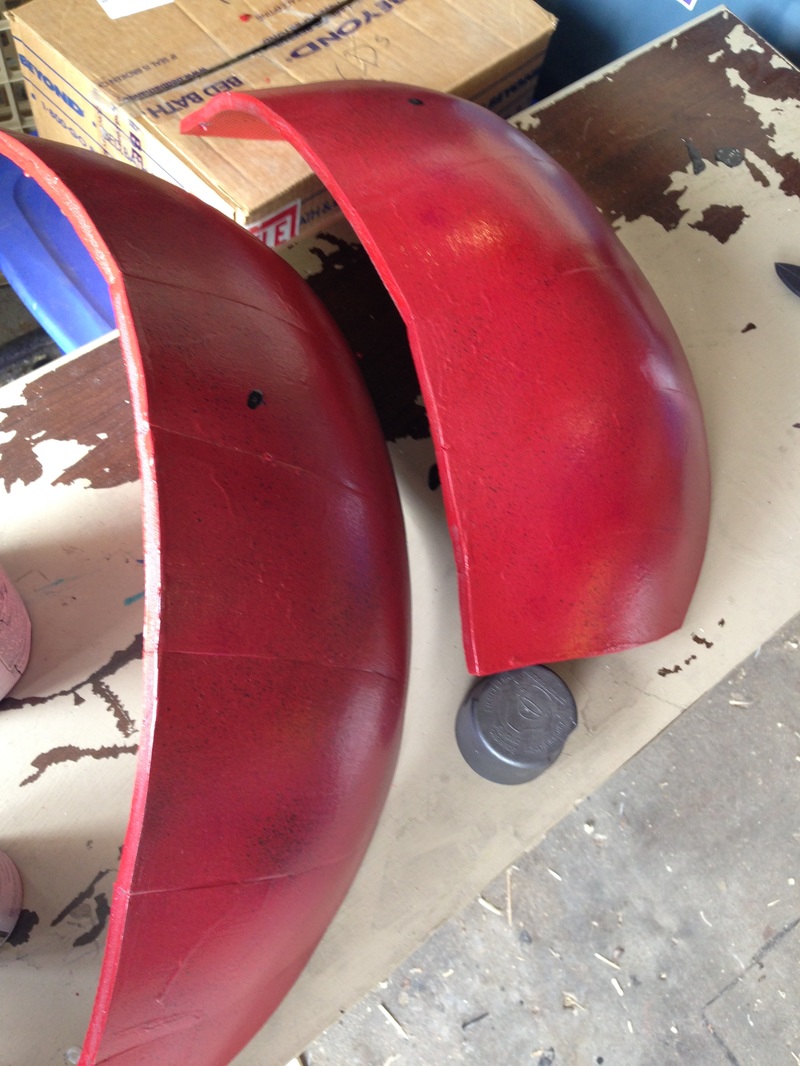
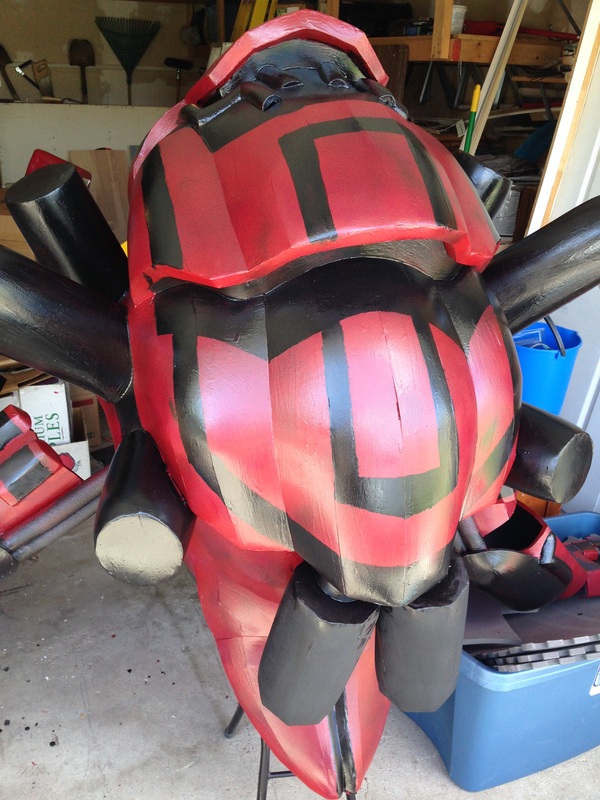
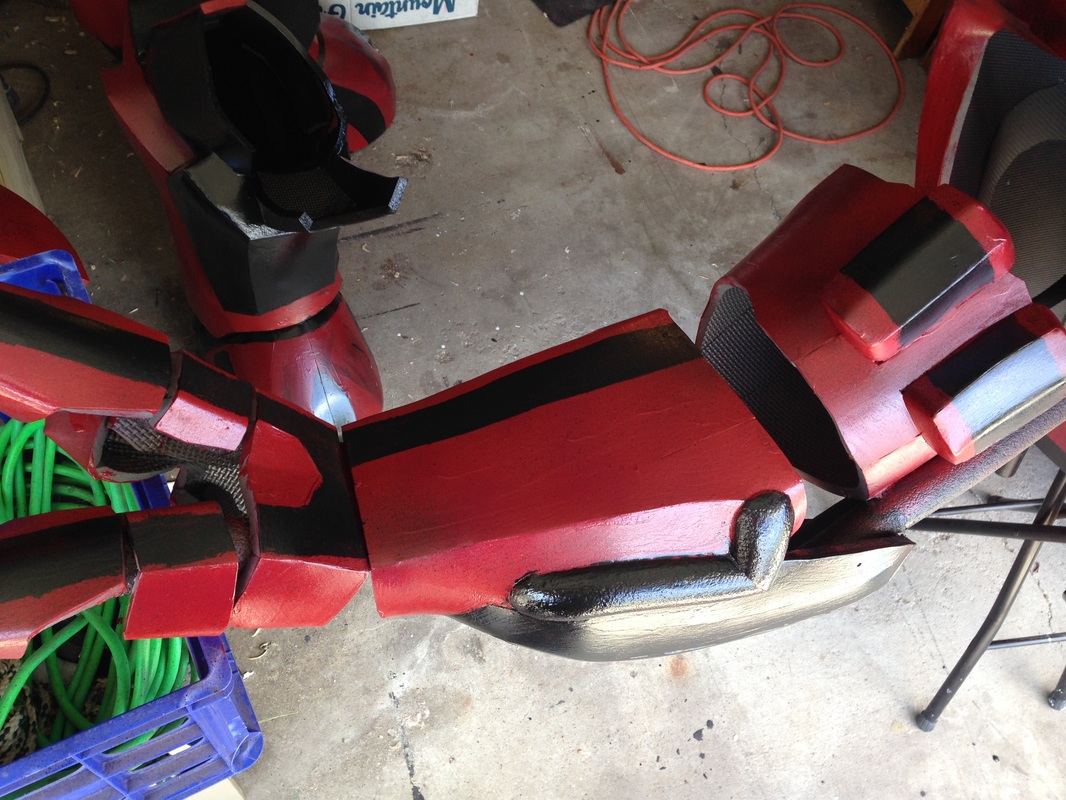
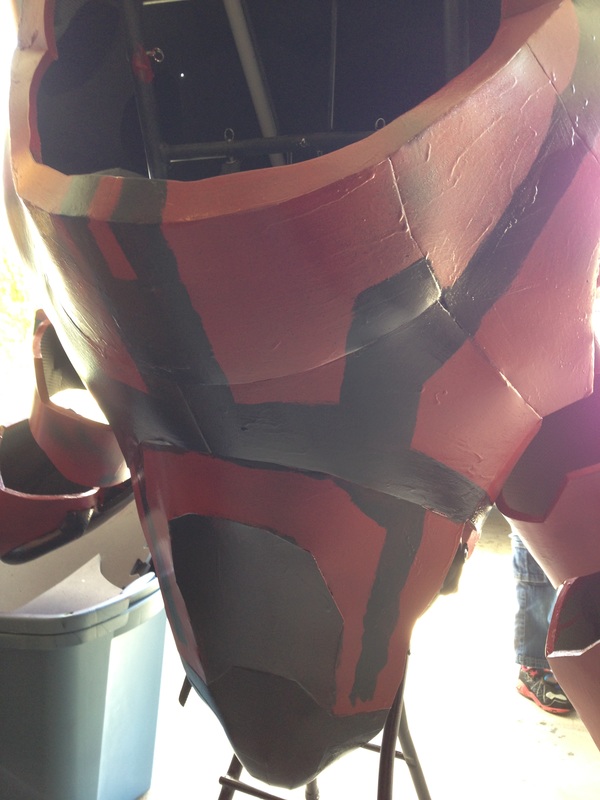
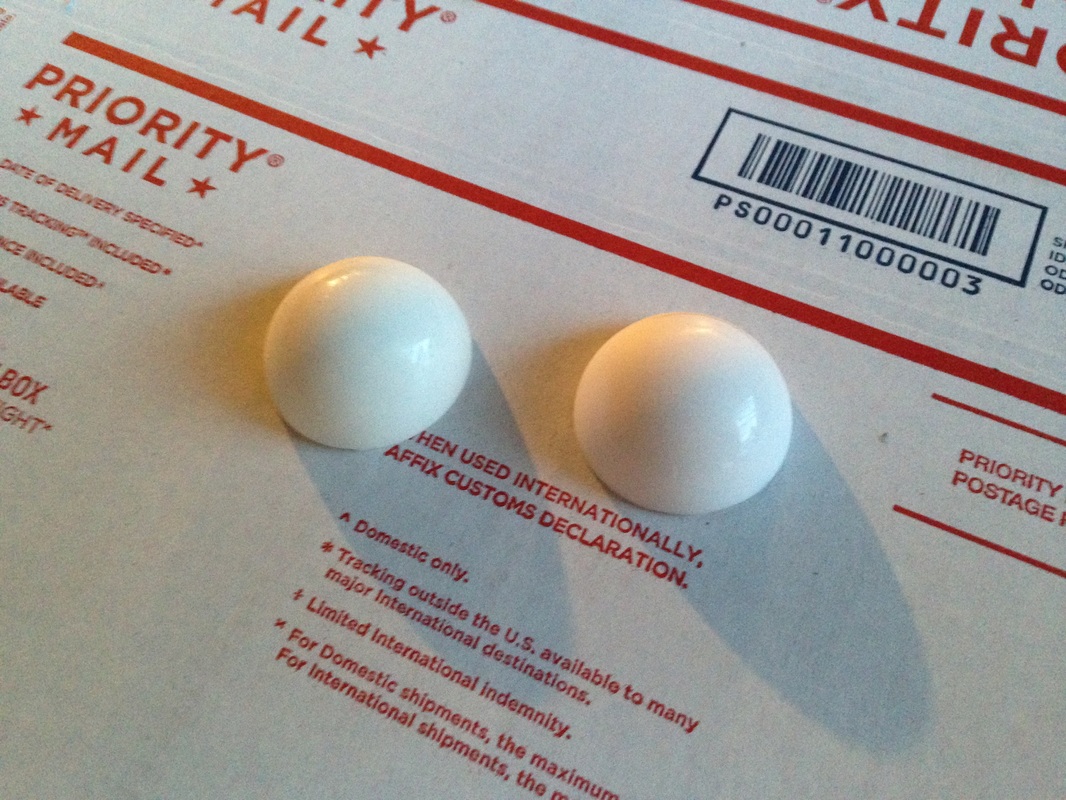
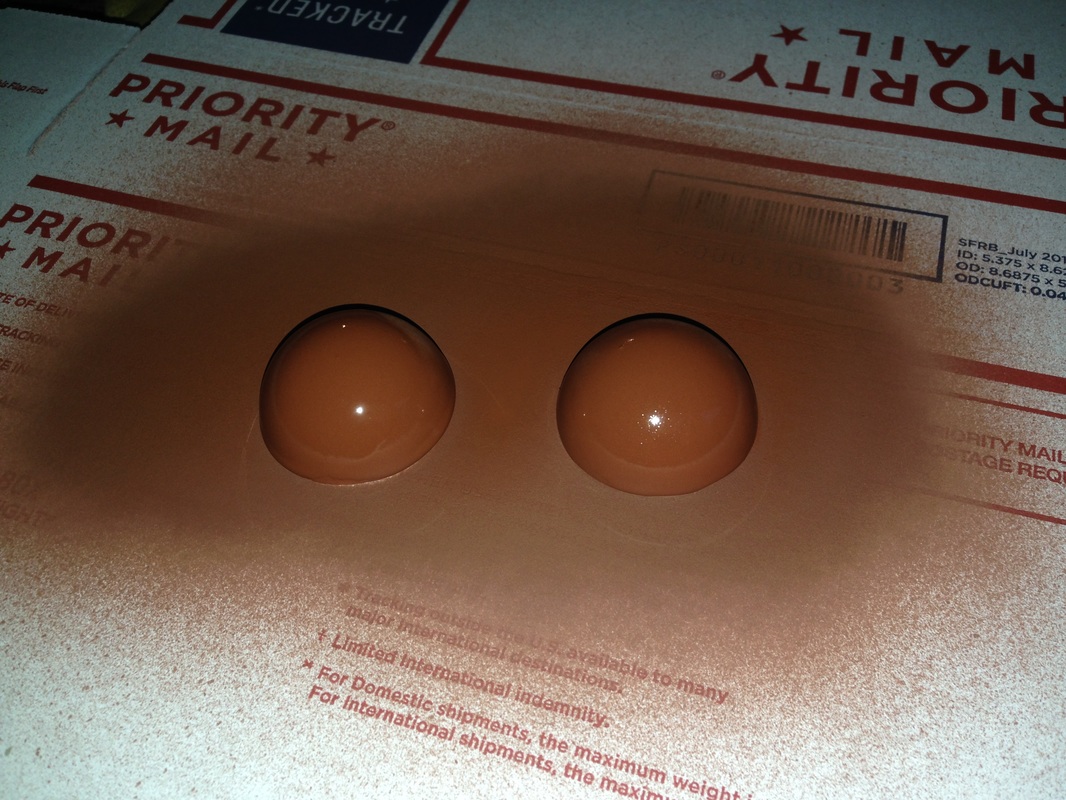
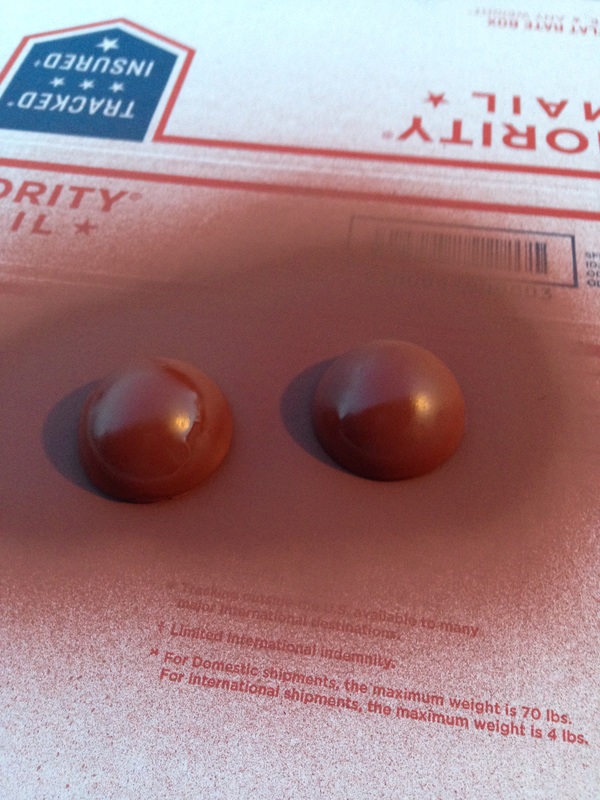
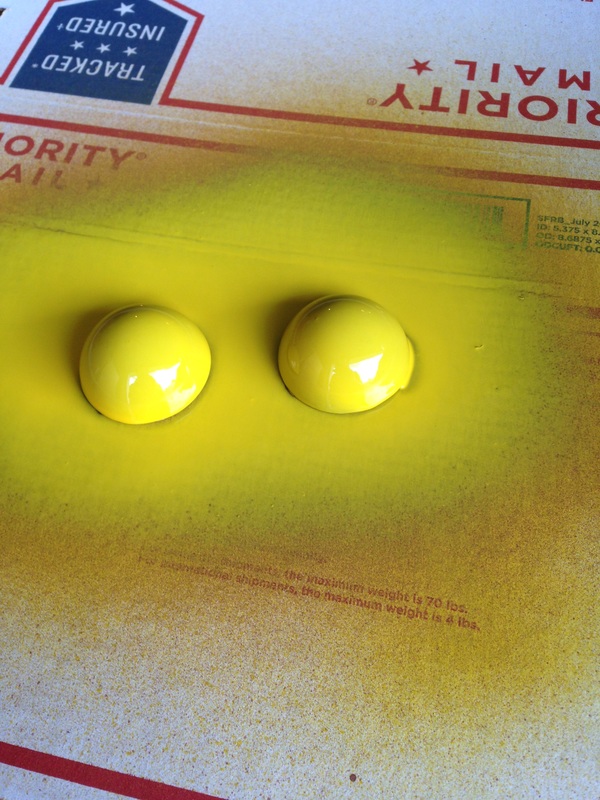
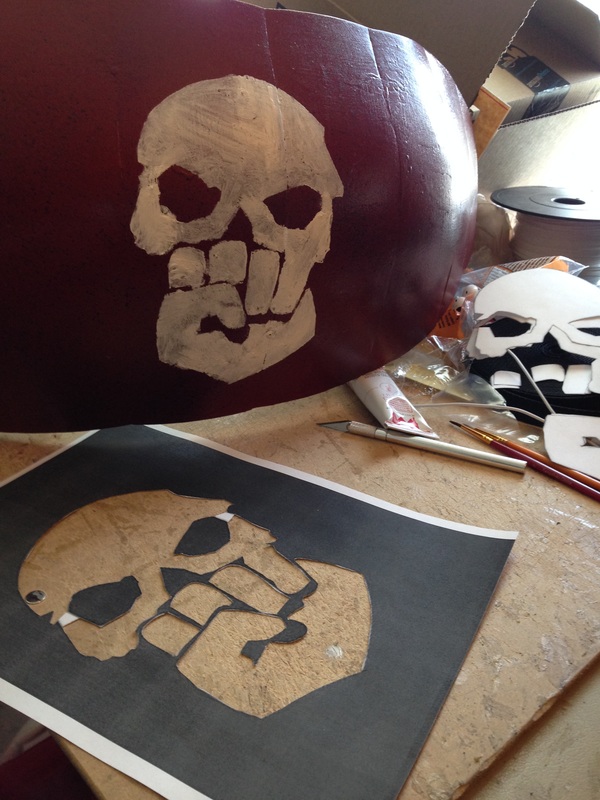
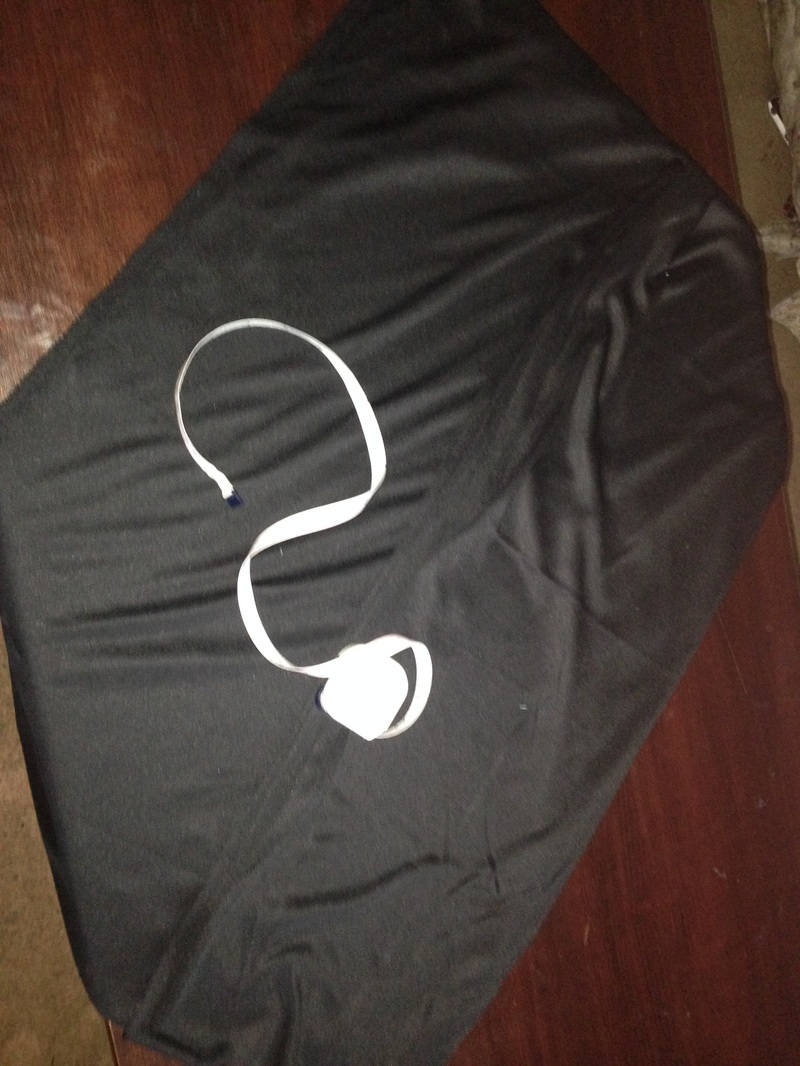
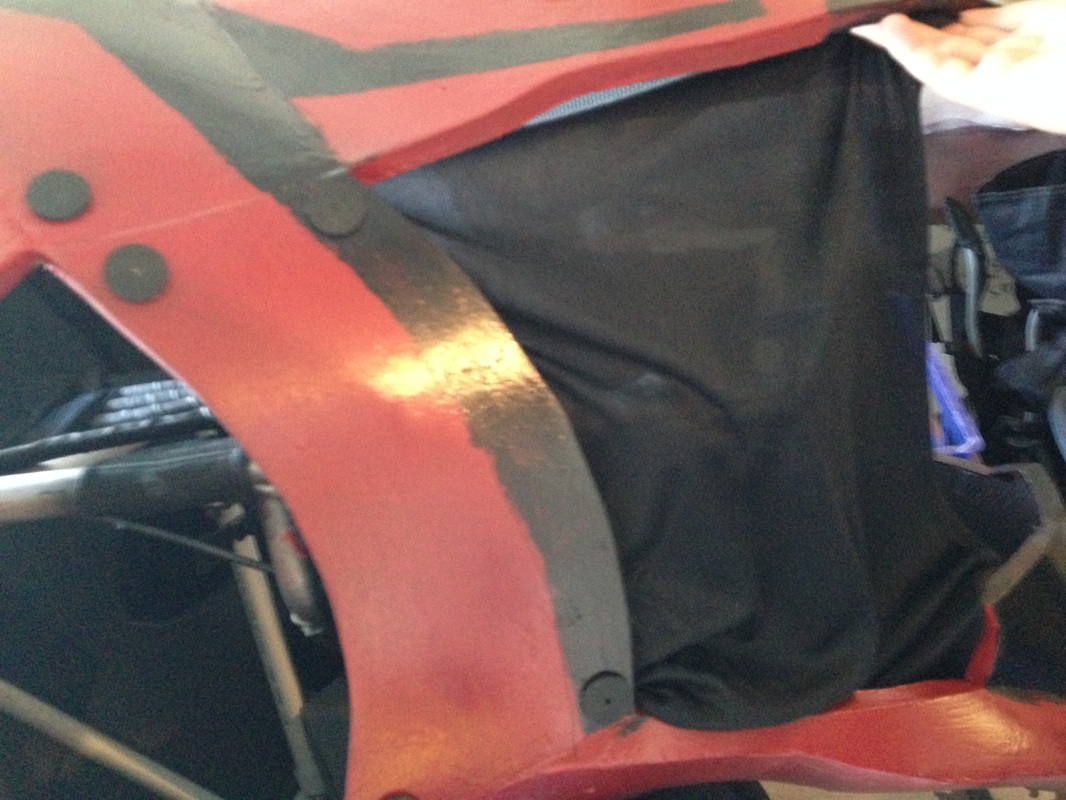
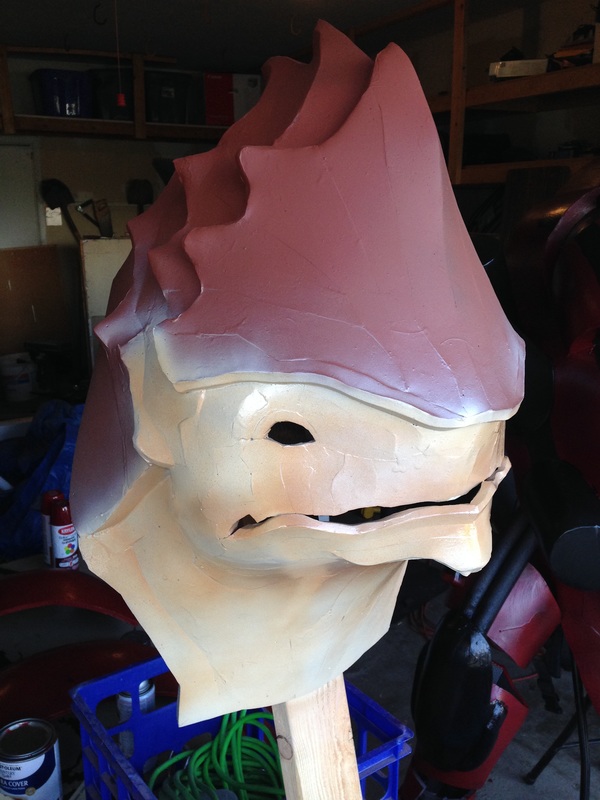
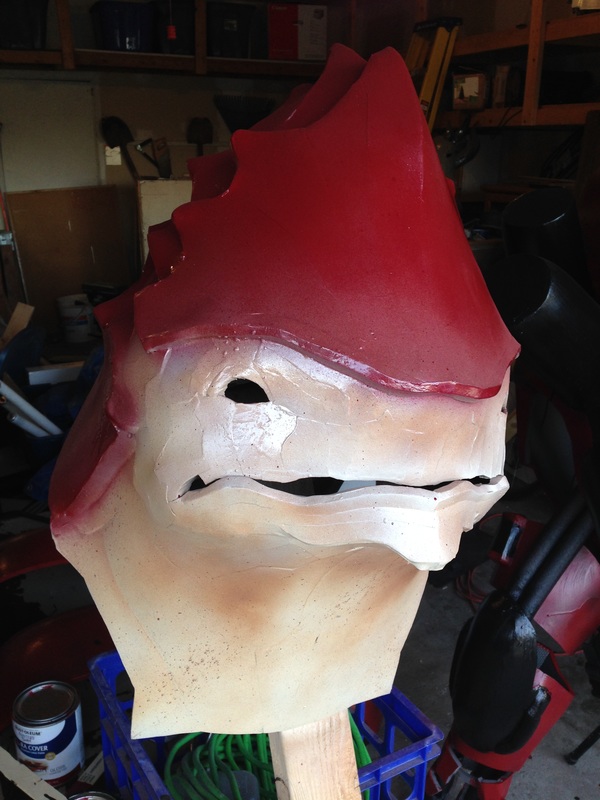
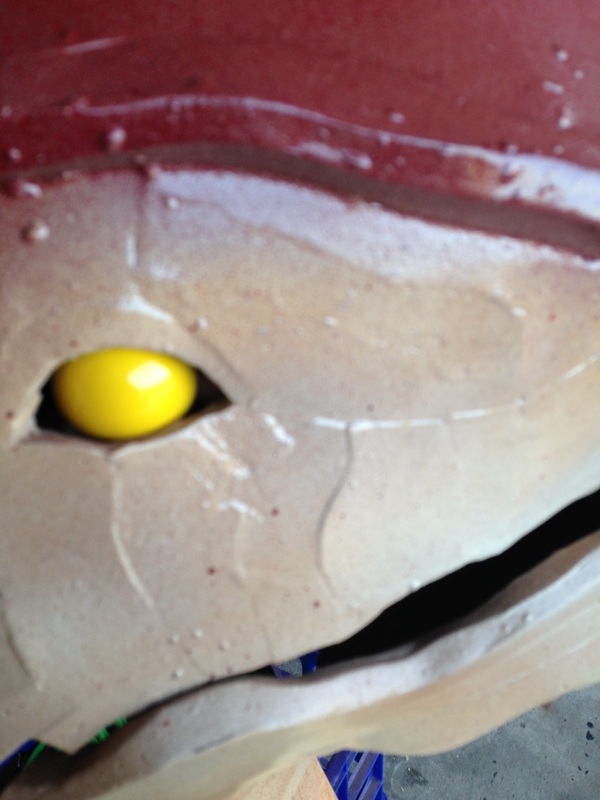
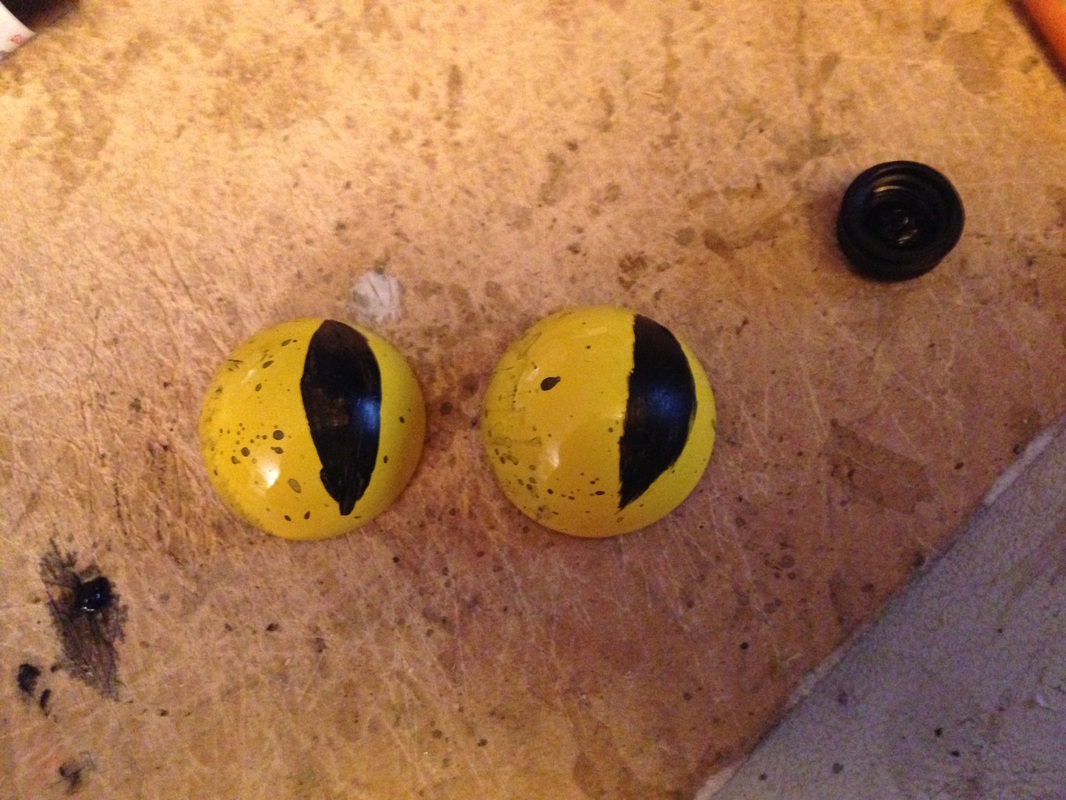
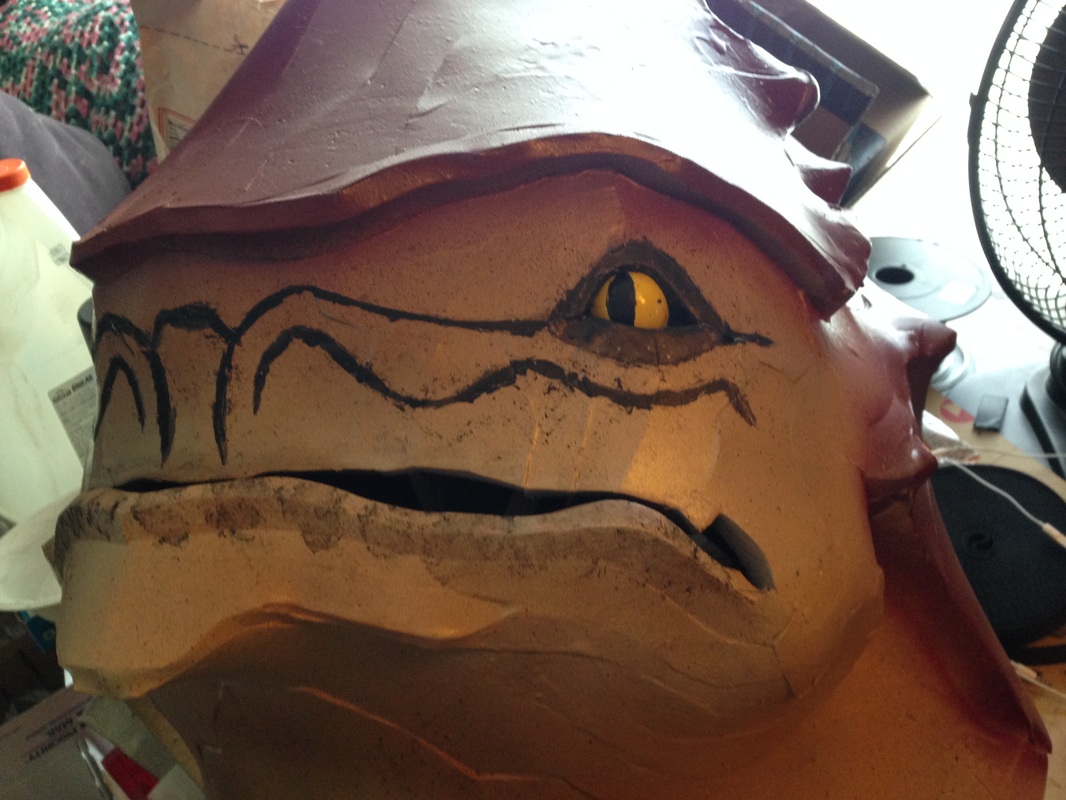
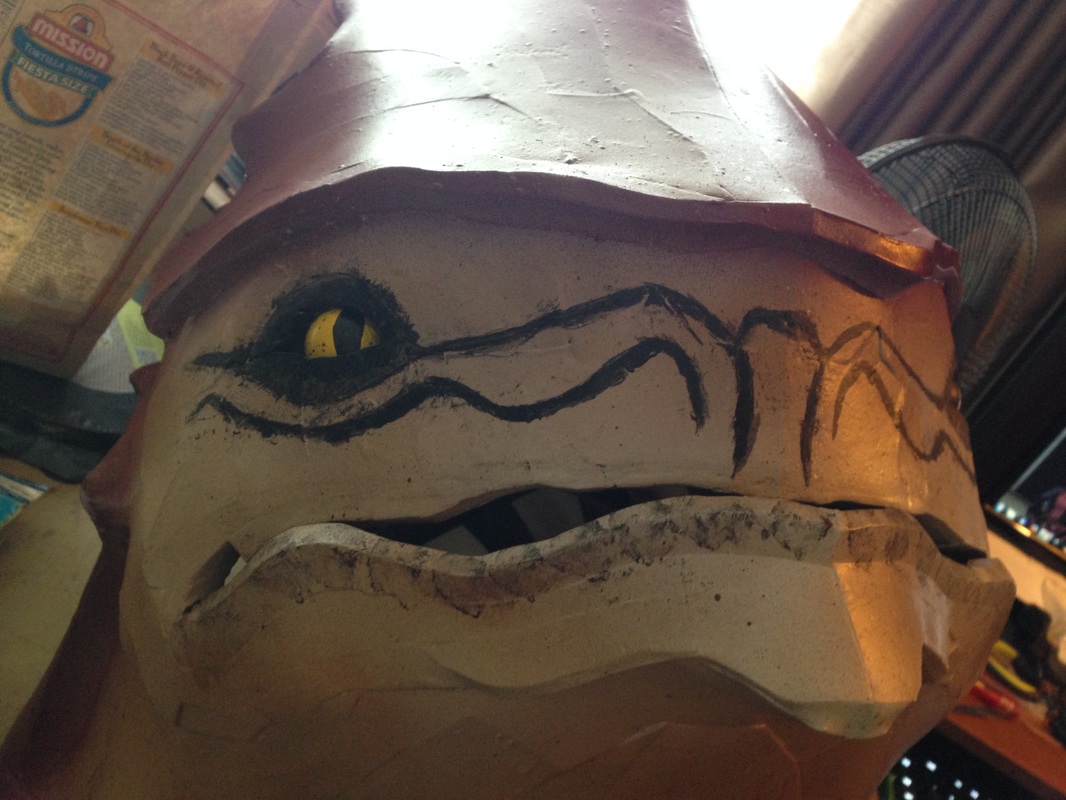
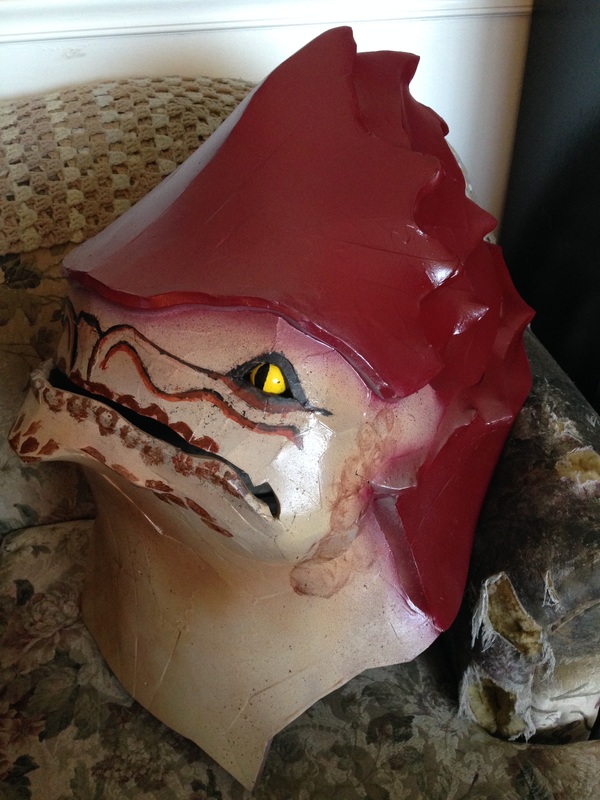
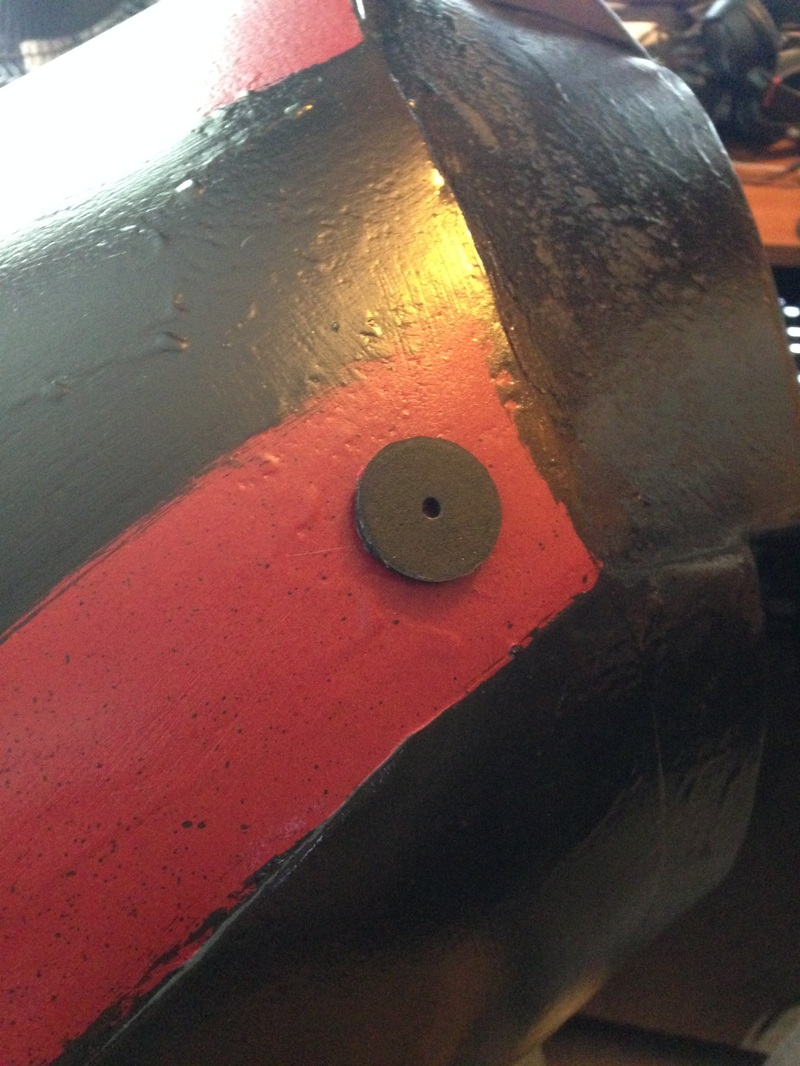
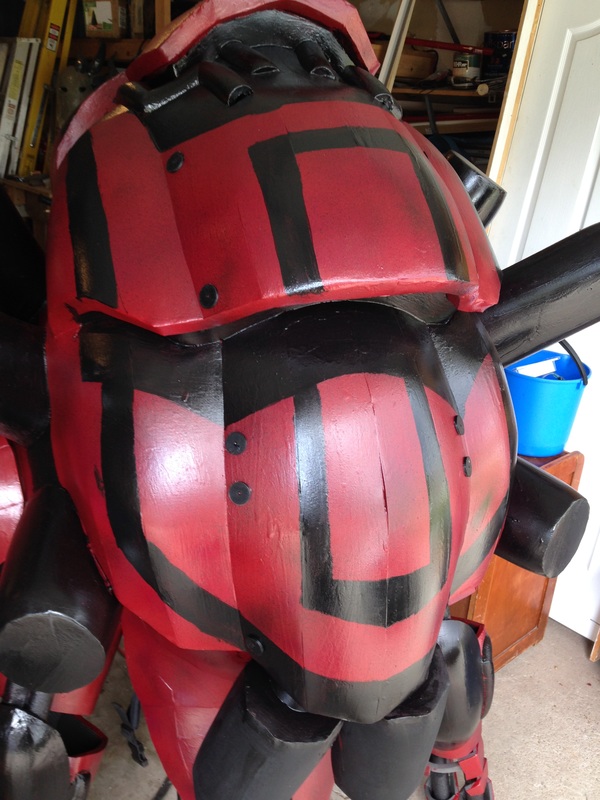
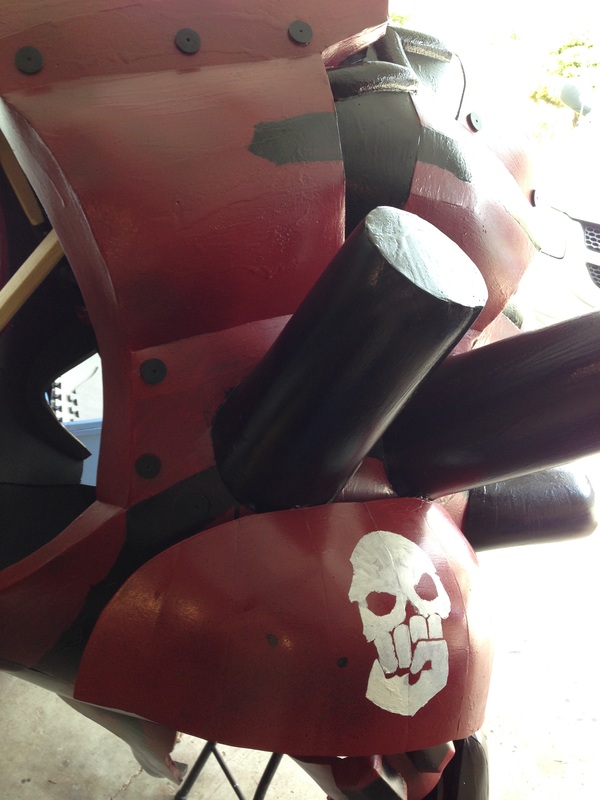
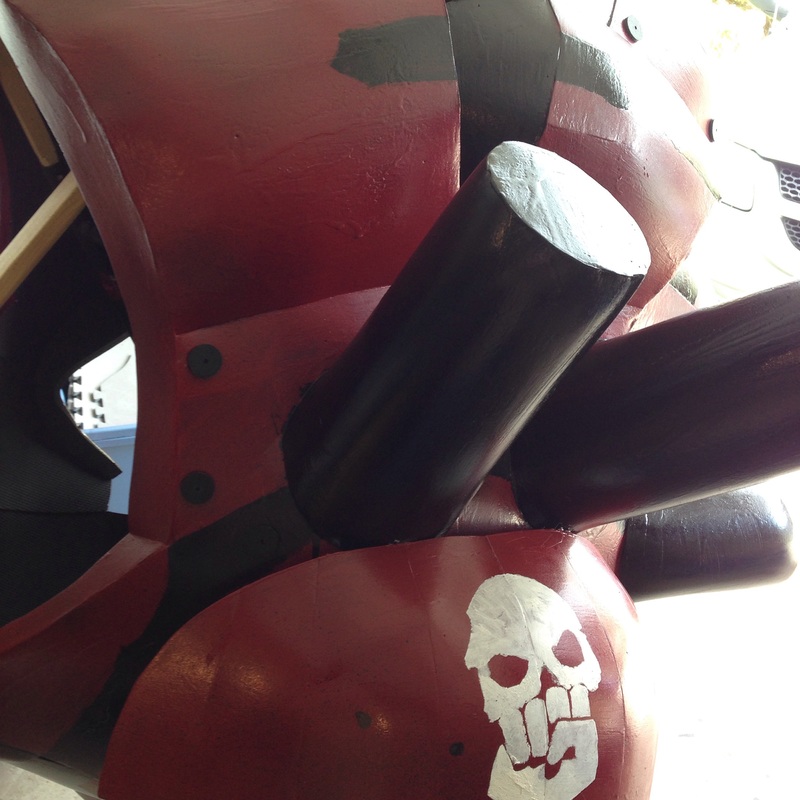
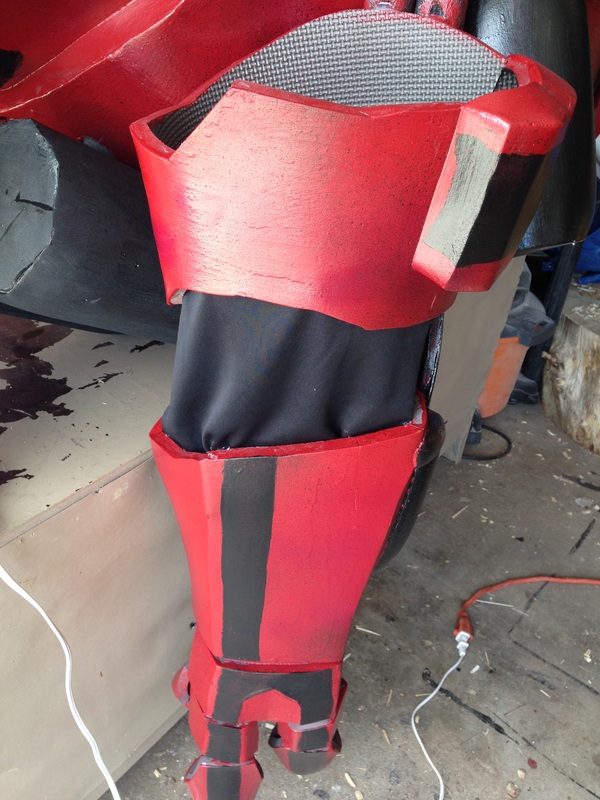
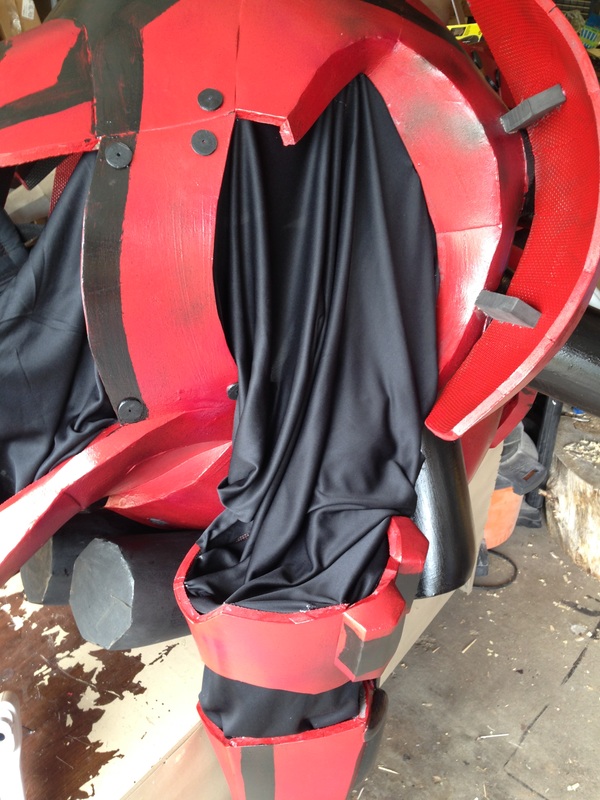
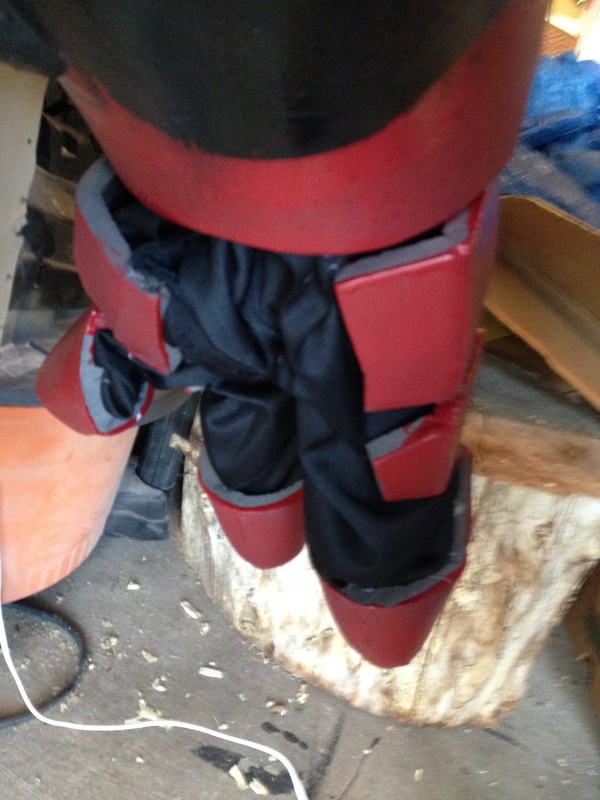
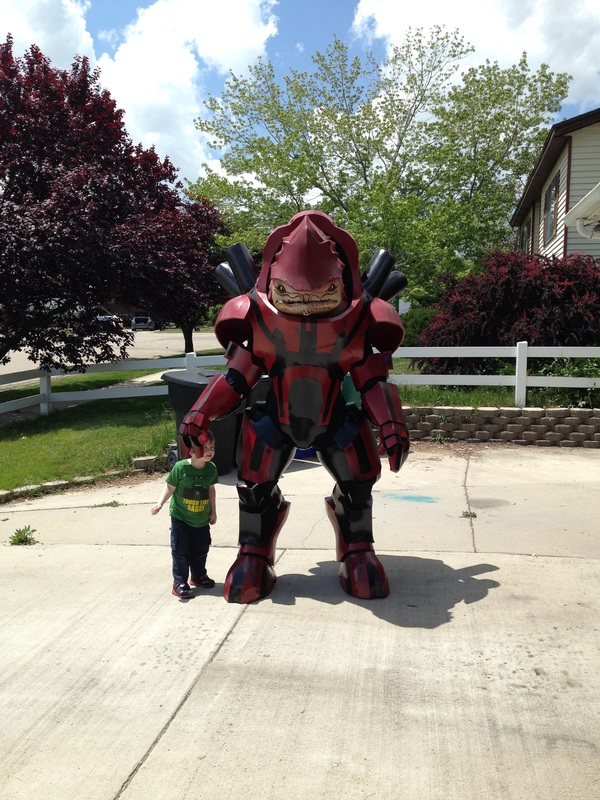
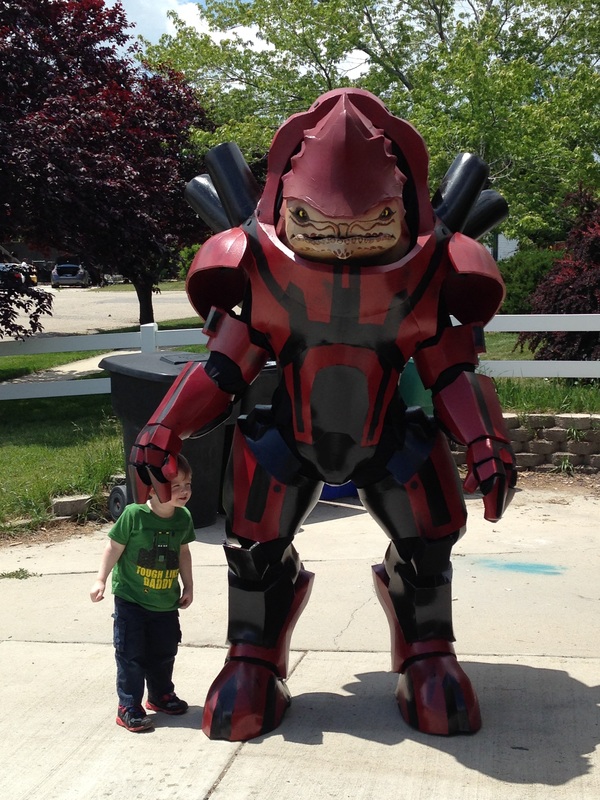
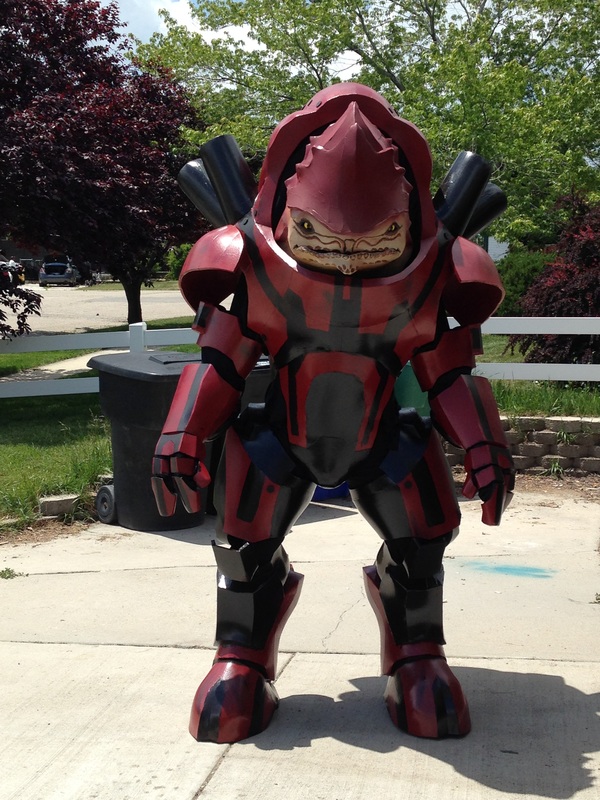
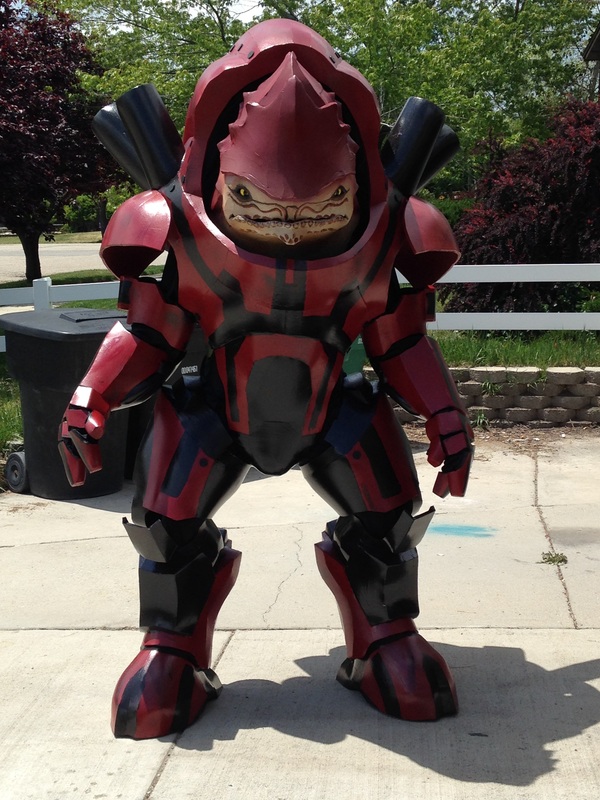
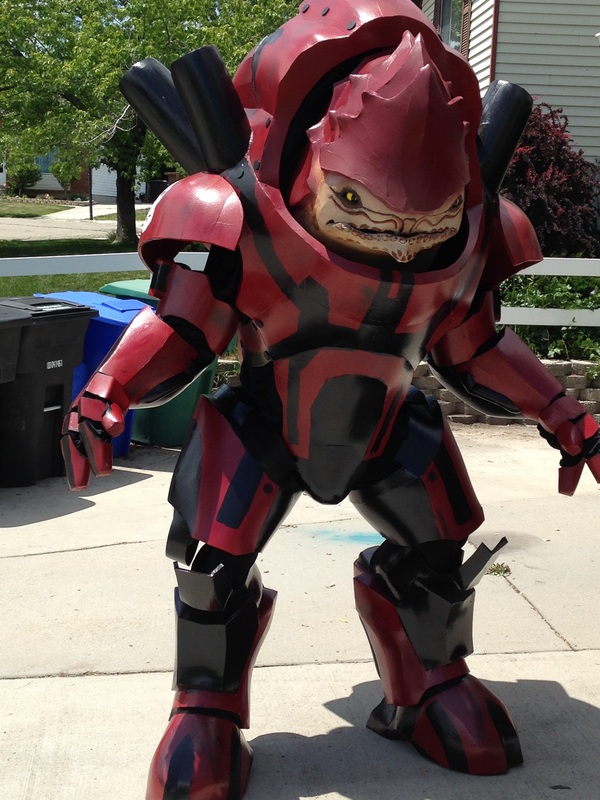
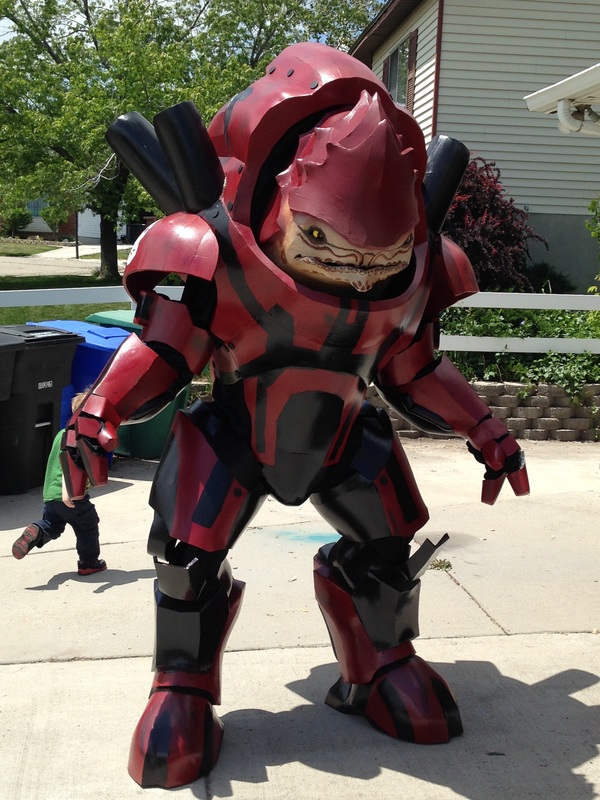
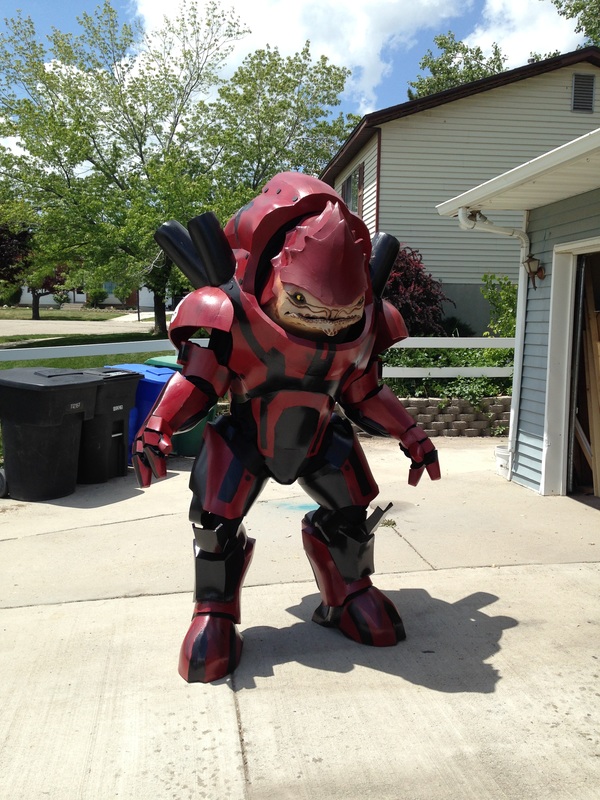
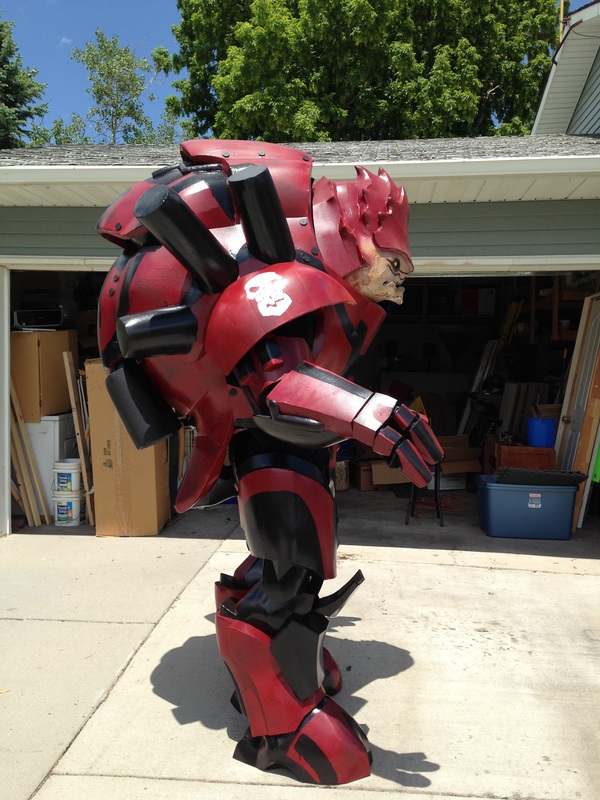
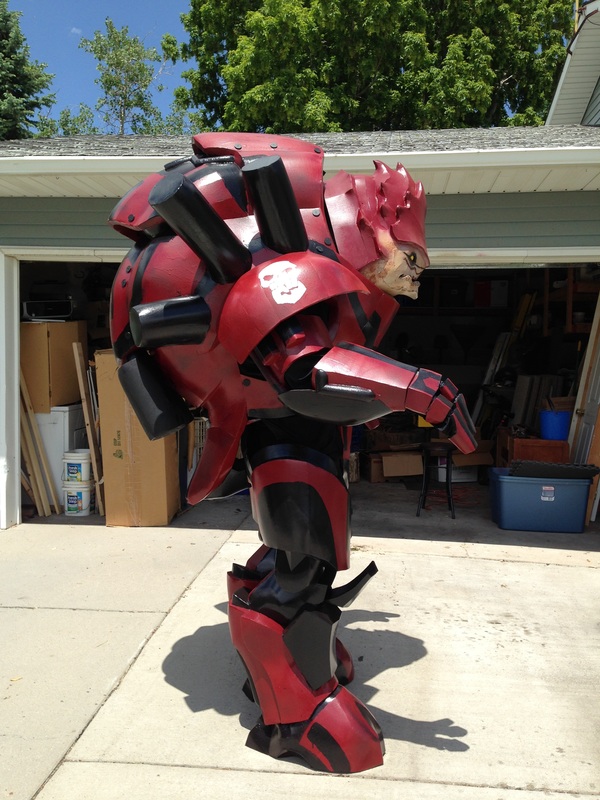
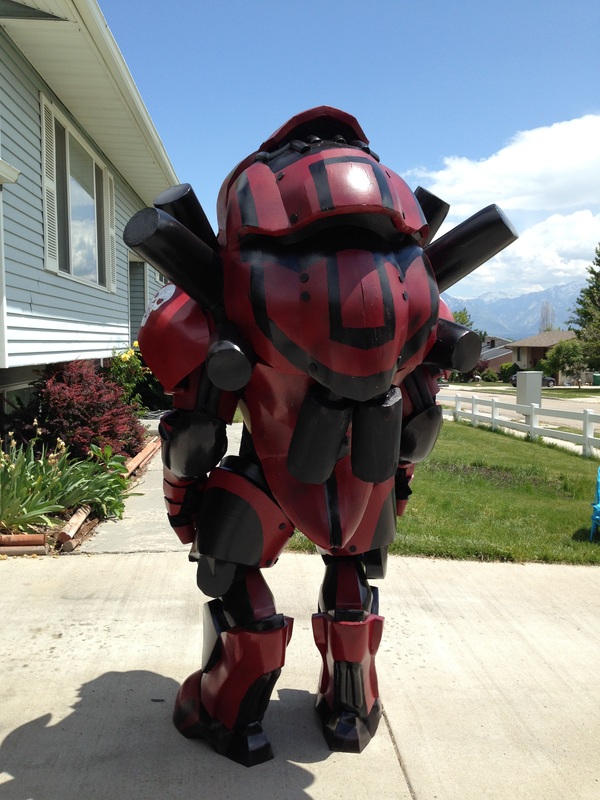
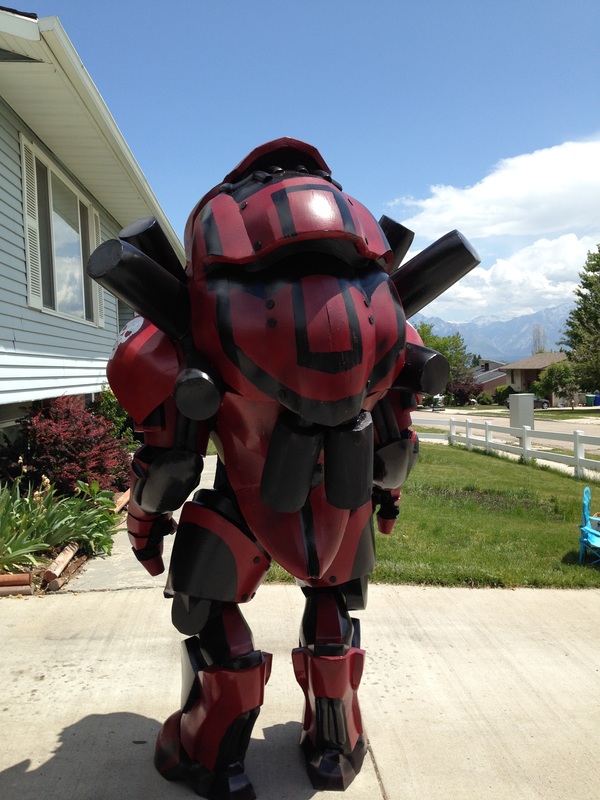
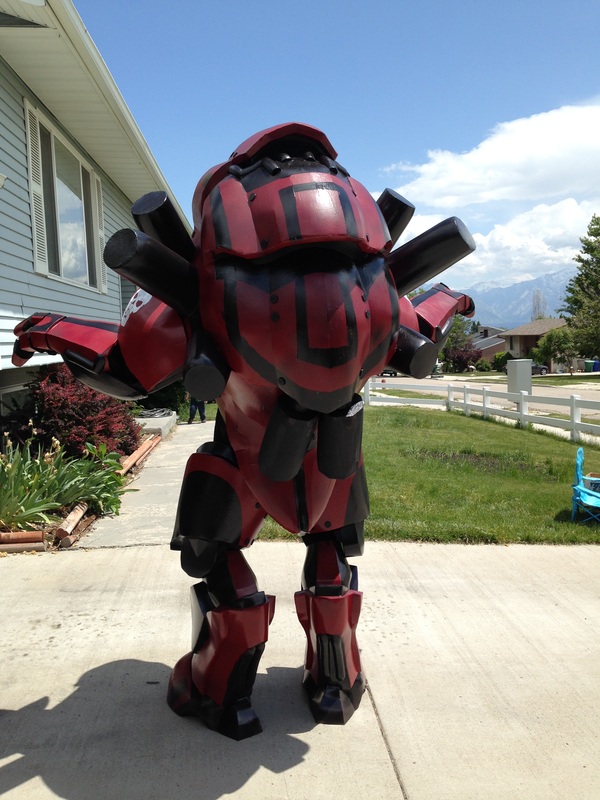
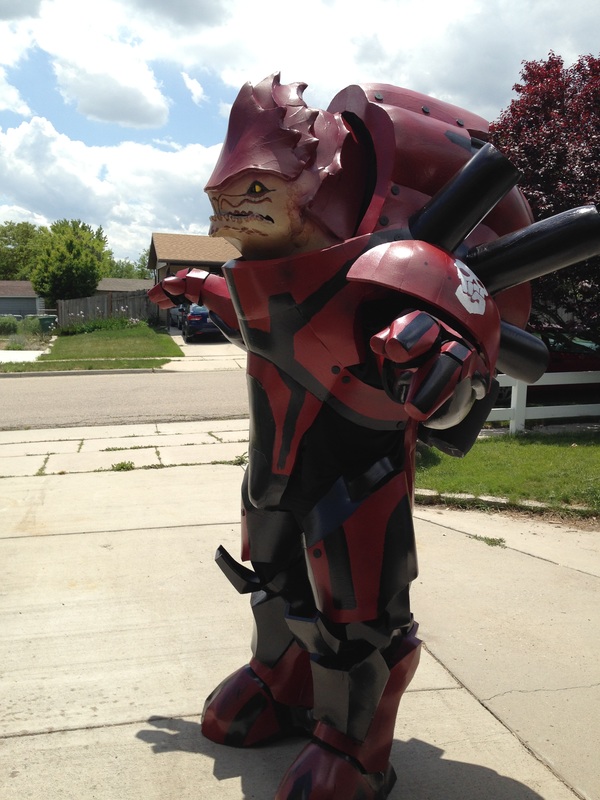
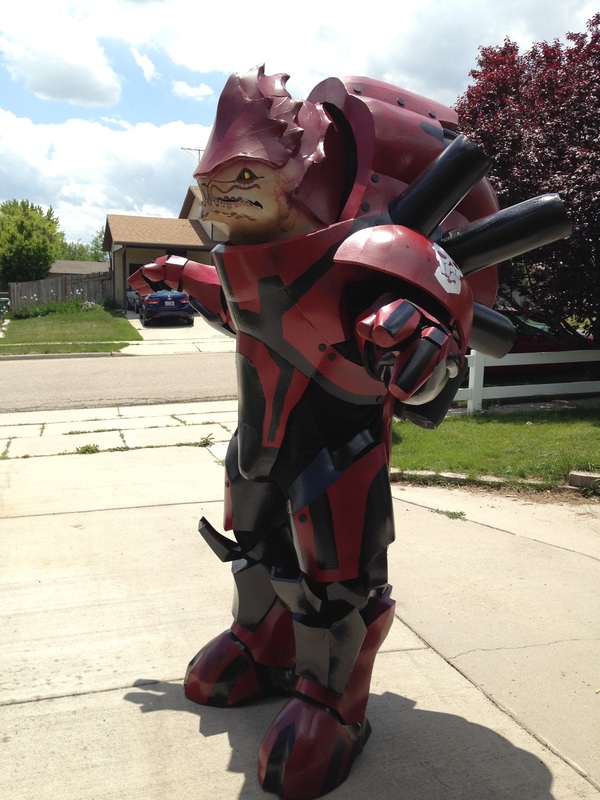
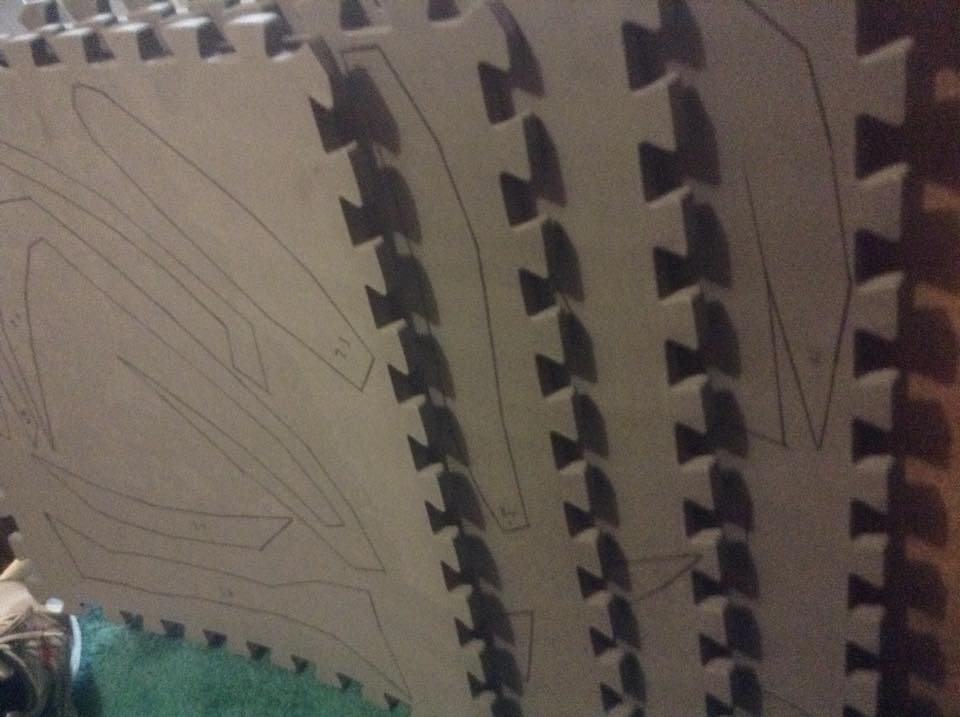
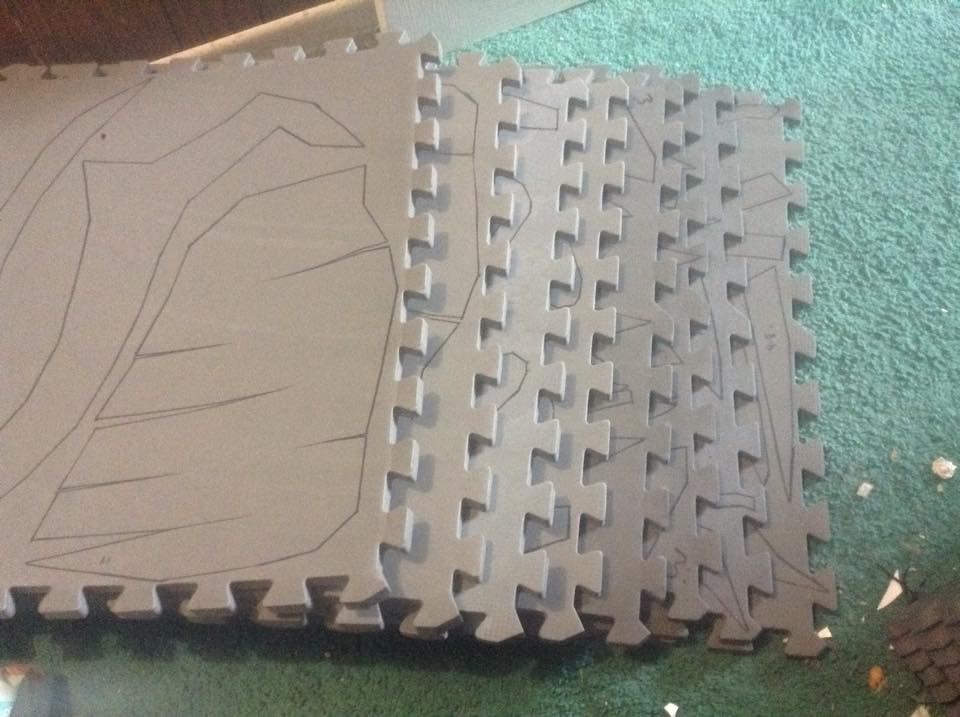
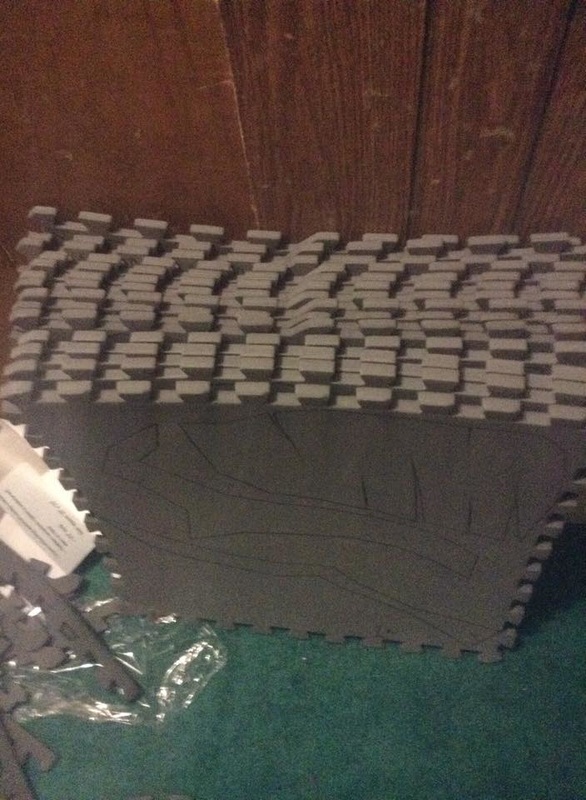
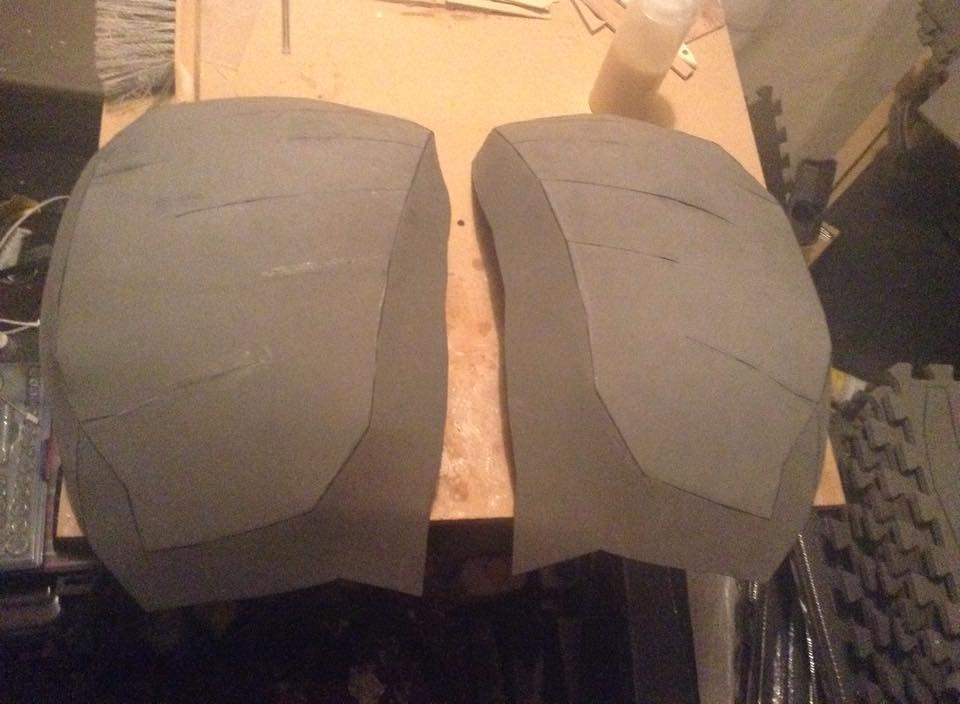
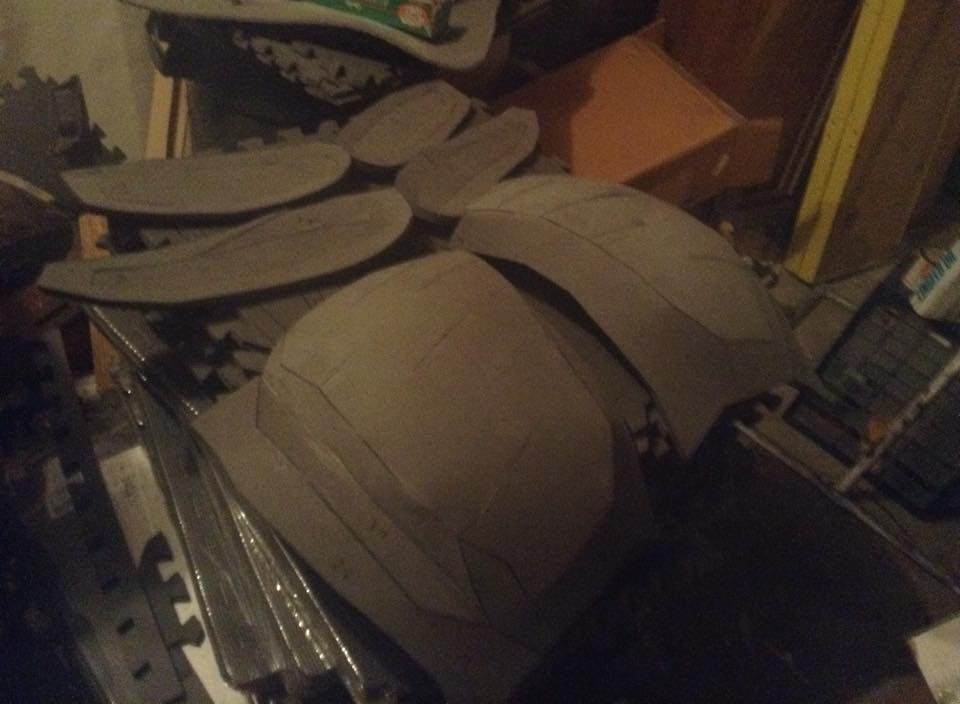
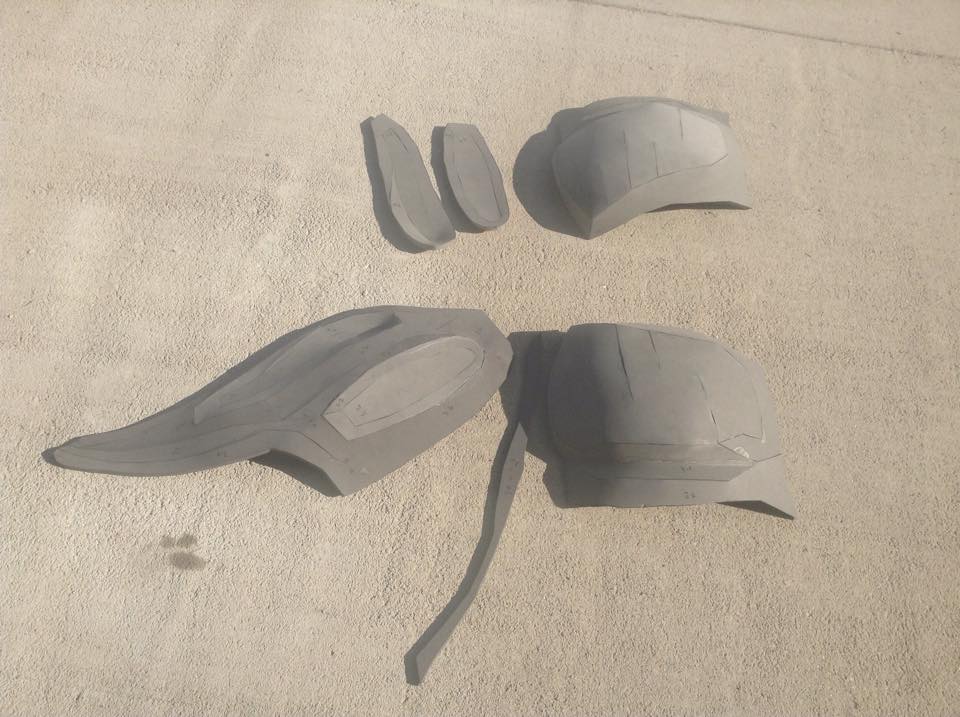
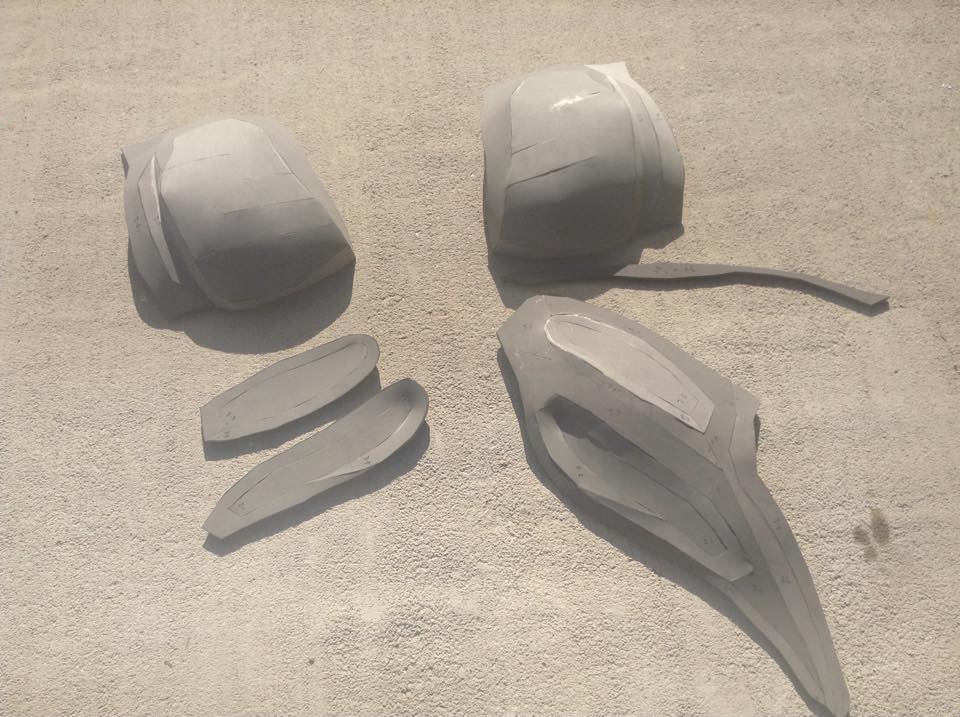
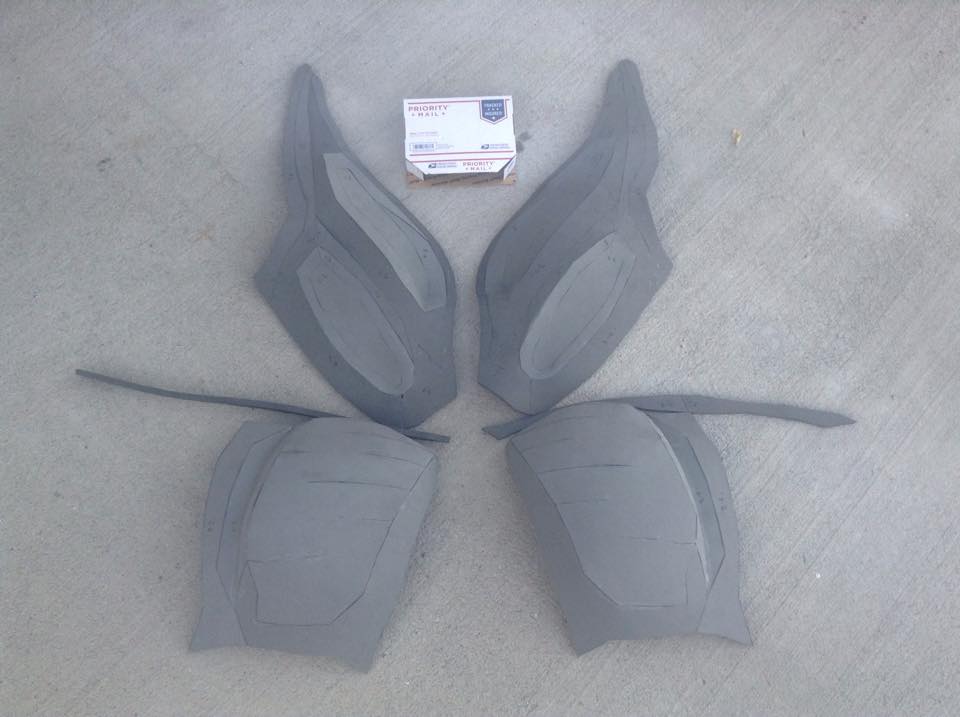
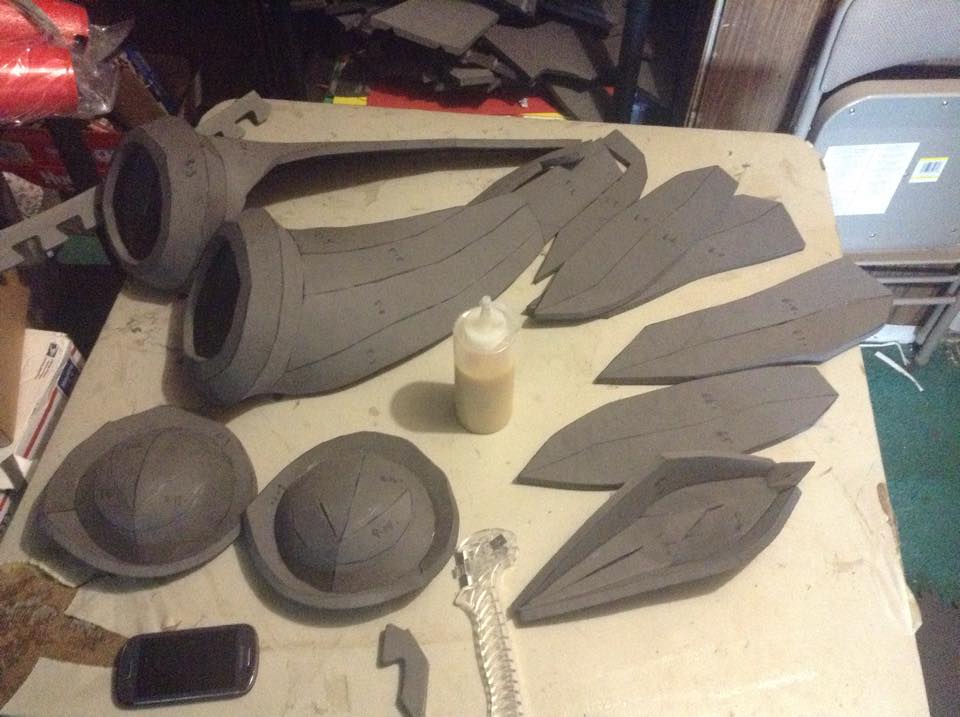
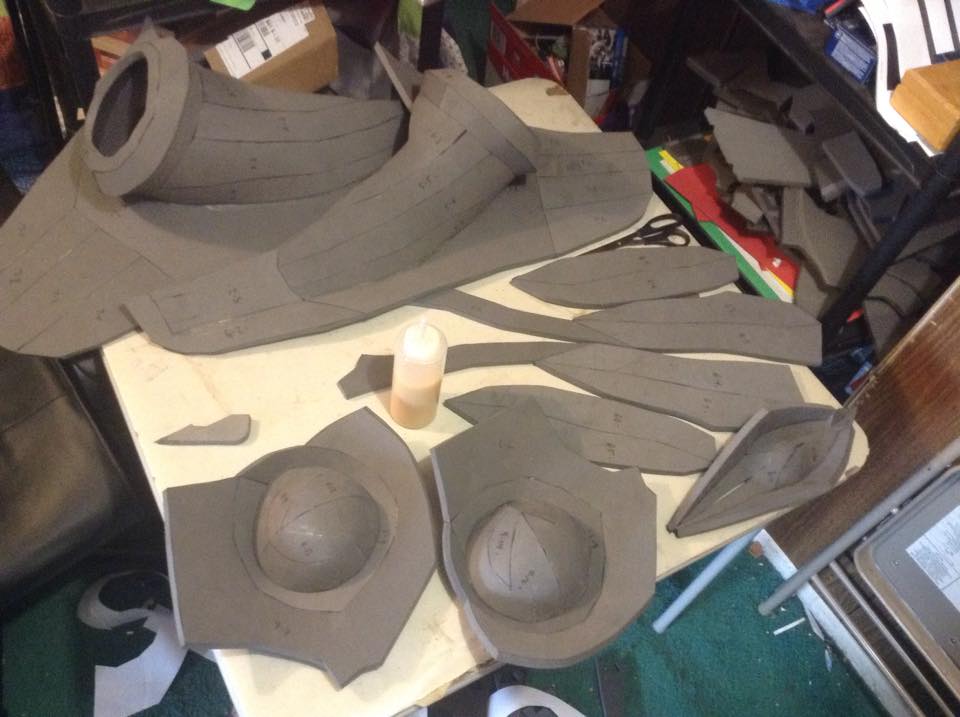
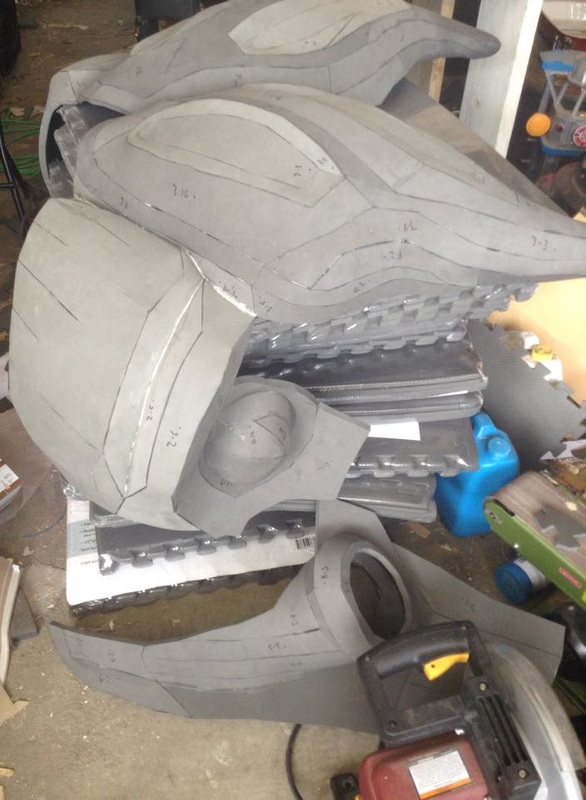
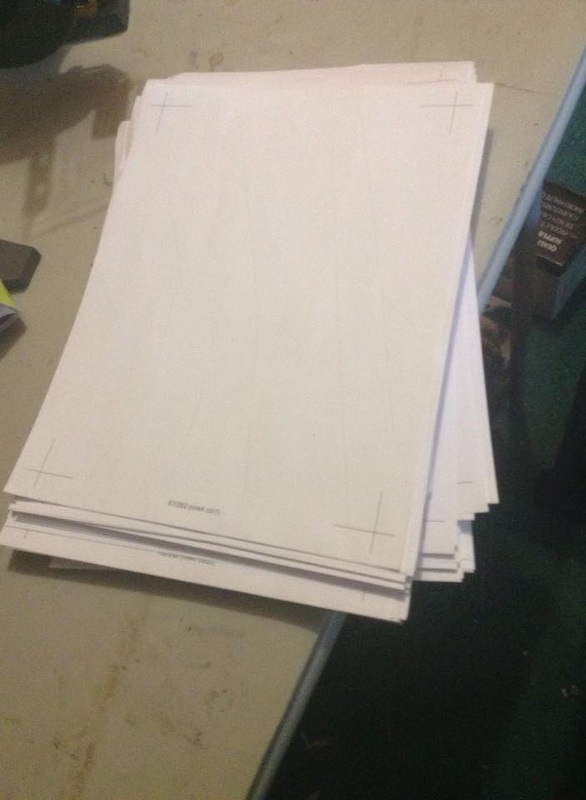
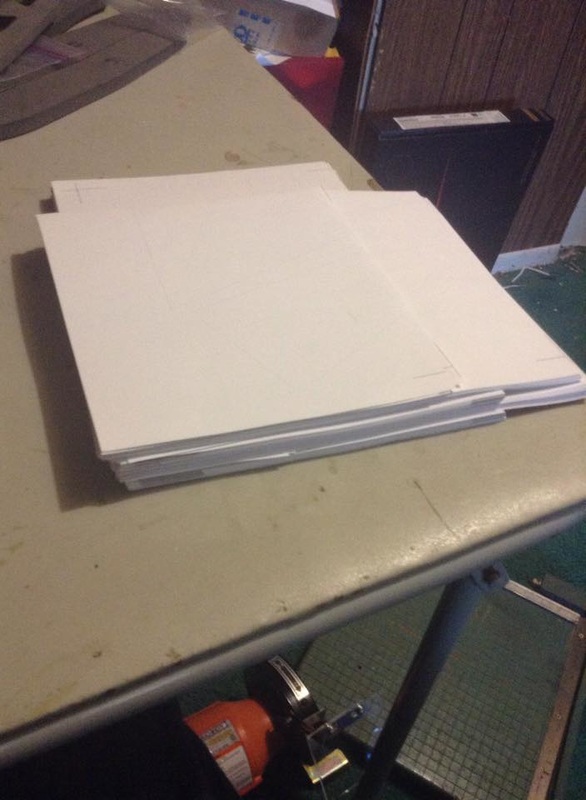
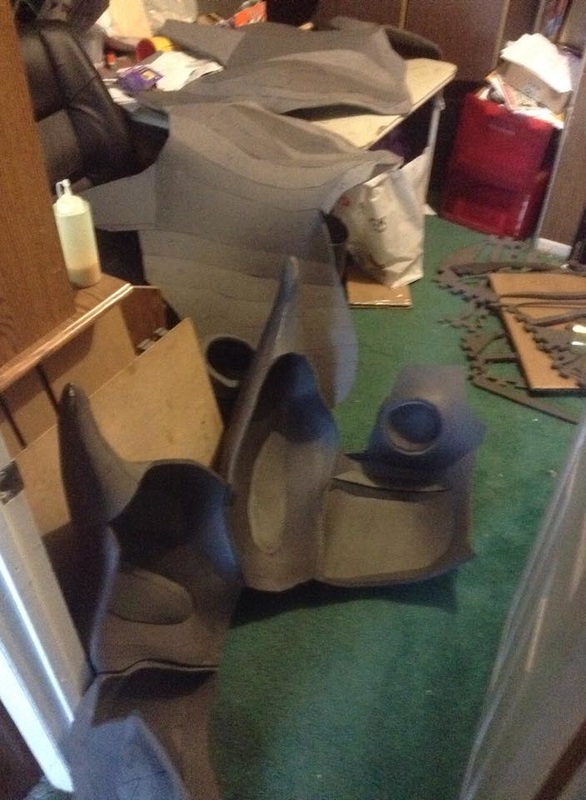
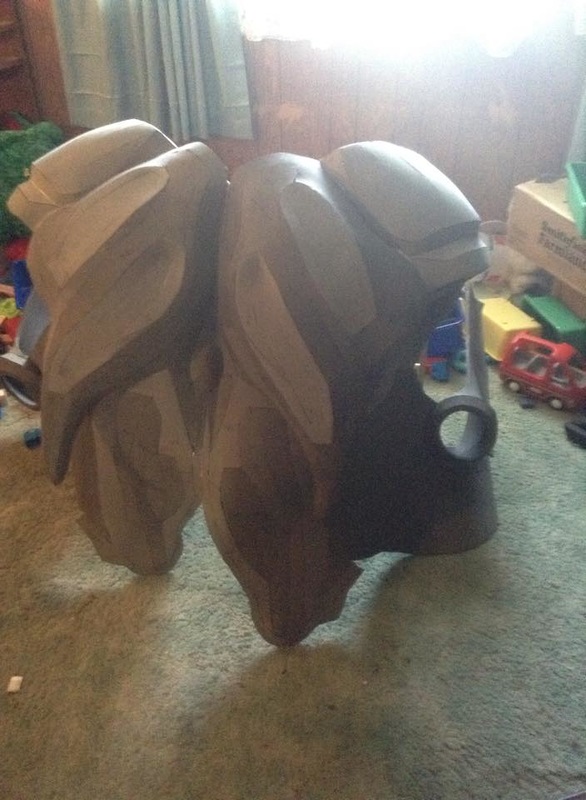
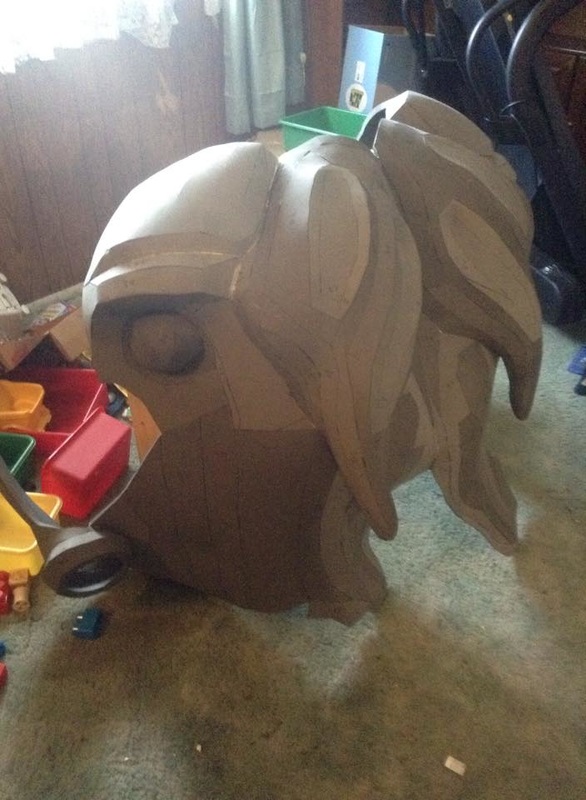
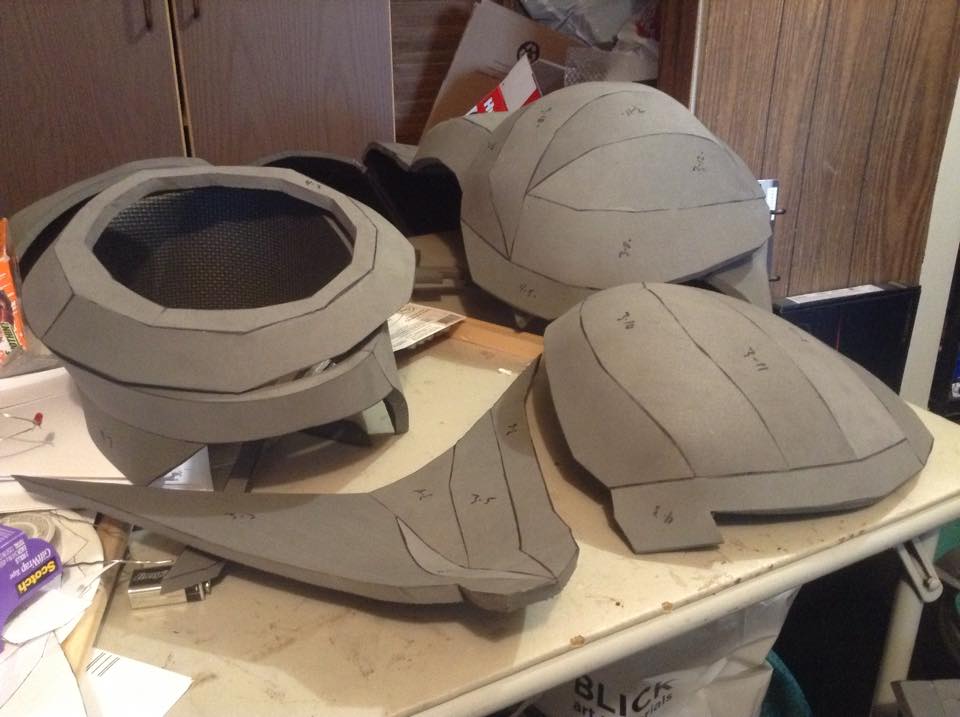
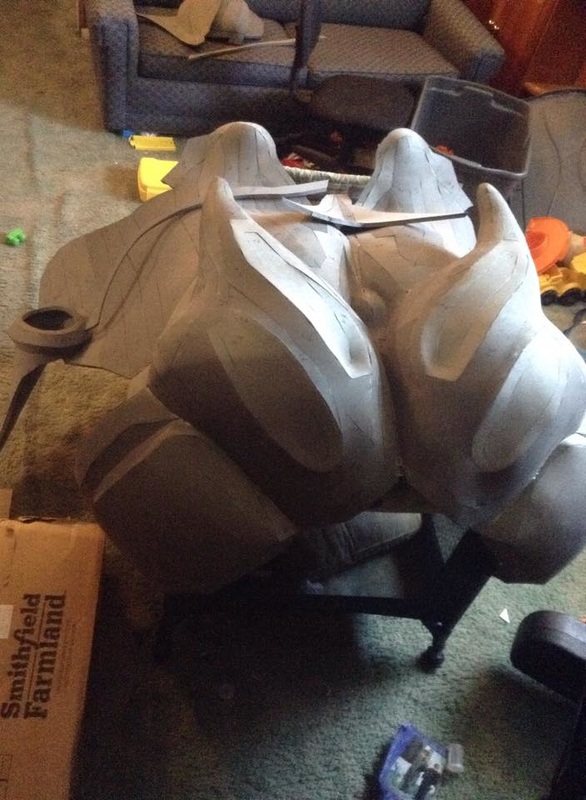
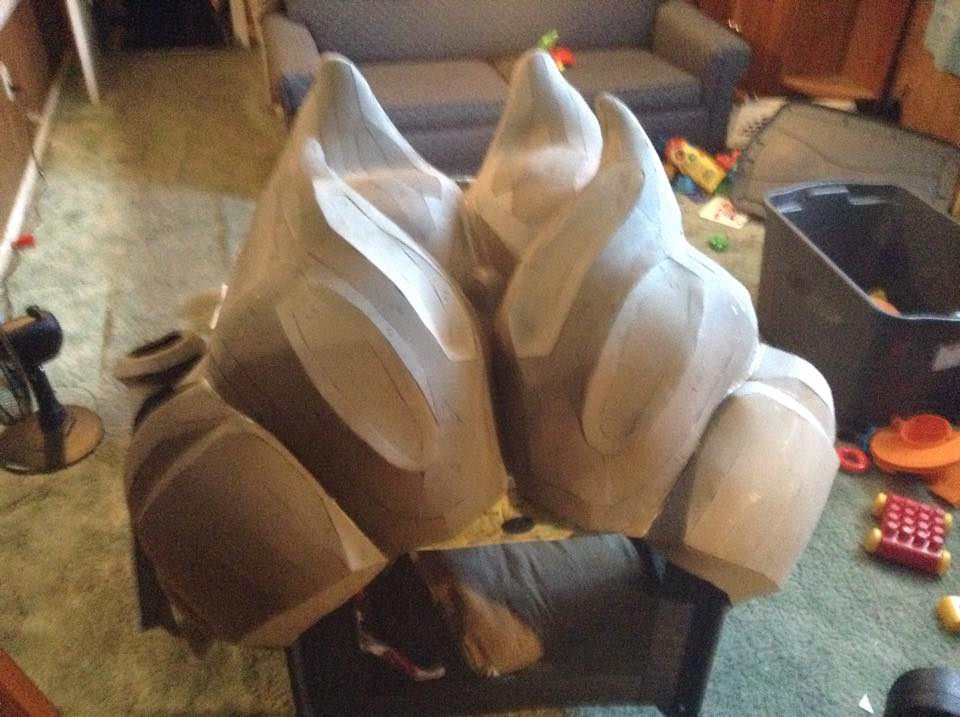
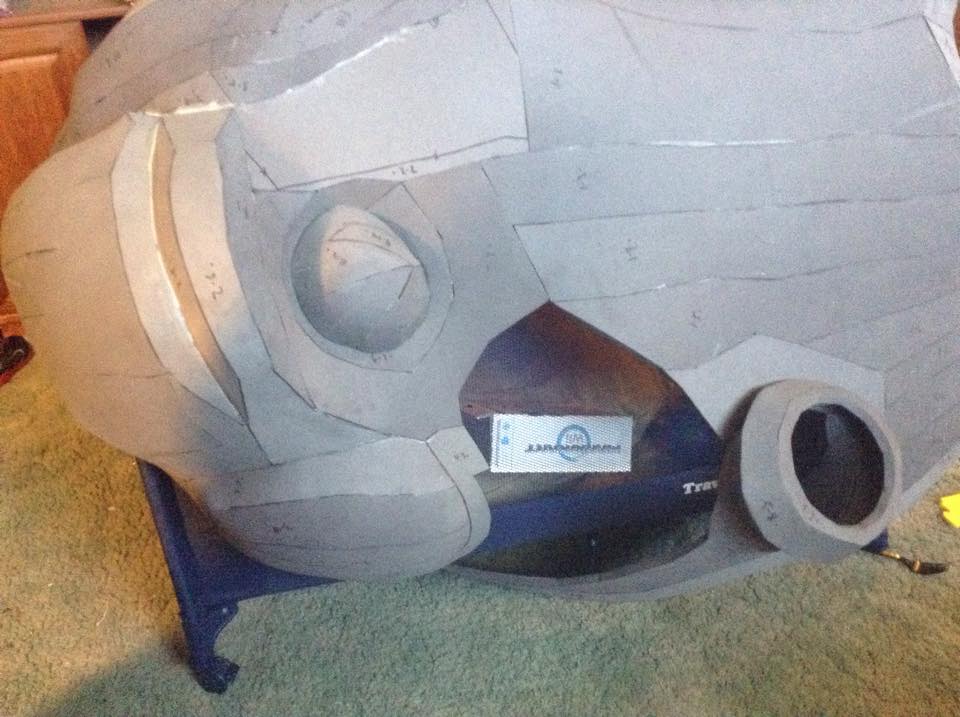
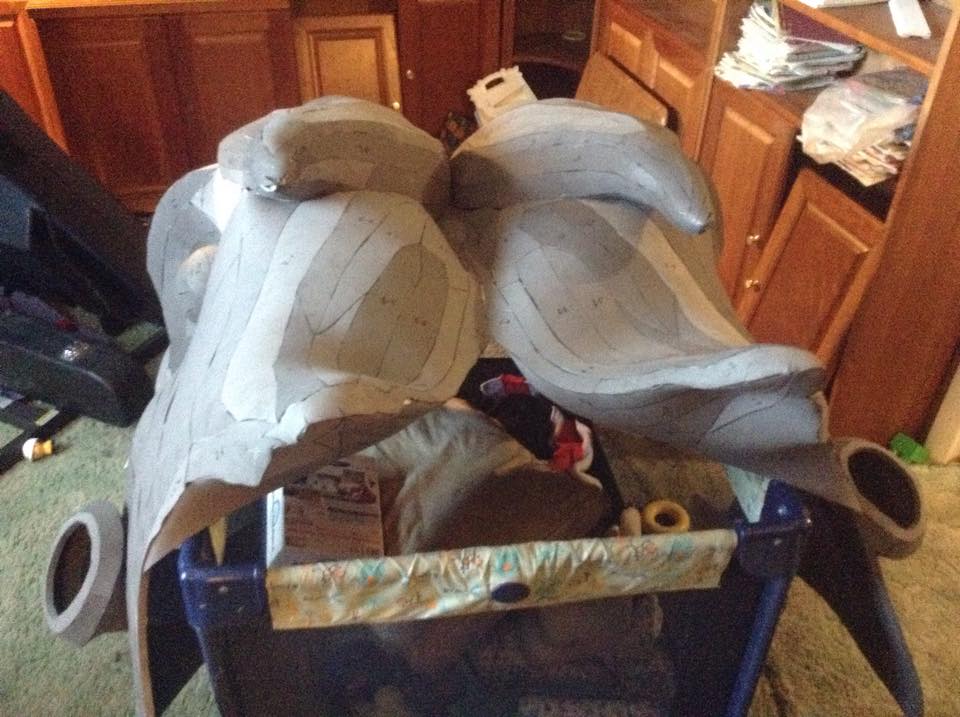
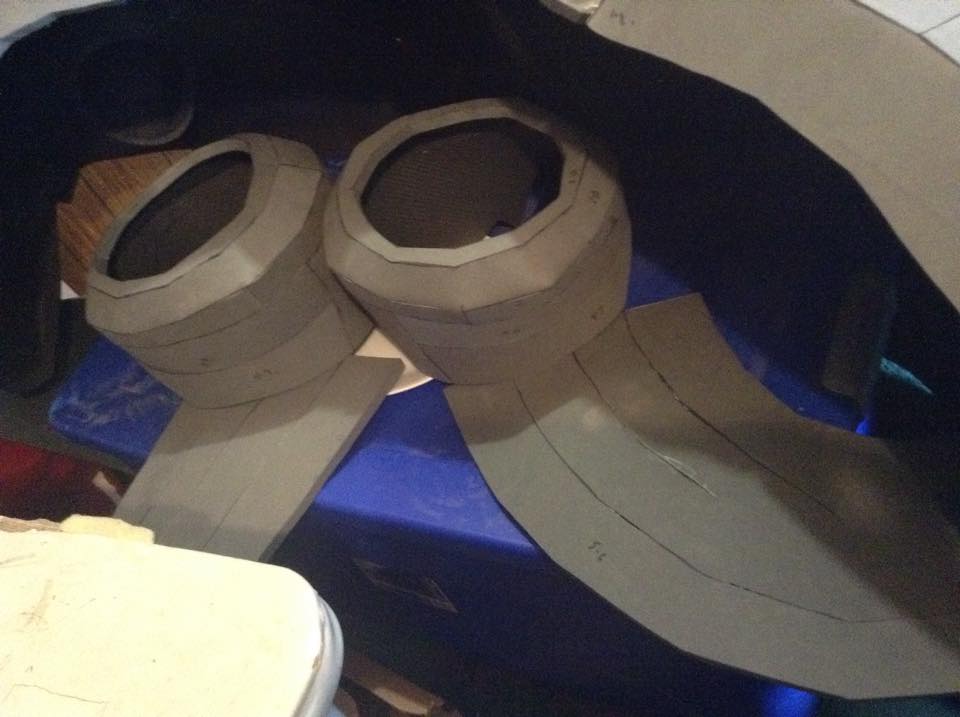
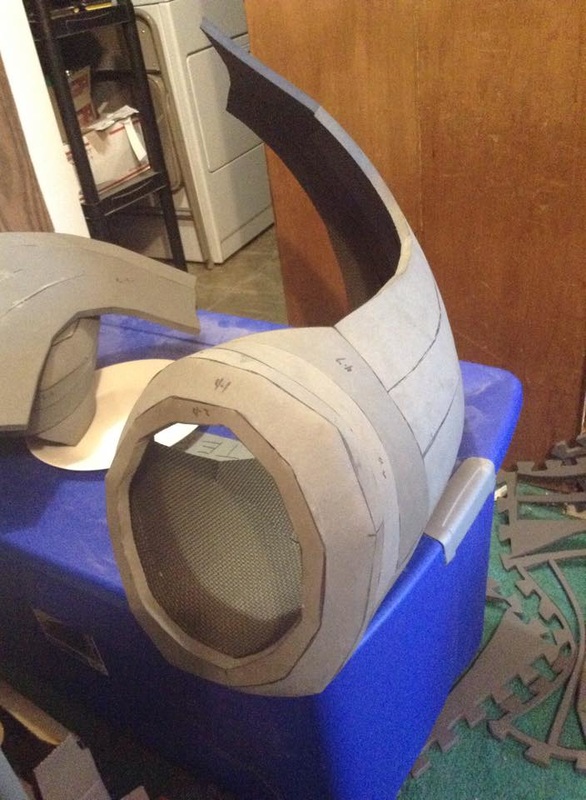
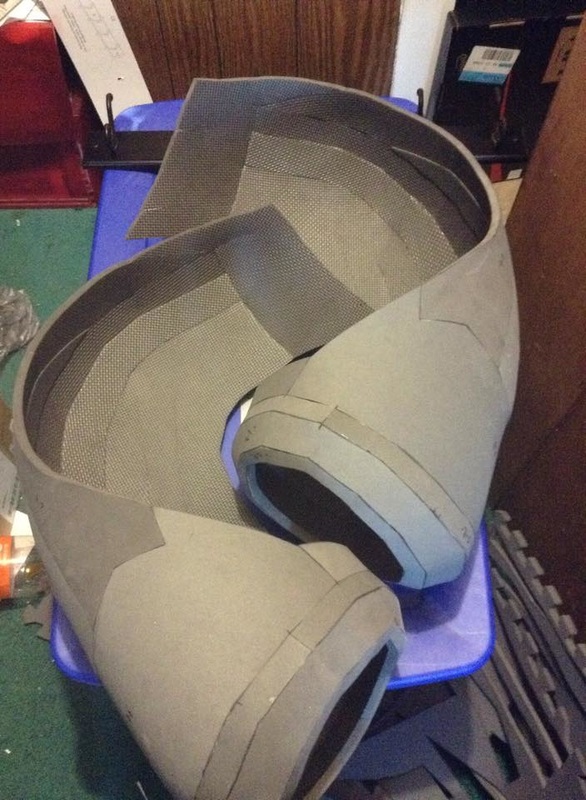
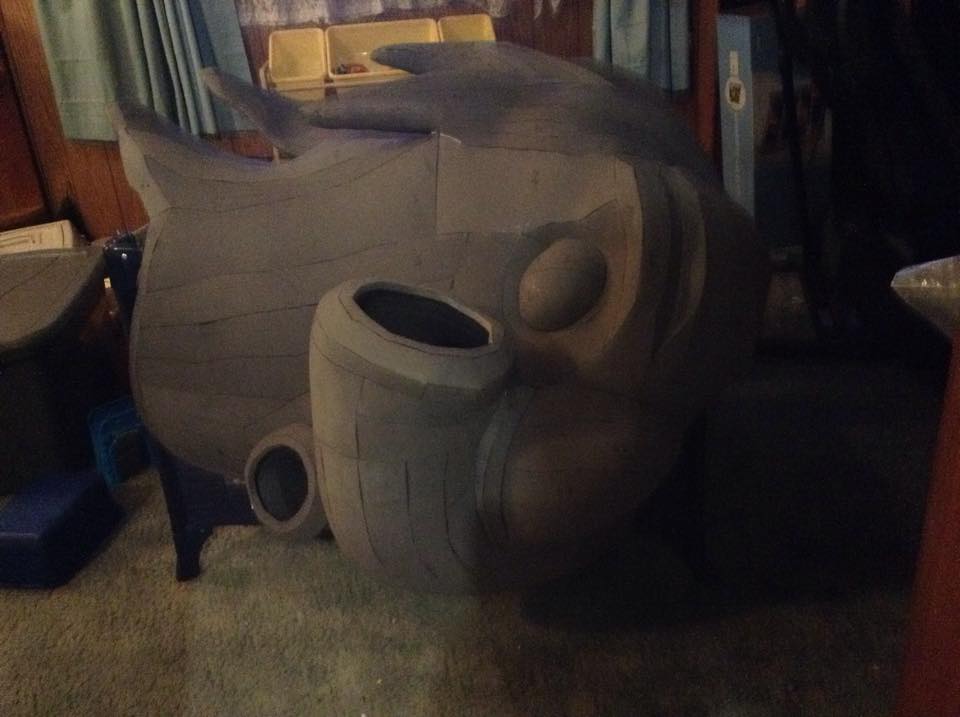
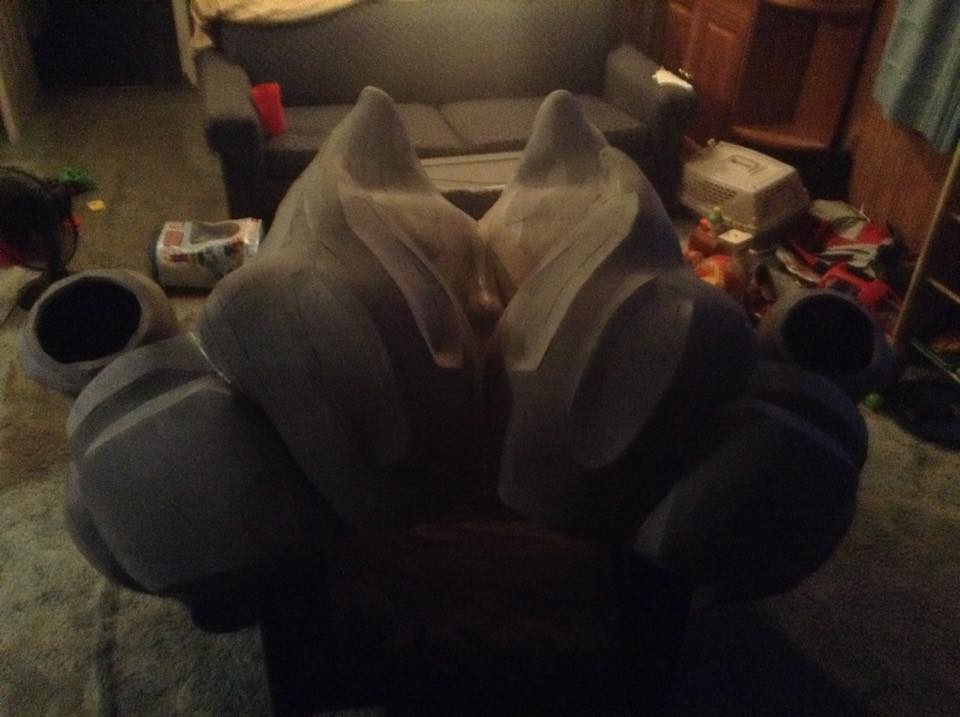
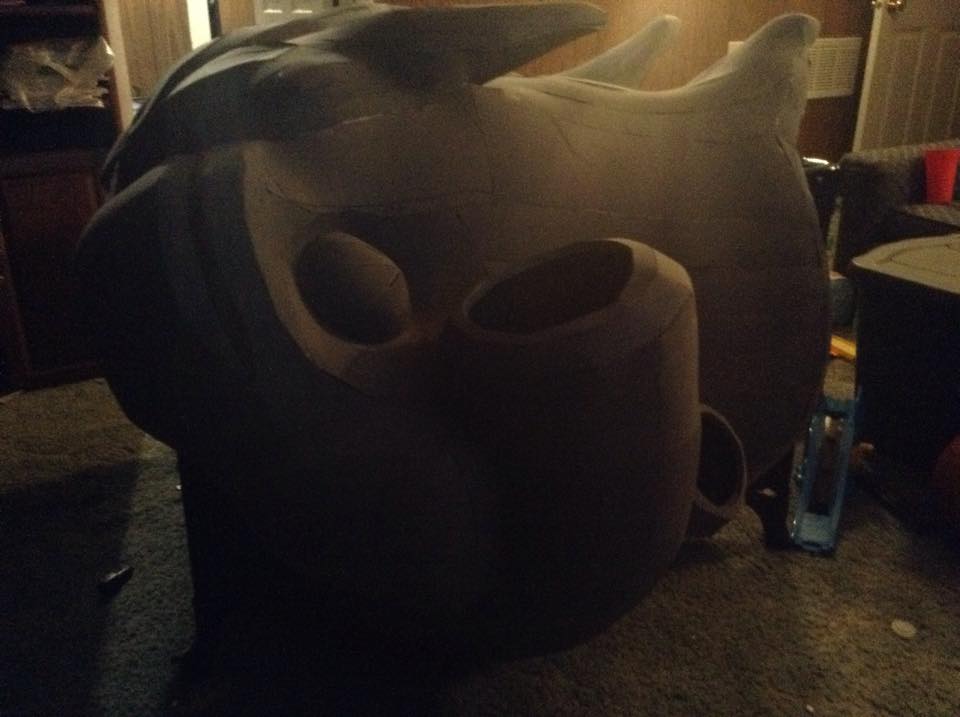
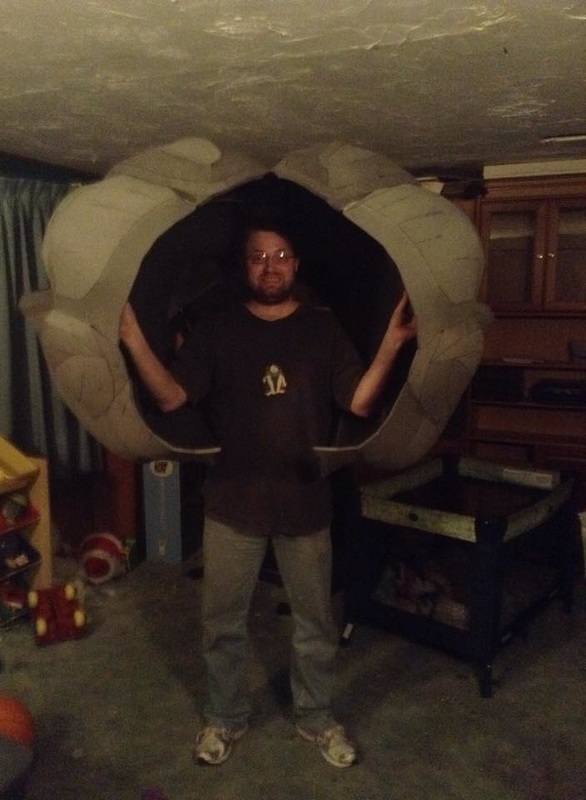
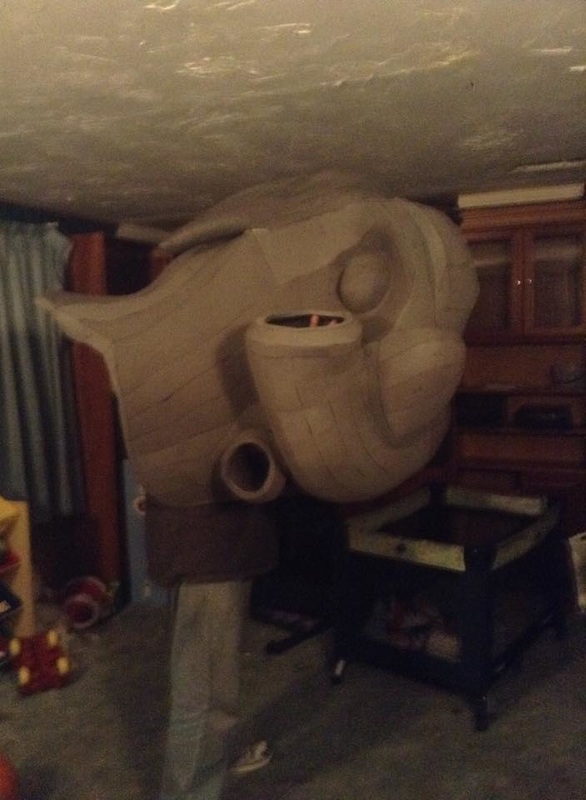
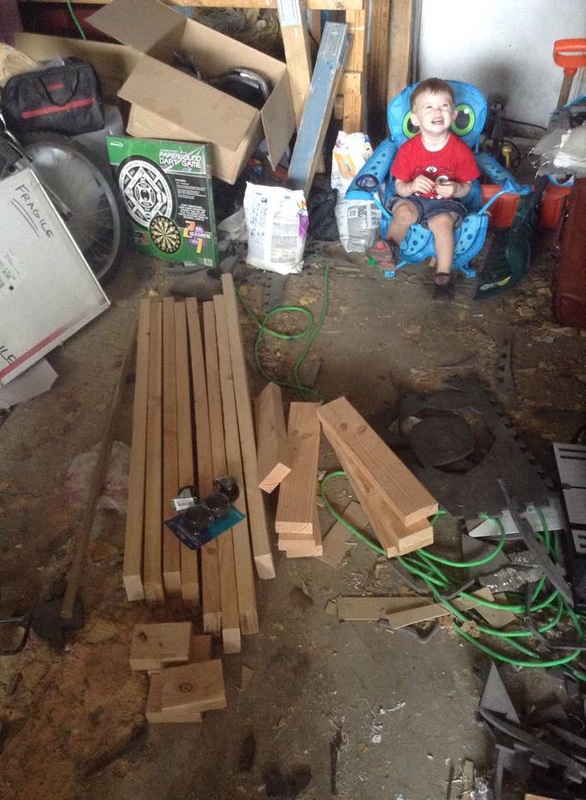
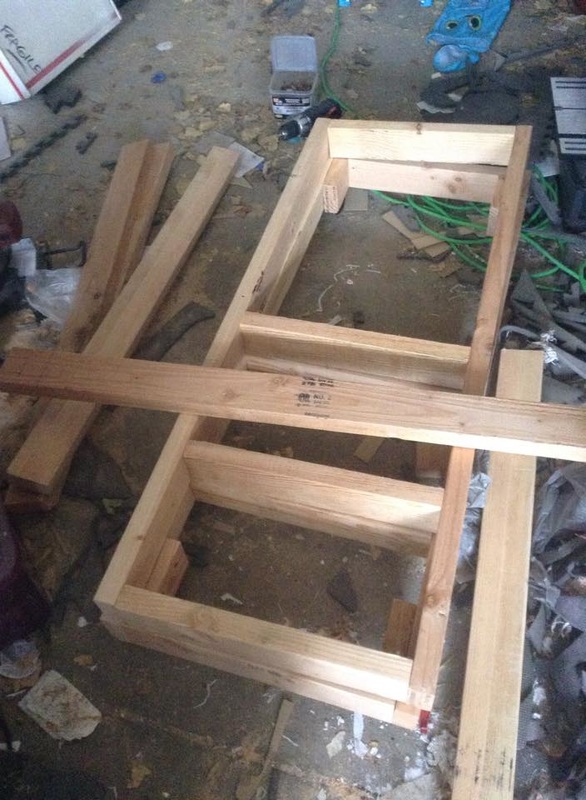
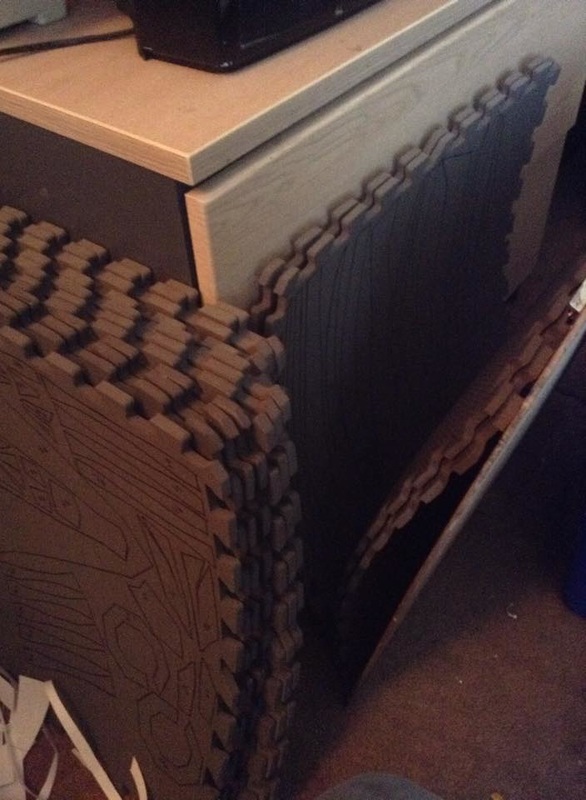
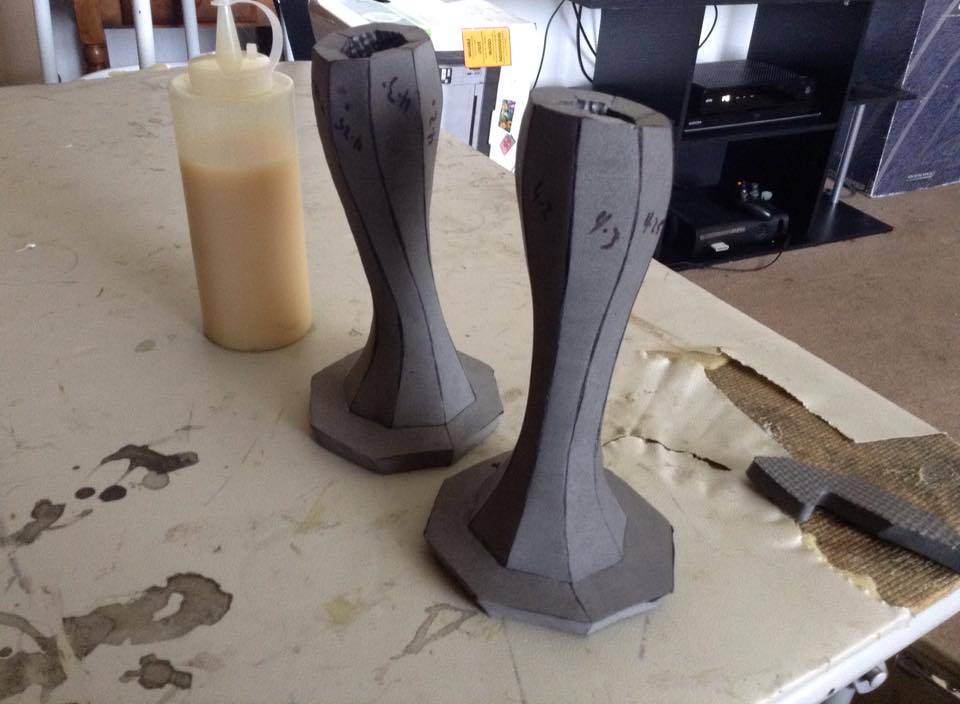
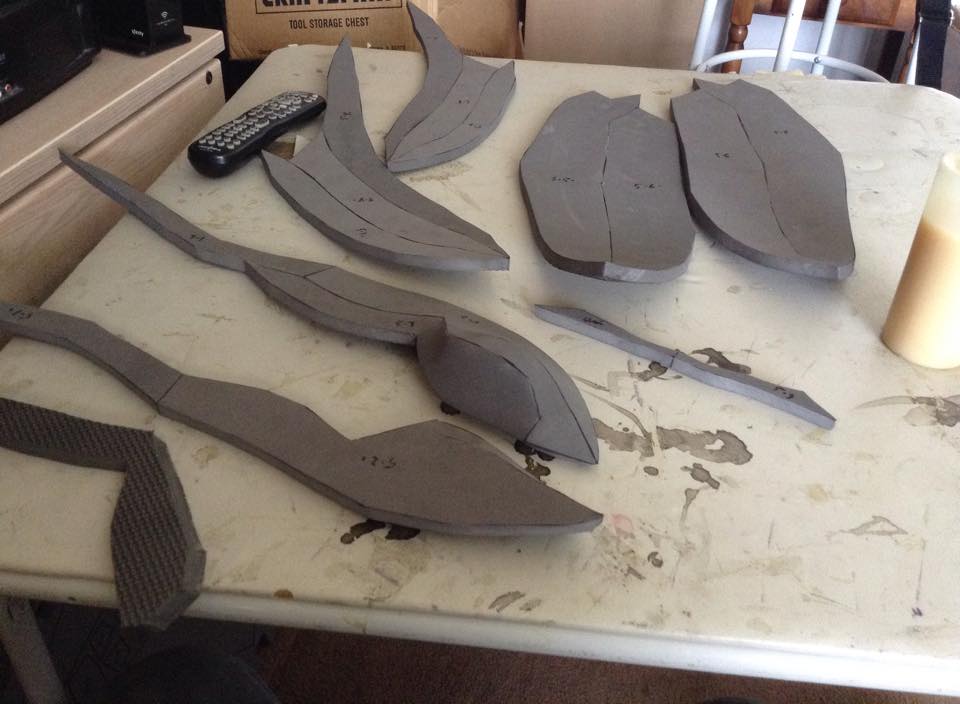
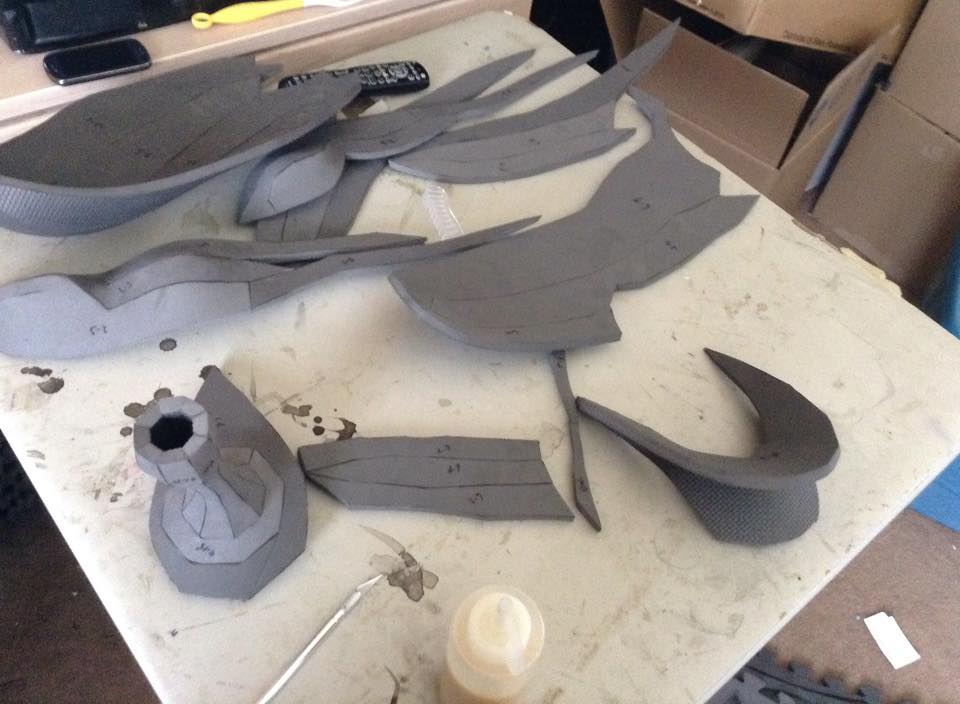
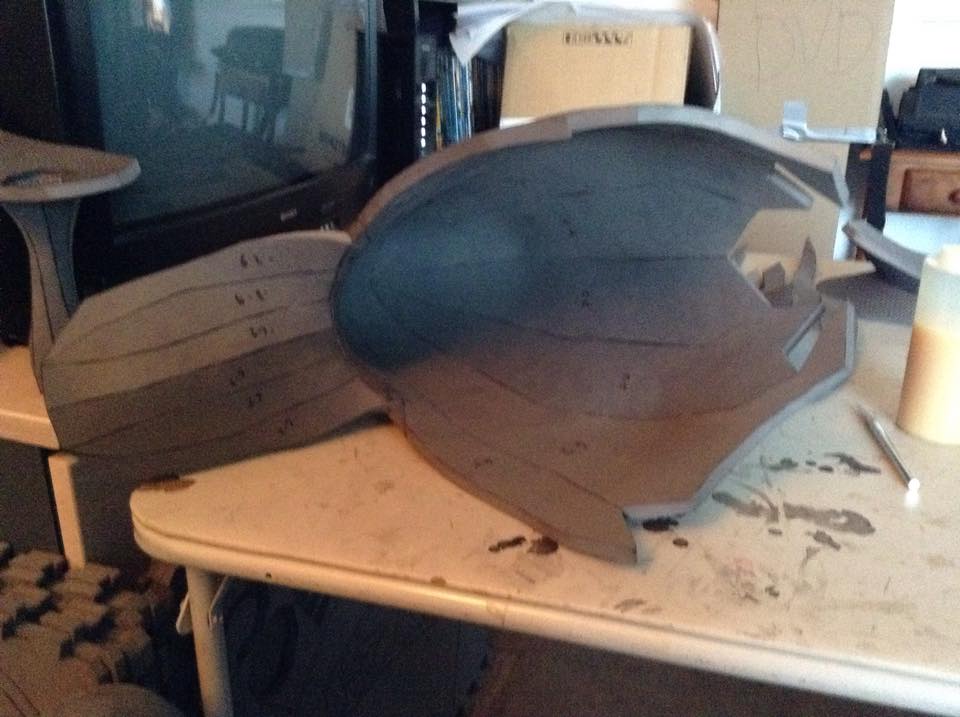
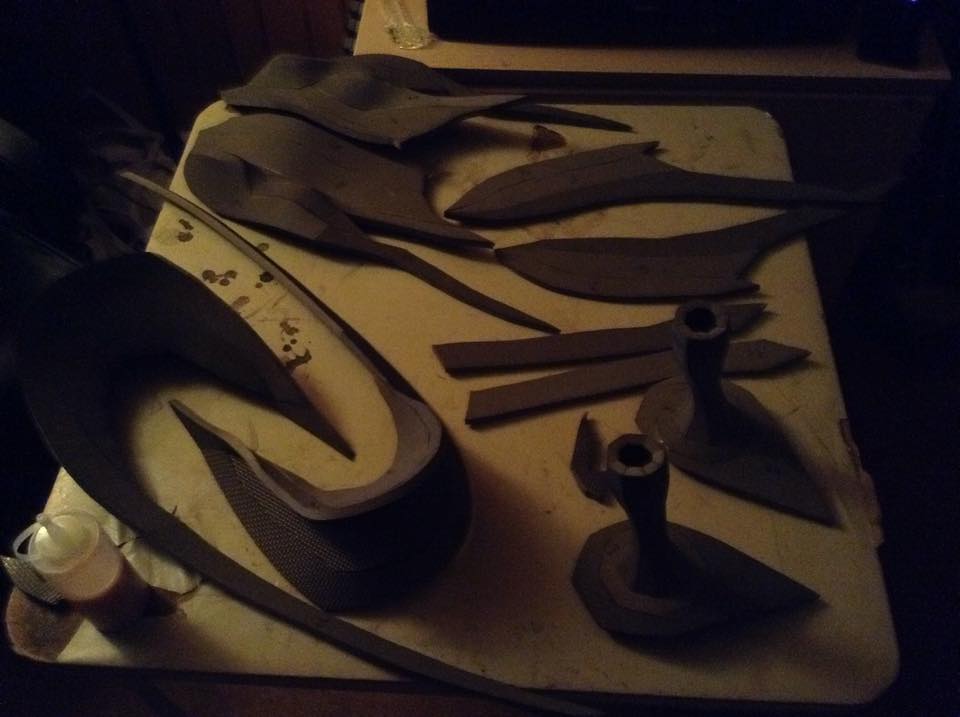
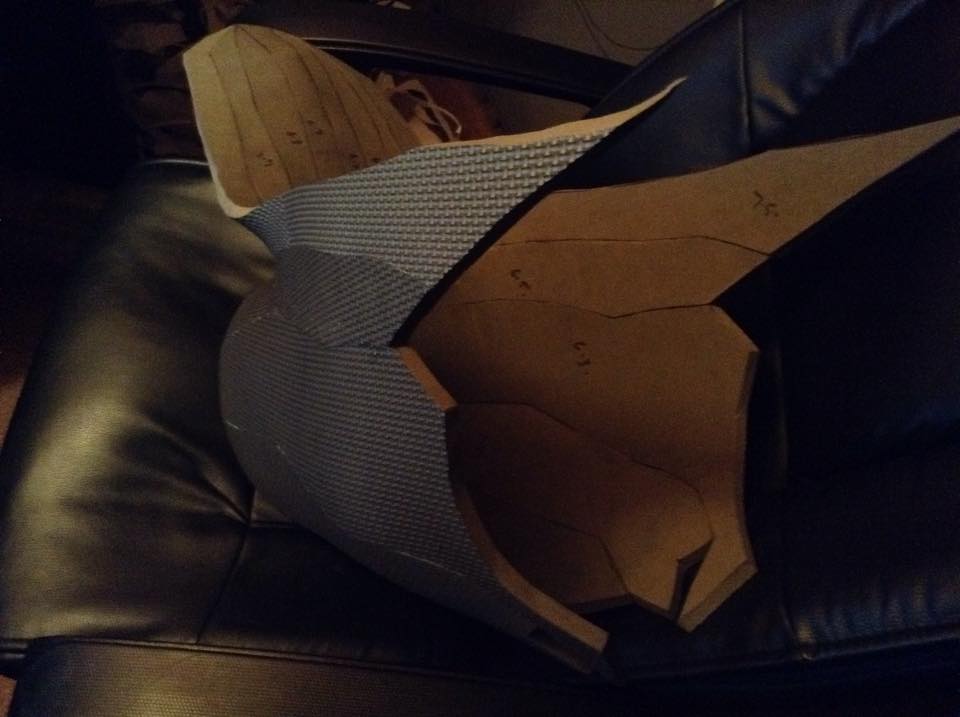
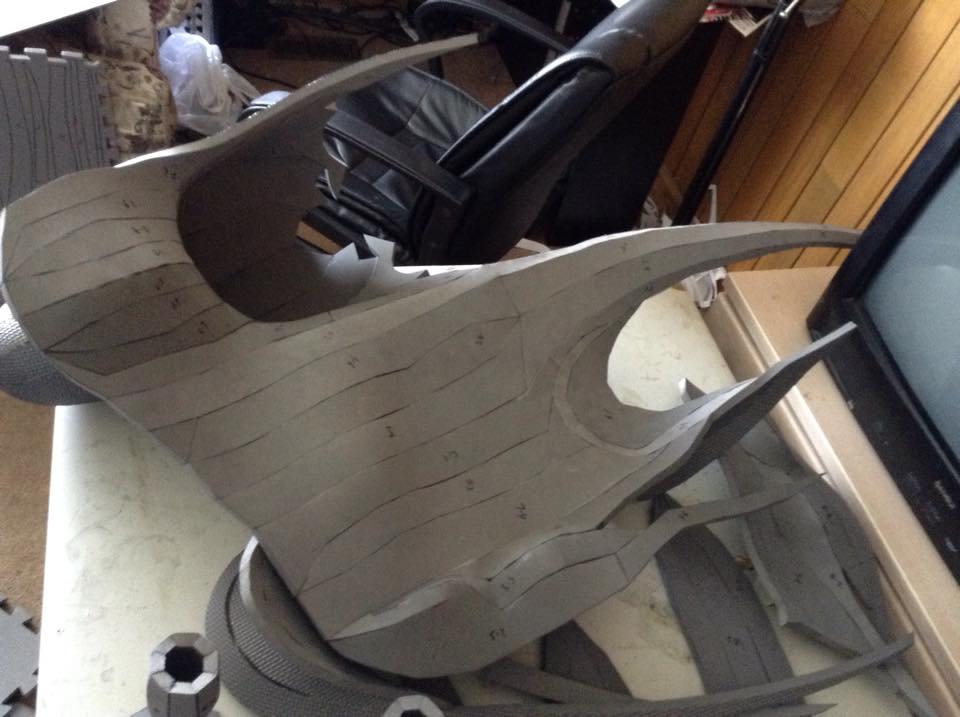
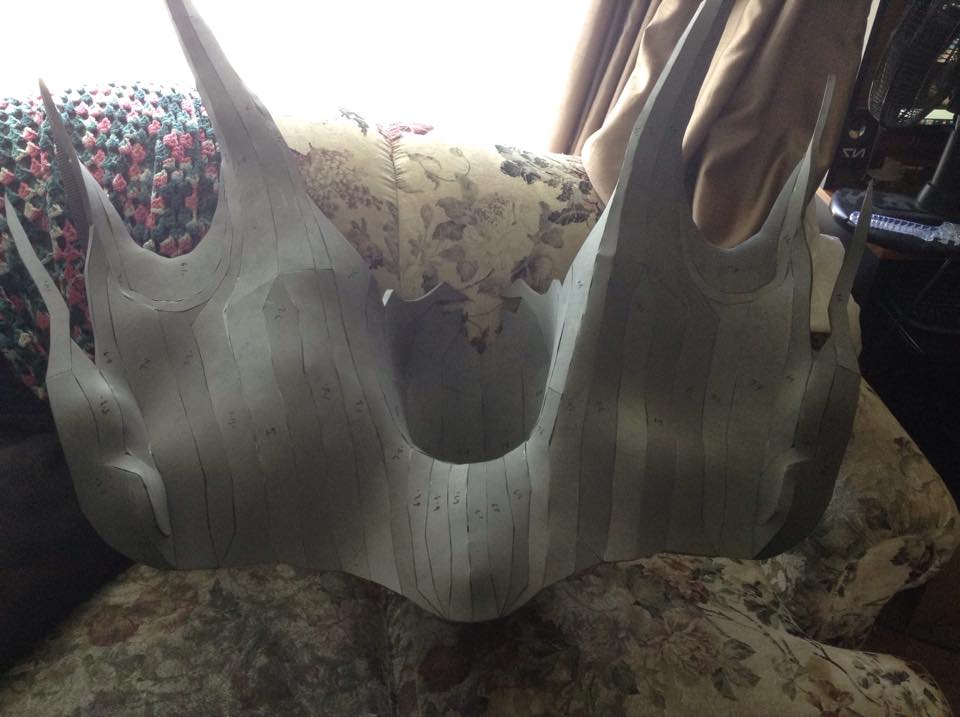
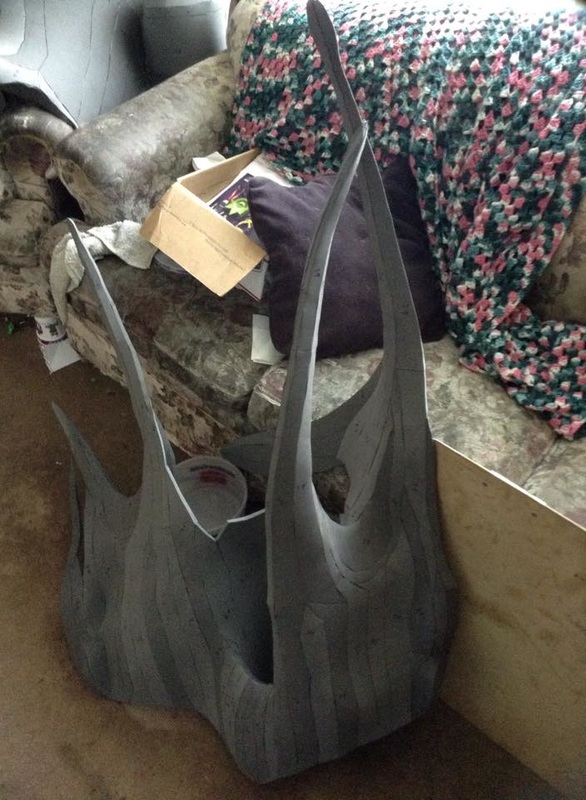
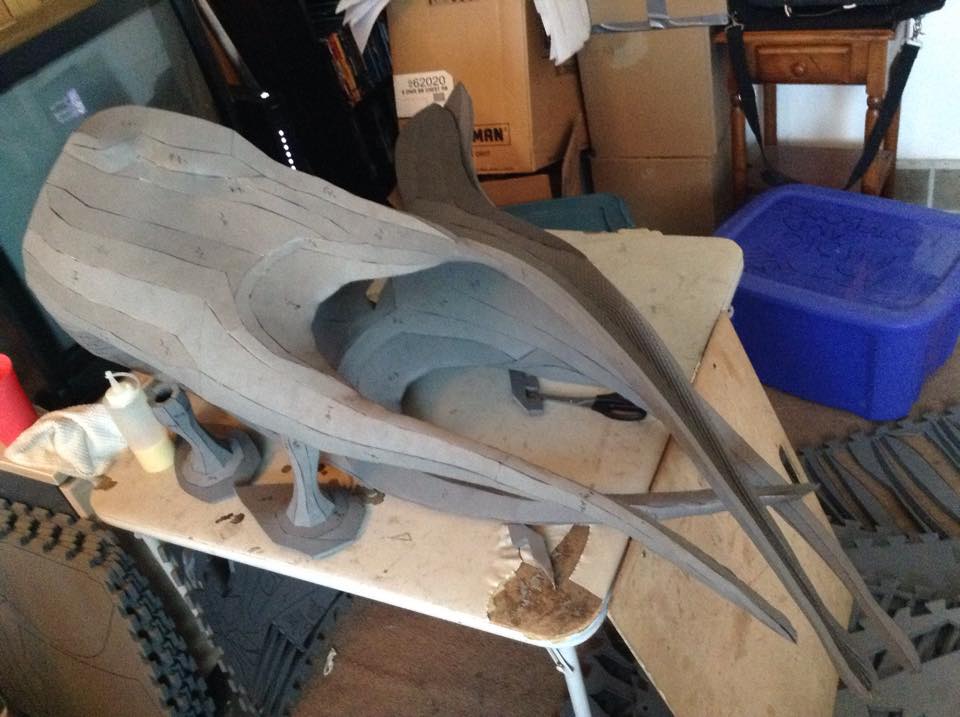
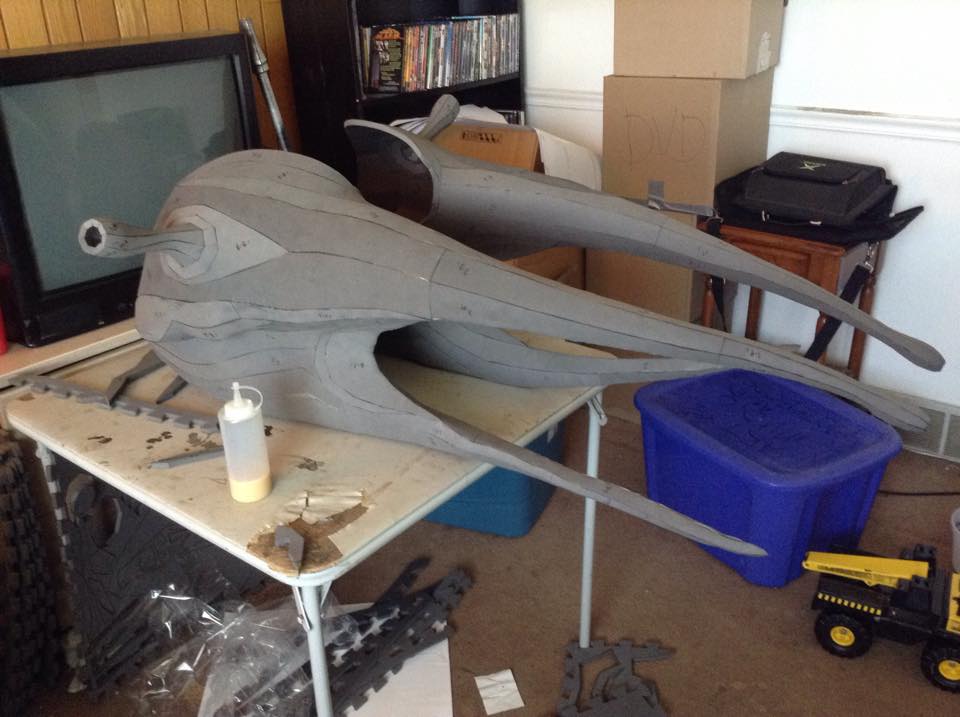
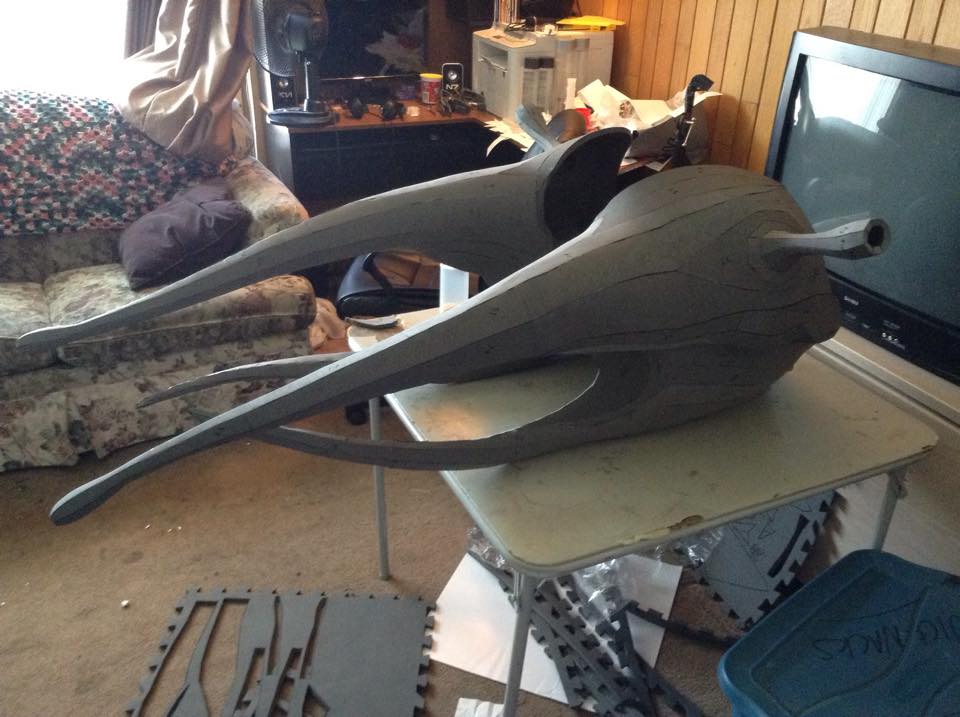
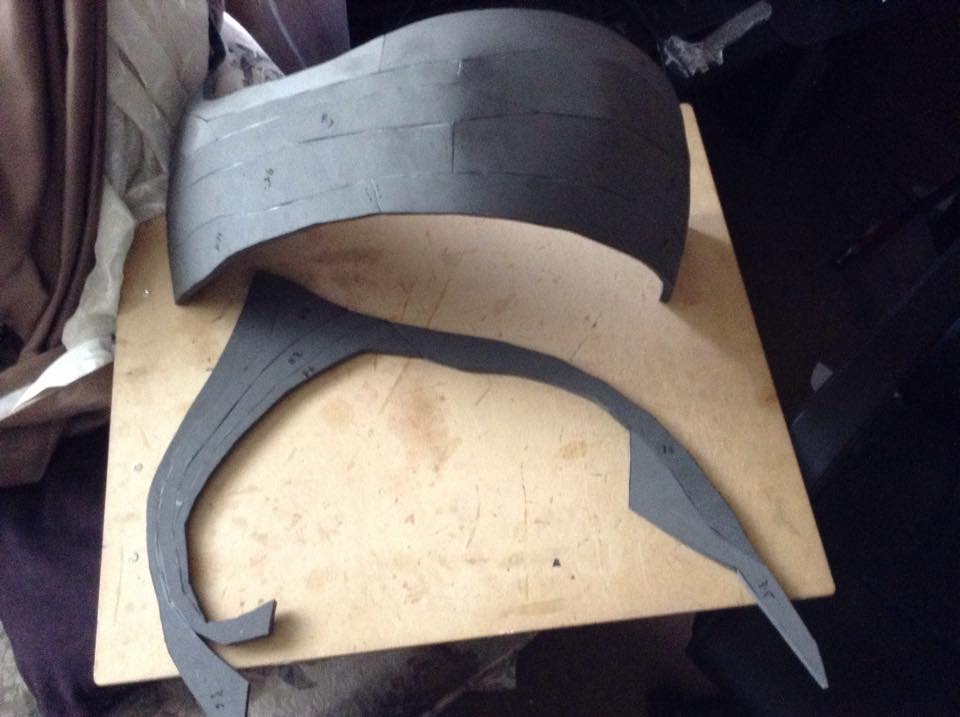
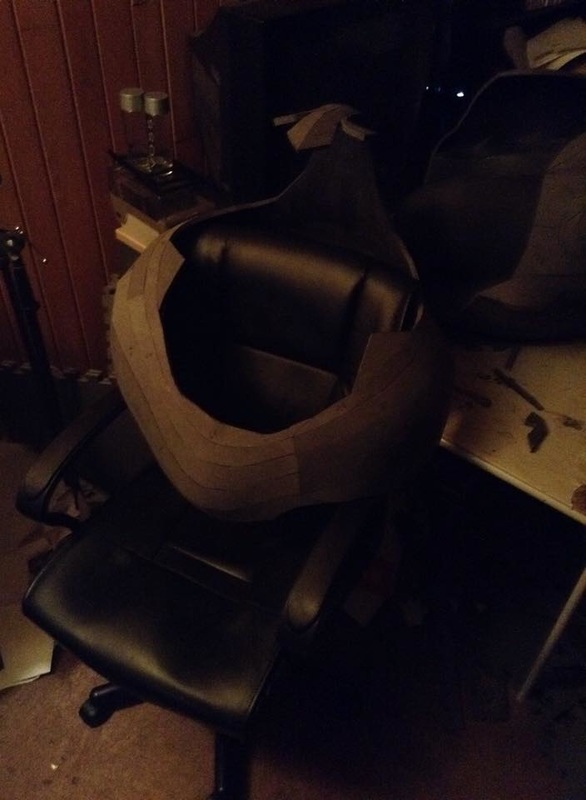
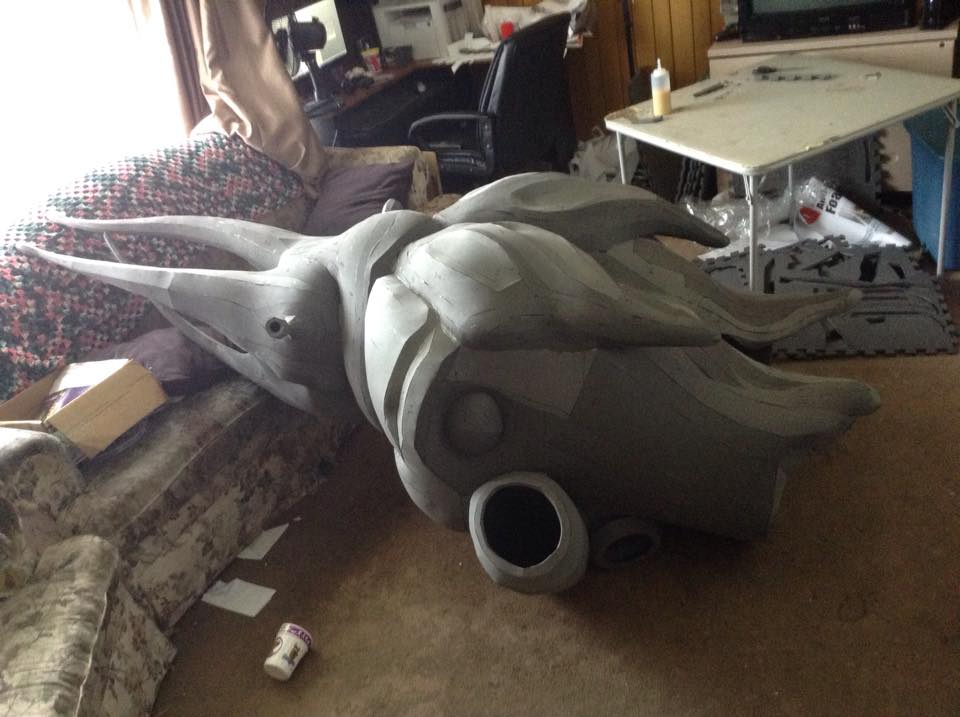
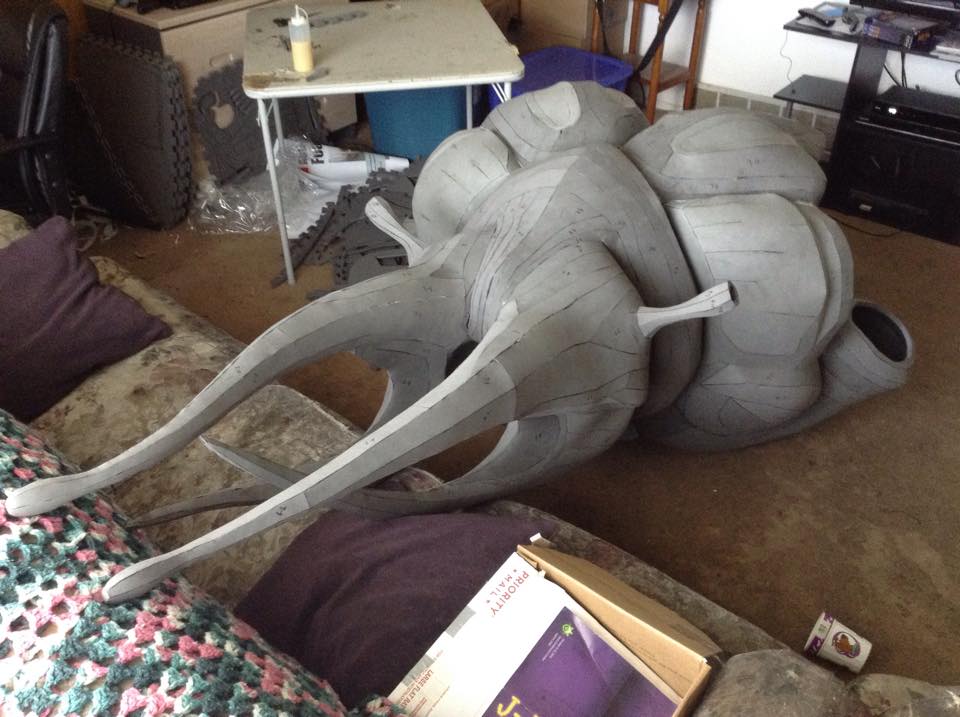
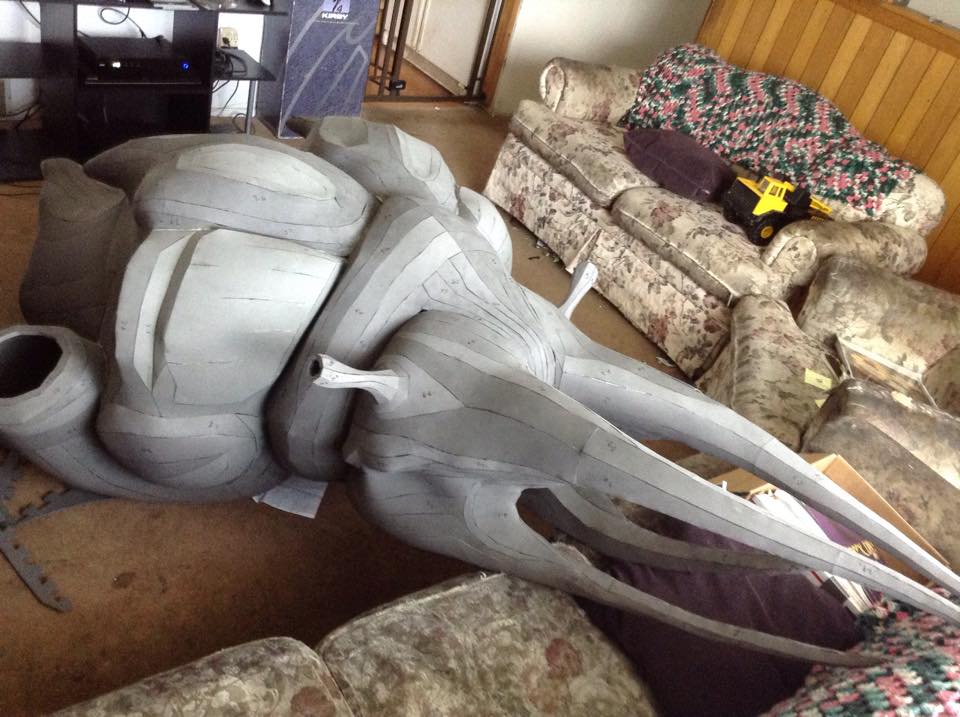
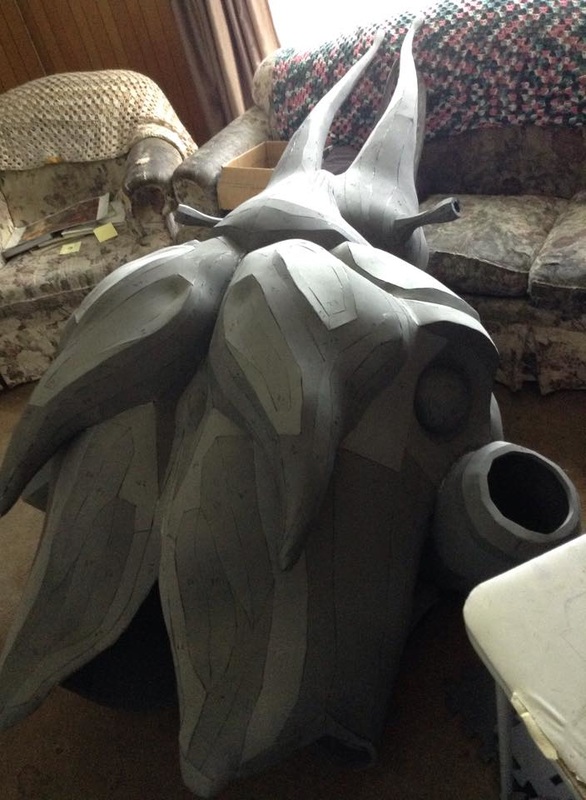
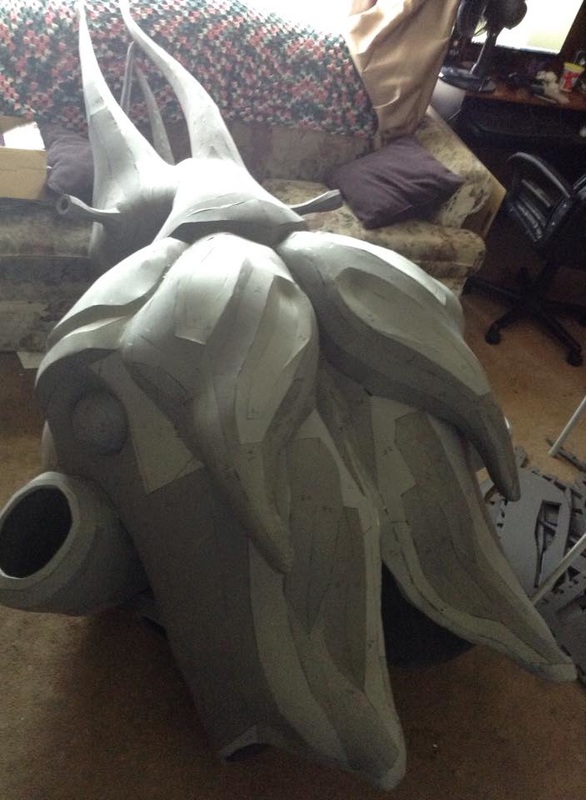
 Straight from one gigantic build and into another! I've always wanted to make a Krogan, and being the crazy person that I am I wanted to do one that was full size - at least according to the lore/game logs. You see, Krogan are supposed to be seven to seven and a half feet tall, but their representation in the game - most pointedly cutscenes - were the same size as humans due to programming constraints. I also wanted to do something different from everyone else; all around the internet you can find some really awesome Wrex and Grunt builds, but no other Krogan really. So while I was going through my wife's playthrough of the trilogy (she gets super sick if she plays so I play while she listens and makes the choices), I actually got up close and personal with Chief Weyrlock Guld. I've always killed him from far away, but somehow he got close enough that I actually got to see his armor. I fell in love with the design, even though the lighting made it look pink (where as the actual color is white). I immediately wanted to make it, and expressed this want to a good friend of mine, Keelah Monster Cosplay. She mentioned that Garm, the leader of the Blood Pack on Omega, had basically the same armor set, and was covered in the group's colors and symbol, and would be much more recognizable. I was instantly hooked. So, if anything, you guys can totally blame her for this gigantic monstrosity. ;) 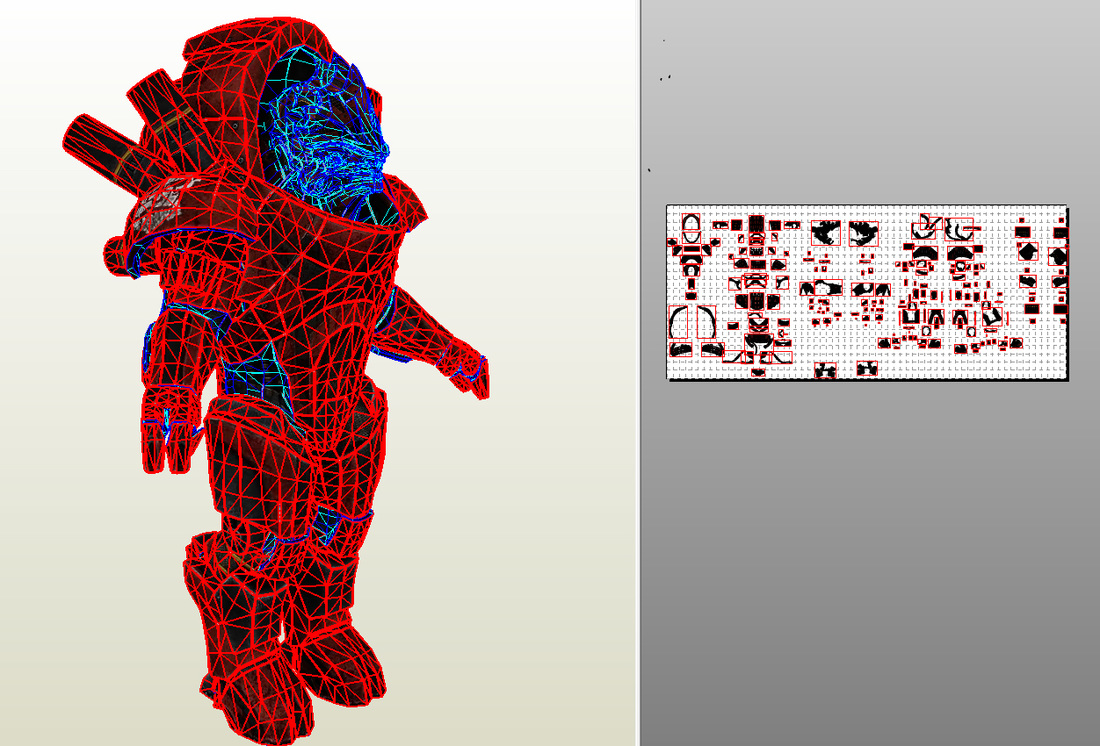 Now, this build not only was a test in patience (as was Threshy), but it also taught me a whole new skill. You see, the model I used was literally ripped from the game, and as such it was designed for animation, not as something to be worn as a costume. Because of this, there were lots of overlapping/clipping parts, some parts that didn't need to be there, and other parts that were hidden inside other things that I needed to fill. Me being unfamiliar with how to edit 3D models, I spent an entire weekend learning Blender, a free yet powerful 3D modeling program. (If anyone is interested in learning this program, I highly recommend starting out with masterXeon1001's Blending Away the Pain beginner course. Very informative, and it's totally free - though donate a few bucks to him for it 'cause it's totally worth it!) Once I had enough knowledge to do what I needed, I fixed up the file, then sent it over to the ever trustworthy Pepakura Designer program. This one isn't free, but it's super useful in turning a 3D model into a physical pattern. That helped me flatten everything out to something I could cut out and trace to the foam. It also help me lay it out in a way that used as much of a foam sheet as possible to cut down on having to buy tons, and cut down on the amount of parts I had to cut out which lowered the amount of seams on the part. 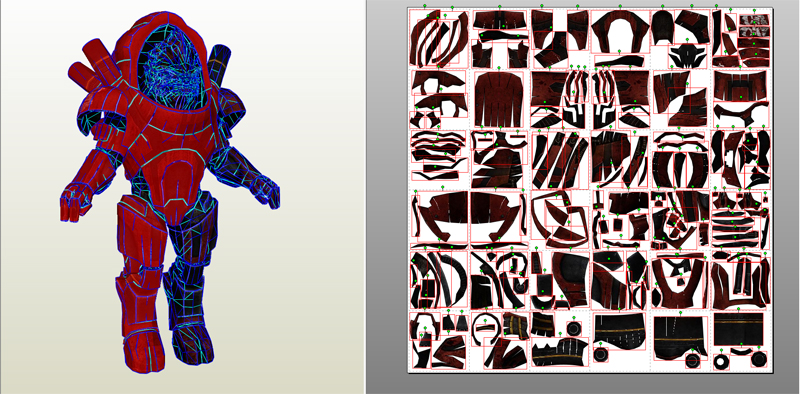 There were still seams of course, but tons less than I would have had to deal with normally. Much easier to hide a few seams than it is when they're everywhere. Next came the fun part: cutting! There was a huge pile of paper to cut, just like with Threshy, though thankfully the parts were much larger and there were fewer of them. It still took forever getting them all ready, but it was worth it. 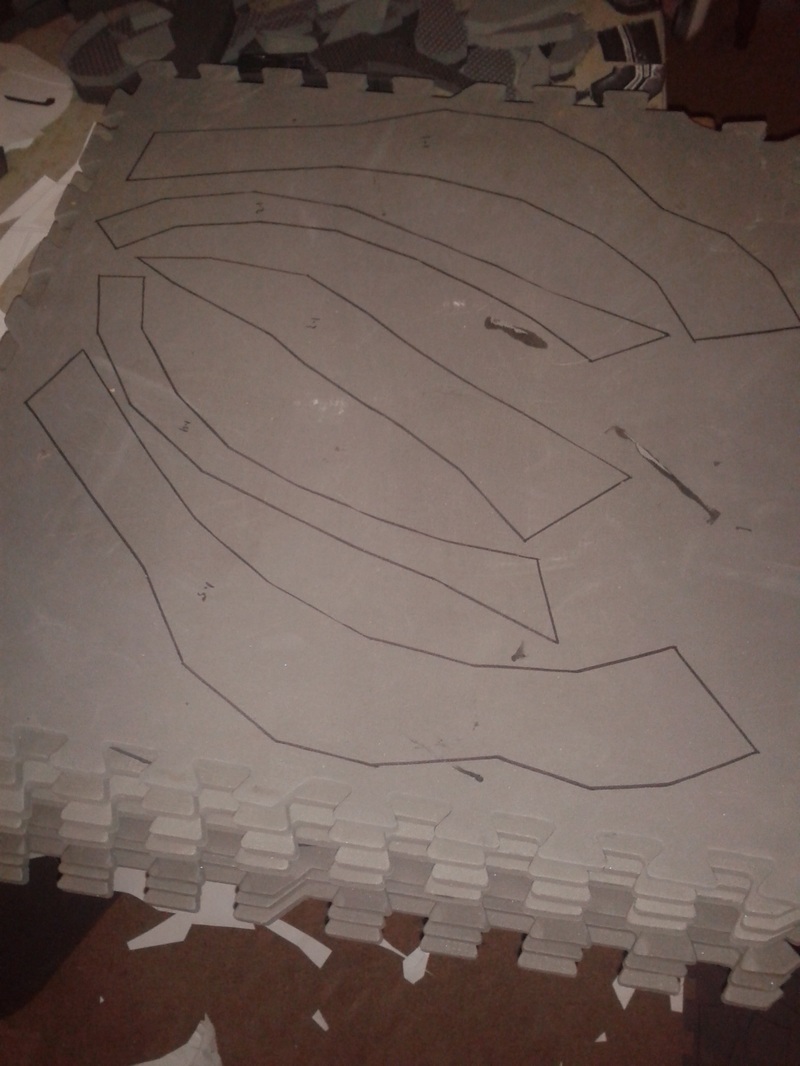 As with Threshy, I ended up cutting all the parts out by hand rather than using the band saw. It's just come to be easier and faster to do it by hand, since I can trace, then immediately cut the part out. I can also change the angle of the cut on the fly, and since half the parts were angled into another part it was just easier overall to cut it all out by hand. That and, since I could regularly sharpen the blade, the edges were a ton smoother than had I done it with the band saw. I used BARGE Contact Cement on this one as well, to give a much more secure hold than the DAP Weldwood does. I started with the torso section, partly because I wanted to but mostly because it was the biggest, most detailed section and I wanted to get the hardest part done first. Had my son lie down under the front half, as a bit of a cute tax and to really show the scale of this. Garm was supposed to be the biggest, baddest Krogan ever, nearly killing Archangel, so I opted to make him the full seven and a half feet tall. Already you can see just how tall this thing is going to be. Got to work on the back next, which is set up in a kind of stair-step section of sorts. It kinda makes me think each section slides upward under the one above it, so that the Krogan inside can get into and out of it. We never actually see it happening, but it's a fun theory all the same. I also made the shoulder bits, which were super simple but really bring out the full look. Right here you can really start to see the evolution of the mass the Krogan have. Laying down on the floor above it's hard to tell, but as the back parts got attached, the full scope of the thing really started to show. Especially when, as you can see, my entire office chair was able to fit inside. Of course, you're probably wondering what those empty spots are on the back and sides. Don't worry, we'll get to those. For now though, I wanted to get the entire back section done. The last bits included the lower back, and a tail. Of course, now that the torso was basically done, I had to thrown it on. You know I had to. XD Without the legs, I didn't really have the placement right, and had no way to properly determine where to frame it, so I totally have itty bitty legs while it dwarfs me lol. We'll get there! I ended up moving the torso out to the garage to keep Threshy company, since I had no idea whether it would fit through the door if I added the other parts to it. Once that was safely stored away, I got to work on the extremities. The arms and legs were muuuuuch easier to do than the torso was, but each would pose their own eventual challenges. You see, I intended to make the hands move and grip things, which meant I only prepared the armored sections of the fingers and left what I would eventually use as the joints open so they could bend. These I planned to cover with cloth or something to hide the mechanisms. I also discovered that I couldn't touch the ground while wearing the boots, which meant I had to make a platform of some kind to stand on. Of course, I planned to do that anyway since I knew I needed to be higher up to keep proportions right, but I've never made an actual platform like that before. Not even for my Giant Robot. So, taking my new skills with Blender and my newly acquired 3D printer (gifted to me by a family member who saw I was taking interest in 3D printing), I started designing finger joints. In the first picture, at the top, you can see the first attempt which failed. It required that I drill into each piece to make the holes, since I was still having trouble with prints failing and didn't want the holes to misprint. I scrapped the idea and just made them with the holes, also printing a rounded piece they could slot into so that I could secure the foam to it - as well as have something to put the wire I'd be using to pull the joints. I used chicago screws on the joints, and attached screws to the top with springs to pull the joints back into place. Here's a video I made to demo the process: I ended up scrapping that, since I was short on time and it was a bit expensive to get all the parts for each finger (and too long to wait for my local hardware store to restock). We'll get to what I eventually used a little later. Meanwhile, I worked out what I would be using for the platforms in the boots, and made the giant tube things for the torso. Yep, I decided to stand on 8 layers of the thicker foam, since it's there and I have a ton of it. I plan to upgrade it to something more secure, like metal pipes and wood which the massive Warhammer Space Marine guys use. For now though, this would work. I stacked each piece and shaped them by hand, so that they could slide right in and sit in place. I also only glued the bottom two layers together, and glued those to the walls of the boot, so that I'd be able to remove them later once I was able to make the more sturdy platform. Video: I totally nailed leg day. XD With those layers of foam inside I was able to test out walking, which worked like a dream. It's filled up enough inside that I can slip my foot in - while wearing my regular everyday tennis shoes - and step down, and my shoe stays in thanks to the wonders of friction. Again, worked as I would need, but eventually I'll secure a shoe in properly with the platforms. And, thanks to having everything to the right sizing, I could finally install the frame inside the torso! Those of you that have been with me for at least the last three-ish years will probably recognize that part of this frame is the same as what I used for the Giant Robot. My old camping frame backpack is really putting in work after all these years! I was going to use it to help puppet Threshy as well, but read Part 1 to find out why that ended up not working. Instead, it sat at the absolute perfect height inside the torso! I added in pieces of PVC pipe as a simple support frame, to hold the rest to the frame backpack and to keep the bulky shape of the torso from getting squished in. Then I went to the hardware store again, and grabbed some insulation tubing used for pipes so that I could fill in the openings in the back and a few spots in the arms. All in the details! :D After I got those all attached, it was time for the first real walk test! Here's video of the test in action: Really happy with the proportions of this; they turned out right on the friggin money. :D Since that worked out how I wanted, I grabbed some more of the tubing and got back to work on the hands. I glued in the foam to the finger armor bits and cut a V in the back right where I wanted the joint to bend. I ended up cutting a small strip of foam to glue the thumb on, rather than dealing with getting it to move as well. I also cut a section of tube in half and glued it to the back of each boot, just to add a little more detail. Since the boots were done, I decided to start painting them so that they could dry while I worked on the next, most difficult part of all: the head. I went through ten full cans of Plasti Dip on Threshy, and at nearly 7 bucks a can I wasn't going to do that again with Garm. Instead, a friend of mine who moved in with us handed me a big bottle of white PVA glue since he didn't have a need for it, which turned out to be the lifesaver I totally needed. I had to hand brush it, but that ended up working out just fine. After I brushed that on, I got a quart can of red interior/exterior latex paint and hand brushed it on too, again mostly for cost reasons. One quart at $12 as opposed to eight or ten more spray cans at $3-5 apiece. While that dried, I went and worked on the head. The head is more organic than the rest of the build, but thankfully I had already learned a ton after building Threshy that things worked out pretty well. I originally wanted to make the mouth move while I spoke, but ended up leaving it as is. Most of the difficulty ended up being in the forehead crest though, with all the spikes and hard edges. Lots of extreme angles, mixed with smooth sides, mixed with smooth but bent sides needing hill and valley cuts underneath, but the monstrosity of foam I call the head really came together well. Thanks to the way the part pattern came out, I didn't need to heat any of it to shape, and it held its look together just fine. The head ended up being bigger than it should be, but it's not so big that it looks like a bobble head and it still fits the overly massive look of a full size Krogan. That and I really didn't want to do all of that again, but with even smaller pieces. The head is also not technically finished either - I still intend to make a moving mouth and add all the wrinkle details with a few tricks I learned recently thanks to Ted Haines and the Stan Winston School. Used even more of the foam tubing to finish attaching the arm pieces, and glued in another PVC pipe inside the wrists so that I could hold them up and move them around. Did another test of the torso, to make sure the arms looked right and to get a shot of it with the head. Skipped leg day this time though. XD Started up on the paint on all the finished pieces, and while I got those going I worked on how the heck to get the head to stay on mine. Had to throw some supports to hold up the torso, since the balance is terrible and all I had for it to sit on was my stool. For the head, I got a hard hat with the intention of adding PVC pipes to it. After multiple attempts to secure them with epoxy, E6000, BARGE, and a number of other things, eventually I went back to the tried and true foam that I should've used in the first place. And now, back to the paint. After sealing everything with white glue and painting on the main red, I grabbed a cherry red spray can I still had and gave everything a random super light powder dusting. Then I grabbed a mahogany and did another similar pass, as randomly as I could. After that, I did an even lighter dusting of what was left of the metallic black from my Terminus build, which really gave it the perfect weathered look that I wanted. Once that was all done, I grabbed the brush again and hand painted the main black sections. If I had bigger rolls of craft foam I would have given it a two layer detail, painting the black on first then the red on the upper layers, but I didn't have any. Instead, the black ended up looking like an awesome tribal paint which I think fit the look just fine. I made the eyes out of a mold of the same half spheres I got for Threshy's eyes, which thankfully ended up being the exact size I needed. They're casted with Smooth Cast 300, which I lightly sanded so the primer could stick to it. I did three layers of primer, and three layers of yellow. I also threw primer all over the head, after sealing it with the PVA glue as well. Time for another full test! 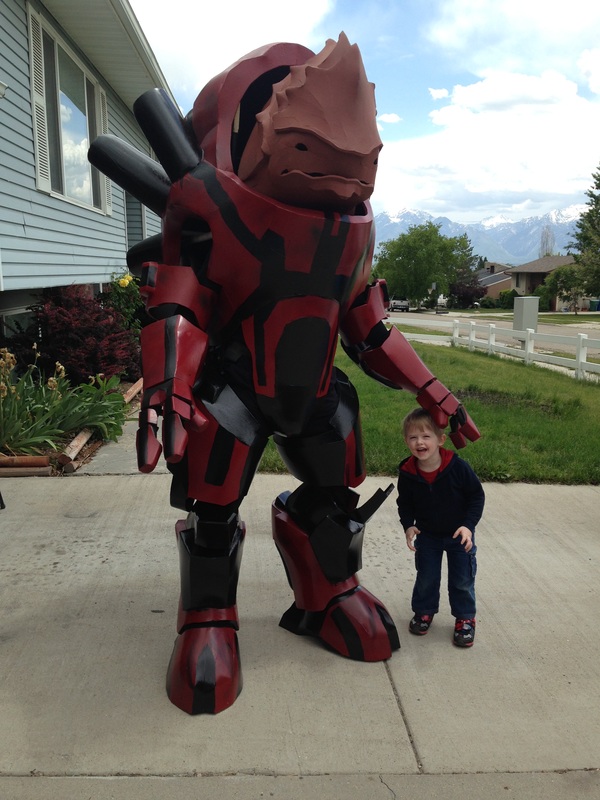 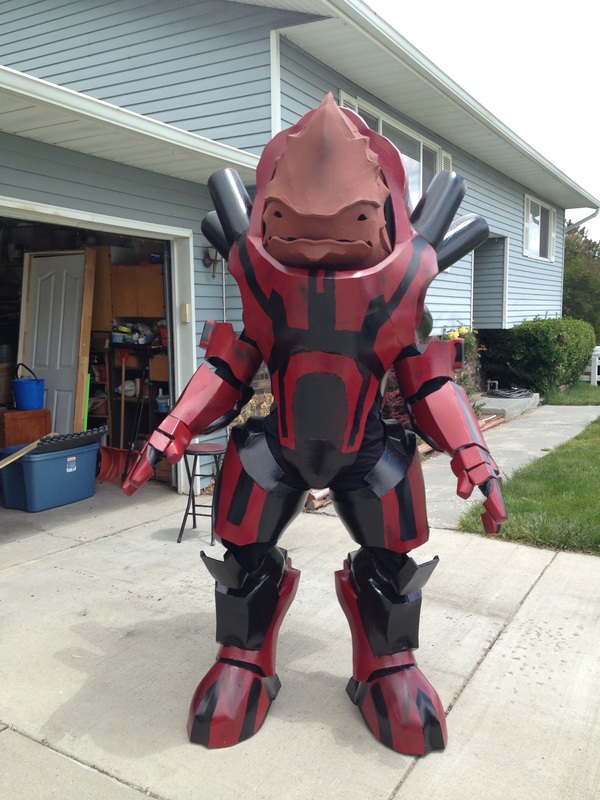 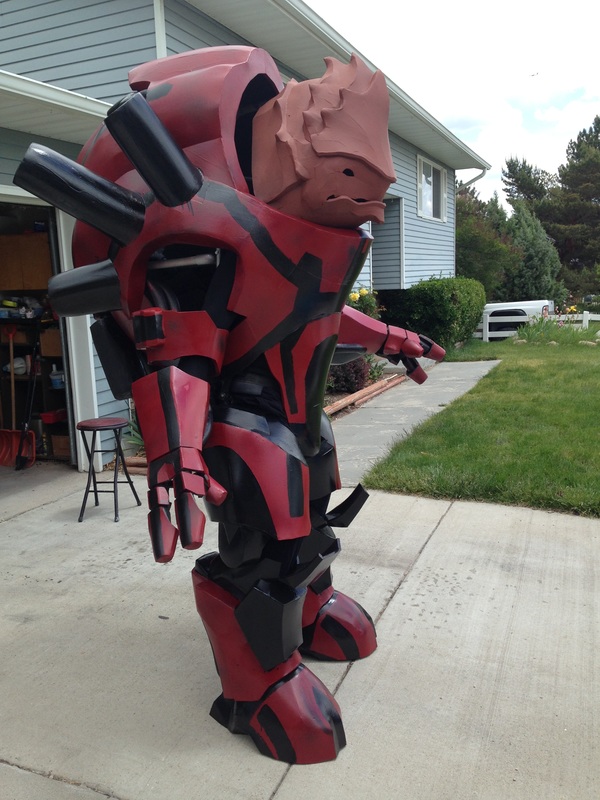 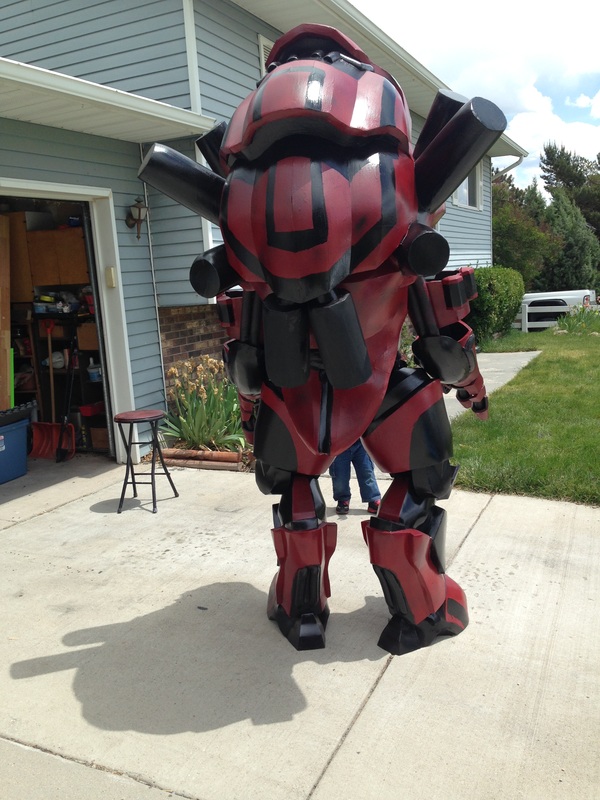 And another test video to check the movement and sight: Something was missing though, so I finished up the pauldrons the same way - adding that little touch that would make Garm stand out from the rest: the Blood Pack symbol! I also went and got the fabric I would need to fill the open areas and sell the illusion properly. Yes guys, I totally used fabric. :D Oh, you thought I actually knew how to sew? XD Nah, don't even own a sewing machine. The last time I sewed anything was in 7th grade. I actually attached the cloth with hot glue, enough to cover the open spots but still leave me room to move and get in/out of it. While this was going on, I finished up the paint on the head. I sprayed on the same ivory color I used on Threshy all over the face, then sprayed the maroon onto the crest. I let some spots overlap, since some of the bony bits meld into the flesh, and I thought that would help with the organic look. Then I dusted on a few different browns, just like with the claws on Threshy, letting some of the darker browns dust up onto the crest. I had to do this a few times, because my hand would either slip and angle it wrong, or it would press a tad too hard and ruin the look. Thankfully having to redo it gave the whole thing a rougher, grainier texture and feel, which really made it all come together. Finished up the eyes as well, with a dragon/lizard look to the iris. I also gave it a light blackwash and speckling with acrylics, to make it more than just a simple yellow ball with a black line on it. I was out of time and money to do all the detailing I wanted to on the face, so I tried painting on the wrinkles and spots, but was failing miserably. My super awesomely amazing wifey came to my rescue though, and made it look tons better! I designed some Krogan sized rivets in Blender and 3D printed out a whole ton of them. I probably could have done the same with a dowel, cutting slices out on the band saw and drilling a hole in the middle, but I had the filament (and the printer needed calibrating anyway). I added a ton of these to the armor to give it one last pop, and filled in all the rest of the open spots on the arms. I also 3D printed some rings that I tied to the fingers with fishing wire, to give them some movement. Demo of the fingers: Aaaaaaaaand done! Garm, Krogan Battlemaster and leader of the Omega Blood Pack, is ready to find Archangel and destroy him. Once that threat is gone, nothing will stand in his way of taking down Aria! RRawrgh!!! This build was a lot of fun, definitely easier than Threshy but still with its own challenges. I still have upgrades I'd like to do on him, but as he stands now he's already a huge success. He was a big hit at Salt Lake Gaming Con, everybody loved him, and he won me my first actual placed award as Best Master Overall! Really happy with him, other than the fact that I need about a dozen fans inside so that I can wear him for longer than an hour at a time lol. Here's the final test pics, with a few videos at the bottom of the test and of Garm in action! Enjoy! 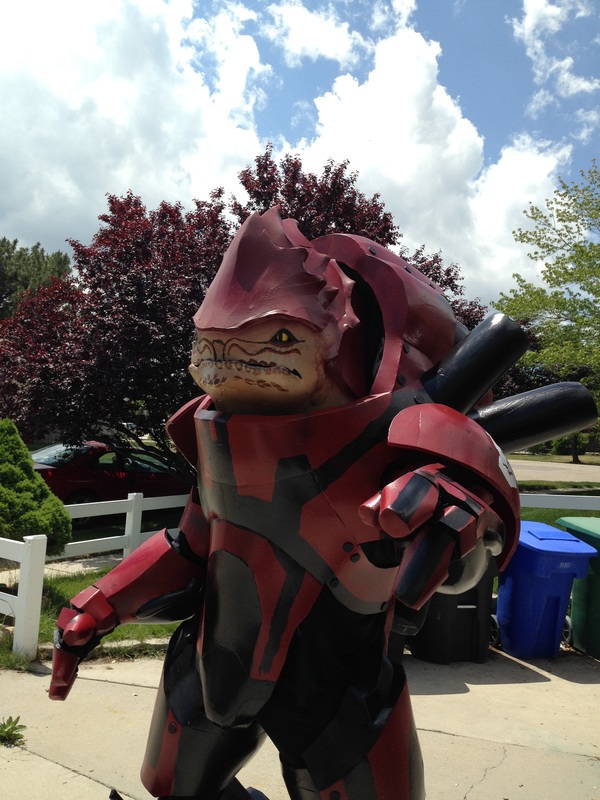 And one more video by Caliston Armory, one of the judges of the contest. Favorite one, since it really shows off the movement!
The amazing folks over at BioWare also took a liking to Garm, and put him up in their Fan Creation Feature! Go check it out!
2 Comments
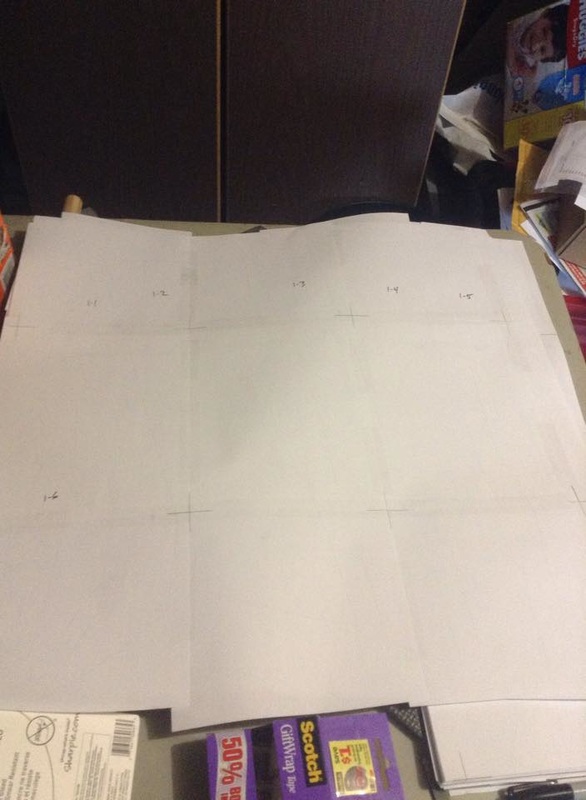
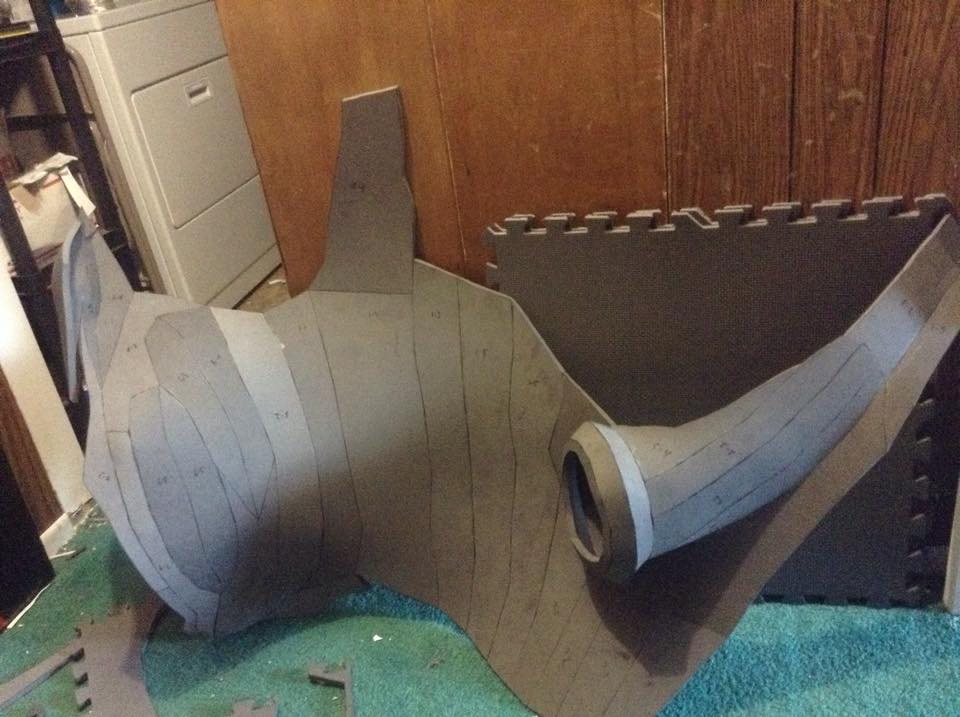
Here it is, the moment you've all been waiting for. If you followed along on my Facebook page, you saw firsthand how intensive this build was, and if you followed along on the RPF thread I made you got some insight into the build. Now, though, it's time to do the write-up here, where you can finally see the inner workings of my honest-to-goodness lack of sanity. This write-up will be in multiple parts, due to its length. 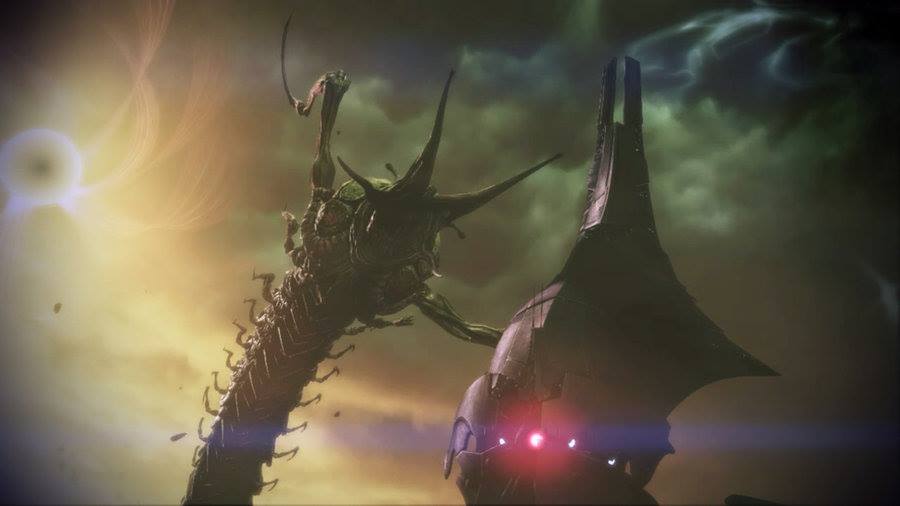 2015 was the first year I attended DragonCon, and I wanted to make something epic for it so that I wasn't just wearing my Terminus armor (so that I wouldn't die in it in the Atlanta heat). At the same time, the N7 Elite Costuming Group, after seeing the amazing Zakuba foam dragon head, wanted to do a Thresher Maw like that in a Chinese dragon style. I opted to take up the challenge, since I've been wanting to do a giant build ever since I had to take apart the Giant Robot, but since the convention was two months away, and I didn't trust my freehanding skills enough with that little of time, I managed to find a 3D file and adapt it for foam pep. 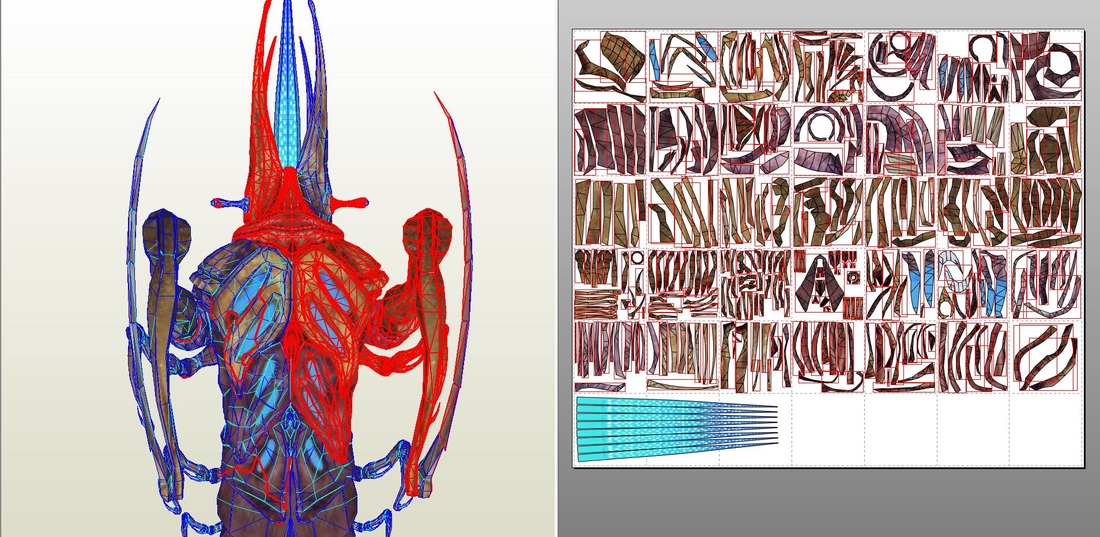 Recently I discovered that you can adjust the dimensions of the printout in Pepakura Designer, which made layout so much easier. I was able to make the dimensions the same size as the foam, then cram all the pieces in as tight as they could get, readjust the dimensions to letter paper, print it out, and tape/cut in such a way that not only saved foam, but saved paper. It still ended up being 264 sheets of paper, with a grand total of 70 sheets of floor mat foam after accounting for all the doubled-up parts.  For those wondering, that translates into 18 packs of foam. And over a ream of paper. 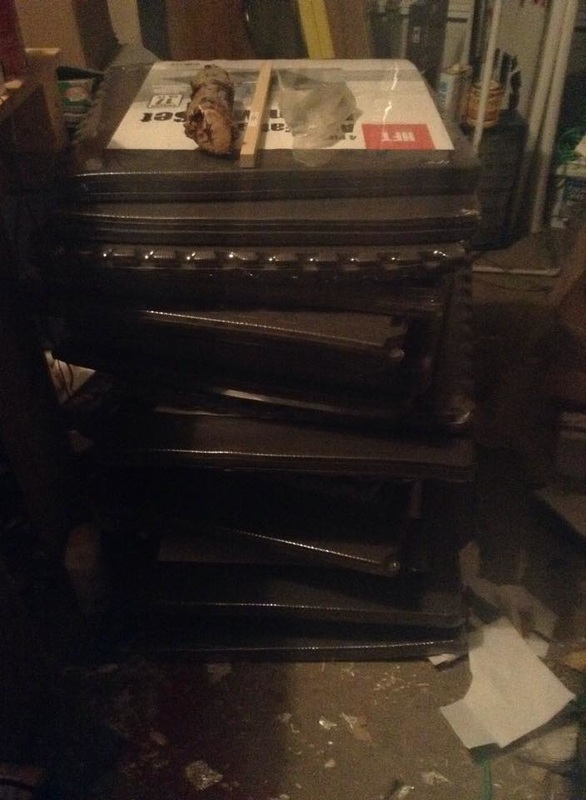 Since my wife works during the day, and I have to watch our son, I was forced to work inside the whole time, rather than out in the garage with all my power tools. He's still too young to take care of himself, unfortunately. This meant, of course, that instead of using the band saw to cut out all the pieces, I had to cut each and every piece out by hand, with an xacto knife. As I cut and traced, I kept track of the parts with a simple numbering system: what number the sheet of foam was in the row, and the part number on that sheet. 1-1, 3-10, that sort of thing. To keep track of the mirrored pieces, a simple dot was added to each number: 1-1*, 3-10*, etc. This greatly helped keep track of pieces, especially if one ended up not being connected until later. Another thing that helped was tracing the entire row, rather than doing one page, cutting, assembling, then moving on to the next. Had I done it that way all I would have had was a mess of pieces that wouldn't fit together until the next sheet was done. Once the first row was traced, it was time to start the upper carapace! You'll see me use a lot of the tricks for foam here that I detailed in the Terminus armor write-up and many others. Angled cuts make sharper corners, under cuts save seams and add detail. The first few parts I initially thought were the eyes of the Thresher Maw - really great lesson in natural survival traits. The small flat-rate box in the last pic should give you a good idea of the scale of Threshy - absolutely massive. 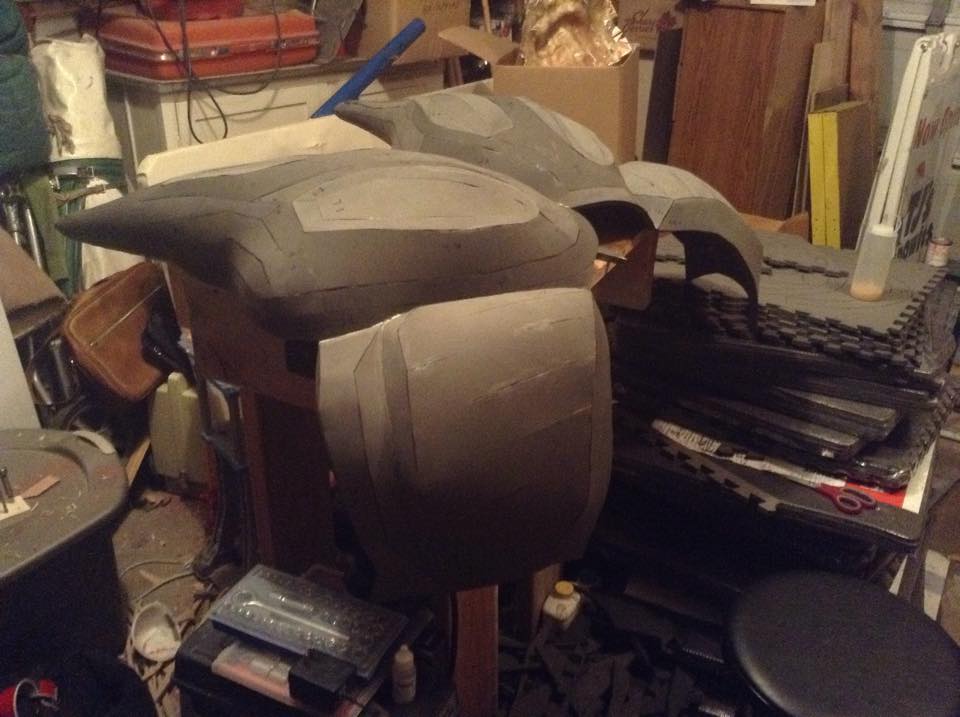 Bit by bit the parts come together, some needing heat forming, others bending the foam naturally. As I went I was able to hook areas together, though as you can see storage immediately became a problem. And, of course, as the first row continued, a lot of the parts couldn't quite go together yet, since several other parts needed to be done first so they had a place to hook onto. From what *could* go together though, Threshy's head was beginning to form quite nicely. Here you see the end of Row 1, of 5. 14 foam sheets down, 56 to go. Row 2 begins with a new ink toner, and the rest of the pages printed out and organized. I was trying to get through at least the first couple of rows of foam as quickly as possible, since I needed to get the measurements of the back done for my partner in crime, Keelah Monster Cosplay. She was doing the fabric tail portion, to once again go along with the Chinese parade dragon theme, and DragonCon was nearing closer and closer. Thankfully, the second row came together extremely quickly, but was a literal pain in the ass to attach to the rest. There were a few close calls, where parts wanted to go one way but needed to go another. I was literally on my own, with no one else able to help - and no frame to hold it in place yet, since the garage at this point was completely full. Eventually though I got it all together. Look at how massive this thing is! 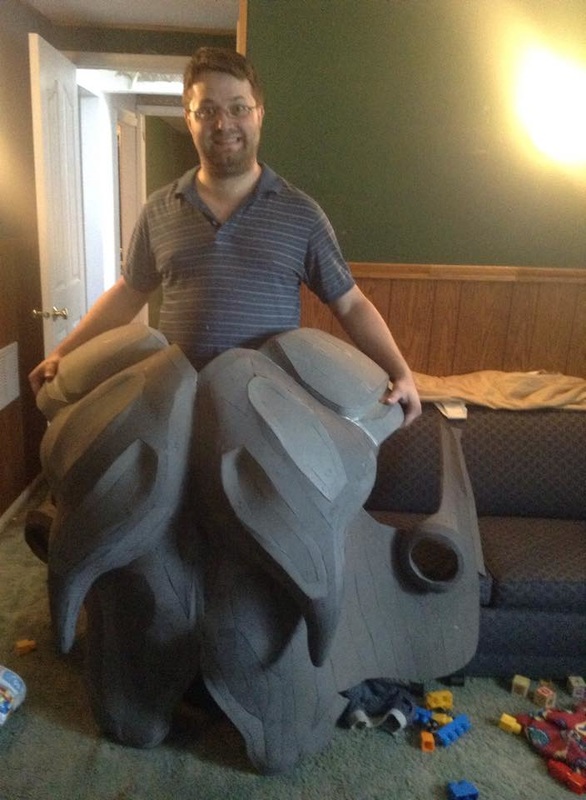 Over the next week and a half, my parents needed help moving from this house into their new house. We stayed here to rent the place from them, and even though them moving took up a lot of precious build time, it opened up more space in the garage to work in. I did have time to put some "smaller" parts together and attach them, which really started to flesh out Threshy and start adding those details that we love to hate. Threshy was so massive at this point I literally had to steal my son's crib/playpen during the day just to hold the mass of foam up so I could work. When things finally got back to normal (ish), I got the large claw holes done in record time. For being much smaller and technically more manageable than the entire back half at this point, it sure was harder getting those attached. Thankfully I got them together, then my wife came in and took some better pictures for me, with me wearing it. And thus ends Row 2. Well, sort of, and for the same reason we're moving on to the middle of Row 4: the last two sheets of 2, all of 3, and the first 3 of row 4 are all the claws and I wanted to do them last. At this point I still held out hope of having enough time to add some articulation to the claws, so I was saving those until the body was done up enough for a proper frame. Speaking of frames, I made a frame/cart I could both store Threshy on but also cart him around if I needed to. Never been to Atlanta, wasn't sure what to expect really. Well, I started to anyway. Needed to know how high up Threshy would need to sit without being smashed into the bottom half of the cart first. So, back I went to building! Once again, new discoveries with this build. Had I not attempted it, I never would have learned about those tiny stalks you see in the third picture - those are the *actual* eyes, not the glowing blue things on top of the carapace. I'd never seen them before, mostly because I was too busy dodging plasma acid spit and massive claws in the Mako and not paying as much attention to the finer details of a thresher maw. Still though, learning! The next day I made absolutely massive progress, as Bill Doran over at Punished Props was doing a 16 hour livestream build of his Destiny armor. I stayed on the whole time while they worked, which gave me enough motivation to not only finish Row 4, but 5 as well! This put me a few days, possibly a week ahead of schedule, which is perfect - I don't think it would have been done in time otherwise. Regardless, it's time for the most difficult part of all: Mass Assembly! 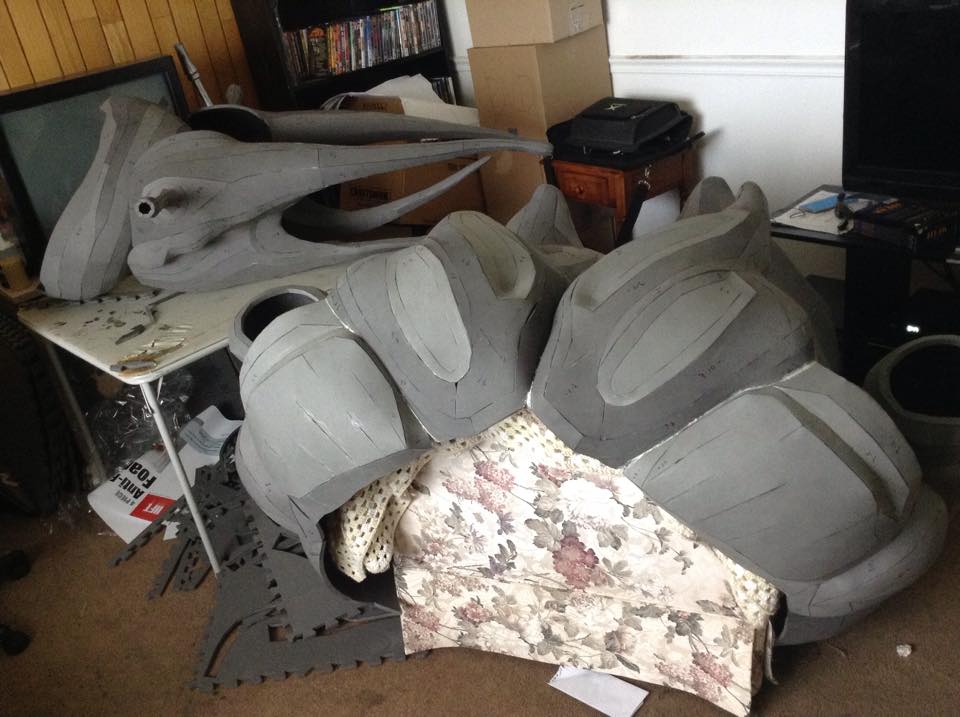 First I put together the front two bits, the face and the neck scarf thing. I thought it would be easiest, and would make assembly easier when attaching everything to the big carapace. 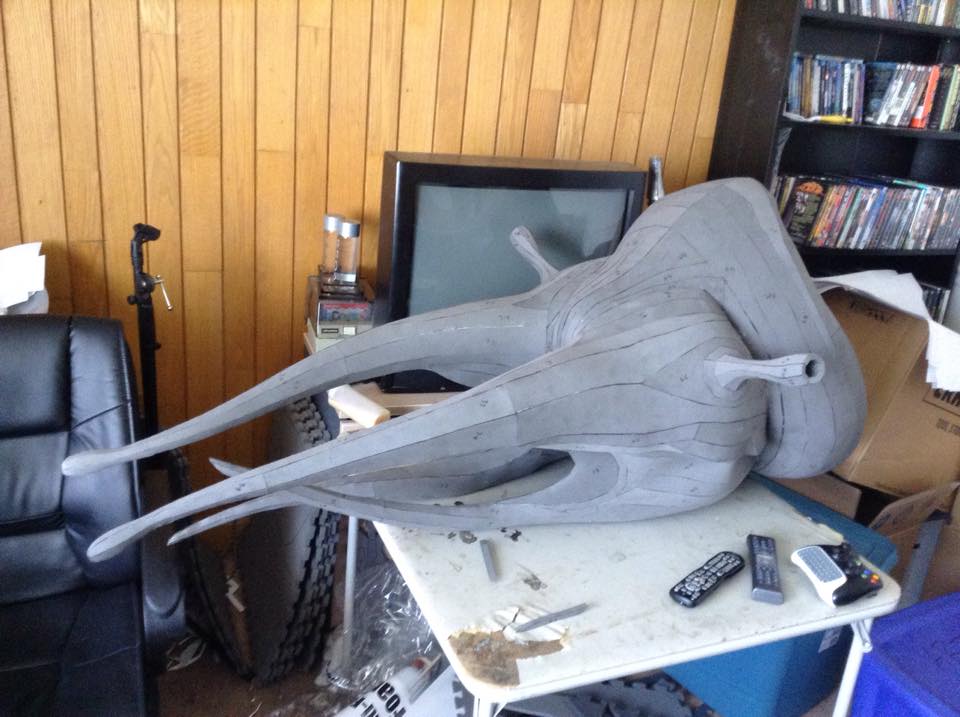 To be fair, it probably would have been just as hard either way, though admittedly this wasn't nearly as hard as the back half of the carapace or the large claw hole things. Ladies and Gentlemen, meet Threshy the Thresher Maw. Threshy, please don't eat the nice people. 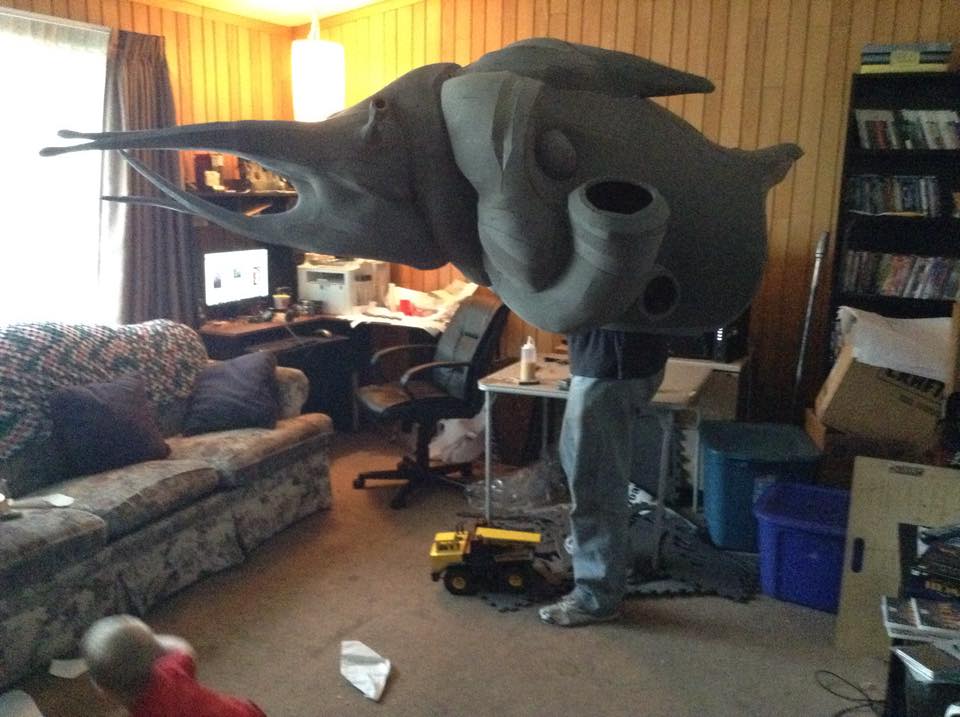 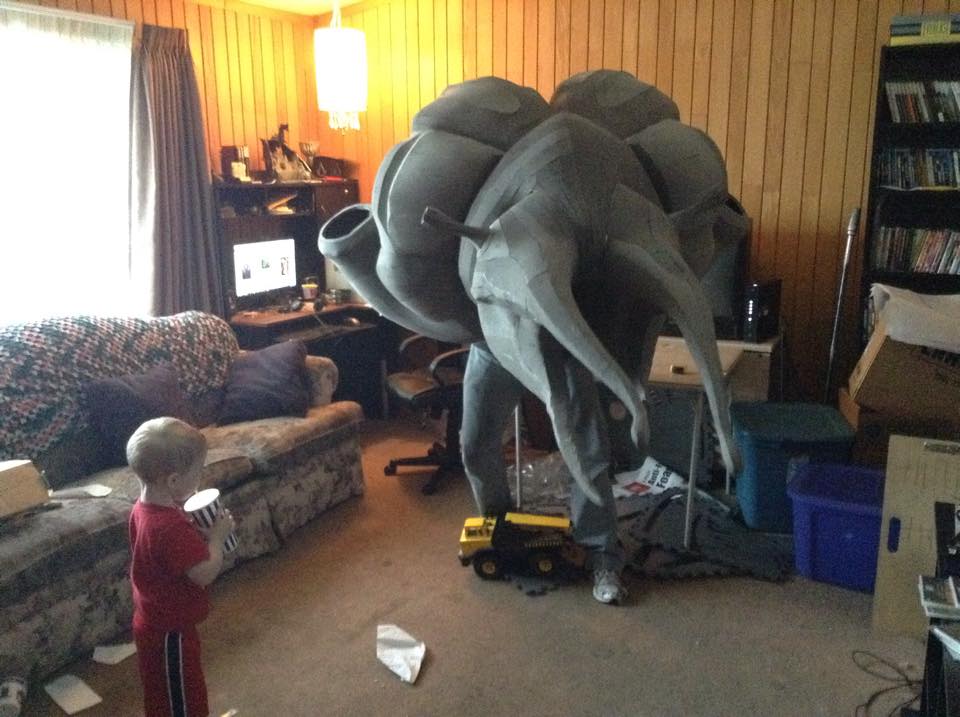 Now that he's all together, I could finally get a proper measurement of him. He's just under 8 feet long from the tip of the upper tendrils to the back point of the carapace, and just a smidge over 5 feet wide at each end of the claw holes.
Because this post is so long and intensive, this marks the end of Part 1. Part 2 is coming soon, and due to the length there may even be a Part 3. Stay tuned! |
|


 RSS Feed
