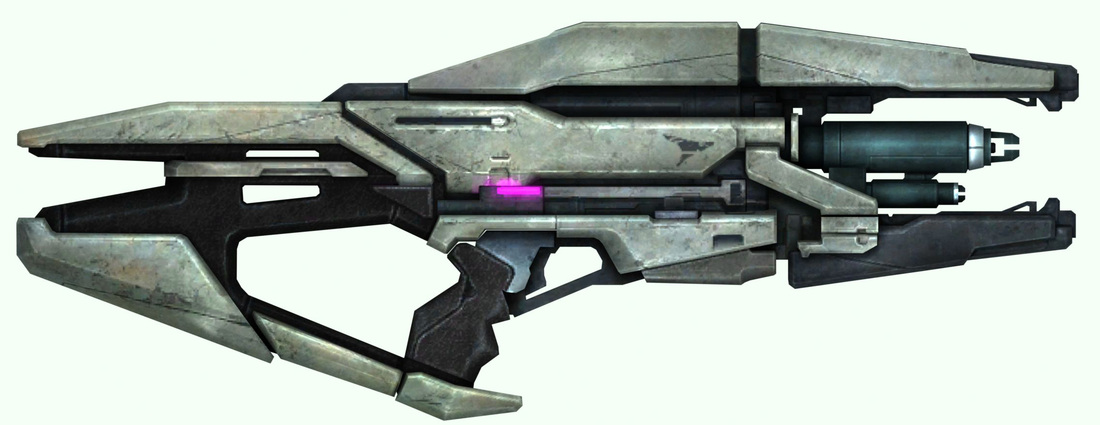
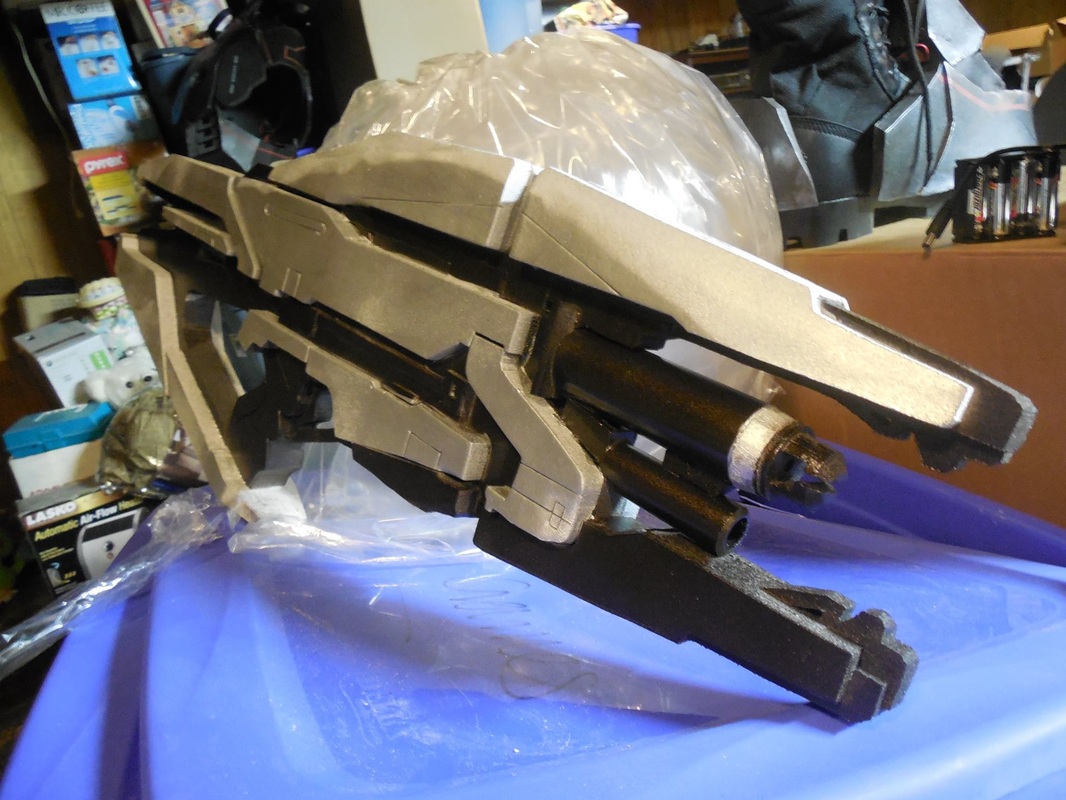
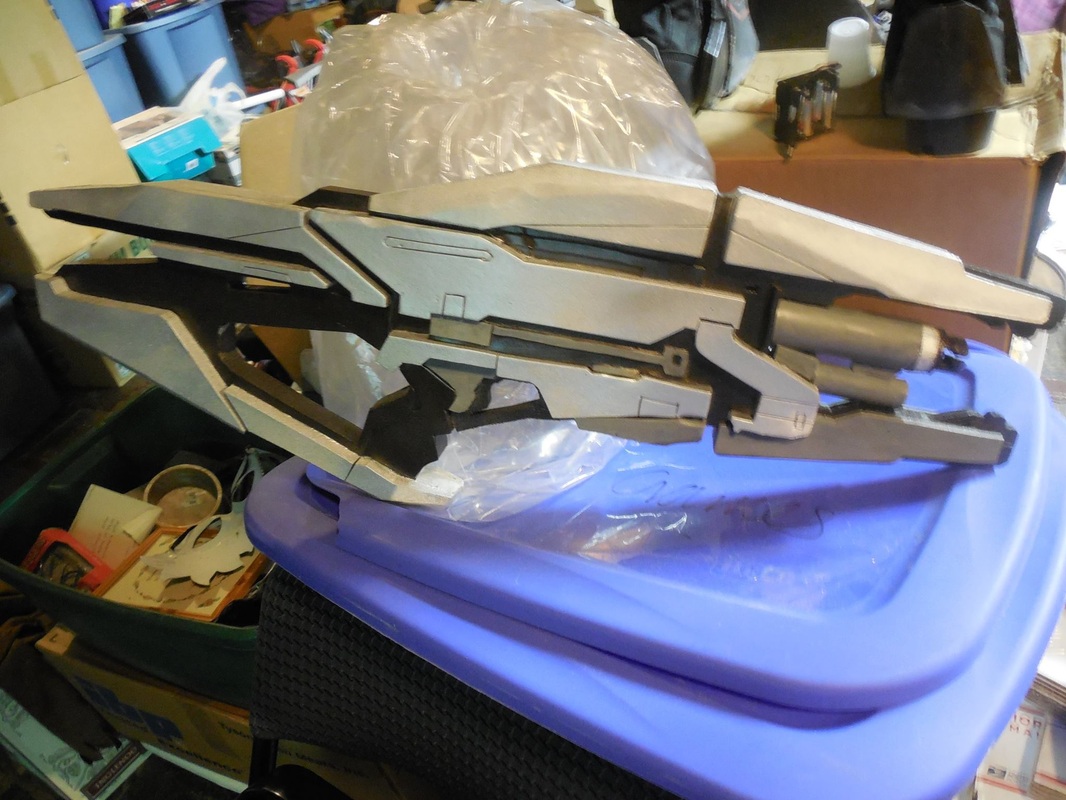
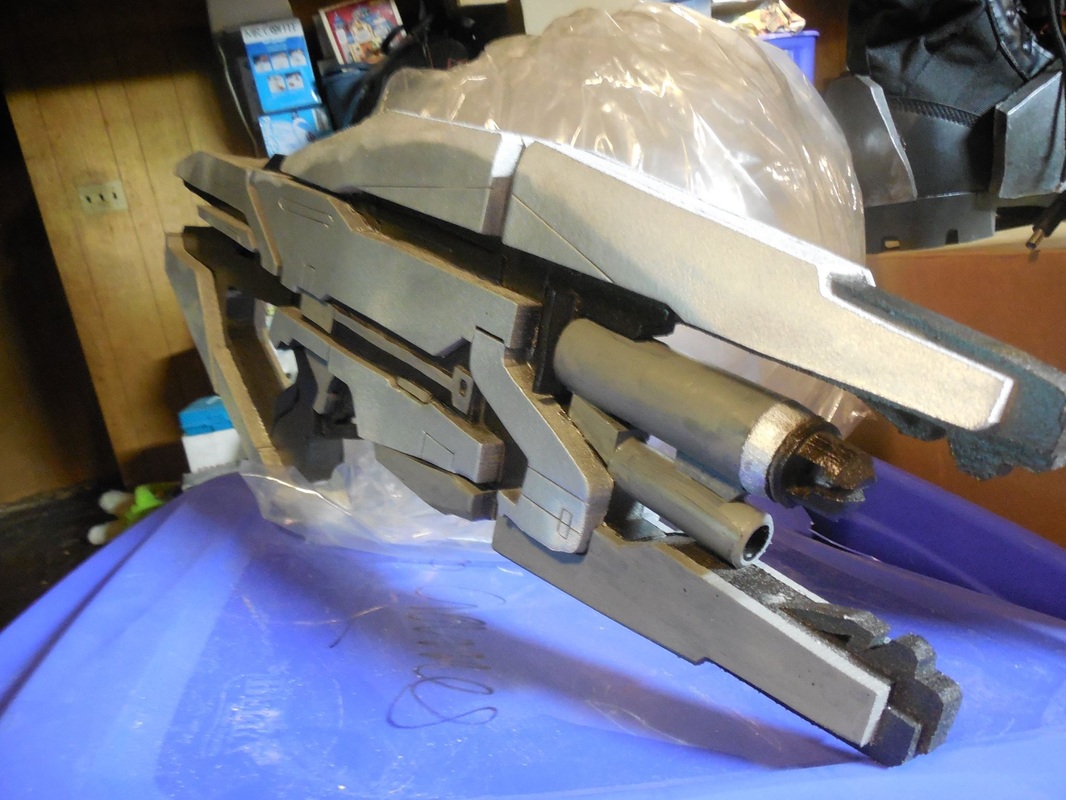
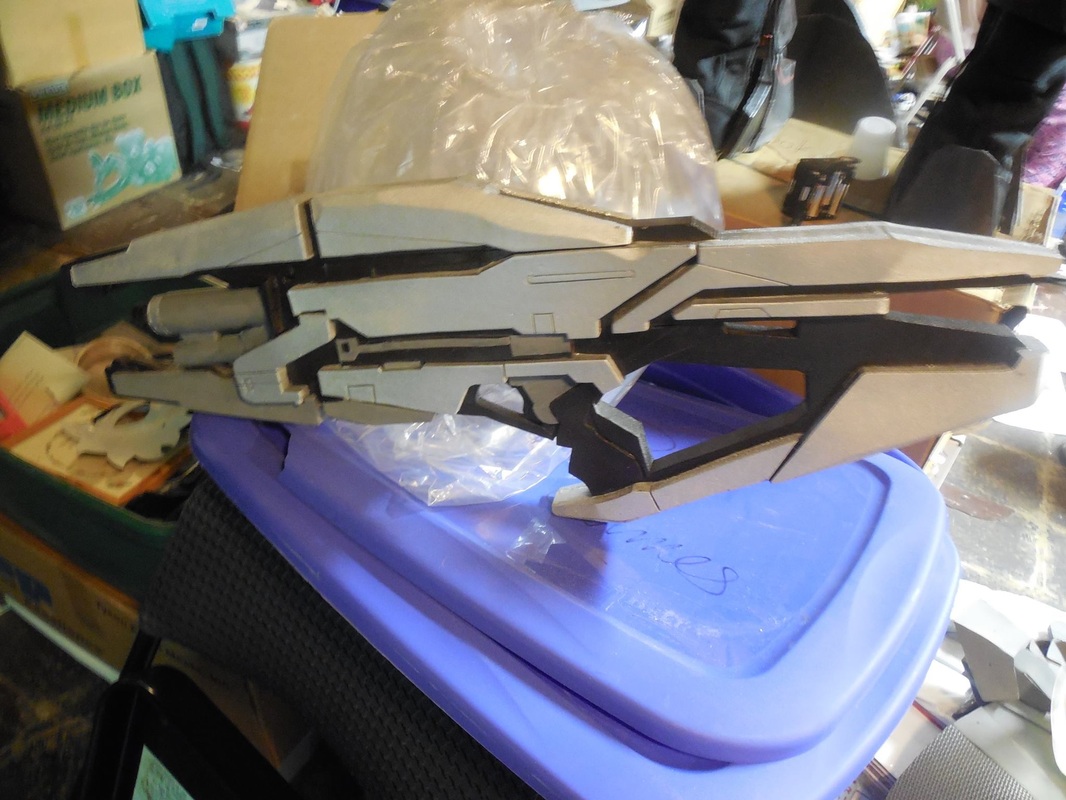
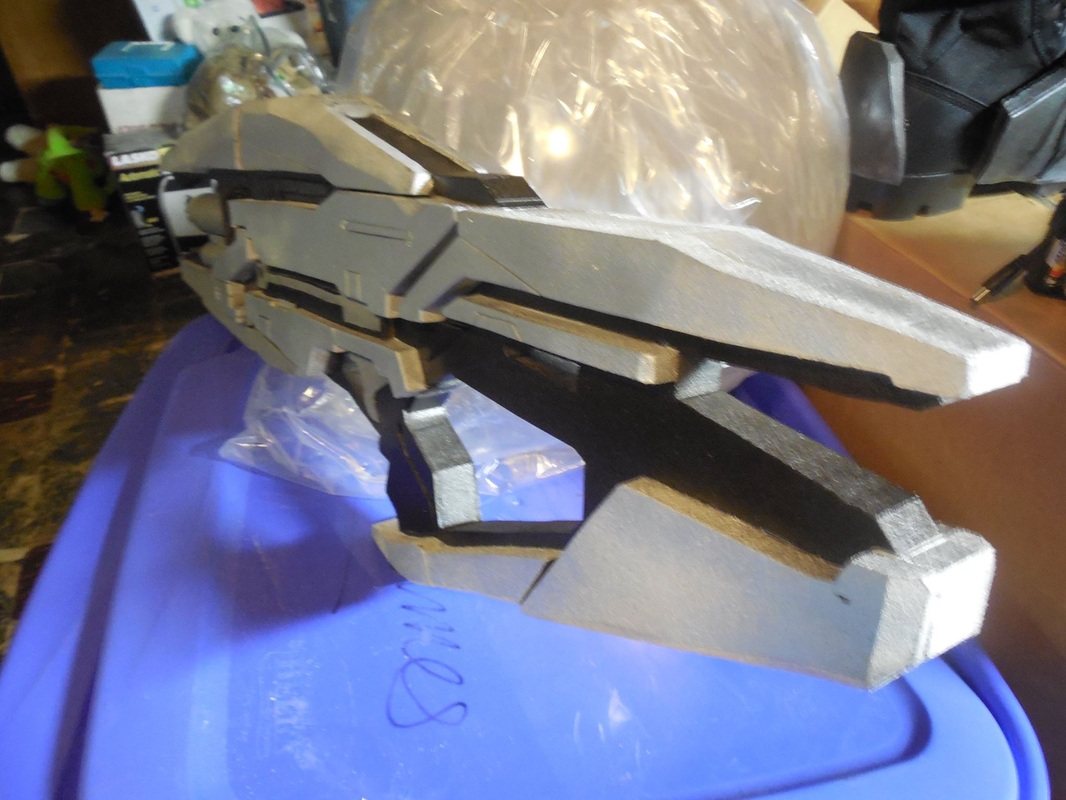
 And now, back to the awesomeness that is the Turian Phaeston. I built this to go along with my Terminus armor, though unfortunately I ended up having to sell it to raise some money to move my family BACK to Utah, after having been in Pennsylvania only six months. Two moves in one year, both cross-country, have really done a number to our already drowning finances. :( Still though, it was a fun build, and I know it's gone to a good home. I'll make another one once I get all my stuff back from the storage pod everything is living in. Onward! Started this one, as always, scaling and printing a massive version to use as a template. 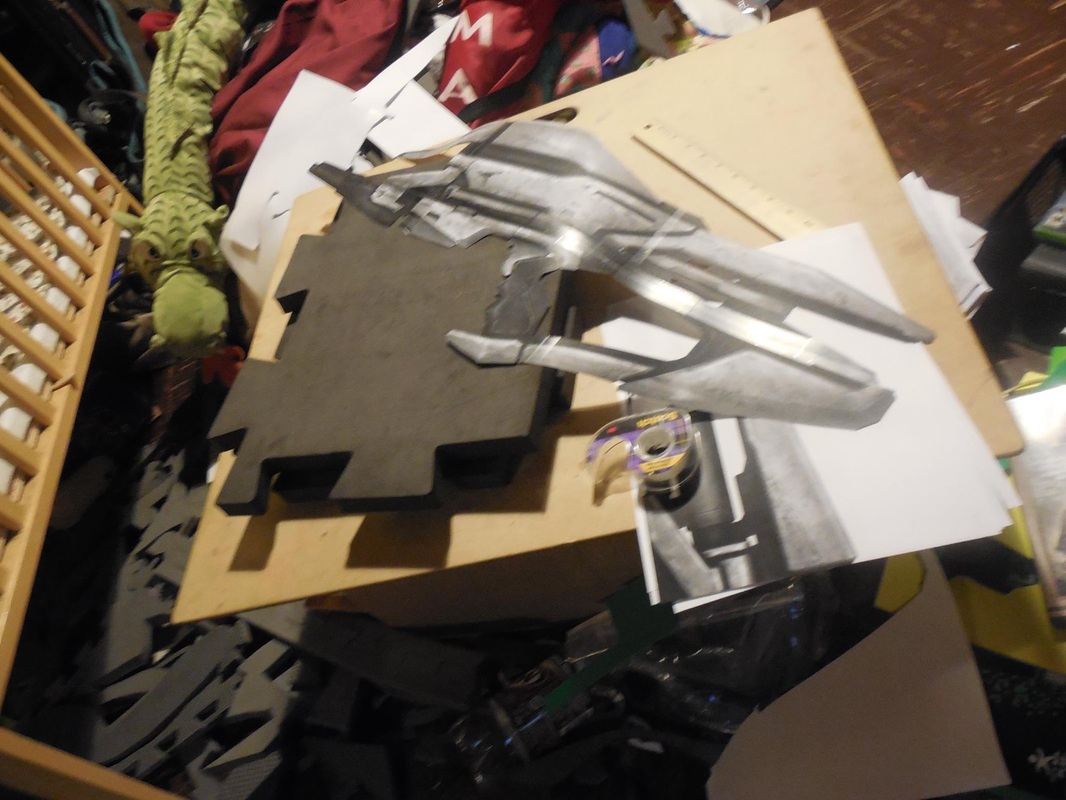 Decided to go the same route as I did with the M8 Avenger version 3, with the 1" thick foam as the core, and the other foam as build-up layers. Had to cut it out in three different pieces though, due to the small sheets of foam you can see above. Got it all cut out though, and used the contact cement to glue it all back together. 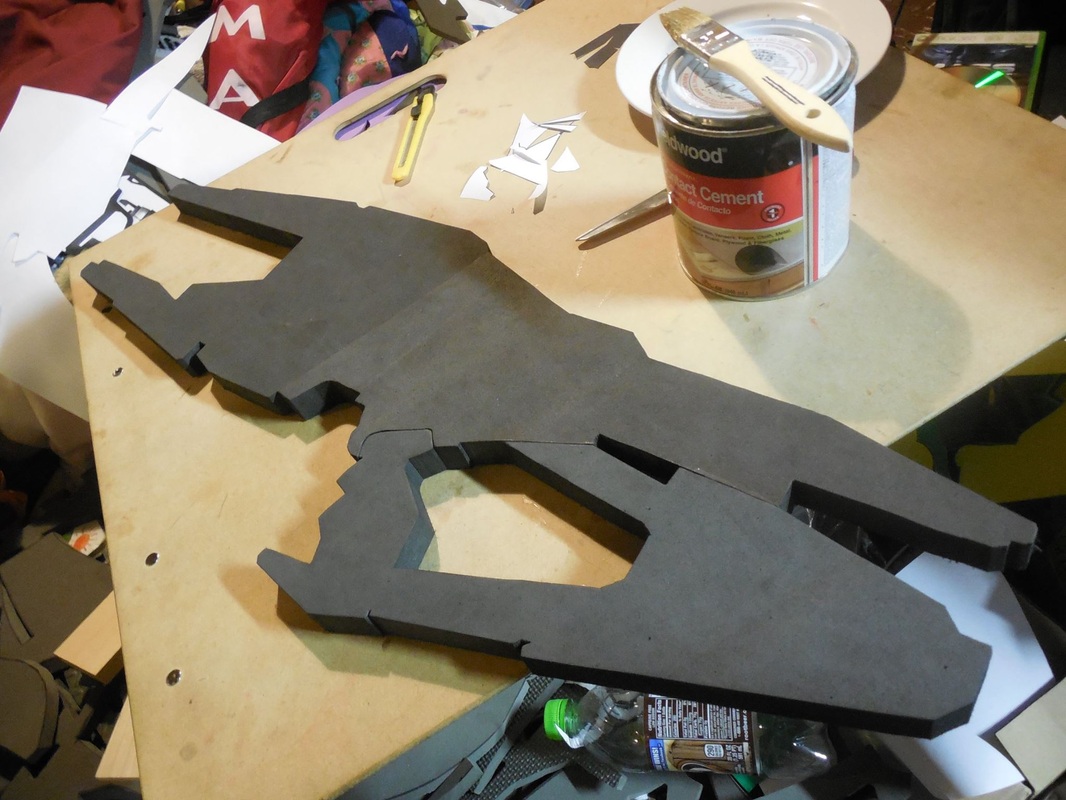 From there, I cut the paper template into smaller pieces, using them to prep the rest of the foam. I traced these onto 1/2", 1/4", and craft foam, to really give it a nice layered effect. The subsequent pile was quite a sight. 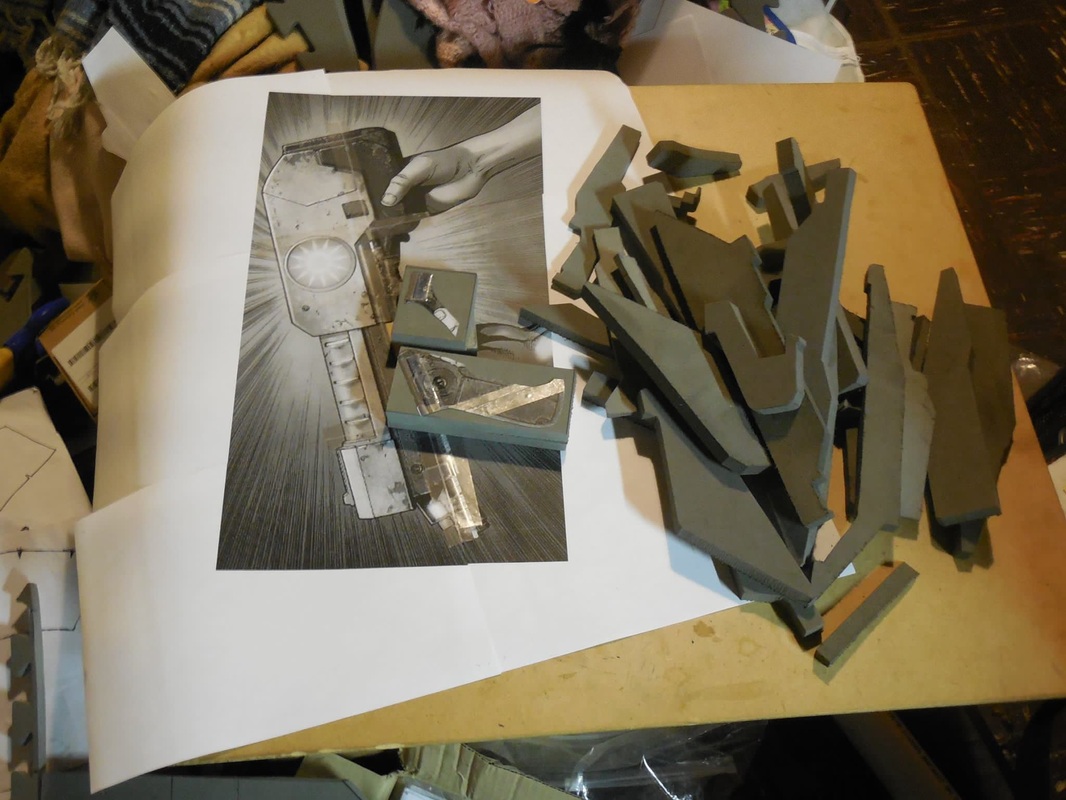 (Heads up - I did a lot of the Phaeston at the same time as Star Lord's pistol, seen on the left, so you'll see a bunch of pictures of them together as we go along. I'll write-up the pistol next, to help stave off any confusion if I can.) Once all the pieces were cut out, I arranged them to ensure they fit on the core, then slung contact cement everywhere and put everything together. 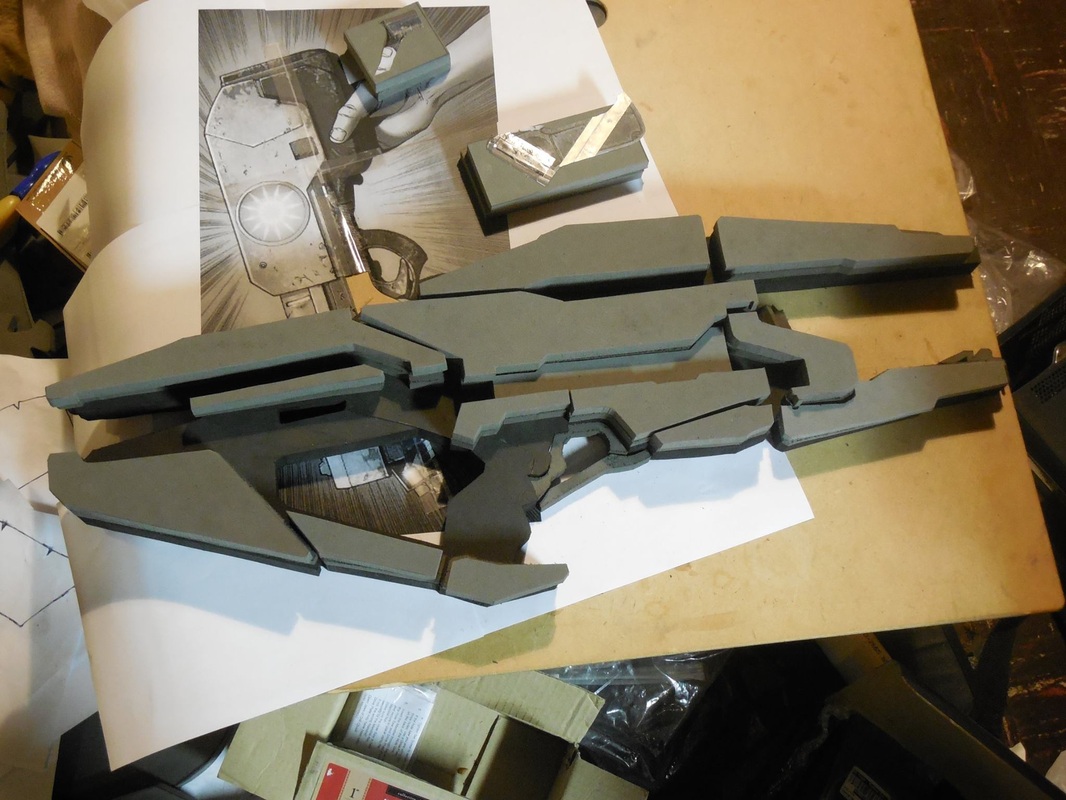 Then I threw on all the craft foam, to give everything the final feel. 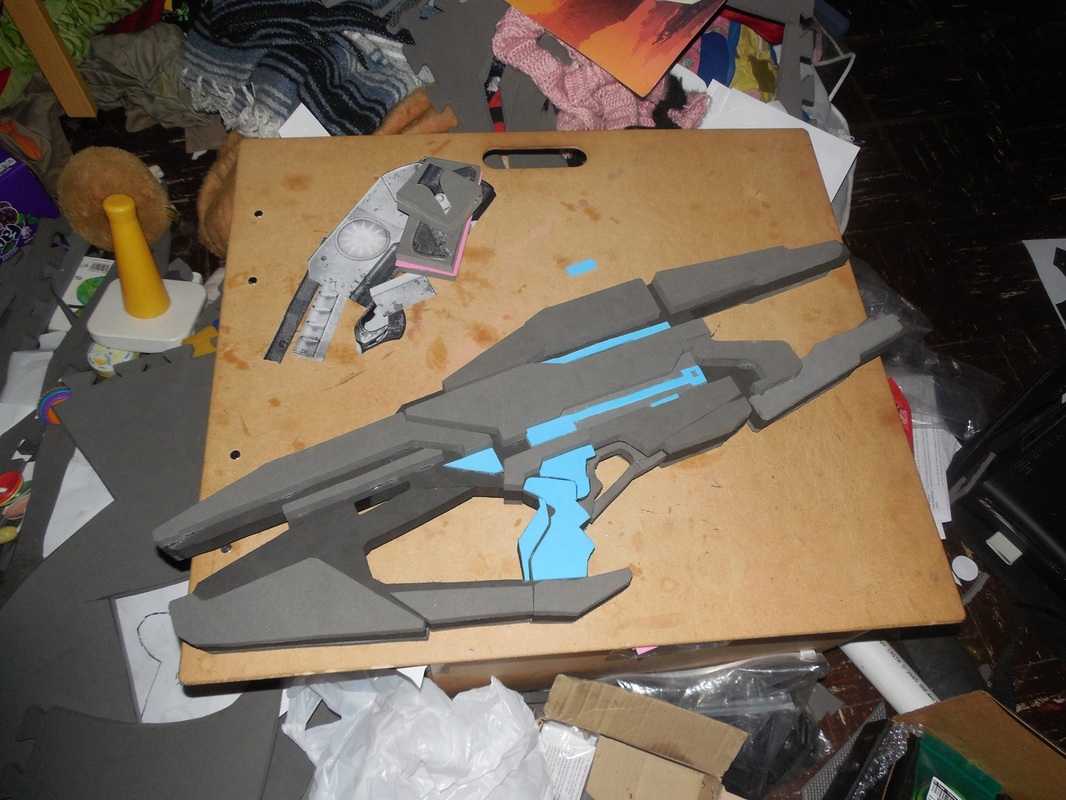 Next came the tricky part. I had to angle the top section, the rear of the stock, and the base of the grip, as well as bevel some of the edges. So, I took it out to the belt/disc sander, and got to work. While I was out there, I also cut out the barrels and final pieces, and used the puck left over from cutting out the hole in Star Lord's pistol to make the extended chunk of the Phaeston's main barrel. 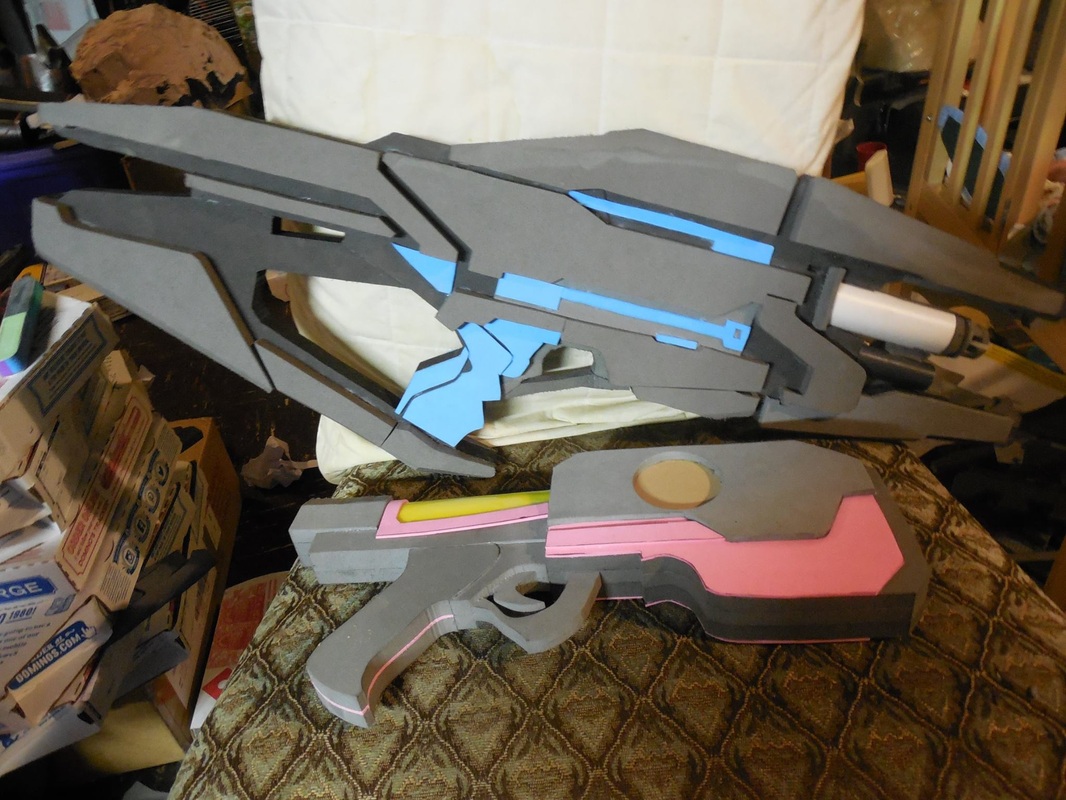 After some cleaning up, I then took my xacto knife and heat gun to it, and etched in all the detail lines. 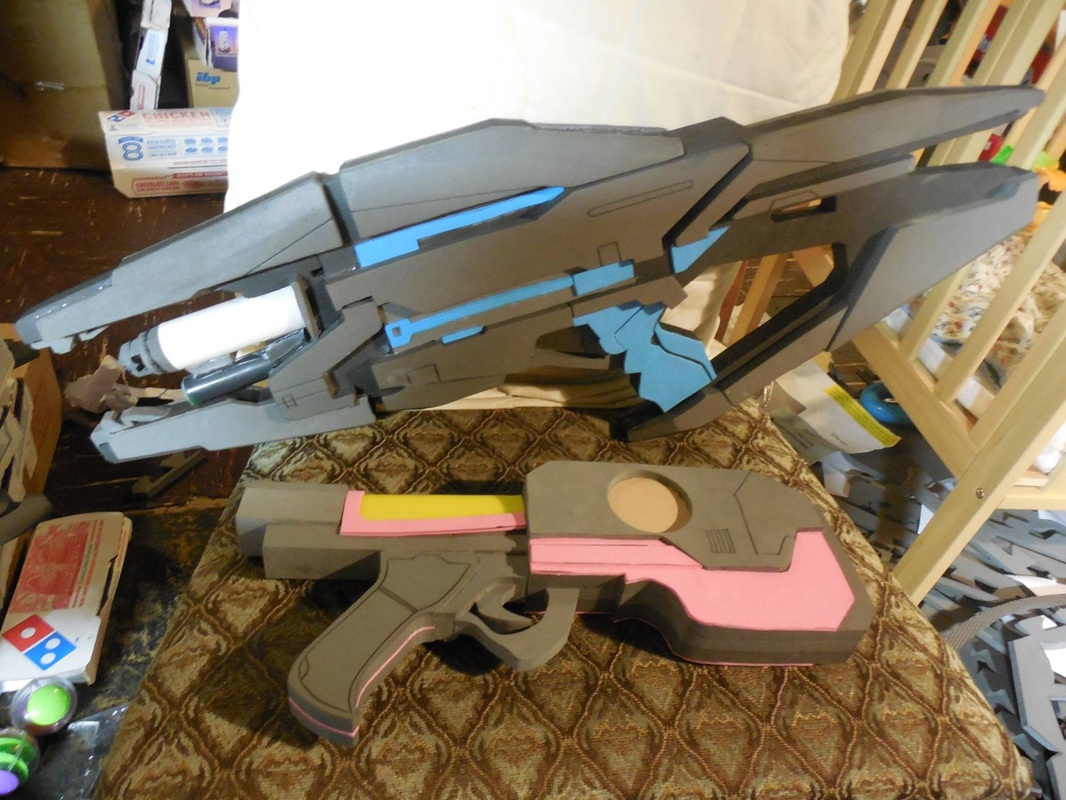 Once I was happy with everything, it was time for everyone's favorite thing, Plasti Dip! I followed that up with a coat of silver as well. Originally I was going to do a custom color scheme with it that was similar to the Terminus armor, but I was worried that it would blend too well with the armor and it would get lost in it. Instead, I stuck with the original coloring to have it stand out on its own and compliment the armor. 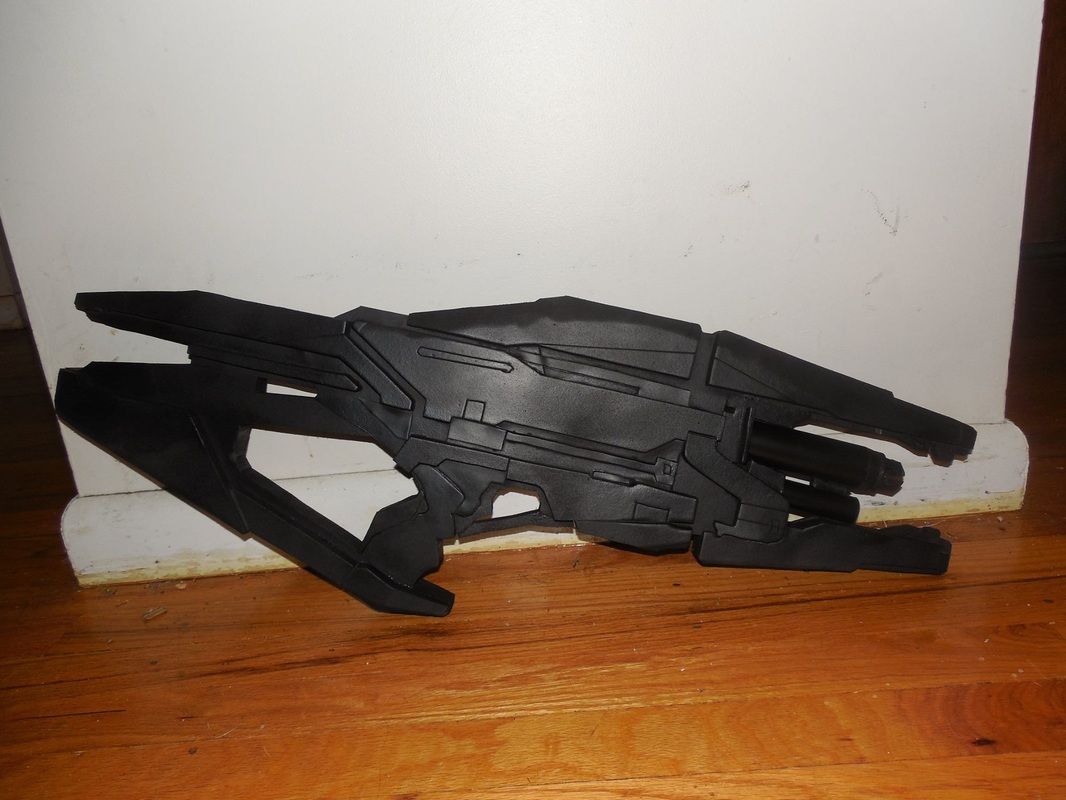 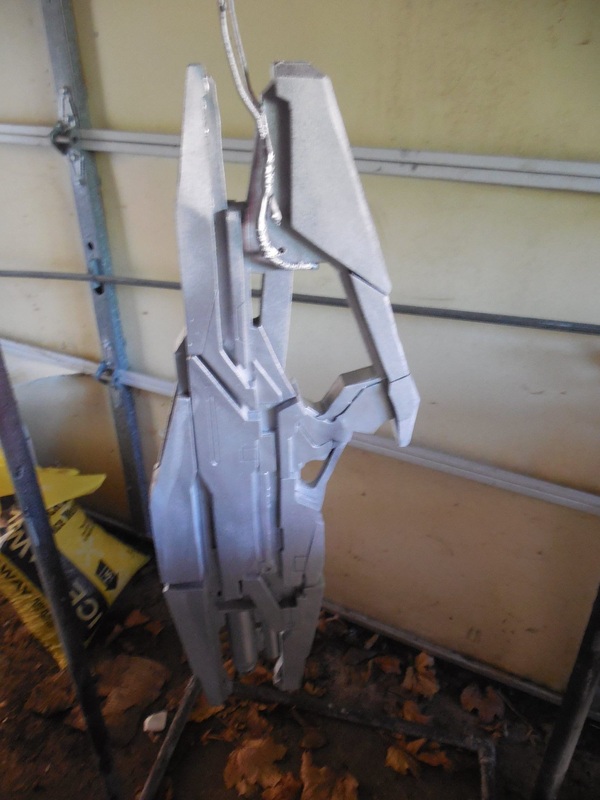 'Course, that ended up not mattering, since I ended up having to sell it, but oh well! Still looked awesome. Taped up everything, then threw on the same metallic black I used on the Terminus. After that I painted on an acrylic pewter, which is what I normally use on the M8. This helped give some contrast to a few of the lower layers and the barrels. And last, but definitely not least, came the weathering. As per usual with the silver, I did a black acrylic wash, with dry brushed highlights over everything else. 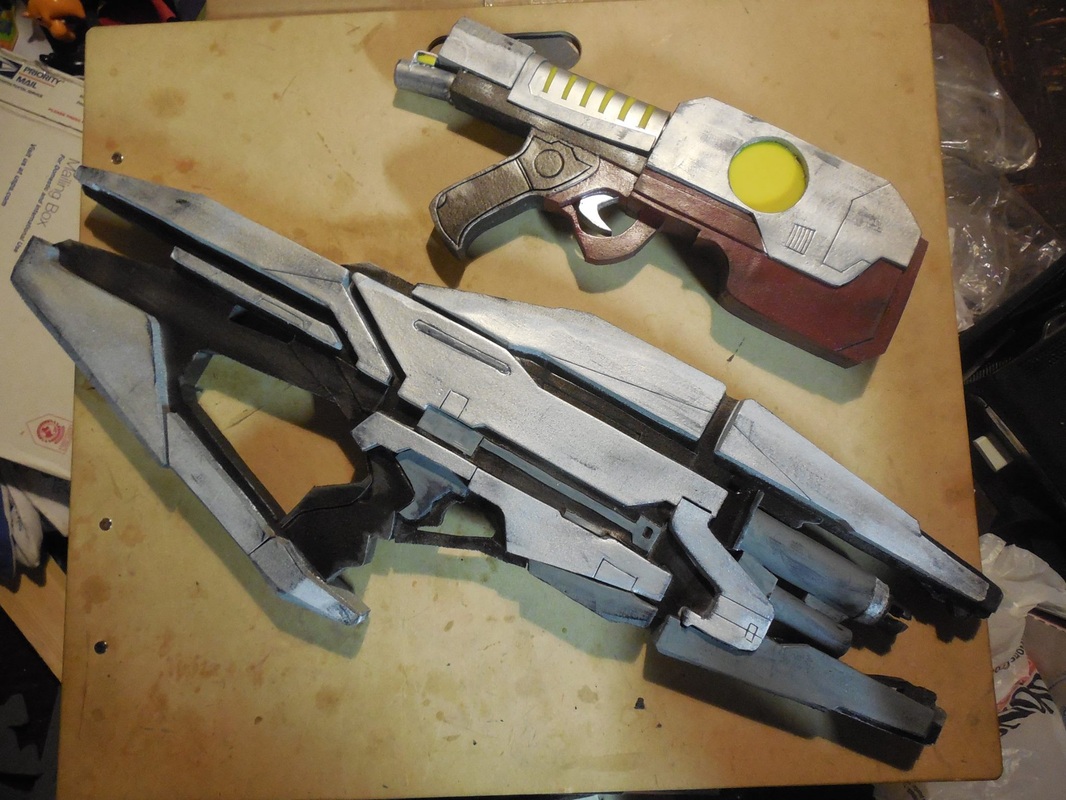 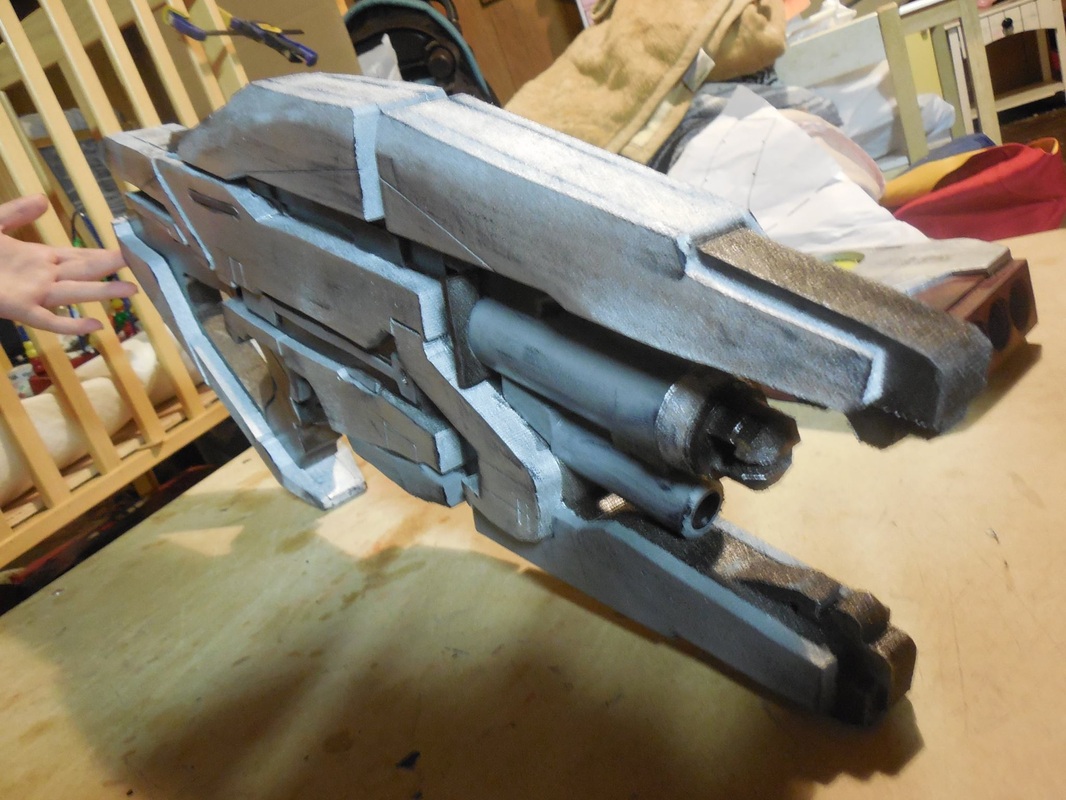 I'm really proud of this build, and sad to see it go, but such is the way of things. At the very least, I know what to watch out for when I make another one! :)
Check the Terminus Armor build for some awesome shots of the two together! Also, while you're at it, take a look over here and vote for me! Contest runs between August 18-28, 2014, and you can vote once per day. Appreciate it!
2 Comments
Pareeeee
6/6/2015 03:35:12 am
Hi!
Thanks! :) I made this one about the same dimensions as my M8 Avenger, though this one ended up being a bit taller. Might I suggest picking up the blueprint I made for it? It's set at the exact dimensions I used, and can be scaled up or down to meet your own needs! Leave a Reply. |
|

 RSS Feed
